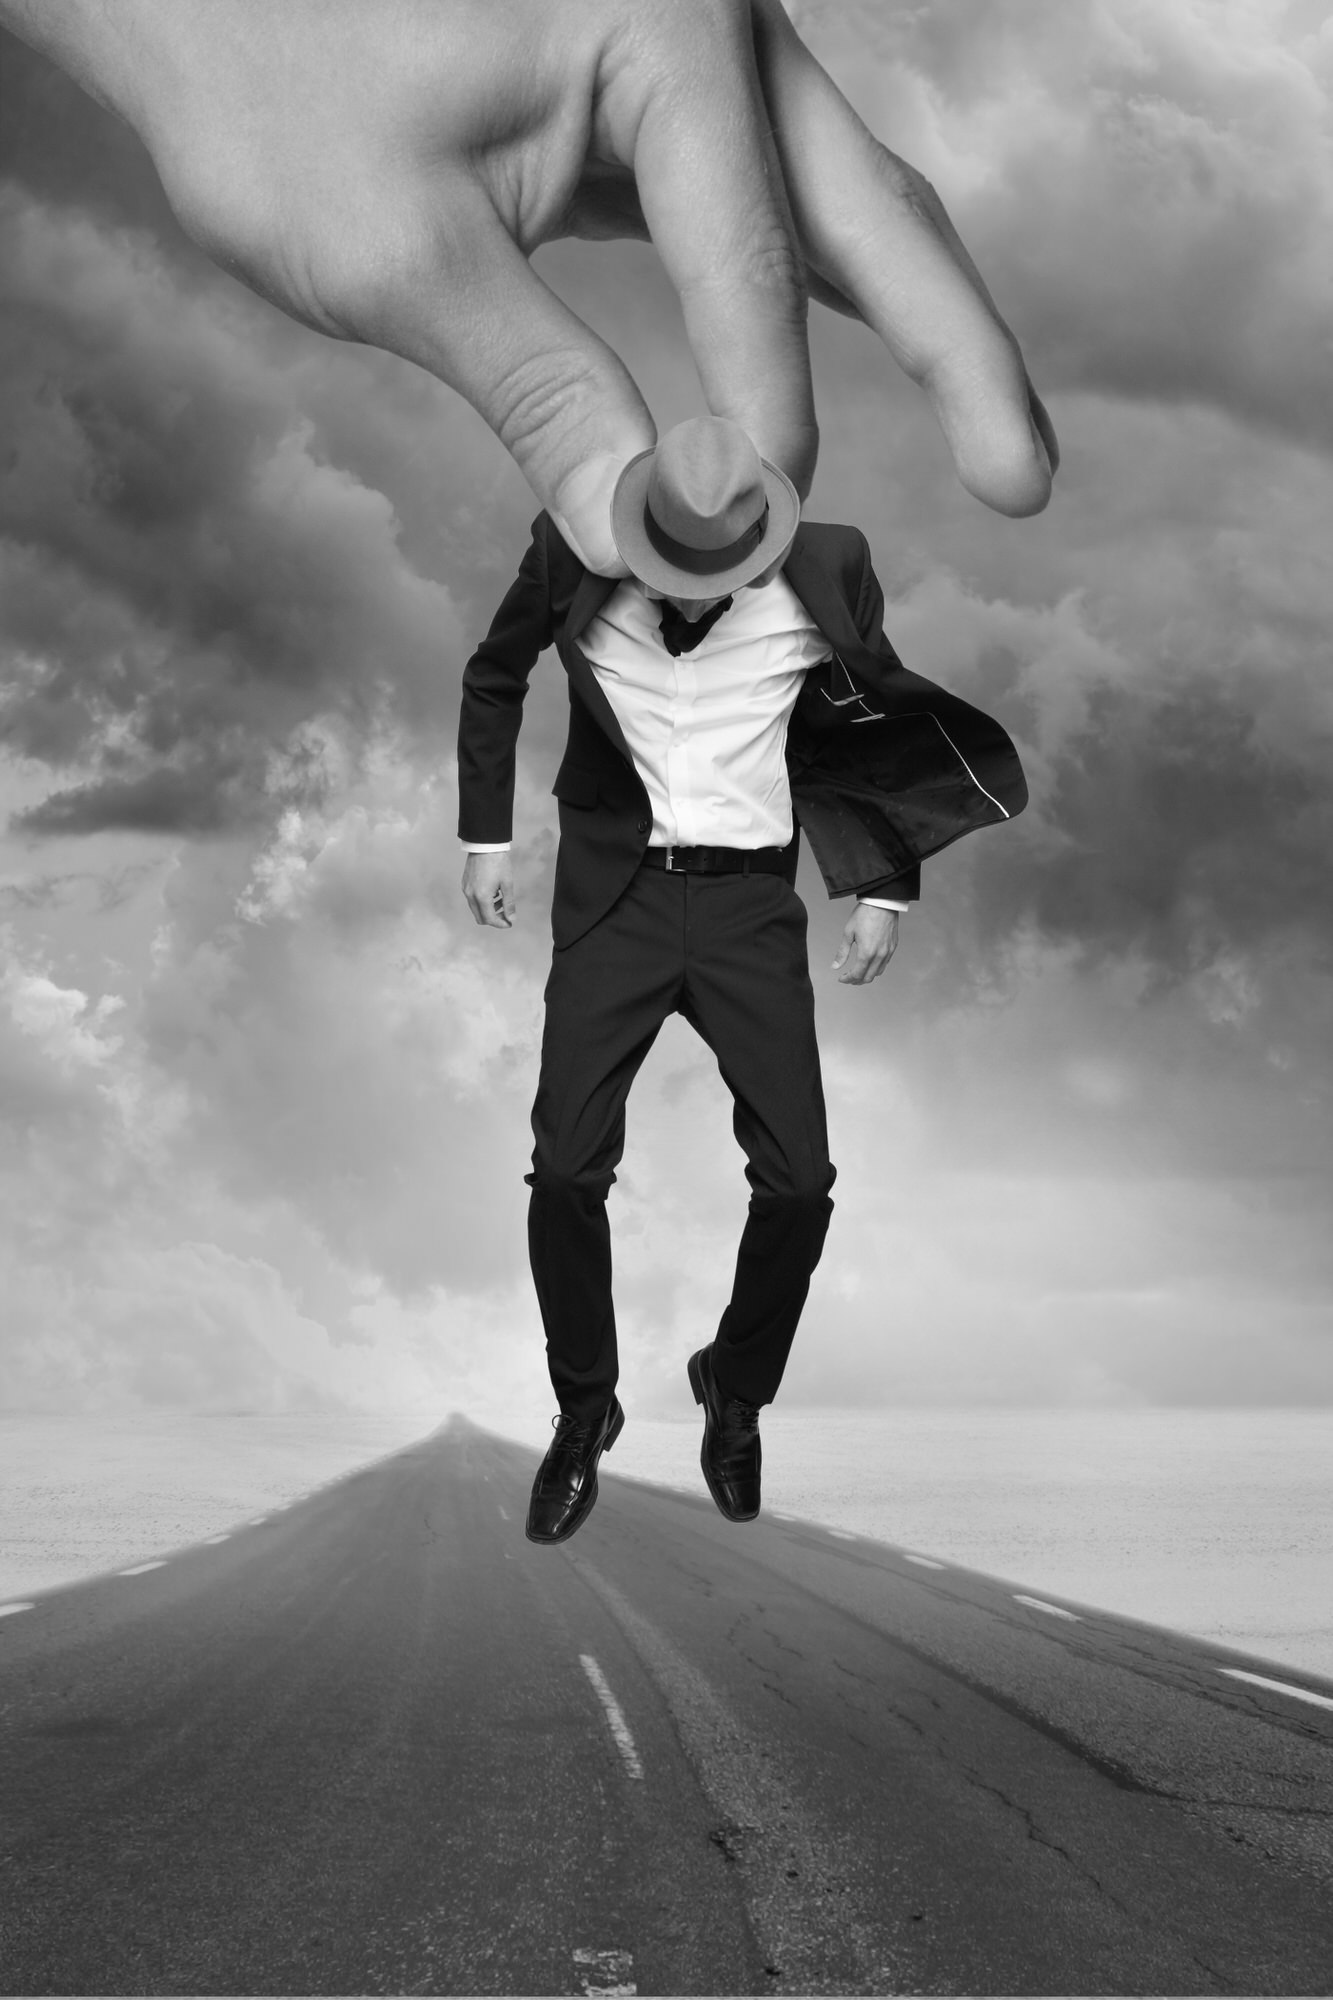
How Visual Artist Tommy Ingberg Turned a Real Man into a Puppet
Surrealist photographer and visual artist Tommy Ingberg has a creative and profound way of expressing himself and his view of the world. His deeply personal art incorporates minimalistic and surreal photo montages that portray subconscious feelings and thoughts through beautiful imagery. Tommy’s image, Puppet, is just one example of his surreal concepts come to life. And, he created it using basic techniques that anyone can do.
Here, the photographer shares the process behind how he made the image, from choosing and shooting the background right down to the finishing touches in post-production.
Tommy
In my photo montages I try to do as much “photo” and as little “montage” as I can. That means doing the majority of the work with the camera and as little work as possible in Photoshop. I do this because I think that well-executed source images are a much better option than excessive editing and “fixing” in Photoshop, and also to keep as much of the true photography feel as possible in my work.
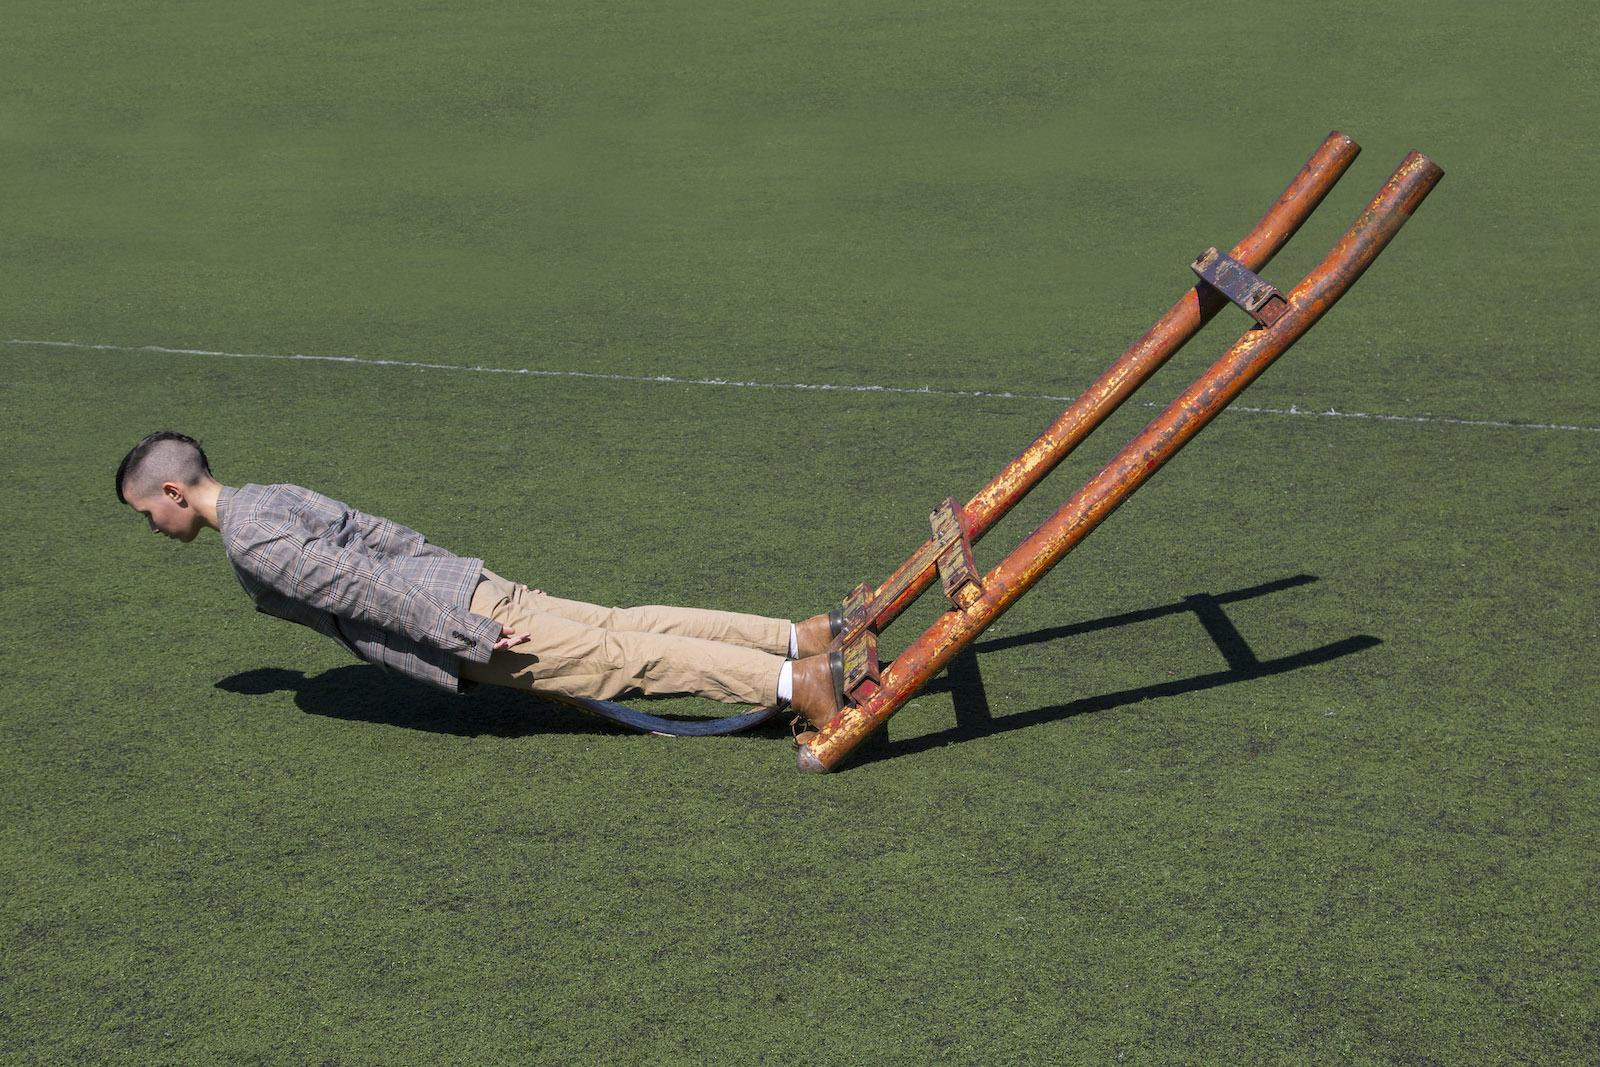
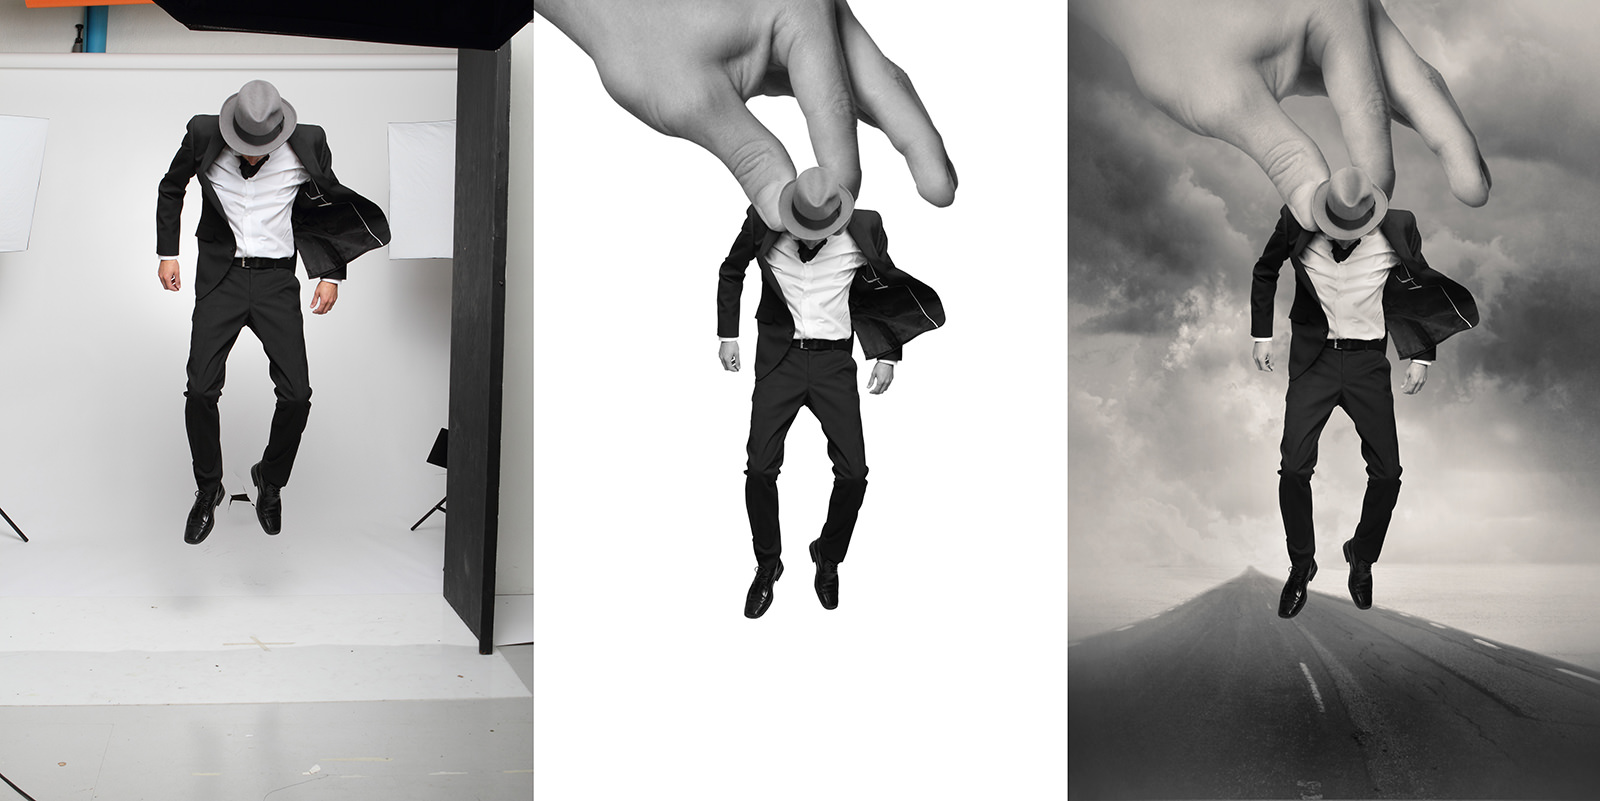
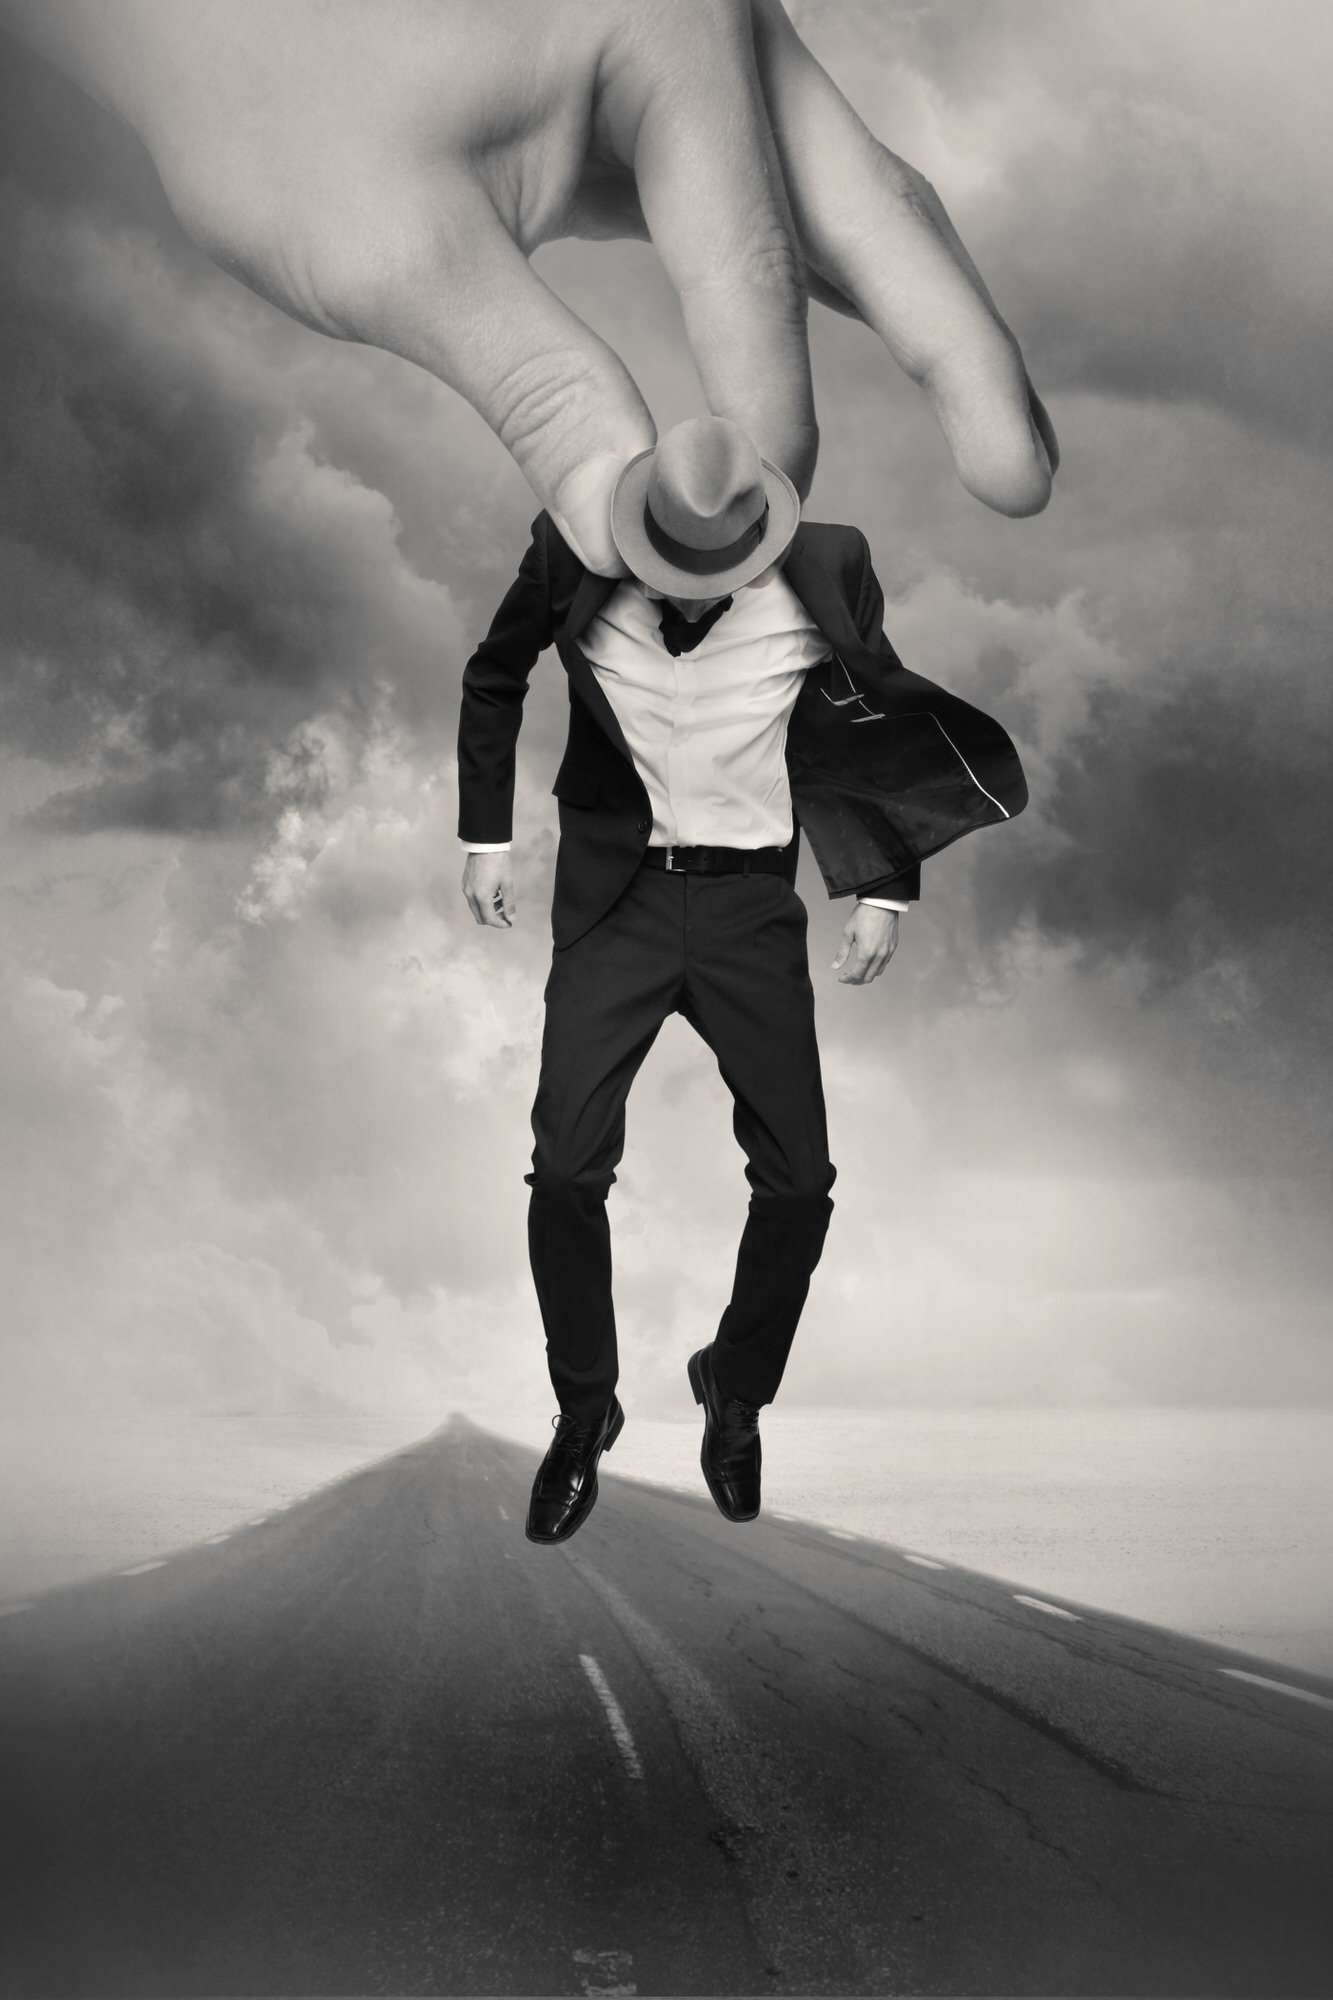
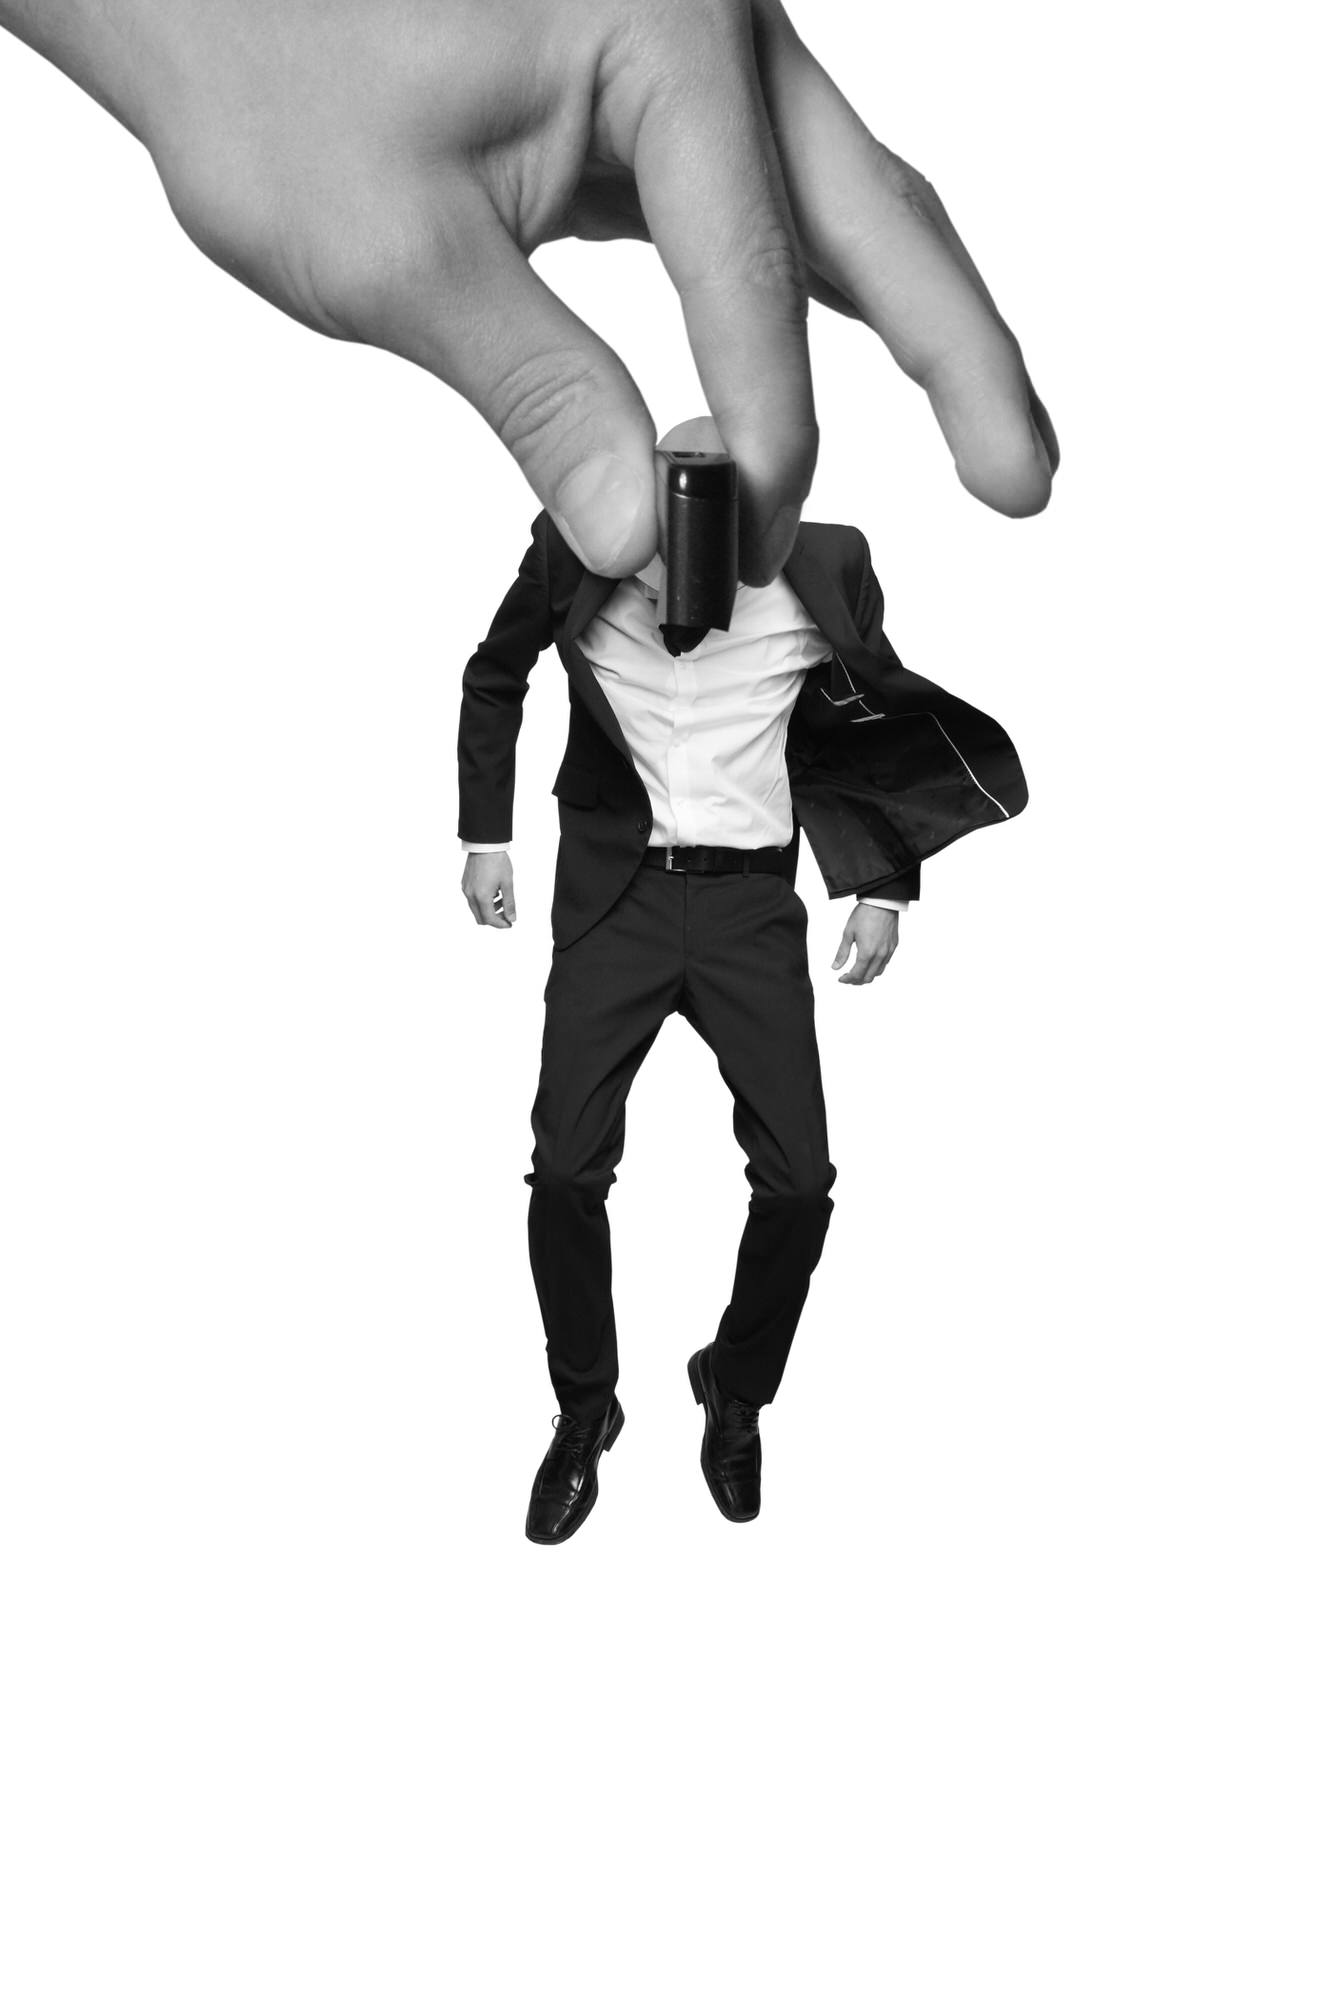
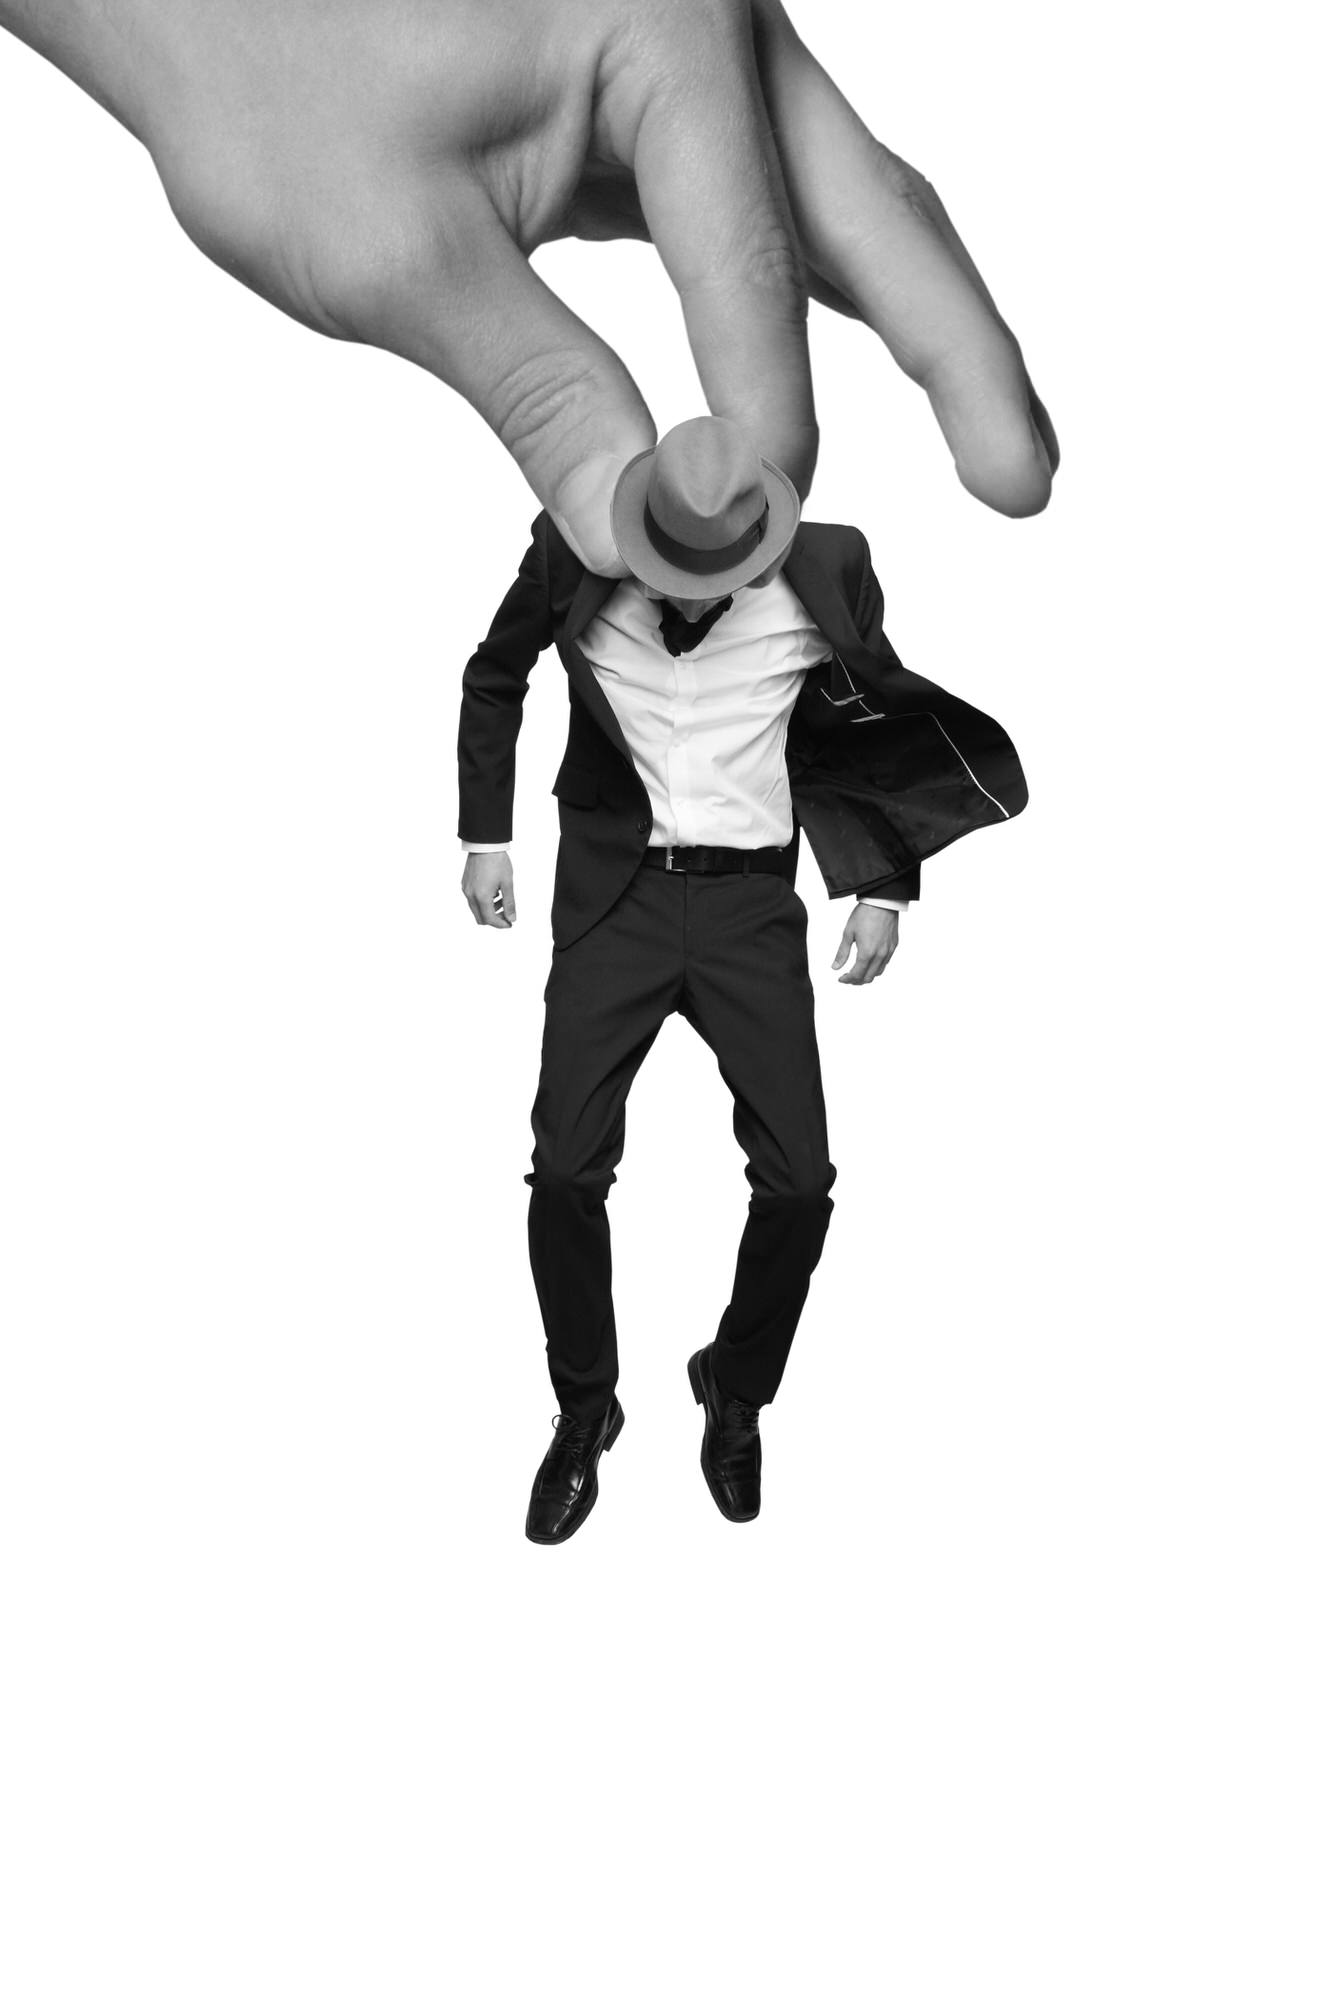
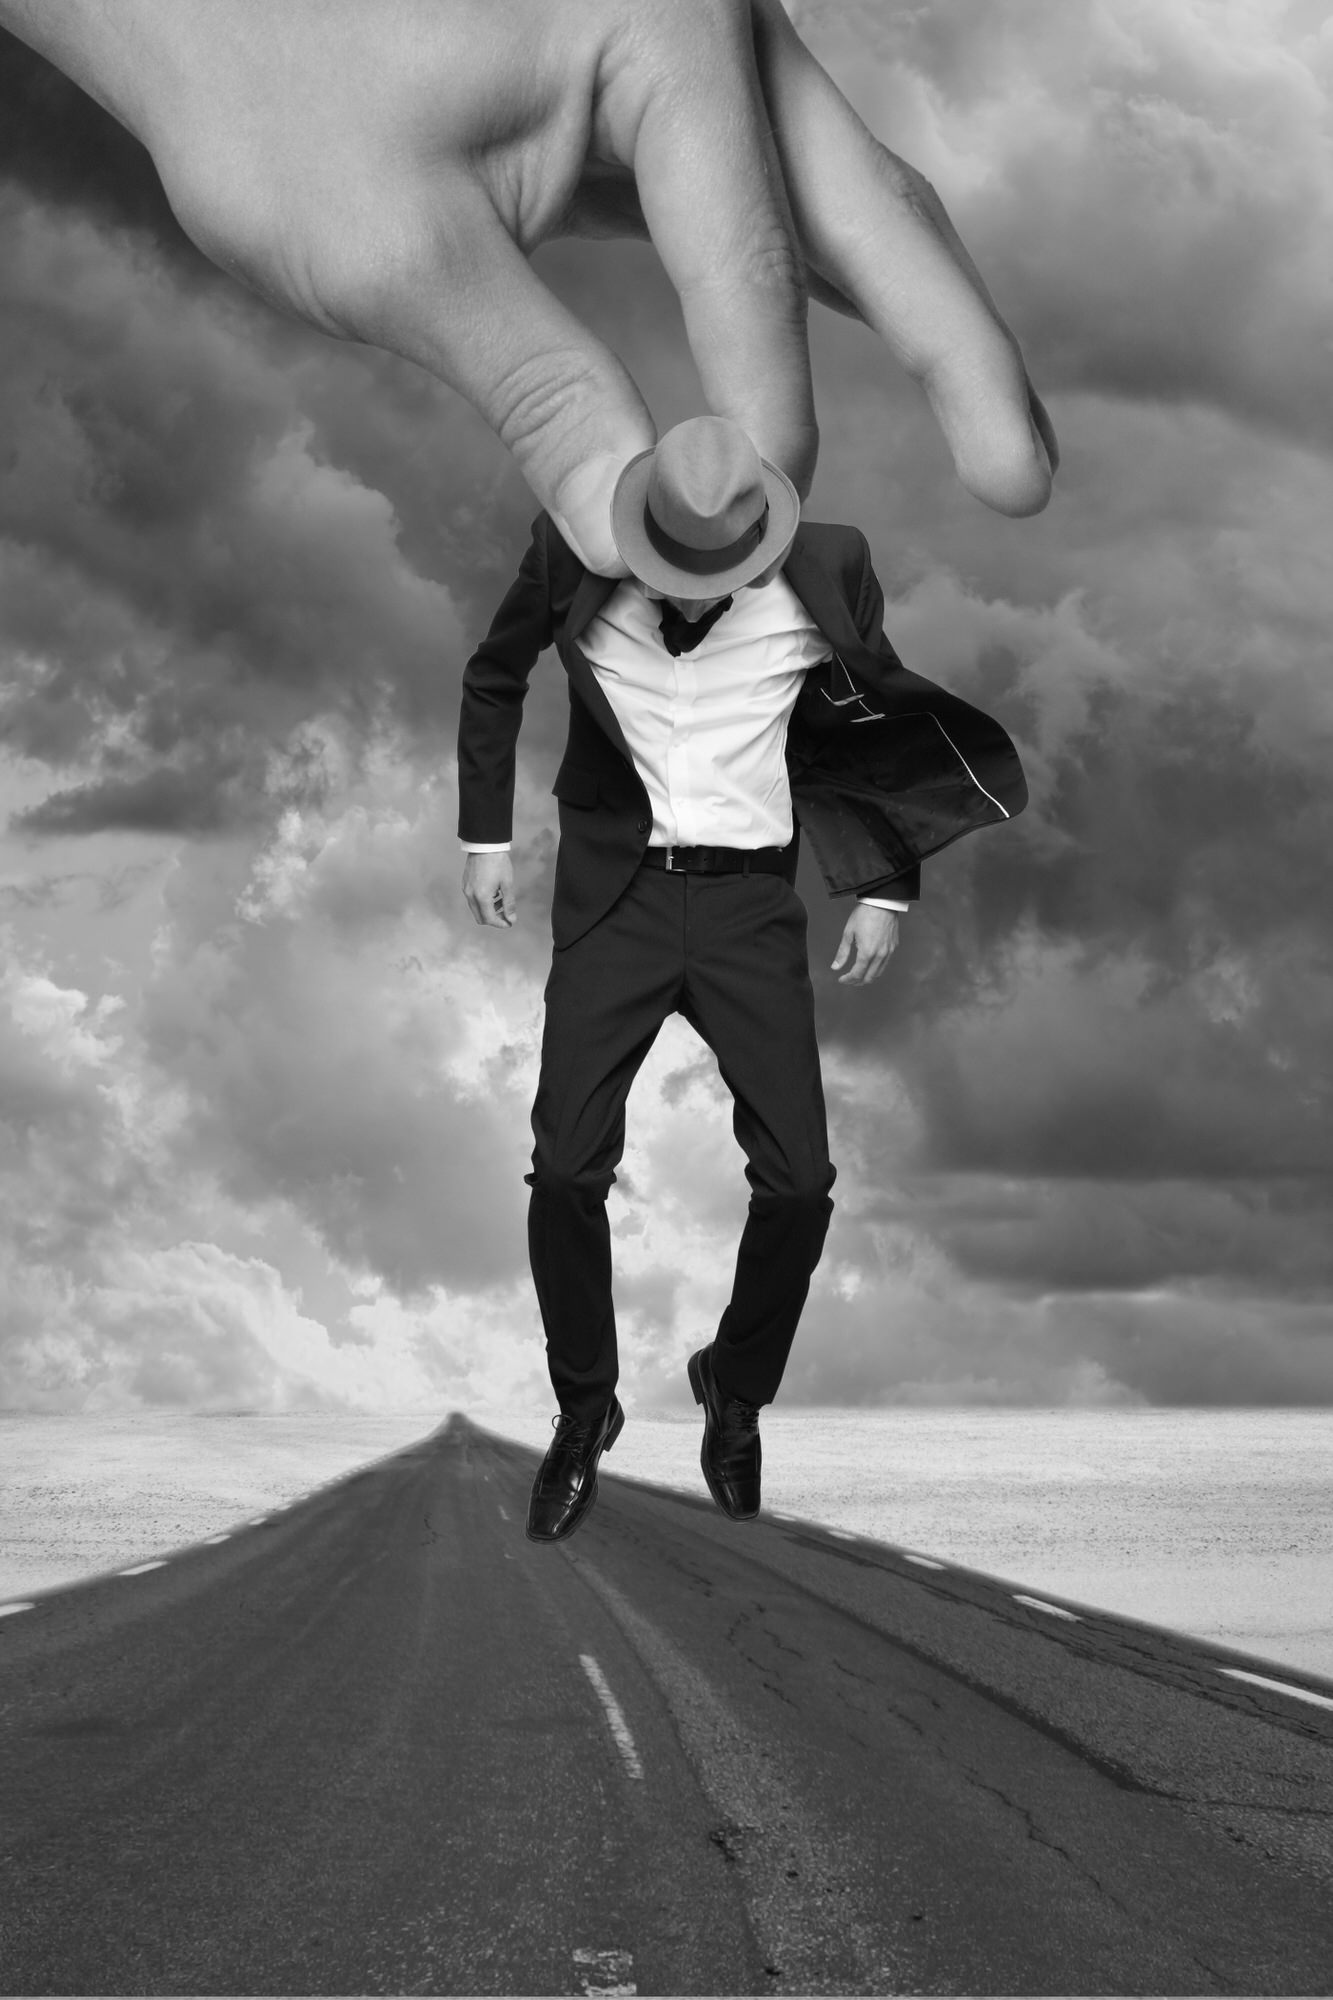
The image we are going to look at here is called Puppet, a good example of this philosophy. It’s a simple montage, consisting of only three elements: the man, the hand and the background. The background is made up of three different pictures: the road, the ground and the sky. This is not a step-by step-guide, but rather my way of trying to show you that you can create convincing montages with very basic techniques.
Photographing the Source Files
For my backgrounds, I try to shoot them on overcast days with soft light, to avoid any sharp shadows. I shoot all my backgrounds from the same height and angle, with roughly the same focal length. I do this so that I have a library of interchangeable backgrounds to use when I’m doing my montages.
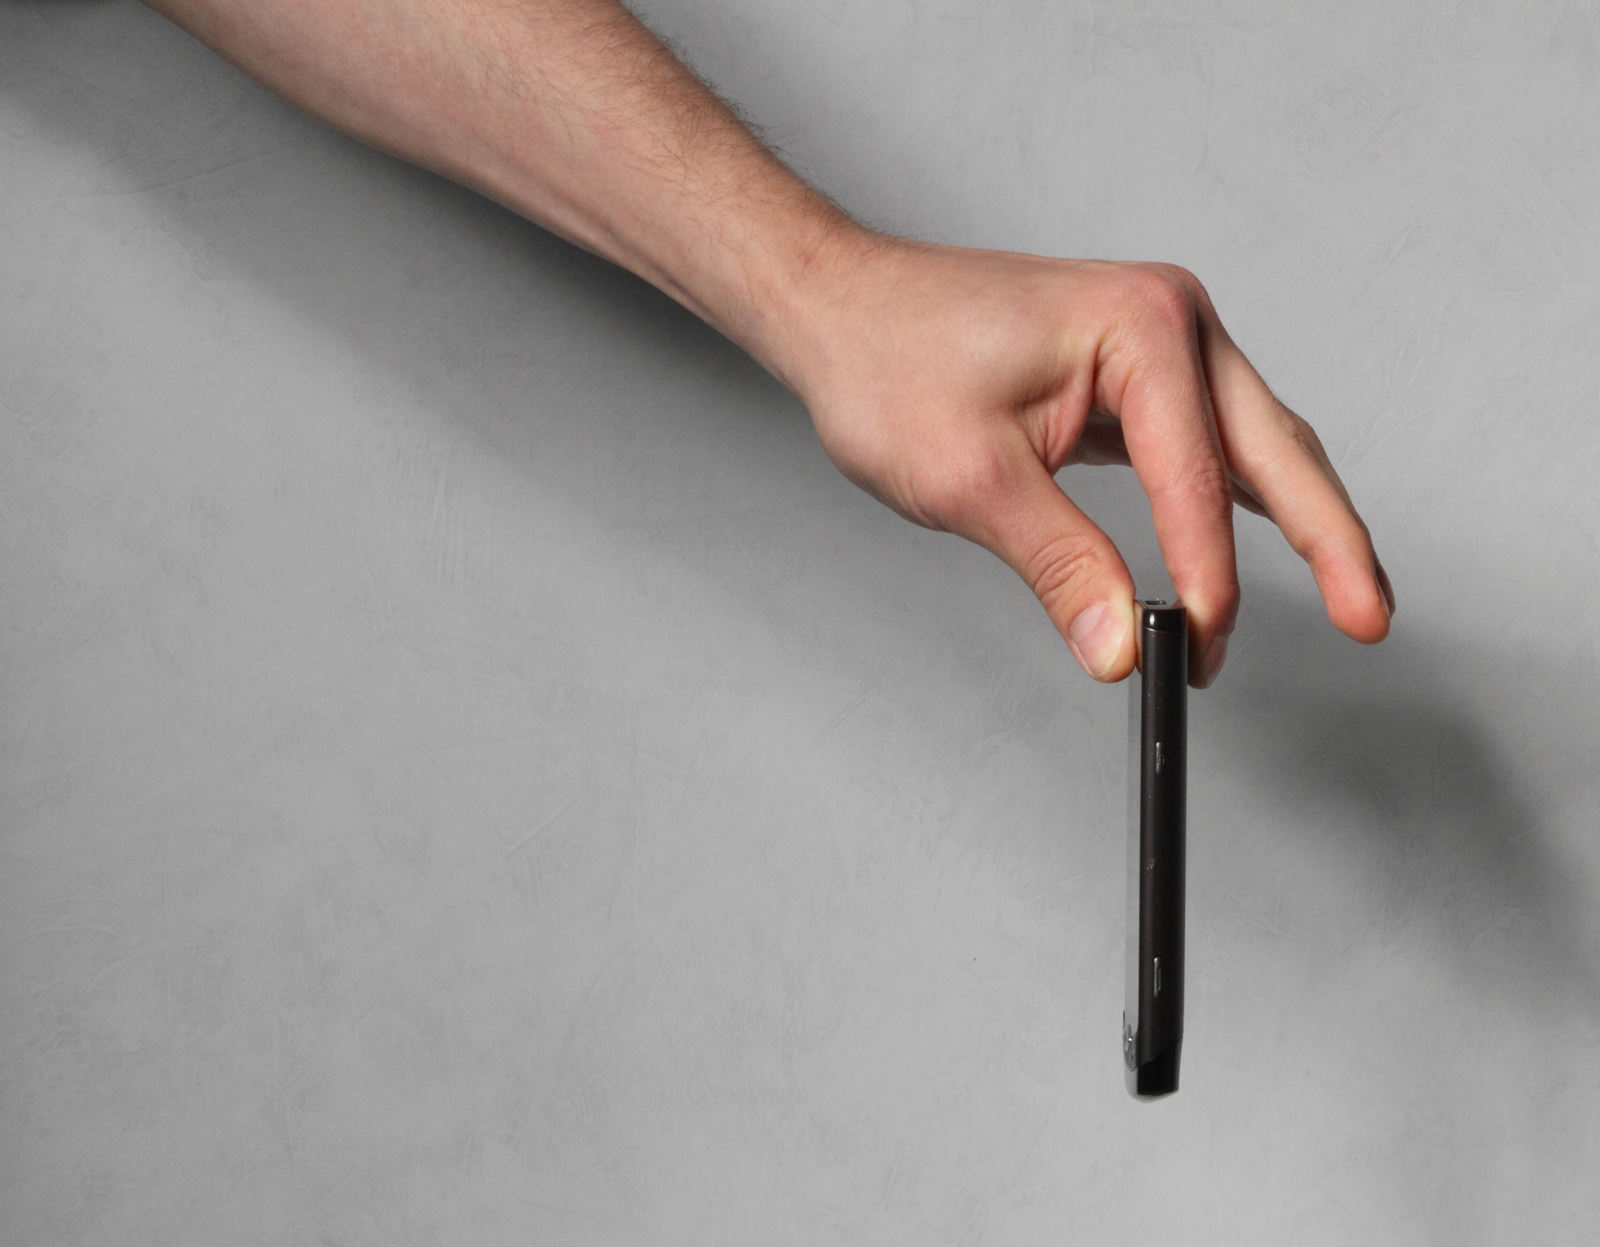
The two main elements in this picture were shot in studio. Here, I used a Canon EOS 7D on manual (set at the fastest shutter speed that will sync with the lighting, lowest possible ISO to avoid noise, and then I adjust the aperture and flash strength to get a good exposure), with a Canon 24-70 f/2.8 L and Elinchrom lighting. I used two light sources, one from above slightly to the right and one fill light from below and straight ahead. I tried to get the light as soft as I could with soft boxes.
Canon EOS 7D Mark II
20.2MP APS-C CMOS sensor, dual DIGIC 6 image processors, high speed continuous shooting and HD video

Canon EF 24-70mm f/2.8L II
Aperture Range: f/2.8 to f/22, Ultrasonic Motor AF System, Weather-Sealed Construction

I always use the same lighting setup so that my source files can be used together regardless of where and when they were shot. I also try to match the background to the one in my final montage.
In this case, I used a light background since the sky in the final montage is light. Had I tried to use a darker background in the montage, I would have gotten a halo around the subjects (light bouncing from the background and bleeding over the edges of the subject).
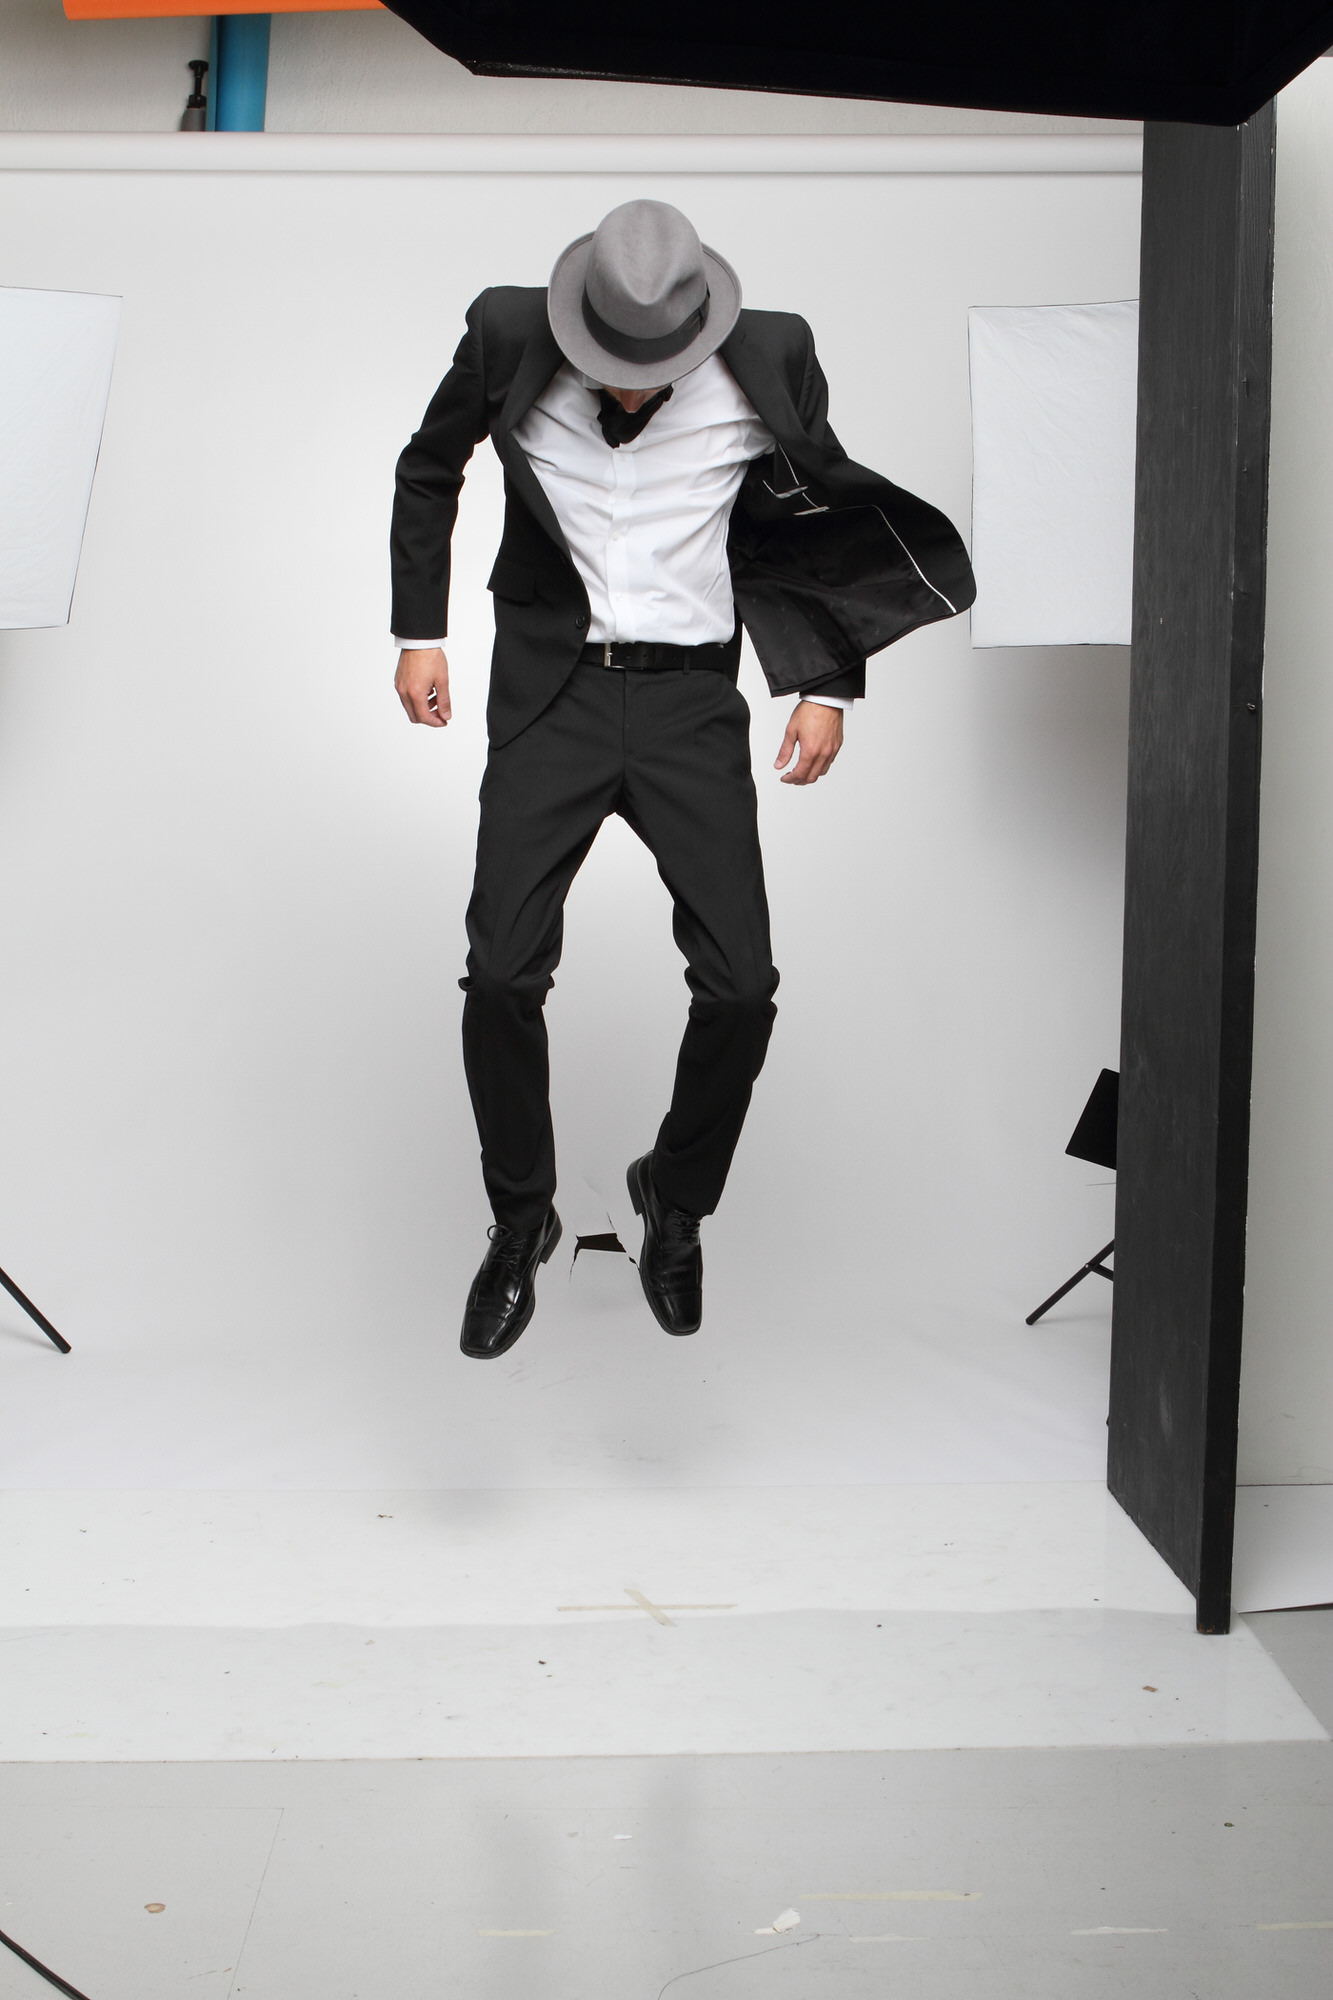
In the picture of the man, my model is jumping, creating movement in the clothes and getting his body in the right position. I often try to use moving models since the randomness it introduces often leads to dynamic and “special” expressions that would be very hard to come up with and pose otherwise. As for the hand, it is gripping a mobile phone to get the right tension in the muscles, and so that it looks to be holding something.
Placing the Main Components
I start by isolating the main elements. This can be done in many ways. Using layer masks, I zoom in to around 200-300 percent and remove the background by selecting it with the lasso tool.
This is very time consuming, but it’s the way I’ve learned it and it gives me pixel-precise control of the process. After I’ve placed the hand and the man, I make a copy of the hat in a new layer and place it in front of the hand. I then proceed to place the background using the same tools.
Finishing Touches
As you can see, the picture still looks rough and unfinished. I usually do my finishing touches with just a soft low opacity brush, white or black.
I start by painting with a white brush behind the main subject to make it stand out against the background. I also paint “fog” with the brush over the parts of the background that are furthest away to create depth.
I finish my retouching by painting the shadow on the ground, shadows around the fingers and going over the whole picture painting white and black to smooth things out and create a bit of an airbrushed effect. I also blur the edges of the picture with the blur tool.
Finally, I run a macro to create the sepia tone and then a final correction of the levels to make sure that black is black, and white is white.
As you can see, you don’t need to be a Photoshop wizard to create a montage. All you need is some basic knowledge of the tools, a good idea and some creativity when it comes to photographing your source images. Try to solve as much of the montage as possible when photographing, instead of when editing, and keep in mind that a strong idea is often more interesting than a technically flawless picture.
You can see more of Tommy’s surreal imagery on his website and Instagram. Plus, if you’re interested in learning more about the photographer, read our interview with Tommy.