
How to Do Levitation Photography: 3 Ways to Make Someone Float
A levitation photo is two or more frames from a camera that never moves, joined in Photoshop. Here are the three ways to shoot one, the settings that make it work, and one photo taken apart step by step.
When I was a boy, I had this dream. I was running through the woods with my brothers toward a cliff, sure that if I ran fast enough I could fly. Every time I reached the edge, I got scared and stopped, until one night I didn’t care what happened, and I pushed off the ground and flew. That magic never really goes away. Photography and Photoshop are how I get it back.
Levitation photography is mostly a trick of the tripod. You need a frame of the person held up by something, a frame of the same room with nothing in it, and a mask that keeps the person and loses the support. Here are the three ways to shoot it, the settings that keep the frames alike, and the edit, followed through one photo from my course The Beginners Guide to Levitation.
 Empty roomMary, waist downMary, waist up + hairLight raysDustColor, dodge & burn
What Is Levitation Photography?
A levitation photo shows a person floating, hovering or falling slower than anyone can, with nothing holding them up. The idea is older than Photoshop. Philippe Halsman and Salvador Dalí needed 28 tries in 1948 to get Dalí Atomicus, with Dalí, three cats and a bucketful of water all in the air at once. From 2011 the Tokyo photographer Natsumi Hayashi posted her “Today’s Levitation” self-portraits, made by jumping at a fast shutter speed. Many levitation photos today are composites, and that’s what this article teaches.
The best ones don’t look impossible. The photographer Christopher James, then based in Hawaii, told us in our 2018 interview that he’s drawn to “not things that are impossible, but things that are implausible”: a picture “not so unreal that people write it off as fake.”
The One Rule: Keep Every Frame the Same
From a technical standpoint, levitation comes down to one idea, and that’s consistency. You’re going to put several photos together, so you want them as alike as possible. Find your angle handheld first, where it’s easy to move around, then lock the camera on a sturdy tripod and leave it there for the whole shoot.
| Setting | What to use | Why |
|---|---|---|
| Focus | Manual (MF) | The camera won’t hunt mid-jump, and the focus can’t shift between frames |
| White balance | Any fixed setting, never Auto | The light changes over an hour; Auto changes the colors with it |
| Mode | Manual exposure | Same brightness in every frame |
| Shutter speed | 1/400 s or faster | Freezes a jump or a fall |
| Aperture | Avoid f/1.4 to f/2.8 when you can | A very shallow depth of field leaves part of the person soft |
| Drive | Burst, if your camera shoots more than 8 frames a second | More choices for every jump |
For manual focus, I like to turn on live view, zoom in on the screen, set the focus ring, then turn live view off and start shooting. Check it a couple of times during the shoot, so you don’t end up with a card full of soft photos.
If the room is dark, raise the ISO before you give up shutter speed. (The frames for the photo in this article were 1/400 s at f/2.8 and ISO 1600, on a wide 16-35mm lens, which keeps more in focus than f/2.8 on a longer lens.) Your photos might be a little grainier than you’d like, but that’s a lot better than a blurry one. Without burst mode, wait for the top of the jump, where the person is barely moving, and take the picture then. That’s what I prefer anyway.
Three Ways to Make Someone Float
| Method | What happens | You need | Hardest part |
|---|---|---|---|
| Falling | The person jumps off something and falls onto a soft landing | A crash pad, a sturdy jump station, a tripod | Getting a good pose in mid-air, over and over |
| Jumping | The person jumps up from a raised surface | A table or dresser to jump from, a tripod | They rarely get horizontal |
| Supported | The person is posed on stools or props that you remove later | Thin-legged stools, other supports, a tripod | The Photoshop: the support touches the body |
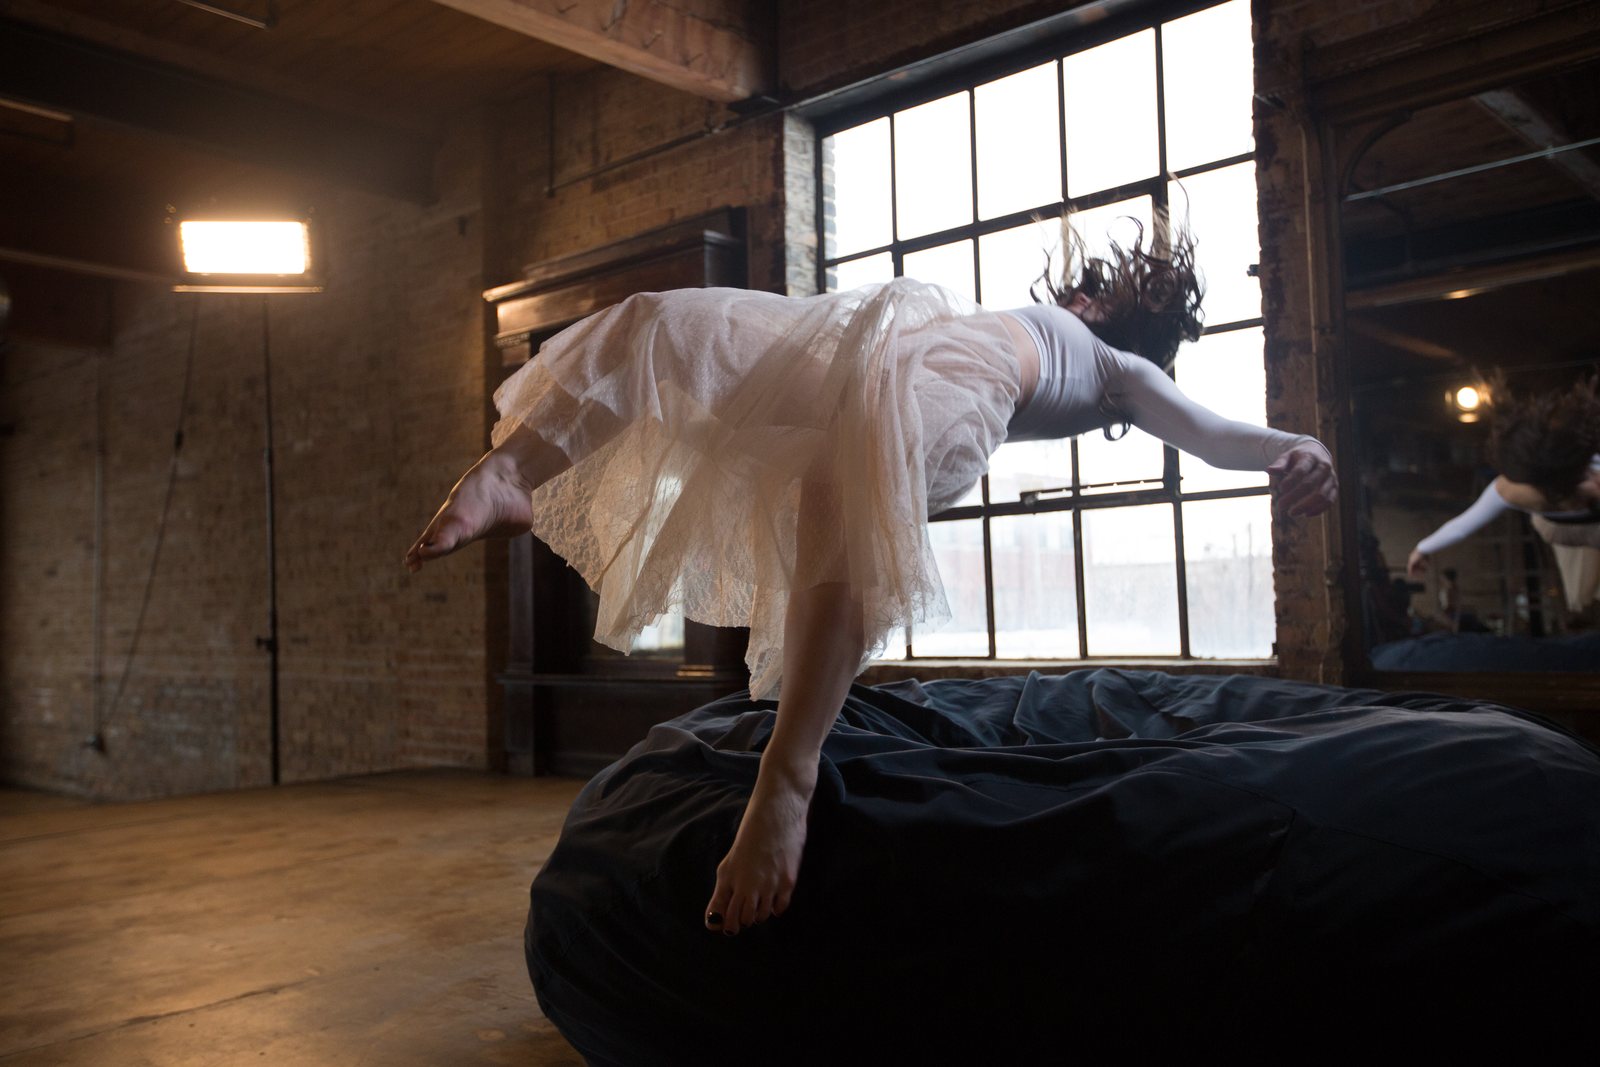
Falling. Your subject stands on something sturdy, jumps off and lands on something soft, and you take the picture while they’re in the air. The levitation pretty much takes care of itself, because they really are floating. Your job in Photoshop is to remove the crash pad. They won’t hit the perfect pose every time, so make the landing comfortable. We found that a giant beanbag chair works better than just about anything else.
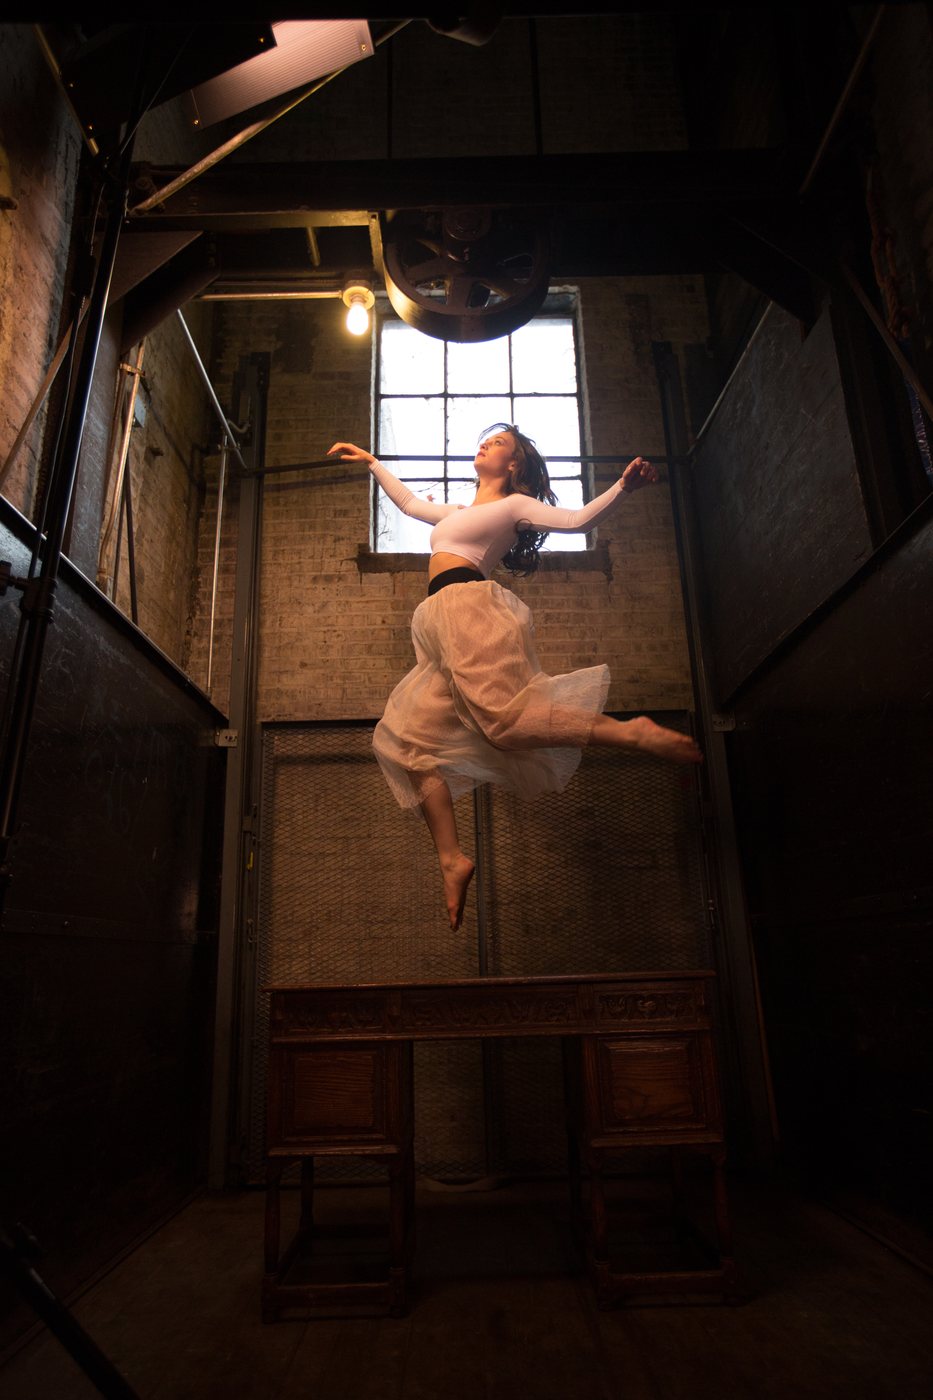
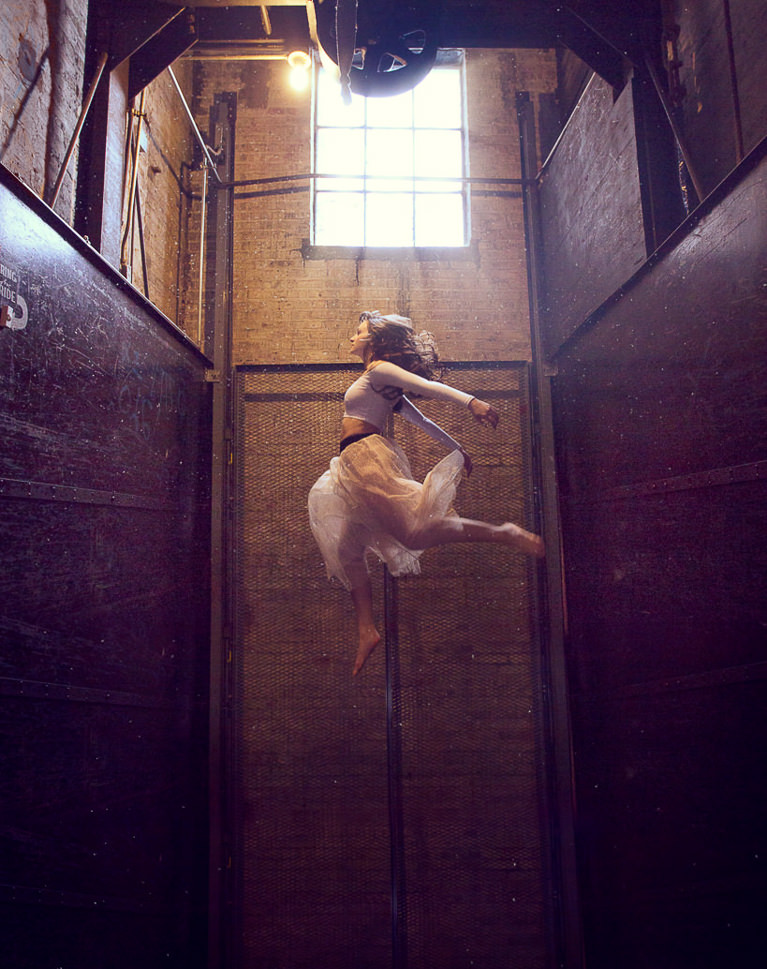
Jumping. This is a great place for beginners to start, because you don’t need much equipment, not even a crash pad. The catch is that people jumping straight up can’t get horizontal, so it reads more like a high jump or a flight than a float. Have them stand on the highest sturdy surface you’ve got, a table or a dresser, never a ladder, and jump just a little. Once the table is gone in Photoshop, they look as high off the floor as the tabletop plus the jump: in the course, a desk made Mary look about five feet up.
In another shot we dropped the floor away entirely. Mary jumped about three inches off the floor, and in Photoshop the walls of the elevator shaft behind her were extended down, so she floats in a world of her own.

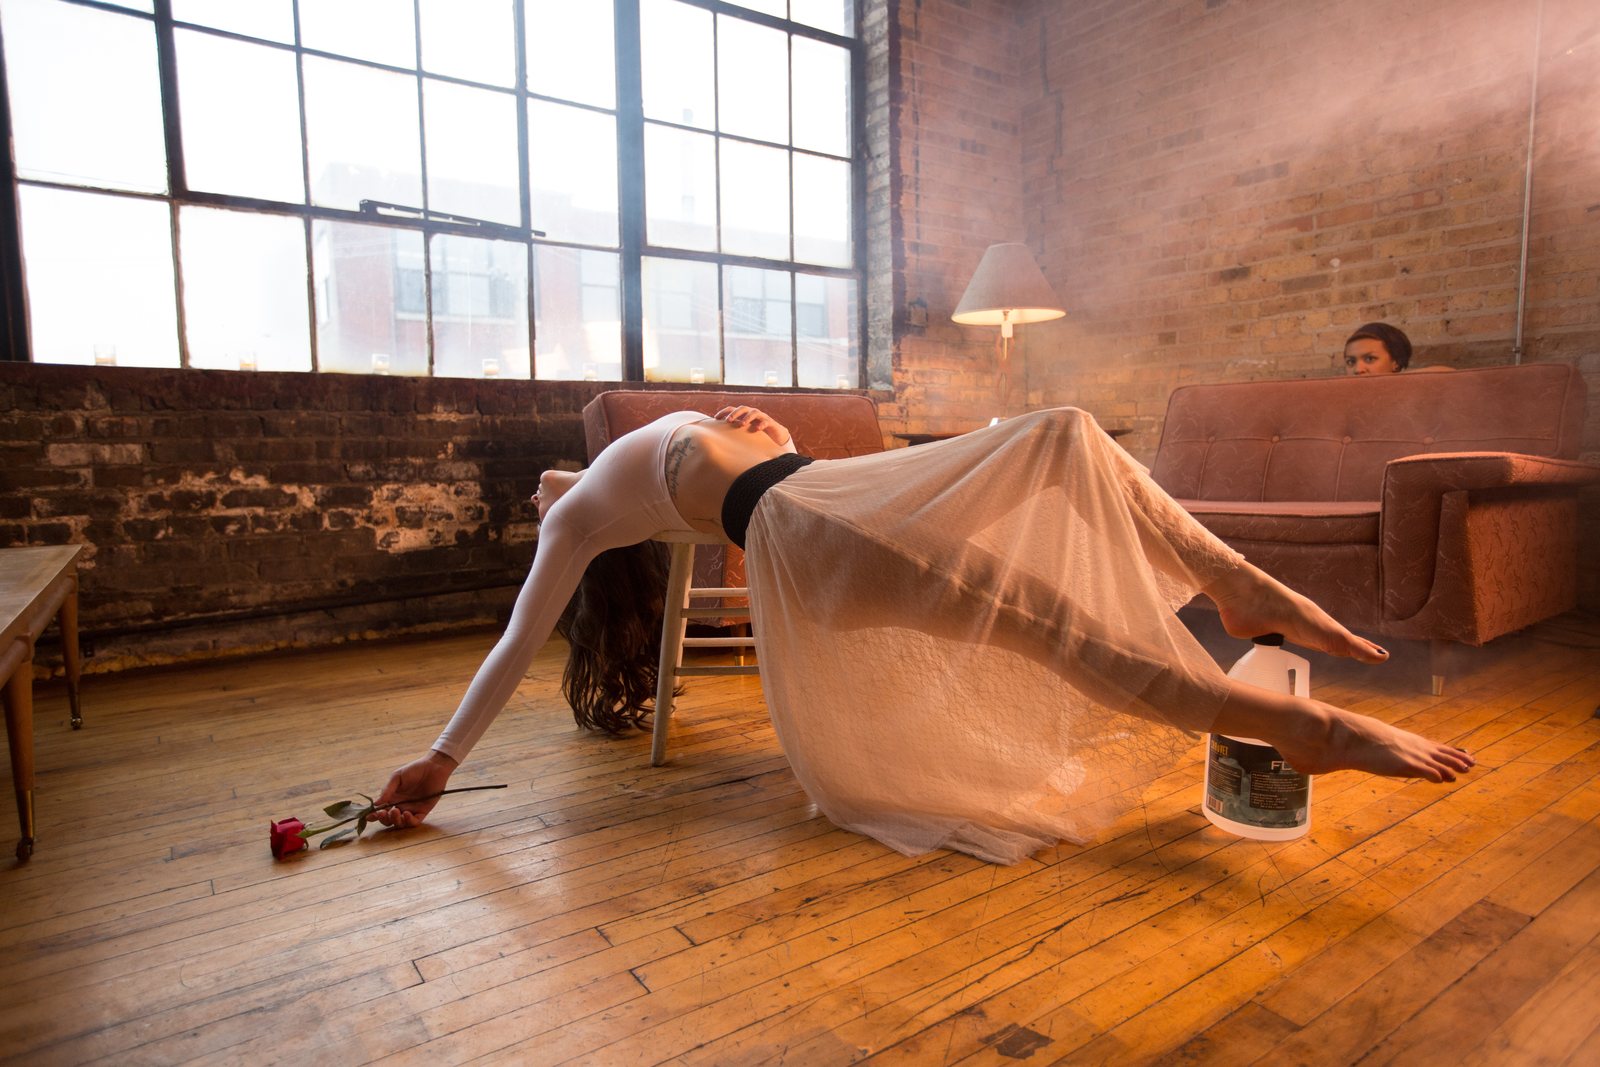
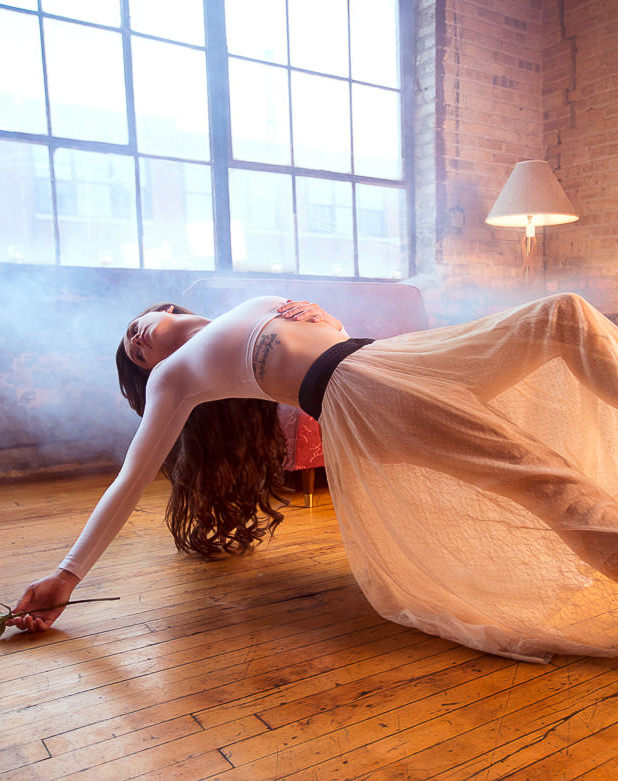
Supported. I’m a huge fan of the supported method. Your subject isn’t moving, so you can take your time with the pose and the light, and you don’t need a fast shutter speed at all. Don’t be afraid to use more than one support. In one of our shoots, a stool held up her back and her foot rested on a big gallon jug. Keep the supports as far from the camera as you can. If one leg needs holding up, use the leg farther away, so the support doesn’t hide the near one.
The Three Photos You Need
Whatever the method, you’re collecting the same three photos.
- The subject. In the air or on the supports, with nothing covering the person. A crash pad or a stool is fine here, because it’s coming out.
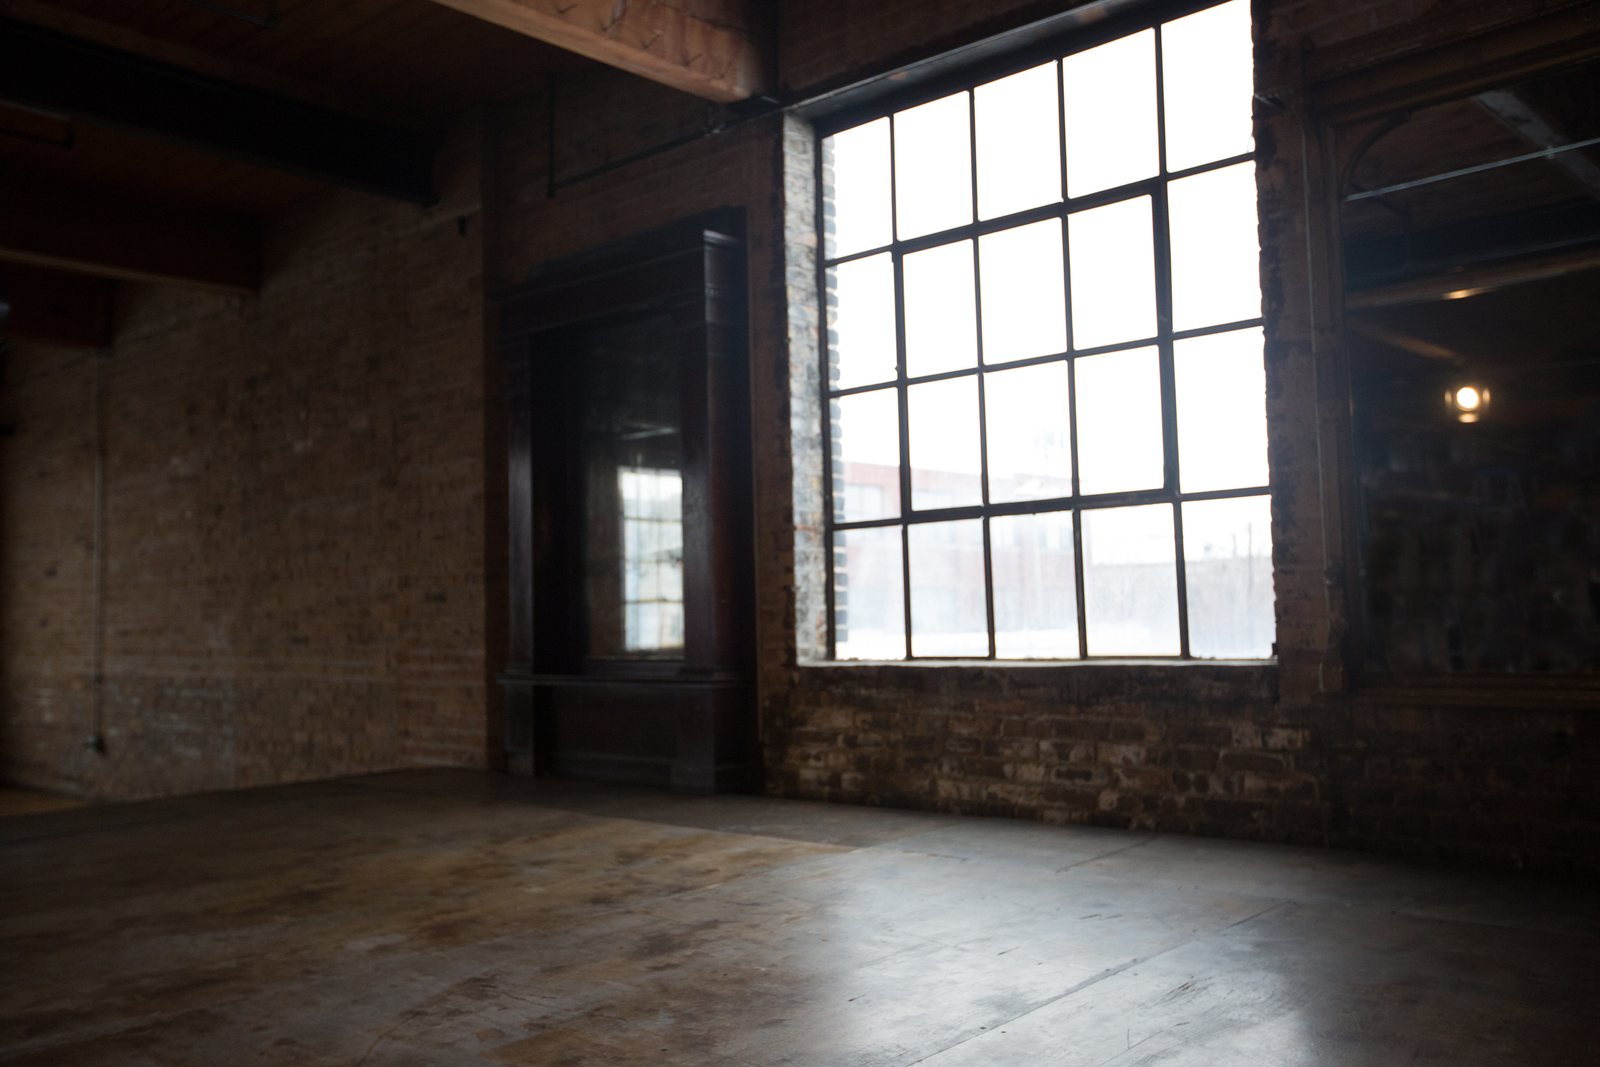
- The empty background. No subject, no crash pad, no stool. Shoot it before and after the shoot, in case the light changes. In a dark room with a bright window, bracket it. On the shoot I bracketed a background at 1/200, 1/400 and 1/800 of a second at f/8 and ISO 1000.
- The shadow. You can paint a shadow in Photoshop, but it won’t look as real as one that exists. Have someone jump where the subject was, or throw a couch cushion in the air, and photograph the shadow it casts.
If a hand or a foot is hidden in the shot you love, take another frame of just that hand in the same place without the obstruction, and swap it in later.

How This Photo Was Made in Photoshop
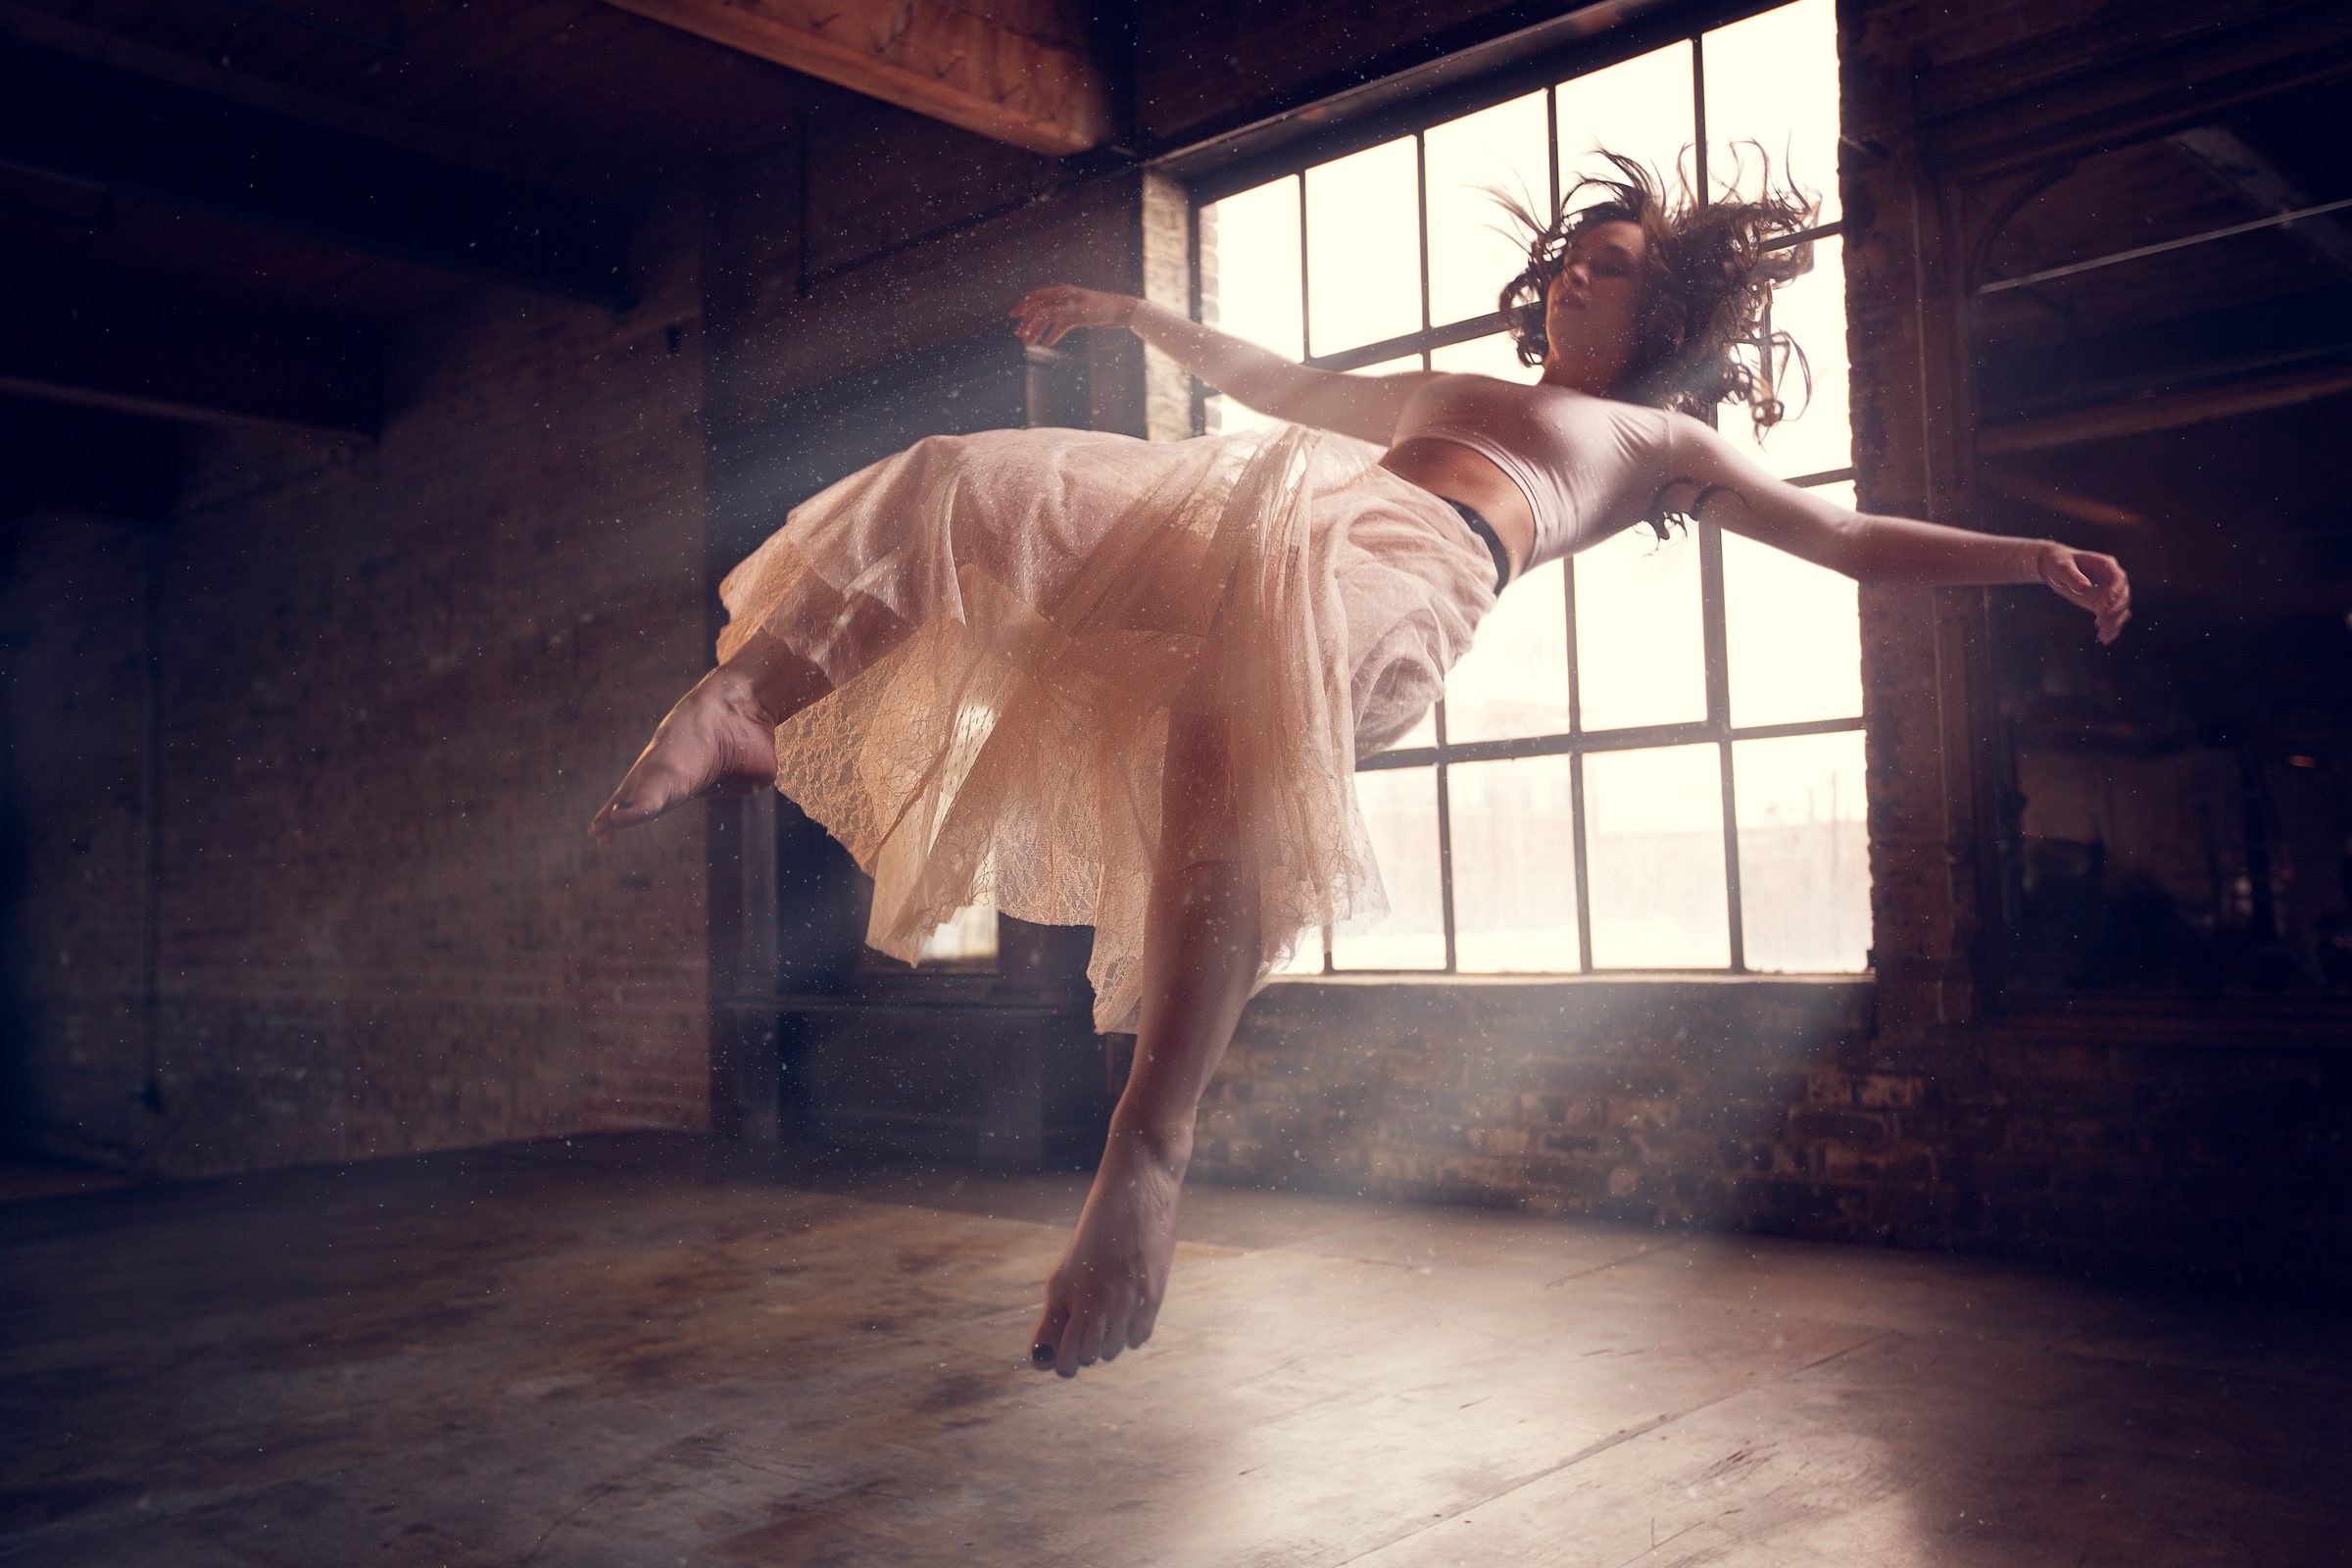
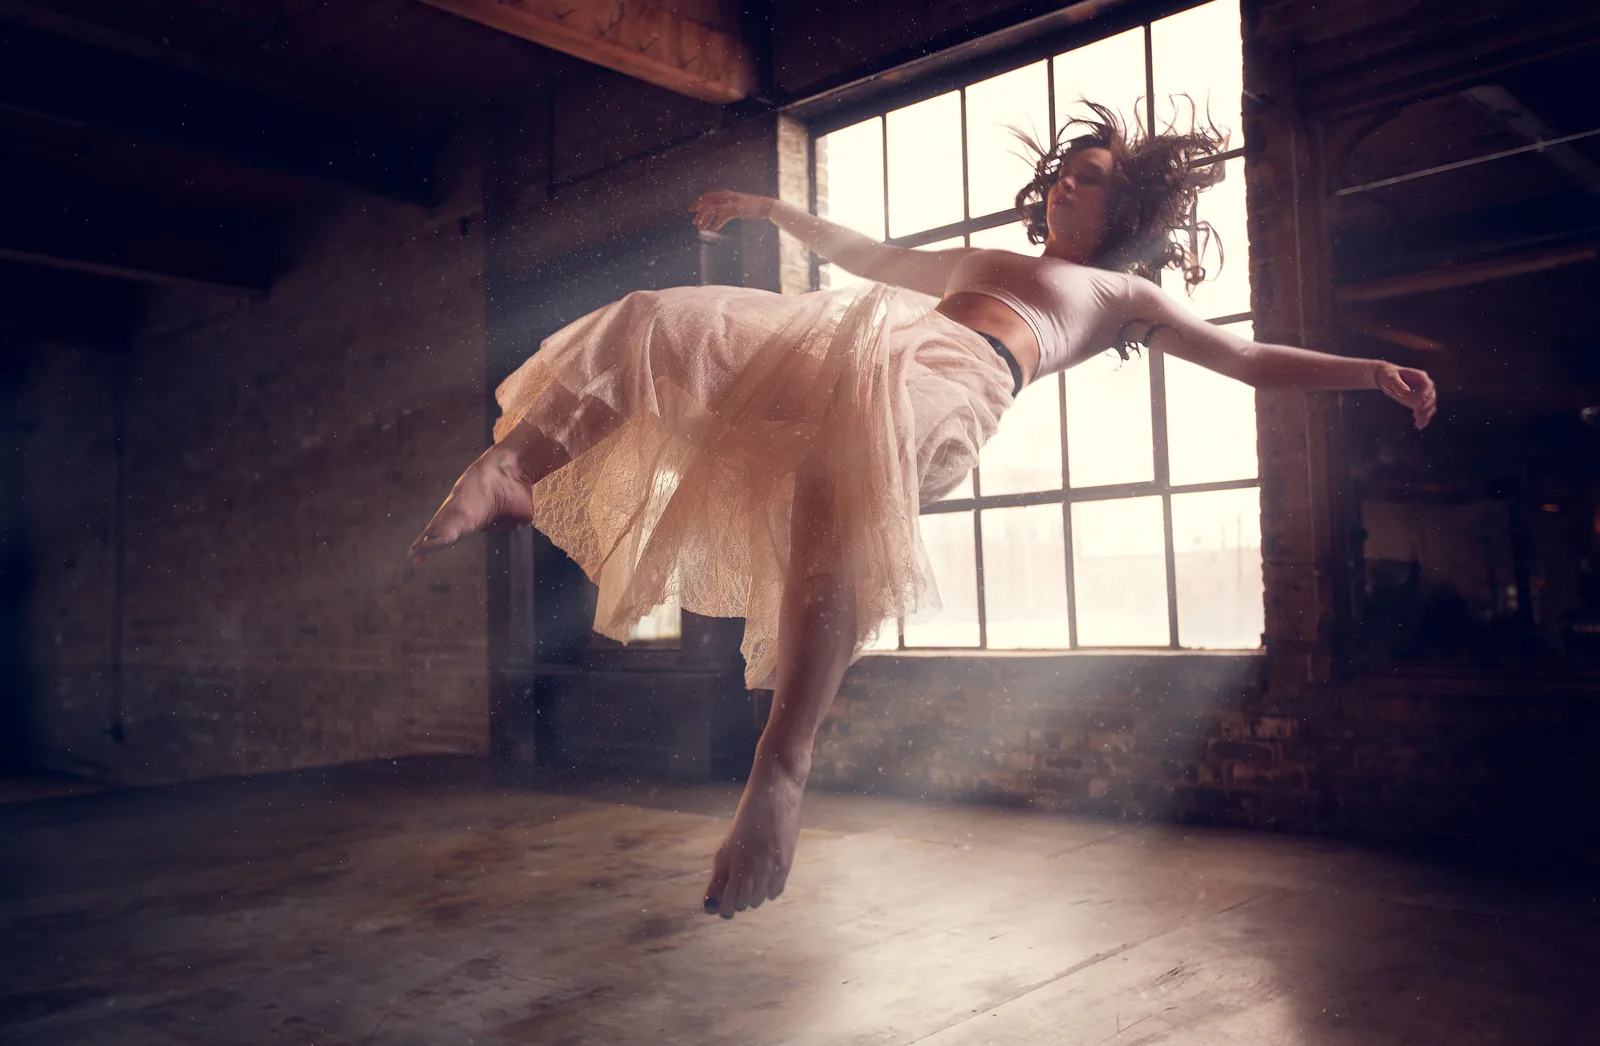
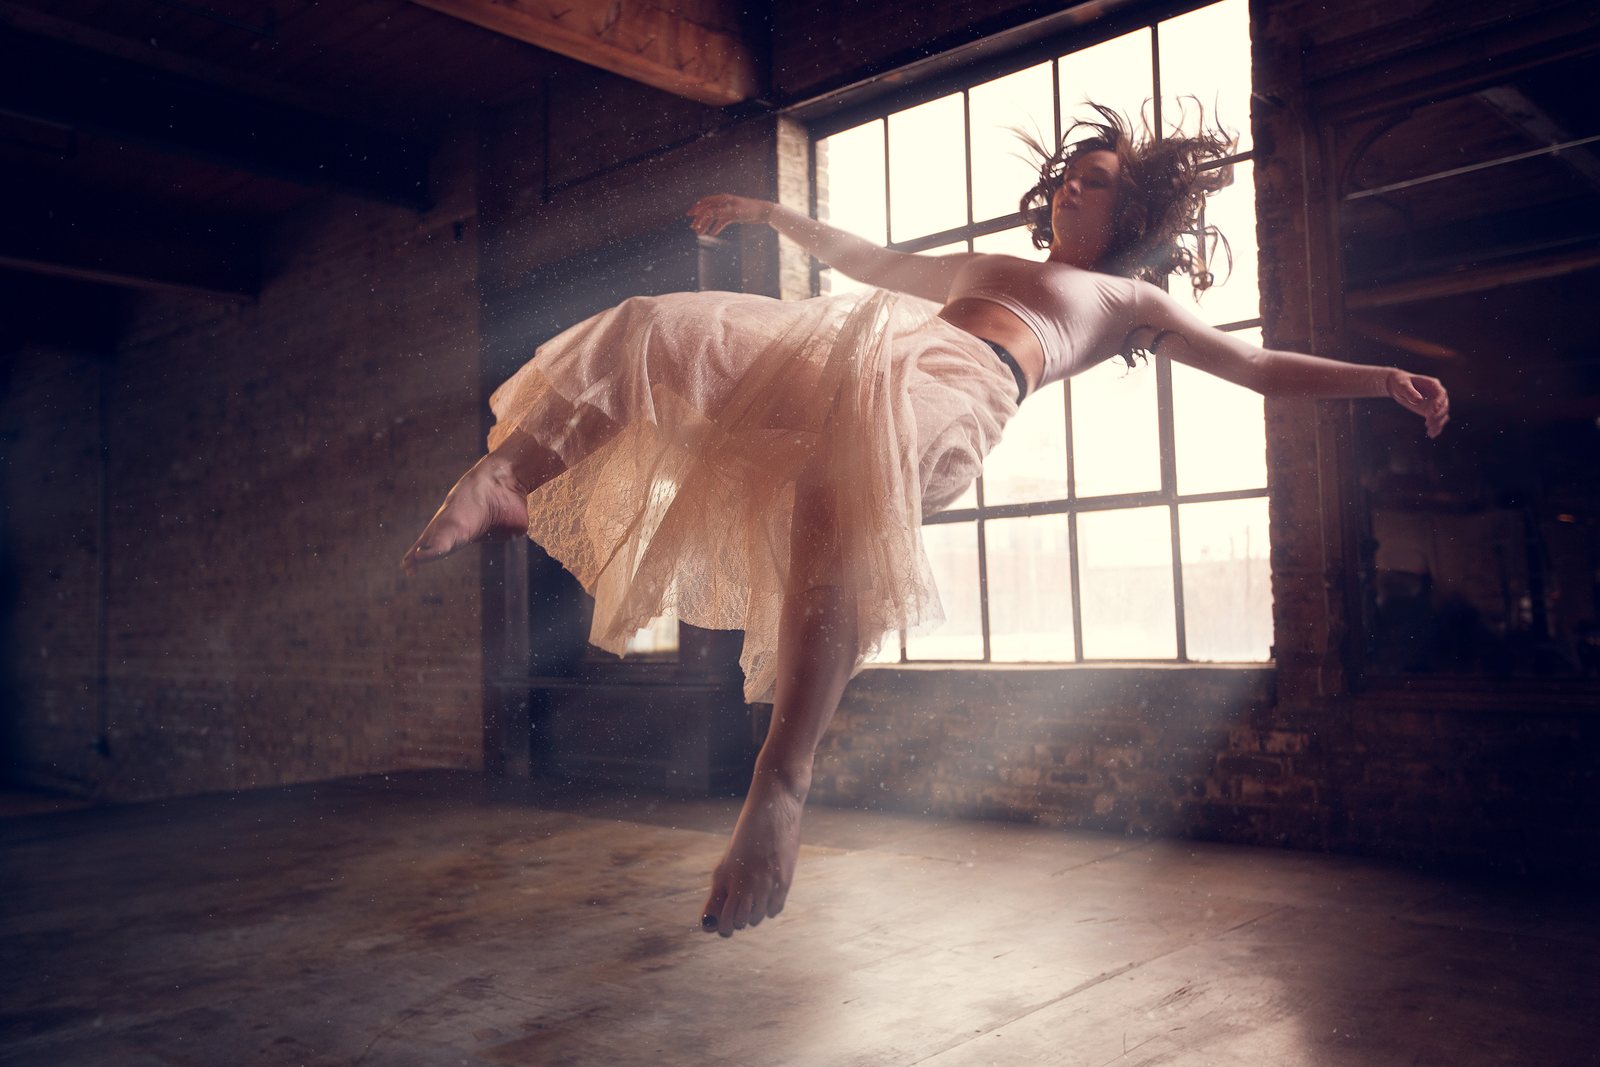
The photo at the top started as four frames from the same tripod: the empty room, Mary from the waist down as she fell toward the bean bag, Mary from the waist up from another fall, and one frame used only for her hair.

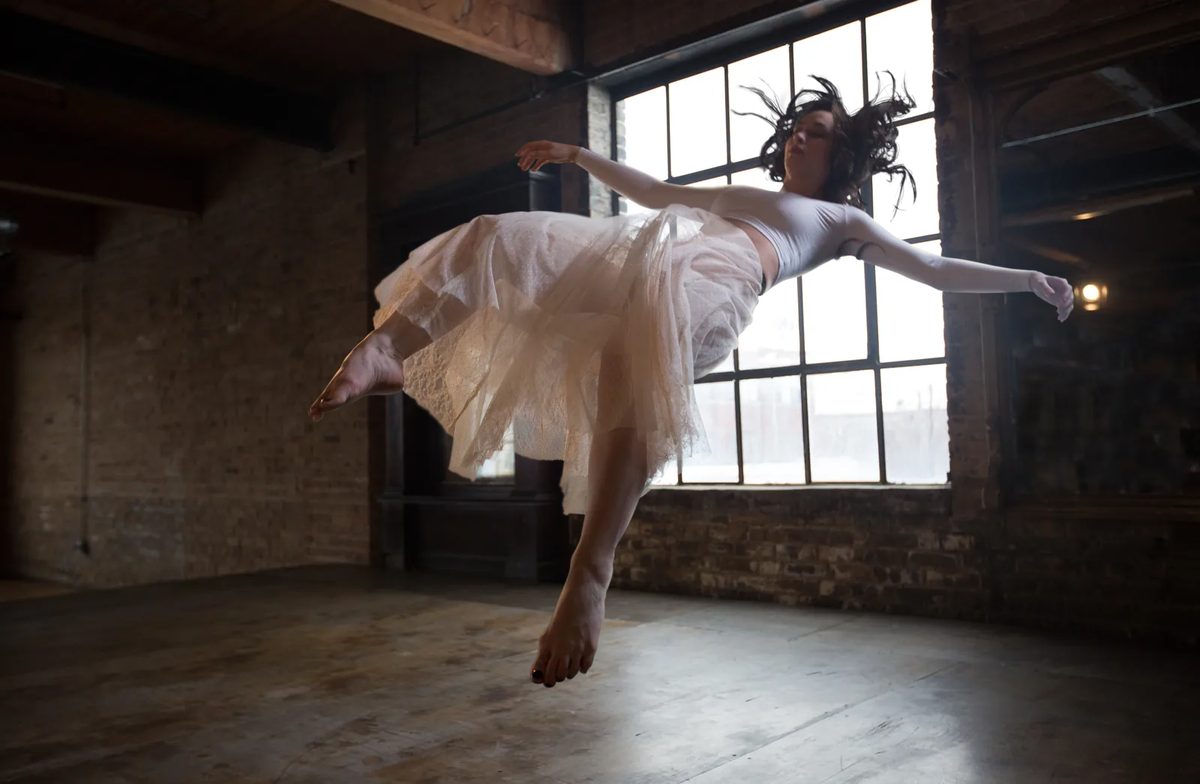


1. Stack the frames. File > Scripts > Load Files into Stack opens them as layers in one document. Tick Attempt to Automatically Align Source Images. Even on a tripod, it corrects a small bump. Before touching anything, I write the plan on a layer of its own.
2. Cut her out with the Pen tool. This is by far the most technical part of the image. Everything after it is done to taste, but you can tell a rushed cut-out in the finished photo. Start the path in a crease rather than in the middle of a curve, and if you can’t get a perfect line, go slightly inside the edge rather than outside. Turn the path into a selection with a Feather Radius of 1 pixel and add a layer mask. The empty room underneath fills in where the bean bag was, so there’s nothing to clone.
3. Join the halves. The top half goes on its own layer, slid right until the waistband lines up, with its own path around the arms. Hair is the exception. The Pen tool is bad at soft edges, so hair is painted into the mask with a brush. The extra hair comes from the fourth frame, blended in with Darken mode, plus a few strands painted with a soft brush. Soften the mask edge a touch and paint out any dark or light halo on a layer clipped to her, so she doesn’t look cut out.
4. Add the light rays. Two sets: one drawn with the Polygonal Lasso from the corner of the window, and one built from thin rectangles, rotated, which look straighter and more like real rays. Both get Gaussian Blur and a layer mask painted at 10% flow so they fade unevenly. Easy does it with light rays. They don’t have to be overwhelming. In fact, it’s better if they’re not.
5. Dust, color, dodge and burn. Warm Curves near the window, then dust, from a brush made of specks with size jitter, angle jitter and scattering turned up, then blue shadows and yellow highlights with Levels, and last a Soft Light layer for dodging and burning at 10% flow, mostly on the folds of the dress. Getting that dust brush just right is my favorite part of the whole tutorial: those little sparks really bring the image to life.
You want this to be a subtle buildup. You don’t want it to be like, “Whoa, who put dust on that photo?”
Aaron Nace
What Gives a Levitation Photo Away
While the supported method is the simplest to photograph, it’s the most complex in Photoshop, because the object you’re removing is touching the subject. The jumping photo in the course was the opposite. Mary never touched the dresser she jumped from, so there was no shadow to fix where they met, and masking it out was a very easy job. The less your subject touches anything, the easier the edit.
When a levitation photo looks fake, it’s usually one of a few things. A piece of the support is left behind. In the supported photo, the jug under Mary’s foot had to go completely, because as long as it’s there, she doesn’t look like she’s levitating, and even a faint reflection of the stool gave it away. The edges are rushed or haloed. The shadow is painted instead of photographed. Or the effects are turned up too far: rays you notice before the person, dust you can count, or color that looks like it was done in Photoshop.
As a human, you tend to exaggerate, so when I do strong color on a photo like this, I bring the opacity down a little at the end, just to check myself.
In the supported shoot, the shadow under Mary was a real one.
We have a real shadow that we actually photographed, so there’s no fakery involved here. It’s actually real, which is always going to look better.
Aaron Nace
I prefer to photograph everything that I possibly can.
Levitation Photo Ideas and Poses
Most of what sells a pose happens on set. A few things from our three shoots:
- Make the fabric see-through. We picked a semi-transparent skirt so the backlight shines through it and you can see there’s nothing under her.
- Light from behind. A backlight separates the subject from the room and puts a glow around them.
- Point the toes. On a jump, pointed toes make it look like floating away rather than jumping up.
- Show every limb, and a little of the face. Hands, feet and legs all visible; the face turned slightly toward the camera. Looking straight up or down both work.
- Give them something to touch. In the supported shot, a single rose on the floor gave Mary something to interact with and put her in the scene.
- Cast the right person. Someone comfortable with their body, like a dancer, a gymnast or another athlete, is the best subject, and they shouldn’t have to jump over and over.
Ideas you can try at home:
- A supported float over a bed or a couch, with a stool under the back and something under one foot.
- Reading a book in the air.
- A small jump against a plain wall, with the floor removed in Photoshop.
- A fall onto couch cushions, as long as it isn’t from very high.
- Objects floating around a person who stands still.
Real Levitation Photo, or AI?
AI apps now sell floating-chair video templates. You upload one photo, and a generated clip shows you hovering in a chair. They take one photo, and they’re all the same clip. A shoot gives you the person’s real face and body, light you chose, and a file big enough to print.
AI does have a place in a real composite. In the Frozen Levitation project of our Ultimate Guide to Manual Compositing in Photoshop, a woman photographed underwater floats over a frozen lake, and the reflection is built twice, once with AI and once by hand, so you can compare them side by side.
Common Questions
Is levitation photography real? The person really is in the air or really is held up when the picture is taken. The floating comes from removing what held them, using frames shot from the same spot.
Can you do levitation photography without Photoshop? Yes, with a jump. A fast shutter speed catches the person at the top. Natsumi Hayashi sets 1/500 of a second or faster for hers (1/320 in the dark), and the float comes from the jump, not from compositing. Anything holding the person up, like a stool or a crash pad, needs an editor to remove.
Can I do it at home? The supported method needs only a stool, a tripod and a little patience. A bed or couch cushions make a crash pad for a short fall.
You Can Fly
In my dreams I could fly, and once you get a taste of flying, it stays with you. Whether you use the jumping, the falling or the supported method, you can get a beautiful photo from all three, so choose the one that fits what you can get done, maybe this weekend. And don’t get hurt jumping in the air.
Photos and steps from Aaron Nace’s PHLEARN course The Beginners Guide to Levitation (2017), with Mary as our model.
In this article
Free with PHLEARN

Join the conversation