How to Master Adjustment Layers in Photoshop
-
Add to
favorites
-
DifficultyEasy
-
Length4.5 hours
-
Videos33
-
Software
Description
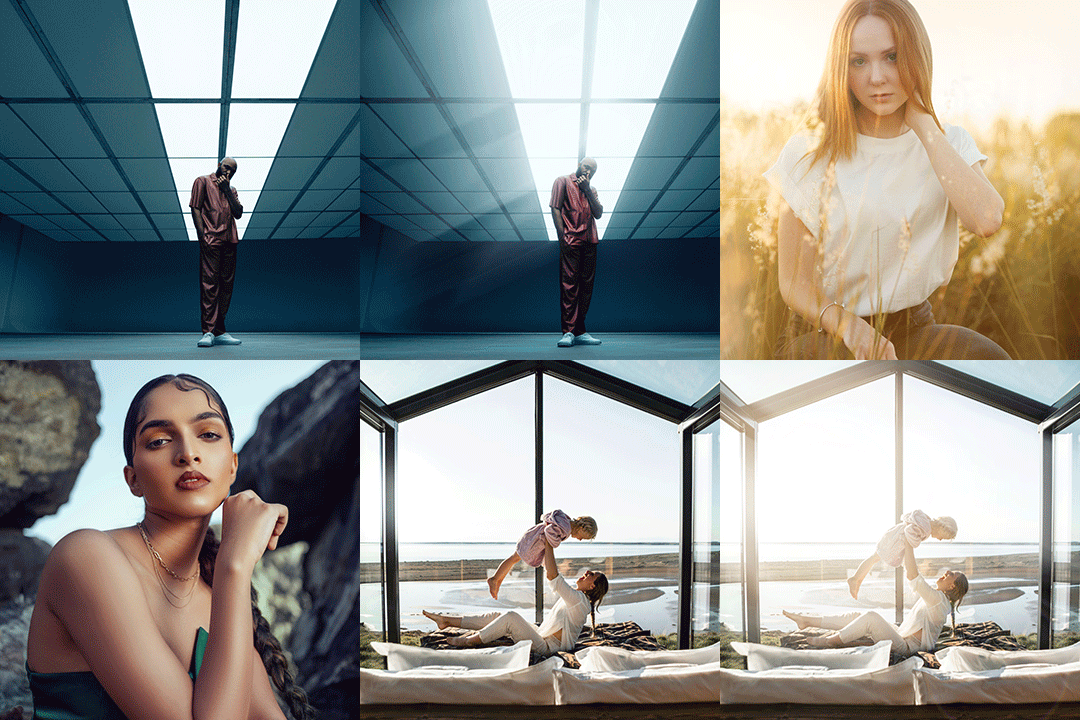
Adjustment Layers are the best tools available for photo editing in Photoshop. Not only do they allow you to work non-destructively, which is one of the most important skills of the creative professional, but they can also help transform your images into something extraordinary!
In this tutorial, we take you through every Adjustment Layer, showing you how to fix exposure, color correct, color grade, place objects on solid colored-backgrounds, make advertisements for print or web, and much more!
THIS COURSE INCLUDES
- 45 Sample Images
SHARE
Table of Contents
-
01 - Introduction to Adjustment Layers3:37m
-
02 - How to Use Adjustment Layers10:59m
-
03 - Layer Masks, Clipping Masks, and Luminance Blending23:36m
-
01 - Radiant Eyes7:14m
-
02 - Fix Uneven Skin Tones4:17m
-
03 - Reduce Skin Redness5:51m
-
04 - Color Correction4:00m
-
05 - Correct Exposure5:12m
-
06 - Create a Pure White Background for Portraits9:34m
-
07 - Create a Solid Background for Products11:23m
-
08 - Film Look3:58m
-
09 - Create Stunning Black & White Photos3:55m
-
10 - Change the Color of an Object4:02m
-
11 - Create Your Own LUTs6:42m
-
01 - Solid Color Fill Layer16:32m
-
02 - Gradient Fill Layer10:20m
-
03 - Pattern Fill Layer14:50m
-
04 - Brightness and Contrast Adjustment Layer2:27m
-
05 - Levels Adjustment Layer24:36m
-
06 - Curves Adjustment Layer15:43m
-
07 - Exposure Adjustment Layer4:56m
-
08 - Vibrance Adjustment Layer3:15m
-
09 - Hue and Saturation Adjustment Layer10:58m
-
10 - Color Balance Adjustment Layer7:12m
-
11 - Black and White Adjustment Layer4:13m
-
12 - Photo Filter Adjustment Layer2:46m
-
13 - Channel Mixer Adjustment Layer13:24m
-
14 - LUT (Color Lookup)4:40m
-
15 - Invert Adjustment Layer4:32m
-
16 - Posterize Adjustment Layer2:45m
-
17 - Threshold Adjustment Layer2:55m
-
18 - Gradient Map Adjustment Layer5:21m
-
19 - Selective Color Adjustment Layer3:41m
Course Downloads
Coloring Made Easy
All About Adjustment Layers
Photoshop is all about Layers and how they work, stack, and interact with one another. Adjustment Layers are a set of layers that allow you to edit any other layer (or layers) without affecting the original pixels in an image. Stay organized and take complete control of the post-production process.
Fix Exposure & Brighten Portraits
Adjustment Layers can do just about anything you need them to. The most basic application, and often most useful, will be to fix or adjust the exposure in an image. Brighten the shadows on a subject’s face or recover the details in a slightly overexposed sky. Not only can you use Adjustment Layers to edit an entire image, but you can also target specific areas on a photo for extra precision.
Create Advertisement for Print & Web
In this tutorial, we’ll demonstrate several examples where we use Adjustment Layers to create layouts for posters and ads. Learn to cut out a product or a person and place them on a background of any color, add patterns to backgrounds and text, and more!
Change the Color of Anything
Being able to quickly and accurately change the color of anything in a photo is an incredibly powerful skill for any photographer to have. Are you a product photographer? Tell your clients that you can create images of their products in any color and on any background. Mostly shoot fashion? Make beautiful and seamless adjustments to clothing and wardrobe.
Color Correct & Color Grade
Starting with an accurate base is the key to great image coloring. We’ll walk you through our workflow of using Adjustment Layers to fix highlights, shadows, and white balance to get your images to a great starting point. Then we’ll dig into the creative side where we color the highlights, midtones, and shadows of an image to give it a unique and powerful look.
Create Custom Looks, Filters & LUTs
Never use an Instagram filter again! Photoshop and Adjustment Layers allow you to dial in your own custom looks and style. Not only can you get an image exactly how you want it, you can copy that look to other images or even save it out as a custom LUT to use later or share with others!
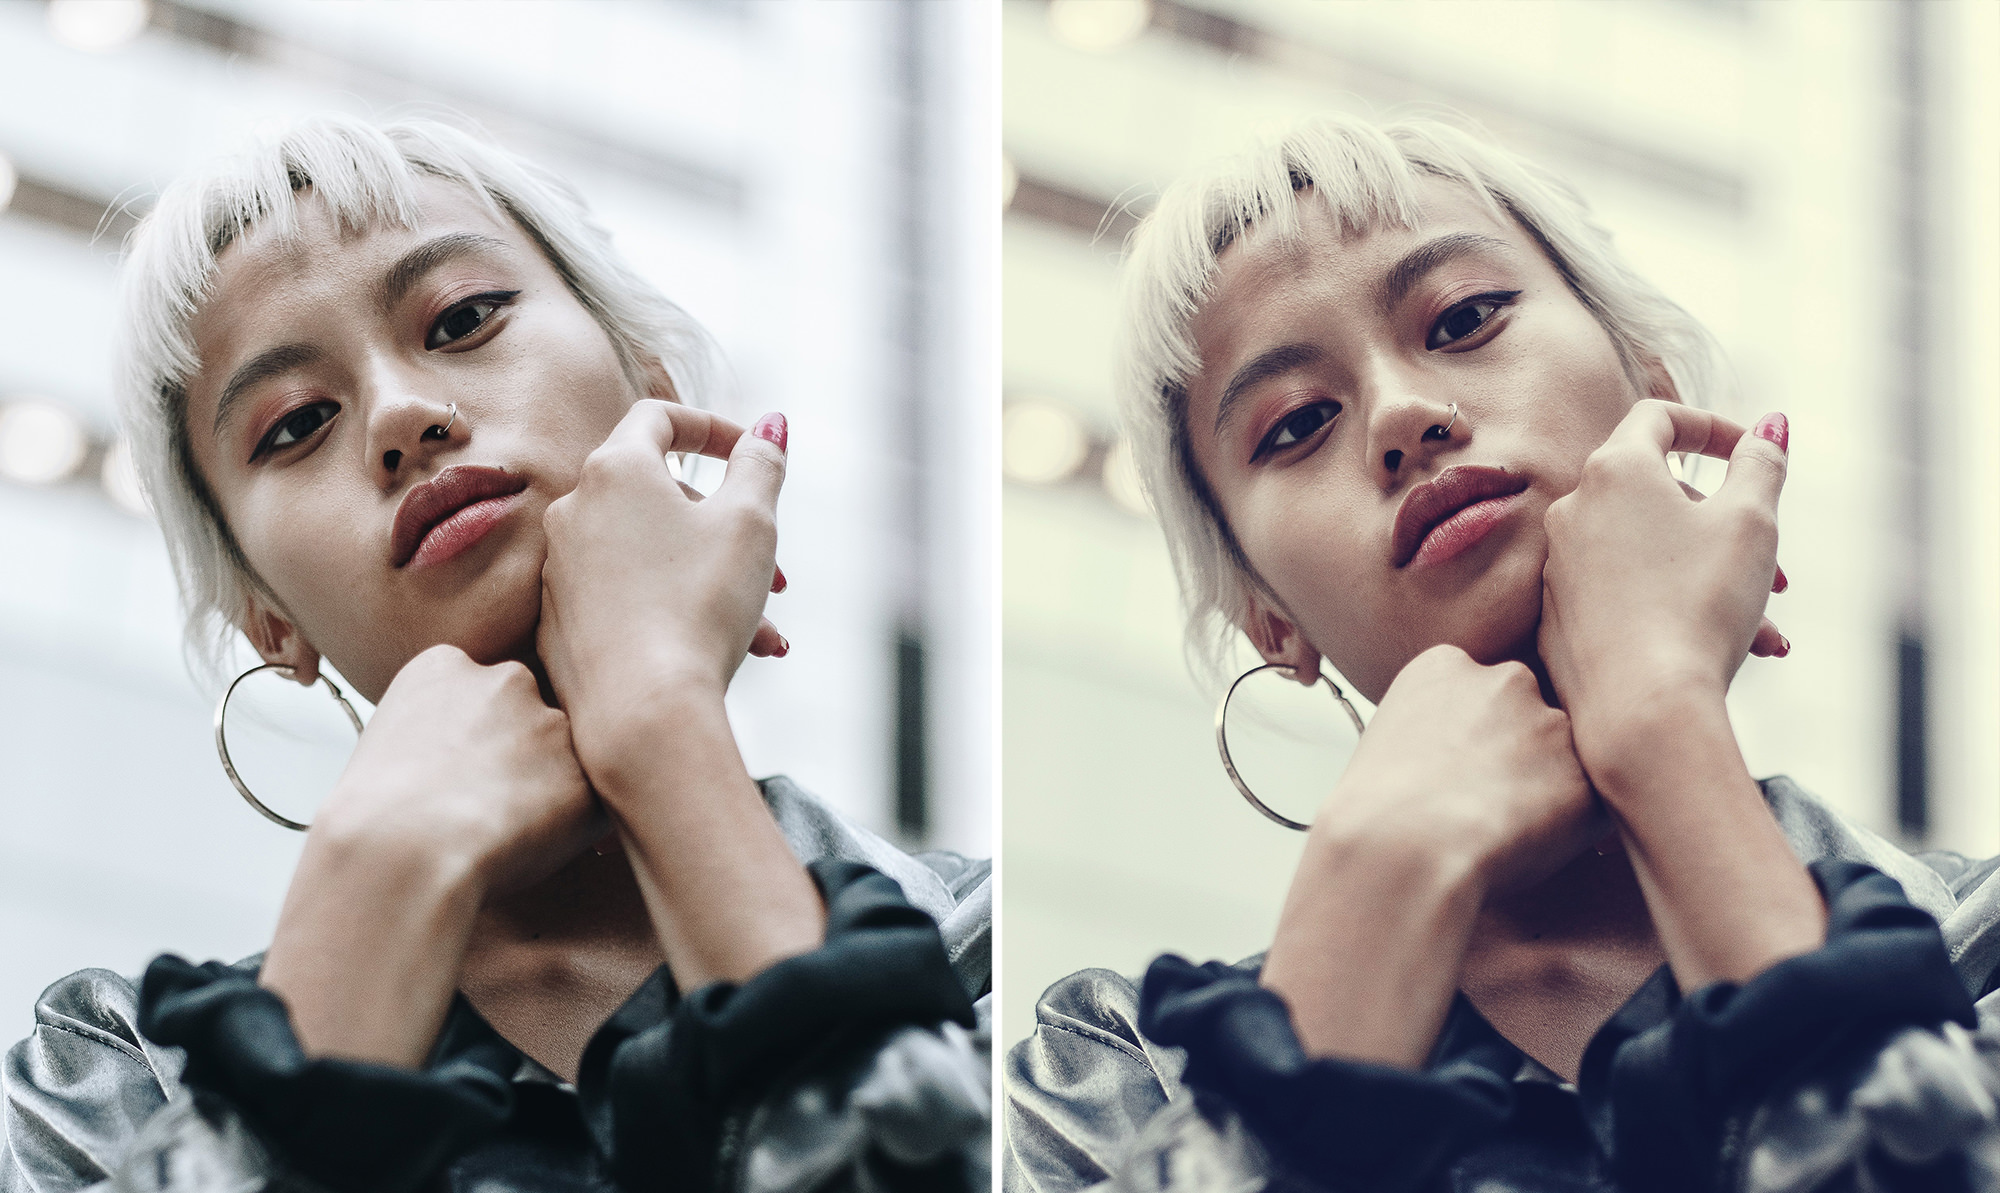
Creative Coloring
Adjustment Layers are the best tools in Photoshop for applying stylistic color to your photos. Learn how to use multiple Adjustment Layers to create your own unique looks!
Work Non-Destructively
Learning a professional Photoshop workflow starts with an understanding of how to work non-destructively. Make any edits you need without ever damaging any of the pixels in the original photo. We’ll show you everything you need to know about how to edit as well as how to make every edit its own layer that can be turned on, turned off, or changed at any time.
Local & Global Edits
Global edits are changes made to an entire image. Local edits are changes made to only part of a photo. During post-processing, you’ll likely find yourself using both to achieve the final image that you want. We show you how to use Adjustment Layers in combination with the many refinement tools Photoshop has to offer, so you have the precision and control you’ll need to impress.
Layer Masks & Clipping Masks
Since Adjustment Layers work like any other Layer in Photoshop, we can use Layer Masks, Clipping Masks, and other techniques to have our edits affect only the areas that we want. Learn how to use Layer Masks and Clipping Masks to apply edits to only a single layer or even groups of layers.
Luminance Blending
One of the most powerful techniques in Photoshop, Luminance Blending allows you to apply Adjustment Layers to the highlights, midtones, and shadows of an image with great precision and flexibility. Have a subject with dark shadows under their eyes? Use an Exposure Adjustment Layer with Blend If to brighten the shadows without affecting the highlights in their skin!
Edit Any Photo
Whether you’re into portraits, landscapes, product photography, food photography, or social media, Adjustment layers are the most powerful way to get the most out of any image. Don’t settle for basic photo editors that don’t give you the control to help your images stand out!
Brightness & Contrast
This Adjustment Layer is a quick and easy solution to fixing basic issues in an image. Too dark? Raise the brightness a bit. Too flat? Try pumping up the contrast a bit. Better yet, use this layer in combination with Layer Masks and Clipping Masks to give your photo perfect balance.
Curves & Levels
Two of the most commonly used Adjustment Layers in Photoshop, Curves and Levels allow you to adjust the contrast in an image by changing the black and white end points. We break down the important differences between both, how they each push and pull the information in an image, and how to use them for additional techniques such as coloring.
Hue & Saturation
The most important Adjustment Layer in Photoshop for changing and affecting colors. We’ll show you how to use this layer to adjust and change the color of anything from backgrounds, to eyes, to landscapes, and even food.
Add Vibrance
Adding saturation can be great, but unrealistic and unnatural skin tones can ruin an image. Vibrance is a smart tool within Photoshop that allows you to bump up the saturation of the more muted colors in an image. Learn how and when to use it to make your images pop without affecting skin tones.
Black & White
Instantly convert any photo to black and white and get full control over adjusting the tonal range to achieve a monochrome look that you’ll love. Black and white is much more than just dropping the saturation and we’ll show you everything you can do to make an image come to life without color. Once you’re ready to go more in-depth, check out our PRO tutorial How to Master Black & White in Photoshop.
Fill Layers
Fill layers can be used for anything from adding color to the highlights or shadows of an image to changing the background color for a poster or advertisement. We’ll show you all the tips and tricks that these versatile Adjustment Layers offer.
Photo Filter
Add quick and subtle color toning to any image using the Photo Filter Adjustment Layer in Photoshop. Quickly and easily warm up or cool down an image or add in notes of any color that you want.
Color Balance
Another great tool for making nuanced color adjustments to an image. Use Color Balance to remove color casts and add add color toning to any photo. With all of the options for color toning in Photoshop, we’ll break down every tool and explain the pros, cons, and best applications of each.
Channel Mixer
Learn how RGB color channels work within Photoshop and how to adjust them using the Color Channel Mixer Adjustment Layer in Photoshop. It can be a complicated topic, but we’ll break down the fundamentals and show you step-by-step how to use this adjustment to create stunning color changes.
Invert
Quickly Invert colors in Photoshop! This Adjustment Layer can be used for either creative effects or in a practical way to change logos or text from light to dark (or vice versa).


Aaron Nace
PHLEARN Founder
Aaron Nace is a photographer, Photoshop artist and founder of PHLEARN. He is the #1 Photoshop instructor in the world with millions of YouTube subscribers.
Reviews
New & Popular Tutorials
Training Site in
the World
Tutorials!
Ratings
and Counting
Subscribers











Amazing thank you so much
I really needed a refresher on many of the adjustment layers and this was perfect. Understanding the adjustment layers opens so many creative doors.
Thank you Aaron Asalam walekum 💙.
Another well crafted and delivered tutorial by Aaron – this man makes learning Photoshop an absolute joy ride. Thank you!
These are the best photoshop tutorials. Very in depth in the tools and professional application. I recomended phlearn to all my friends. Thank you so much phlearn amazing lessons
Aaron! You are just Grate. Yes, I learned a ton of thing! Thank you so much. Have a good day!
Yes, I learned a ton Aaron! Thank you so much..
Thank you so much!
Mate, you such a great teacher!
This tutorial was very eye opening. I have been following Phlearn on Youtube for a while now and finally decided to be part of the community. It is a great learning experiences and Aaron makes is so easy to follow and understand. Definetly a great way to step up the photo editing game.
Learning lots from Aaron and this site but am puzzled by one thing on this ‘adjustment levels’ course. Isn’t the Invert adjustment level a bit redundant? Cant i just use the ‘Command/Ctl I” to achieve the same effect or am I missing something??
I have just finished studying a full 27 of Aaron’s incredible tutorials (123 hours of videos), and cannot recommend more highly buying the PRO subscription. This was a critical tutorial. Deep dive. You’re a real champion Aaron.
I like the Pro tutorials because they cover the entire topic. By their nature free tutorials are shorter and have to hit the main points. The extra depth has increased my understanding. I feel a lot better using adjustment layers.
Thank you Aron for your lovely videos and your amazing way of teaching. I loved the adjustment layers and i wish you can extend these contents by not only show how they work but also to do tutorials shows how to use them making these professional look photos like photography artists on social platform. I really wish i can know the secrets 🙂
This is a fabulous series! I learned so much, and as always, in the fun Phlearn way. Aaron, you’re brilliant. Photoshop is becoming much less mysterious to me as I work my way through all the Pro tutorials. Thanks!
Finally clear explanations and great tutorial!! thx!
I have invested hundreds of hours watching tutorials, both free and paid over the past years. I have been following Phlearn on YouTube but finally decided to become a member. If I had done this a few years ago I could have saved all that time, effort, and money. Aaron has clearly mastered what he teaches and his excitement carries on into his teaching. Simple bite sized lessons with real images illustrating how things work in the real world. I stopped the videos several times to open my own images and fixed problems I had been poking at for days in a matter or minutes. Only a couple of tutorials in and I have gone from playing around with Photoshop to actual editing where I can change what I want where I want on an image. Thanks Aaron for the free time I have now that I can edit images in a fraction of the time and with better results than I ever have.
awesome perfect teacher i like the lessons a lot and i m doing good and i have more experience and skills
This was a really useful series Aaron, and I’m certain that I will be coming back to review some of the modules in the future. It was nice to see some practical examples earlier in the course and then a more detailed explanation of each adjustment layer in the later modules. I’m sure there is something useful in this course for anyone who works with Photoshop.
Aaron is such a great and fun teacher!! I have a problem in focusing more than 10 minutes. But this man made me stay watching this tutorial till the end!
Loved it. Filled in some gaps for me, and as always, Aaron makes it fun. Love his depth of knowledge.
A few minutes ago I finished working on this course. A little sad that it’s over, I’ll have to start again )) the Material is very lively and a lot of useful practices. Made the discovery for themselves is a LUT. In section 2, lesson 4 “How to Color Correct Photos in Photoshop” adjusted the skin tone in neutral mode, while in the third part of lesson 19 “Selective Color Adjustment Layer” it is recommended to use the”reds” mode. Probably in the second part we were more adjusted the color balance in general. Thank you Aaron and the whole PHLEARN Team, to learn with you is a pleasure. I wish you success.
thumbs up,excellent
I loved this class. My favorite so far. I actually don’t feel like such a newbie anymore. Thanks Aaron!
Wow! I just finished “How to create a solid background for products”. It was fantastic and so useful. I have been doing things the HARD way and I REALLY appreciate these wonderful tutorials that show me a faster, better, more effective way. Also, now I know that I can make changes that I once thought impossible. I’m only half-way through the series on adjustments layers but I had to take time out to say thanks for doing this. You are helping me to become a better artist.
This is a brilliant tutorial. A must for all
What?! No reviews yet. So far this is the best of the best. Love the coffee cup adjustment example. Made LOL! Outstanding tutorials.
I’ve had my pro membership for a while, and kept finding reasons I didn’t have time to go through these tutorials. Finally I thought I should make some time and decided to start with this tutorial… OMG! Aside from the wealth of info in each section, the other little tips (like “apply image” to your mask) were a huge bonus as well. I’ve discovered a whole new appreciation for things like the Solid Colour adjustment layer, as well as the Levels adjustment layer! I’ll be carving some time out of my Mondays to catch up on all the tutorials from now on! Great work here, on what could have been a really boring topic… Thanks for these!
Adjustment Layers clear and simple explained. Learned some new things, refreshed some old. A lot of practical value.
With Arons usual style he deep dives into Adjustment Layers explaining every aspect of practical usage. Follow the examples as they are important in improving your knowledge of the materials.