Download Sample Images
description
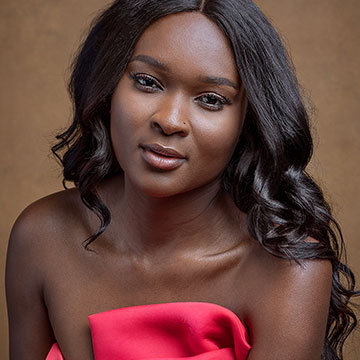
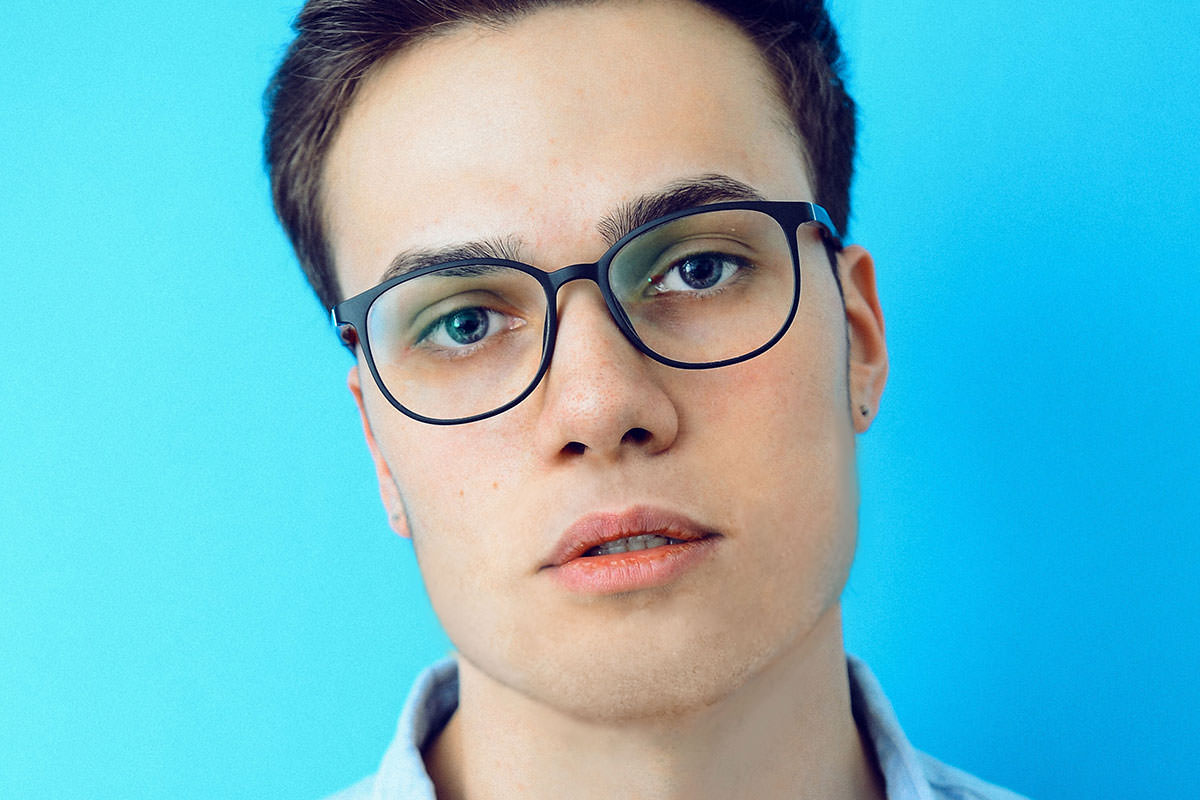
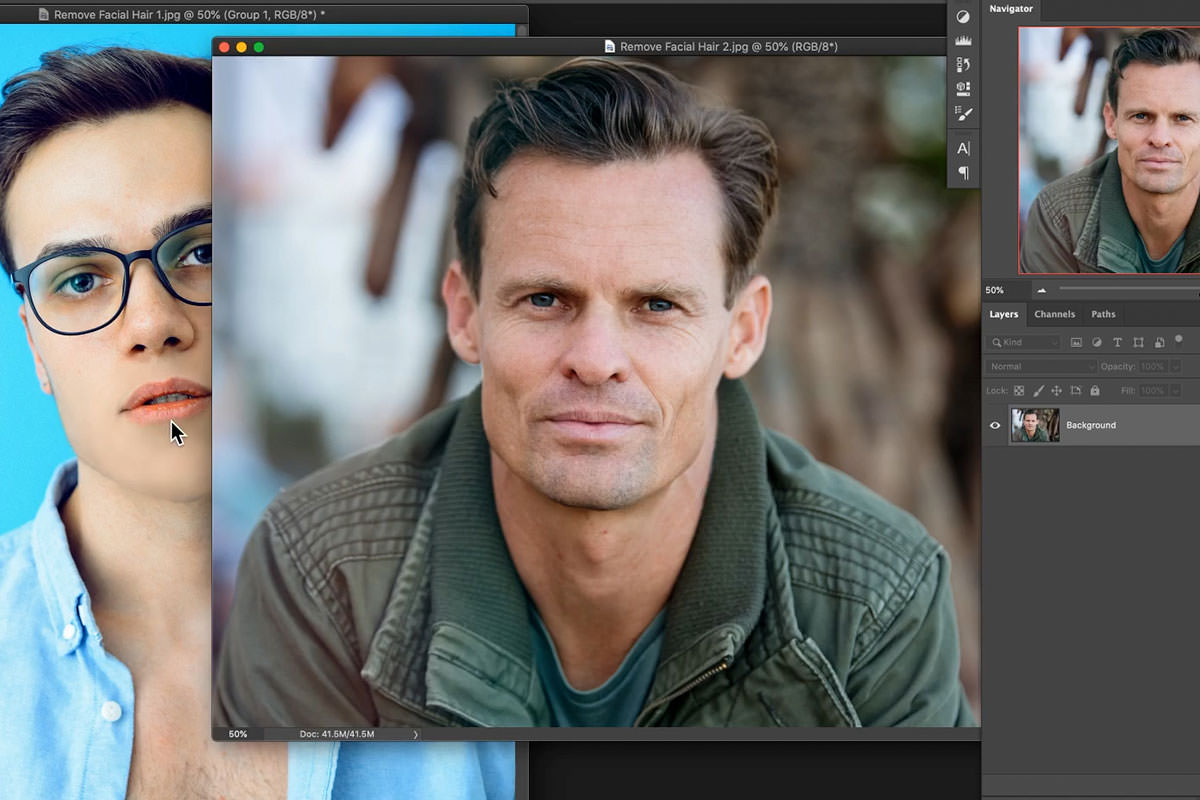
If you’ve ever needed to remove facial hair from a portrait, you know how tricky the process can be. That’s why we’re breaking down our method that will save you time and make sure the people in your photos look their best!
Whether your subject has a full-on beard or just a 5 o’clock shadow, you’ll learn how to paint away facial hair with the Brush Tool, recreate skin texture using a second reference image, and then blend everything together with some professional tools and techniques.
Share

Remove Facial Hair & Preserve Skin Texture!
Working with Facial Hair & Skin in Photoshop
Facial hair is tricky to remove, but the reason why might not be obvious. Removing hair is easy enough. Tools like the Spot Healing Brush make short work of it in most cases. The problem with removing facial hair isn’t getting the hair out of the way, it’s making sure we don’t damage or remove the skin texture from the subject’s face.
Removing Hair with the Brush Tool
We just mentioned the Spot Healing Brush, which is a great automated tool for removing objects and distractions from surfaces without much detail. But since we’re working with skin, we need a tool that will give us more control and the ability to replicate the natural highlights and shadows that fall on our subject’s face.
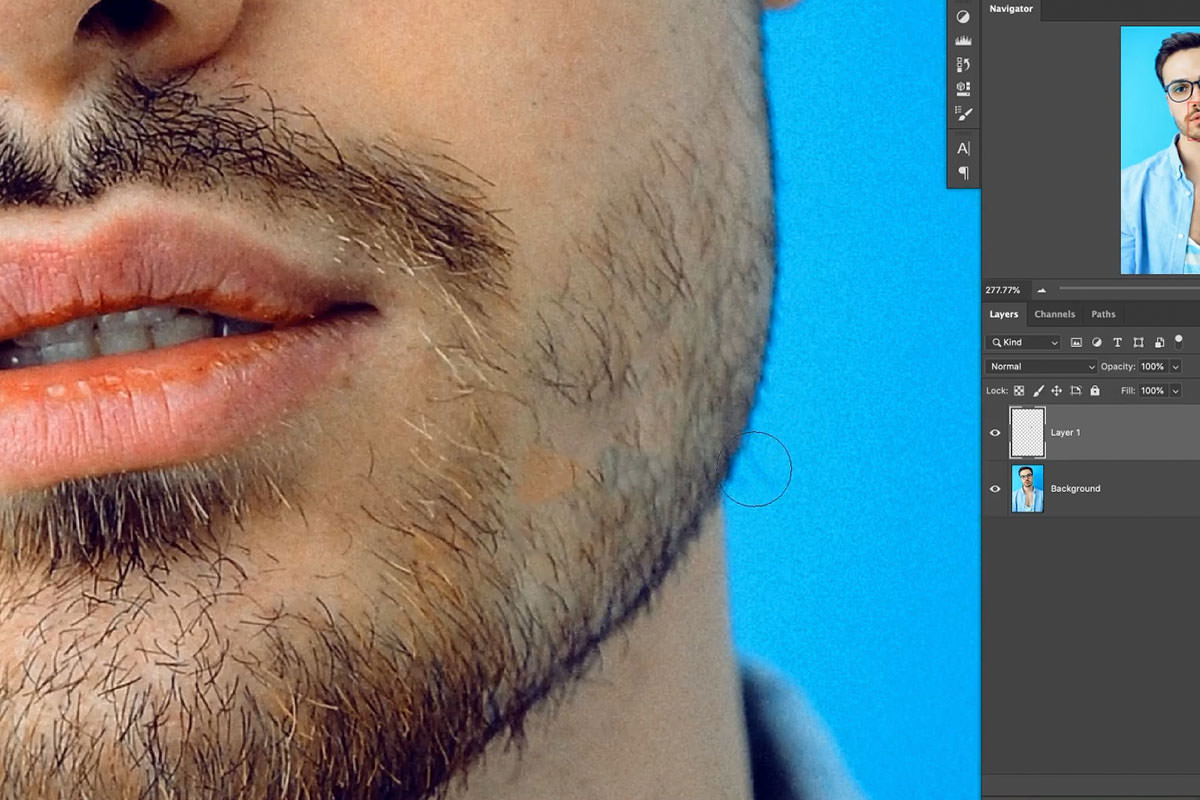
Notice how the Spot Healing Brush creates blotchiness and discoloration? This is where the Brush Tool comes in.
The Brush Tool is equal parts powerful and versatile and, if you haven’t had the chance to take a deep-dive into what it can do, we recommend checking out our PRO course The Amazing Power of the Brush Tool in Photoshop.
Using the Brush Tool to remove facial hair is an advanced technique that will require a little extra time and care, especially the first few times you try it. Take your time and give yourself some space to get comfortable with the process. Once you master the Brush Tool for this application, it can save you a ton of time while helping you solve a wide variety of problems that might pop up during future edits.
Sample & Paint
As we said, this is an advanced technique, but the steps involved are actually very simple. Create a new, blank Layer above the image of the subject. Select the Brush Tool, set it to a low Flow (around 20% if you’re using a pressure-sensitive tablet, 2-5% if you’re using a mouse), hold ALT to sample an area of the subject’s skin near the facial hair, and then begin to carefully paint over the hair near that area.
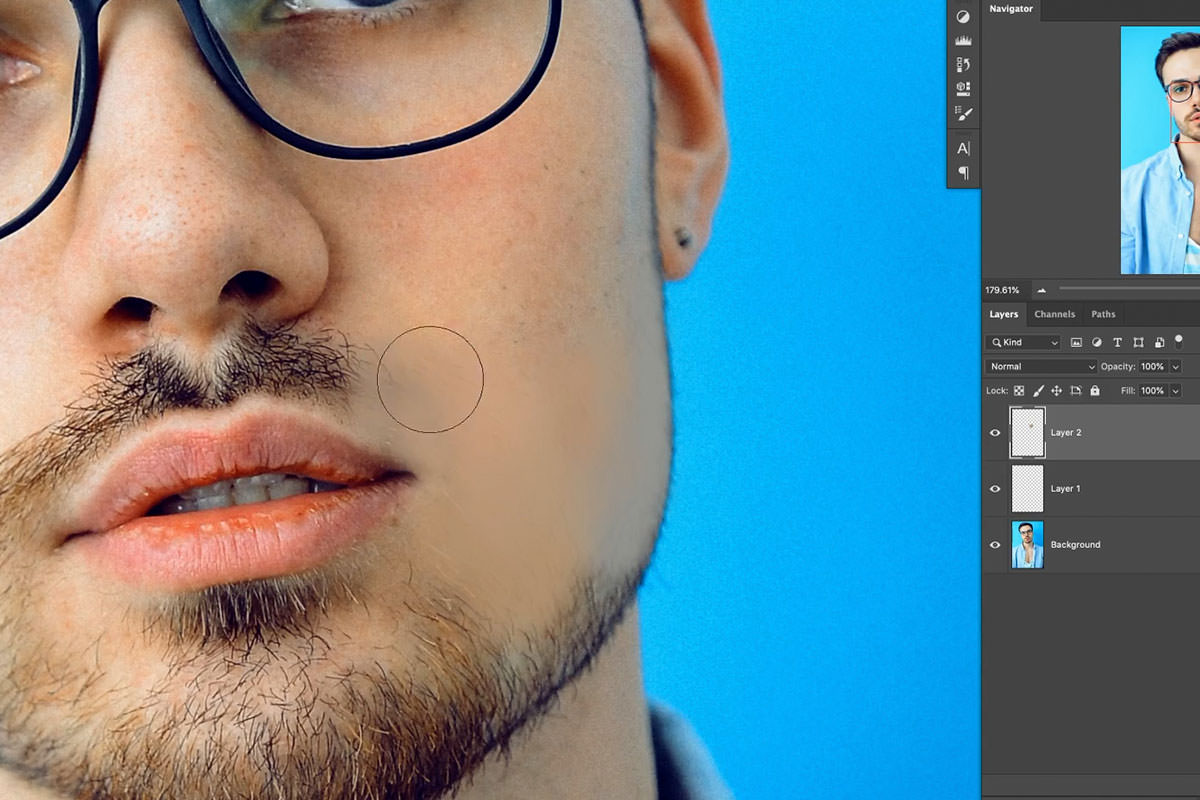
More concisely: use the Brush Tool to sample colors from the subject’s skin, and then paint over the facial hair. It’s that easy! Well, sort of. If you stick with just a single color of skin tone, the subject’s face will end up looking flat and unrealistic. You’ll need to constantly sample new areas of skin, paying close attention to areas of highlight and shadow. Keep in mind that skin is going to have a wide range of tones, even within a similar area.
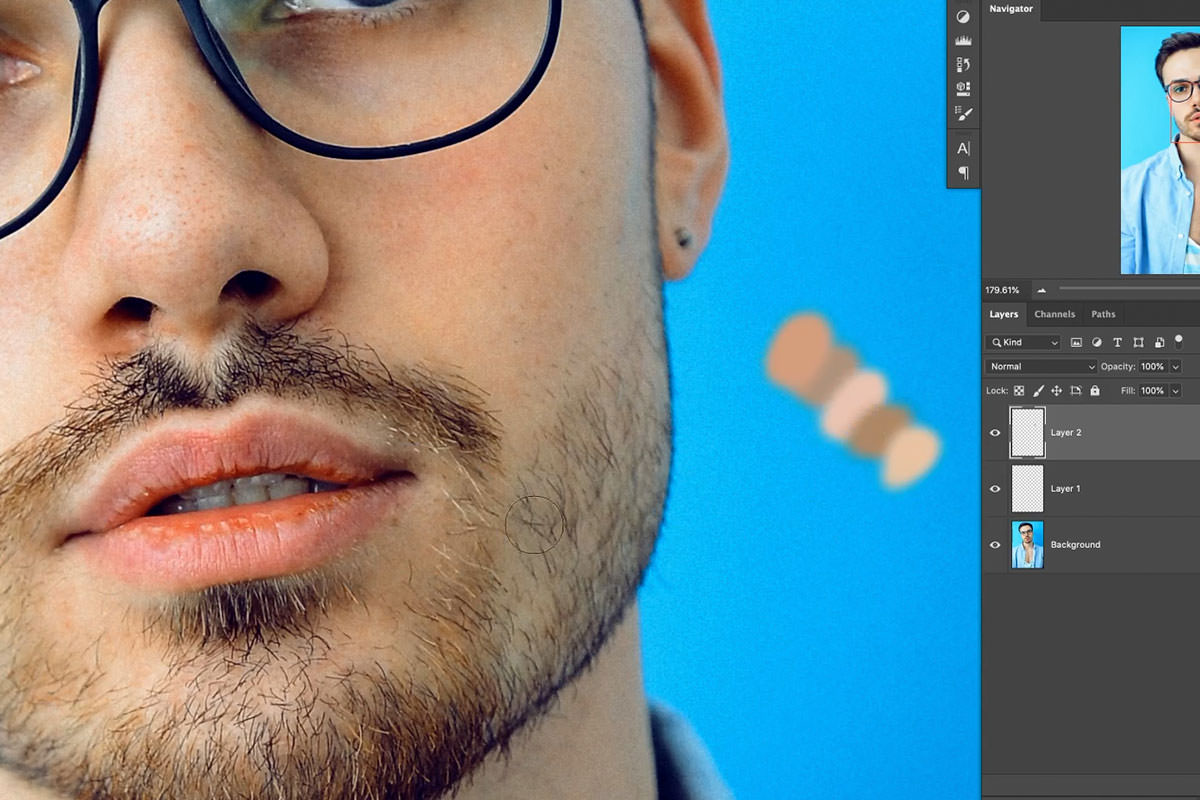
With this in mind, the process should feel more like this: sample, paint, sample, paint, sample, paint, and so on.
Take your time with this. It might also help to have a copy of the original area you’re painting over off to the side to use as a reference as you cover up the hair. This can help you make sure the skin tones, highlights, and shadows match as closely as possible.
Once you’re done, you’ll notice that the hair is gone, but the image doesn’t look anywhere close to natural. We took our time to make sure the skin tones and lighting were a close a match to the original as possible, but the subject’s skin texture is completely gone. We started off by saying that preserving skin texture is the make-or-break things to look out for during tasks like this. So how do we fix it? Let’s find out!
Recreating Skin Texture
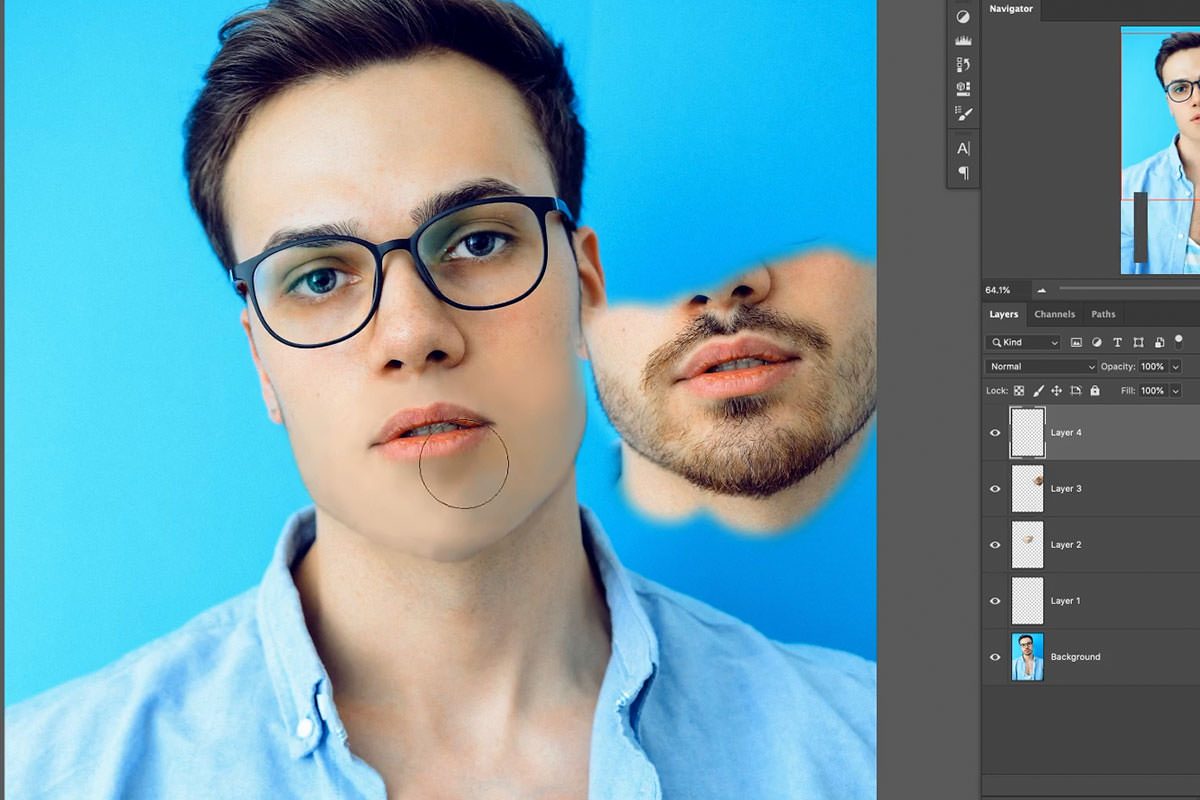
You could call this step recreating skin texture, or you could call it borrowing skin texture. While everyone certainly has their own unique features, skin texture will be relatively similar from person to person. This means that we can find another image with a subject with similar skin and features, and then add the skin texture from that image over the area we just painted.
You could just sample skin texture from other areas of the subject’s face to fill in the areas of missing texture, but that normally doesn’t result in a natural-looking image. Skin texture changes depending on where it is on the body. So skin texture on your forehead will not look the same as skin texture on your cheeks and chin. Using a second image, with skin texture from a similar part of the body, is the best way to go.
If you need to find reference images, we recommend free resources like Pexels or Unsplash.
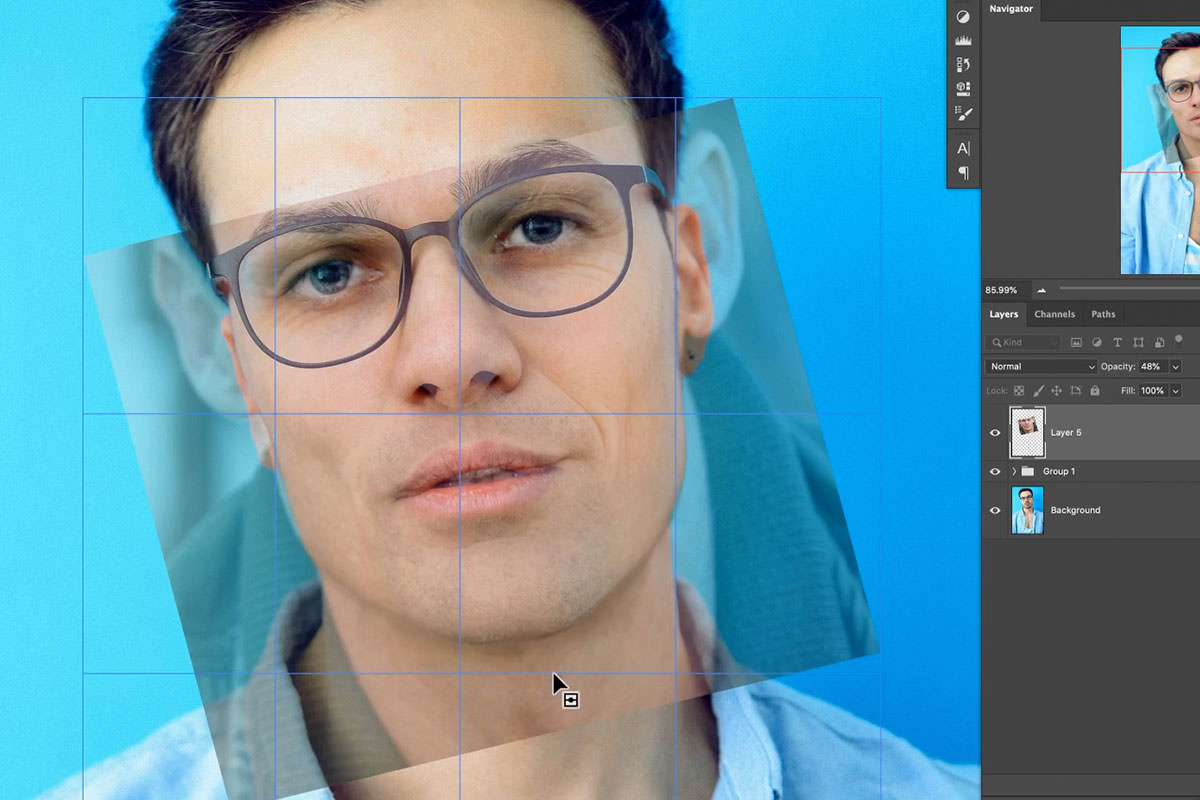
Once you’ve got a second image that works, bring it into your Photoshop project and try to align it as closely as possible over the original subject’s face. Again, people will have unique features and it won’t be a perfect match. You just need to get it close. Once it’s aligned, it’s time to extract the texture.
Extracting Skin Texture
We only want the skin texture from the second image, so any color or features that don’t match our original subject need to go. First, right-click on the new image and convert it to a Smart Object. This will allow us to dial-in the settings we need without damaging the original image.
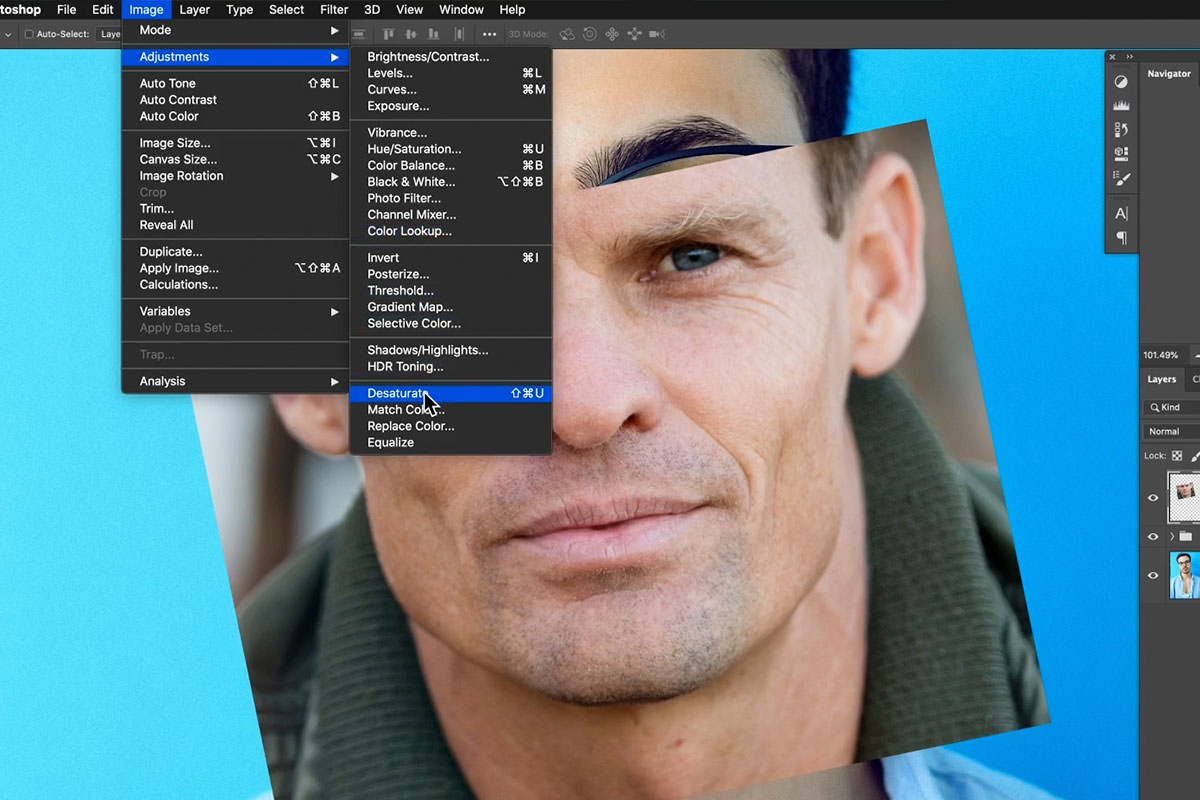
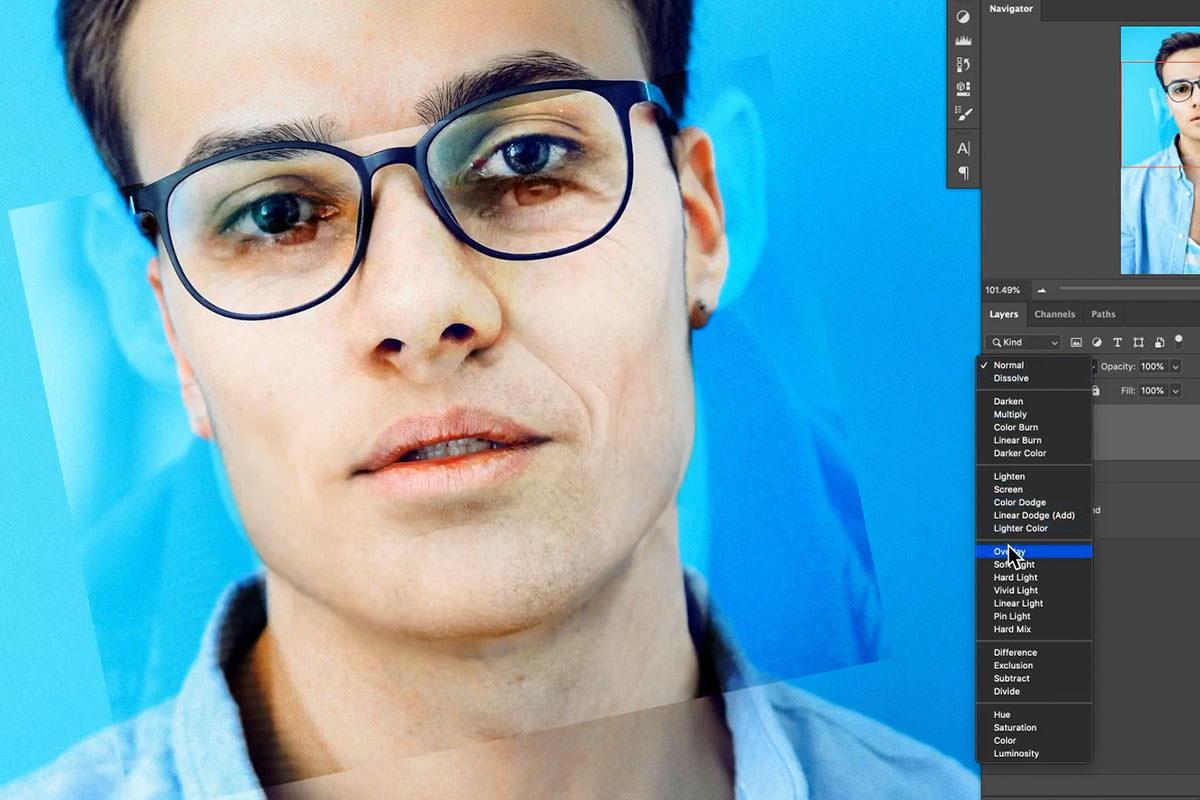
Then, with the new image selected, go to Image, Adjustments, and then select Desaturate. This will remove all of the color from the new image so that we can focus on getting the texture extracted.
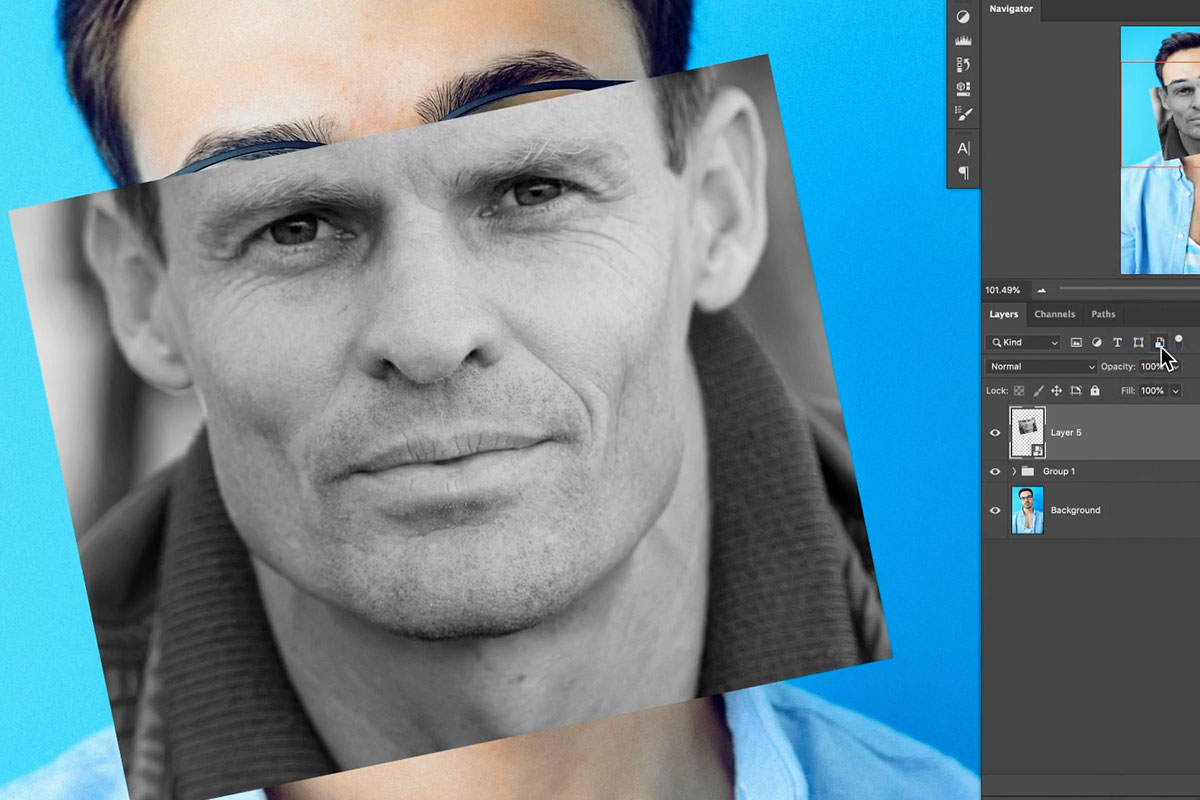
Next, set the Blending Mode of the new image to Overlay. It’s getting closer, but we’ve still got one more Filter to apply.
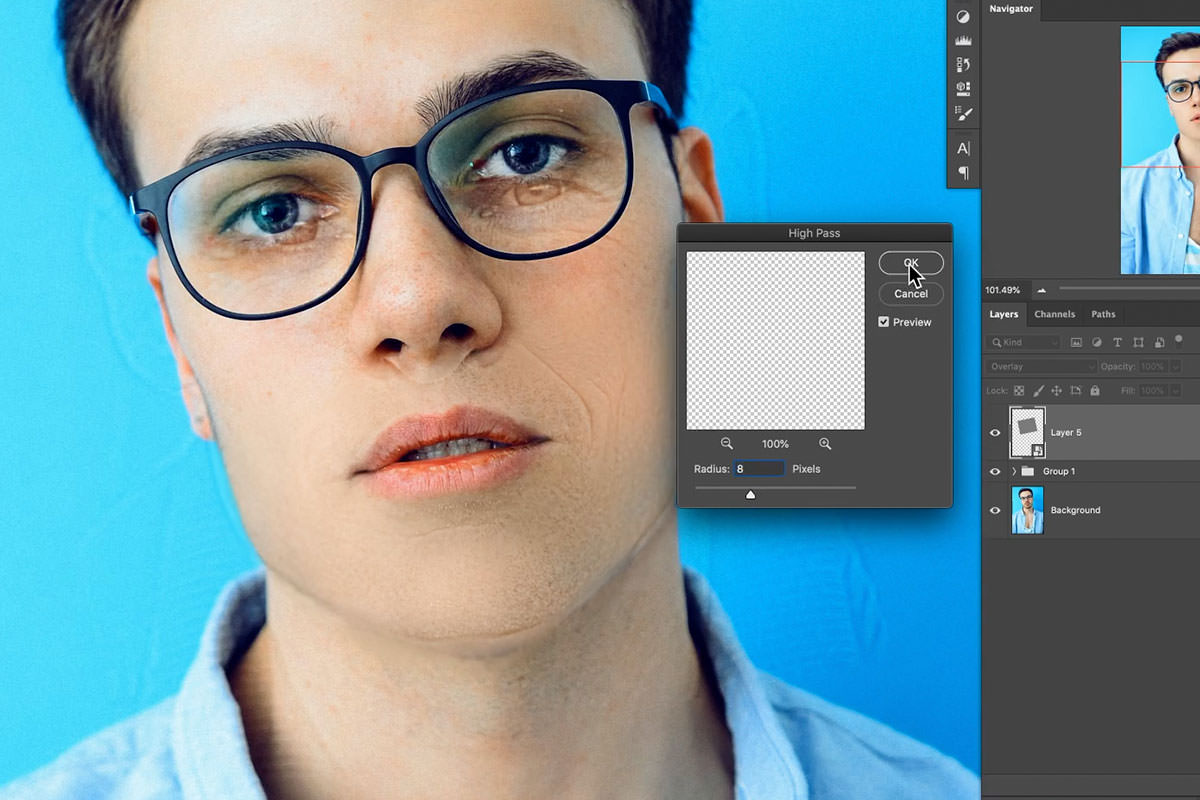
Go to Filter, Other, and select High Pass. High Pass allows us reduce a Layer down to only it’s textures, which is exactly what we want. Adjust the settings until you get something that looks natural.
Now we just need to get everything lines up perfectly, and Mask out the things we don’t need. You can use the Transform Tool and Split-Warp Tool to get the texture from the new image lined up as closely as possible with the original subject’s face and facial features.
Once it’s close, use a Layer Mask to remove any areas that we don’t want exposed from the second photograph.
Clean Up & Refine
We’re almost there! Now we just need to clean things up a bit. You can use the Spot Healing Brush and Clone Stamp Tools to remove any facial features like wrinkles, hair, and creases from the new image that we don’t want on our original subject. Also, double check that no other elements from the second image are visible around the edges or outside of the subject’s face.

Feel free to use a variety of tools to help blend the new texture in with the original image. With a little bit of detail work, you should end up with a facial-hair-free portrait with perfect, natural skin texture!