Download Sample Image
Download Sample PSD
Click here to download the complete sample PSD file (304 MB).
description
Follow along as we show you how to realistically change the color of clothing in Photoshop. Learn how to use Layer Masks, Hue/Saturation Adjustment Layers, and Curves Adjustment Layers to change clothing to any color–even black or white.
Share
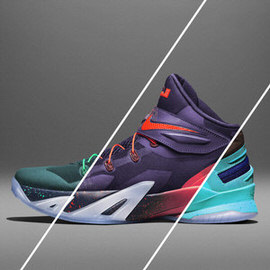
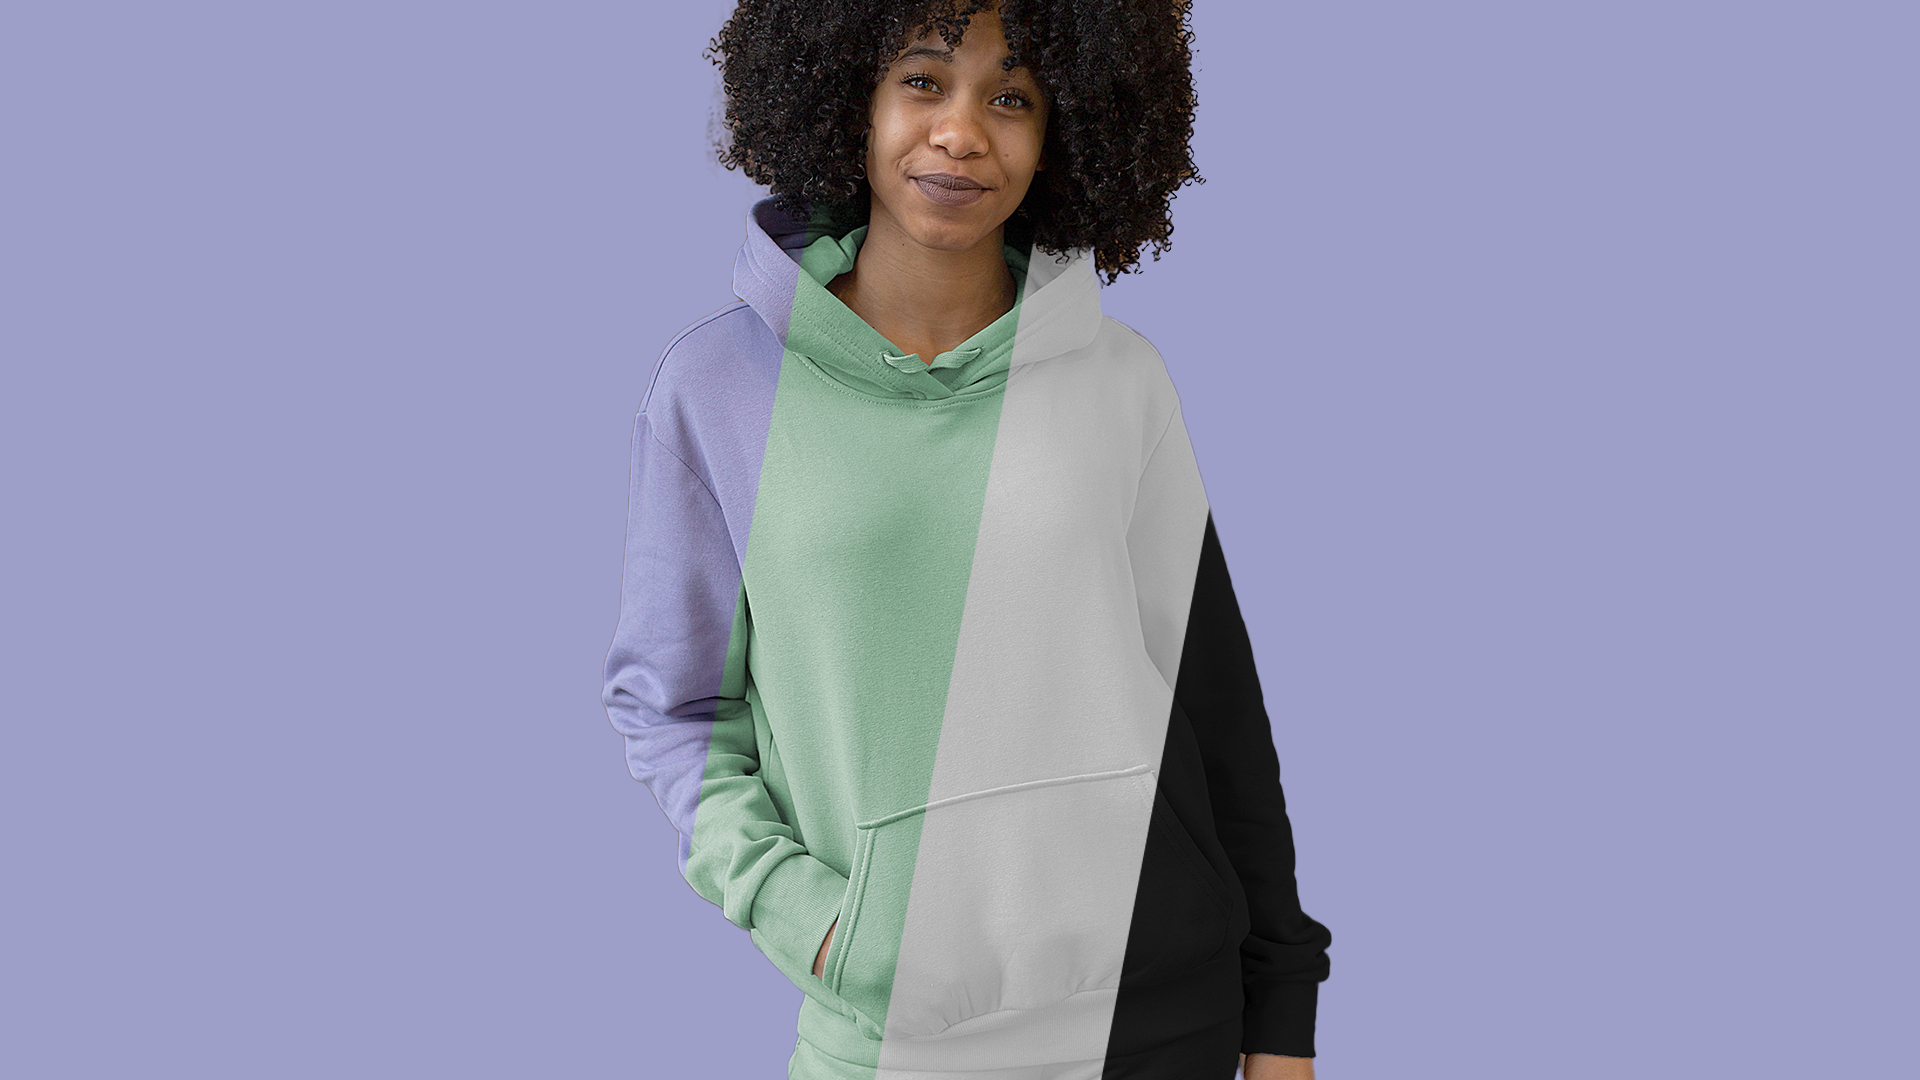
CHANGE THE COLOR OF CLOTHING–EVEN TO BLACK AND WHITE!
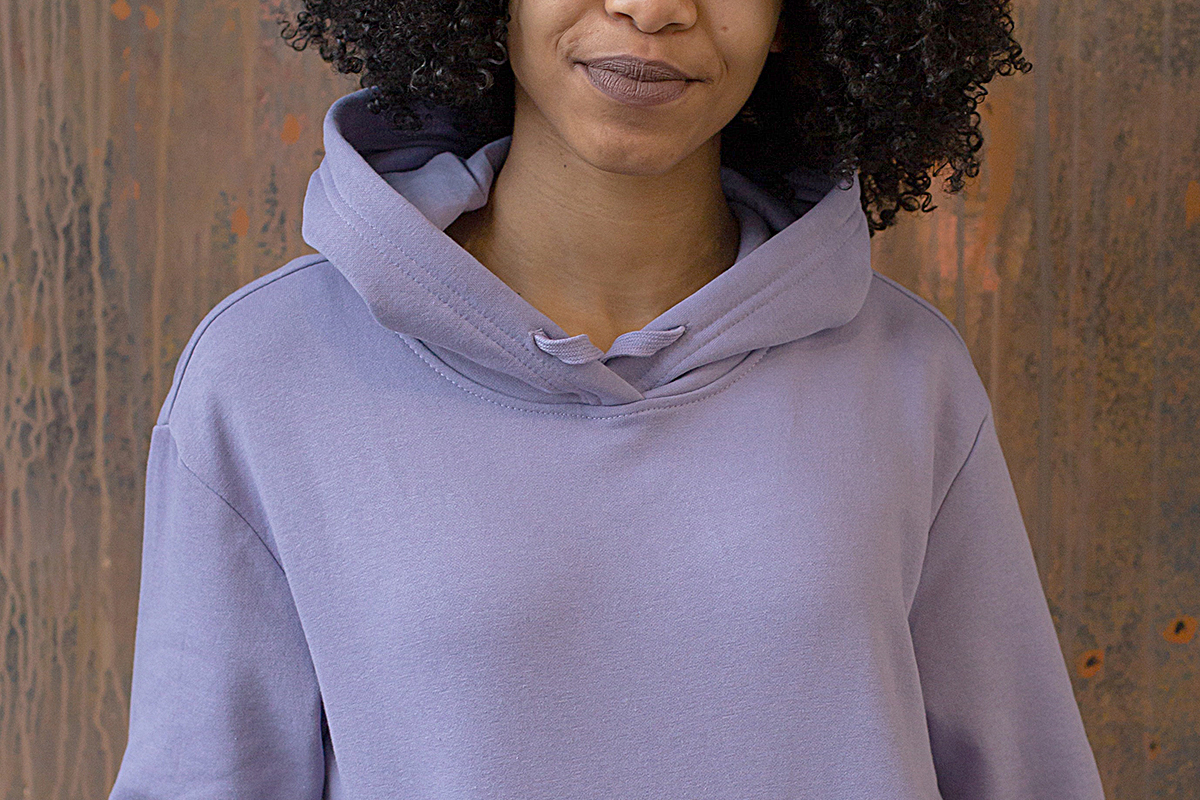
BEFORE
Change the Color of Clothing & Products
The Basics of Changing Colors in Photoshop
Being able to realistically change the color of something in Photoshop is an essential skill, especially when working with images of clothing, fashion, or products. Fortunately, the tools and techniques you’ll need to work with color are easy to use and master.
Using basic selections, Layer Masks, and Hue/Saturation and Curves Adjustment Layers, you’ll be able to change the color of anything in a matter of minutes.
Making a Selection
Like many other Photoshop techniques, the color change workflow starts with a selection. Selections allow us to do a number of things, like target a specific area or object in a photo that we want to edit.
Since we’re trying to change the color of the subject’s clothing, we need to make a selection of the clothing so that we can change the color without affecting anything else in the image.
There are a ton of ways to make selections in Photoshop–some are quick and easy, and others require a little more time and attention. Since the image we’re working with has a relatively simple background, we’re going to focus on the quicker, automated tools to get the job done.
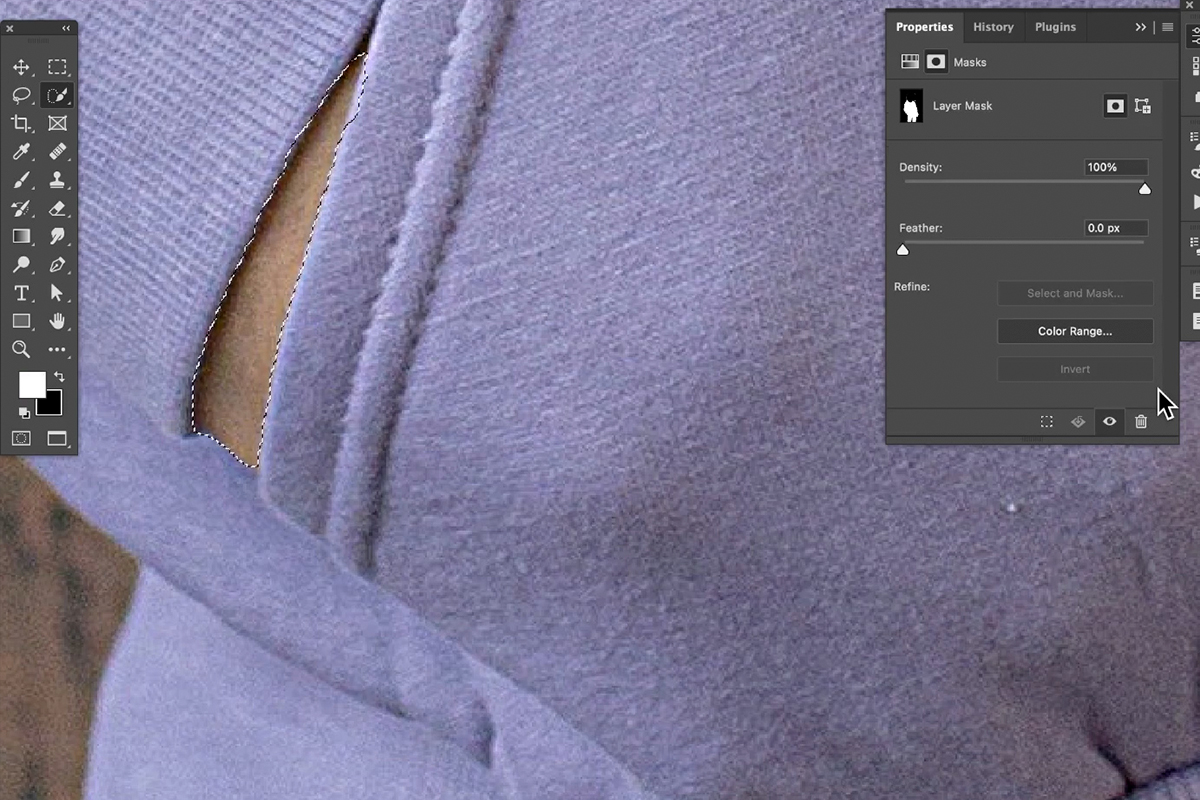
Keep in mind that selections (and Layer Masks) are things that evolve and change throughout an edit. As you’ll see later, an original selection might need to be refined later in the editing process as we notice areas that the quick selection tools might have missed.
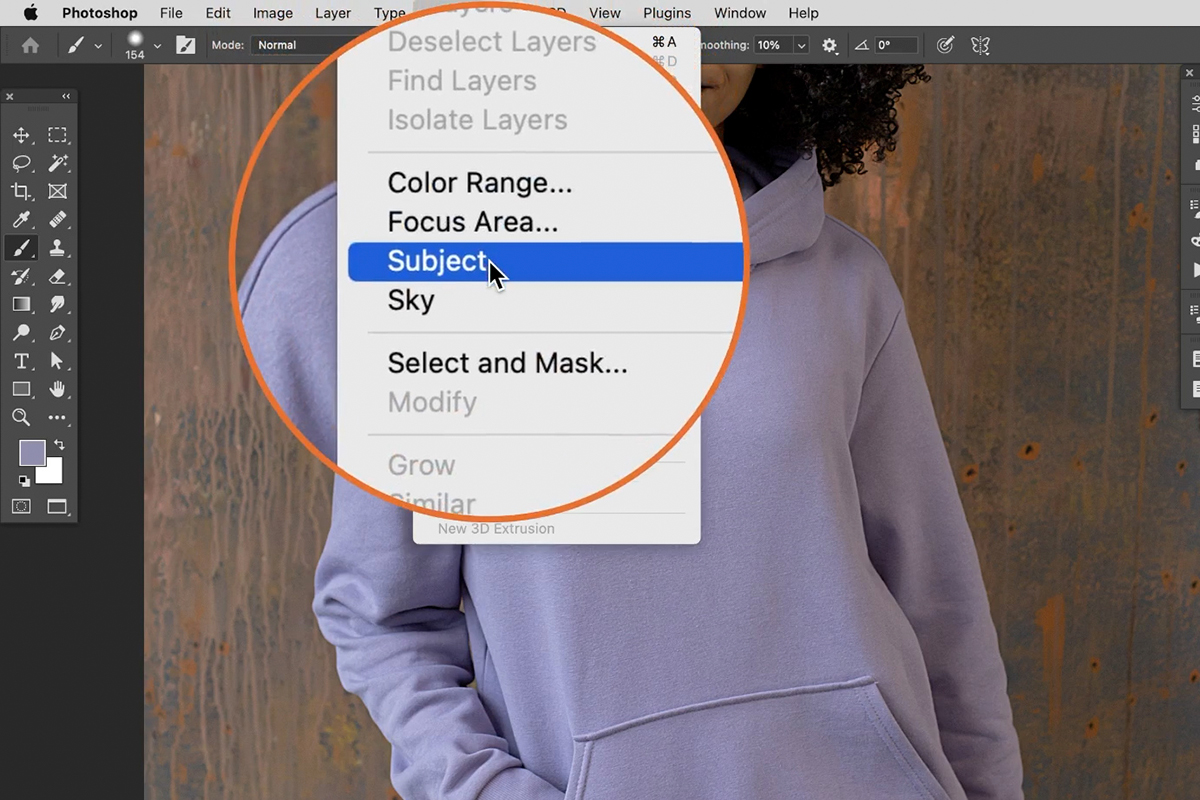
To create a quick, initial selection, open the Select menu and choose the Subject option. Photoshop will try to automatically identify and create a selection around the main subject in the photo.
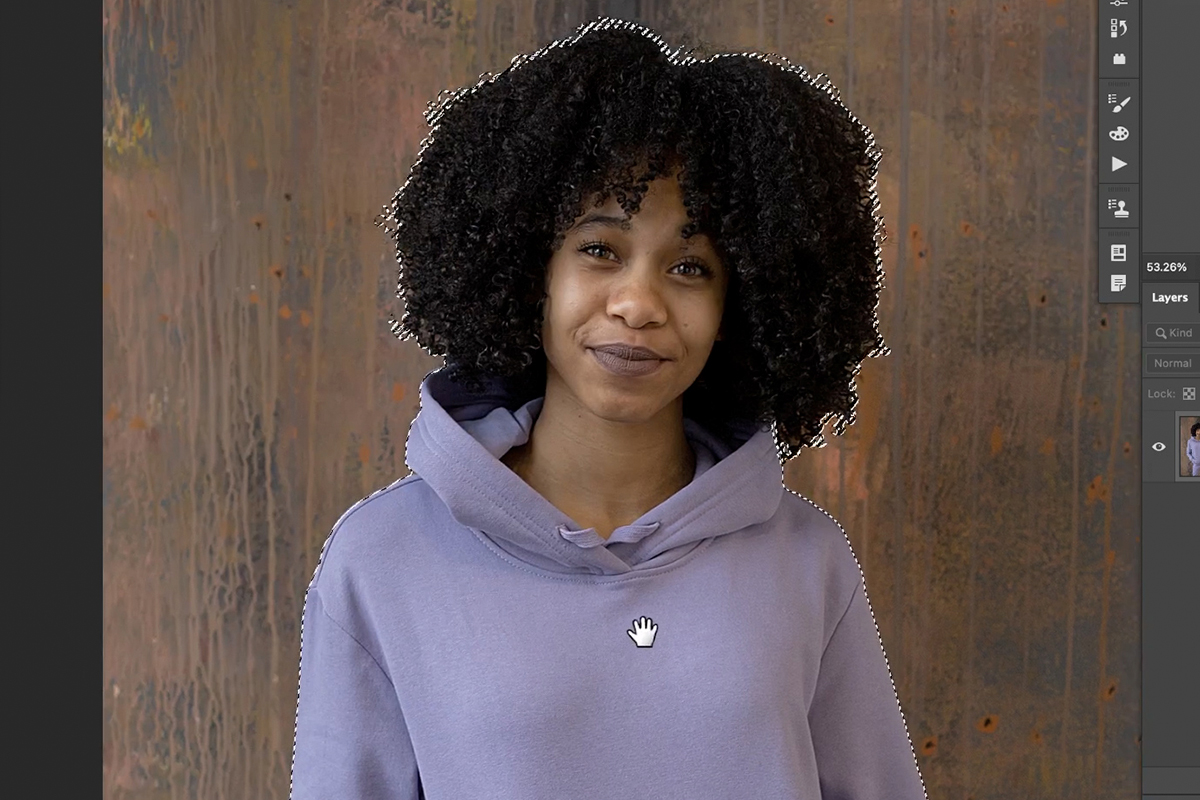
With this particular image, Select Subject does a nice job of accurately identifying the subject and selecting them. Since we’re only trying to edit the clothing, we’ll eventually need to remove the subject’s face, skin, and hair from the selection, but that will be easier once we’ve converted the selection into a Layer Mask.
Creating a Layer Mask from a Selection
Now that we have an active selection, it’s easy to turn it into a Layer Mask. Since we’re focusing on color change, the main tool we’ll be using is a Hue/Saturation Adjustment Layer. Whenever you have an active selection while creating a new Adjustment Layer, Photoshop automatically loads that selection as the Layer Mask of the Adjustment Layer.
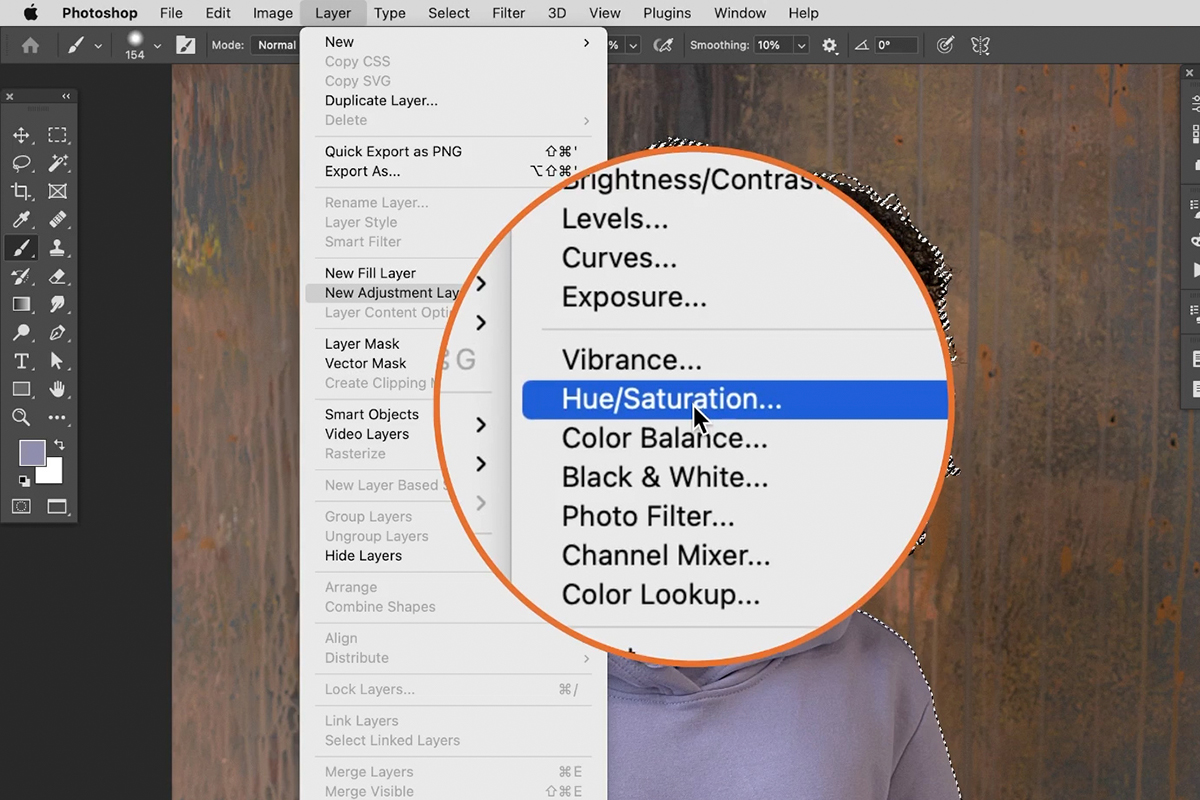
With the selection active, simply create a new Hue/Saturation Adjustment Layer above the image in the Layers Panel. Photoshop will apply the selection to the Layer Mask.
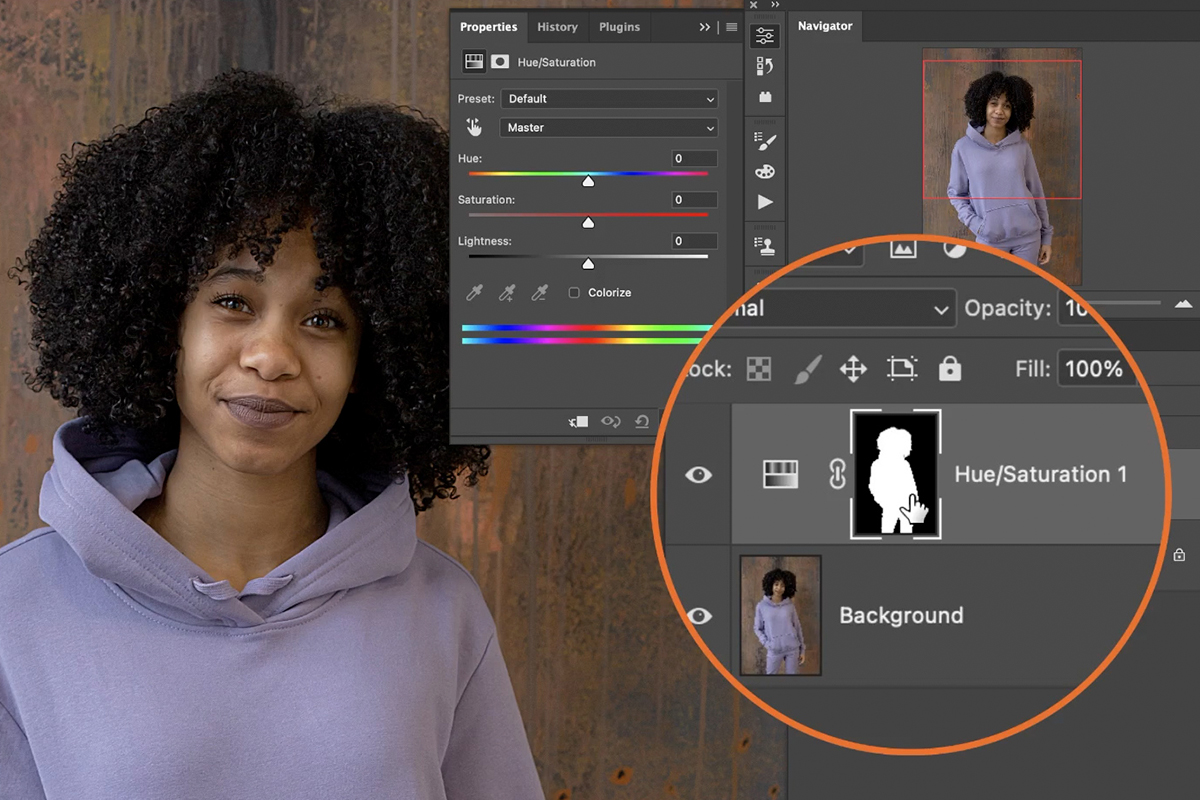
We’re just about ready to start adjusting the color of the clothing, but first we need to remove the subject’s face, skin, and hair from the Layer Mask so that they’re not affected by the Hue/Saturation Adjustment Layer.
Refining the Layer Mask
Layer Masks are very easy to edit and refine over time. The most important thing to remember is that a Layer Mask simply defines where its associated Layer will be visible. White means that that part of the Layer will be visible (in this case, the subject), and black means that that part of the Layer will be invisible (in this case, the background).
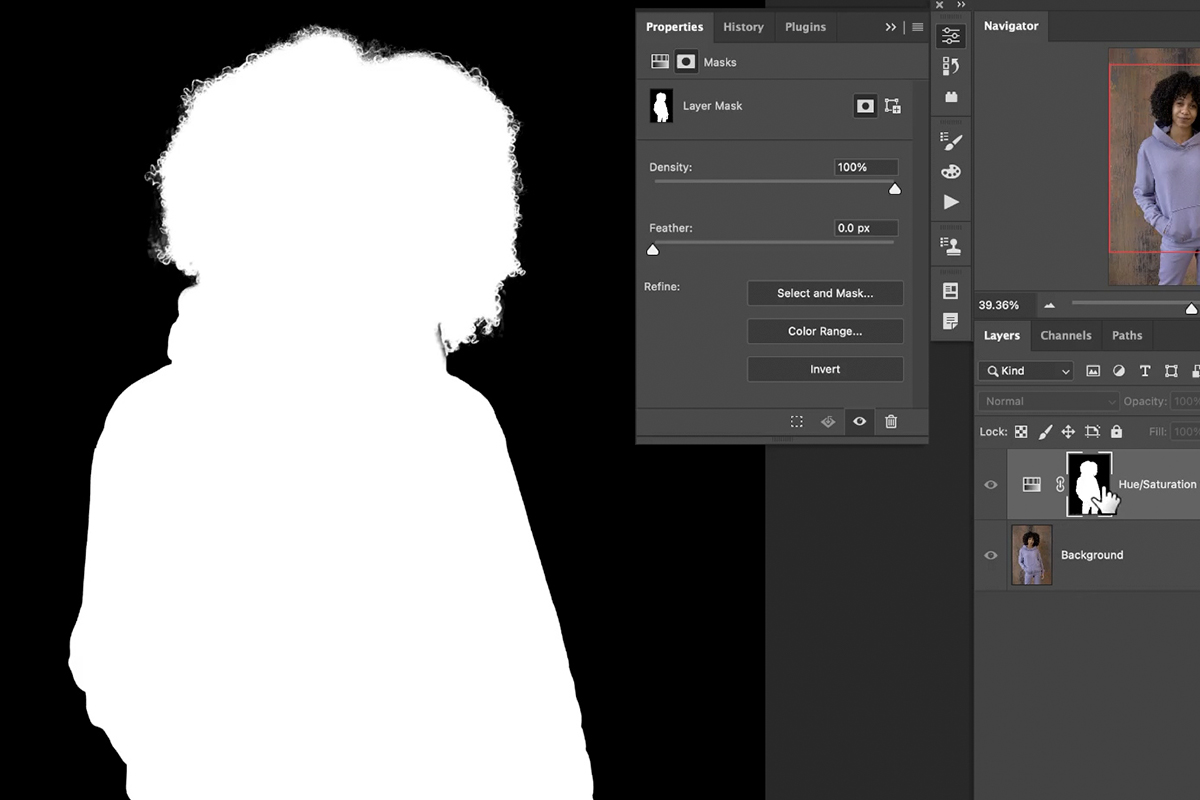
Since we want to isolate the clothing, only the clothing should appear in white on the Layer Mask.
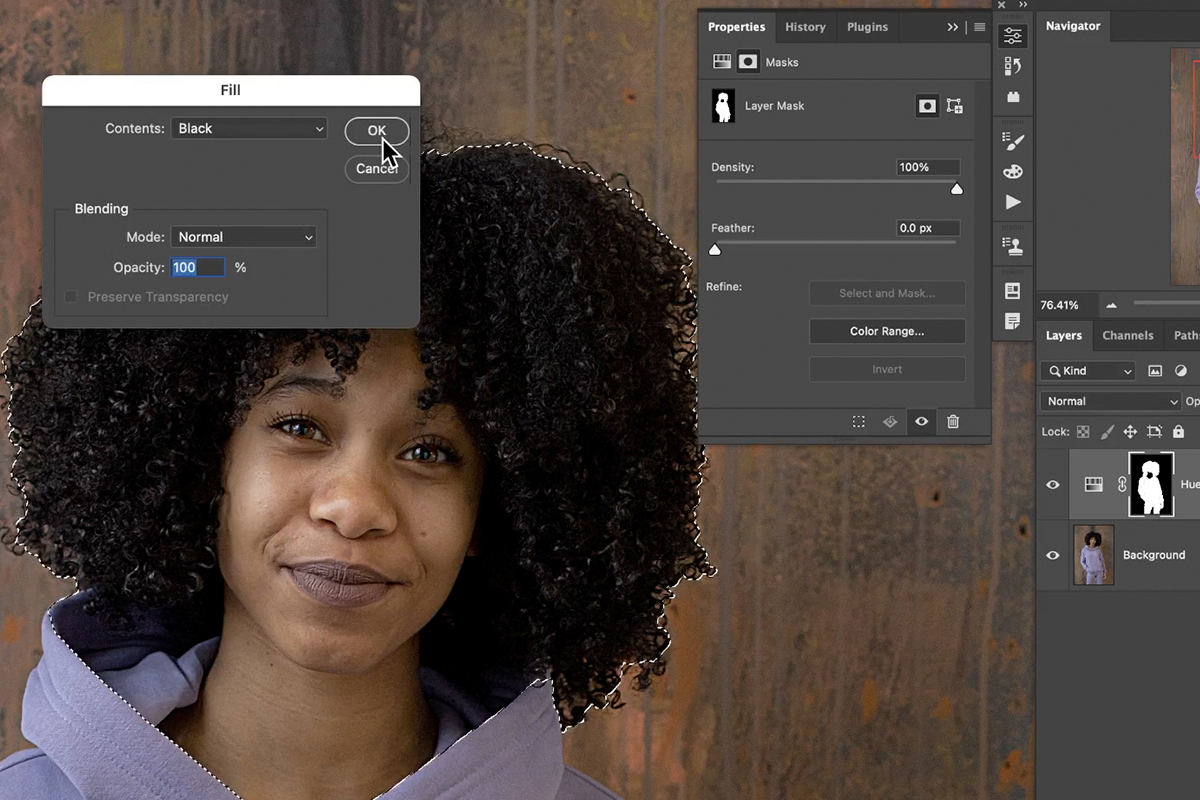
Try using the Quick Selection Tool to select the subject’s face and hair. Once you have an active selection, click on the Layer Mask of the Hue/Saturation Adjustment Layer, and then fill the selection with black by opening the Edit menu and clicking on the Fill option.
Repeat this process for any other areas of the subject’s skin and hair.
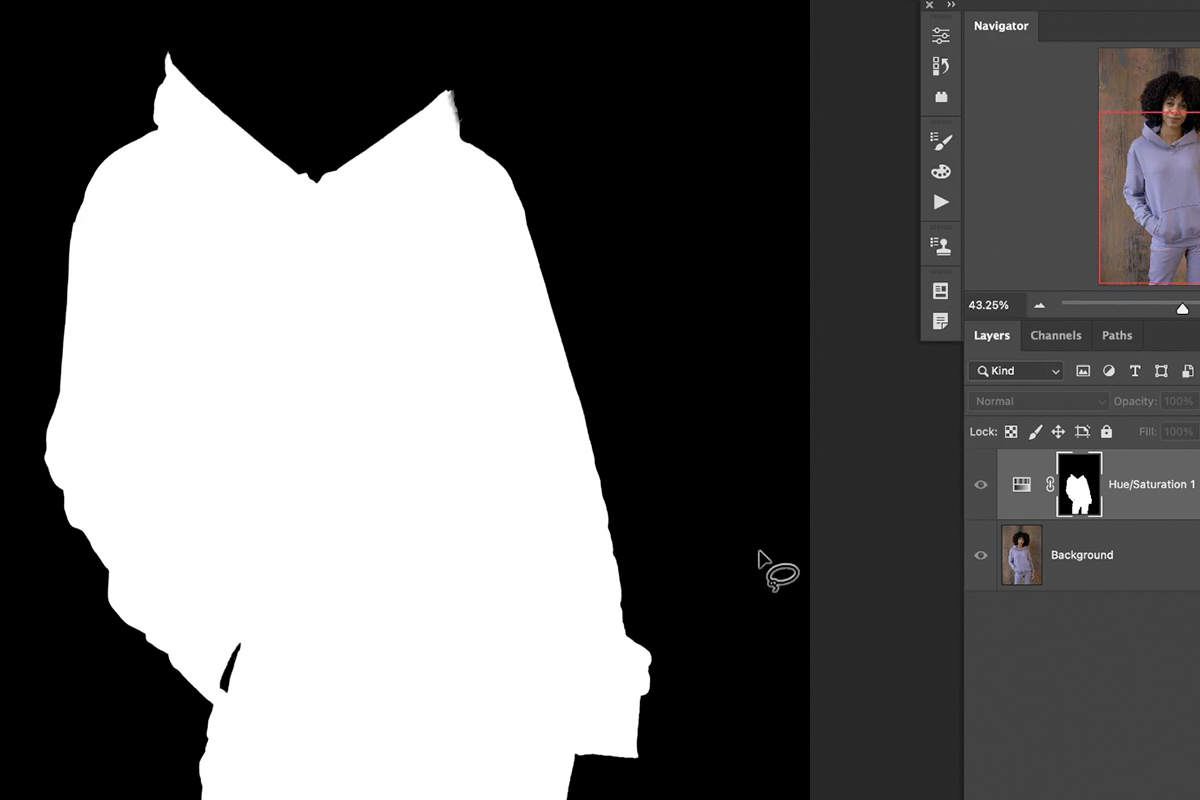
Once you’re done, only the clothing should be visible in white on the Layer Mask.
Changing the Color
Now that the clothing is separated from the rest of the image, we’re ready to adjust the color! In many cases, a single Hue/Saturation Adjustment Layer will do the trick, but occasionally an additional Curves Adjustment Layer can help bring back detail in the highlights and shadows (most useful when changing the color to black or white). Since it’s handy to have a Curves Adjustment available, let’s set the project up so that we can use both.
We’re going to need the same Layer Mask for both the Hue/Saturation Adjustment Layer and for the Curves Adjustment Layer.
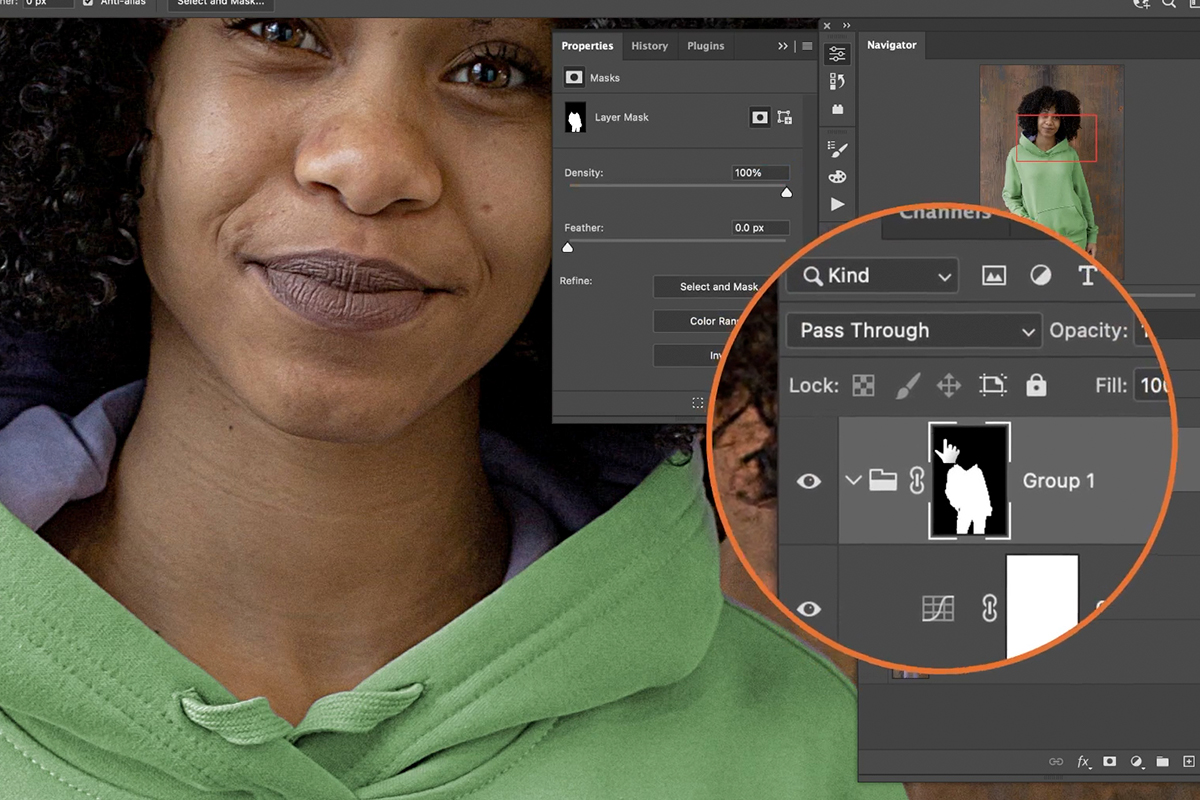
The easiest way to do this, and stay organized, is to put the Hue/Saturation Adjustment Layer into a Group by selecting it and then hitting CTRL or CMD + G.
Then click and drag the Layer Mask we created up to the Group. Now everything we place into this Group will be defined by the Layer Mask of the Group.
Create a Curves Adjustment Layer and place it into the Group with the Hue/Saturation Adjustment Layer.
Working with Hue/Saturation Adjustment Layers
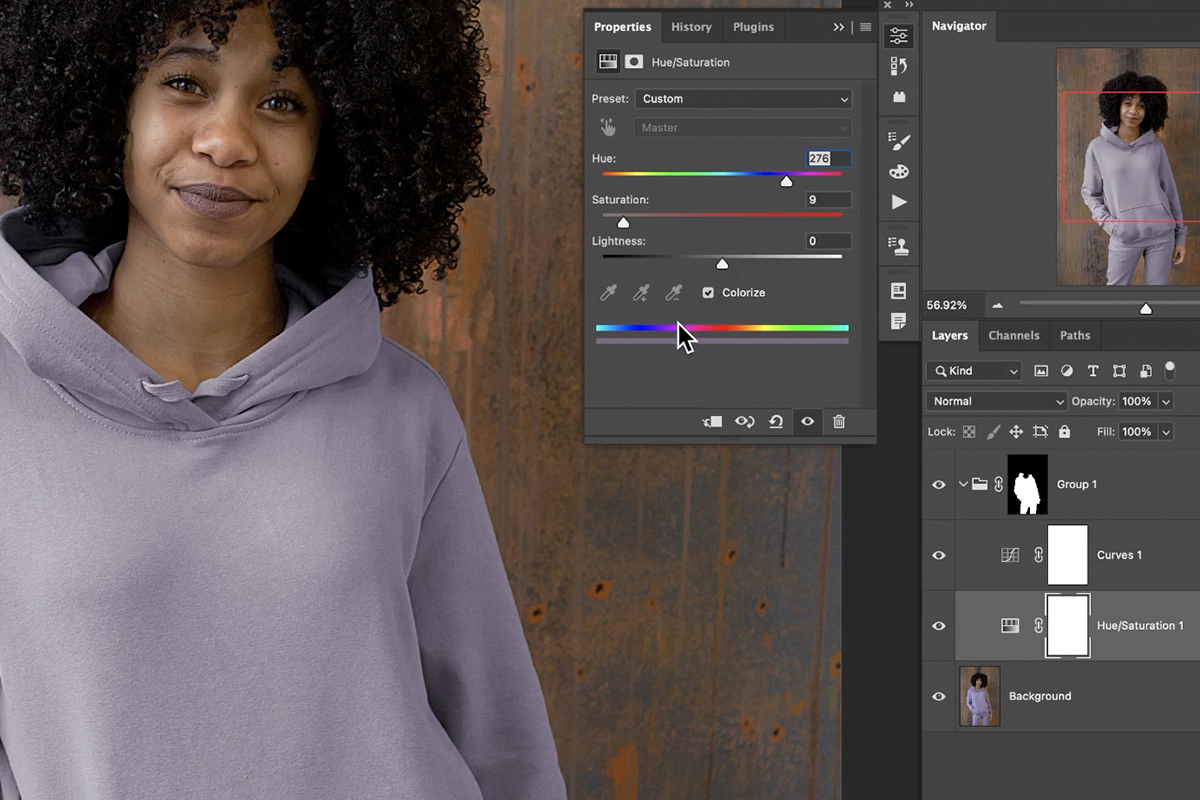
To change the color of the clothing, double-click on the Hue/Saturation Adjustment Layer to open the dialog.
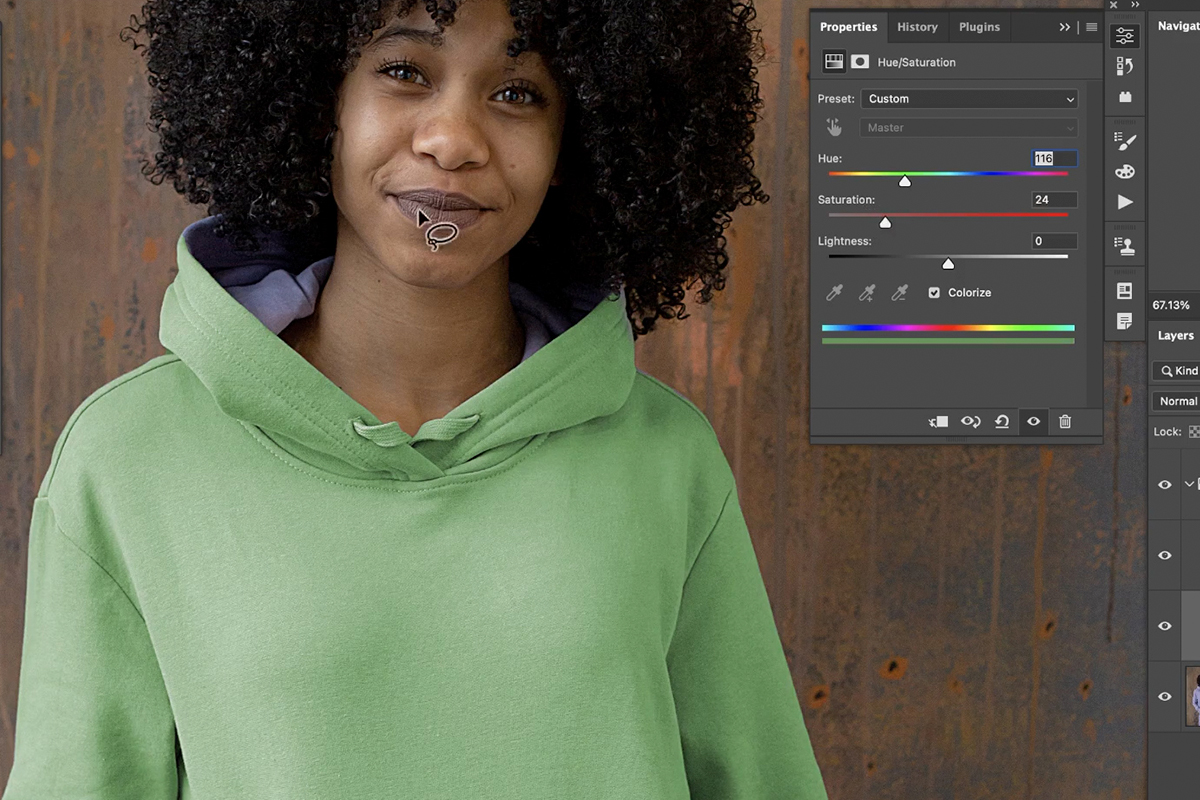
Make sure to check the Colorize box just below the three main sliders. Then adjust the sliders to change the color of the clothing!
While changing the color, you may notice other areas you might have missed while creating the selection and Layer Mask. You can use a variety of selection tools, or just the Brush Tool set to black or white, to further refine the Layer Mask.
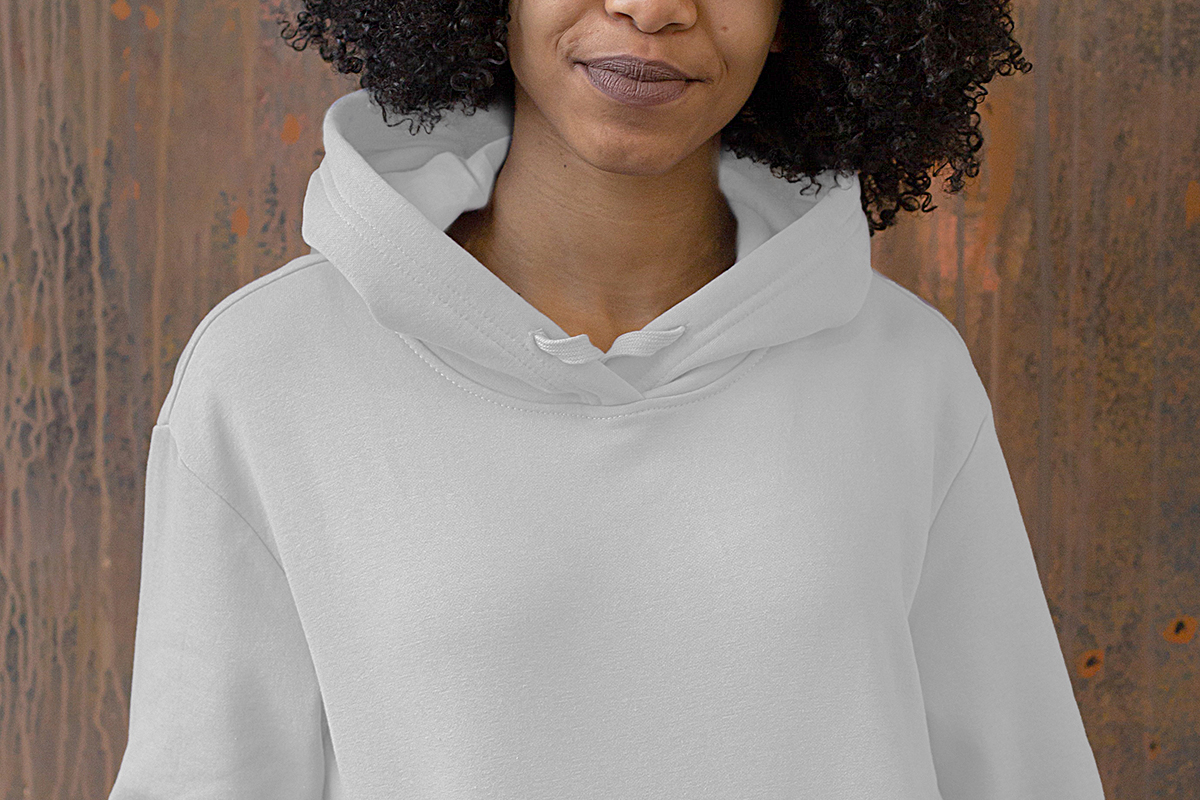
Changing the Color to Black or White
Our initial color change turned the clothing from lavender to green, which was pretty easy. But what if we wanted to change the clothing to black or white?
Changing the color of something to black or white can be tricky as it’s easy to lose important details in texture or in the highlight and shadow information.
That’s where the Curves Adjustment Layer can help. For example, let’s try changing the color to black.

Drag the Saturation slider all the way to the left. Then, drag the Lightness slider in the Hue/Saturation Adjustment Layer dialog to near black. Don’t drag it all the way to the left, as you will lose almost all of the detail you’ll need to make it look realistic.
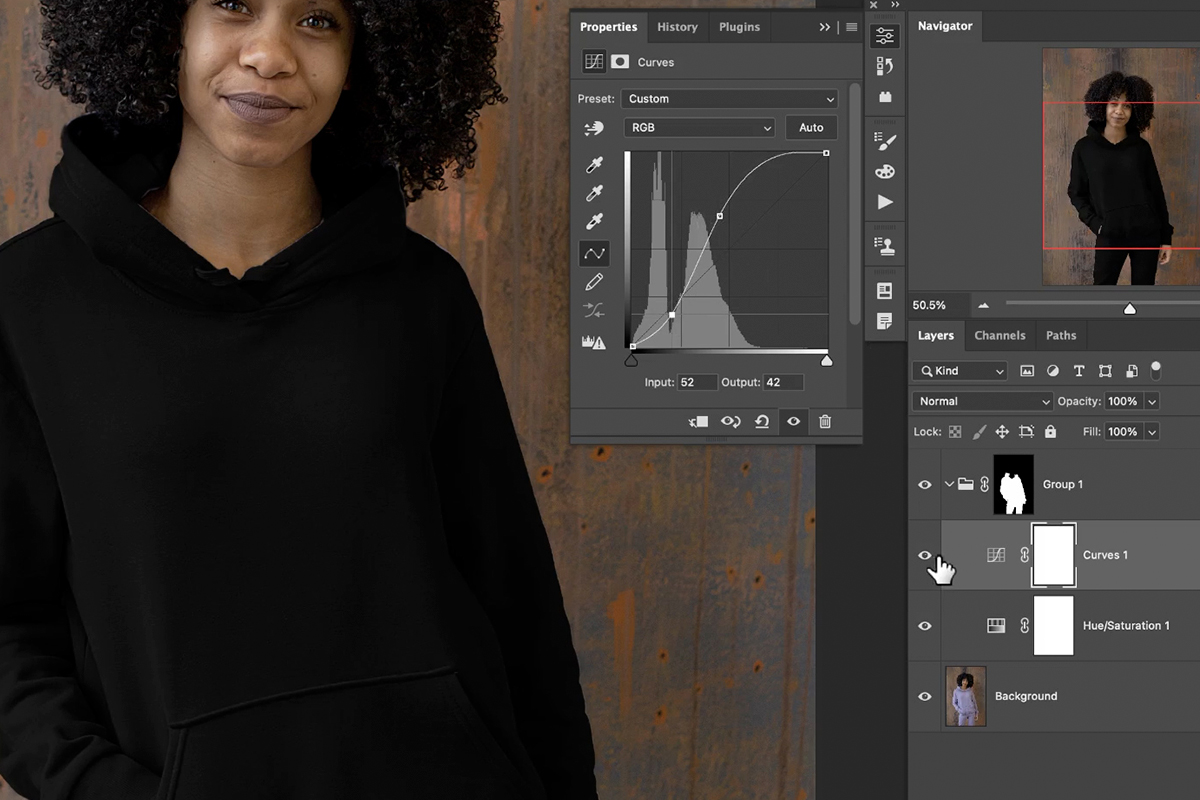
Then, double-click on the Curves Adjustment Layer dialog. Make the darks a little bit darker, and the highlights a little bit brighter. This will help to recover some of the original highlight and shadow information, creating a much more realistic effect.
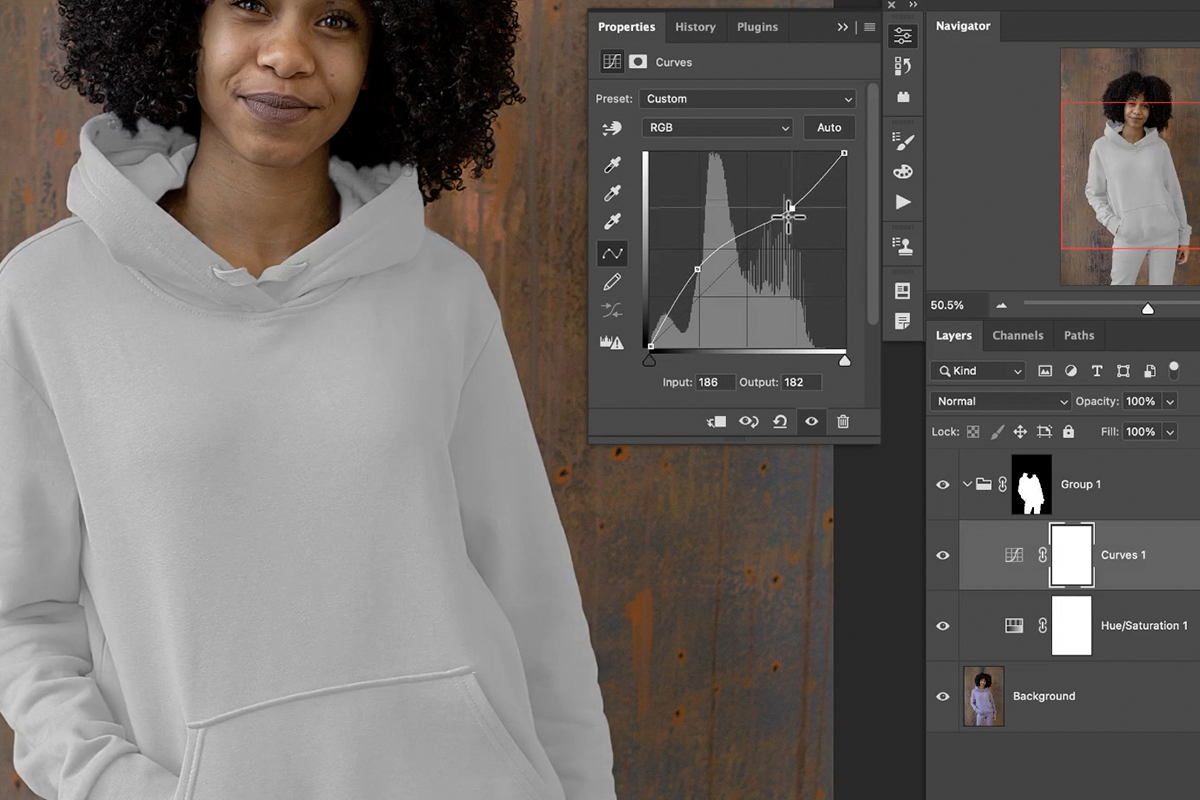
You can follow the same steps if you want to change the color to white. The only difference being that you want to reverse the Curves adjustments, instead making the highlights a little bit darker and the shadows a bit brighter.