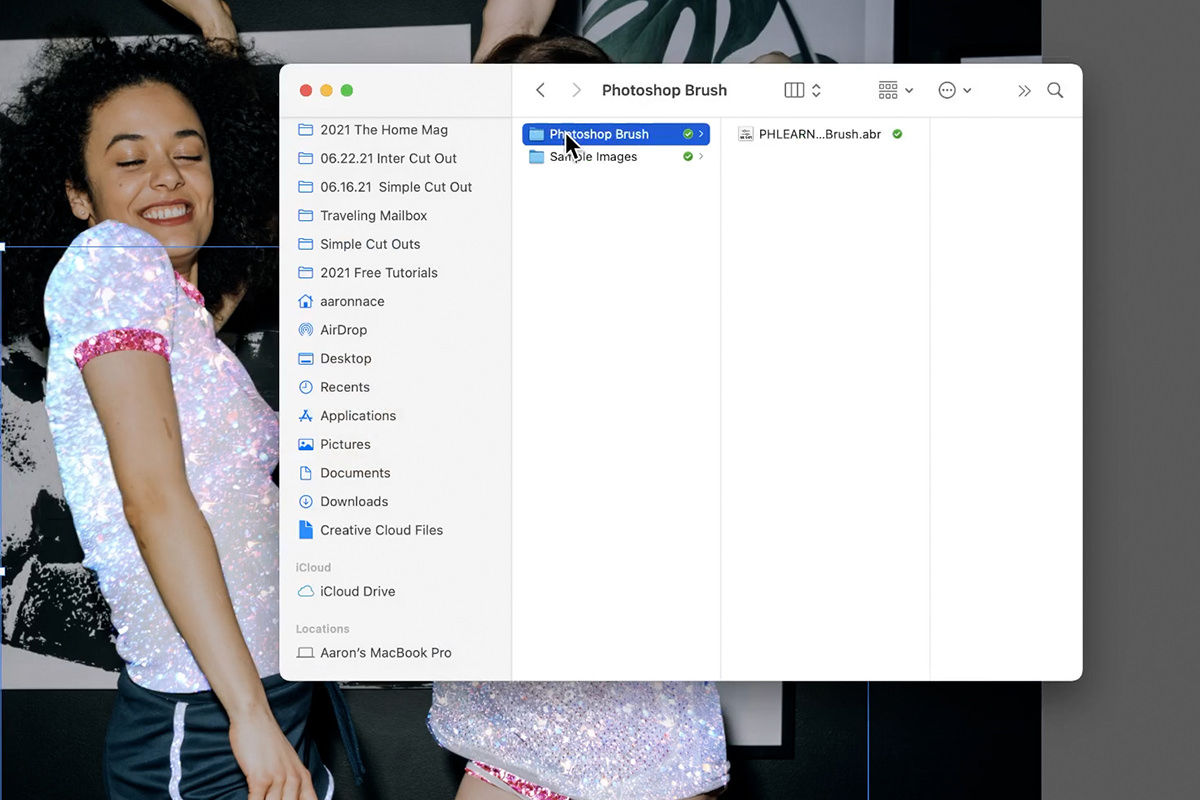
Download Sample Image & Brushes
description
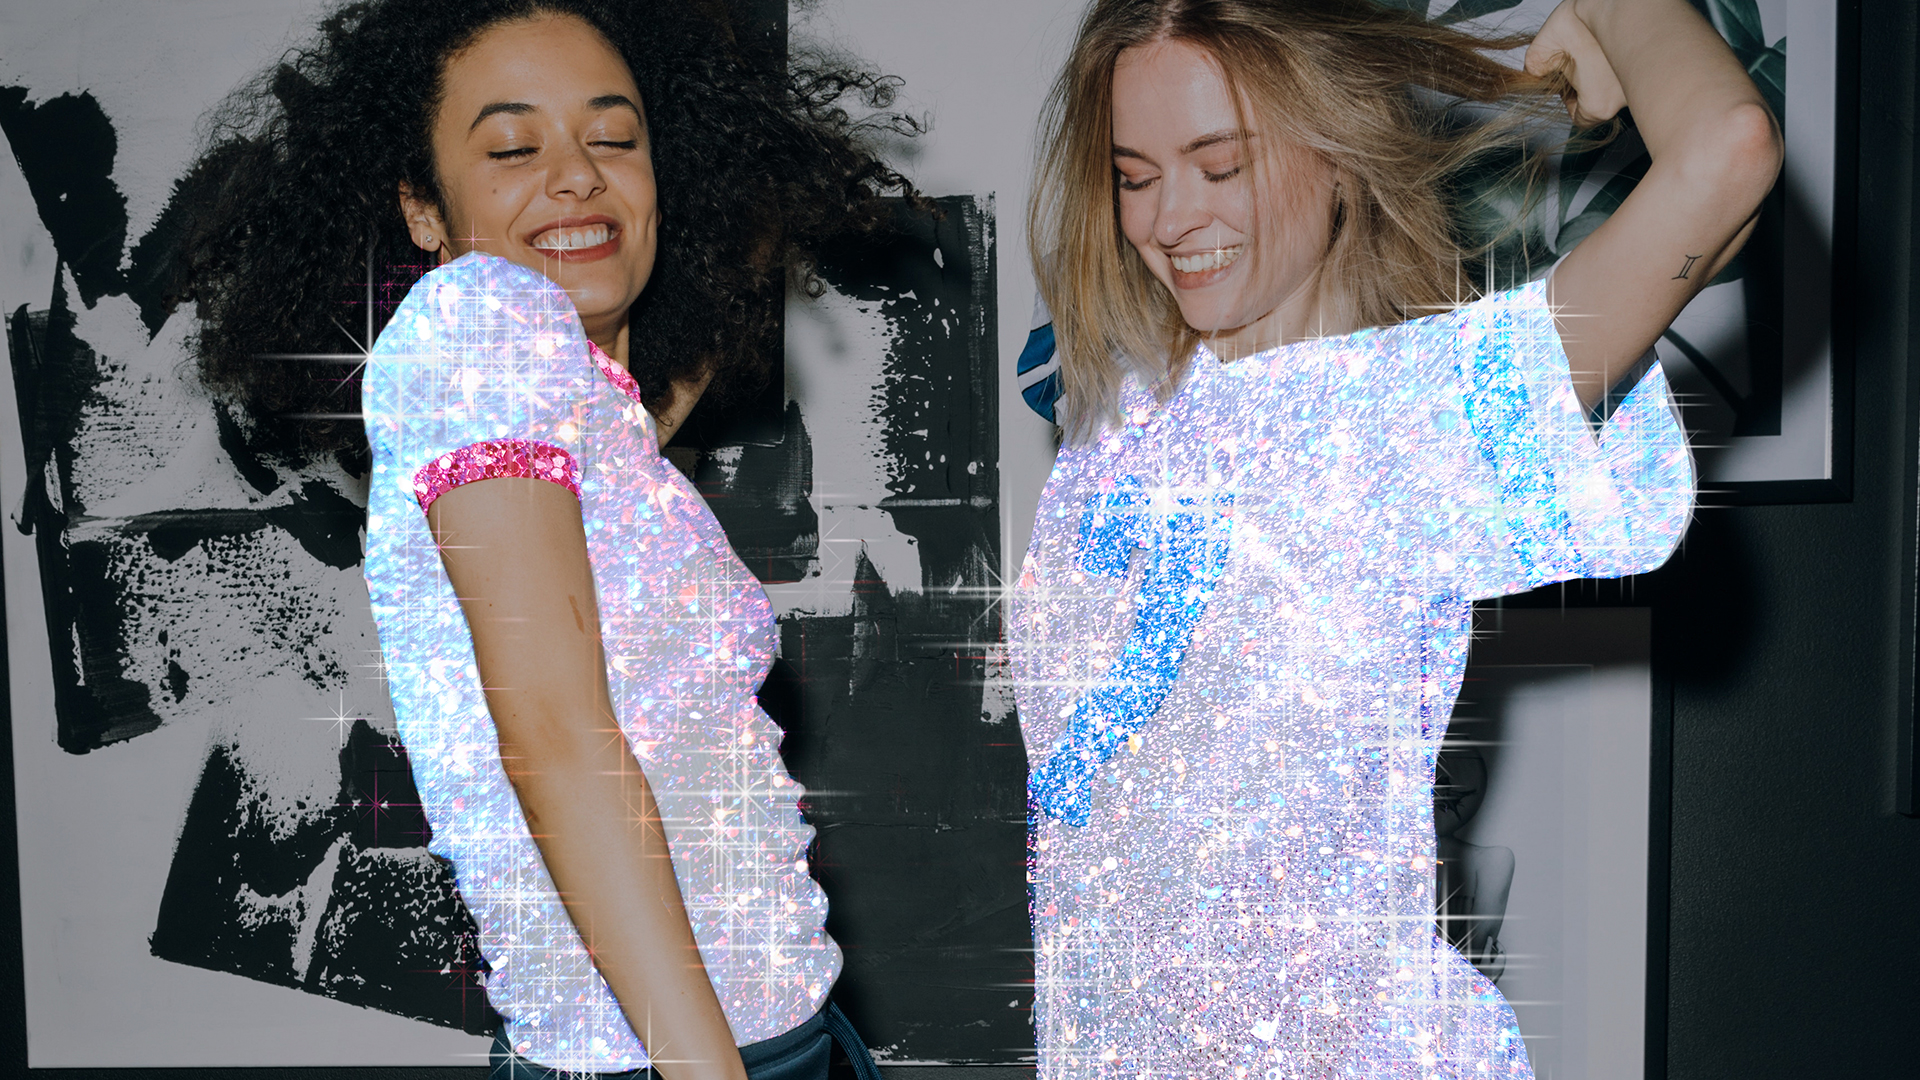
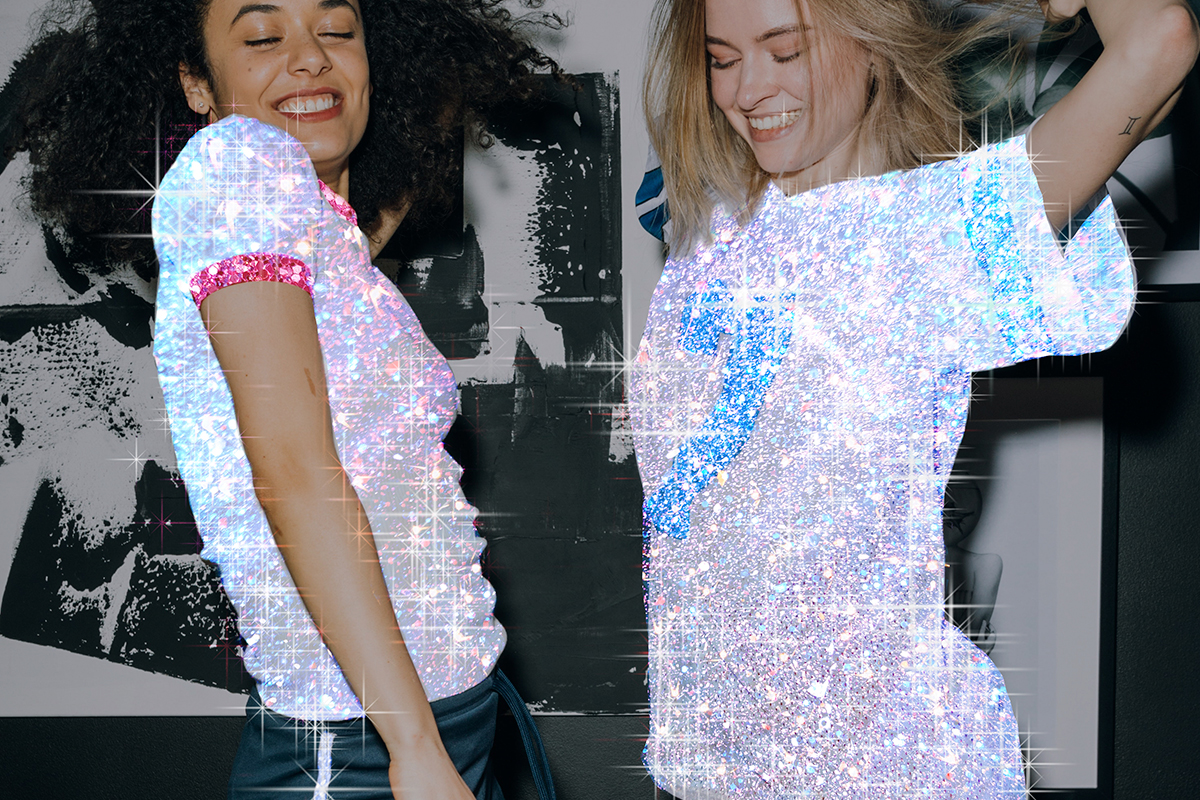
Help your photos shimmer, sparkle, glimmer, and glow with this stunning glitter effect in Photoshop! Learn how to use glitter textures with Layer Masks and some easy adjustments to make anything in a photo shine.
Share
MAKE YOUR PHOTOS SPARKLE & SHINE
BEFORE
Create a Stunning Glitter Effect
Create Popular Glitter Effects
This particular effect has been all the rage on social media lately, so we figured it’s a good time to show you how easy it is to create!
All you’ll need is a handful of sparkling textures (we’ve included 4, and you can find more on free stock image websites like Pexels and Unsplash), and some commonly used Photoshop tools.
Getting Started
It’s time to get into the sparkling specifics of this effect! Open up the image that you want to apply the glitter effect to in Photoshop.
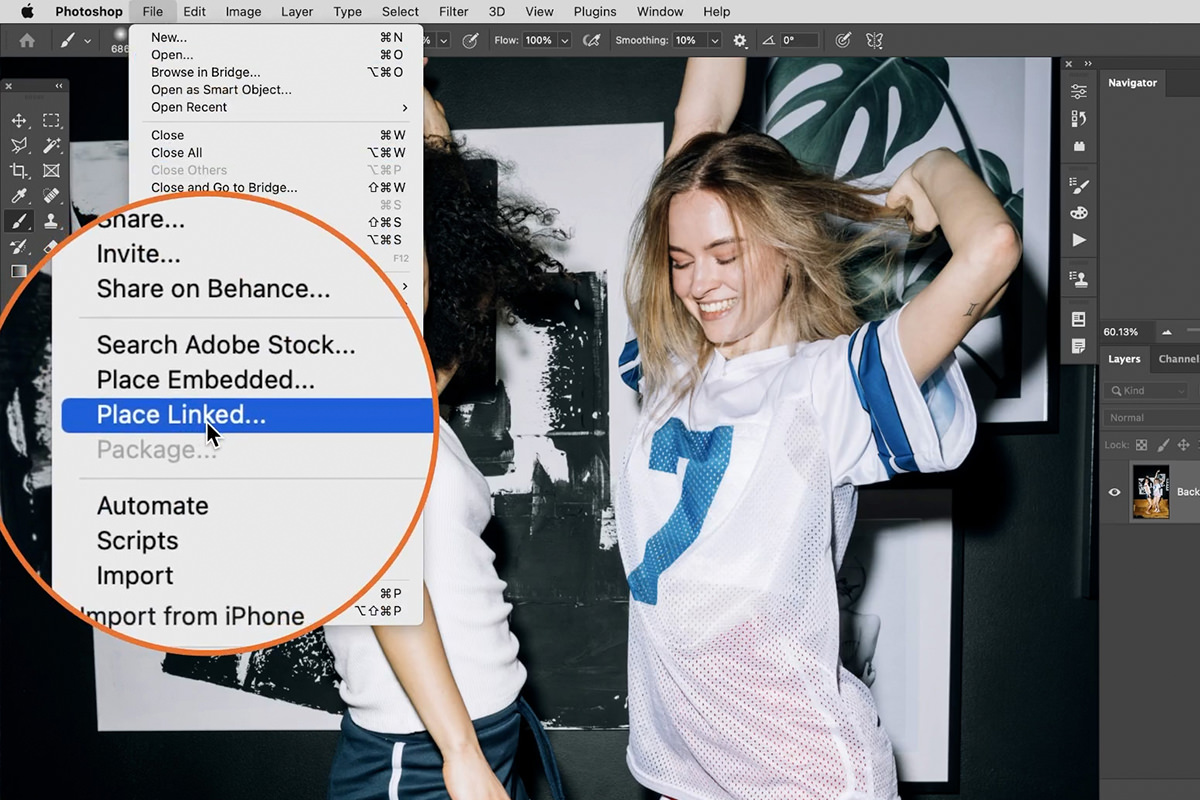
Open the File menu and select Place Linked. Navigate to the folder that contains the glitter textures you want to use, select them, and hit Place.
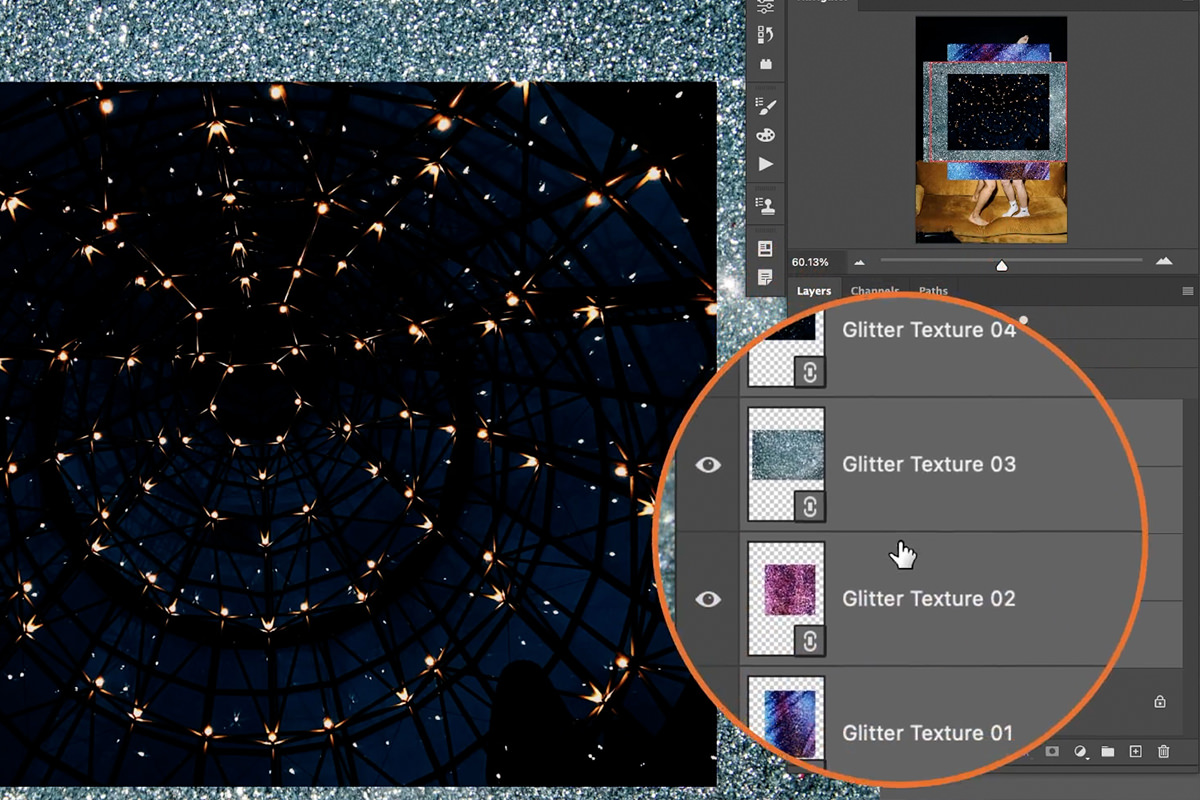
This will add the textures to the Layer Stack above the background photo. We’ve included 4 textures, but feel free to find and use your own!
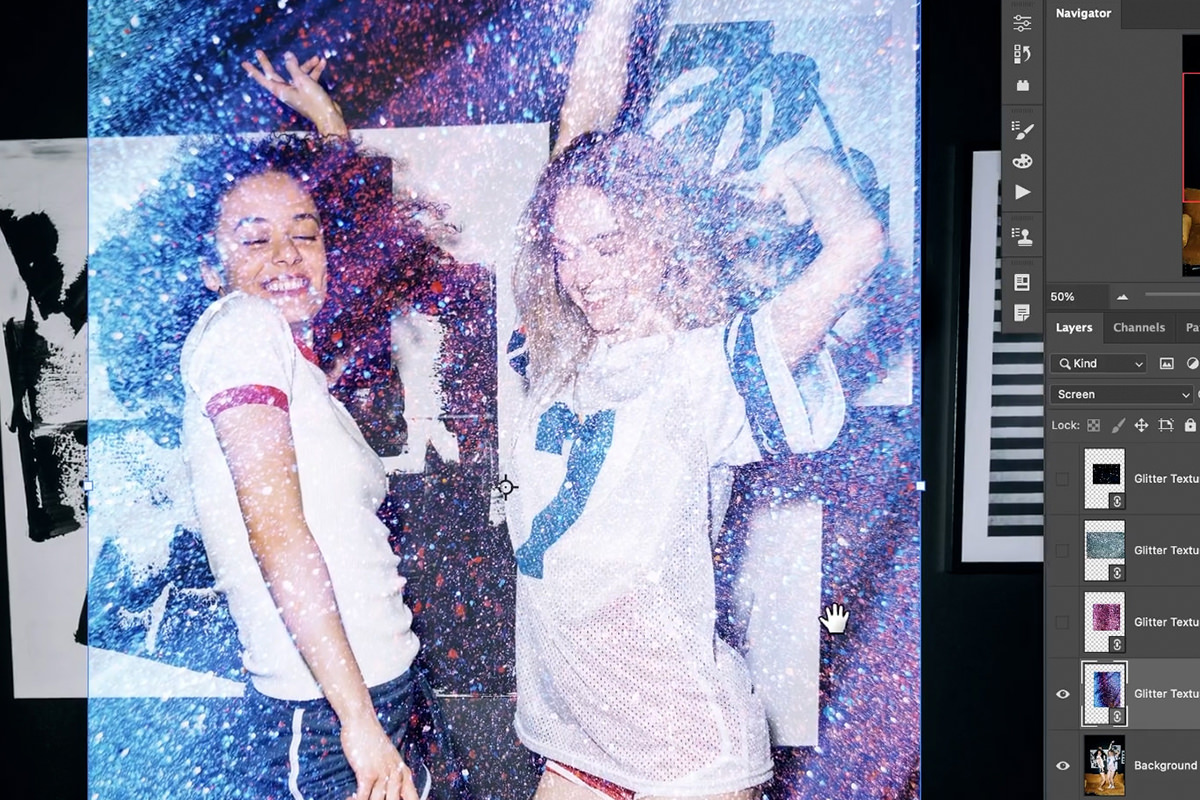
Choose the first texture you want to apply, and hide the rest. Select the visible texture and set the Blending Mode to Screen.
The key to this effect is choosing different objects in a photo, and applying a different glitter texture to each. This effect is popular with clothing, so let’s focus on that with our example image.
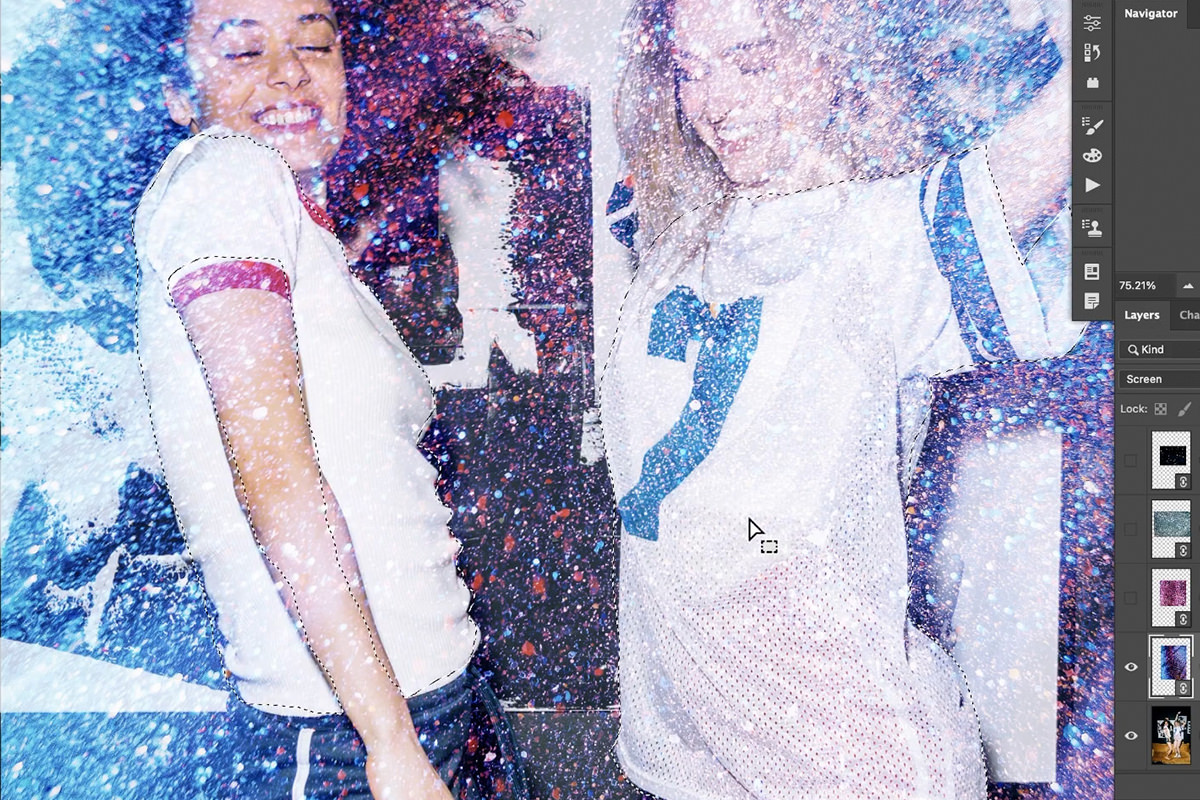
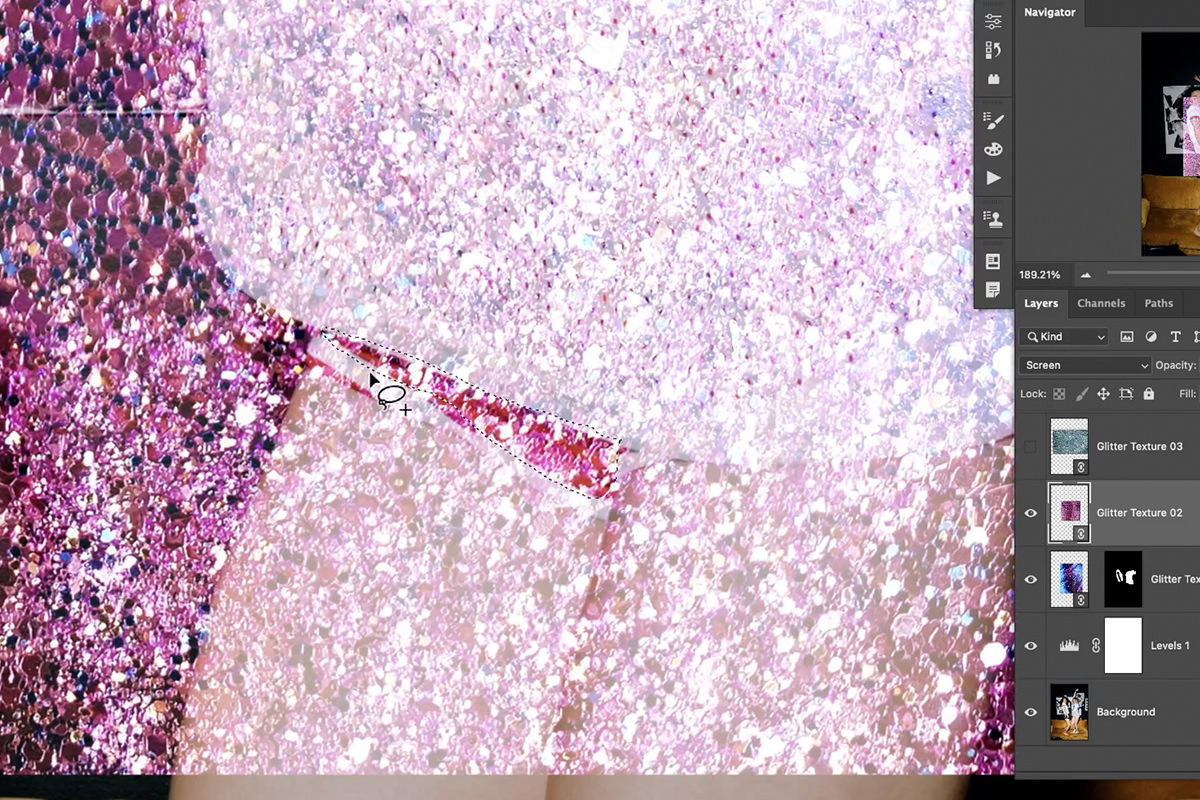
Use the Lasso Tool to make a rough selection around the clothing you want to make sparkle. You can hold SHIFT to add different areas of a photo to the same selection.
We chose to start with the white areas of each shirt. And don’t worry about make a precise selection, once we convert the selection to a Layer Mask, it’s extremely easy to clean it up.
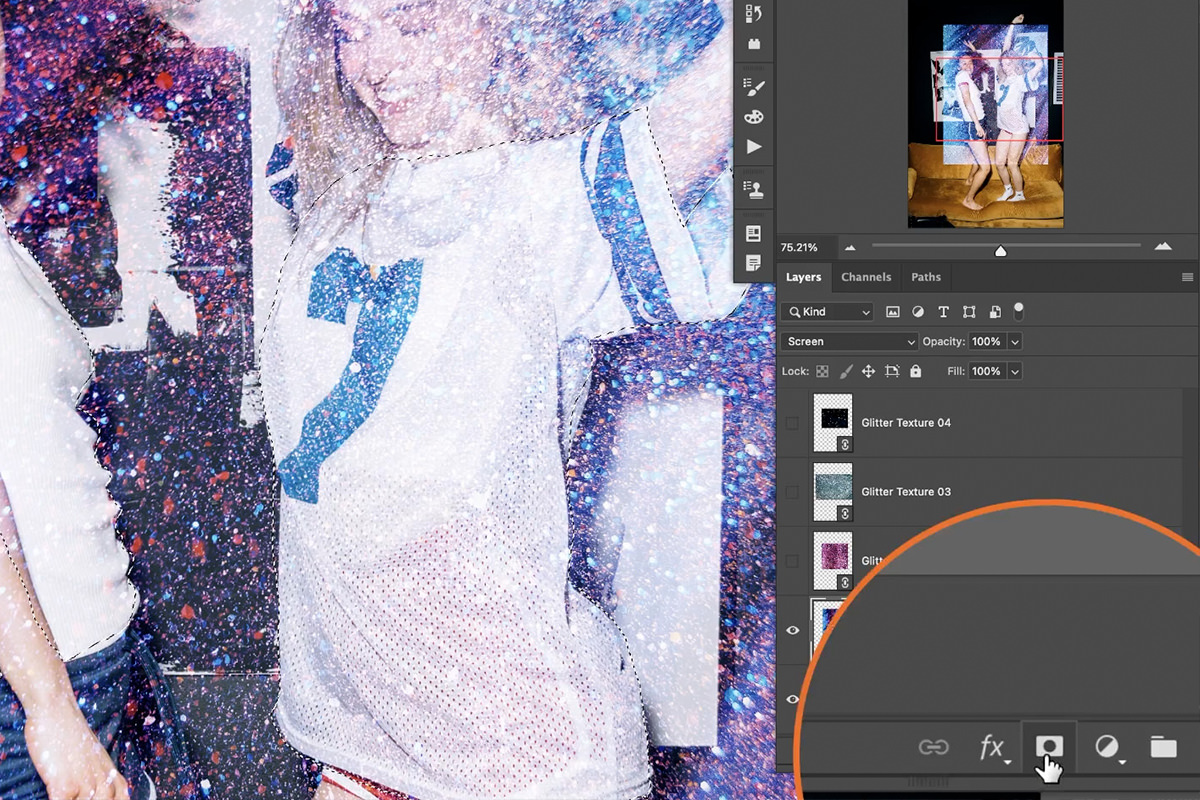
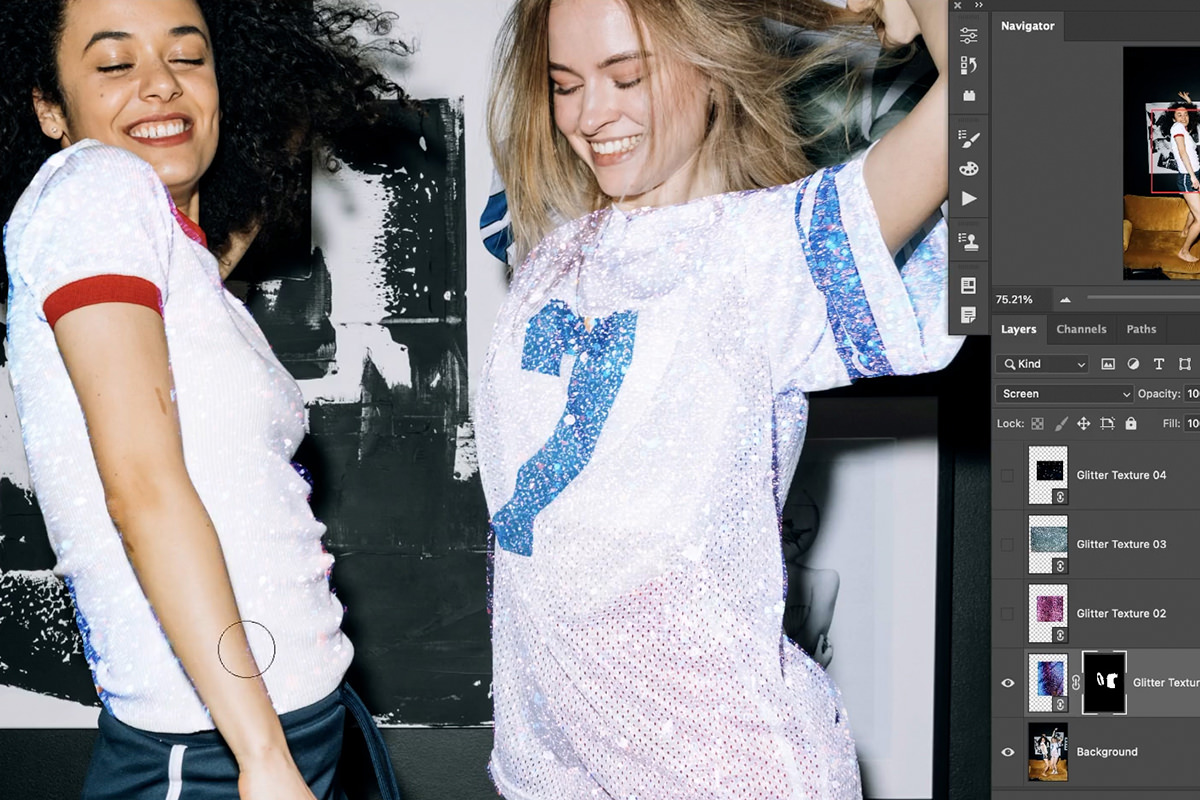
Once the rough selection has been made, select the glitter texture layer and click on the Layer Mask icon near the bottom right of the screen.
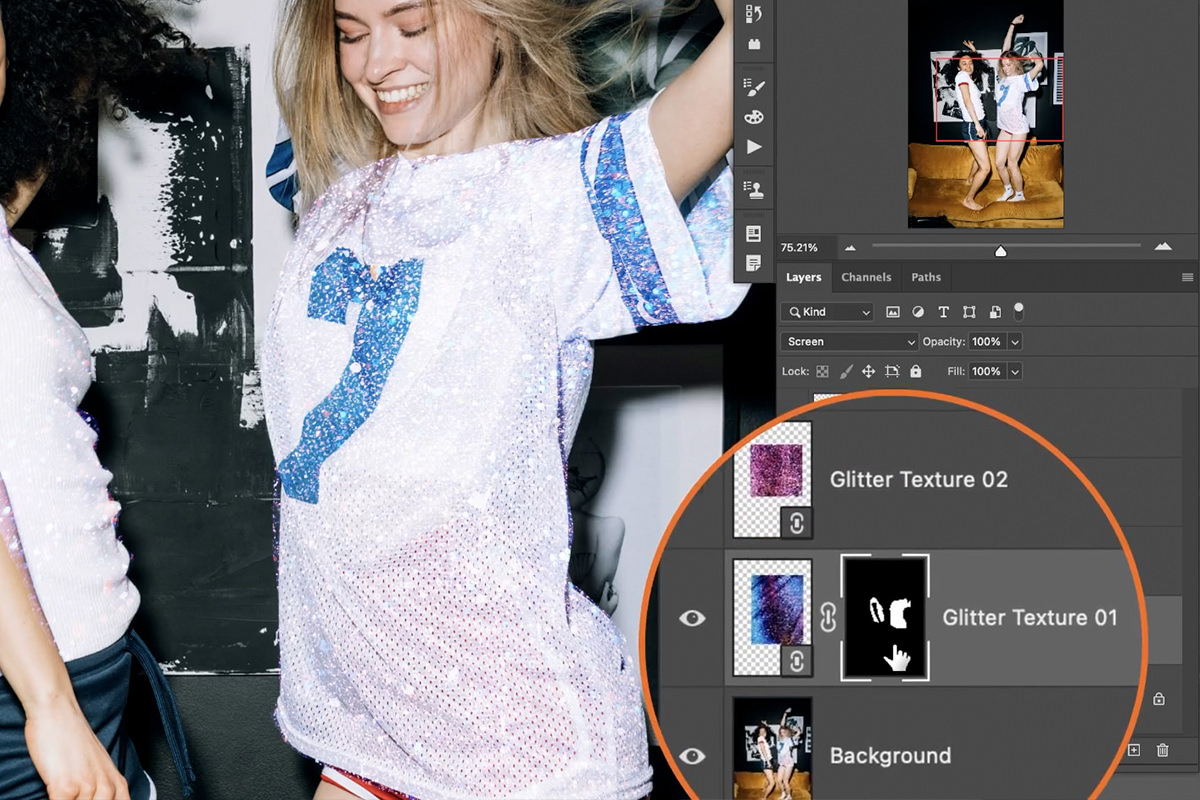
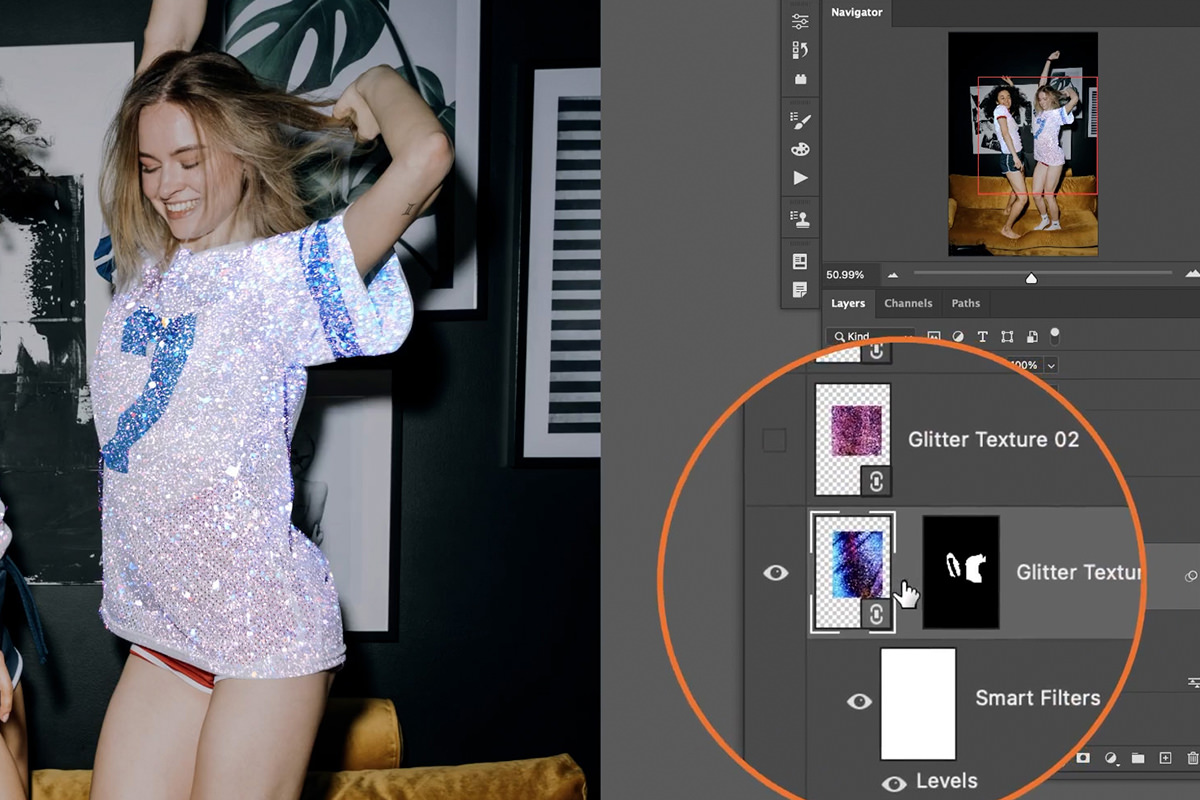
Now the texture is only visible within the areas we selected!
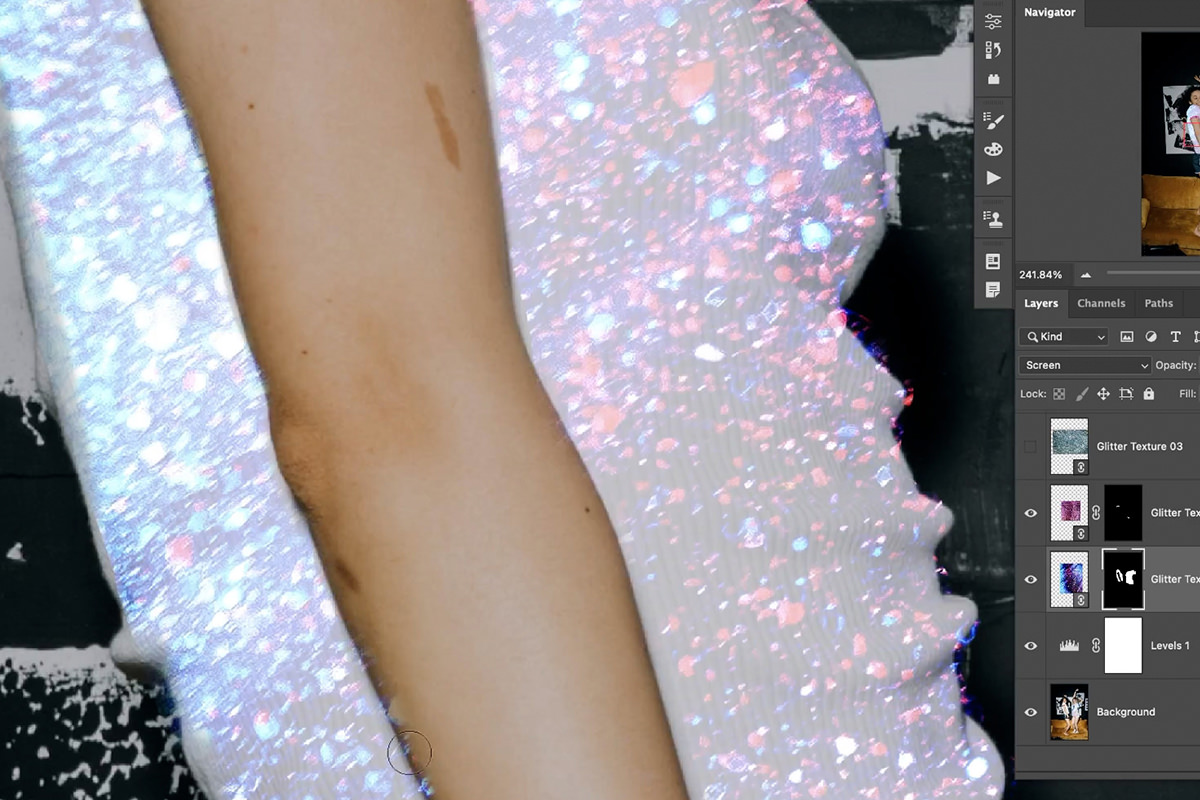
Now we can easily clean up the Layer Mask by using the Brush Tool to paint with black over any areas that we don’t want the glitter texture to appear (like on the subject’s skin or in the background).
Make the Effect Pop
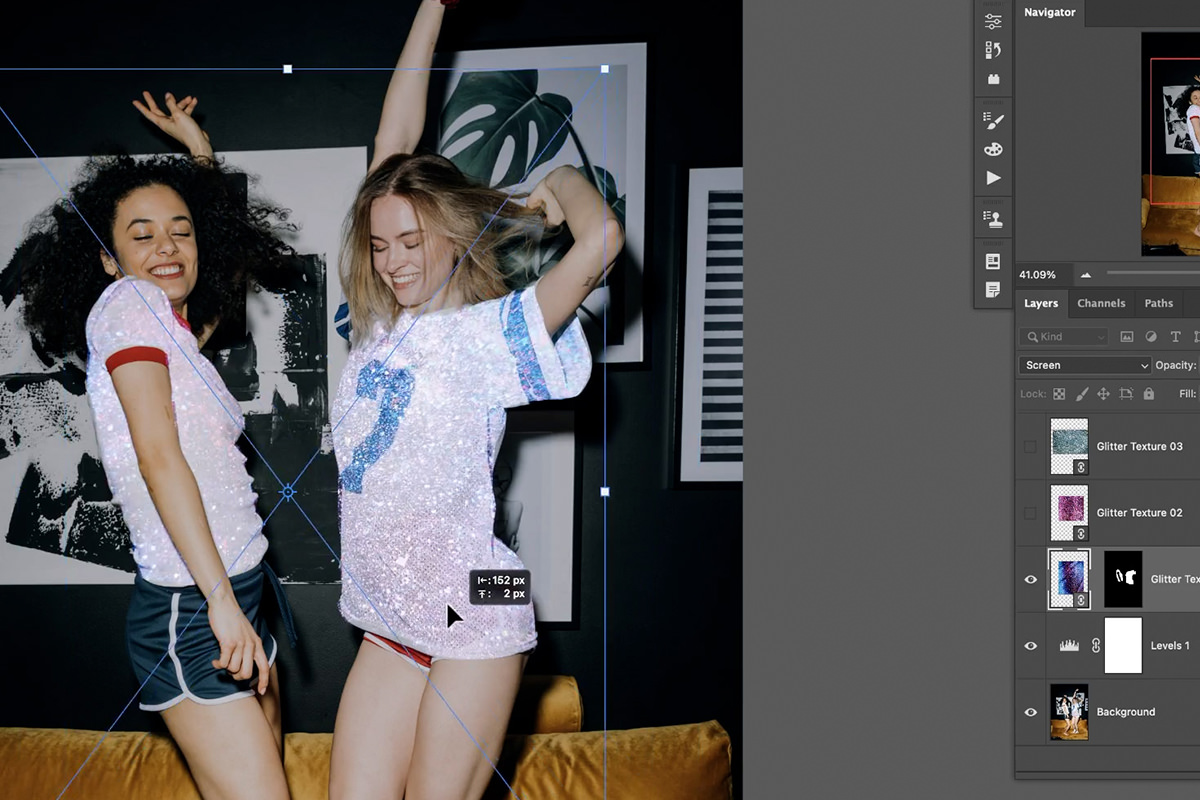
This is supposed to be an eye-catching style, so it’s okay to exaggerate the effect a bit. We want the sparkles to really pop, and the best way to do this is by making the rest of the image a little bit darker.
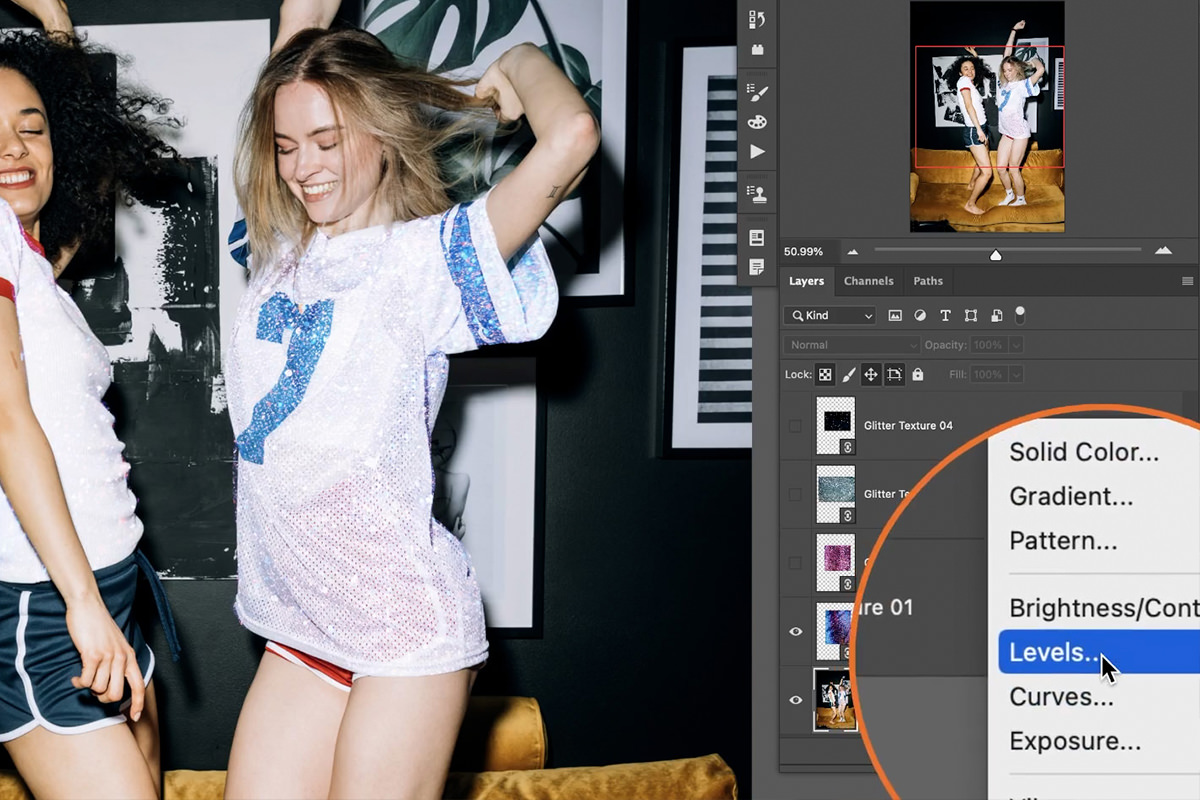
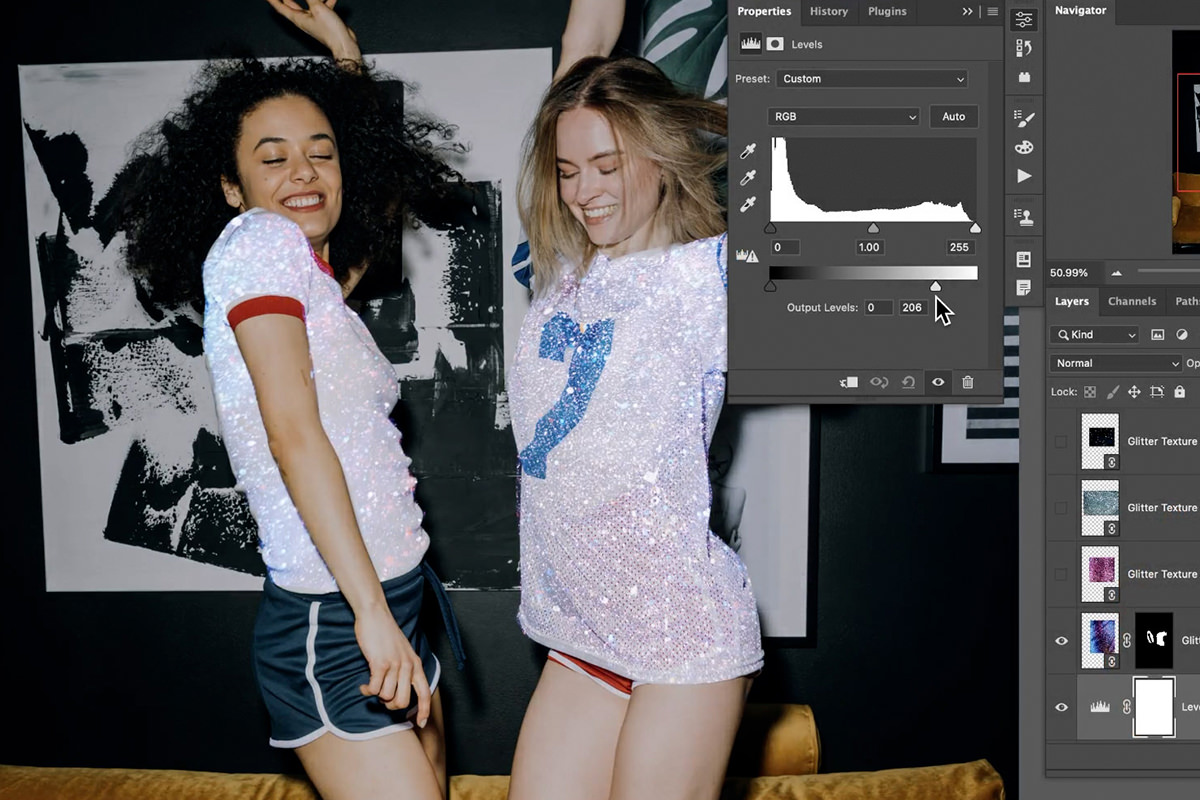
Create a Levels Adjustment Layer on top of the background image on the Layer Stack–and make sure it’s below the glitter textures.
Move the highlight slider to the left. This will make the background image darker, while not affecting the glitter textures above.
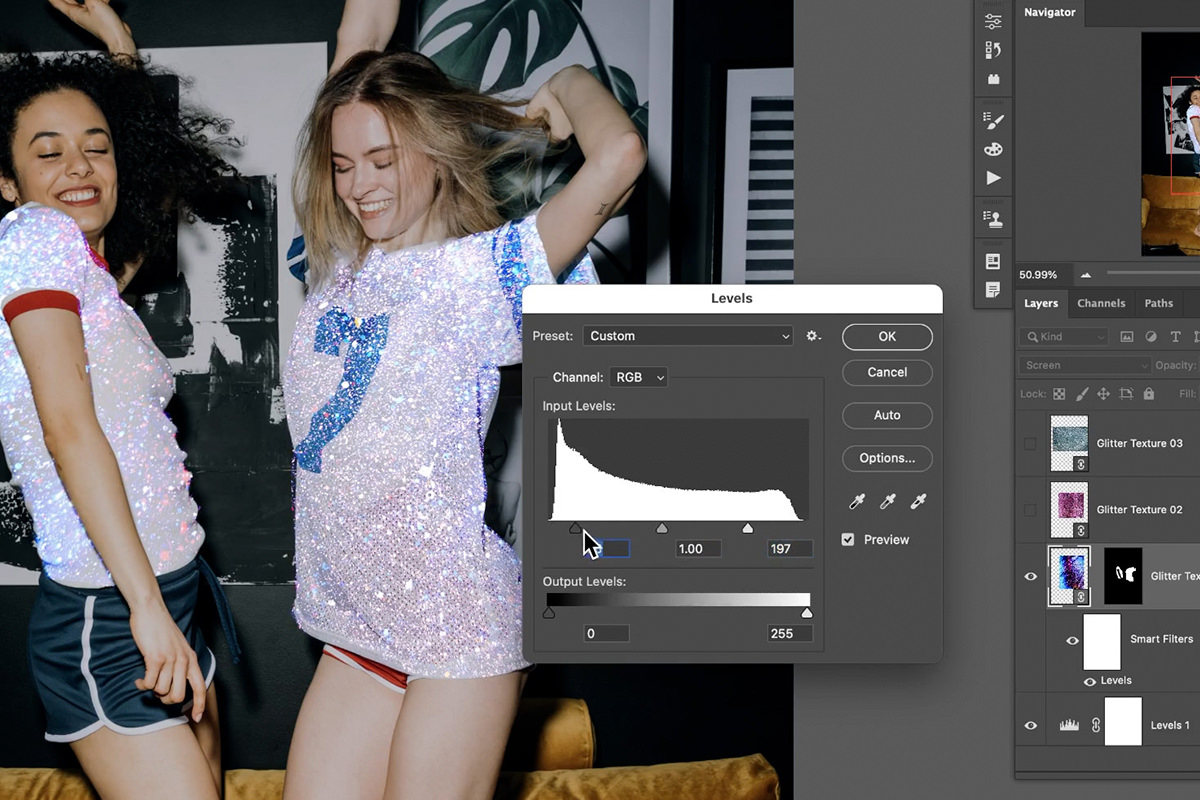
Speaking of the glitter textures, we can use Levels on those layers as well. But this time, we want to make the highlights brighter while adding a little bit of extra contrast.
Since the glitter textures are Smart Objects, you can hit CTRL or CMD + L to add a Levels Adjustment Smart Filter to the Layer. Move both the highlight and shadow sliders inward to dial up the contrast.
And that’s it! If you want to adjust the positioning of the glitter texture, you can do so by unlinking the Layer Mask from the Layer, and then using the Move Tool to move the layer around while the Layer Mask stays in position over the clothing.
Step & Repeat
Alright, so the main effect is done. If you really want the effect to stand out, we recommend using different glitter textures on different areas of the photo.
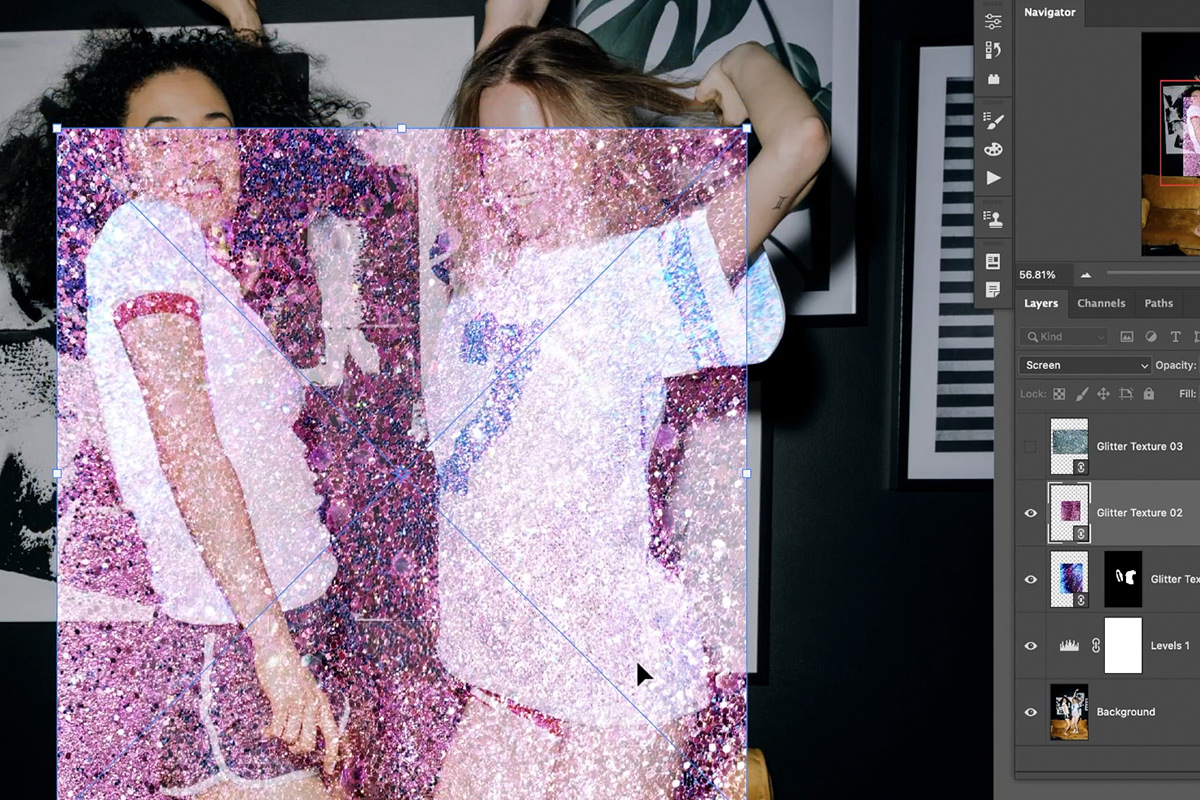
Hide the first texture we applied and choose another. Set the Blending Mode to Screen, and then choose an surface in the image that you want to apply it to.
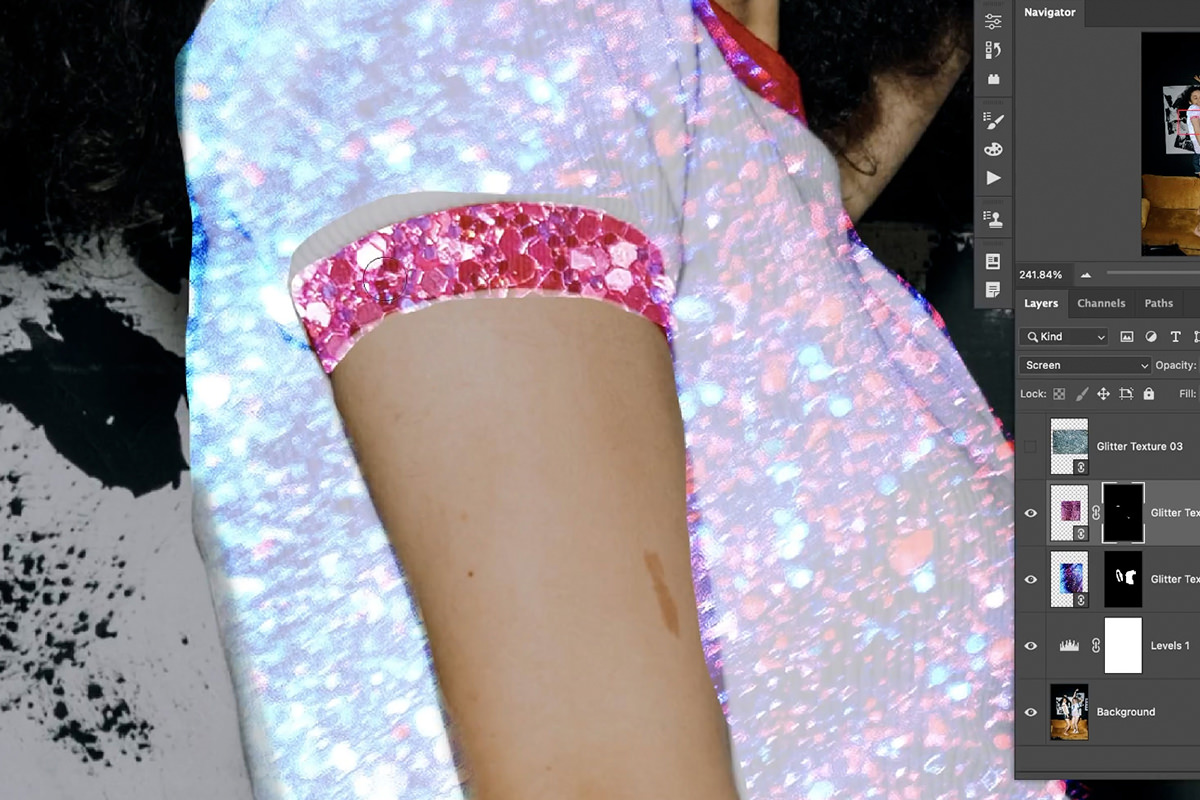
We found that this effect works really well when you can match up the color of the glitter layer to the color of something in a photo. This texture is pink, so let’s use it to accent some of the pink areas in the image.
Use the Lasso Tool to make a rough selection of those areas.
Again, remember this can be a very rough selection, we’ll clean everything up once we turn it into a Layer Mask.
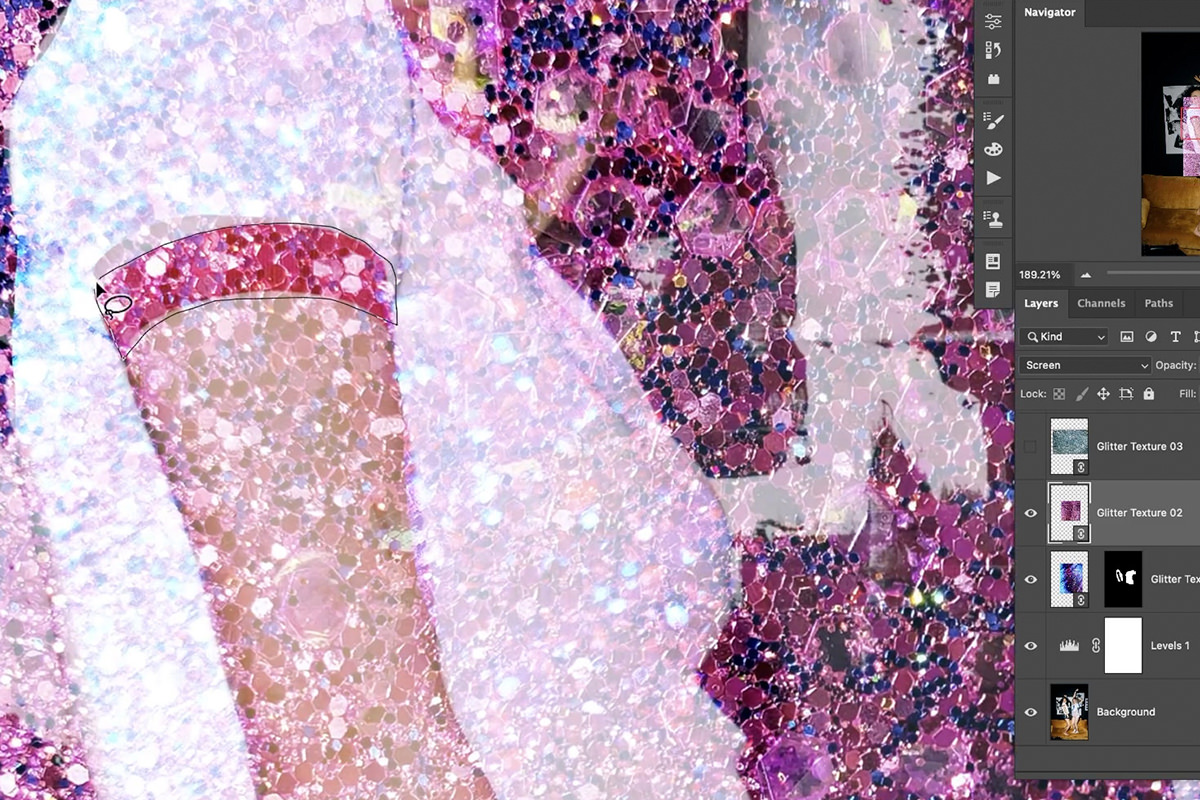
Load the selection as a Layer Mask.
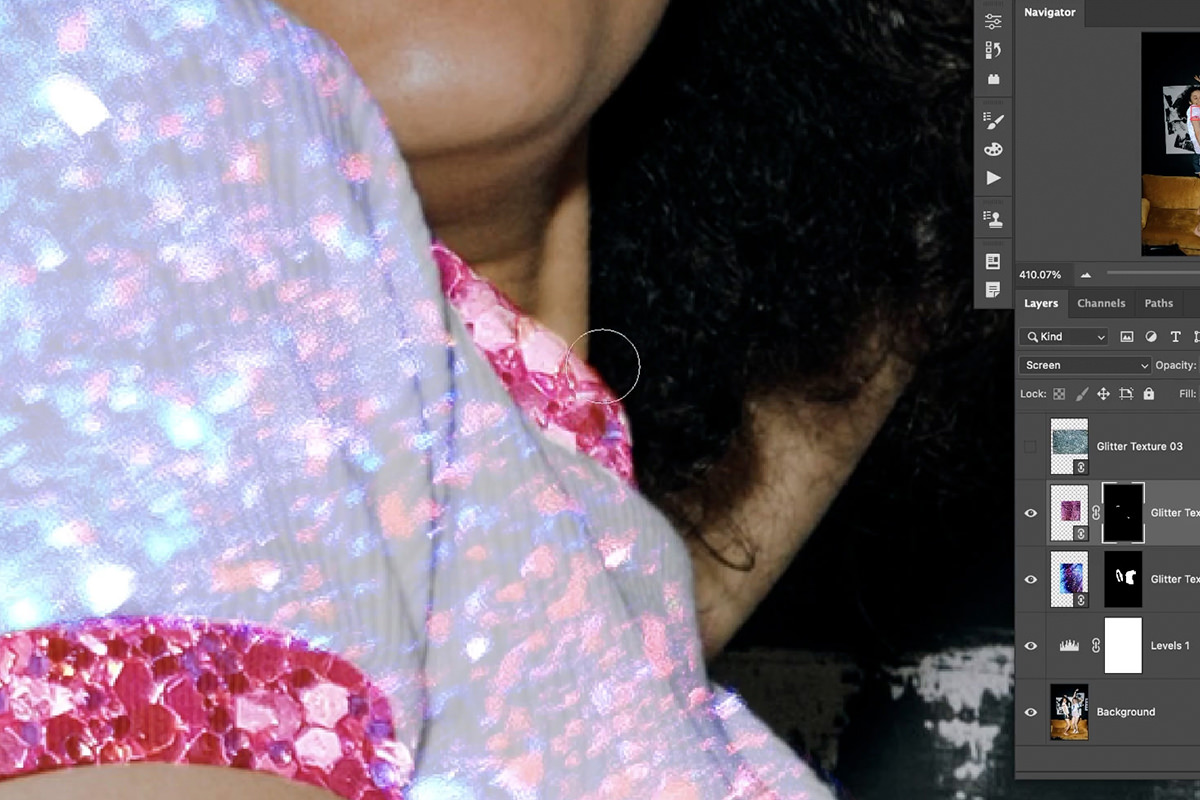
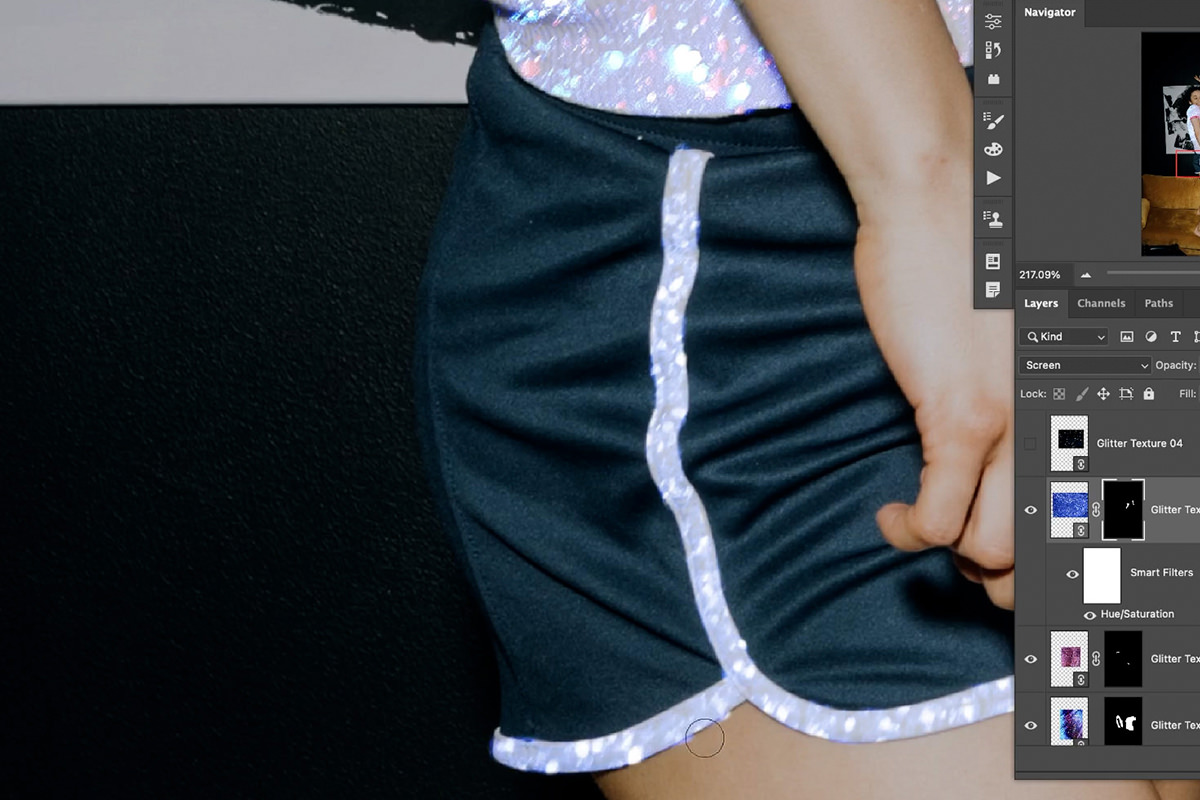
Zoom in and use the Brush Tool to paint with black or white on the Layer Mask to make the texture invisible or visible where you want it.
While you’re zoomed in, it’s also helpful to look at the mask for the first texture and clean up any edges that you might have missed earlier.
And take some time to find any other areas or details where you think this new texture would work. Remember to try and match up colors!
Changing Colors
Since we mentioned that’s in nice to try and match up colors, there’s a chance that your textures might not match anything in the photo. Fortunately, it’s easy to change and adjust the colors as we need to.
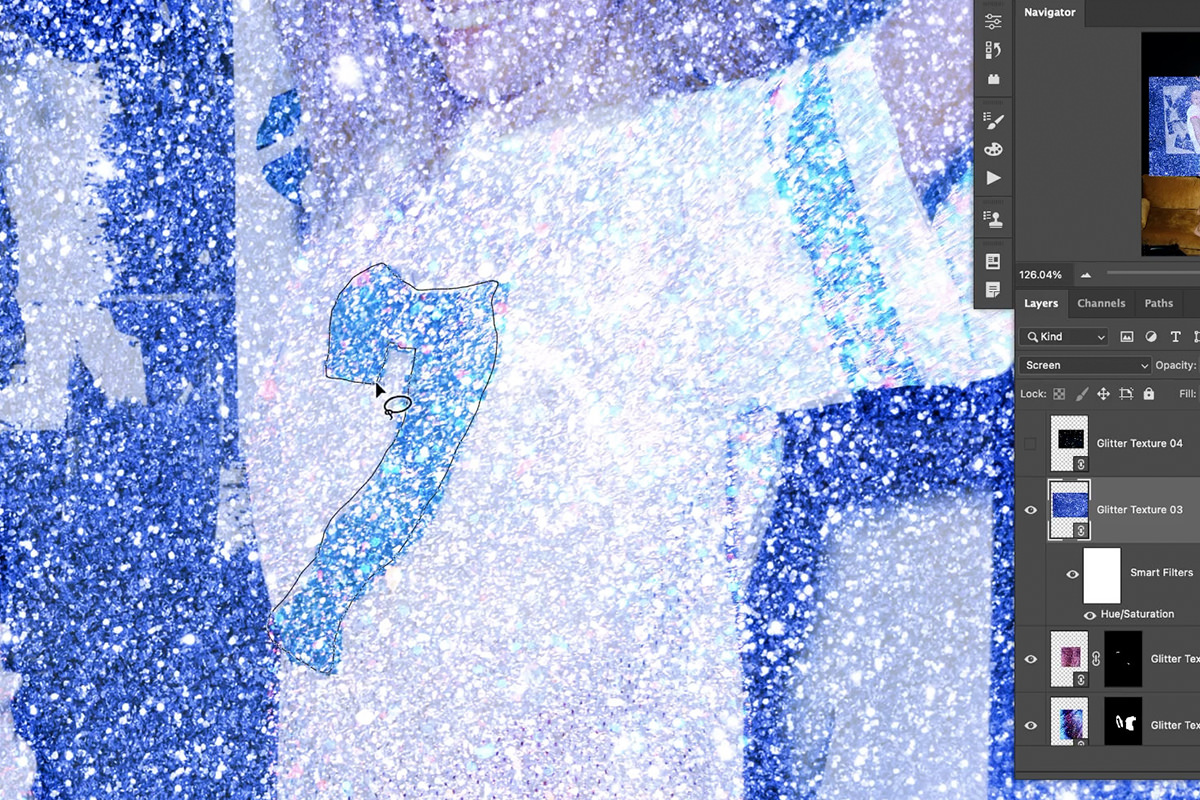
We brought in our third texture, but noticed it didn’t really match any of the objects in the photo that we wanted to accent. For example, the blue number and stripes on the subject’s shirt.
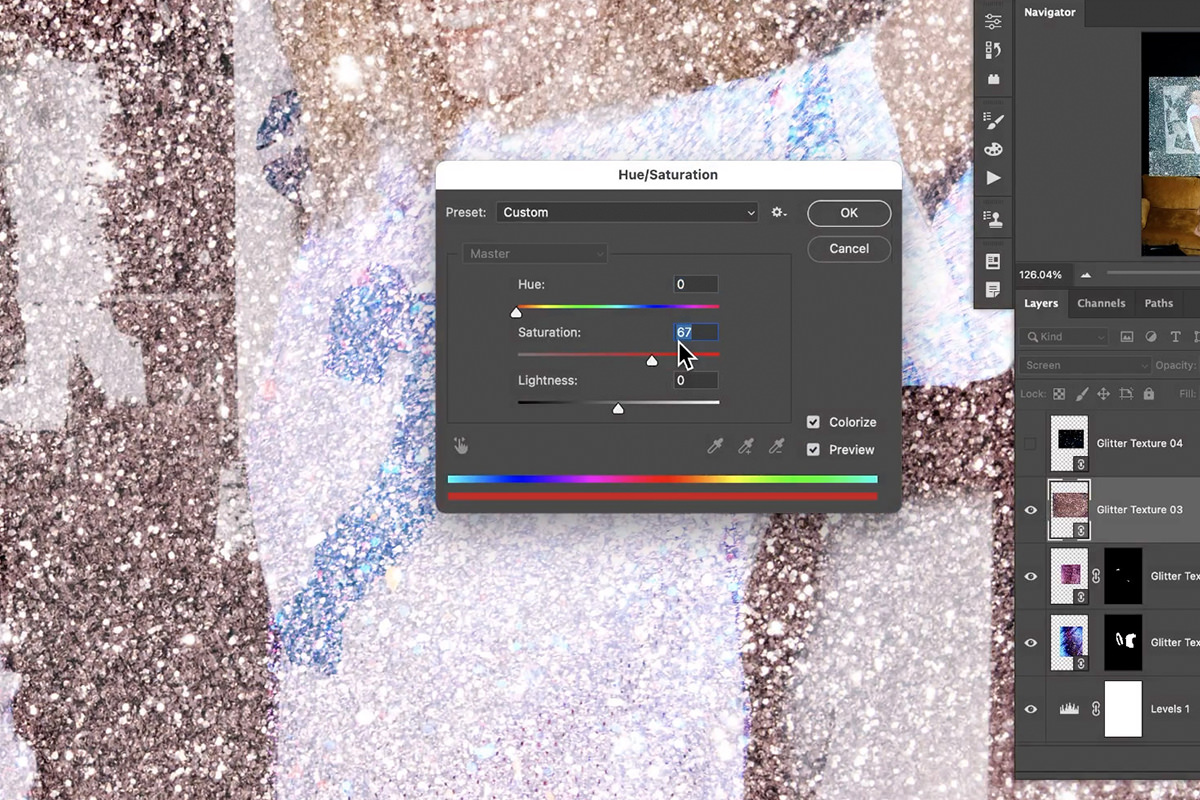
To fix this, add a Hue/Saturation Adjustment to the glitter texture that you want to change the color of. Move the Hue slider to change the color, and the Saturation slider to change the intensity. If you’re following along, try and get it to match the blue accents in the subject’s clothing.
Perfect! Now just use the same steps we went through previously: make a rough selection around where you want to apply the texture, convert it to a Layer Mask, and then refine the mask.
Keep going and use any number of textures that you want. And get creative with all of the different places in a photo that you can apply them.
Adding Accents with Custom Brushes
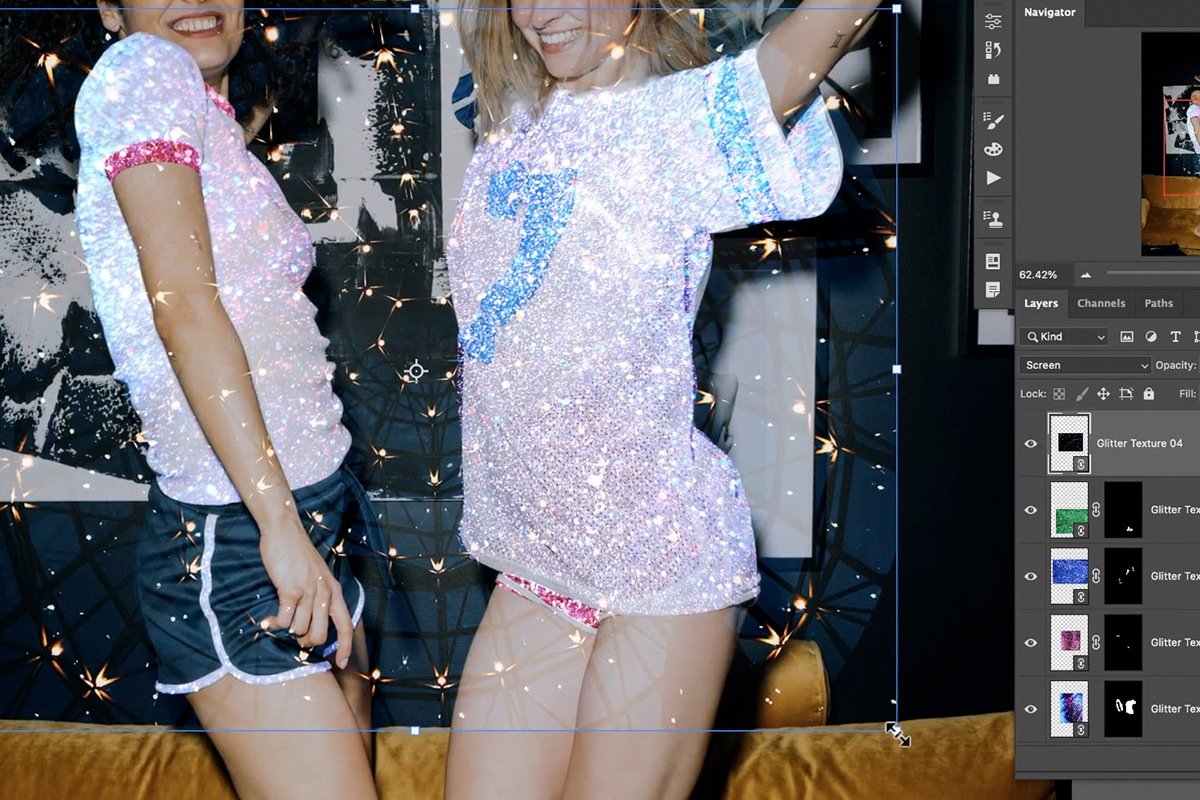
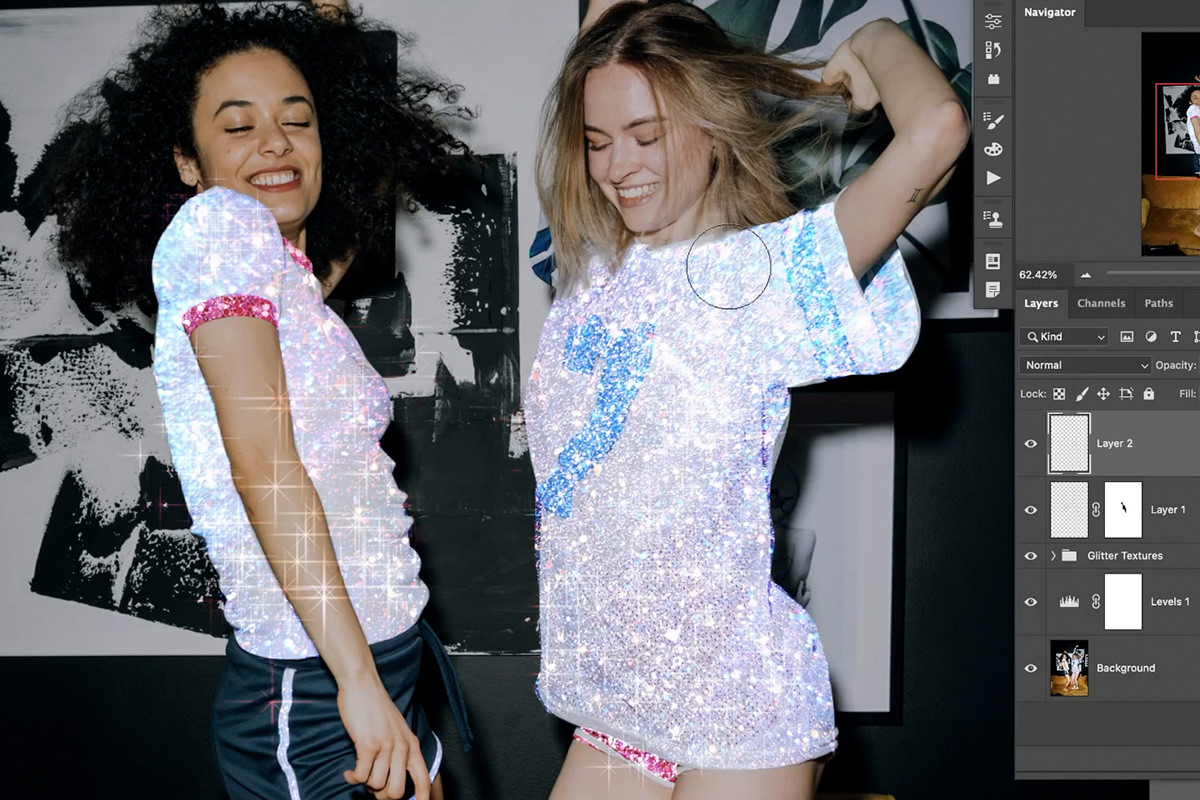
Now that the main effect is complete, we can add some final accents to it in the form of larger sparkles.
First, we have a texture that already has some large sparkles that we can apply in the same fashion as the earlier textures.
And second, we’ve included a custom Photoshop Brush that allow us to paint in additional sparkle effects wherever we want!
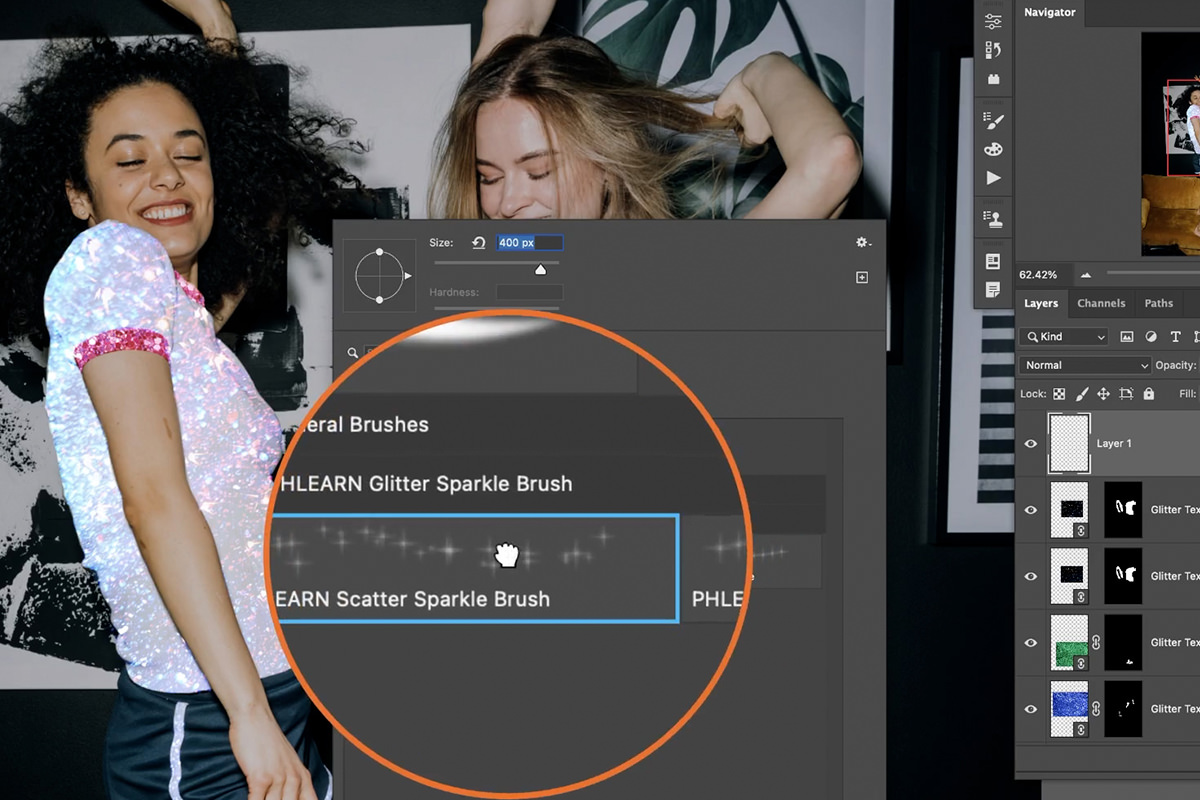
Load the brush into your Brushes panel. Notice that we’ve included two different Glitter Sparkle Brushes.
One is more of a scattered effect that you can apply more generously over the image. And the other creates larger, more pronounced sparkles that work great for singular accents.
To use them, just create a new Layer, and use the Brush Tool to paint with white (or a sampled white color from the image) wherever you want to add a little extra shine.
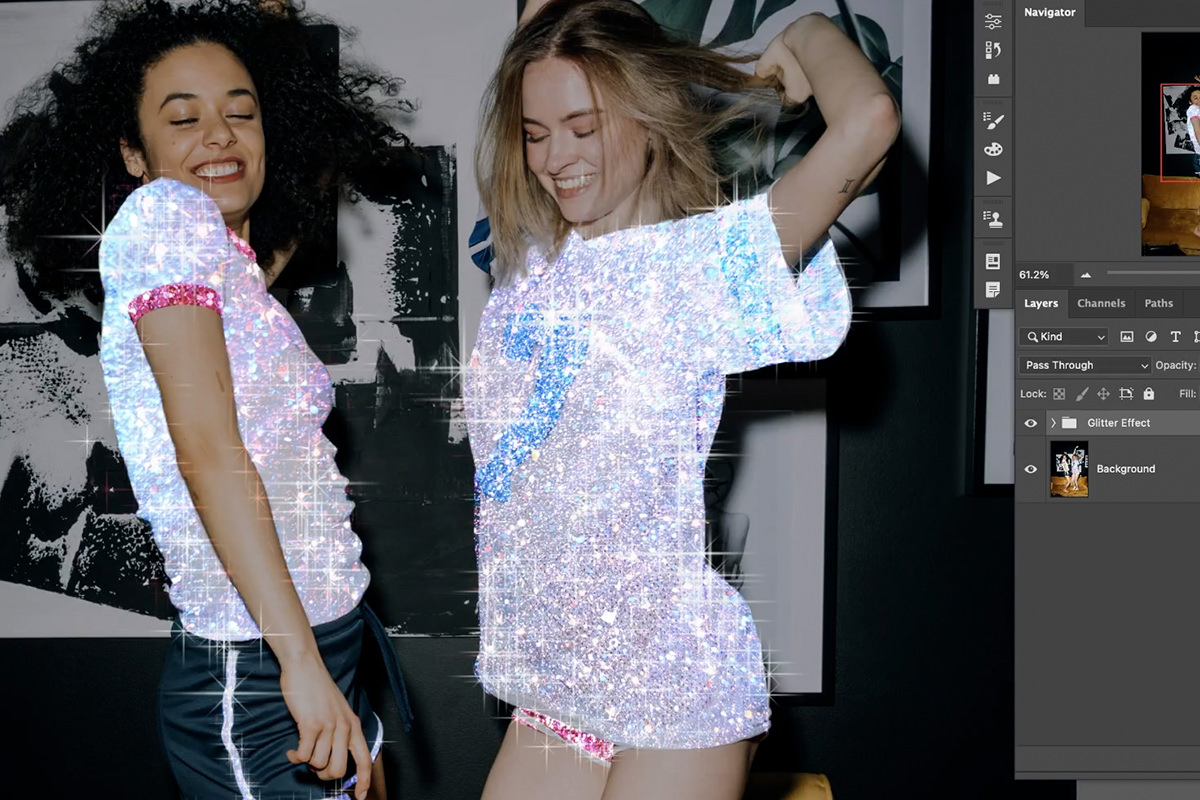
And your done! Try finding more glitter textures, and try the effect on your own images to see what you can create!
