

Download Assets
This tutorial includes 1 sample image, 1 sample PSD and 1 PDF guide. Downloads are free with a PHLEARN account.
- Download the sample images and PSDs from every free tutorial on PHLEARN
- New free tutorials published every week
- One free account — sign up once, then download anything
Free PDF Guide · 4 Pages
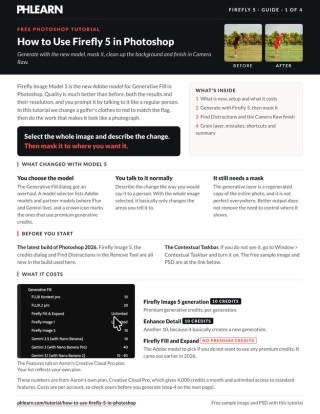
This Tutorial as a Step-by-Step PDF
Every step from the video in order: choosing Firefly Image 5 in the model selector, checking your credits, the plain-language prompt, Enhance Detail, the Select People mask, Find Distractions, and the Camera Raw finish with Point Color. Keep it next to your keyboard.
description
Learn how to use Firefly 5 in Photoshop for Generative Fill, understand the new credit system, and cleanly blend AI edits back into a real photograph using layer masks and Camera Raw.
Enjoying This Free Tutorial?
We publish a new free tutorial every week, each one with sample images and PSDs you can download and follow along with. Sign up and they land straight in your inbox, along with early word on sales, events and subscriber-only offers.
Image Source
Photo by Fellipe Ditadi via Unsplash


Make Firefly 5 Look Like a Photograph
Firefly Image Model 5 is a real step up in what Generative Fill can produce, but the gap between “the AI made the change” and “this looks like a photograph” is still yours to close. That gap is almost never about the prompt. It’s about what you do in the three minutes after the generation finishes.
This walkthrough runs the whole loop: generate with Firefly 5, mask the result properly so it doesn’t bleed into things it shouldn’t, clean the background, and finish in Camera Raw with the one adjustment that kills the digital look faster than anything else.
What Changed in Model 5
You Choose the Model Now
Generative Fill used to just run whatever was current. There’s now a model selector, which means you can pick Firefly Image Model 5 deliberately — and see your premium generative credit balance before you spend any.
Better Material and Fabric
The most noticeable improvement is in how it handles cloth: folds, weight, the way a color sits on a real material rather than looking painted on. That’s why wardrobe changes are the obvious first thing to test it with.
Still Needs Masking
What hasn’t changed is that a whole-image generation touches the whole image. Better output doesn’t remove the need to control where it applies.
Generate With Firefly 5
Selecting the full frame gives the model complete context, which produces better results than a tight selection — you’ll restrict it afterwards with a mask.
-
Select the Entire Image
Go to Select > All, or press Cmd/Ctrl + A.
-
Open Generative Fill
Bring up the Contextual Taskbar from the Window menu if it isn’t showing, then click Generative Fill.
-
Pick Firefly Image Model 5
Click the model selector icon. It shows your premium generative credit balance alongside the model list — worth glancing at before you start iterating.
-
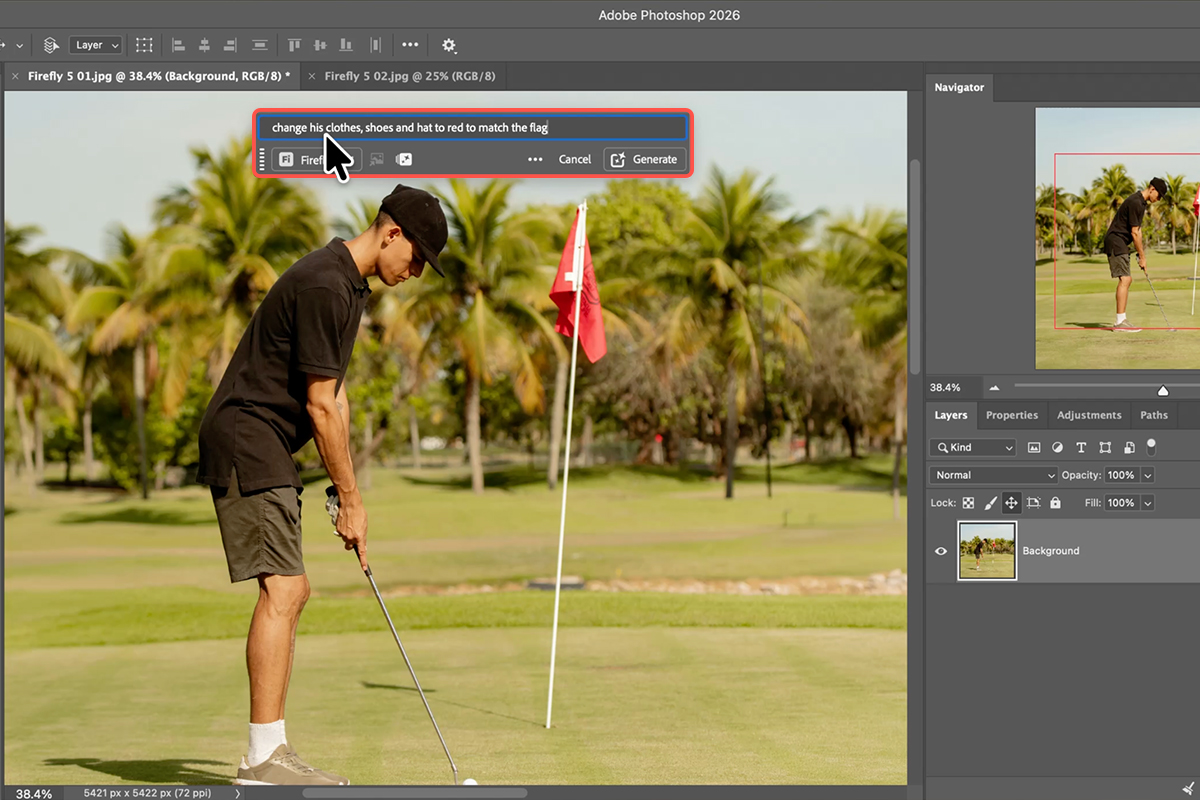
Write a Plain, Natural Prompt
Describe the change the way you’d say it out loud — a color swap on a jacket, a different shirt. Plain description beats keyword-stuffing with Model 5; it responds better to a sentence than to a list of adjectives.
Control Firefly 5 With a Mask
The generation will have changed things you didn’t ask about. Masking is how you keep only the part you wanted.
-
Select What You Want to Keep
Press W for the Object Selection Tool and click each element you want the generation to apply to — the shirt, the shorts, the shoes. Hold Shift to add each one to the selection.
-
Turn the Selection Into a Mask
With the selection active, click the Layer Mask icon in the Layers panel. The generated change is now confined to exactly those areas and everything else reverts to your original photo.
-
Refine the Edges by Hand
Press B for the Brush Tool and paint white on the mask to bring back any part the automatic selection clipped. Object Selection is good but it isn’t perfect around fabric edges, and a few seconds of brushwork is what makes the boundary invisible.
Clear the Background
With the subject sorted, the background clutter becomes the next most distracting thing in the frame.
-
Run Find Distractions
Press J for the Remove Tool and click Find Distractions. Photoshop color-codes background clutter — poles, wires, signage — and groups it for you. Hold Alt/Option and paint over anything it flagged that you actually want to keep.
-
Check Sample All Layers and Create a New Layer
Both boxes in the options bar. This keeps the removal on its own layer rather than burning it into your work, so you can undo any single decision later. Press Enter to run it. Our free guide to the Remove Tool update covers the rest of what changed.

Finish in Camera Raw
This is the stage that decides whether the image reads as a photograph or as an edit, and it’s two adjustments.
-
Merge and Convert to a Smart Object
Go to Image > Apply Image to merge everything onto a new layer, then Filter > Convert for Smart Filters. Everything after this stays re-editable.
-
Add Grain
Open the Camera Raw Filter and go to the Effects tab. A small amount of Grain is the single fastest way to kill the digital look — generated pixels are unnaturally clean, and giving them the same texture as the photographed ones settles the whole frame down.
-
Grade With Point Color
Use the Point Color eyedropper inside your masks to push color variance in the background and the subject separately. A little separation between the two is what gives the final image depth. Our free Point Color walkthrough goes deeper on the tool.

Spending Credits Sensibly
Check the Balance Before Iterating
The model selector shows your premium credits. Knowing the number before you start regenerating is the difference between three deliberate attempts and twelve reflexive ones.
Fix It With a Mask Rather Than a Regeneration
If the generation is 80% right and the problem is where it applied rather than what it produced, masking costs nothing and regenerating costs credits. Reach for the mask first.
Generate Once, Grade Repeatedly
Color, contrast and grain are free and infinitely adjustable. A lot of what looks like a bad generation is actually an ungraded one.
Where It Usually Falls Down
Selecting Tightly Before Generating
A narrow selection starves the model of context and the result matches the surrounding scene worse. Select all, then constrain with a mask.
Trusting Object Selection at the Edges
It gets the shape right and the boundary approximately right. The approximately is what people notice. Brush the mask.
Exporting Straight From the Generation
Skipping Camera Raw is the most common reason AI edits look like AI edits. The grain pass takes ten seconds and does more for realism than any prompt rewrite.
What Firefly 5 Still Doesn’t Change
Every version of these tools gets better at generating and none of them get better at deciding. Which areas the change should apply to, how much grain the image needs, whether the background should be warmer than the subject — those are photographic judgments, and they’re the reason two people using the identical model get very different results.
Which is also the reassuring part. The workflow around the generation is the durable skill; the model underneath it will be replaced again next year.
Test It on a Real Photo
Select All, Generative Fill with Model 5, mask what you meant to change, clear the background with Find Distractions, then grain and Point Color in Camera Raw. Download the free sample image and PSD and follow it exactly — then run the same loop on a portrait of your own and compare the graded version against the raw generation. The difference is almost entirely in the last two steps. For the deeper color work, our PRO Advanced Portrait Editing course takes it further.
Quick Reference: Keys, Menus and Settings
- Select everythingSelect > All, then Generative Fill in the Contextual Task Bar (Window > Contextual Task Bar if hidden)
- Pick the modelModel selector > Adobe models > Firefly Image 5; the crown means premium credits
- Check your creditsThe credits icon in the dialog; Features lists what each tool costs on your plan (Image 5: 10 per generation)
- Sharper resultEnhance Detail in Properties (another 10 credits; can add a crosshatch pattern)
- Mask to the clothesW Object Selection > Select People, Shift-click each item, drag the old mask to the trash, click Add Layer Mask
- See the maskOption/Alt-click the mask thumbnail
- Remove distractionsJ Remove tool > Find Distractions > General Distractions; Option/Alt-paint to keep something; Sample All Layers and Create New Layer on
- Finish in Camera RawNew layer, Image > Apply Image, Filter > Convert for Smart Filters, Filter > Camera Raw Filter: Grain, Vignette, Masking > Background > Point Color (variance up), Select Subject, Radial Gradient
- Grain without Camera RawLayer > New Adjustment Layer > Grain
Mac first, then Windows where they differ.
Free Downloads
Follow Along on the Same Photo
Get the sample image, the layered PSD with the generative, remove and Camera Raw layers, and the PDF guide. Free with a PHLEARN account.
Firefly Image 5: Common Questions
What’s different about Firefly Image 5?
Three things: you describe the change the way you’d tell a person (“change his clothes, shoes and hat to red”), the quality and resolution of the result are much higher, and you can select the whole image and it only changes what you asked for.
How do I choose it?
Click Generative Fill, then the model selector. Adobe models and partner models are listed; Firefly Image 5 is under Adobe. A small crown icon marks models that spend premium credits. Firefly Fill and Expand is the one to use if you want to avoid premium credits.
How many credits does it use?
Ten per generation on Aaron’s plan, and Enhance Detail is another ten because it’s a new generation. The credits icon in the dialog shows your balance, and the Features tab lists what every tool costs on your plan, so check it before you generate.
It changed more than the clothes. Why?
With everything selected, the model regenerates the whole photo, including the flag and the hands, even though the prompt was about clothes. The result is good, but mask it so only the clothes come from the generated layer.
How do I make that mask?
Press W for the Object Selection tool, click Select People and hover over the shirt, shorts, hat, socks and shoes, Shift-clicking each one. Drag the generative layer’s old mask to the trash and click the Add Layer Mask icon; the selection loads into the new mask. Paint white or black on it to tidy any edge.
What does Enhance Detail do?
It rerenders the chosen variation at higher quality. It costs another ten credits and can leave a faint crosshatch pattern on skin, which is one more reason to keep the original face through the mask.
How does the new Remove tool clear the background?
Press J, click Find Distractions and choose General Distractions. It finds and color-codes fixtures, highlights, poles, spots and clutter. Option/Alt-paint over anything you want to keep (the flag), paint over anything it missed, then press Enter. Keep Sample All Layers and Create New Layer on.
What’s the Camera Raw finish?
Apply Image onto a new layer, convert it for Smart Filters and open the Camera Raw Filter. Add a little grain (it hides generated areas), a vignette in Optics, then a Background mask with Point Color (hue, saturation and variance up), a Subject mask to tune the red, and a radial gradient to lift the exposure. The Grain adjustment layer works too.
Are the sample files free?
Yes, with a free PHLEARN account. You get the sample image, the layered PSD and the PDF guide.
Master Photoshop, Lightroom and Photography
Join PHLEARN PRO for $12.99 a month or $99.99 a year. Cancel anytime, with a 100% money-back guarantee.





