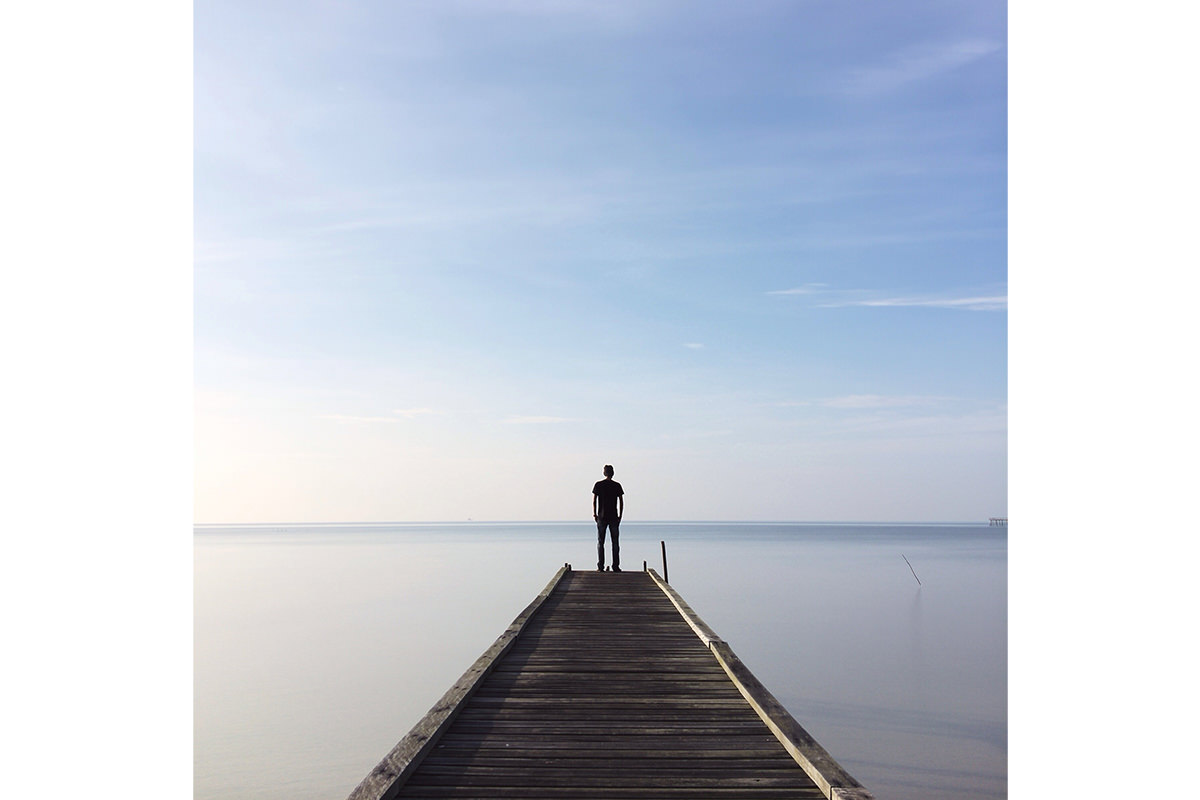
BEFORE
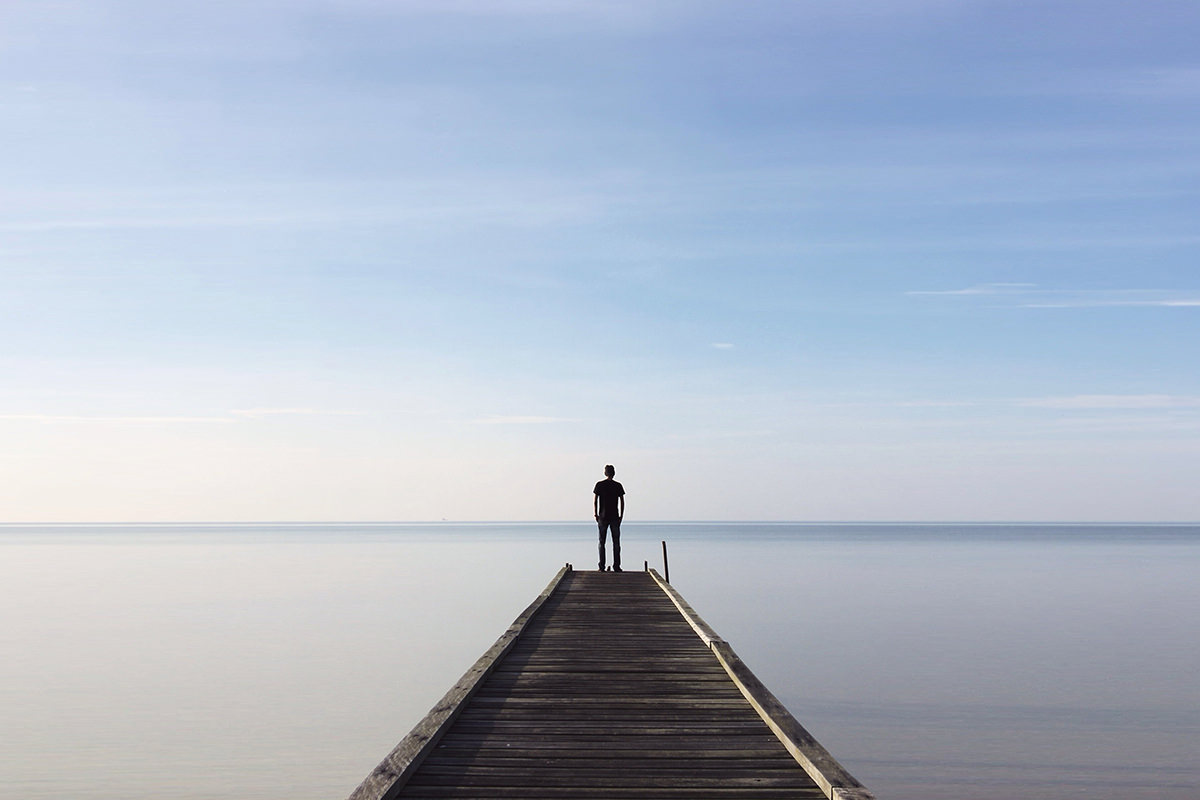
AFTER
Background Not Big Enough?
Have you ever really needed to extend the Background of your image, but not wanted to spend hours with the Clone Stamp tool? If so, today’s episode is for you! Learn How to Stretch Images Using Content Aware Scale!
Preparation
We start out with a square image that we would like to extend. It is a great example because we want to stretch out the water and sky, but not the person standing in the center. If you have a highly detailed photo that you want to stretch, the Content Aware Scale Tool will not be the best option. If it’s simple open space, however, like a sky or the ground, it will most certainly help you out! You can do this both horizontally and vertically.
Start by extending the canvas behind your image. You can do this by using the Crop Tool and just widening the background. Hold the edge and drag it to the left or right.
- TIP: Hold Alt/Opt while doing this to extend out evenly from the center.
Duplicate the background layer by holding Cmd + J. To test out how incorrect the photo will look with the normal Transform Tool, you can press Cmd + T and Stretch the image out to the new width. Yuck!! It will not look good at all. This is where Content Aware Scale comes in!
Content Aware Scale
Go to Edit – Content Aware Scale. Now, you can drag the edges of the images outwards and the most important information will stay intact (human figure and the pier) while the more simple information (sky and water) will be extended to hit the new borders. It creates a much more natural look than the previous example!
Protect Your Important Information!
You might notice that when you used the Content Aware Scale Tool, there were parts of your image that were warped or slanted a bit. To truly make sure the items you don’t want to stretch stay protected, it will just take a few extra steps.
- Make a selection of the object you would like to “protect.” In this case, it is the man and the pier.
- Load this selection as a Channel. To do this go to the Channels tab, and create a new channel. Your objects should still be selected!
- You will see a completely black Screen with marching ants around your objects. Hold Shift + Delete and select Use – White. Now, your objects will be white on a black Background.
- Go back to your regular layers tab. Go to Edit – Content Aware Scale, and select your Alpha 1 Channel under the Protect drop down menu.
- Scale the image just as you did before! The objects you chose to “protect” should not move, and you will have a more successful final image.
As you can see in our example, the Before and After images are only different in their cropped Size. The goal is to have the end image look completely natural, and not give away the secret that you’ve stretched it out!
- TIP: Sometimes you just can’t scale as much as you’d like. A helpful hint is to Scale it halfway, stop, and then start over and Scale it the rest of the way.