
Download Assets
description
Learn how to use Adobe’s brand-new Firefly Image Model 5 in Photoshop 2026 to easily change elements in your photos. This tutorial walks you through using Generative Fill to swap clothing colors, understanding the updated premium credit system, and cleanly blending AI edits with layer masks.
Go PRO:
Dive deeper on non-destructive editing with our in-depth PRO tutorial The Ultimate Guide to Non-Destructive Editing in Photoshop . We’ll cover everything from mastering masks and smart objects to building an unbreakable raw pipeline, all while preserving your original image intact..
Image Source
- Fellipe Ditadi
Images sourced from Unsplash.
Share


AFTER
BEFORE
Firefly 5 Made Simple
Learning new AI features can feel overwhelming, especially when updates change your favorite workflows or introduce complex credit systems. It is easy to feel stuck trying to make digital generations look like real, high-quality photographs instead of obvious edits. In this guide, we break down the newest tools into simple, practical steps so you can skip the frustration and get straight to creating beautiful, professional images.
Firefly 5
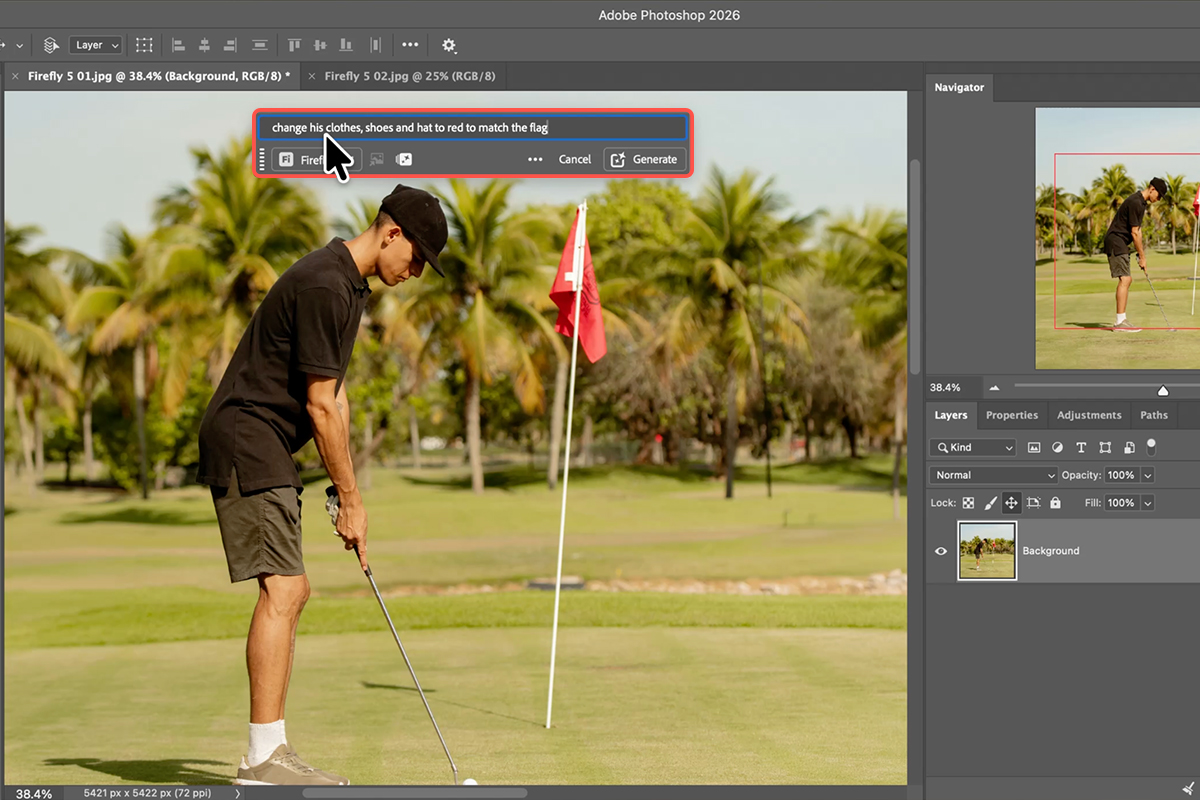
1. First select your entire image by going to Select > All, or use the handy shortcut Ctrl/Cmd + A.
2. Open your Contextual Taskbar from the Window menu and click Generative Fill.
3. Click the new model selector icon to check your premium generative credits and choose Firefly Image Model 5.
4. Type a clear, natural prompt to describe your changes—like swapping clothing colors—and hit generate.
Perfect Your Mask
To keep your edits looking clean and professional, blend the AI generation seamlessly with your original photo using a layer mask.
5. Grab the Object Selection Tool by pressing W, and select the areas you want to keep, like shorts, shirts, or shoes, by holding Shift and clicking each piece.
6. Head over to your Layers panel and click the Layer Mask icon to load your selection directly into the mask.
7. If you need to fix any rough edges manually, select the Brush Tool (Keyboard Shortcut “B”) and paint with white to refine the shape.

Clean the Background
Now you can remove unwanted clutter using the upgraded Remove Tool (Keyboard Shortcut “J”).
8. Click the new Find Distractions option to let Photoshop automatically color-code and select background clutter like poles or wires. To fine-tune the selection, hold Alt/Option to paint away and protect important objects you want to keep.
9. Make sure Sample All Layers and Create a new layer are both checked in the options bar, then hit Enter to erase everything cleanly in a single step.

Finish the Photo
Always finish your image inside Adobe Camera Raw to blend your edits perfectly.
10. First, merge everything onto a new layer by going to Image > Apply Image, then go to Filter > Convert for Smart Filters.
11. Open the Camera Raw Filter and add a touch of Grain in the Effects tab to instantly mask the digital AI look and make it feel like a real photograph.
12. Use the powerful Point Color eyedropper tool within your masks to boost color variance in the background and subject for a beautiful, final grade.


