
How to Create Realistic Studio Composites
-

-
Add to
favorites
-
DifficultyMedium
-
Length4.25 hours
-
Videos10
-
Software
description
Studio compositing is a balance between photography and Photoshop magic. Learn how to balance and match light, analyze perspective, and combine multiple images together in Photoshop.
THIS COURSE INCLUDES
- 7 Sample Images
share
Table of Contents
-
01 - Introduction to Studio Compositing29:49m
-
02 - Ocean: Part 111:05m
-
03 - Ocean: Part 222:30m
-
04 - Ocean: Part 313:39m
-
05 - Ocean: Part 48:42m
-
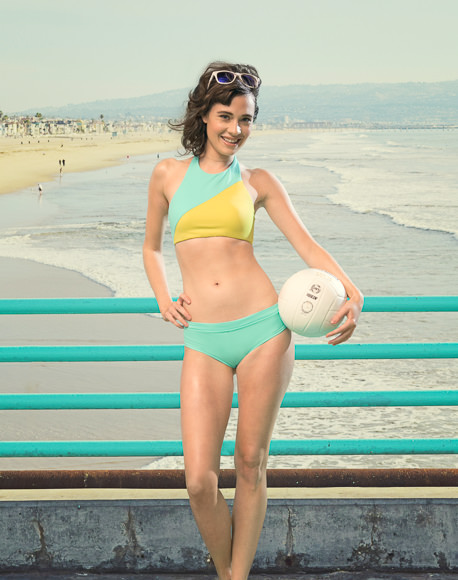
06 - Pier: Part 133:47m
-
07 - Pier: Part 221:27m
-
08 - Pier: Part 325:30m
-
09 - Door: Part 134:42m
-
10 - Door: Part 238:51m
Course Downloads
Learn Green Screen Compositing

3 complete composite tutorials.
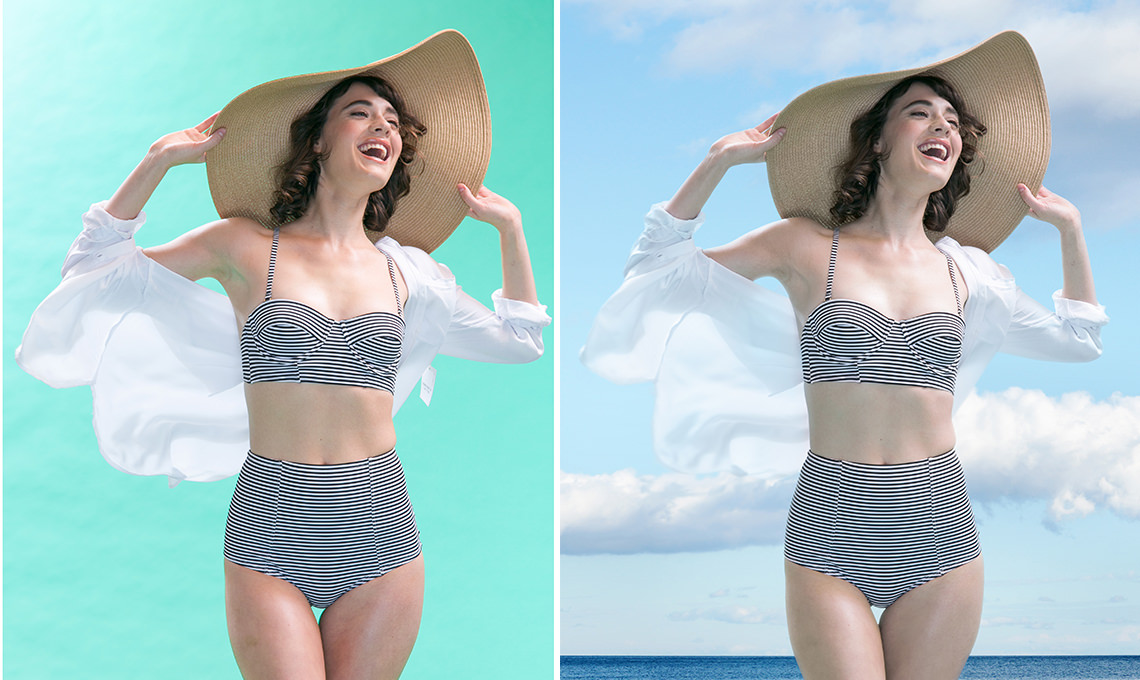
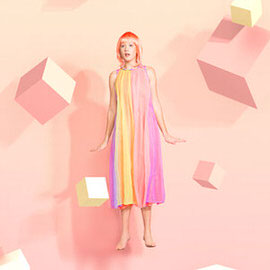
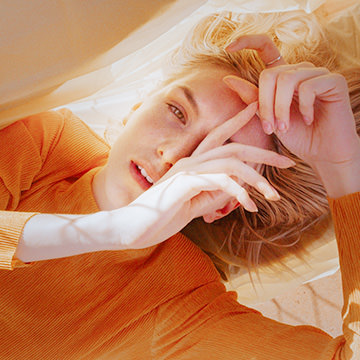
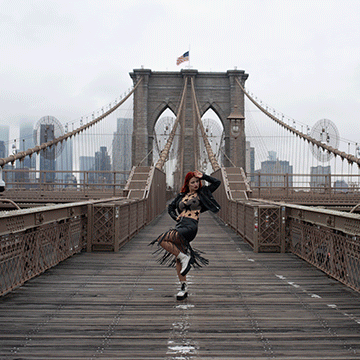
Each composite image is different and comes with its own set of challenges. We include three composite image tutorials to go over the majority of techniques you need to create a successful studio composite. Learn to create shadows, match color, cut out hair, and match lighting on 3 different images.
Studio lighting explained.
One of the biggest challenges you will face in studio compositing is matching the light from the studio to the background image. If the light doesn’t match, your image will look out of place. Learn how to match multiple lighting conditions with the included 3-d lighting diagrams and lighting explanation video.
Learn to master the Pen Tool.
When it comes to cutting out your subject – there is no better tool than the Pen Tool. The accuracy, control and flexibility of the Pen Tool makes it the perfect companion for studio compositing. Learn to cut-out your subject from head to toe using the Pen Tool.
Copy shadows perfectly.
When it comes to compositing – the shadow is as important as the subject. Without a realistic shadow, your subject will look as if they were floating. You will learn how to use the exiting shadow from the studio image over-top of the composite, making your shadows perfectly real.
Mask hair flawlessly.
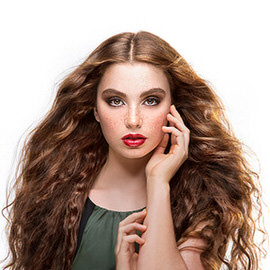
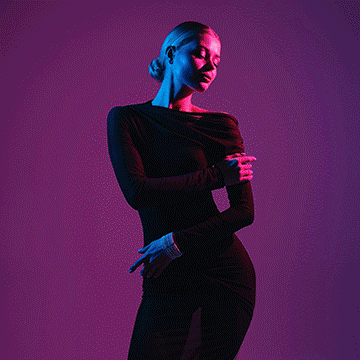
One of the hardest parts about studio compositing can be cutting out hair. Each hair needs to be removed from the background, and with detail that small, it can be difficult to capture. In this tutorial you will learn to cut out hair perfectly – that means every single strand. Check out the full size image to see for yourself.
Learn to shoot on green screen.
Photographing your subject on a green screen or “chroma key” background is a great technique for studio compositing. Ideally you can select out the green in Photoshop and remove it from the image, leaving just your subject. While this technique does work well, you are often left with some green color cast on your subject. In this tutorial we show you how to remove color casts and how to match color to your environment.
Stock backgrounds included
We provide you with everything you need to follow along with your tutorial – including the stock image backgrounds. These high-resolution images are carefully selected to make great composite backgrounds, they are simple and feature your subject nicely. Practice photographing your own subjects and placing them on the included backgrounds.
Create realistic shadows.
In order to make a composite image look real, your shadows have to match the background perfectly. Learn how to take an existing shadow, make it a selection, then copy shadows from the background image into that selection.
Realistic Compositing
Learn how to match color, lighting, and perspective to create realistic composites.

Match background color
Environmental color plays a huge role in the color of a person’s skin. Outside on a sunny blue-sky day, your skin will take on some blue color. Sitting in a dimly lit restaurant, your skin will look more orange. When compositing your subject into a new environment, matching color is very important. You will learn how to analyze and color correct your subject’s skin to match the background.
RAW images included
Intro to studio compositing includes 16-bit RAW images of each subject – giving you more power to properly adjust color and exposure. Learn how to edit RAW images using ACR (Adobe Camera Raw). Edit RAW images side-by-side your background to match color and light perfectly.
3D lighting diagrams
3 included 3D lighting diagram videos give you an in-depth look into the studio lighting we used for each image. Experience our lighting diagrams from every angle to clearly see and understand how we use studio strobes to match background light.
Remove white edges
Halos, fringes, and white edges are a common problem for composite images. You try to cut your subject perfectly but can’t seem to get rid of those white edges. In this tutorial you will learn a fool-proof technique for removing white edges quickly and accurately.


Reviews
New & Popular Tutorials


Training Site in
the World
Tutorials!
Ratings
and Counting
Subscribers
An other great tutorial! I learned a lot of techniques which will help me in my composites. I am also doing things like Aaron did when first starting, i don’t have a studio and everything happens in my room. But with the right compositing techniques, you can eliminate the drawbacks of lacking a studio. A well lit room with not much furniture is a good studio! I want to say more, but at the same time not give spoilers. Just one thing i’ll mention, the technique of color correcting skin is really great, something i never thought of doing, and really easy to do. Thank you for awesome tutorials!
I’ve actually done other pro compositing tutorials before this one, but with my new monthly subscription, I decided to give this one a shot. I was pleasantly surprised to learn a handful of new tips that significantly improved my compositing even more! (Although I should NOT have been surprised… this is Phlearn, after all… the best in the business, IMHO!
This series of composites was very helpful as it provided me with additional techniques for compositing 🙂 I used the young lady from the ocean composite, a stock image of Vestrahorn iceland, and an image I took a few years back (dog).
This tutorial has really answered a lot of questions for me about how to get started with compositing. The explanation of how to match the lighting and camera angles was explained in a way that made it easy to understand. I’m still a little confused on how to guess the focal length for each image, but I am sure that I will get it with more practice. Thank you Aaron and team for another AMAZING tutorial. I have spent a lot of money on this site, but it was money well spent.
On a side note… I would love to see an in depth pro tutorial that is only focused on studio lighting. Maybe, types of lights, wattage, when to use a soft box vs. a cone, etc… Would be great for a beginner like me who feels lost with this topic.
I think I bought this tutorial just to see you studio. Amazing ! ( Intro clip / 9:02 to 9:18 ). Envy…. But seriously, as always – great stuff !
Thanks Aaron and thanks to the staff of Phlearn. Great tutorial as always! If I think that using the birthday coupon and $ 20 in addition for the newsmail I bought it for only $ 4 I’m super happy. Viva Viva Phlearn, AAron and his friends. Kisses , Besos !
I like this tutorial because for me it’s pushing the boundaries of my capabilities without overwhelming me. Thank you Aaron and the team.
question: on your videos on the beach and on the pier; could you please tell me what type of lights you use and at what power? I know most of thel have a reflectoron them, but not thedone representing the sun………what lights do you use and with what setting thanks.Debbie Morris
I just bought this pack and I already feel like I’m getting better at my photoshop compositing skills. I really wish I would have discovered these tutorials early in my college years. It would have made my graphic design classes much easier. Thank you for sharing your skills with everyone. Can’t wait to buy more of these tutorials.
This is an outstanding tutorial with 3 different images, each one builds on the previous one. If you’ve ever wanted to learn how to cut someone out of an image and place them in a different one, these tutorials will answer all your questions. Plus your new image will not look like it was just a cut and paste type of work that you learn on u Tube. I highly recommend this Pro Tutorial.
Hello,
Do your tutorials work with PS 6 ?
Regards.
D.
The tutorials are very good.
good
Its good
As always… Thank you for another great tutorial! Would like to see some more after effects ones in the near future