
Download Assets
description
Discover the incredible power of Photoshop’s new cloud-based Select Subject tool! We’ll show you how this significant update effortlessly isolates complex subjects in challenging images, offering stunningly accurate selections compared to the traditional on-device processing.
Go PRO:
New to Photoshop? Explore our PRO tutorial Photoshop Fundamentals: Aaron’s Top 10 Essential Tools & Techniques . Discover mind-blowing tricks for selecting, removing, retouching images, and more!
Image Source
- Rada Aslanova
- Anya Juárez Tenorio
- Bruna Corrêa
- Nguyen Kha
Images sourced from Pexels.
Share


AFTER
BEFORE
Your Guide to Cloud Select
Photoshop’s Select Subject Tool has received a significant upgrade, moving beyond on-device processing to leverage the power of the cloud. Unlike the previous version, which processed selections locally, this new iteration offers the choice to utilize cloud processing for potentially more accurate and detailed results, especially with challenging images. This guide will walk you through the steps to harness this enhanced feature.
Getting Started
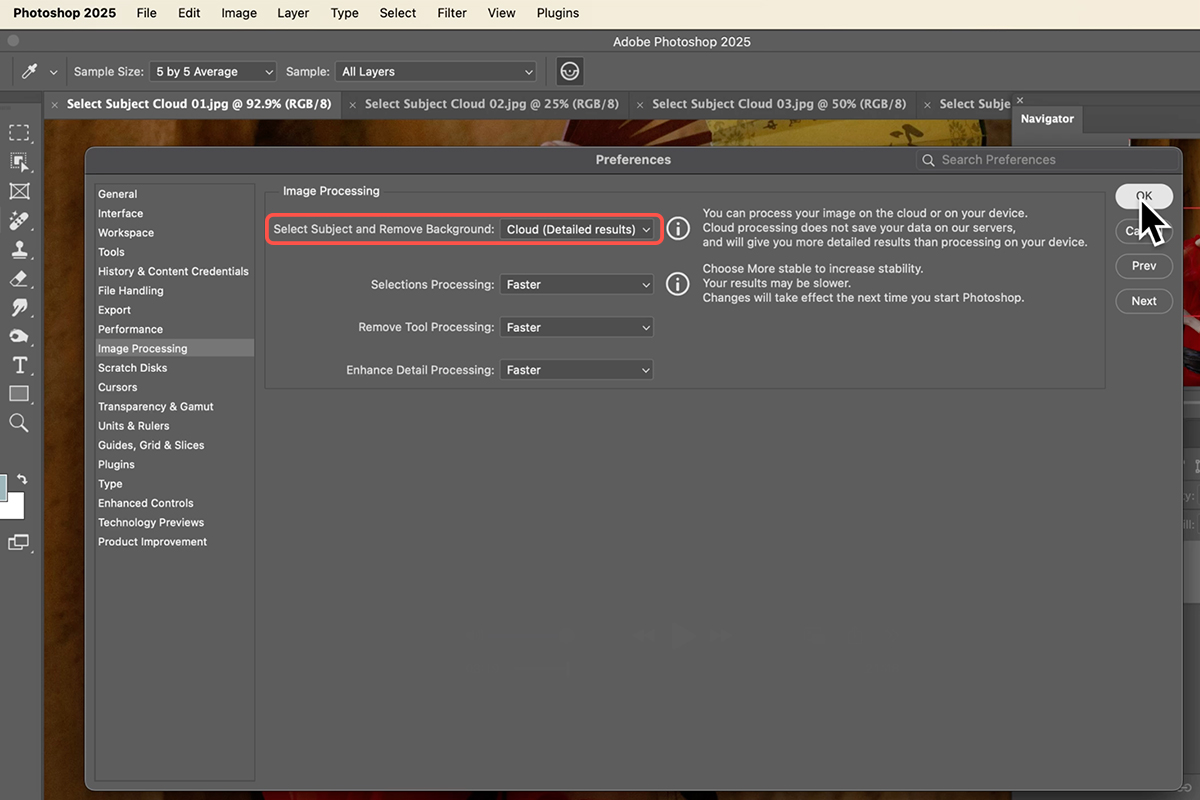
To take advantage of cloud processing, you’ll first need to enable it within Photoshop’s settings:
1. Navigate to Photoshop > Settings > Image Processing. Here, you will find options for both “Select Subject” and “Remove Background”.
2. Choose Cloud for “Select Subject”.
3. Click OK to save your changes.
Alternatively, when using the Object Selection Tool, you can find a “Select Subject” dropdown in the top bar, allowing you to choose between “Device” and “Cloud” processing on a per-image basis.
Utilizing Select Subject
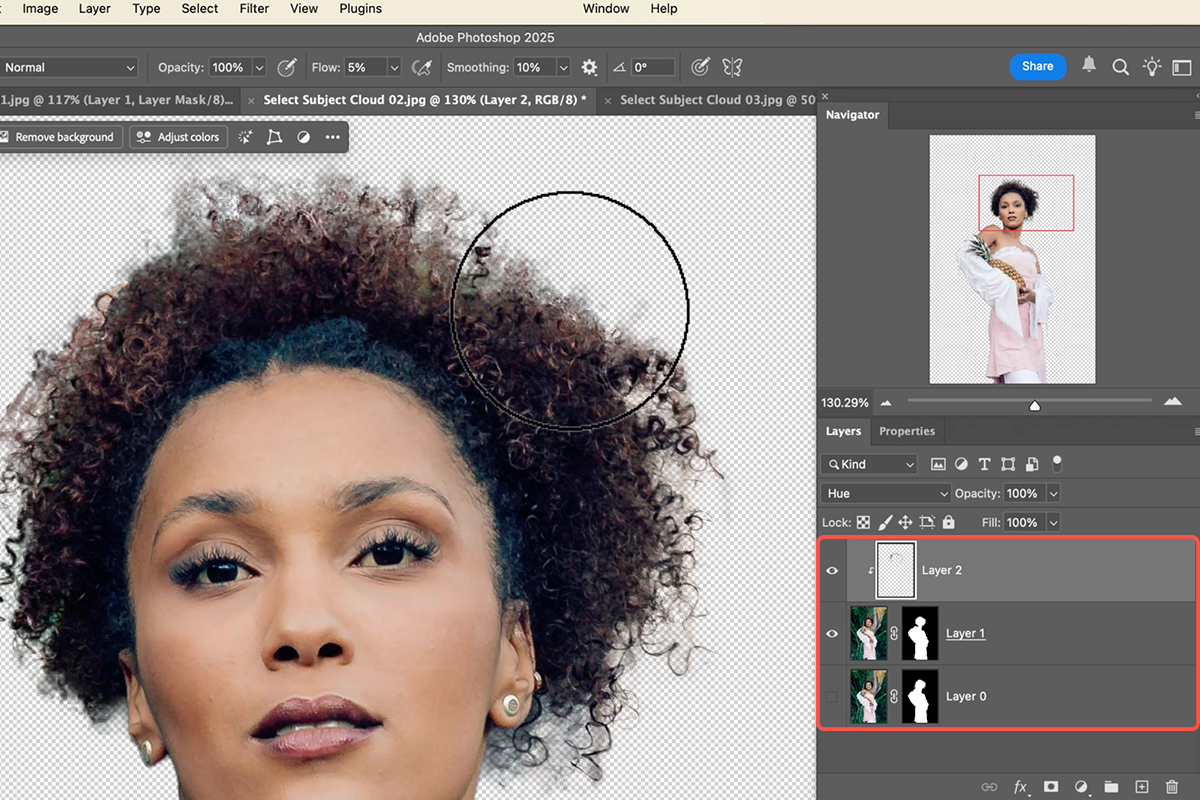
With cloud processing enabled, you can now use the “Select Subject” feature. One common method is via the contextual taskbar, where a “Select Subject” button may appear. However, the Object Selection Tool is highlighted as a preferred method, offering a direct “Select Subject” button with the option to choose processing location. After selecting your desired processing (cloud recommended for optimal results), simply click “Select Subject”. Photoshop will then analyze your image and generate a selection of the main subject. For further refinement, double-click the layer mask and use the Refine Edge Brush Tool to clean up any imperfect areas, particularly around hair or complex edges.
Advanced Refinements
For intricate selections, especially with hair, follow the steps below.
1. After creating an initial selection and mask, duplicate the masked layer (Keyboard Shortcut “Ctrl/Cmd + J”) and merge the copies (Keyboard Shortcut “Ctrl/Cmd + E”).
2. Then, using the Selection Brush Tool, make a selection of a well-defined area of the hair and duplicate it.
3. Use the Move Tool (Keyboard Shortcut “V”) to position this duplicated hair over less defined areas.
4. You can further refine its appearance using Edit > Transform > Warp (Keyboard Shortcut “Ctrl/Cmd + T”) and adjust the layer blend mode (e.g., “Darken”) for a more seamless integration.
5. Add a layer mask to hide any unwanted portions.
That’s a wrap on exploring the cloud-powered “Select Subject” in Photoshop. With this guide, you’re ready to leverage its enhanced accuracy for smoother, more efficient image editing workflows. Remember, if you don’t like the selection you can always revert to device processing or refine the mask for perfect results.


