BEFORE
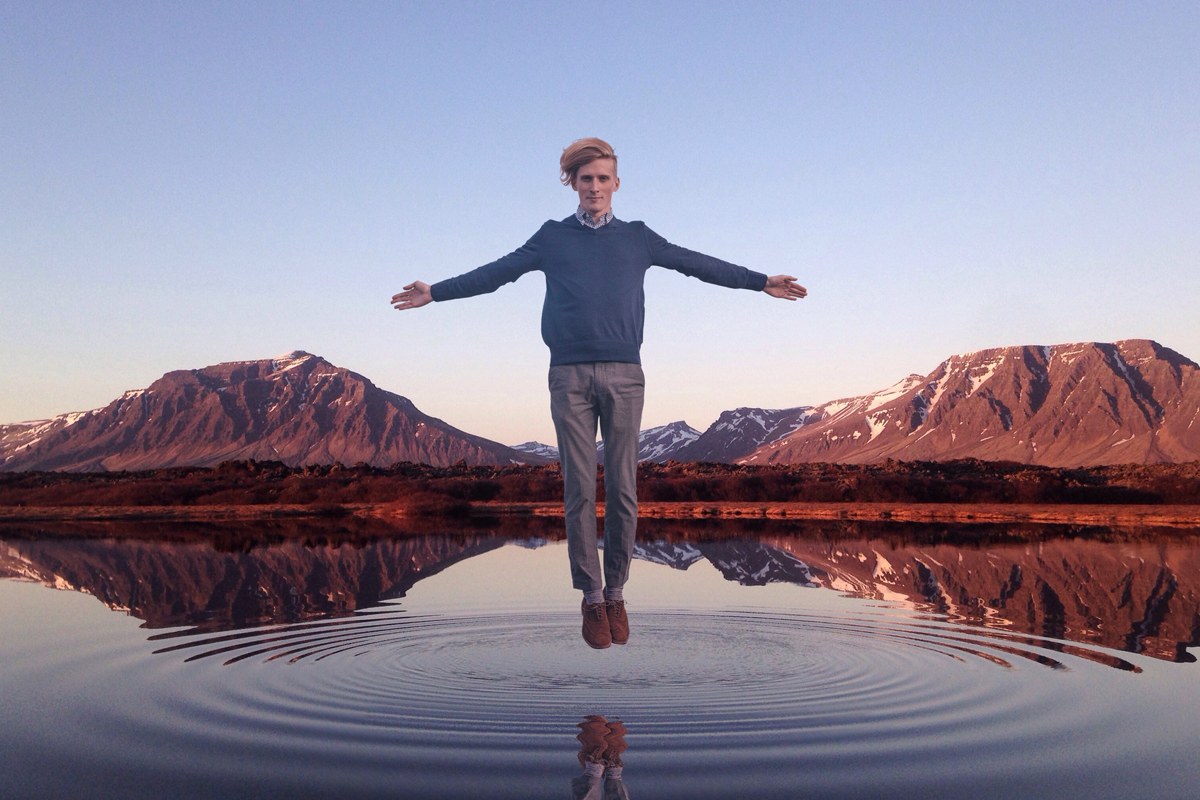
AFTER
Download Sample Images
Click the link below to download the sample images and follow along with this tutorial.
DownloadTutorial Description
Create epic landscapes and fun conceptual shots with reflections in Photoshop! Learn how to make a subject levitate over water, add their reflection below, and then use a Displacement Filter to match the rippled texture. Follow along and get some useful tips for compositing, coloring, and recreating textures.
Preparing the Reflection
To make a reflection, you’ll need: 1.) a background image with a reflective surface, and 2.) a subject or object to mirror in that surface. In our example, we’re using a photo of a man (already cut out from the background) and a mountain landscape with a lake in the foreground. We’ll be placing the man into the landscape, making it appear as if he’s levitating over the lake. Then we’ll add his reflection in the water below while matching the existing ripples and texture.
Once you’ve positioned the subject in the background image, Duplicate the subject layer. We’ll use the copy to create the reflection below. Use the Transform Tool to vertically flip the copied subject and then position it below the original subject layer. Pay close attention to the spacing of the reflection! Estimate the distance between the subject and the surface of the water and then match that distance between the surface of the water and the reflection below.
Before we get into matching the reflection to the texture of the water, let’s first match the color. Create a new Layer above the reflection, Sample a color from the water, and then use the Brush Tool to completely paint over the reflection. Right-click on the paint layer and select Create Clipping Mask. This will make the painted areas only appear over the reflected subject. Then change the Blending Mode of the paint layer to Color and adjust the Opacity until you think it looks realistic. If there are other reflections in the image, like the mountains in our example, use those color differences as a guide.
The Displacement Filter
With the reflection in place, we’re ready to use a Displacement Filter to add realistic shape and texture. Start by hiding every Layer except for the background Layer. Go to File, Save As, and save the background Layer out as a separate PSD. The Displacement Filter will analyze this PSD and use it to apply textures to any Layer that we choose.
Now we just need to fill in the transparent pixels around our reflection Layer–this will help the Displacement Filter be more accurate when comparing the background PSD to our cut-out reflection Layer. Create a Solid Color Fill Layer and place it behind the reflection Layer (lower the Opacity a bit so you can see the rest of the image). Select the Solid Color Fill Layer and the reflection Layer in the Layers Panel, right-click and select Convert to Smart Object. This will allow the Displacement Filter to recognize the Fill Layer and reflection as a single Layer without merging them together.
We’re ready for some displacement! Select the new reflection Smart Object and go to Filter, Distort, and then to Displacement. The Displacement Filter will take a PSD (like the background PSD we created earlier), analyze the textures from it, and apply a texture effect to the Layer we’ve selected (the reflection Layer). You may need to play with the settings a bit to get a realistic effect. In our example, we want to match the reflection to the ripples in the water. We ended up at the following settings:
Horizontal Scale: 25
Vertical Scale: 2
Displacement Map: Tile
Undefined Areas: Repeat Edge Pixels
And uncheck “Embed File Data in Smart Object”
If you’re following along, you should end up with a ripple effect on the reflection that closely matches the ripples of the background. With the Displacement Filter complete, double-click on the reflection Smart Object and hide the Solid Color Fill Layer.
Finishing Touches
Our image is almost done! To wrap it up, try adding some Motion Blur and Noise to the reflection. Motion Blur will make the effect softer and more photorealistic and adding Noise that matches the original background will help it all look like it was captured in camera.