Download Sample Images
Click the link below to download the sample images and follow along with this tutorial.
DownloadTutorial Description
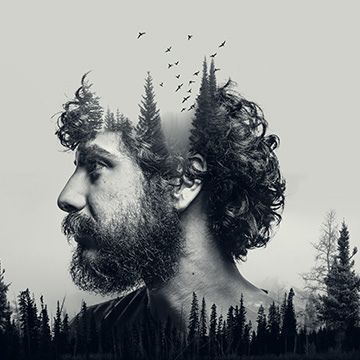
Since the earliest days of photography, people have been fascinated by combining and blending exposures. Photoshop and digital photography have only made this effect easier to achieve, allowing us all to create beautiful and powerful effects in almost no time at all!
Learn how to create a double exposure effect in three minutes or less using the magic of Photoshop! Follow along as we put our subject on a pure white background using Levels and then blend two images together with Blending Modes.
If you love effects like this, check out How to Master Double Exposure in Photoshop or try How to Master Blending Modes in Photoshop to learn even more about the power of Blending Modes.
Subject on White
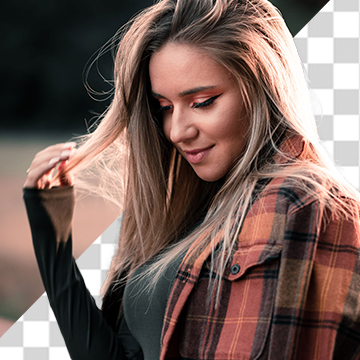
For this particular approach, we’ll want a subject that’s on a pure white background. The image we’ve chosen to use has a subject that was photographed in front of a white seamless, but the background appears as a light gray in the photo. If you ever have a relatively light background that you want to turn into a clean white background, try Levels!
Start by converting the Layer with the subject into a Smart Object. This will allow us to both work non-destructively and make adjustments to our Levels Adjustment at any time.
Once the Layer has been converted into a Smart Object, open the Levels Adjustment dialog. Then grab the right slider which represents the highlights in the image and gradually move it to the left. You’ll notice that the lighter areas of the photo will start to appear lighter. Move it until the light grays of the background are almost completely white. We’ll take care of any dark spots later!
Blending Modes
With our pure white background ready, we can turn to Blending Modes to create the double exposure effect. Makes sure that the Layer with the subject is on top of the Layer(s) that you want to combine. Then, with the subject Layer selected, change its Blending Mode to Screen.
The Screen Blend Mode will make the lighter areas of a Layer visible, while blending the darker areas with the underlying Layers. You should see the background Layer become visible underneath the subject.
To wrap it up, you can reposition each Layer until you have a composition that you like. If you want to get even more control over the effect, simply create a Layer Mask on the underlying Layer and paint black to make the subject more visible and to hide any areas of the background Layer.