
Download Assets
This tutorial includes 4 sample images, 2 sample PSDs and 1 PDF guide. Downloads are free with a PHLEARN account.
- Download the sample images and PSDs from every free tutorial on PHLEARN
- New free tutorials published every week
- One free account — sign up once, then download anything
Free PDF Guide · 4 Pages
This Tutorial as a Step-by-Step PDF
Every step from the video in order: the blend mode and opacity for each texture, Hue/Saturation and Colorize, inverting a dark texture for Screen, masking the light textures, and the Camera Raw color grade on an Apply Image layer. Keep it next to your keyboard.
description
Add textures to any photo in Photoshop without flattening a thing — blend modes, inverted layers, masked light textures and a Camera Raw grade to tie it together.
Enjoying This Free Tutorial?
We publish a new free tutorial every week, each one with sample images and PSDs you can download and follow along with. Sign up and they land straight in your inbox, along with early word on sales, events and subscriber-only offers.
Image Source
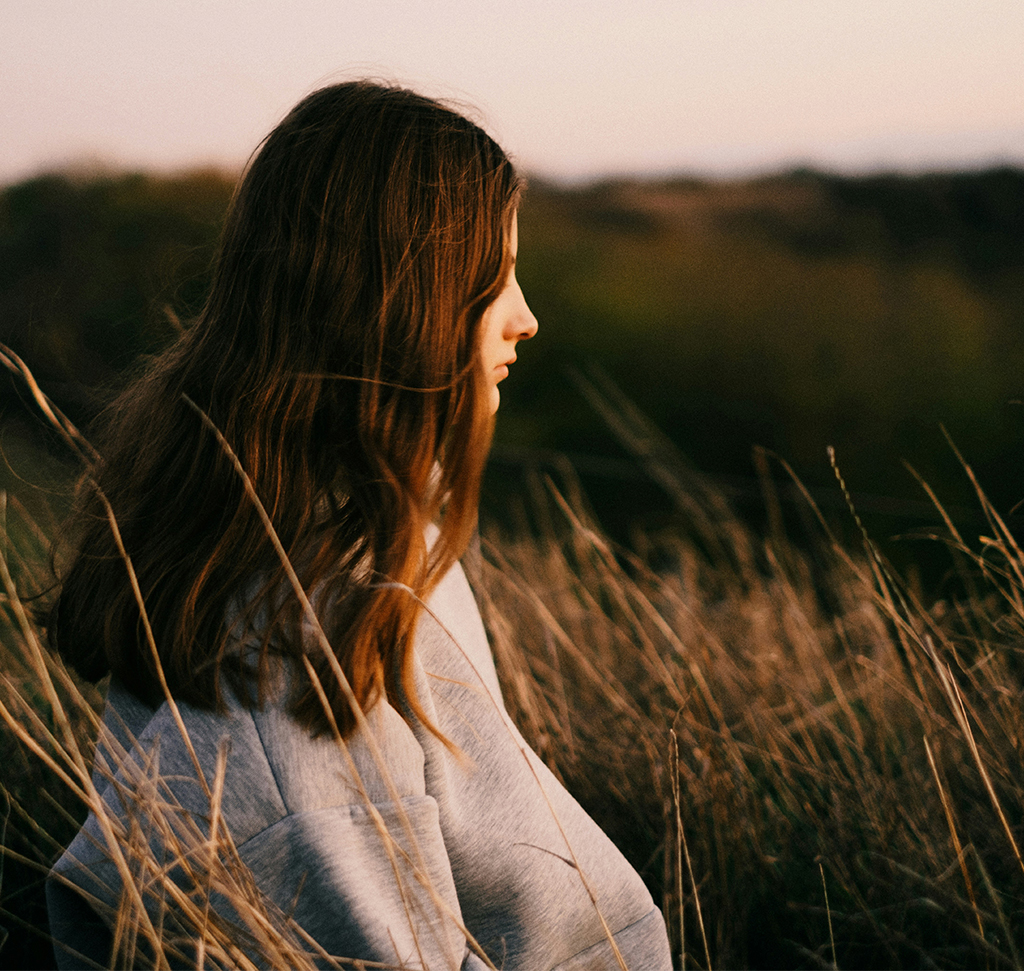
Photos by Alina Chernovolova, Thomas Lefebvre, Kiwihug and Heli Dima via Unsplash
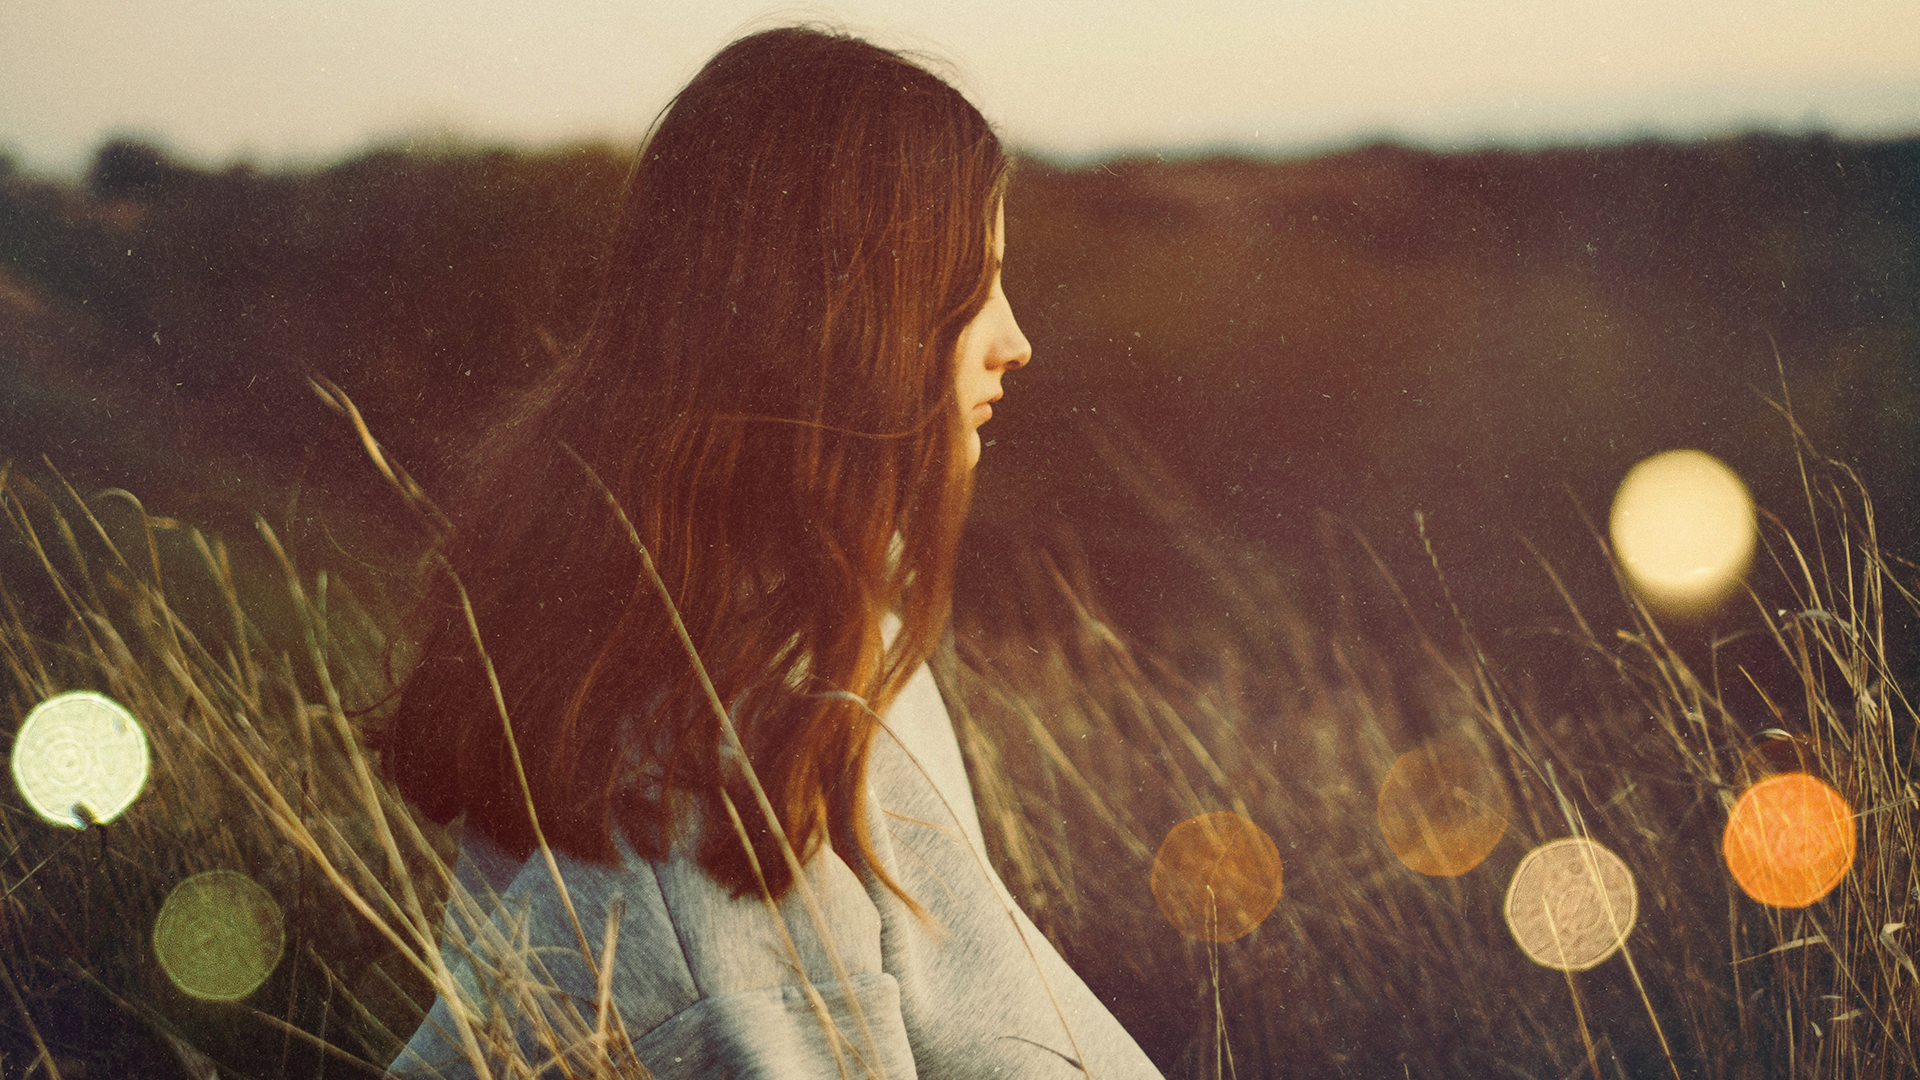
Add Textures to a Photo Without Flattening Anything
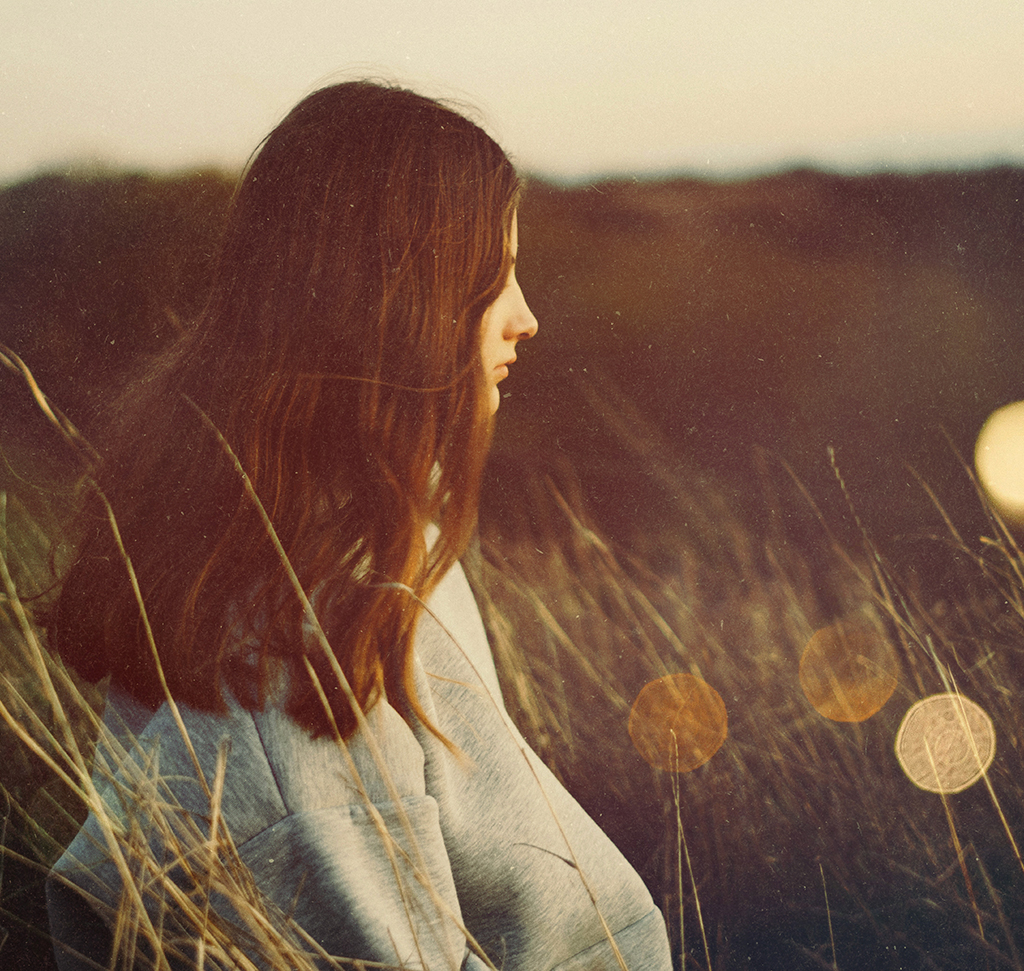
Texture is what stops a clean digital photograph from looking sterile. Grain, paper, light leaks, dust on glass — they give an image a surface, and a surface is what makes it feel like an object rather than a file.
The reason most people avoid it is that texture work tends to end up baked in and impossible to adjust. It doesn’t have to. This whole workflow — blend modes, an inverted layer, a masked light texture and a Camera Raw grade — stays fully editable from the first drag to the last slider.
Which Blend Mode, and Why
Lighten and Linear Dodge Keep the Bright Parts
Both discard dark pixels and keep light ones. That’s what you want when the texture’s interesting content is the highlights — scratches, light leaks, dust catching the sun.
Screen Does the Same Thing More Softly
Screen is the gentler member of that family. Linear Dodge is the most aggressive. If Linear Dodge blows out your highlights, drop to Screen before you start pulling opacity down.
Normal Is Almost Never the Answer
On Normal the texture simply covers the photo. Every blend mode in this workflow exists to let one image see through another, which is the whole difference between texture and a sticker.
Drop In Your First Texture
-
Drag the Texture File Onto Your Document
Straight from Finder or Explorer. It arrives as a Smart Object, which is exactly what you want — scale it as many times as you like without degrading it.
-
Scale to Fit With Free Transform
Press Cmd/Ctrl + T and size it to cover the frame. Cover fully; a texture that stops short leaves an edge that gives the whole thing away.
-
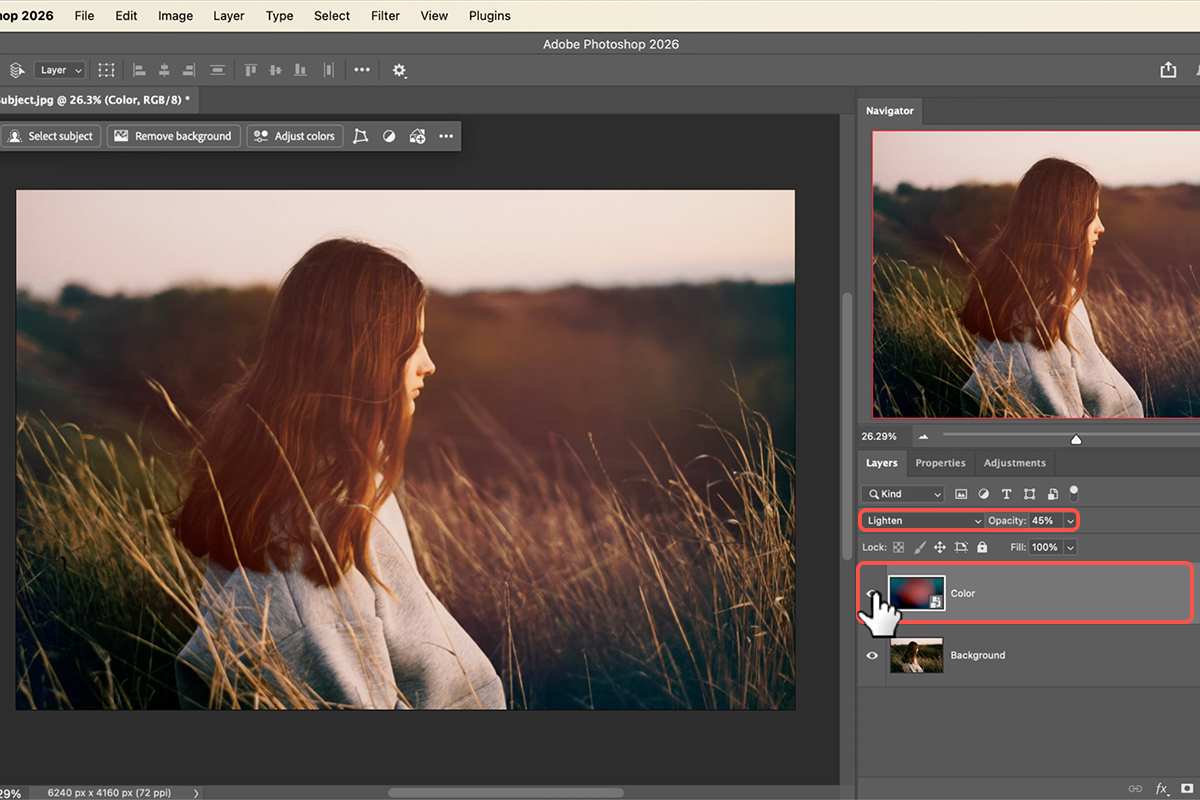
Switch the Blend Mode to Lighten or Linear Dodge
Immediately the texture stops sitting on top of your photo and starts interacting with it. The highlights of the texture combine with the highlights of your subject.
-
Pull the Opacity Back
The first setting is almost always too strong. Drag opacity left until the texture reads as part of the photograph rather than an effect applied to it.
Invert a Texture That’s the Wrong Way Round
Plenty of good textures are dark marks on a light background — ink on paper, cracks, scanned scratches. Those are useless to Screen and Lighten as they are, because the part you want is the dark part.
-
Invert the Layer
Cmd/Ctrl + I. Dark marks become light ones and the background flips to black — which is precisely the shape Screen wants.
-
Set It to Screen
The black background drops out completely and only the marks survive. A texture that did nothing a moment ago now works.
-
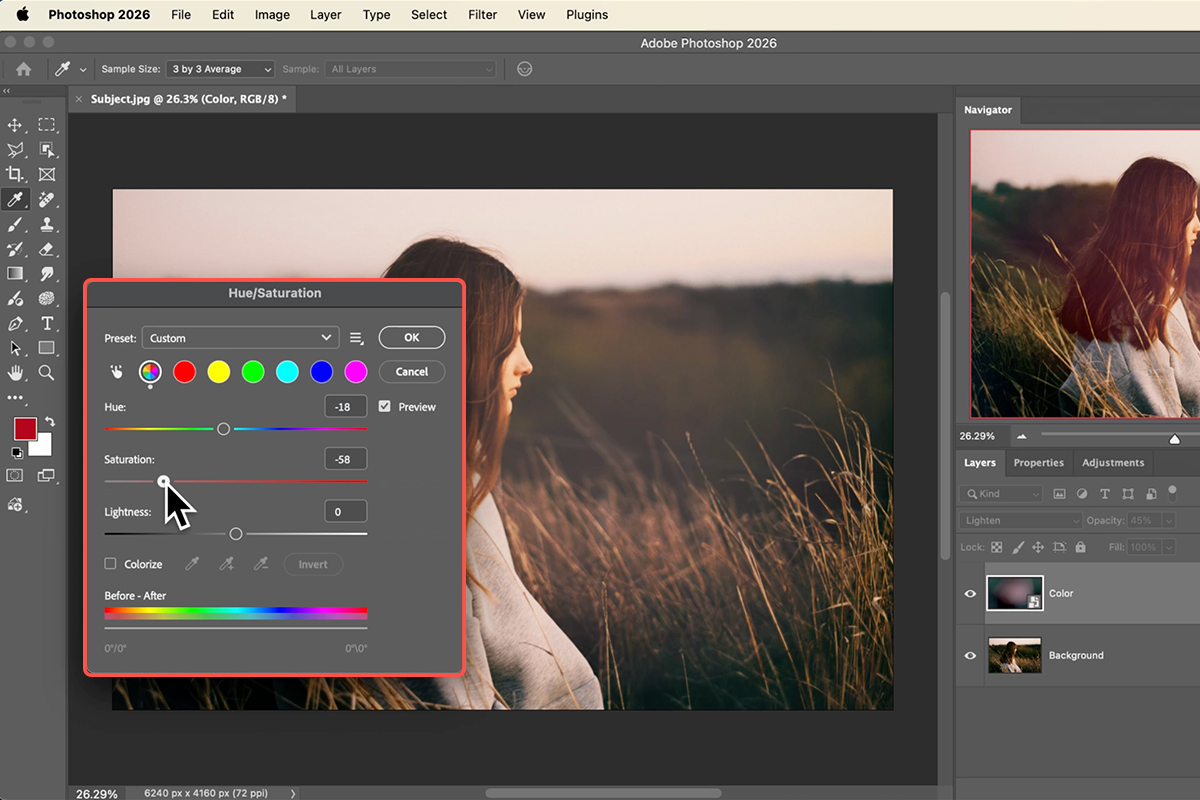
Colorize It to Match the Photo
Press Cmd/Ctrl + U for Hue/Saturation, tick Colorize, and move the Hue slider until the texture sits in the same colour family as the image. A grey texture over a warm photo always looks stuck on; matching the hue is what dissolves it in.
Put the Light Exactly Where You Want It
Light textures — leaks, flares, hazy glows — are the ones most likely to land in the wrong place, usually across a face. The fix is a mask, not a delete.
-
Drag In a Lighting Texture and Set It to Screen
Same principle: light adds, so Screen is the correct mode. Position it roughly where a light source would plausibly be.
-
Add a Layer Mask and Paint With Black
Click the Layer Mask icon, press B for the Brush, set the foreground to black, and paint over anything the light shouldn’t be touching. Use a soft brush at low flow — a hard edge on a light texture is instantly visible. This is how you keep the glow off the eyes while the rest of the frame still gets it.
Grade Everything Together at the End
At this point you have a photo and two or three textures that are still visibly separate things. The final grade is what makes them one image.
-
Stamp Visible Onto a New Layer
Make a new empty layer and use Image > Apply Image to merge everything visible into it. Your original layers stay untouched underneath.
-
Convert for Smart Filters
So the grade you’re about to apply stays adjustable. One right-click, and everything after it is reversible.
-
Colour Grade in Camera Raw
Shift + Cmd/Ctrl + A, then the Colour Grading tab. Tint shadows, midtones and highlights so photo and texture share one palette. This is the glue — more than any single blend mode, a shared grade is what convinces the eye that everything was captured together. Our free guide to colour grading in Camera Raw covers those wheels in detail.
The Usual Mistakes
Leaving Everything at 100%
Texture at full strength reads as a filter. Almost every layer here wants its opacity reduced, often a long way.
Deleting Instead of Masking
Erasing part of a texture is permanent and you will change your mind. A black brush on a mask does the same job and can be undone by painting white.
Skipping the Colorize Step
A texture whose colour doesn’t belong to the photo stays visible as a separate layer no matter how low the opacity goes.
Grading Before Adding Texture
Then the texture arrives ungraded and sits outside the look you just built. The grade goes last, over everything.
The Principle Worth Remembering
Every decision in this workflow is a version of the same one: don’t destroy anything you might want back. Smart Objects instead of flattened pixels, blend modes instead of erasing, masks instead of the Eraser, Smart Filters instead of baked adjustments.
The payoff isn’t tidiness for its own sake. It’s that texture work is entirely a matter of taste, and taste changes as the image comes together — the amount that felt right when you dropped the first layer in is rarely the amount that’s right at the end. A non-destructive file lets you act on that; a flattened one doesn’t.
Build One Yourself
Drag the texture in, Free Transform to fit, Lighten or Linear Dodge, drop the opacity, invert anything that’s the wrong way round and Screen it, Colorize to match, mask the light off the face, then stamp visible and grade in Camera Raw. Download the free sample images and PSDs and rebuild it exactly — then try it on a clean studio shot of your own, which is where added texture does the most. To go deeper across the whole application, our PRO Photoshop Learning Path is where to go next.
Quick Reference: Keys, Menus and Settings
- Place a textureDrag it in, drag the W or H value to scale it over the canvas, click the checkmark
- Try blend modes fastClick the blend mode menu and press the up and down arrows; lower Opacity to taste
- Change a texture’s colorCmd/Ctrl + U (Image > Adjustments > Hue/Saturation); Colorize to pick one hue
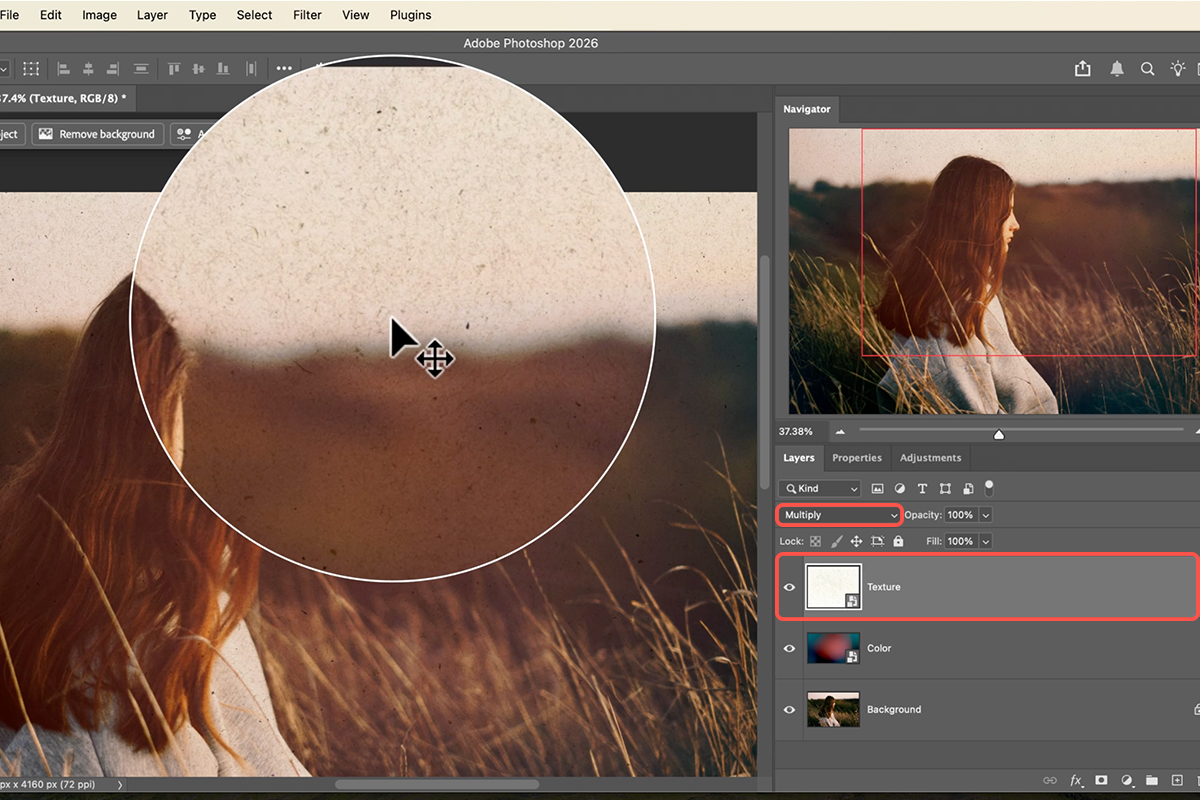
- Dark marks on lightBlend mode Multiply
- Light marks insteadCmd/Ctrl + I to invert, then blend mode Screen
- Light and star texturesScreen; add a layer mask and paint black (or Subtract from Mask) where a light covers the face
- Rotate while placingDrag outside a corner; hold Shift for 15° steps
- Color grade it allNew layer, Image > Apply Image, Filter > Convert for Smart Filters, Filter > Camera Raw Filter > Color Grading, keep the markers near the center
Mac first, then Windows where they differ.

Free Downloads
Follow Along on the Same Files
Get all 4 textures, both PSDs (including the drag-and-drop template) and the PDF guide, and build the same look on your own photo. Free with a PHLEARN account.
Photo Textures: Common Questions
How do I add a texture to a photo?
Drag the texture onto the photo, scale it to cover the canvas, then change its blend mode. The blend mode is what mixes the texture with the photo; opacity controls how much.
Which blend mode should I use?
It depends on the texture. Click the blend mode menu and step through with the arrow keys until one looks right. Light textures on dark usually want Screen or Lighten; dark marks on light want Multiply. The video uses Lighten for the color texture and Screen for the lights.
The texture’s color doesn’t match my photo. Can I change it?
Yes. Press Cmd/Ctrl+U for Hue/Saturation on the texture layer and move the hue slider. For a single color, turn on Colorize and set the hue, saturation and lightness. It only affects that layer, and it stays editable as a Smart Filter.
What if the texture is the wrong way round?
Invert it. A texture of dark specks on white works with Multiply; press Cmd/Ctrl+I and it becomes light specks on black, which works with Screen. Same file, opposite result.
A light is sitting on my subject’s face. How do I move it?
Add a layer mask to that texture and paint black over the part you don’t want, or click Subtract from Mask in the task bar, which does the same thing. The texture stays everywhere else.
How do you tie all the textures together?
With a color grade on top. Make a new layer, run Image > Apply Image, convert it for Smart Filters and open the Camera Raw Filter. In Color Grading, nudge the midtones and shadows markers a little; keep them near the center or the color gets strong.
What’s in the PSD?
The finished stack, set up so you can drag your own photo in and the textures land on top automatically. Every texture, invert and adjustment can be turned off and on.
Does this use AI?
No. Blend modes, Hue/Saturation, masks and a Camera Raw color grade.
Are the sample files free?
Yes, with a free PHLEARN account. You get all 4 textures, both PSDs and the PDF guide.
Master Photoshop, Lightroom and Photography
Join PHLEARN PRO for $12.99 a month or $99.99 a year. Cancel anytime, with a 100% money-back guarantee.





