

Download Sample Images
Download Assets
This tutorial includes sample images and a PDF guide. Downloads are free with a PHLEARN account.
- Free sample files with every tutorial on PHLEARN
- New tutorials published every week
- Unlimited downloads with your free PHLEARN account
description
2020 Edition
This lesson is from the original 30 Days of Photoshop. Photoshop has changed a great deal since — there is an updated version of this lesson in the 2025 Edition: Free Transform in Photoshop, Day 12.
Things get interesting when you start to work with multiple photos, text, and logos in a single Photoshop project. Learn how to transform, scale, rotate, and align multiple elements to create the perfect composition and bring yours design ideas to life.
This is Day 8 of our 30 Days of Photoshop series. Follow along with all 30 episodes as we explore the the magic of Photoshop together!
Continue Watching 30 Days of Photoshop
Enjoying This Free Tutorial?
We publish a new free tutorial every week, each one with sample images and PSDs you can download and follow along with. Sign up and they land straight in your inbox, along with early word on sales, events and subscriber-only offers.
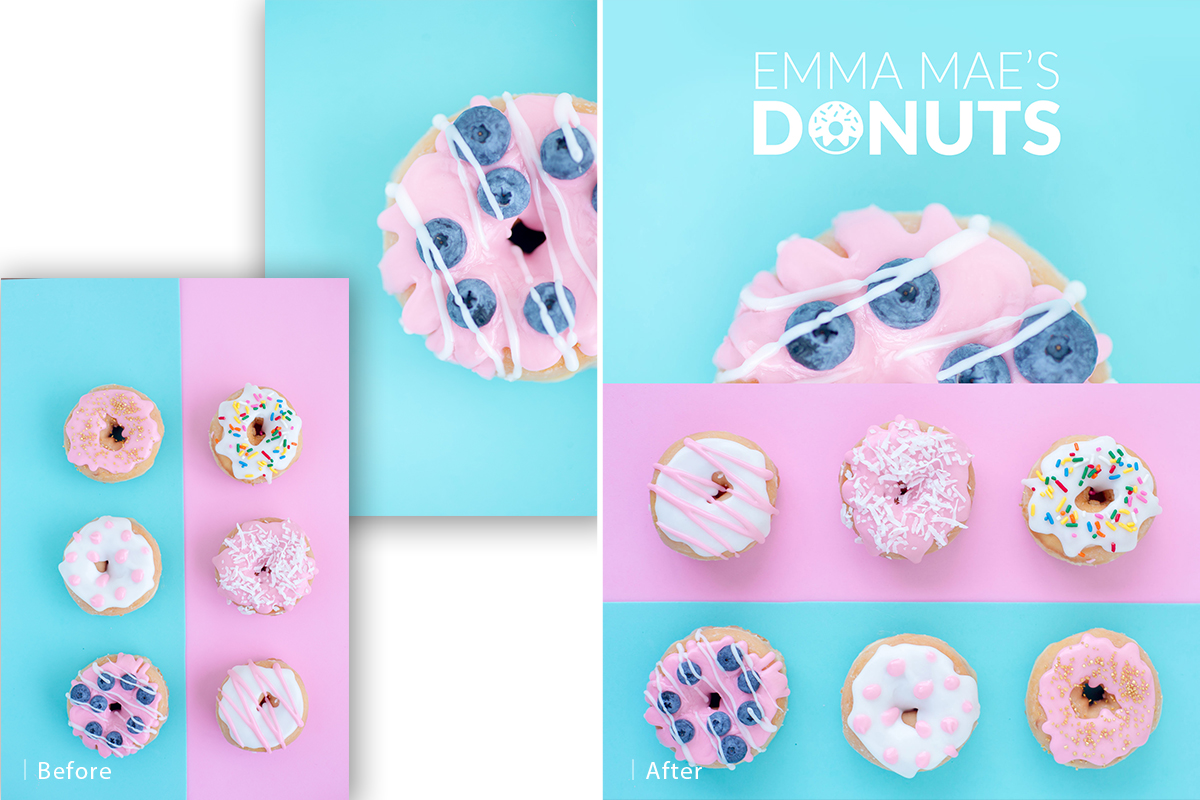
Transform, Scale, Rotate and Align in Photoshop
Any time you combine more than one element in a document, whether photos, graphics or type, you need to move, scale, rotate and line them up precisely. Nearly all of that happens through Free Transform and the alignment controls in the Move Tool. In this lesson you will use them to build a small donut-shop flyer, complete with a logo where a real donut stands in for a letter, and see why measuring and aligning beats eyeballing every time.
Set Up the Document
-
Combine the Assets
Open the sample files. With the Move Tool (V), drag each donut photo and the donut cut-out into one document and close the others. Press F for full screen.
-
Crop a Little Larger
Press C, choose a square ratio, hold Alt/Option and drag a corner outward to give yourself more canvas. Make sure Delete Cropped Pixels is unchecked, then commit.
-
Turn Off Auto-Select
In the Move Tool’s Options bar, uncheck Auto-Select. With many small or transparent layers it is easy to grab the wrong one. Click the layer you want in the Layers panel instead, or hold Ctrl/Cmd and click on the canvas to select a layer on demand.
The Free Transform Controls
-
Open Free Transform
Select a layer and press Ctrl/Cmd + T. Everything in this lesson starts from this shortcut. Press Esc to cancel or Enter to commit.
-
Move the Reference Point
The small crosshair in the center is the reference point. Drag it anywhere, even a corner, and rotation and scaling now pivot around that spot. The grid at the far left of the Options bar sets it to a corner or edge precisely.
-
Position, Size, Angle and Warp
The Options bar holds X and Y position, Width and Height (linked by default; unlink the chain to scale them separately), an Angle field (type 45 for an exact rotation, or drag just outside a corner to rotate freely), horizontal and vertical skew, and a Warp button that lets you push individual corners of a mesh.
-
Convert to Smart Objects First
Duplicate a photo with Ctrl/Cmd + J, convert one copy to a Smart Object (right-click > Convert to Smart Object) and leave the other as a regular layer. Scale both down to a speck and back up again. The regular layer is destroyed; the Smart Object is untouched, because Photoshop transformed a reference rather than the pixels. Delete the regular copy and convert every photo you plan to transform.
Lay Out the Photos
-
Flip and Rotate
Press Ctrl/Cmd + T, right-click and choose Flip Horizontal or Flip Vertical. Hold Shift while rotating to snap in 15-degree increments.
-
Use a Guide to Level a Line
Go to View > Rulers, then drag down from the top ruler to create a guide. Transform the photo until the row of donuts runs exactly along the guide and scale it (holding Shift) so the margins left and right are equal. Drag the guide back into the ruler to remove it, or use View > Clear Guides.
-
Mask an Uneven Edge
Where an edge isn’t perfectly horizontal, add a layer mask, select the offending strip with the Rectangular Marquee (M), and press Shift + Delete to fill it with black. Straight lines matter in a layout.
-
Place the Second Photo
Transform and rotate the second donut photo into the remaining space with Shift held, again checking that the margins match.
-
Extend the Canvas and Fill It
Press C, clear the ratio and drag the top edge up to make room for type. To fill the new area, create a new layer, press B for a large soft brush, Alt/Option-click to sample the turquoise near the edge and paint it in, resampling as the tone changes so the fill blends seamlessly.
Build and Align the Logo
-
Add the Main Word
Press T and type “DONUTS.” In the Properties panel (or the Character panel in older versions) set the color to white, choose a font and pick its heaviest weight, then enlarge it.
-
Align to the Whole Document
Press Ctrl/Cmd + A to select all, switch to the Move Tool and the alignment buttons appear in the Options bar. Click Align horizontal centers to center the type on the canvas. Alignment always works relative to the active selection; make a selection first, then align.
-
Move in a Straight Line
To move the type up without losing its horizontal alignment, hold Shift while dragging so it can only travel straight up and down.
-
Swap a Letter for the Donut
Press Ctrl/Cmd + I on the donut cut-out to make it white. Add a layer mask to the type layer, select the “O” with the marquee and fill the mask with black to hide it. Then select from the top of the letters to the bottom with the marquee, select the donut layer, and align it to the vertical center of that selection.
-
Scale From the Center
Press Ctrl/Cmd + T on the donut and hold Shift + Alt/Option while dragging so it scales proportionally from its center and stays aligned. Use marquee selections to check it matches the letter height and sits evenly between the D and the N. Compare this with simply eyeballing it: the measured version has visual harmony the guessed one lacks.
-
Add a Secondary Line
Type the shop name above in a lighter weight of the same font and a smaller size. Select all and align it to the horizontal center as well. Different weights of one font pair far more reliably than two unrelated fonts.
-
Group and Align Together
Ctrl/Cmd-click the word and the donut layers and press Ctrl/Cmd + G so they move as one. Group that with the secondary line as “Logo.” To align two layers to each other rather than to the canvas, select both with no active selection and use the same alignment buttons.
-
Balance the Margins
Select all and center the logo group. Then drag a marquee from the top of the canvas to the top of the nearest donut photo and align the logo to that selection’s vertical center so the spacing above and below it is even.
When every element is measured and aligned, the design feels settled and cohesive. When it isn’t, viewers may not be able to say why, but they will feel that something is off.
Key Takeaways
- Ctrl/Cmd + T is the gateway to moving, scaling, rotating, skewing and warping.
- Convert layers to Smart Objects before heavy transformations to avoid resolution loss.
- Shift constrains rotation to 15 degrees and movement to straight lines; Alt/Option scales from the center.
- Make a selection first, then use the Move Tool’s alignment buttons to align to it.
- Guides, rulers and marquee selections replace guesswork with measurement.
Related Tutorials
Master Photoshop, Lightroom and Photography
Join PHLEARN PRO for $12.99 a month or $99.99 a year. Cancel anytime, with a 100% money-back guarantee.





