
Download Assets
This tutorial includes 1 Photoshop brush. Downloads are free with a PHLEARN account.
- Free sample files with every tutorial on PHLEARN
- New tutorials published every week
- Unlimited downloads with your free PHLEARN account
description
Learn how to create freckles in Photoshop starting from an unlikely source: a photo of granite. Color Range pulls the speckling out of the stone, a few layers turn it into a black-on-white shape with a broken-up edge, and Define Brush Preset plus Size, Angle, and Flip Jitter turn it into a brush that never stamps the same way twice. Painting it across several Soft Light layers, each blurred and masked on its own, builds up freckles that vary naturally across the face.
Enjoying This Free Tutorial?
We publish a new free tutorial every week, each one with sample images and PSDs you can download and follow along with. Sign up and they land straight in your inbox, along with early word on sales, events and subscriber-only offers.
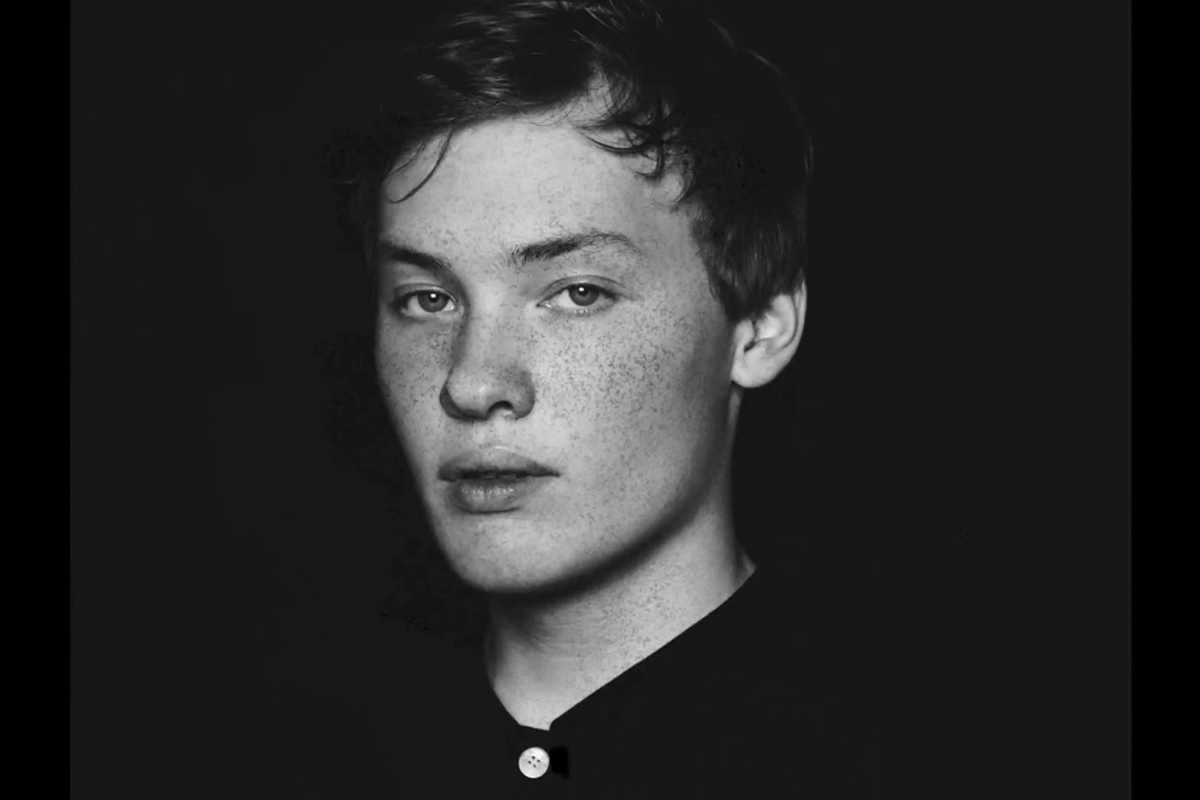
How to Create Freckles in Photoshop
A photo of granite, of all things, turns out to be the raw material for a completely convincing freckle effect. This tutorial builds a custom brush from the natural, random speckling in a granite texture, then paints and blends that brush onto a portrait across several layers to add realistic, organic-looking freckles.
Selecting the Granite’s Dark Areas With Color Range
A photo of granite works well as the base for a freckle brush because its speckling is naturally random and scattered, with no repeating pattern the way a hand-drawn or computer-generated texture would have.
-
Open the Granite Photo and Select the Background Layer
Start with a photo of granite and click on its background layer.
-
Open Color Range
Go to Select > Color Range.
-
Click the Dark Speckled Areas
Use the eyedropper to click on the dark specks in the granite, keeping in mind that whatever appears light in the preview will be selected and whatever appears dark will not.
-
Adjust Fuzziness to Refine the Selection
Adjust the Fuzziness slider to select more or less of the speckled detail, then click OK.
Building the Black-and-White Brush Base
A custom brush needs a white background with black shapes wherever the brush should actually paint, so the granite selection gets rebuilt as exactly that on its own layers.
-
Fill a New Layer With Black Using the Active Selection
With the Color Range selection still active, create a new layer above the background and press Shift+Delete to fill the selection with black.
-
Add Another Layer and Fill It With White
Create a new layer beneath the black speckled layer and fill it with white, so the finished stack is a black speckled layer over a white layer over the original background.
Softening the Brush’s Edge for an Organic Shape
A brush built from a straight-edged crop will stamp with a visible square cutoff every time it’s used, so painting in extra white around the border first avoids that giveaway.
-
Create a New Layer for Edge Cleanup
Add a new layer above the speckled black layer.
-
Paint White Around the Edges With a Hard Brush
Use a hard-edged brush set to white to paint around the border of the speckled area, breaking up any straight cutoff line so the shape ends in a more organic, uneven way.
Why the Brush Needs a Soft, Irregular Edge
Any spot where a custom brush’s source image cuts off in a straight line gets baked into the brush and shows up as an obvious square edge every time it’s stamped. Painting extra white around the border first removes that hard line, so the finished freckle brush reads as an organic pattern instead of something that was clearly built in Photoshop.
Scaling Down and Defining the Brush Preset
A full-resolution internet photo is far larger than Photoshop needs for a brush, so the whole stack gets merged and scaled down before it’s turned into a preset.
-
Merge the Layers Together
Shift-click to select all the layers, then press Cmd/Ctrl+E to merge them into one layer.
-
Scale the Image Down
Go to Image > Image Size, lock the width and height together, and scale the image down to around 600 pixels.
-
Define the Brush Preset
Go to Edit > Define Brush Preset, name it, and click OK to save it to the Brushes panel.
Adding Randomness With Shape Dynamics and Spacing
A handful of settings in the Brush menu turn a single static freckle shape into something that looks different with every click, which is what makes a whole face of brushed-on freckles believable.
-
Turn On Size Jitter
Under Shape Dynamics, turn on Size Jitter and raise the minimum diameter so freckle size varies without shrinking too small.
-
Turn On Angle Jitter
Raise Angle Jitter all the way up so the brush shape rotates randomly with every click instead of stamping the same orientation repeatedly.
-
Turn On Flip X and Flip Y Jitter
Turn on both Flip X Jitter and Flip Y Jitter so the shape also flips horizontally and vertically at random.
-
Increase the Brush Tip Spacing
In Brush Tip Shape, raise the Spacing value so individual freckle shapes land evenly apart instead of blending together into a solid smear.
-
Save the Finished Brush Preset
Open the brush preset dropdown, choose New Brush Preset, and give the finished, fully randomized brush its own name.
Why Granite Makes a Better Freckle Brush Than a Hand-Drawn Shape
Granite’s natural speckling already has the random scattering and varied sizing that real freckles have, with no repeating pattern to give away that it was built rather than found. Starting from a texture like this, instead of drawing dots by hand, means the underlying shapes were never uniform to begin with, which is a big part of why the finished brush doesn’t look like it was made in Photoshop.
Painting and Blending Freckles Onto the Subject
With the brush ready, painting directly onto the subject and adjusting its blend mode and sharpness is what starts turning it into a believable skin detail.
-
Change the Foreground Color to Black
Switch the foreground color from whatever test color was used earlier to black before painting on the actual subject.
-
Paint Freckles Onto the Subject
Click with the custom brush over the subject’s face, adjusting brush size to match how close the subject is to the camera.
-
Change the Layer’s Blend Mode to Soft Light
Change the freckle layer’s blend mode to Soft Light so the black shapes blend into the skin tone instead of sitting as flat black marks.
-
Soften the Freckles With Gaussian Blur
Go to Filter > Blur > Gaussian Blur and apply a small blur, around 7 to 8 pixels, so the brush’s crisp edges match the softer detail of the photo itself.
Building Up Freckles Across Multiple Layers and Masking Them Out
Repeating the freckle brush across several separate layers, each masked and blended individually, builds up a more convincing result than trying to get everything right in one pass.
-
Add a Layer Mask and Paint Away Unwanted Areas
Add a layer mask to the freckle layer and use a soft round brush to mask away any areas that shouldn’t have freckles.
-
Repeat With Additional Freckle Layers
Create new layers with a fresh pass of the brush, varying the brush size and blend mode (or lowering opacity on a Normal layer instead of using Soft Light) to build up density in areas like the cheeks.
-
Blur and Mask Each New Layer
Apply the same Gaussian Blur amount to each new freckle layer, then add a layer mask and paint away any areas that don’t need freckles.
-
Group All the Freckle Layers
Shift-click all the freckle layers and press Cmd/Ctrl+G to group them together.
-
Mask Out the Eyes, Mouth, and Teeth on the Group
Add a layer mask to the group itself and paint black over areas like the eyes, mouth, and teeth, since freckles shouldn’t appear inside the eyes or teeth no matter how the individual layers were painted.
Why Building Freckles Across Multiple Layers Looks More Natural
Trying to place every freckle correctly in a single pass tends to look too uniform or too heavy in the wrong spots. Splitting the work across several layers, each with its own brush size, opacity, and mask, makes it easy to build up more density in areas like the cheeks while keeping other areas lighter, without having to get the entire effect right on the first try.
Why This Approach Works
Building the brush from a granite photo instead of a hand-drawn shape is what gives the final freckles their random, organic scattering, since real granite never repeats the same pattern twice. Shape Dynamics settings like Size, Angle, and Flip Jitter are what keep that randomness going every time the brush is clicked, rather than stamping the same rotated shape over and over. Splitting the painting across several separate, individually masked layers is what makes it possible to vary freckle density across the face without having to plan out every placement in advance.
Final Thoughts
Freckles built this way hold up because nothing about them comes from a repeating stamp or a uniform dot pattern, it all traces back to a genuinely random texture. The same granite-to-brush technique isn’t limited to freckles either, any naturally speckled or textured photo can become the starting point for a custom brush built the same way.
Quick Reference: Keys, Menus and Settings
- Select the specksSelect > Color Range, click the dark specks, adjust Fuzziness
- Black on whiteNew layer, Shift + Delete, fill black; new layer filled with white
- Organic edgeHard brush in white around the border
- Make the brushCmd/Ctrl + E; Image > Image Size, about 600 px; Edit > Define Brush Preset
- RandomizeSize Jitter, Angle Jitter all the way up, Flip X and Flip Y Jitter; more Spacing; New Brush Preset
- BlendPaint black, blend mode Soft Light; Filter > Blur > Gaussian Blur, 7 to 8 pixels
- FinishMask each layer; Cmd/Ctrl + G, mask the group off the eyes, mouth and teeth
No AI, no generative credits.
Free Downloads
Paint With the Same Brush
Get the freckle brush made from a granite photo in the video, ready to paint natural-looking freckles onto any portrait. Free with a PHLEARN account.
Painting Freckles in Photoshop: Common Questions
Why make a freckle brush from a photo of granite?
Granite’s specks are naturally random, with no repeating pattern, so the brush doesn’t look like it came out of a computer. Dots you draw yourself look too even.
How do I pull the specks out of the granite photo?
Use Select > Color Range and click the dark specks. Whatever shows light in the preview is selected; adjust Fuzziness to take more or less. Then fill the selection with black on a new layer using Shift + Delete, over a layer filled with white.
Why does my custom brush stamp with a square edge?
Anywhere the source image cuts off in a straight line, the brush does too. Paint white around the border with a hard brush first so the pattern ends in an uneven, organic shape.
How big should the brush image be?
Around 500 to 600 pixels. Merge the layers with Cmd/Ctrl + E, then use Image > Image Size with width and height linked. The granite photo in the video started at 2560 pixels.
How do I turn the image into a brush?
Choose Edit > Define Brush Preset and name it. With the Brush tool, right-click on the image and pick the last thumbnail to use it.
How do I stop every freckle stamp looking the same?
In the brush settings turn on Size Jitter with a higher Minimum Diameter, Angle Jitter all the way up, and Flip X and Flip Y Jitter. Raise Spacing in Brush Tip Shape so the specks land apart instead of smearing like charcoal.
My freckles look like flat black dots. How do I blend them?
Paint with black, set the layer to Soft Light, and add a small Gaussian Blur of about 7 or 8 pixels so they’re as soft as the photo. A Normal layer at lower opacity works too.
Should I paint all the freckles on one layer?
The video builds them over several layers, each blurred and masked with a soft round brush. That makes it easy to put more on the cheeks and fewer on the nose.
How do I keep freckles out of the eyes and teeth?
Group the freckle layers with Cmd/Ctrl + G, add a mask to the group and paint black over the eyes, mouth and teeth.
Is the freckle brush free?
Yes, with a free PHLEARN account. You get 1 Photoshop brush: the freckle brush built from granite in the video, ready to paint with.
Master Photoshop, Lightroom and Photography
Join PHLEARN PRO for $12.99 a month or $99.99 a year. Cancel anytime, with a 100% money-back guarantee.





