Free Lightroom Presets: Sample 10 Pack for Classic & Mobile
-

-
Add to
favorites
-
Software
-
CompatibilityLightroom Classic & Mobile
-
Lightroom presets10 Free Presets
-
Works in every Lightroom.xmp for Classic, Desktop & Mobile
-
Backup for older app versions.dng for Lightroom Mobile
-
In the download4 Sample Images + PDF Guide
Free Download
It’s free: sign up for a PHLEARN account, or log in if you already have one, to download the pack. One account gets you every free preset, LUT and sample file on PHLEARN.
Install Guide
How to Install Your Presets
A short PDF that walks you through installing the 10 presets in Lightroom Classic, Lightroom desktop and Lightroom on your phone, plus three tips for better results.
DESCRIPTION
Ten free Lightroom presets from four of our most popular packs: Family, Minimal Blogger, Neutral Airy and Pastels. Bright whites, soft light and skin that still looks like skin. They work in Lightroom Classic and in Lightroom for desktop and mobile, on RAW files and JPEGs, and they are yours to keep. Need help installing them? See our Lightroom Preset Install Guide.
All ten lower contrast, open the shadows and lift the black point for a soft, matte finish, and nearly all pull back bright highlights so faces stay bright without losing detail. After you apply one, adjust Exposure or Temperature to match your light.
One zip holds the 10 presets as .xmp files, which work in Lightroom Classic, Lightroom on your computer and Lightroom on your phone, plus .dng versions for older releases of the mobile app, each in its own labeled folder, with 4 sample images to practice on and the PDF Start Here guide.
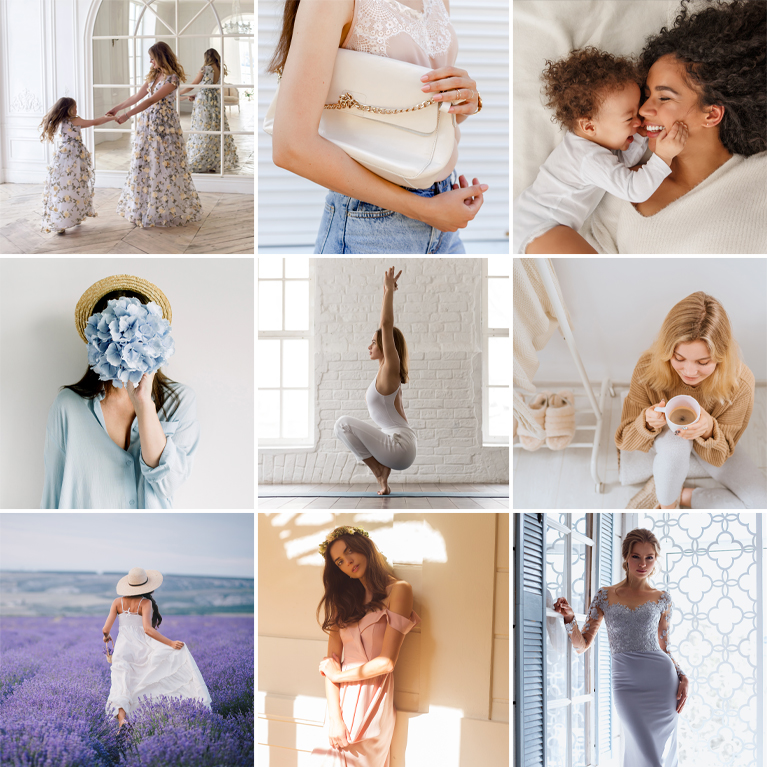
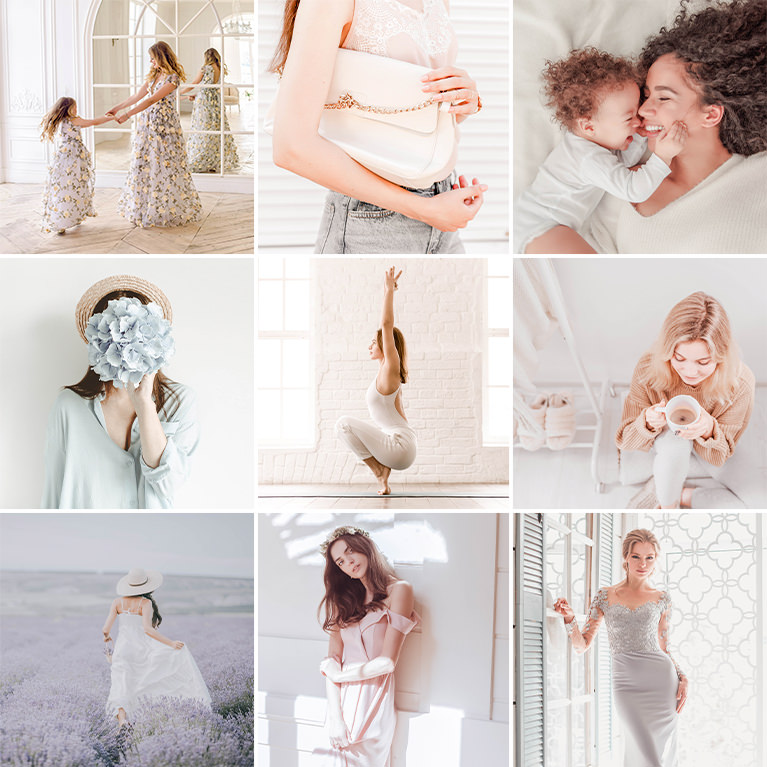
PHLEARN · Free Lightroom Presets
Free Lightroom Presets Sample Pack
10 presets4 sample imagesLightroom Classic & Mobile
Free Lightroom Presets for Lightroom Classic and Lightroom Mobile
A preset is a saved set of develop settings (exposure, contrast, tone curve, color mixing, split toning) that you can drop onto any photo in a single click. A good one does not rescue a bad photo. What it does is give you a consistent, considered starting point, so the time you spend editing goes into the ten percent that is specific to that frame instead of the ninety percent that is the same on every frame you shoot.
This free 10 pack is a slice of the PHLEARN Lightroom preset library. Ten presets, pulled from four of our packs: Family, Minimal Blogger, Neutral Airy and Pastels. All four are built around the same idea: bright whites, soft light, and skin tones that still look like skin.
They install in Lightroom Classic and in Lightroom for desktop and mobile, they work on RAW files and JPEGs, and they are yours to keep. Hit the download button above, install them once, and they live in your Presets panel from then on.
Each of those four packs holds ten looks in total, and all four are included with PHLEARN PRO alongside every other preset pack we have made. More on that further down. First, here is what the ten free presets actually do.
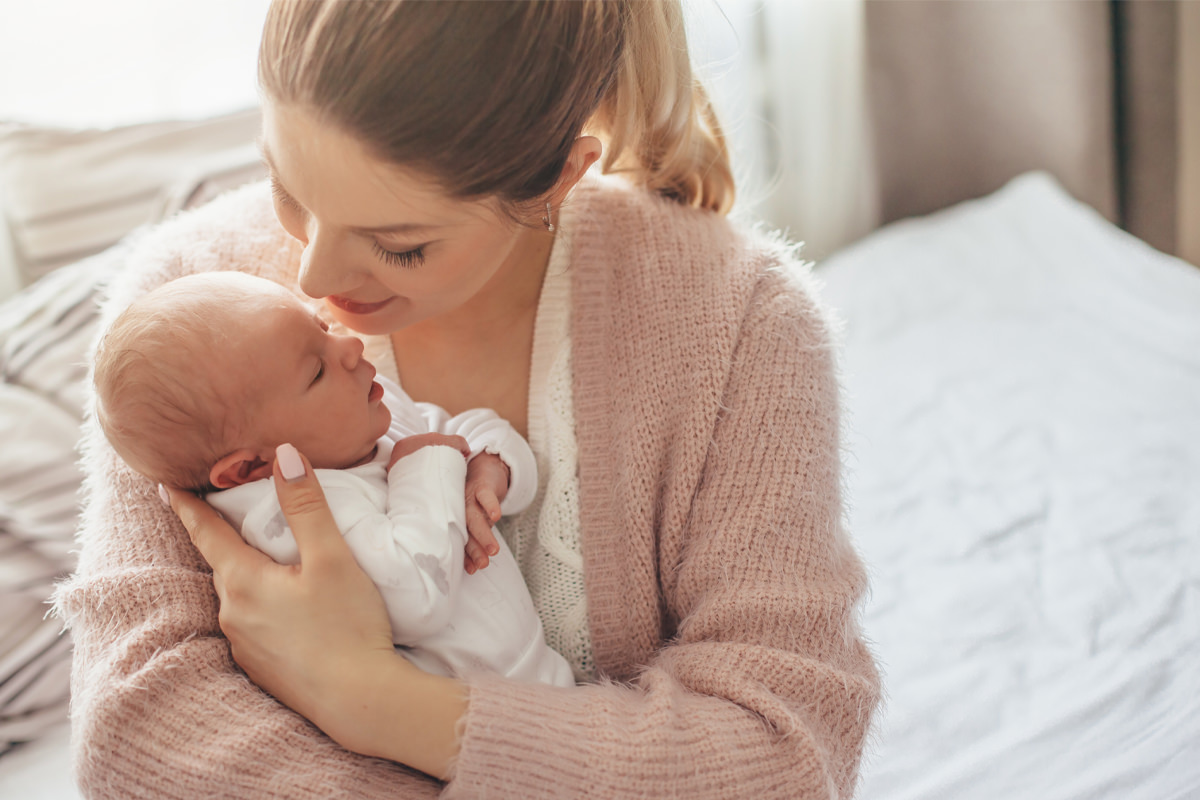

Bright Whites, Soft Lights
One click, nothing else touched. The same frame before and after a single preset from the free pack: the whites come clean, the skin stays warm, and the light reads soft instead of flat. Every preset on this page works the same way.
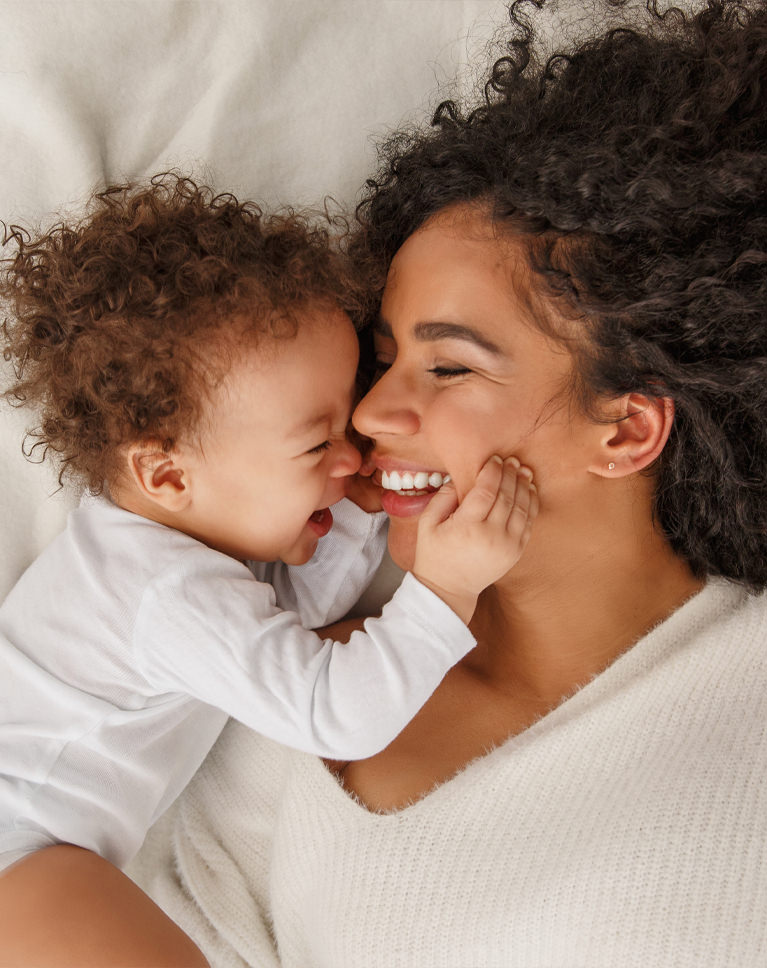
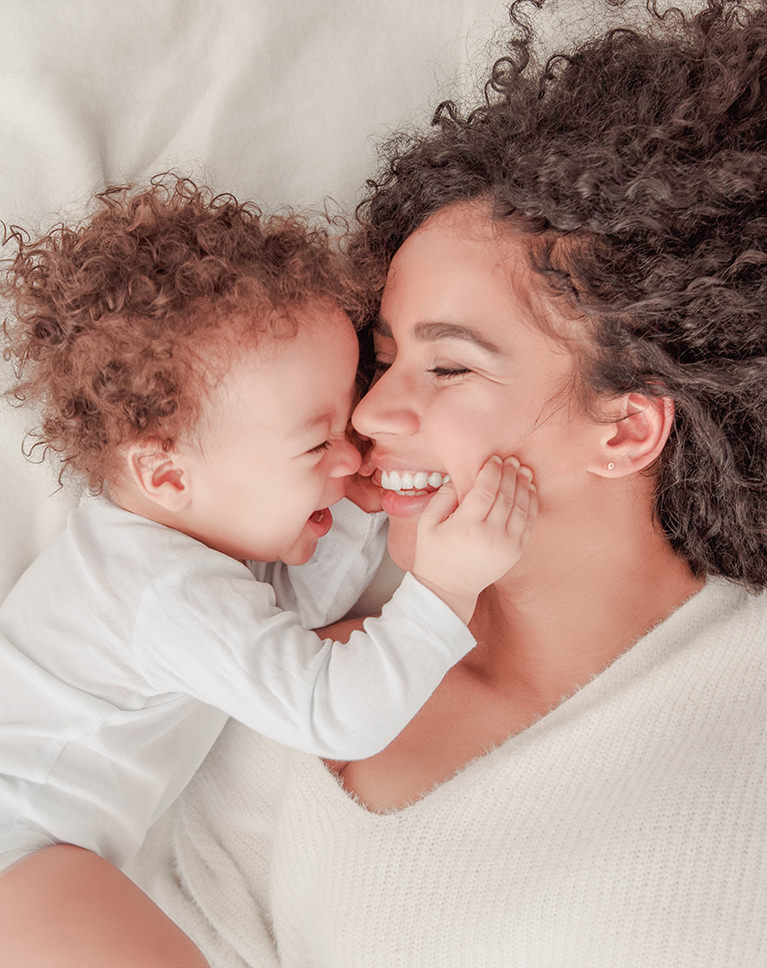
Family: Cherry Glow and Chic White
Family photographs are almost always shot in bad light. Kitchen bulbs, a window on one side, a phone screen throwing green onto somebody’s chin. These two presets are built for exactly that.
Cherry Glow warms the midtones and lifts the reds a little, which is what pulls a face out of a dim room instead of leaving it flat and gray. Chic White goes the other direction: it cleans the whites, cools the highlights slightly, and drops overall saturation just enough that a cluttered background stops competing with the people in front of it.
Best on: kids at home, birthdays and holidays, newborns on a bed, anything lit by a window plus a lamp. Reach for Cherry Glow when the room is dim and the faces need lifting. Reach for Chic White when the room is bright but busy (toys, laundry, a kitchen counter) and you want the people to be the only thing that matters.
After you apply one: the only slider worth touching is Exposure. Cherry Glow can push a bright window past white, so pull exposure down a third of a stop and the highlights come back. Chic White can leave very fair skin a touch cool; nudge Temp toward yellow by 200–300K and it settles.
Both are gentle on purpose. Applied to a portrait they change the mood without changing the person, which is the whole trick with photographing people you know. Used together across an afternoon (Cherry Glow indoors, Chic White by the window), the whole set still reads as one day.
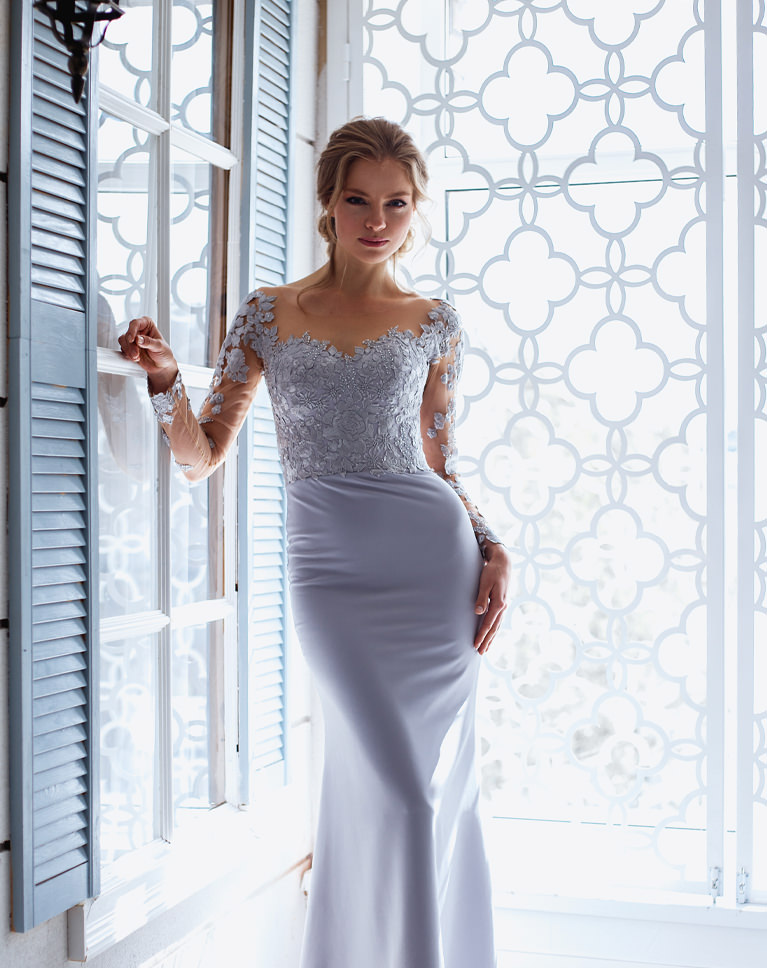
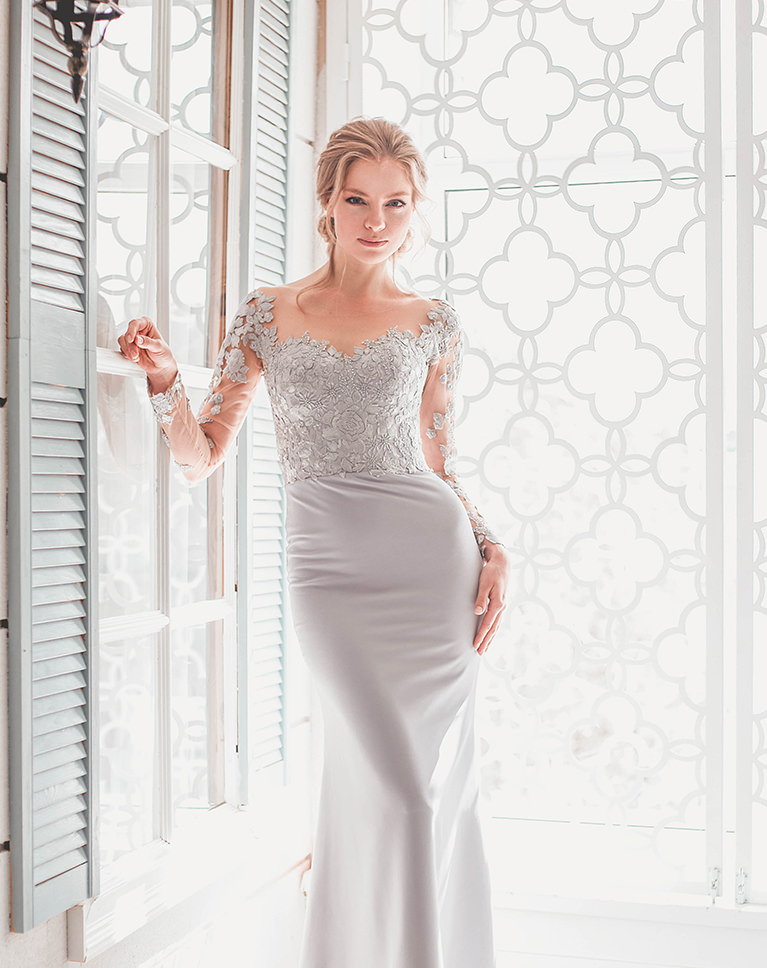
Pastels: Powder Blue and Soft Apricot
Soft light, muted color, a little bit of candy. The Pastels looks lift the shadows and desaturate the deepest tones, so nothing in the frame reads as fully black. That is what gives a photo the airy, print-like feel you see in spring and holiday work.
Powder Blue pushes the cool end, which suits open shade, overcast days, and anything shot near water. Soft Apricot does the same job with warmth instead, and it is the one to try first on golden-hour frames that came out of camera looking flatter than they felt.
Best on: maternity and engagement sessions, flower fields, beaches, pale dresses, white walls: scenes that are already light and want to feel lighter. Powder Blue is the pick when the sky or the water is in the frame. Soft Apricot is the pick when skin is the subject and you want it to glow rather than cool off.
After you apply one: pastel looks reward a slightly brighter exposure than you would normally set. If a photo looks muddy, raise exposure a third of a stop before you touch anything else. If the blacks feel too lifted for a moodier frame, drag the Blacks slider down 10 to 15 points and the look keeps its softness without going hazy.
Where these two really earn their keep is a full gallery. Apply Soft Apricot to the warm frames and Powder Blue to the shaded ones and the set holds together, which is far harder to do by hand than it sounds.
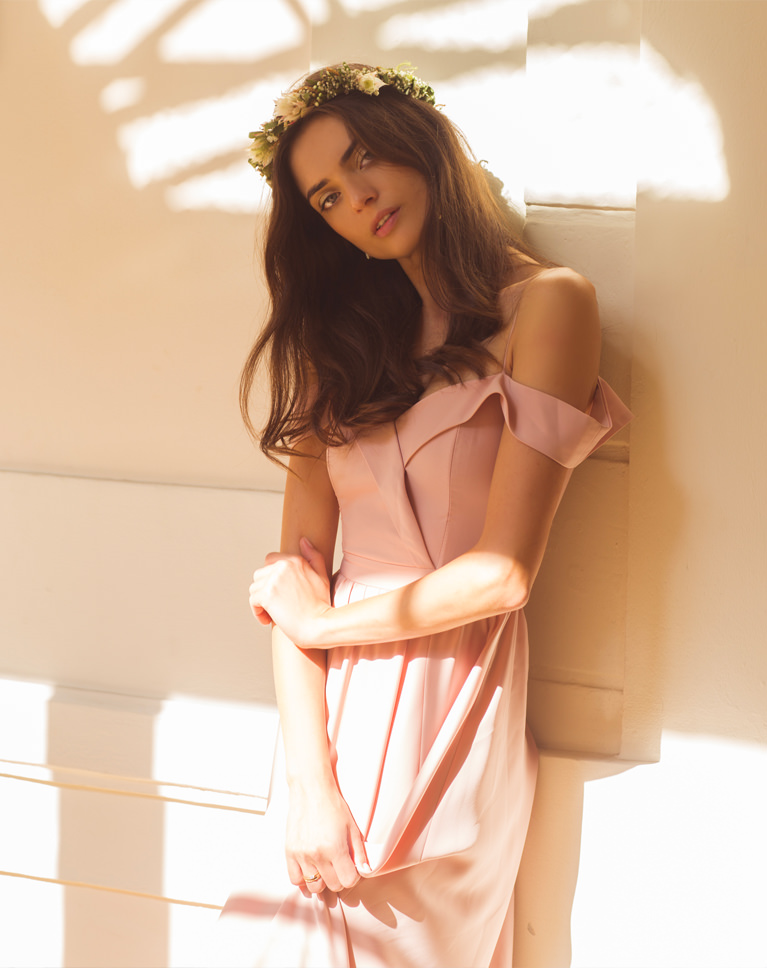
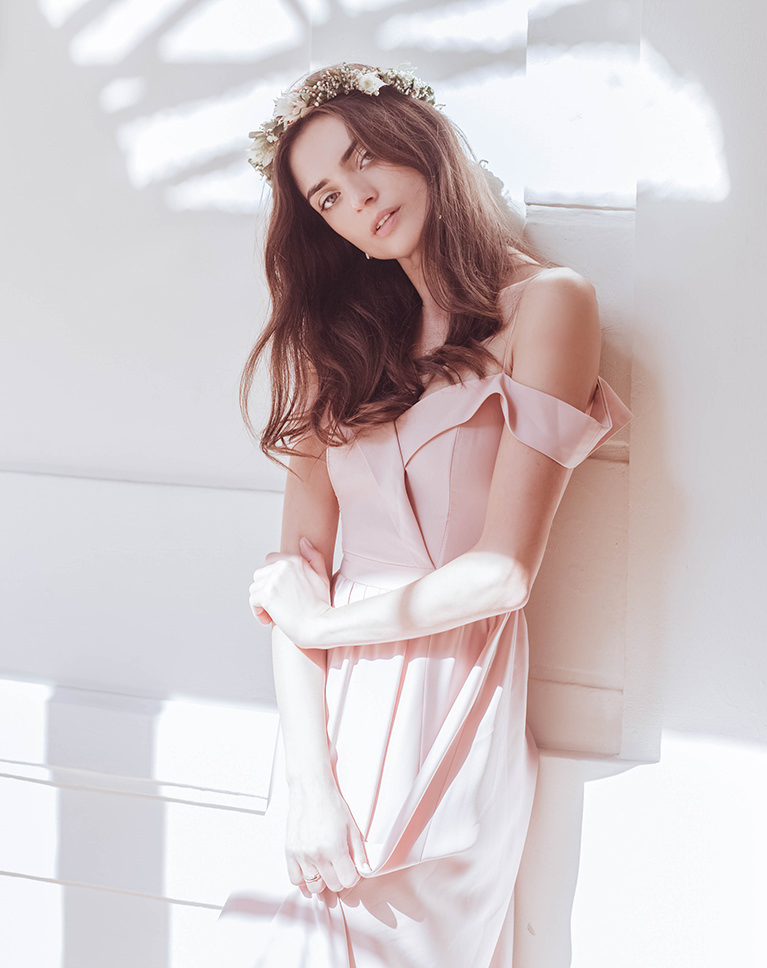
Neutral Airy: Chamomile, Pale Orchid and Sand Dance
Three of the ten free presets come from Neutral Airy, which is the pack we reach for most often when a photo does not need a look so much as it needs cleaning up.
Chamomile is the quietest of the three: a small warm shift, a gentle lift in the shadows, nothing you would notice unless you toggled it off and on. Pale Orchid adds a faint magenta cast to the highlights, which reads as soft rather than pink and sits well on skin. Sand Dance is the most obvious of the set: a warm, sandy tone through the midtones that suits outdoor and travel frames.
Best on: almost anything, which is the point. Chamomile is the one for client work, product shots and anything that has to look natural. Pale Orchid suits portraits, weddings and soft studio light. Sand Dance is for sun: beaches, deserts, late-afternoon streets, anywhere the light is already warm and you want to lean into it.
After you apply one: these three barely touch exposure, so the file underneath matters more than usual. Get white balance close before you apply Chamomile and it will look like you never used a preset at all. Sand Dance can tip pale skin toward orange in mixed light; if that happens, drop the Orange saturation in the Color Mixer by 5 to 10 and leave everything else alone.
If you only keep one preset from this whole download, make it Chamomile. It is the closest thing here to a default, and a good place to start before you decide what a photo actually wants.
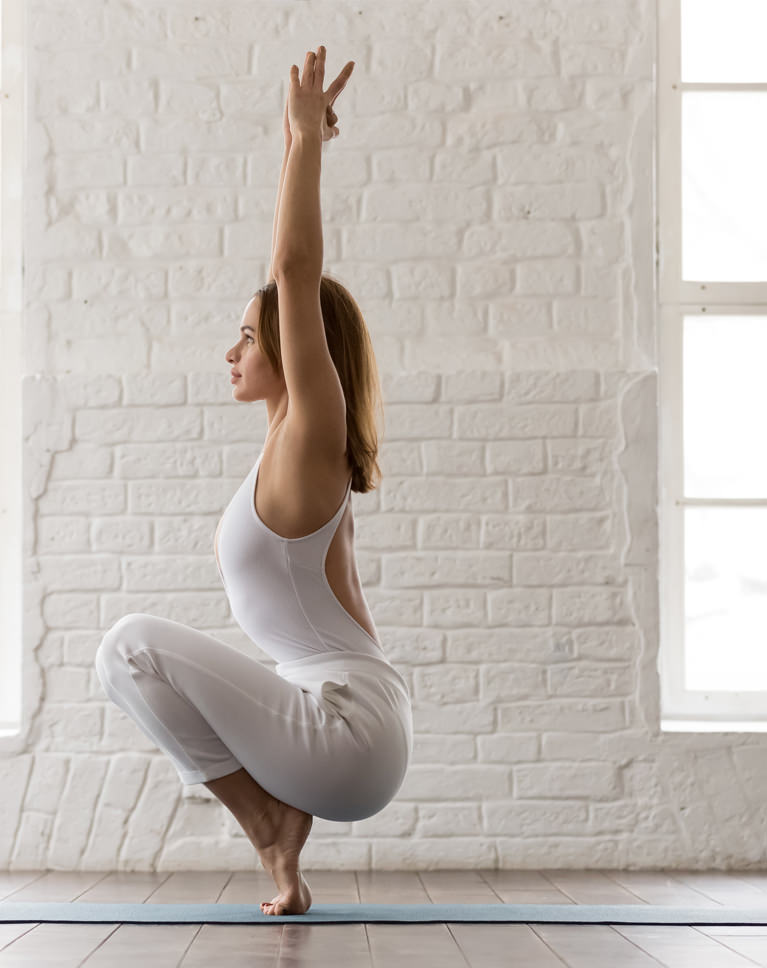
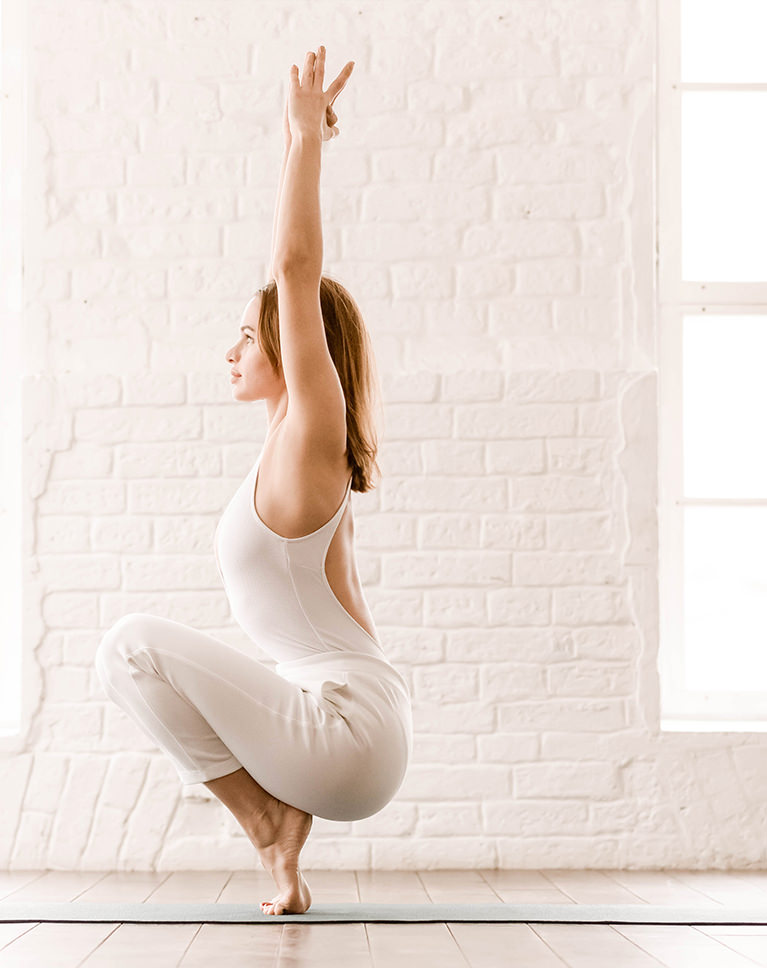
Minimal Blogger: Soft Balm, Spring White and Velvet White
These three were built for people who publish constantly and cannot spend twenty minutes on a single frame. Food, flat lays, interiors, travel: anything where the photos need to look like they belong to each other more than they need to look dramatic.
Soft Balm keeps a little warmth in the whites so a room does not go clinical. Spring White is the brightest of the three and the one to use when you want a background to fall away. Velvet White holds more contrast in the shadows, which stops a light-on-light image from turning into mush.
Best on: a feed. Coffee on a table, a made bed, a plate by a window, a product on a white sweep. Soft Balm is the everyday choice. Spring White is for the frames where the subject is small and the background is doing most of the work. Velvet White is for white subjects on white backgrounds (linen, ceramics, a wedding dress on a hanger), where the other two would flatten the texture.
After you apply one: these presets brighten aggressively, so watch the histogram. If the right edge is clipping, pull Highlights down rather than Exposure; you keep the airy feel and get the detail back. And resist adding contrast. The whole look depends on the shadows staying open.
Apply the same one across a set and your feed or your post reads as a single shoot, even when the frames were taken weeks apart. That consistency is most of what a preset is worth, and it is the reason this pack has three near neighbors instead of three different looks.
What’s in the Download
One zip, desktop and mobile
One zip with both versions in labeled folders: .xmp presets for Lightroom Classic, desktop and mobile, and .dng backups for older releases of the mobile app, plus 4 sample images to practice on. In Lightroom they show up under User Presets.
- ZIPPHLEARN Free Lightroom Presets Sample Pack 2026.zipDesktop and mobile presets in one download, 29.5 MB
- XMPLightroom Classic, Desktop & Mobile (.xmp)10 presets for every Lightroom app
- DNGLightroom Mobile Backup (.dng)The same 10 for older releases of the mobile app
- JPG4 Sample ImagesFree-to-use practice photos
- PDFPHLEARN Free Lightroom Presets - Start Here (2026).pdfInstall steps for Classic, desktop and mobile, plus three tips
- PHLEARN-Family-Cherry Glow
- PHLEARN-Family-Chic White
- PHLEARN-Minimal Blogger-Soft Balm
- PHLEARN-Minimal Blogger-Spring White
- PHLEARN-Minimal Blogger-Velvet White
- PHLEARN-Neutral Airy-Chamomile
- PHLEARN-Neutral Airy-Pale Orchid
- PHLEARN-Neutral Airy-Sand Dance
- PHLEARN-Pastels-Powder Blue
- PHLEARN-Pastels-Soft Apricot
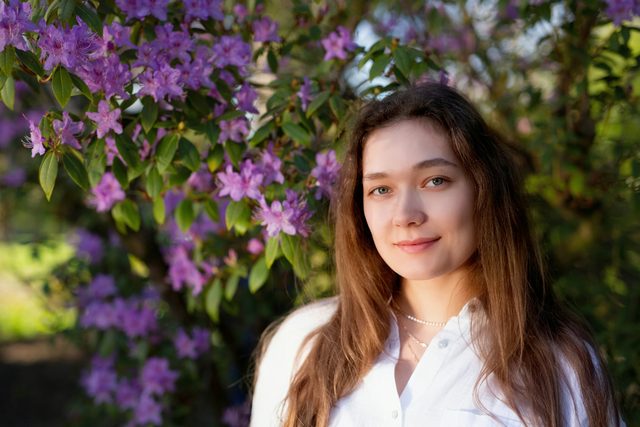
The 4 sample images


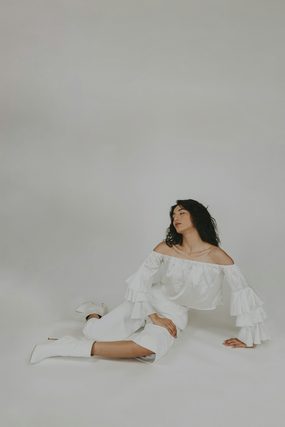
10 Presets Free. The Full Packs With PRO.
The sample pack is yours to keep. PRO adds the four full packs these ten presets come from, plus every other preset pack we make.
This page
Free Lightroom Presets Sample Pack
$0
- 10 presets from Family, Minimal Blogger, Neutral Airy and Pastels
- .xmp for Lightroom Classic and desktop, .dng for mobile
- Works on RAW and JPEG files
- 4 sample images and a PDF Start Here guide
- Yours to keep, permanently
- Only 2 or 3 looks from each of the 4 packs
- No Photoshop Actions, LUTs or brushes
- No PRO courses
With PRO
PHLEARN PRO
From $8.33/month
- The full Family, Minimal Blogger, Neutral Airy and Pastels packs, 40 presets
- All 60 Lightroom preset packs, over 600 presets
- Every LUT, Photoshop Action and brush set
- 250+ PRO courses in 4K
- Practice files for every course
- Cancel anytime
Lightroom Preset Questions, Answered
Are these Lightroom presets really free?
Yes. The sample 10 pack is a permanent download, not a trial and not a time-limited license. Once the presets are installed in Lightroom they stay in your Presets panel whether or not you ever buy anything from us. The paid packs are separate products, and all of them are included with a PHLEARN PRO membership.
Do they work in Lightroom Classic and Lightroom mobile?
Both. The zip has .xmp files for Lightroom Classic and Lightroom for desktop, and .dng files for Lightroom on iOS and Android, so you can install on your phone directly. If you install the .xmp files in Lightroom Classic while signed in to your Adobe account with sync turned on, they also appear on your phone on their own.
Which version of Lightroom do I need?
The presets are .xmp files, which need Lightroom Classic 7.3 or newer (April 2018 onward) or any current version of Lightroom for desktop, iOS or Android. Older versions that only read .lrtemplate files are not supported.com/install-lightroom-presets/”>install guide covers how to bring them in.
Will they work on JPEGs, or only RAW files?
Both, though RAW files give you more room. A preset moves exposure, color and tone; a RAW file simply holds more information in the highlights and shadows for those moves to work with. On a JPEG the same preset still looks right, you just have less latitude if you then want to push exposure much further.
I installed them and I cannot see them. What went wrong?
Three things account for almost every case. You may be in the Library module rather than Develop, where the Presets panel does not appear. You may have imported the .zip file itself rather than the .xmp files inside it, which Lightroom accepts silently and then does nothing with. Or Lightroom may need a restart, which is occasionally true after importing a new preset group. Our full Lightroom preset installation guide walks through all three.
What is the difference between the free pack and the paid packs?
The free download is ten presets drawn from four of our packs. Each of those four packs contains ten presets of its own, and there are sixty packs in the library in total, over six hundred presets covering portraits, weddings, landscape, travel, food, product, real estate, film looks and black and white. Individual packs can be bought on their own, and every one of them is included with PHLEARN PRO.
Do I need an account to download the free presets?
You need a free PHLEARN account, which takes a moment to make and also unlocks our free tutorial library. There is no payment step and no card required.
Can I make my own presets from these?
Yes, and you should. Apply one of ours, adjust it until it suits your camera and your light, then save the result as a new preset. Our free tutorial on creating Lightroom presets covers which settings to include and which to leave out so a preset behaves well across different photos.
Reviews
Master Photoshop, Lightroom and Photography
Join PHLEARN PRO for $12.99 a month or $99.99 a year. Cancel anytime, with a 100% money-back guarantee.






Thank you ❤️
I thank you for your awesome preset. Love it.
simply amazing, thank you
I love your videos, thank you so much for all your hard work!
I’m obsessed. I’m currently in an online graphic design bachelor’s program, and Phlearn has been a life saver. I love how clear and concise Aaron explains things from broad concepts to small details. I feel inspired, this has given me a huge confidence boost that I really can bring my visions to life. Thanks!!