Download Sample Images
Download the Sample PSD
Download the final PSD from this tutorial here (1 GB).
description
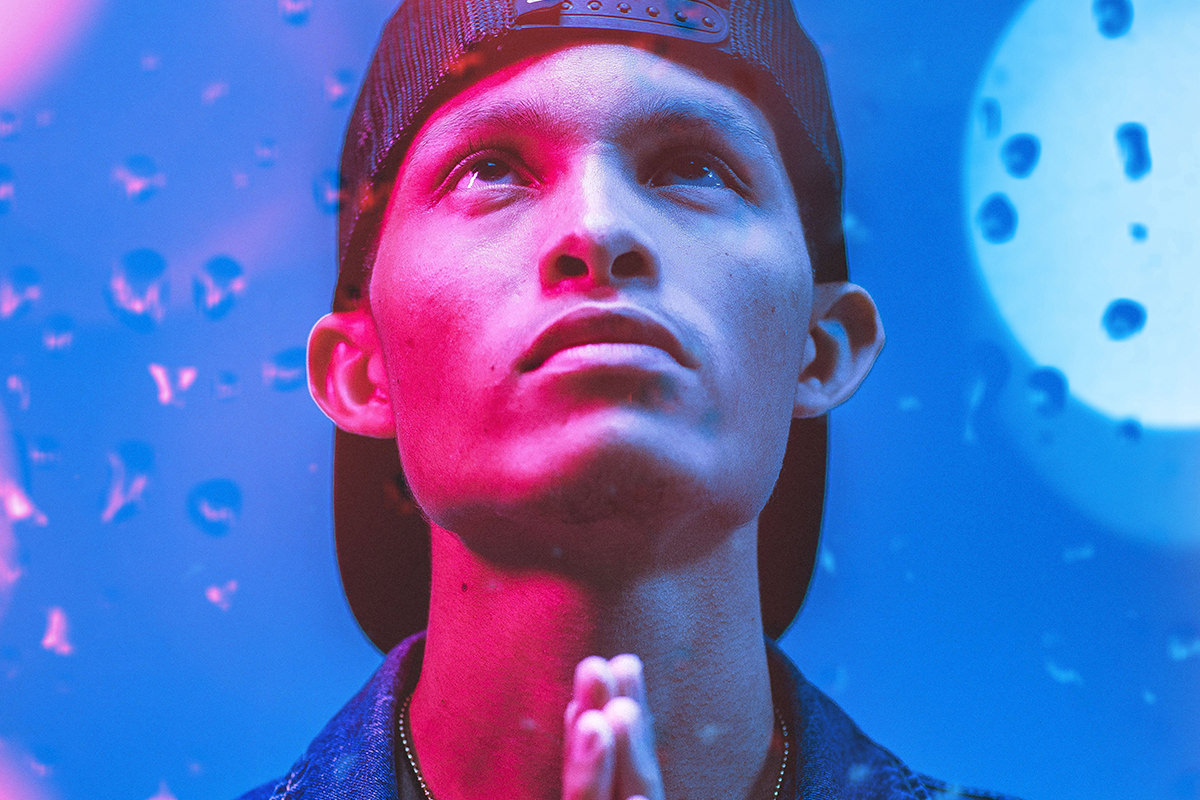
Want to spice up your photos? Try adding textures and overlays to them in Photoshop! Follow along as we show you how to blend textures from another image into a portrait, adding bokeh, raindrops, and tying it all together with realistic lighting effects.
Share
Add Bokeh & Textures to Any Photo!
Choosing Images for Textures & Overlays
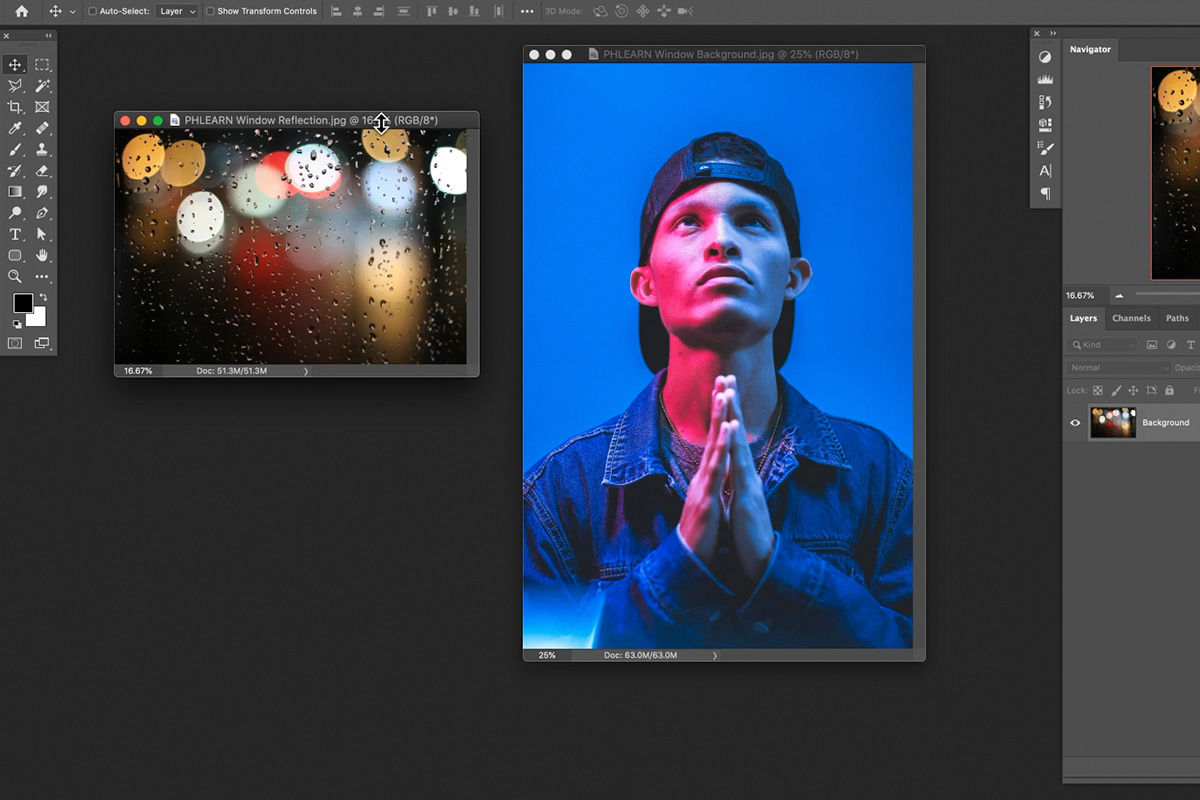
To pull this effect off, you’re going to need at least two images: one that will act as your primary image (like a portrait or landscape) and at least one that is the texture or effect you want to apply to the primary image (like raindrops or bokeh lighting). When you’re choosing an image to use a texture, make sure that the elements you want to add to the primary image are bright and that the background of the image is dark.
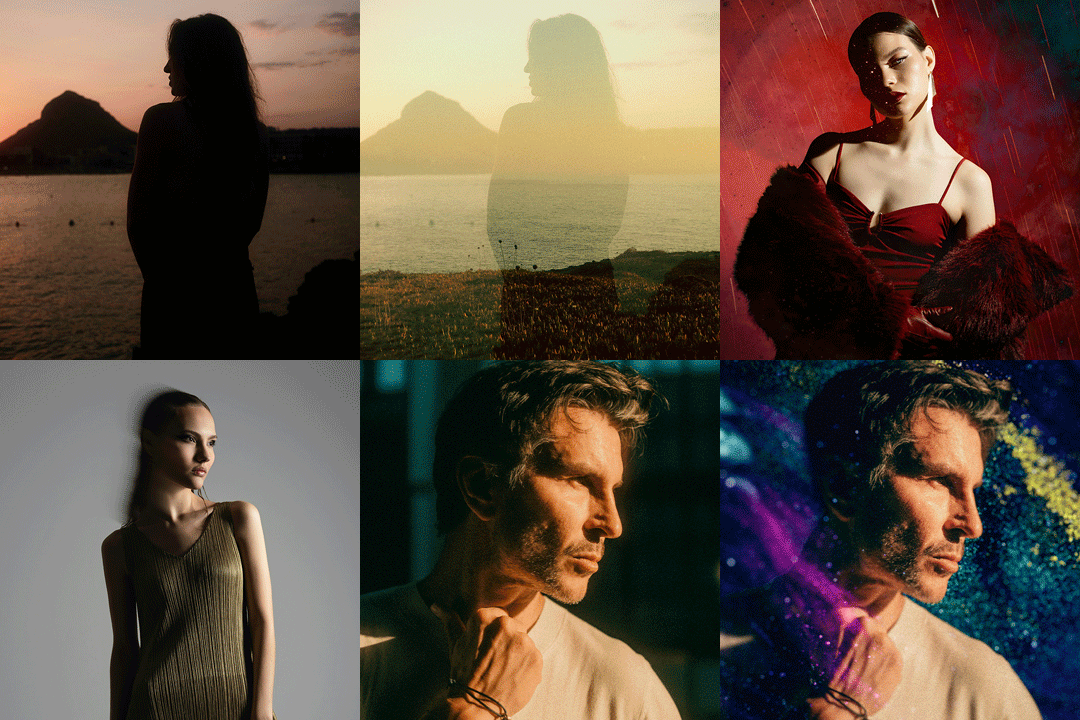
For example, we chose an image of out-of-focus lights and raindrops on glass. Notice that the brightest parts of the image are the lights and the highlights on the raindrops. The rest of the image is much darker, near black. This will make it much easier to remove the dark background and keep the elements we want.
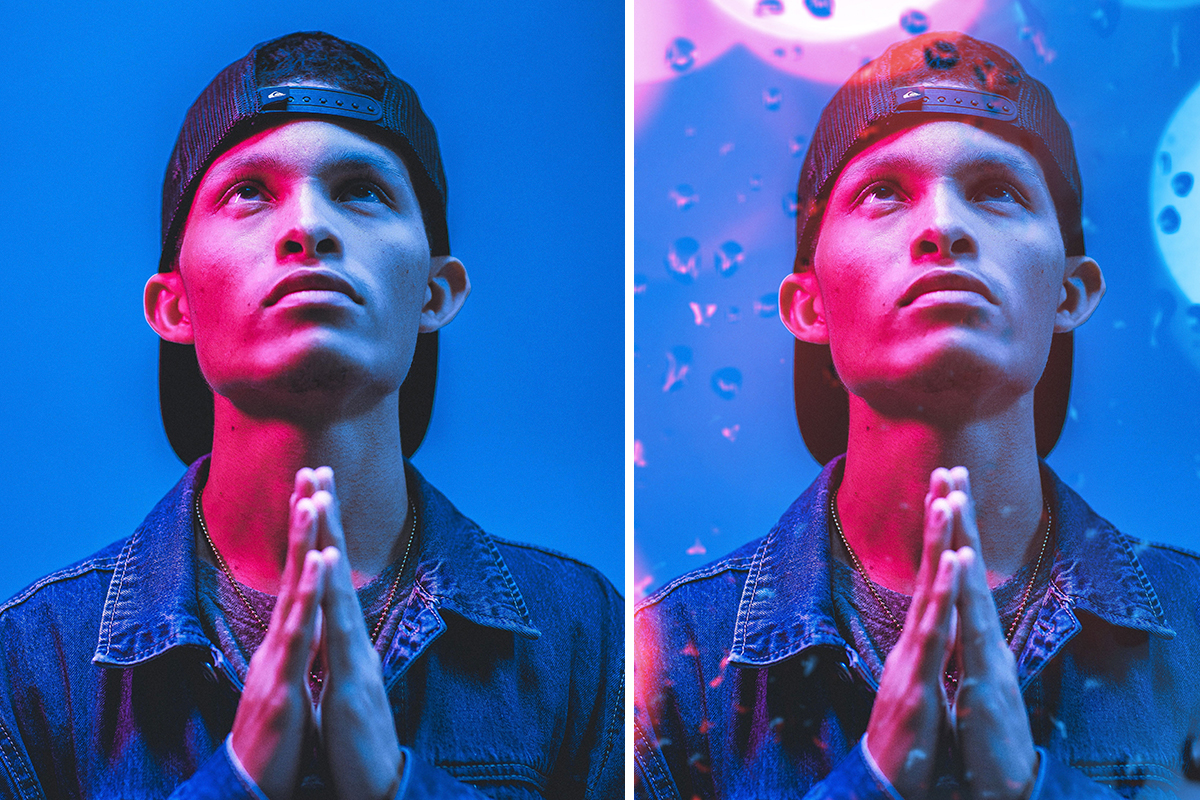
Our primary image is a colorful portrait with a relatively simple background. Having an empty background will give us some room to work when adding effects from the other image.
Compositing with Blending Modes
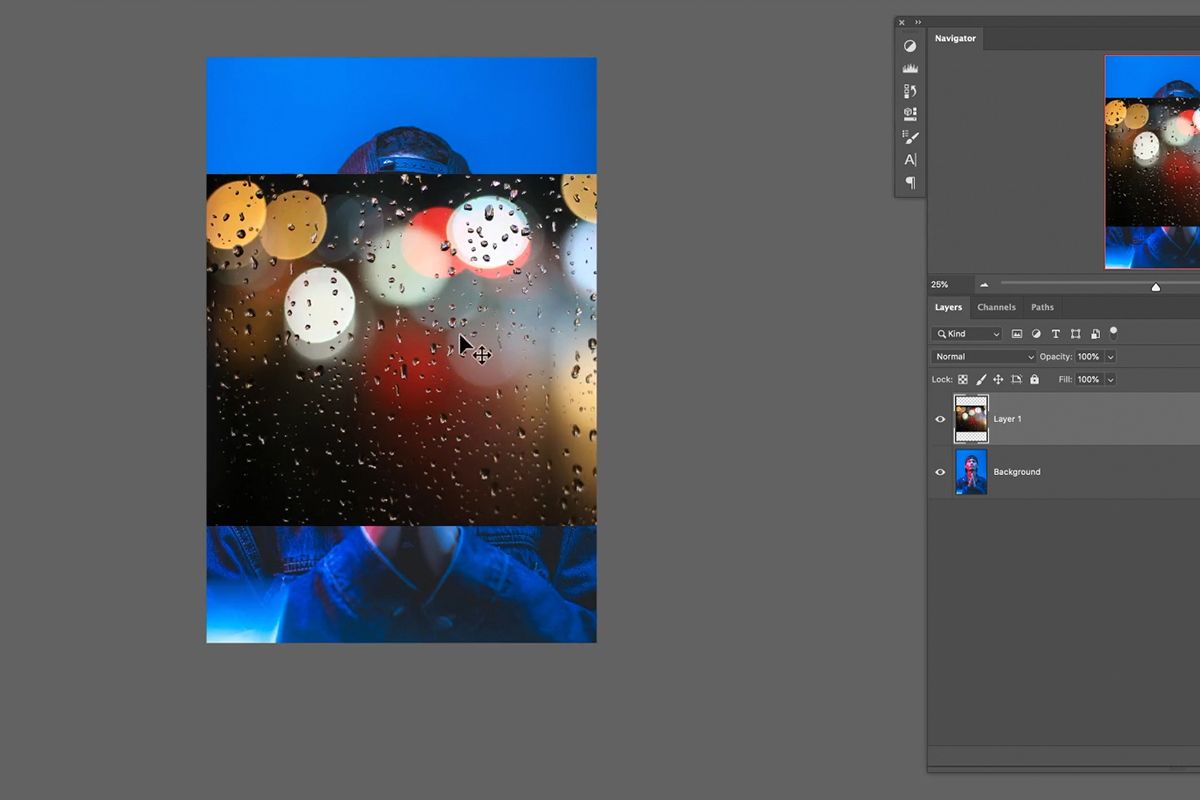
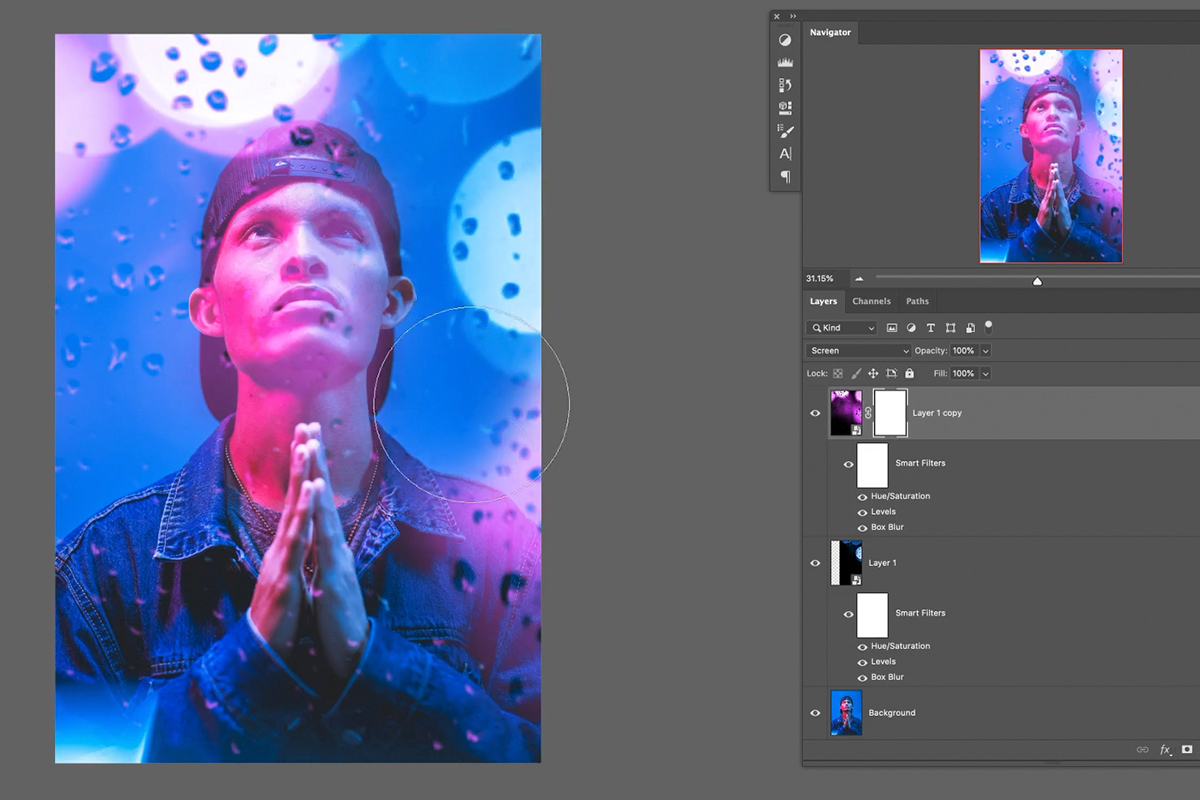
Bring both images into Photoshop and make sure that the bokeh image is on top of the Layer Stack. Now we need to remove the dark areas of the bokeh image so that only the lighting and raindrops are visible, but how?
We could use a tool like Channels to select the highlighted areas and then load that selection into a Layer Mask. But that takes a lot work and will require a lot of refinement to get it to look right. Luckily, there’s an easier way!
If you’re not familiar with Blending Modes, now is great time to learn about one of the most powerful tools Photoshop has to offer. We even have a PRO course that takes an in-depth look at every single Blending Mode in the program.
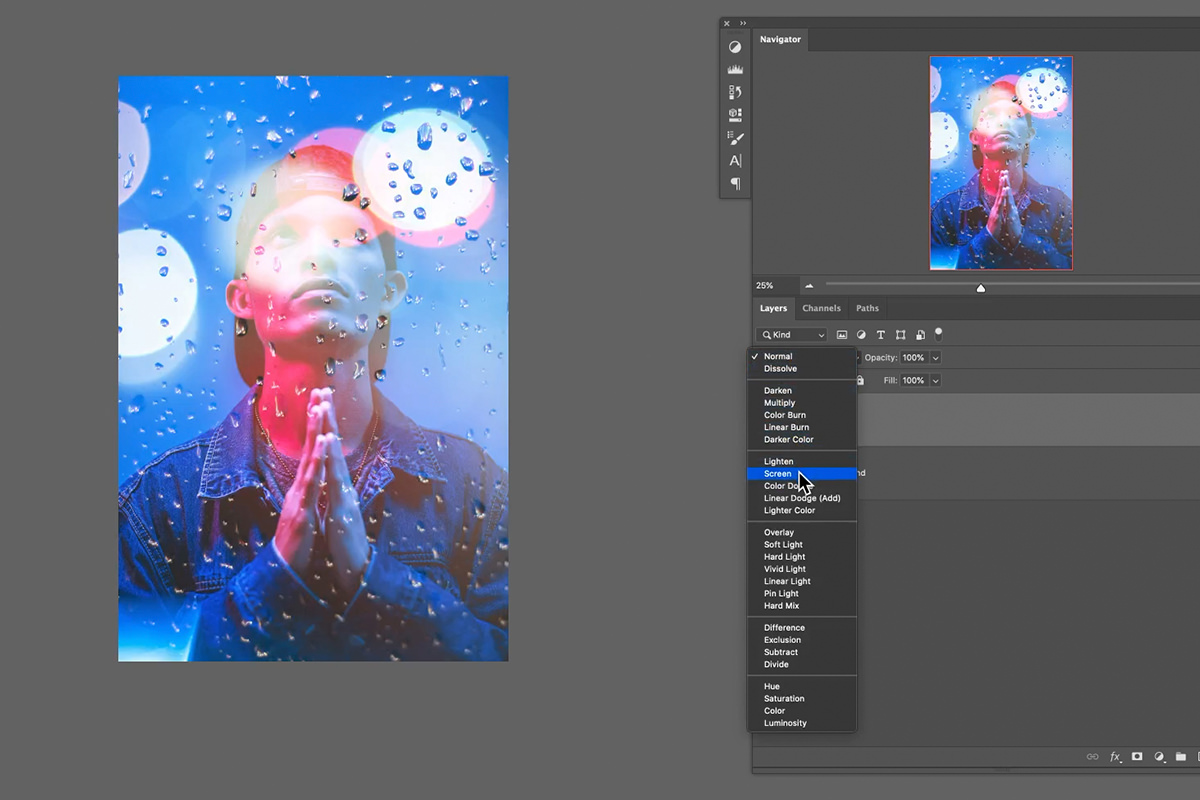
So what do Blending Modes do? Like the name implies, they help us to blend Layers together in different ways. Let’s try it out: select the bokeh Layer, click on the Blending Mode drop-down box, and select Screen.
See? Compositing made easy! The Screen Blending Mode tells Photoshop that you only want the brighter areas of an image to be visible. So Photoshop then analyzes the image and removes any areas darker than a certain threshold. Now we’ve got bright bokeh lights and raindrops with our portrait image visible in the background.
Refining the Effect
Now we’ve got a pretty good idea of what the effect is going to look like, but we’ve still got some work to do. There are a few things that will keep the final composite from looking realistic. First, the in-focus and out-of-focus areas of the portrait and the bokeh image don’t match. When you composite multiple images together, it’s important that everything looks like it was photographed in the same scene, and that means things like lighting direction, depth-of-field, and perspective all need to match. Our photos are pretty forgiving when it comes to perspective and lighting, but we do need to create a realistic focus area for natural-looking depth-of-field.
We want the subject to be sharp and in-focus, so we can build the rest of the scene from there. If the subject is in focus, and if we were shooting with a shallow depth-of-field to get soft bokeh lighting, everything in front of and behind the subject should be blurry. The lights are creating a beautiful, soft bokeh effect, so they should work fine as-is. The raindrops are the main problem here. The raindrops are in front of the subject but, zooming in, you can see that they’re sharp and in-focus. We’ll need to add a blur to them to create the illusion of realistic depth.
Adding a Blur Effect in Photoshop
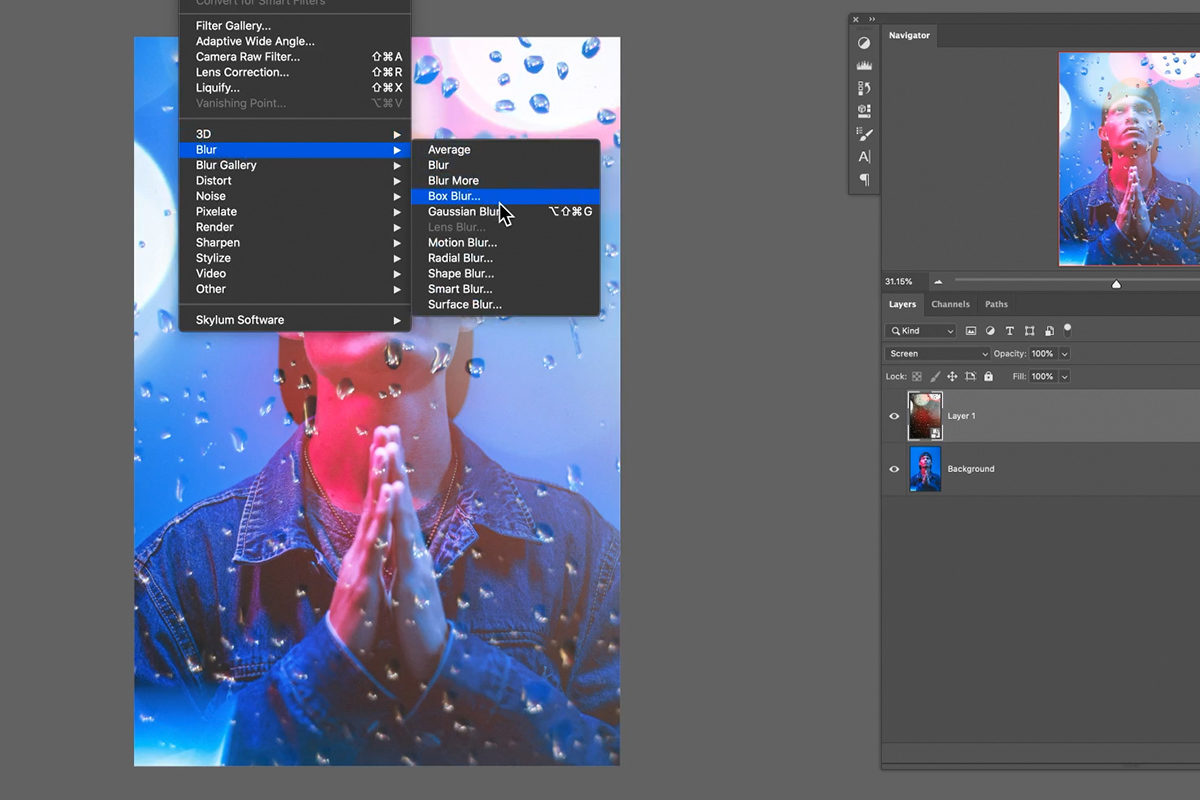
Blurs are a commonly used effect and they have a wide variety of applications. Here we just need to create a blur that looks like photorealistic depth-of-field. For this we recommend the Box Blur. But before applying Blurs (or any Filters in Photoshop for that matter), right-click on the Layer you’re editing and select Convert to Smart Object. Smart Objects are a great way to work non-destructively in Photoshop, allowing us to add, remove, and change Filters at any time.
With the bokeh image converted to a Smart Object, select it and click on the Filter menu, then on Blur, and then on Box Blur. Set the amount of Blur to a level that looks good to you, but keep a close eye on how it fits in with the rest of the image.
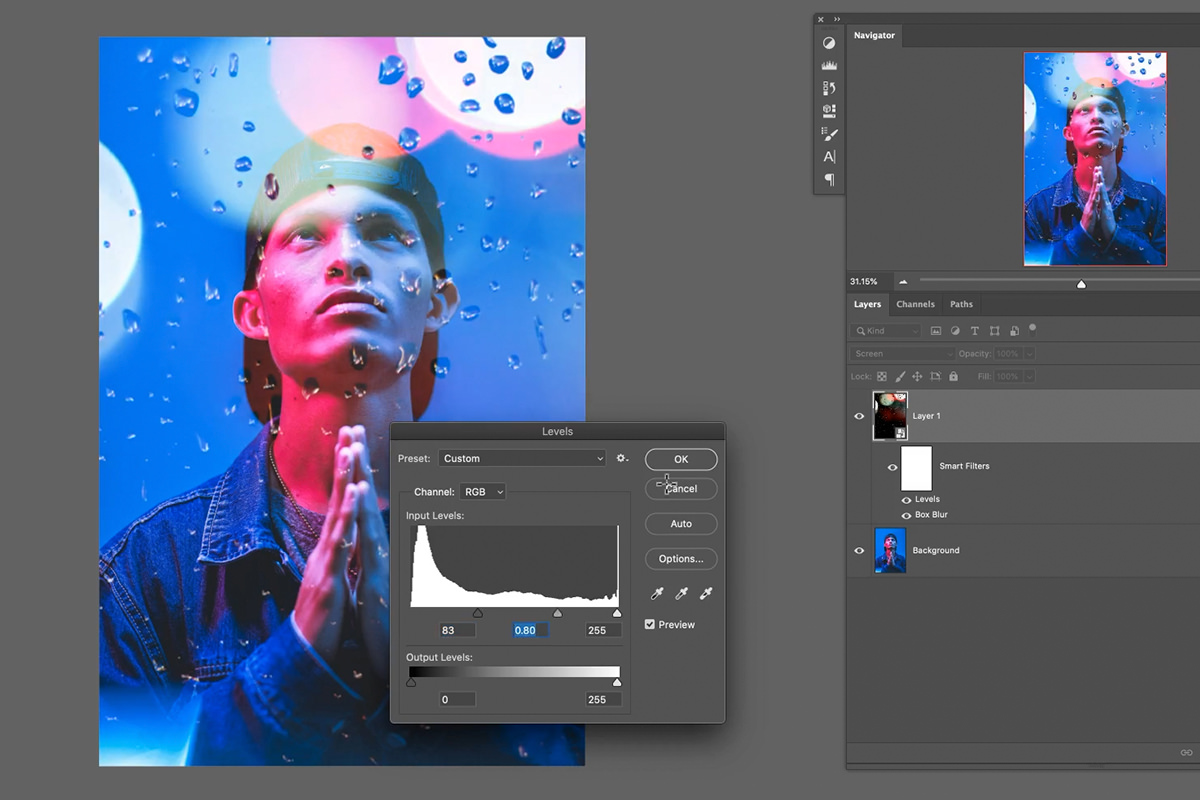
After adding the Box Blur, we noticed that the rain drops were still a little too prominent. Since that Layer is set to a Screen Blending Mode, it’s an easy fix. Just select the bokeh Layer, hit CTRL or CMD + L to open the Levels dialog (you’ll also notice a Levels setting added to the Smart Filters section under the Layer).
Click on the leftmost slider directly under the histogram, and drag it to the right. This will make the darks in the bokeh Layer even darker. Since the dark areas are also hidden by the Screen Blending Mode, the Levels will also help to hide more of that Layer and make it less prominent overall.
And remember, since we converted the bokeh Layer to a Smart Object, both the Box Blur and Levels can be adjusted or removed at any time without damaging the original photo.
Working with Color
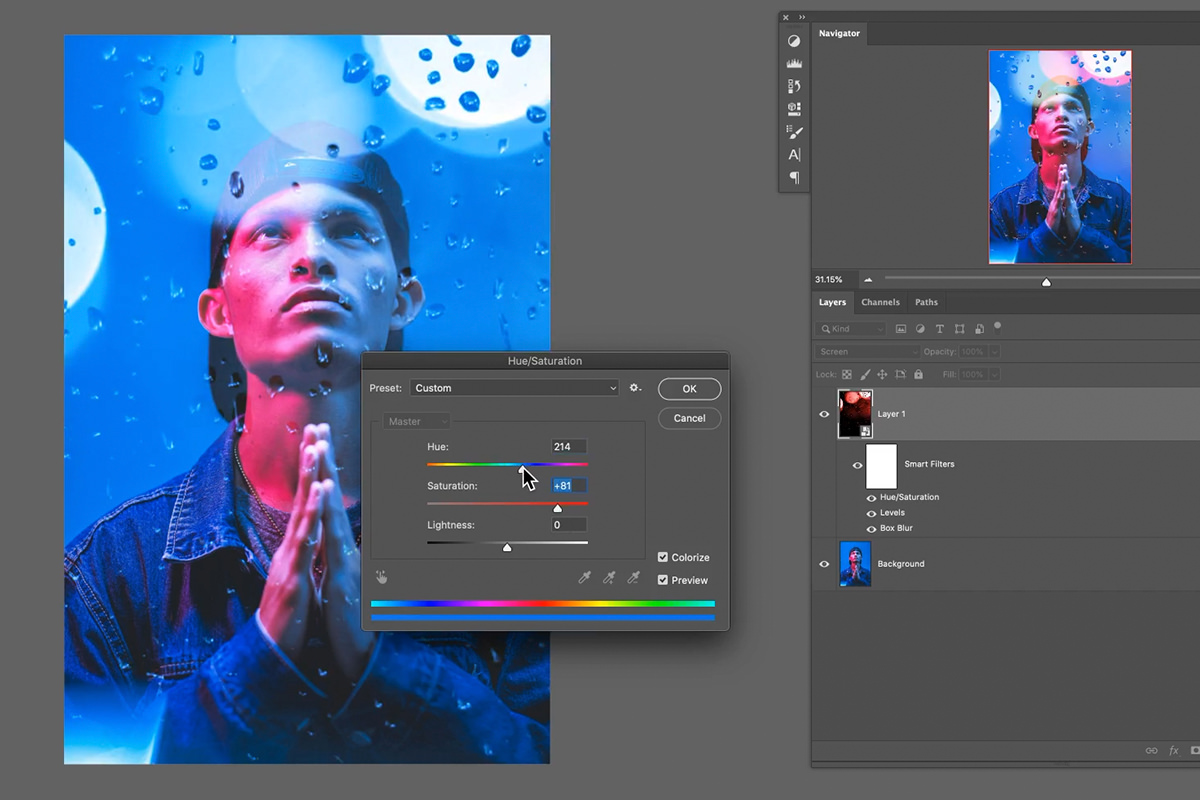
The bokeh layer is looking good, but the colors don’t quite match with the lighting on our subject in the portrait image. Select the bokeh layer and hit CTRL or CMD + U to open the Hue/Saturation dialog.
Click the Colorize checkbox and then adjust the Hue slider until the light reflection in the raindrops matches the blues in the portrait image.
We’re almost there! We just need to add some of the magenta color from the original portrait image. Simply Duplicate the bokeh layer, and then double-click on the Hue Smart Filter option to adjust the color of the lighting to a magenta.
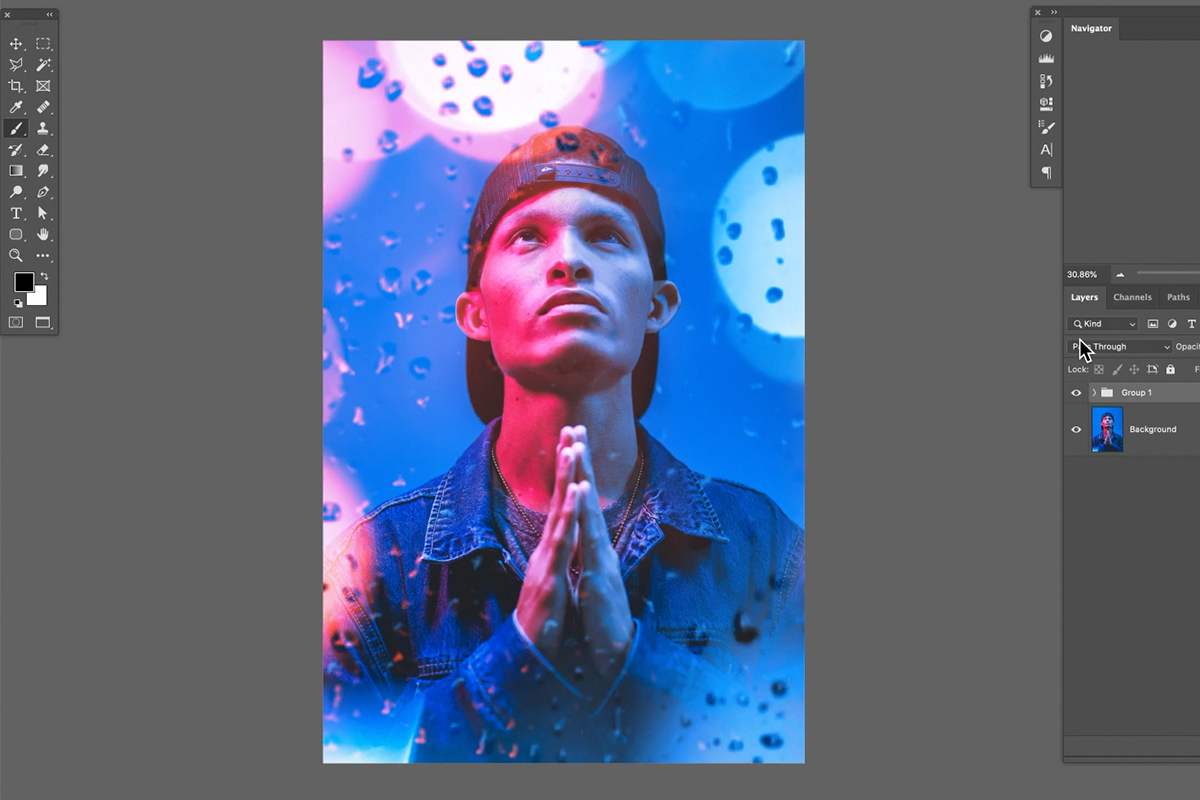
Now you can move and scale each of the bokeh Layers to create a compositing you like. You can also paint black on the Layer Masks of any of the bokeh Layers using a soft, round brush. This can help you blend them into the portrait image as well as hide any hard edges.
Once all the pieces are in place, zoom out and take a look at the final image!
These techniques are versatile and can be used on many different combinations of images. If you want to take the effect to the next level, Blending Modes are also great for creating beautiful double exposure effects.
