

Download Assets
This tutorial includes 1 sample image, 1 sample PSD, 1 Photoshop action and 1 PDF guide. Downloads are free with a PHLEARN account.
- Download the sample images and PSDs from every free tutorial on PHLEARN
- New free tutorials published every week
- One free account — sign up once, then download anything
Free PDF Guide · 4 Pages
This Tutorial as a Step-by-Step PDF
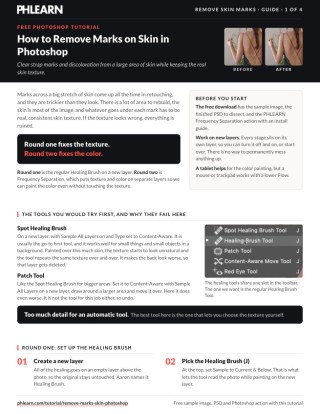
The guide walks through both rounds: the Healing Brush (J) on a new layer with Sample set to Current & Below, then loading the Frequency Separation action from Window > Actions, matching Image > Mode, blurring about 8 px, painting color between HF and LF at low Flow, and masking permanent marks back in. Keep it next to your keyboard.
description
Learn how to remove marks on skin in Photoshop, even across large areas where the Spot Healing Brush and Patch Tool start repeating texture. Start with the regular Healing Brush on a new layer, sampling clean nearby skin by hand, then load a Frequency Separation action to split the image into texture and color layers so you can paint in corrected skin tone without flattening any detail. Finish with the Clone Stamp on the texture layer and a mask to restore permanent marks.
Enjoying This Free Tutorial?
We publish a new free tutorial every week, each one with sample images and PSDs you can download and follow along with. Sign up and they land straight in your inbox, along with early word on sales, events and subscriber-only offers.
Image Source
Photo by Sunsetoned via Pexels
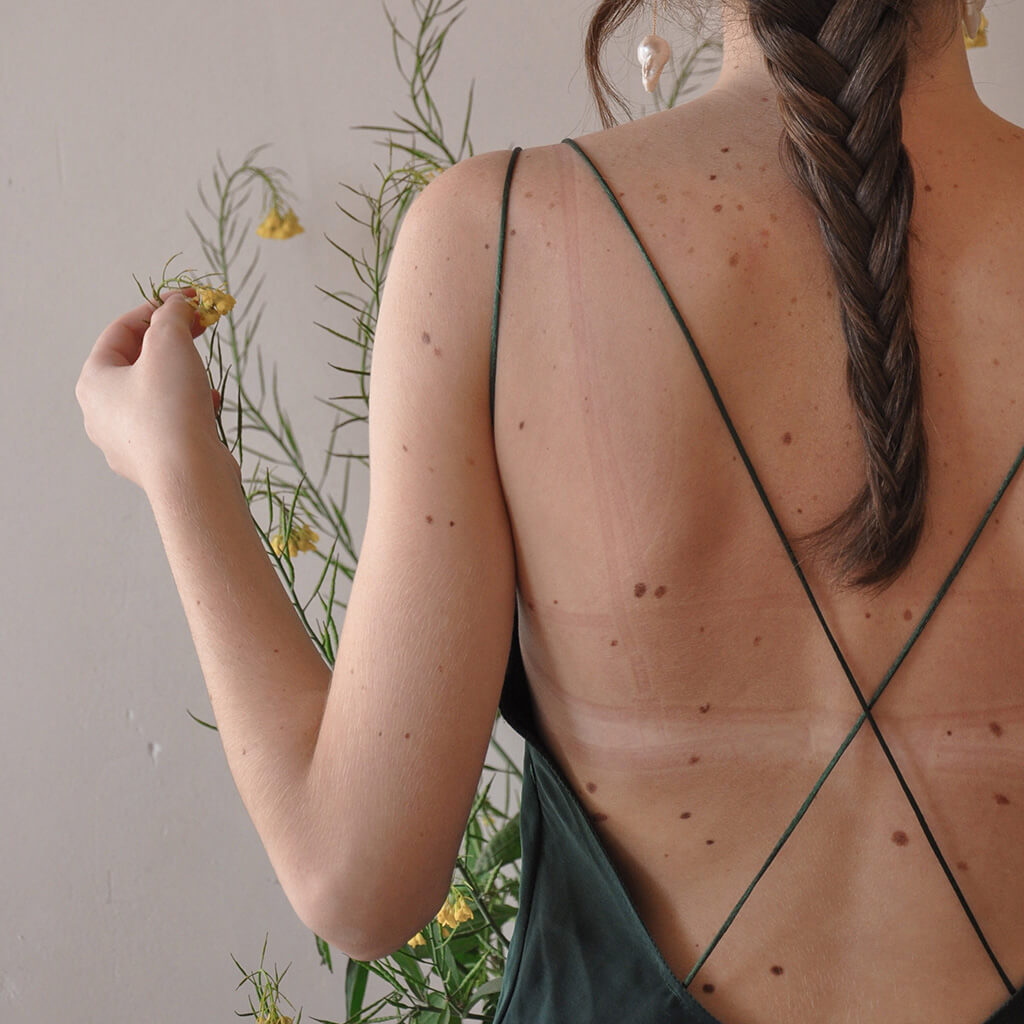
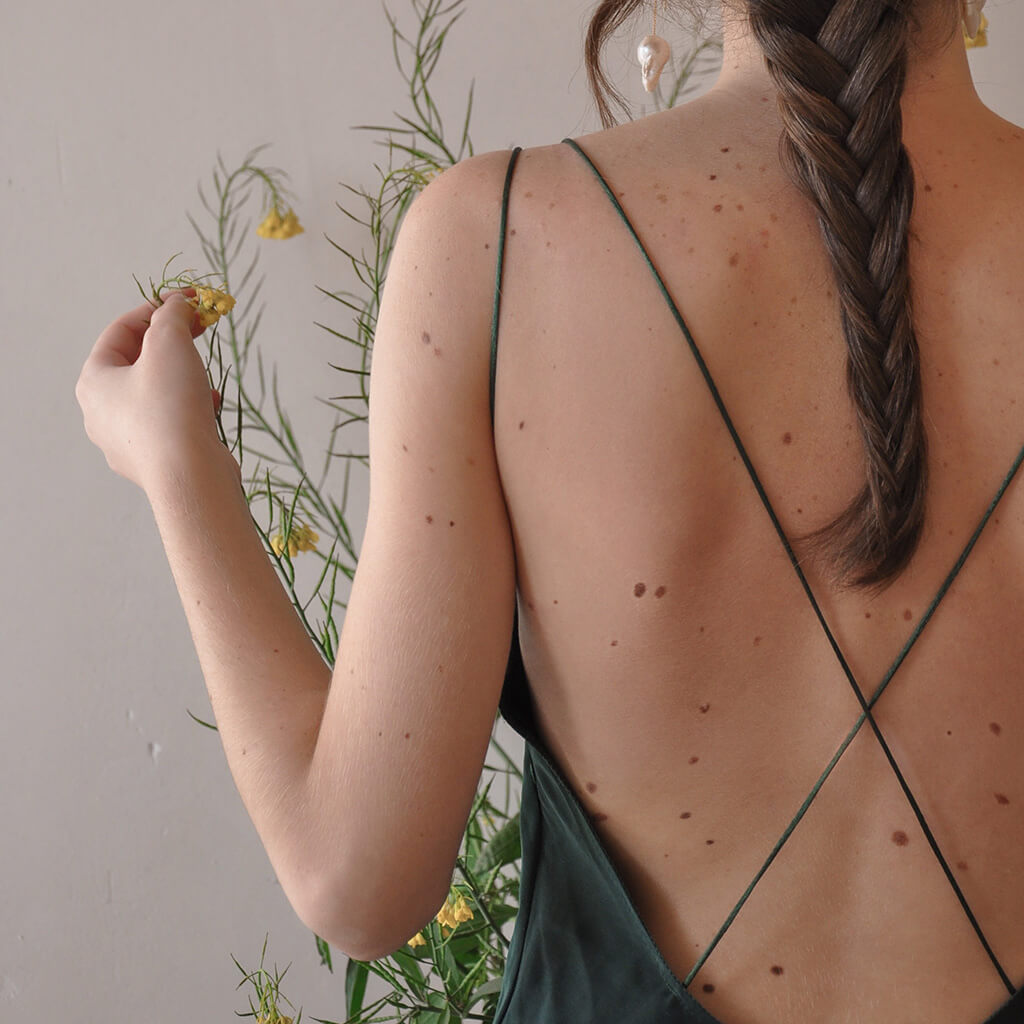
How to Remove Marks on Skin in Photoshop
Marks scattered across a large area of skin — straps, blemishes, scrapes, or bruises — are a genuinely tricky retouching problem, because there’s too much surface area for a quick automated fix, and any solution has to rebuild real, consistent skin texture underneath. This tutorial works through the healing tools that fall short here, then brings in Frequency Separation to finish the job properly.
Why Automated Healing Tools Fall Short on Large Areas
The Spot Healing Brush is a great first instinct — set to Sample All Layers with a Content-Aware type, it can clean up small, isolated marks quickly. Across a large stretch of skin, though, it starts repeating nearby texture over and over, leaving the skin looking unnatural. The Patch Tool, even set to Content-Aware, runs into the same problem on bigger areas: it just isn’t built for this much surface to rebuild.
When These Tools Do Work Well
Both tools are genuinely useful for small, isolated objects — a stray hair, a tiny blemish, a small distraction in the background. The failure mode only shows up when there’s simply too much area and too much real texture detail for an automated tool to convincingly reconstruct.
Using the Regular Healing Brush Tool for Manual Control
The regular Healing Brush (J) takes more effort because the texture source has to be chosen by hand, but that control is exactly what a large area needs.
-
Set Sample to Current & Below
With the Healing Brush selected, set Sample to “Current & Below” at the top of the screen and work on a new layer, so the retouching stays separate from the original image.
-
Sample Nearby Texture and Paint
Hold Alt (Option on Mac) and click a clean area of skin to sample its texture, then paint over the mark. The tool blends the texture from the sample point with the color from wherever it’s painted, repeating the sample-and-paint motion across the whole area.
Sampling from Similar Skin Areas
Skin texture varies noticeably across the body, so sampling from a genuinely similar nearby area matters — pulling texture from the wrong part of the body can introduce texture (even hair) that doesn’t belong. It can also take a few tries at different sample points before one looks right, which is completely normal.
Temporarily Removing Permanent Marks to Rebuild Clean Skin
When a mole or other permanent mark sits inside the area being rebuilt, it’s fine to paint over it temporarily at this stage — it makes rebuilding smooth, consistent texture much easier, and it gets added back deliberately at the end with a layer mask. The only marks that should be removed permanently are temporary ones like straps or blemishes; anything permanent to the subject gets restored unless they specifically ask for it to be removed.
Loading a Frequency Separation Action
The Healing Brush pass gets skin looking better, but color mismatches under the marks are usually still visible. Frequency Separation solves that by splitting an image into a texture layer and a color layer that can be edited independently.
-
Load the Action
Open Window > Actions, click the panel’s menu icon, and choose Load Actions to load the Frequency Separation action file.
-
Choose 8-Bit or 16-Bit
Check Image > Mode to see whether the file is 8-bit or 16-bit, then run the matching version of the action — most JPEGs are 8-bit, while TIFFs and PSDs from RAW files are typically 16-bit.
-
Set the Blur Amount
When prompted, set the blur radius high enough that skin texture detail is no longer visible in the preview — around 8 pixels is a reasonable starting point, adjusted per image.
Why the Bit-Depth Choice Matters
Running the wrong bit-depth version of the action against the file’s actual mode can produce broken or unexpected results, so checking Image > Mode first is worth the extra few seconds every time.
Understanding the Texture and Color Layers Frequency Separation Creates
Running the action produces a group with two layers: a gray texture layer on top, which holds all the fine surface detail, and a color layer underneath, which holds only color and tone with none of the texture. Toggling the texture layer on and off shows exactly what it’s contributing — all the skin’s grain and detail lives there, completely separate from color.
Painting In Corrected Skin Color on a New Layer
Add a new layer between the texture and color layers. Hold Alt/Option to sample a clean nearby skin tone, then paint directly over any remaining discoloration with a large, soft brush at a low flow, building up color gradually. Because texture lives entirely on its own separate layer, painting color here doesn’t erase or flatten any of the real skin texture underneath.
Zooming Out to Judge the Blend
It’s worth avoiding too much zoomed-in focus during this step — working at something closer to full-image view makes it much easier to see whether the color transitions look smooth and where the skin still gets lighter or darker naturally.
Cleaning Up Leftover Texture with the Clone Stamp Tool
Any small texture inconsistencies left after the color pass can be handled directly on the high-frequency (texture) layer with the Clone Stamp tool, set to sample the current layer only — sampling “current and below” here would pull in color information that doesn’t belong on a texture-only layer and cause visible artifacts.
Restoring Permanent Marks with a Layer Mask
Once the retouching is finished, add a layer mask to the combined retouching work and paint black with the Brush tool (B) over any permanent marks — moles, freckles, or anything else that’s genuinely part of the subject — to bring them back exactly as they were. This step matters ethically as much as technically: anything temporary is fair to remove, but permanent features should stay unless the subject asks otherwise.
Why Frequency Separation Works
Regular healing tools have to solve texture and color at the same time, which is exactly why they struggle across large areas — there’s no way to fix one without risking the other. Frequency Separation removes that conflict entirely by splitting the image into a texture-only layer and a color-only layer, so color can be corrected freely with a soft brush while every bit of real, natural skin texture stays completely untouched on its own layer.
Final Thoughts
Large-area skin marks are one of the harder retouching problems precisely because the fix has to hold up at both texture and color level. Starting with the Healing Brush for a rough pass, refining color with Frequency Separation, and finishing with a layer mask to restore any permanent features gives a natural result without erasing anything that’s genuinely part of the subject.
Quick Reference: Keys, Menus and Settings
- Rebuild textureHealing Brush J on a new layer, Sample: Current & Below
- Sample skinAlt/Option-click similar skin right next to the mark, then paint
- Load the actionWindow > Actions, panel menu > Load Actions
- Pick the versionImage > Mode: 8-bit or 16-bit; blur until texture is gone, about 8 px here
- Paint the colorNew layer between HF and LF, Brush B, large and soft, Flow about 10%
- Fix leftover textureClone Stamp S on the HF layer, Sample: Current Layer
- Restore molesGroup the layers, add a layer mask, B and paint black
No AI, no generative credits.
Free Downloads
Follow Along on the Same Photo
Get the bare-back photo with strap marks, the layered PSD to dissect, the PHLEARN Frequency Separation action and the 4-page PDF guide. Free with a PHLEARN account.
Removing Skin Marks: Common Questions
Why doesn’t the Spot Healing Brush work on large areas of skin?
It picks the texture for you, so across a big stretch of skin it starts repeating the same texture over and over and looks unnatural. It is great for small, isolated marks and small objects in a background.
Can I use the Patch Tool instead?
The Patch Tool is like the Spot Healing Brush for bigger areas, but on this back it did even worse, even set to Content-Aware with Sample All Layers. It is not the tool for this job.
How do I set up the Healing Brush on a new layer?
Create a new layer, press J for the Healing Brush and set Sample to Current & Below at the top. Alt/Option-click clean skin right next to the mark, then paint over it.
Where should I sample skin texture from?
From a similar area close to the mark. Skin is very different all over the body, and sampling from the wrong place can paint in texture that doesn’t belong, even hair.
Should I use the 8-bit or 16-bit Frequency Separation action?
Go to Image > Mode and see which is checked, then play the matching version. 8-bit is for JPEGs and is what you’ll need most of the time; 16-bit is for TIFFs and PSDs, like work from a raw image.
How much blur should I use in Frequency Separation?
Raise it until you can no longer see texture detail in the skin. Aaron uses about 8 pixels on this image.
How do I fix skin color without losing texture?
Add a new layer between the HF (texture) and LF (color) layers. Use a large, soft Brush (B) at a low Flow, Alt/Option-click the skin color right beside the mark and build it up. The texture stays on the HF layer above.
What brush Flow should I use for painting skin color?
Low, for a slow build-up: about 20% with a pressure-sensitive tablet, about 5% with a mouse or trackpad. Aaron sets about 10% here, and paints zoomed out.
How do I bring moles back after retouching?
Group the retouching layers, add a layer mask, press B and paint black over each mole or skin tag. Temporary marks can go; anything permanent stays unless your subject asks you to remove it.
Are the sample files free?
Yes, with a free PHLEARN account. You get 1 sample image, 1 sample PSD, 1 Photoshop action and 1 PDF guide: the photo, the finished layered file, the Frequency Separation action with an install guide, and the step-by-step guide.
Master Photoshop, Lightroom and Photography
Join PHLEARN PRO for $12.99 a month or $99.99 a year. Cancel anytime, with a 100% money-back guarantee.





