How to Shoot Concert Photography Part 2
Welcome back, Phlearn Phamily! Again, my name is Brendan Shanley, and recently the team at Lost In Concert—a web-based music publication—launched a Kickstarter campaign to produce an epic 160-page book featuring amazing concert photography and artist interviews. Now I’m teaming up with Phlearn to create this article and shed some Light on the world of concert photography.
If you missed Part 1 be sure to check it out here. I’d also like to point out that there was an excellent question brought up by phamily member Braxton Klavins. You can can check out his question and a detailed reply all in the comments section of Part 1.
In Part 1 we covered some of the groundwork to get you into the show. Now let’s take a closer look into some of the gear and technique necessary to capturing these live performances.
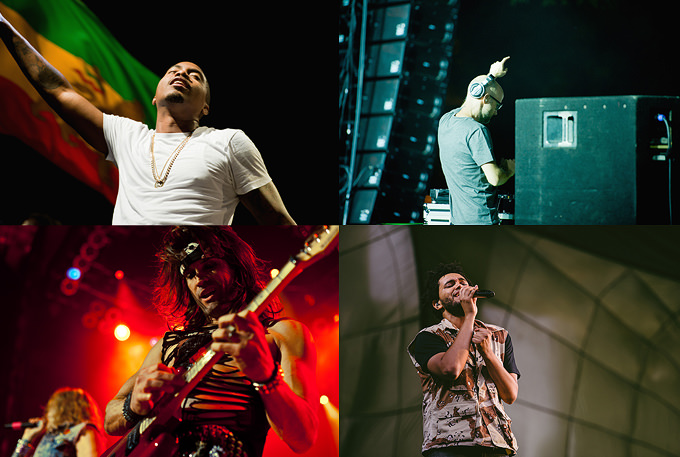
Left to right, top to bottom: Nas + Moby at North Coast Music Festival, Steel Panther at House of Blues Chicago, The Weeknd at Lollapalooza
Do I need to bring more than one camera body?
I typically shoot a show with only one camera Body. So don’t feel like you can’t do it if you only have one. I like sticking to one for a few reasons. It challenges me to make the best photos I can with the lens I’m currently shooting with.
There’s less to keep track of and less to swing around and hit something. When you’re shooting a concert you might find yourself moving quickly to follow the shot you want. Having the second body could slow you down in this case.
I shoot primarily with a Nikon D4 and a Nikon D700. I may shoot Nikon but have a bunch of friends who shoot Canon. Personally, they are both good. No worries if you’re shooting with a non full-frame body, but if you can afford the larger sensor the image space you’ll gain and increased noise reduction will definitely help.
I started shooting shows with a Nikon D70s and I still have it as a backup. It doesn’t look like much but with the right lens I can achieve great results with it.
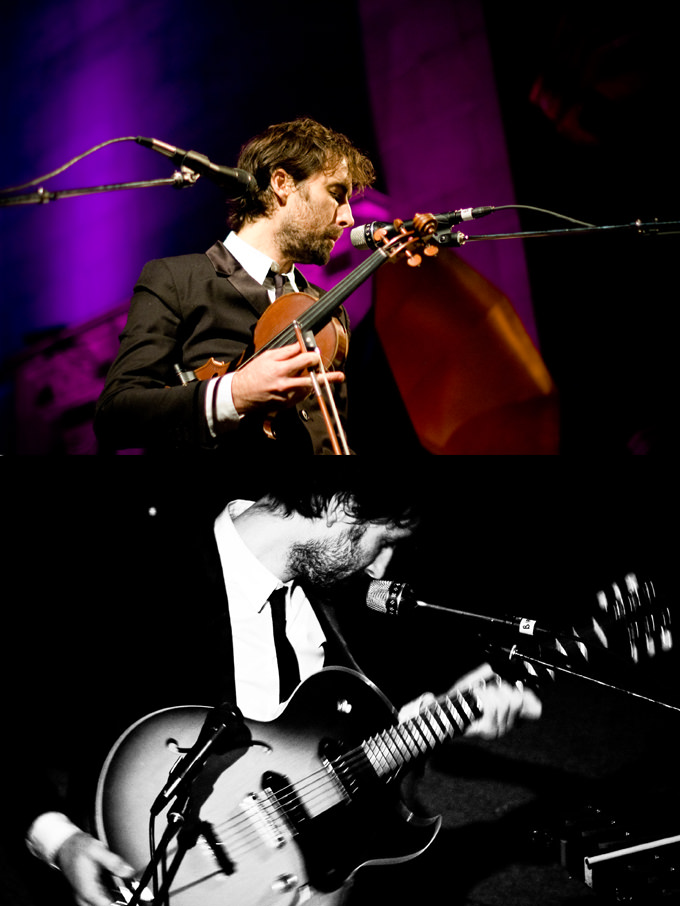
Andrew Bird shot with a DX Nikon D70s. First image shot with 50mm Prime at f1.4, 1/90, ISO800, EV-.5. Second shot with 55–200mm at 200mm, f5.6, 1/45, ISO1600.
There are some benefits to shooting with 2 Bodies. I’ve shot in pits that have literally had up to 70 other photographers in them at one time. I’ve also had the pleasure of being alone at times. When there are a lot of other photographers your movement can be restricted. This makes it incredibly difficult to change a lens and to move to a new vantage point.
Shooting with more than one body means you do not have to change your lens. Changing lenses at a concert can also seriously increase the risk of getting your sensor dirty. If you shoot concerts regularly I suggest having your sensor cleaned at least every 2 months. I go to Calumet for this where I can have it cleaned while I wait for about $60. Obviously, another good reason to have a second body is for backup in case of equipment failure.
I’m just starting out. What’s the best lens for me?
If you’re just getting started with concert photography, or almost any photography, I recommend your first lens to be a 50mm f/1.4. You’ll want the 50mm prime for it’s sharpness and ability to utilize the available light. Remember, no flash photography here. By shooting at 1.4 or 1.8 you can keep the ISO down to maintain more of the image integrity.
A lot of people ask if there’s really a difference between 1.4 and 1.8. Or if the difference is worth the cost. I say there is and it is. If you’re shooting a concert, odds are you’re gonna be in the dark. Especially if you’re shooting the opening act. Most venues and concerts save the impressive lighting for the headliners to make them look more grand.
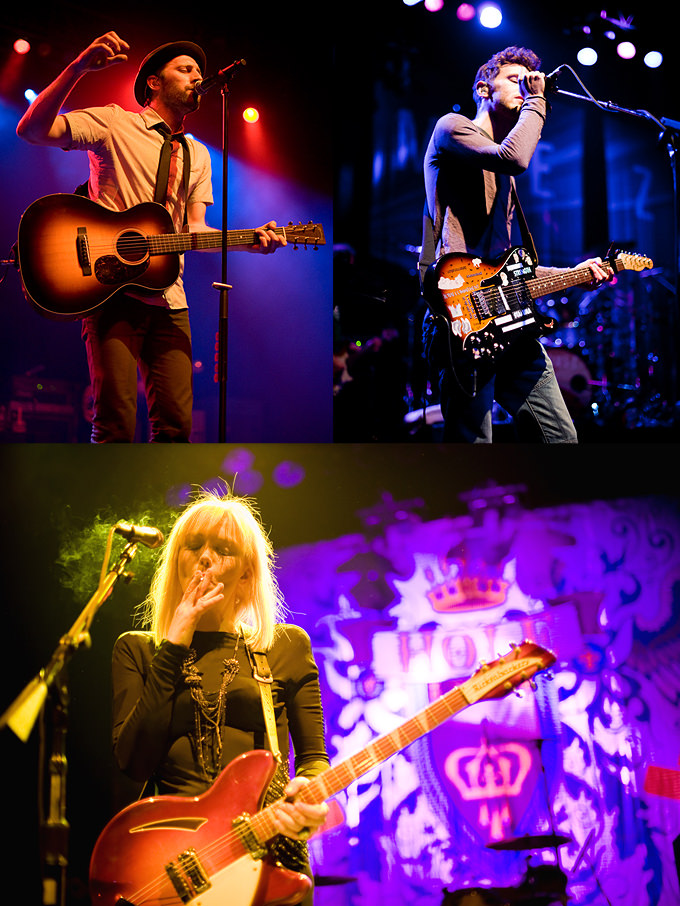
Matt Kearny at The Riviera, Gomez and Courtney Love of Hole, both at The Vic—all shot with the 50mm Prime f1.4. These were all shot very early in my career.
The 50mm 1.4f lens is great when you’re focussing in on one band member and want the backdrop and lighting behind the artist to blend into each other. If a guitarist is playing into your lens and pointing the neck of the guitar your way you can also build the depth of the shot by focussing on the face leaving the guitar to blur out as it gets closer to you.
This lens is also my favorite for traveling since it’s so compact and lightweight.
If you’re shooting with a kit lens or another introductory lens that will only open up to f4 don’t worry. All hope is not lost. For some concerts you will find that there’s ample lighting for you to use such a lens. In fact, you may even find yourself dialing up to f5+ if you’re trying to achieve a more bursted look from a stage light. Check out some of these photos to help illustrate what I mean.
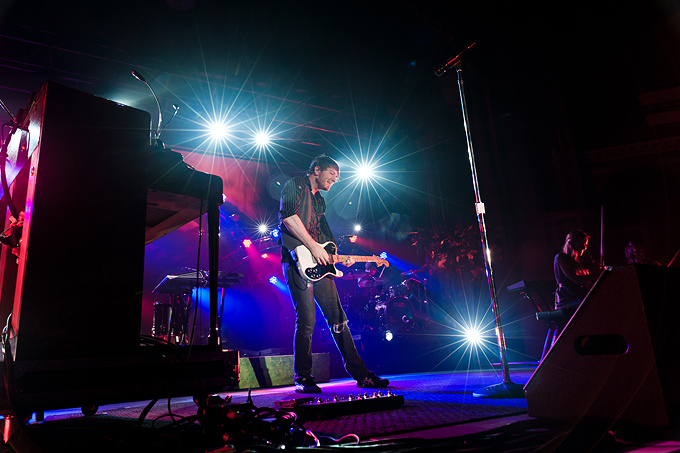
Owl City at The Aragon Ballroom shot at F5
What other gear is in my bag? Why?
First off, I use the Lowepro Mini Trekker AW bag and I love it. This bag has an All Weather cover which pulls out to cover the whole bag and protects it from rain or other elements. This has saved me and my gear more than once while in transit to or from a gig. My bag is a backpack style bag which is good for balance and stability when I choose to ride my bike to a venue.
It’s walls are padded extremely well and there’s plenty of room for a speedlight, 1 or 2 camera bodies and up to 3 lenses. If I choose to bring a fourth lens with I can easily strap it in a lens case to the side of the bag. Plus there are smaller zipper pockets for all the other goodies that we’ll discuss.
In addition to the Nikon 50mm f1.4 which I always pack I also bring a Nikon 70–200mm f2.8 VR2 and a Sigma 24–70mm f2.8. Since I’m shooting on full frame bodies it is very important to me that my lenses also be full frame (FX in the Nikon world). If you’re investing in a new lens and plan to someday have a full-frame camera body you should consider going with the full-frame lens if you can afford it.
Shooting a full-frame Body with a cropped (DX) lens can achieve an interesting excessive vignetting but I bet you’ll be happier to use that sensor space for capturing more of the scene. I didn’t start with these lenses. Some images that I’m still proud of were shot using a small 55–200mm f4-5.6 lens.
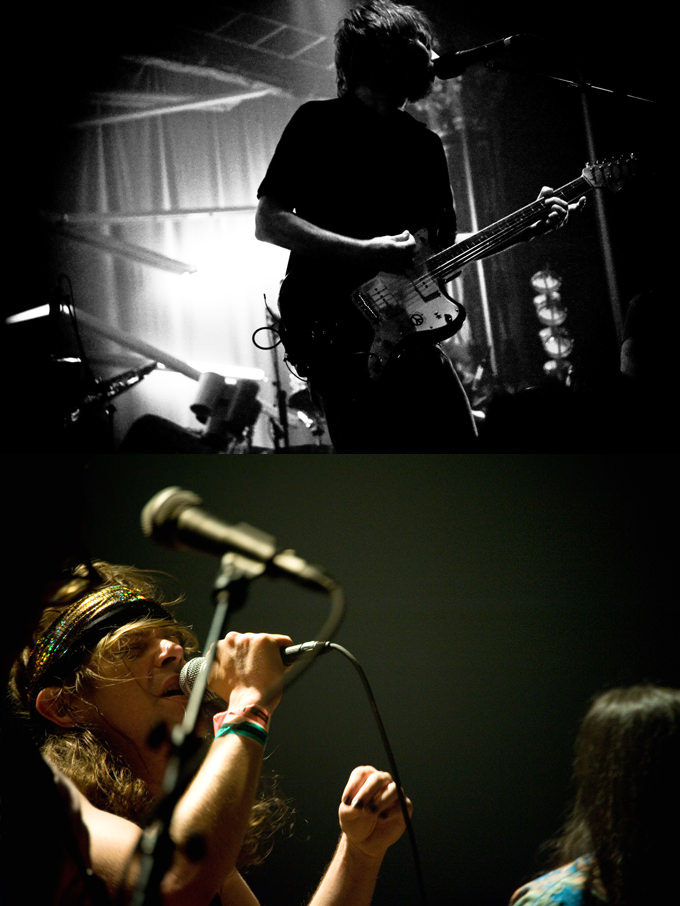
Thom Yorke at The Aragon Ballroom shot using a Nikon kit DX 18–70mm lens at 70mm, f4.4, 1/125, ISO2500 on a Nikon D700 FX Body. Notice the strong vignetting. Ariel Pink’s Haunted Graffiti shot using a Nikon 55–200mm lens at 200mm, f5.7, 1/125, ISO2500 on a Nikon D700.
I absolutely love the Nikon 70–200mm VR2 lens. Yes, it’s heavy and comes with a high price tag, but I find the weight helps me keep steady. The VR2 will take care of that when I can’t though. I’ve shot fully zoomed in with a shutter speed of 1/60 and had images of a moving subject come out crisp.
This lens rocks when you get stuck at the soundboard or you need to get a shot of the drummer who might be way in the back of the stage. Another great time for this lens is when you’re on a balcony or in a pit where the stage is 20 feet high. If I’m shooting a main stage at a festival I will likely use this lens the entire time.
You may be wondering why my 24–70mm is made by Sigma. The honest answer is I bought it on Craigslist for $375 cash. And it’s a full frame lens. I couldn’t pass it up at the time since I had recently switch from my old DX Nikon D70s to the FX D700. That Sigma lens is by far the best deal I have ever gotten on camera gear.
I use it all the time for shows and even in the studio for portraits. Point being, while I do love the Nikon gear, you can make great images with almost any lens if you use it right. In the case of shows, this focal depth allows me to zoom close enough for an intimate portrait yet wide enough to get more interaction between band members.
Only on rare occasions will I pack my Nikon 14–24mm f2.8 lens. For me, this lens is more of a specialty lens. When shooting at 14mm you should expect there to be quite a bit of distortion at the edges. Some photographers think this is a neat effect but I prefer to reduce this type of distortion when I can.
This is a great lens when you’re shooting to capture a very large area such as the entirety of a venue or a very large stage with multiple band members at once. Although originally a landscape oriented image, an image I shot at the Oprah Finale with this lens appeared on the cover for the April 2011 issue of Live Sound International.
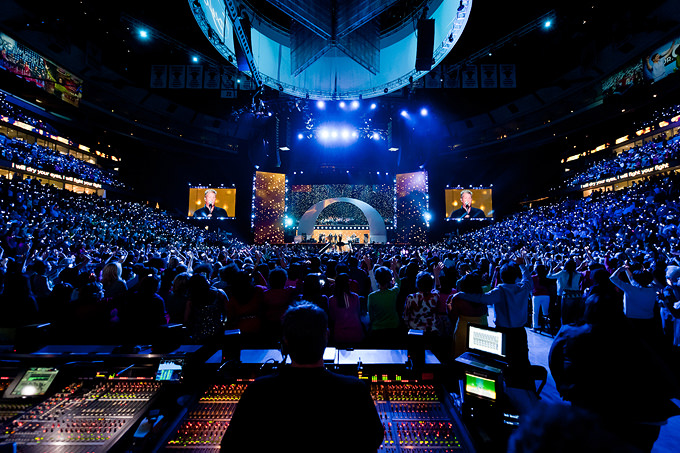
Stage setup for the Oprah Finale at the United Center during Rascal Flatts
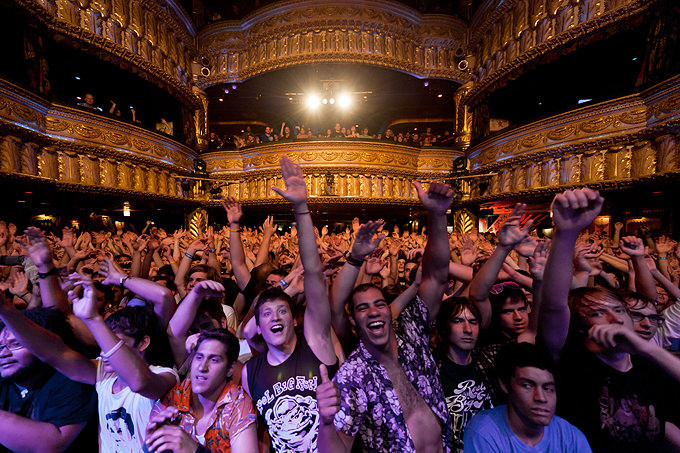
Reel Big Fish fans at The House of Blues Chicago
In the rest of the smaller pockets of my bag you’ll find ear plugs by Ear Love, a Nikon lens cleaning cloth, dual rapid straps, extra memory cards, batteries, a Sharpie and some business cards. If you plan on going to concerts 2 or more nights a week you should absolutely be wearing ear plugs. I prefer to wear mine since they are designed to cut out the ultra high and low frequencies which are most harmful leaving only the quality sound of the music I want to hear anyway.
I love the dual BlackRapid straps for weight distribution and also since they split apart if I’m shooting with only one body. Lastly, carrying a Sharpie with you can come in handy more than more people think. Let’s just say that manipulating or copying certain marks with a Sharpie can sometimes get you into places you want to be.
What are my default settings when the show starts?
My default settings for any show will start with the ISO at 1600 and move from there depending on the lighting setup. Typically I will move as low as 500 and as high as 2500. I’ve had moments where 6400 was necessary but it’s uncommon. I start with my shutter speed at 1/160 and try not to go slower than that unless I’m intentionally going for a motion or blurred look.
I start with my aperture around 2.8 and will vary again depending on the light and my desired look. On Nikon cameras you can control the color perception of the sensor through the Picture Control in the menu. I start with this on VI – Vivid and sometimes will switch back to SD – Standard depending on it I like the look I’m achieving or not. VI can sometimes be a bit too saturated.
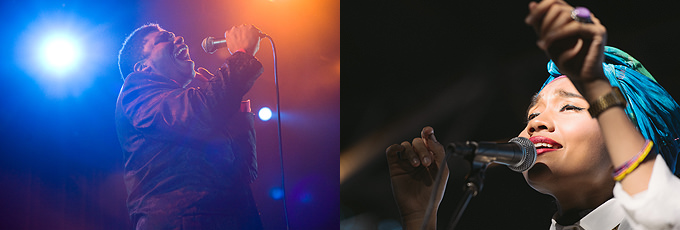
JC Brooks at Metro and Yuna at Lollapalooza
I have my focus settings set to auto focus and single point so I can control the region of the sensor the focus falls into. If I’m shooting a band and the person I want to get a photo of is moving around extremely fast I’ll switch to continuous focus. Sometimes this is great but you will want to practice with this setting before relying on it for an important shot. If the band is going crazy with fast strobe lights you do not want to be in auto focus.
No matter how fast of camera and lens system you’re using you’ll be hard pressed to get the shot you want. Sure you could get lucky, but let’s rely on skills first. They are more reliable. Some lenses will have a M/A or M setting on them. What’s nice about this is when you’re shooting with Auto Focus and the M/A is also set you can easily switch to manual focus just by twisting the focus ring. When you want to return to Auto Focus you just let go of the focus ring and continue shooting normally.
When choosing between shutter modes of Single, Low Speed Continuous and High Speed Continuous I prefer either Low or Single. You might think that by shooting 11 FPS (frames per second) that you couldn’t possibly miss that shot you want. However, if you’re shooting that fast the odds are that you’re hoping for a shot to happen and not planning it or predicting it.
With the subject moving around you’ll be firing off shots focused where the subject was 2 seconds ago and not where they are now. Personally, I don’t like to go home with hundreds of blurry shots. Get used to shooting smarter and you’ll have more fun when it comes time to edit and process your images.
How many images will I shoot at a show?
For each band I shoot a live set for I usually take about 100 to 250 images during those first 3 songs. If you’re shooting 500 or more you might want to consider investing in a storage company—and refining your shots before pushing the shutter. Make the most of those 3 songs but don’t open up like your camera is some kind of Tommy Gun. Remember, you have to go through these images later.
What are some of the atmospheric conditions to expect at a venue?
Unlike the olden days of shooting concerts where smoke machines were not as necessary due to the fact that everyone at the show was smoking something, today’s venues are often quite clean.
You may notice a lot of concerts today use smoke machines. This isn’t to replicate the ambiance that someone is smoking, however. Smoke carries light in wonderful and interesting ways. Smoke pulls Light through it and amplifies the lights span while softening its appearance.
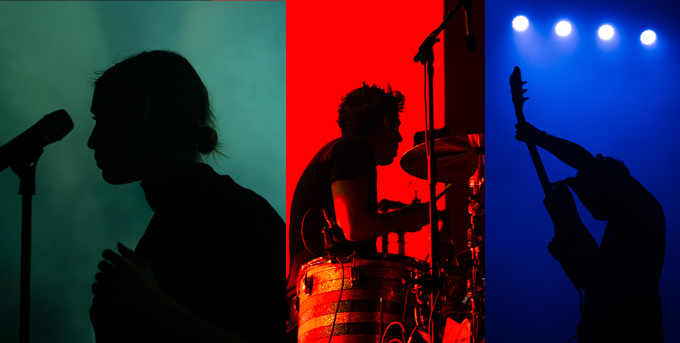
Lykke Li at Metro and The Black Keys at Lollapalooza
You might also run into situations where a band has set up mirrors or even a disco ball to blast the Lights into other directions. This can look really great combined with some of that smoke to reveal lots of light trails. For larger productions you will likely see spotlights being used. Typically there are more than more in use and they are located at the highest point in the venue.
I love when spotlights are being used because it makes focusing and getting a great exposure much easier.
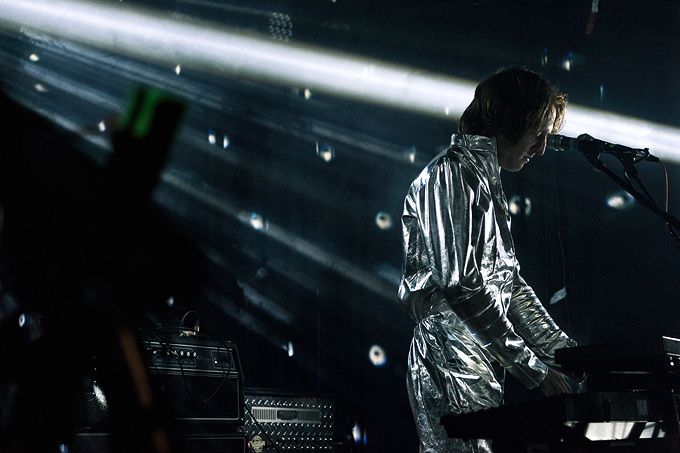
Art vs Science at Lincoln Hall with LED Laser lights and a Disco Ball
On the other hand, you may find yourself shooting a concert where the band has decided to project visuals onto a screen behind them. This is really great for the guy in the crowd who dropped acid before coming into the venue. Unfortunately you’re there to take photos and not trip and now you can expect there to be practically no lighting at all since they’ll want to put all focus on the visual screen.
This can however be a good opportunity to capture a nice silhouetted image of the artist. Another difficult lighting scenario we touched down on earlier that can be great for silhouetted images is intense strobe lighting.
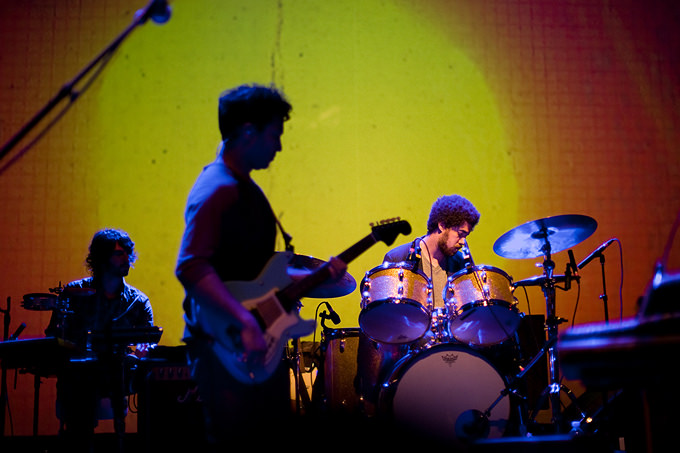
Broken Bells at The Vic Theatre with a large projection in the background. Not ideal shooting conditions.
Break it down, now.
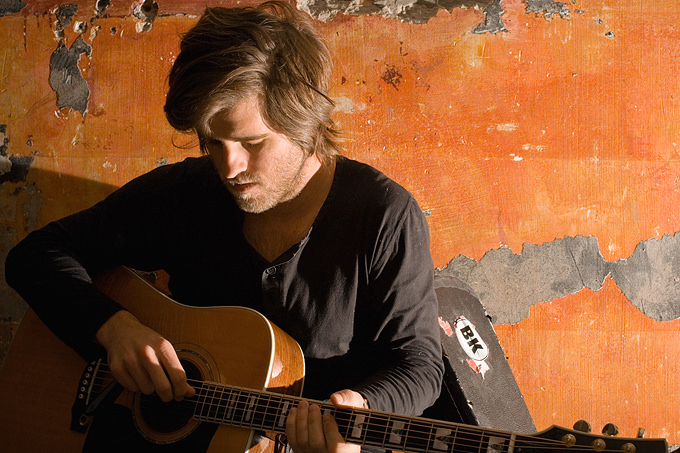
The following are a few very different portraits I’ve shot of artists backstage at venues here in Chicago along with some of the details that make the show what it is. First let’s take a look at the idol heartthrob Graham Colton. This guy is awesome. We chatted for awhile backstage at Lincoln Hall before his set and had some time to shoot a few portraits after the interview.
The shot was achieved with one speedlight placed far camera right set to approximately half-power. This was shot with a 50mm prime at: f10, 1/250, ISO320 on a Nikon D700. The speed light allowed me to pretty much ignore any garbage ambient light the room was putting off while adding a bit of drama to the image.
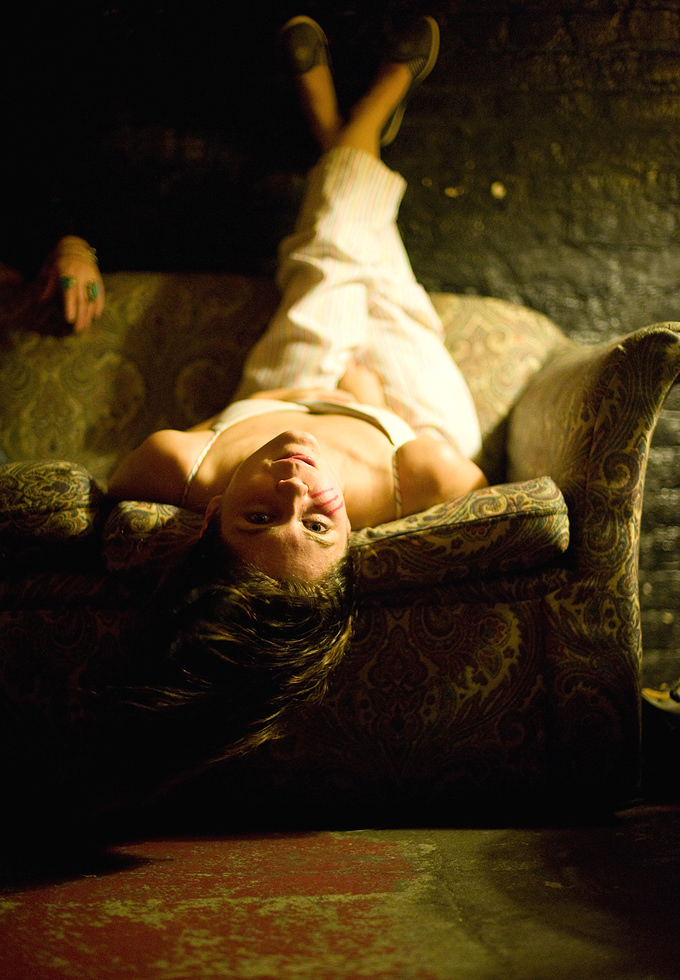
Next we have Rachel Williams formerly of Sleepy Sun. After watching Sleepy Sun nail an excellent performance at the Double Door here in Chicago, my writer and I met up with the band for somewhat of a session backstage. Everyone was having a good time and Rachel felt comfortable enough to spin around on the couch. It was during such time that it made perfect sense for myself to lay on my stomach against the floor while the tour manager pulled a nearby lamp off a table and held it camera right midway over Rachel’s head.
The lampshade made for a natural diffuser. Another band member aimed a small fan towards her head on the floor which also happened to be in the room. Yes, some of this was directed but parts of it were just about being in the right place at the right time and having the wit to know the shot when you see it. I’m convinced this shot would not be as cool if it hadn’t been shot with my 50mm prime.
The technical side reads: f1.4, 1/100, ISO4000 on a Nikon D700.
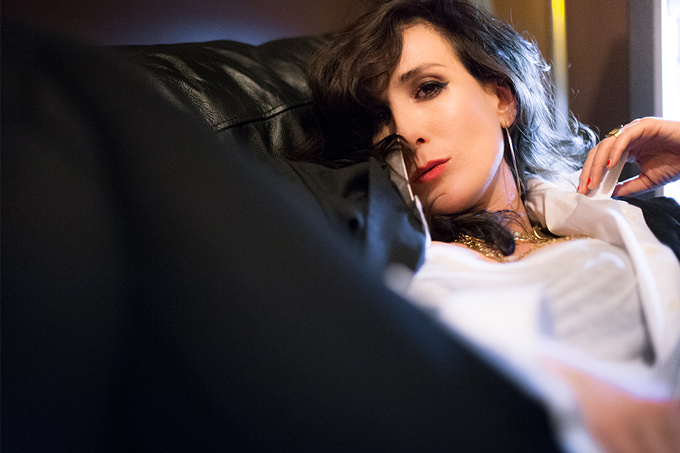
Lastly we’ll look at the lovely Class Actress herself, Elizabeth Harper. This situation was completely different that the aforementioned two. After rounds of texting and waiting I finally was able to meet Elizabeth after her set at Lincoln Hall. We met by her merch table where she’d been selling merch (and drinking lots of whiskey). She escorted me backstage for a “quick” portrait.
I did not have my speedlight with me which was just as well considering how in and out this experience was. Another challenge other than time you will find yourself faced with is how to make portraits in the same venue completely different. Believe it or not this shot was taken literally 3 feet away from the Graham Colton shot shown above. On the opposing wall was a couch and next to the couch a table with a small beverage refrigerator. When light is scarce you will look in the most random places to bring more into your frame.
This small refrigerator made for the perfect cool rim light in this shot. It’s cool nature almost makes it feel like outdoor window / skylight. Another major difficulty with this shoot was that the artist wanted to see each shot after it was taken to say yes keep it or no delete it now. I typically don’t offer this luxury but she insisted. This photo was taken with a Nikon D700 using a 50mm prime lens at: f1.4, 1/160, ISO4000. You can scope out another shot of Elizabeth in Part 1.
That’s it, huh? I can totally do this!
Well, mostly yea. I use Adobe Lightroom 4 for editing and pretty much solely use that for all the editing needed. The program’s cataloging and advanced editing capabilities including brushes allow me all the tools I require to tell the story how I saw it. When I edit any image I consider the story of what I saw and how to best relay that. Usually, I can edit a selected image in anywhere from 2 minutes to 20 minutes. Yes this is a big range but I want to make sure the image speaks the volumes to make the view feels like they were there. I especially love the ability to edit my dodges and burns with a feathered brush.
More than likely you will also have to package and deliver the images to the media outlet at their specifications. During which time you’ll hopefully be hearing about your next gig! Let the cycle start over again.
There’s a lot more than meets the eye to concert photography. Like anything you will probably get better the more you do it. So what are you waiting for? Get out there and rock it!
