

The teal-and-orange cinematic grade comes out of video editing, and it translates cleanly to Photoshop stills. This free tutorial pushes midtones toward blue and green and highlights toward red and yellow with Color Balance, then solves the harder half of the problem: protecting skin from that same push, comparing a quick Color Range mask against a far cleaner selection built from the Red channel, and neutralizing leftover casts with an inverted fill layer.
We publish a new free tutorial every week, each one with sample images and PSDs you can download and follow along with. Sign up and they land straight in your inbox, along with early word on sales, events and subscriber-only offers.
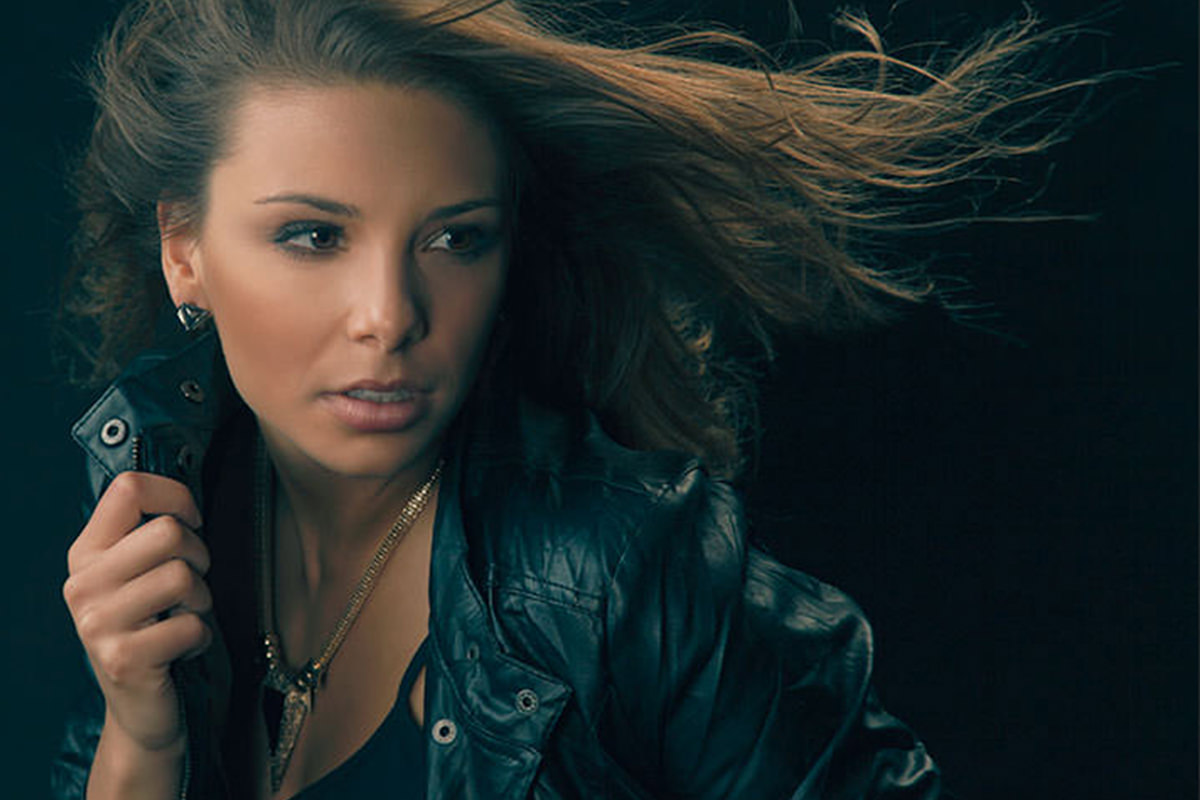
How to Apply Cinematic Color Grading to Your Photos
This teal-and-orange color grade is adapted from a video editing technique rather than a photo one — the concepts come from a fantastic tutorial by Juan Melara built around different footage and a different program entirely. The core idea translates well to Photoshop stills: push cool colors into the shadows, push warm colors into the highlights where skin tones usually live, and then protect that skin so the grade reads as stylized rather than discolored.
Building the Teal-and-Orange Look With Color Balance
The classic cinematic look pushes blues and greens into the shadows and oranges into the highlights, using complementary colors to create contrast between the two tonal ranges.
-
Add a Color Balance Adjustment Layer
Create a Color Balance adjustment layer and make sure Preserve Luminosity stays checked. Shadows are best left alone for this technique, since pushing color into them tends to look worse rather than better — the midtones and highlights sliders do most of the work.
-
Push Midtones Toward Blue and Green
On the Midtones range, push the slider toward Blue and toward Green, exaggerating it more than you’d expect for a natural-looking result, since a subtle version of this grade can be hard to see.
-
Push Highlights Toward Red and Yellow
Switch to the Highlights range and push toward Red and Yellow. Because skin tones are naturally orange, a mix of red and yellow in the highlights complements skin especially well when most of the highlight detail in an image falls on skin.
Protecting Skin Tones: Method One, Color Range Selection
Pushing color into the highlights this hard will also shift skin tones more than intended, so the next step is masking that effect away from the skin using one of two approaches.
-
Select Skin Tones With Color Range
Go to Select > Color Range and click on the skin in your image, using the plus eyedropper to add any missed highlight areas to the selection until the skin tones are reasonably well covered.
-
Apply the Selection to the Layer Mask
With the selection active, click the Color Balance layer’s mask, press Cmd/Ctrl+I to invert it so the adjustment is hidden where the skin was selected, then press Cmd/Ctrl+D to deselect.
Why Color Range Alone Isn’t Ideal
A Color Range mask tends to come out very dense and hard-edged, which can be softened somewhat by lowering the mask’s Density and raising its Feather in the Properties panel, but it still throws away a lot of the tonal nuance in the original selection compared to a channel-based mask.
Protecting Skin Tones: Method Two, Selecting From the Red Channel
A more detailed alternative uses the Red channel, since skin is made up mostly of red and yellow and the Red channel typically holds the most contrast and detail in skin tones.
-
Duplicate the Red Channel and Boost Contrast
Open the Channels panel, duplicate the Red channel by dragging it onto the new channel icon, then press Cmd/Ctrl+L and raise the black point to increase contrast and focus the channel on skin detail.
-
Load the Channel as a Selection
Hold Cmd/Ctrl and click the duplicated channel’s thumbnail to load it as a selection — areas over roughly 50% brightness will be selected even if the marching ants don’t appear to cover everything.
-
Apply and Fine-Tune the Mask
Return to the Layers panel, click the Color Balance layer’s mask, invert it with Cmd/Ctrl+I, deselect with Cmd/Ctrl+D, then press Cmd/Ctrl+L on the mask itself and drag the shadow input slider to the right to make the mask’s darks darker, reducing the adjustment’s effect on skin even further as needed.
Why the Red Channel Gives a Cleaner Mask
Selecting skin through the Red channel preserves far more tonal variation than a Color Range selection does, producing a mask with soft, detailed transitions instead of one hard edge. The extra step of working through channels is worth it because the resulting mask blends the color grade out of the skin much more naturally.
Reusing the Mask for a Second Color Balance Pass
Once a solid skin mask exists on one layer, there’s no need to rebuild it from scratch for other adjustments that need the same protection.
-
Add a Second Color Balance Layer for Extra Warmth
Create another Color Balance adjustment layer, choose Midtones, and push toward Red and slightly toward Yellow for additional warmth beyond the first pass.
-
Copy the Existing Mask Across
Hold Alt/Option and drag the layer mask from your first Color Balance layer onto this new one, confirming Replace when prompted, then invert it with Cmd/Ctrl+I so it protects the same skin area.
Why Reuse an Existing Mask Instead of Rebuilding It
A channel-based skin mask takes real effort to build well, so once one exists, dragging a copy of it onto a new adjustment layer with Alt/Option is far faster than repeating the channel duplication and selection process from scratch every time another layer needs the same protection.
Neutralizing Color Casts With an Inverted Fill Layer
Beyond the intentional color grade, real images often carry unwanted color casts in the deepest shadows or brightest highlights, and there’s a specific trick for canceling those out.
-
Sample and Fill With the Cast Color
Create a new layer, hold Alt/Option with the Brush tool to sample the color cast directly from the highlight or shadow area you want to neutralize, then hold Alt/Option+Delete to fill the layer with that sampled color.
-
Invert the Color and Set Blend Mode to Color
Press Cmd/Ctrl+I on that filled layer to get its exact opposite hue, then change the layer’s blending mode from Normal to Color.
-
Mix the Original and Opposite Colors at 50% Opacity
Press V, then 5, to set the layer’s opacity to 50%, which mixes the original color cast and its opposite evenly, neutralizing the cast toward a more neutral tone.
Why Inverting the Sampled Color Cancels the Cast
A color and its exact opposite, blended together at equal strength using the Color blending mode, mathematically cancel each other’s hue rather than simply covering it up. That’s what makes this approach more reliable at neutralizing a cast than trying to eyeball a correction color directly.
Isolating the Correction to Highlights and Shadows With Blend If
The neutralizing layer needs to affect only the tonal range that actually had the color cast, not the entire image.
-
Restrict the Highlight Fix With Blend If
Double-click the neutralizing layer to open its blending options, hold Alt/Option, and drag the dark (left) handle of the Underlying Layer slider toward the right to restrict the effect to just the brightest highlights, watching the image update live as you adjust.
-
Fine-Tune Opacity
Once the range is set, lower the layer’s opacity further if the correction still feels too strong — a value like 30% often keeps enough of the fix without overcorrecting.
Repeating the Process for the Shadows
The same fill-invert-blend approach works for a shadow color cast, isolated to the dark end of the tonal range instead of the highlights.
-
Sample, Invert, and Blend the Shadow Cast
On a new layer, sample the shadow color cast, fill with Alt/Option+Delete, invert with Cmd/Ctrl+I, and set the layer’s blending mode to Color and its opacity to 50% with V then 5.
-
Restrict to Shadows With Blend If and Adjust Opacity
Open the layer’s blending options, hold Alt/Option, and drag the light (right) handle of the Underlying Layer slider toward the left this time to restrict the effect to the darkest shadows, then lower opacity to taste if a small amount of cast is actually fine to keep.
Finishing With a Break and a Final Saturation Pass
With every adjustment layer in place, the last step is stepping back before deciding the grade is finished.
-
Take a Break Before Final Adjustments
Step away from the image for five to ten minutes before making final judgment calls — color grading decisions made in a stretch tend to drift, and a short break makes it much easier to spot what still needs a small tweak.
-
Group Everything and Add a Hue/Saturation Layer
Shift-click all your grading layers, group them with Cmd/Ctrl+G, and compare before and after. Add a Hue/Saturation adjustment layer on top and nudge saturation up or down depending on whether the grade feels too subtle or too strong.
Why This Approach Works
The teal-and-orange look works because it leans on complementary colors, pushing cool tones into the shadows while pushing warm tones into the highlights where skin naturally lives, which creates contrast between tonal ranges rather than just a single color tint over the whole image. The harder problem this tutorial solves is protecting skin from that same push, and the Red channel selection is the better of the two masking methods shown because skin’s own red-and-yellow composition gives that channel unusually clean, detailed contrast to select from. The color-cast neutralizing trick works for a similar mathematical reason: blending a sampled color with its exact inverse at equal opacity cancels the hue rather than papering over it, and Blend If lets that correction target only the tonal range that actually needs it, based on live visual feedback rather than a hand-painted mask.
Final Thoughts
Cinematic color grading in Photoshop comes down to layering several small, targeted adjustments rather than one heavy-handed filter: a Color Balance push for the overall look, a channel-based mask to protect skin, and a fill-invert-blend trick with Blend If to neutralize any color casts left in the deepest shadows or brightest highlights. None of these techniques are exclusive to a teal-and-orange grade either — the Red channel masking method and the color-cast neutralizing trick are both worth keeping in your back pocket for any color work where skin needs to stay natural while the rest of the image gets pushed harder.
Quick Reference: Keys, Menus and Settings
- The gradeColor Balance, Preserve Luminosity on: Midtones to Blue and Green, Highlights to Red and Yellow
- Red channel maskDuplicate Red in Channels, Cmd/Ctrl + L, Cmd/Ctrl-click to load
- Apply to the maskCmd/Ctrl + I, Cmd/Ctrl + D; Cmd/Ctrl + L on the mask to darken its darks
- Copy a maskAlt/Option-drag it to the other layer, Replace
- Cancel a castSample, Alt/Option + Delete to fill, Cmd/Ctrl + I, Color mode, V then 5
- Limit by toneBlend If, Underlying Layer, Alt/Option to split; about 30% opacity
- FinishGroup with Cmd/Ctrl + G, take a break, Hue/Saturation to taste
No AI, no generative credits.
Cinematic Color Grading: Common Questions
How do I get a teal and orange look in Photoshop?
Add a Color Balance adjustment layer with Preserve Luminosity checked. Push Midtones toward Blue and Green, then push Highlights toward Red and Yellow, which mix to orange.
Should I change the Shadows in Color Balance too?
The video leaves Shadows alone; pushing them tends to look odd. Midtones and Highlights do the work.
How do I keep the grade off skin tones?
Select the skin, click the Color Balance mask and press Cmd/Ctrl + I so the grade is hidden there, then Cmd/Ctrl + D to deselect. Select > Color Range is the easy way; the Red channel gives a better mask.
How do I make a skin mask from the Red channel?
In Channels, drag Red to the new channel icon, press Cmd/Ctrl + L and raise the black point a little. Cmd/Ctrl-click the copy to load it; anything over 50% is selected even where marching ants don’t show.
My Color Range mask has hard edges. Can I soften it?
In the mask’s Properties, lower Density and raise Feather. It helps, but a Red channel mask still keeps far more detail.
Can I reuse the same skin mask on another layer?
Yes. Alt/Option-drag the mask onto the new layer and choose to replace its mask. Press Cmd/Ctrl + I if you need the opposite area, like warming only the skin.
How do I cancel a color cast in the highlights?
On a new layer, Alt/Option-click the cast with the Brush, fill with Alt/Option + Delete and press Cmd/Ctrl + I for the opposite color. Set the layer to Color and press V then 5 for 50% opacity, so the two colors cancel.
How do I limit the fix to only highlights or only shadows?
Double-click the layer for Blend If. For highlights, drag the dark handle of Underlying Layer to the right; for shadows, drag the light handle to the left. Hold Alt/Option to split a handle for a smooth falloff, then lower opacity to taste.
How do I know when the grade is finished?
Step away for five to ten minutes and look again. Then group the layers and try a Hue/Saturation layer; lower saturation if it is too strong, raise it if it is too subtle.
Master Photoshop, Lightroom and Photography
Join PHLEARN PRO for $12.99 a month or $99.99 a year. Cancel anytime, with a 100% money-back guarantee.





