
Tutorial Description
Photoshop has an impressive arsenal of Tools when it comes to creating and refining masks.
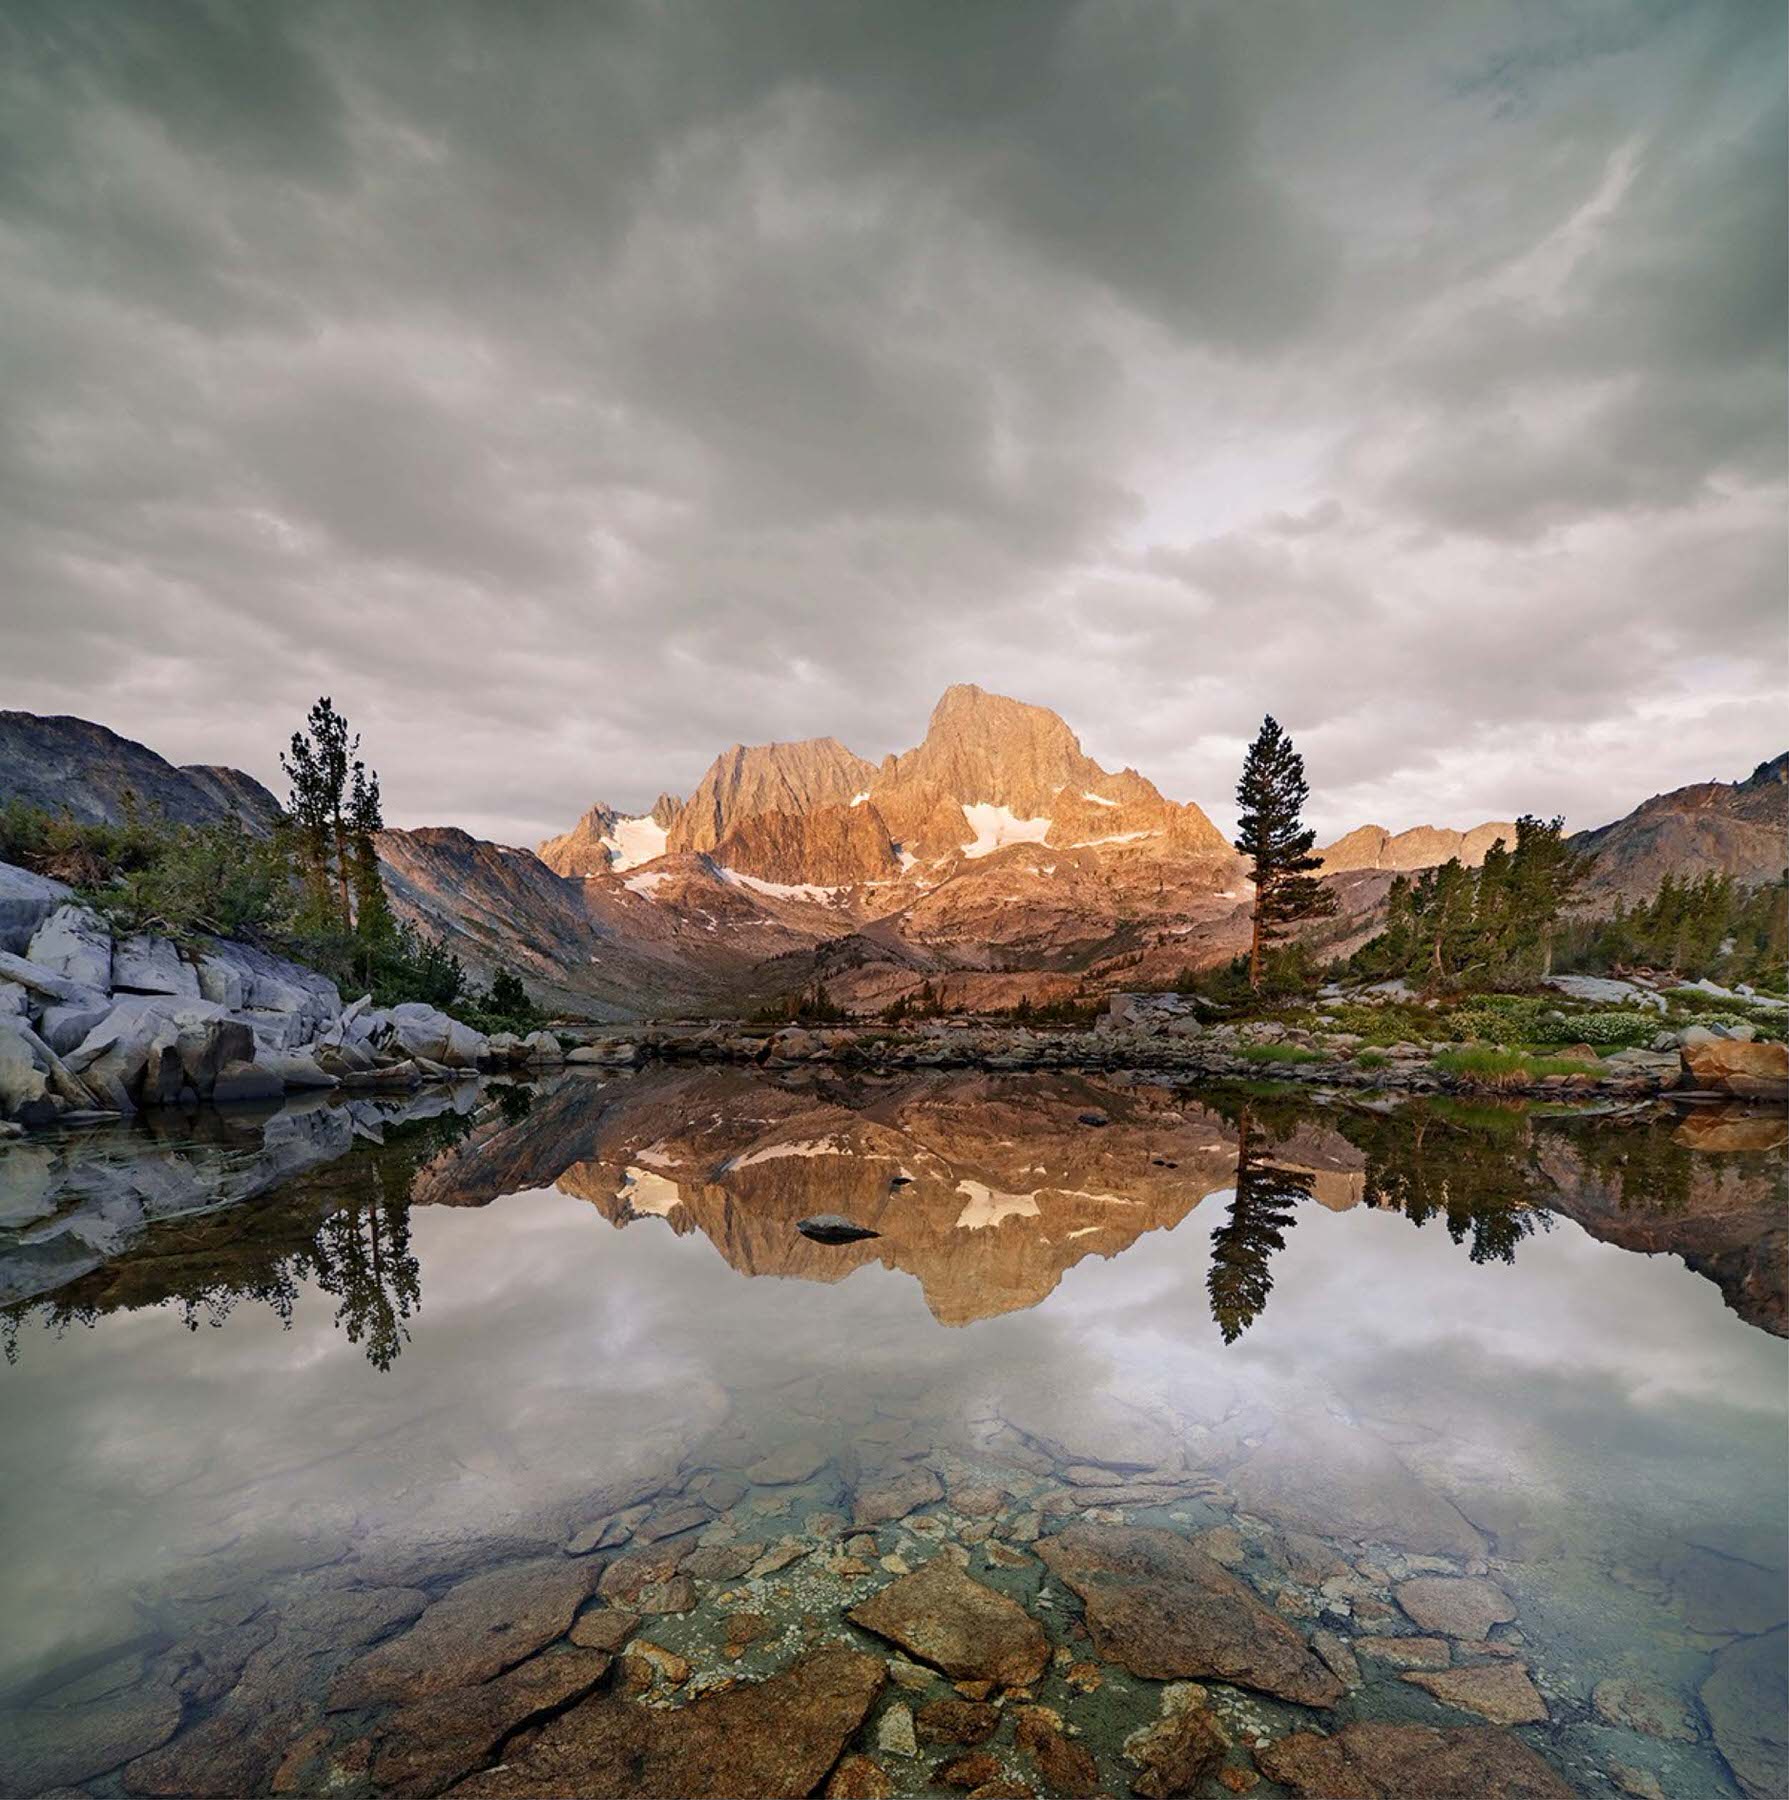
But there’s one little Tool that’s so powerful, so almost-magical in its application that you’ll wonder why you never knew about it before. It’s the Brush Tool, with one small quirk: it’s the brush Tool with the blend mode set to Overlay. And this one little change lets you dramatically and easily clean up your masks, even in areas with complex edges, like Hair or tree branches. In this tutorial we’re going to use this technique, as well as a few other nifty ones, to combine two photos to create the image at right.
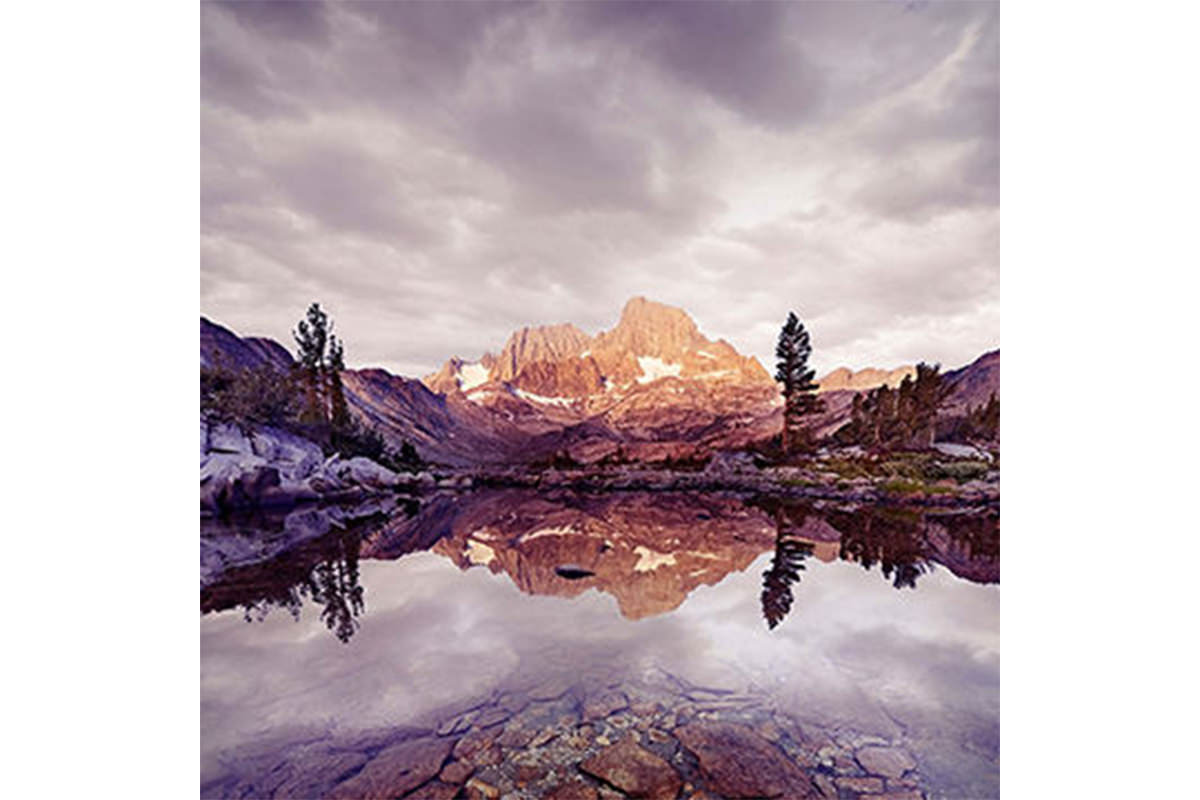
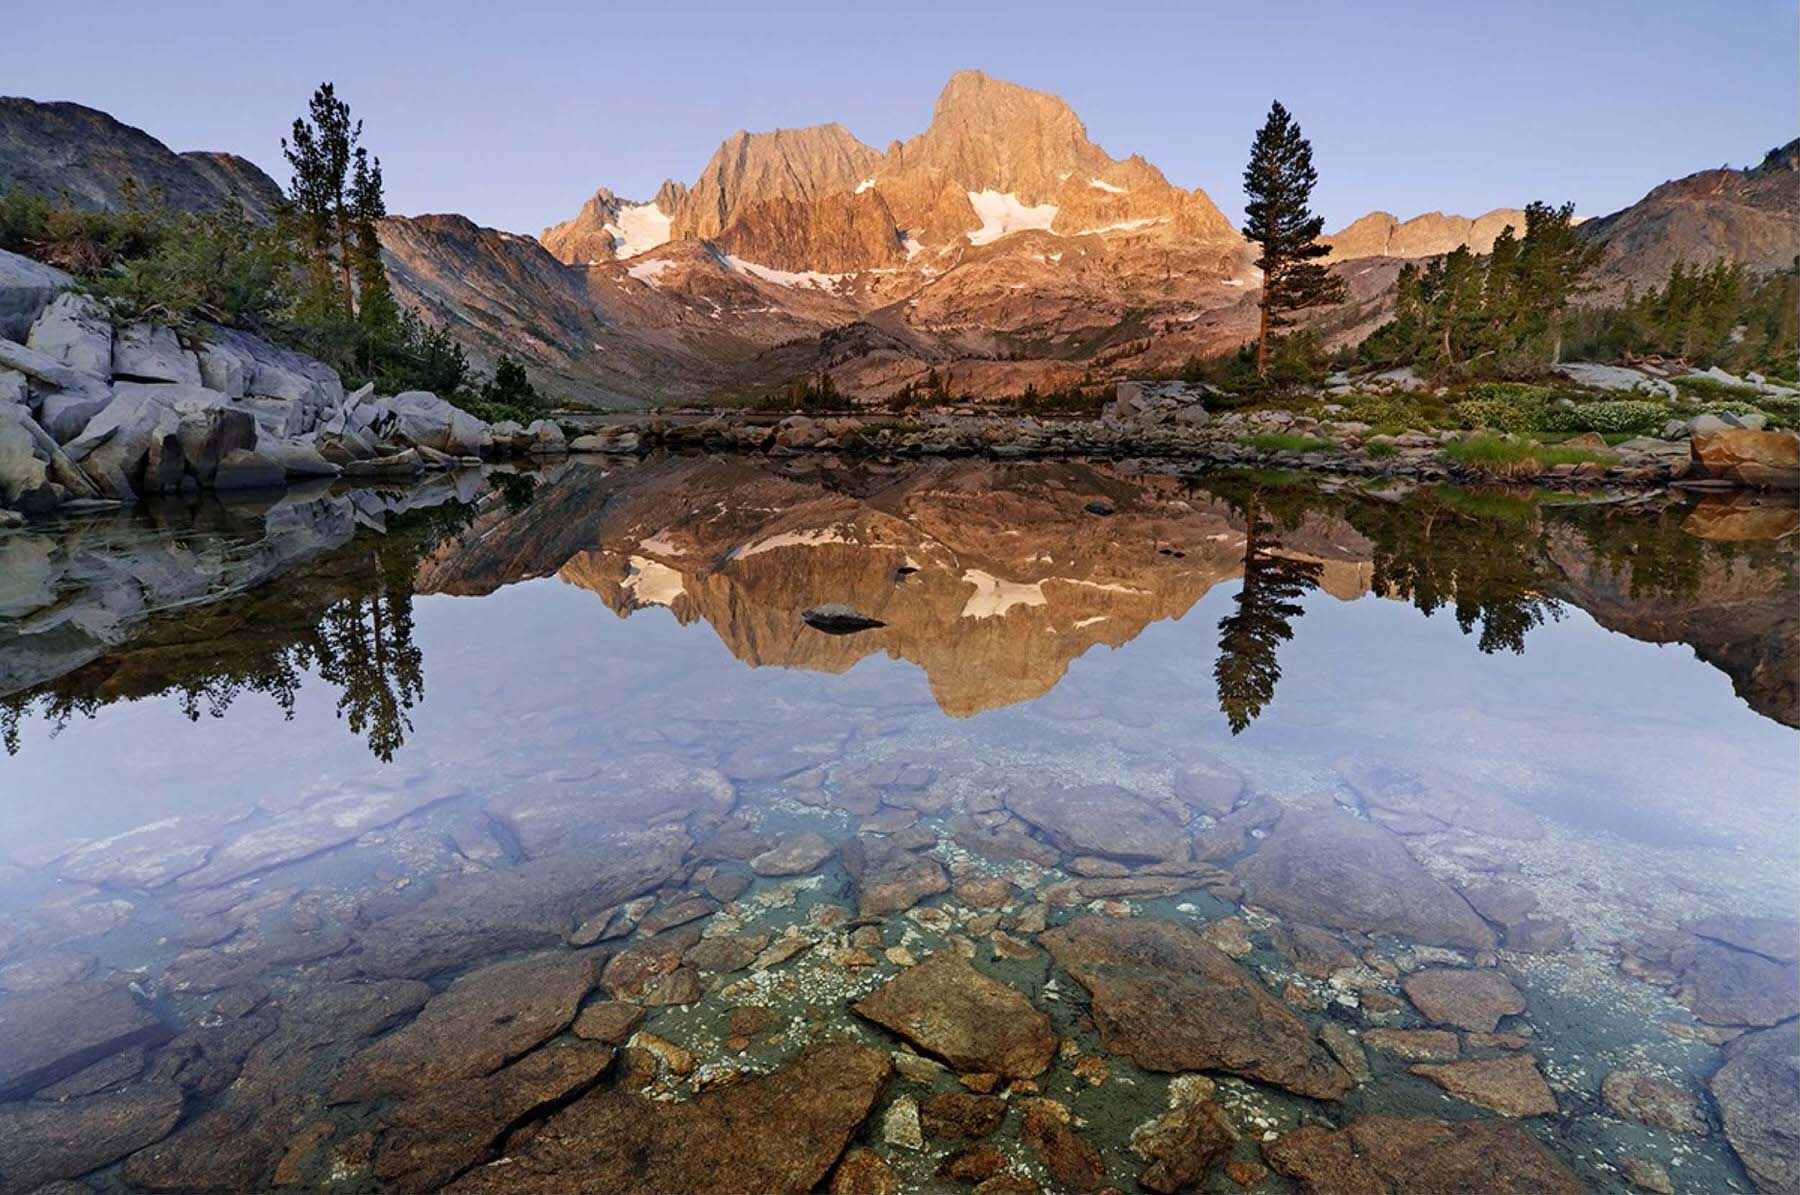
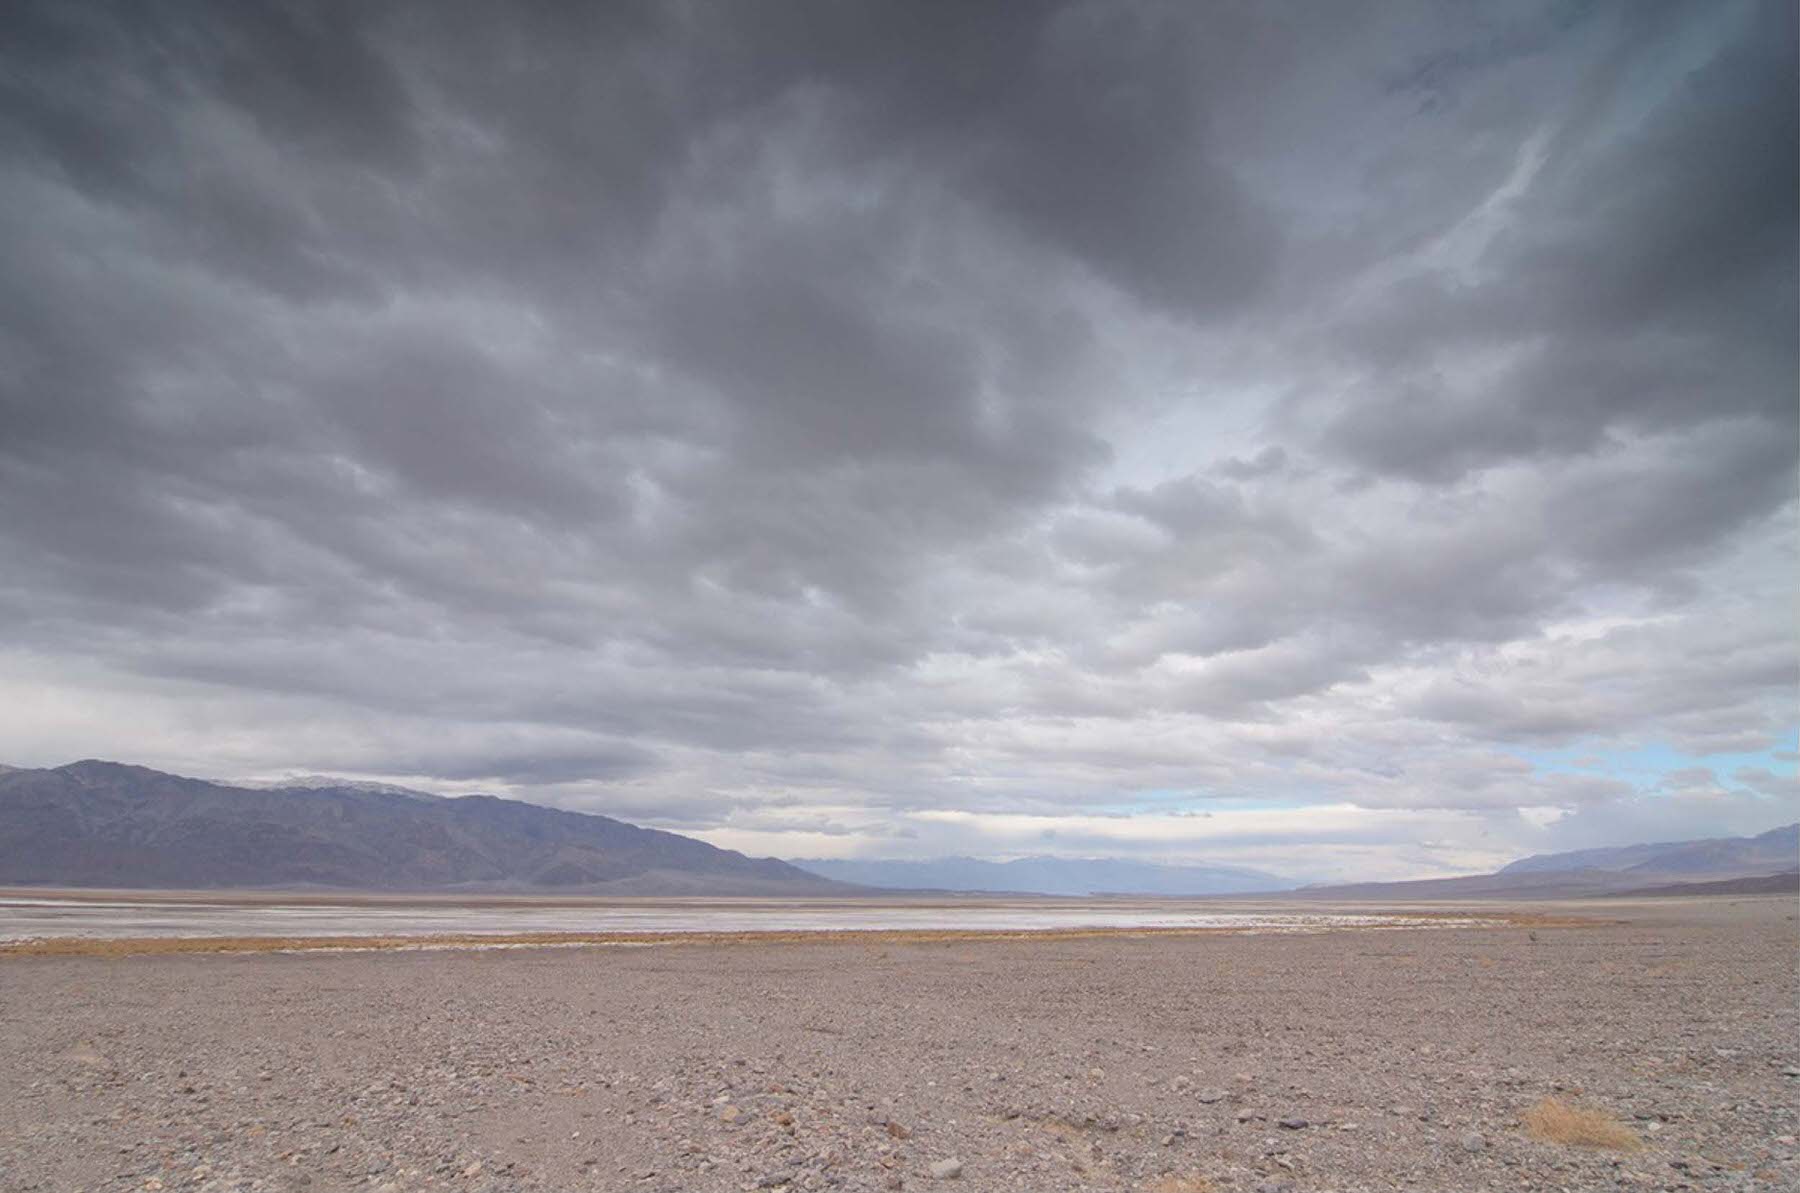
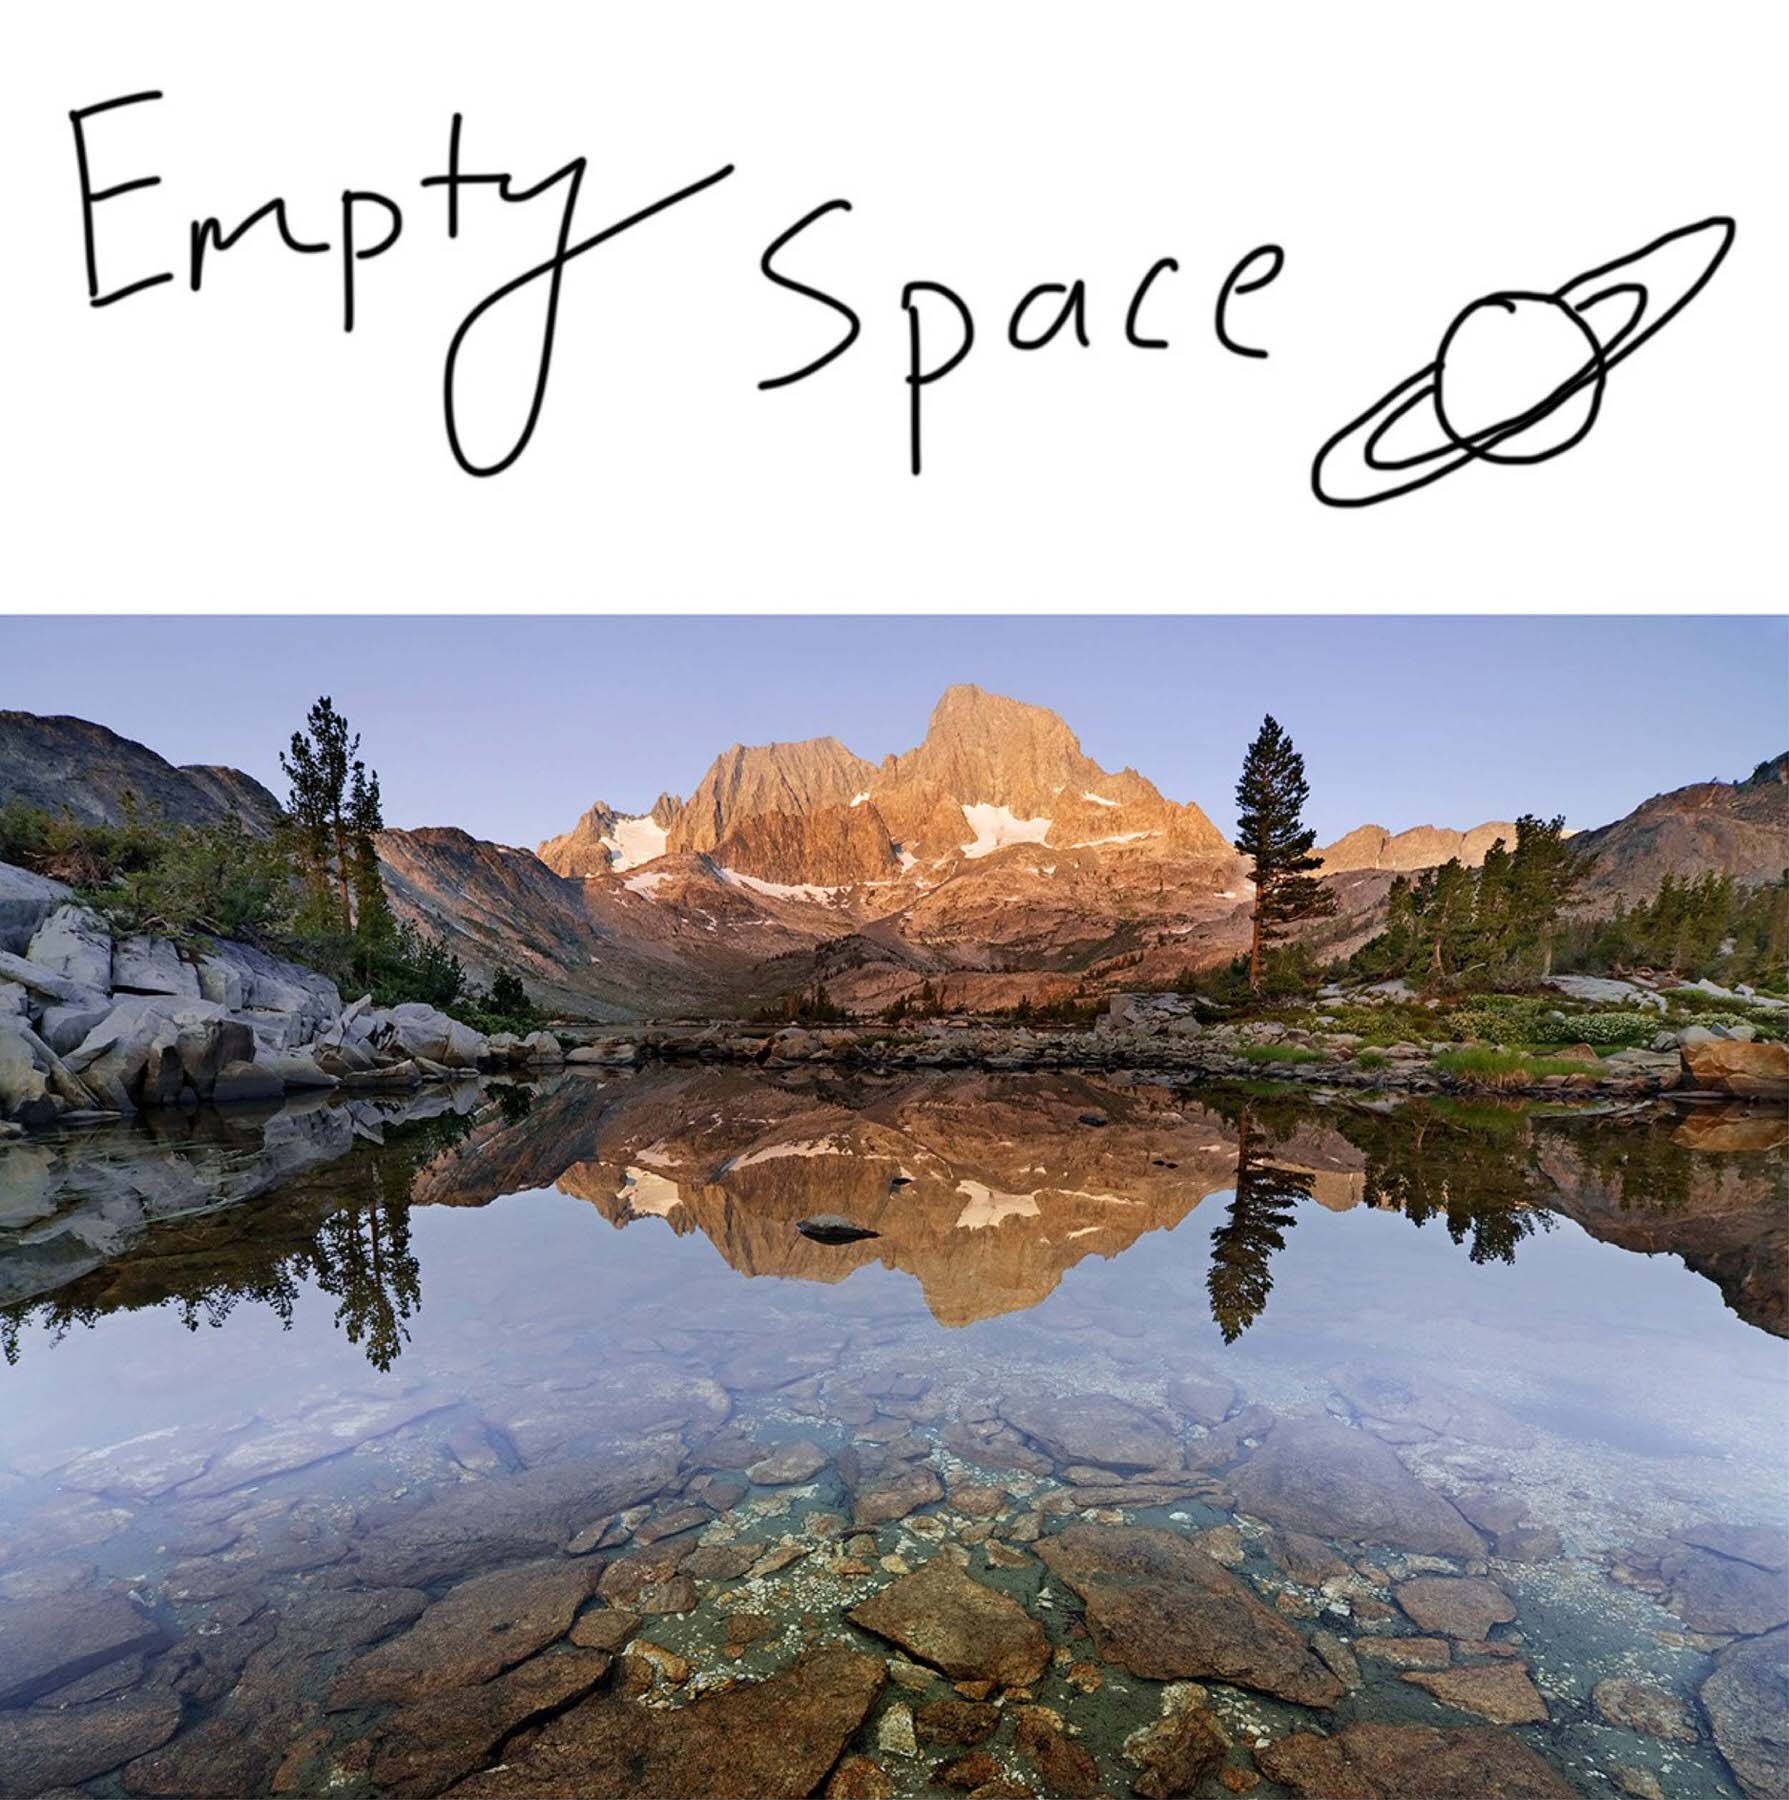
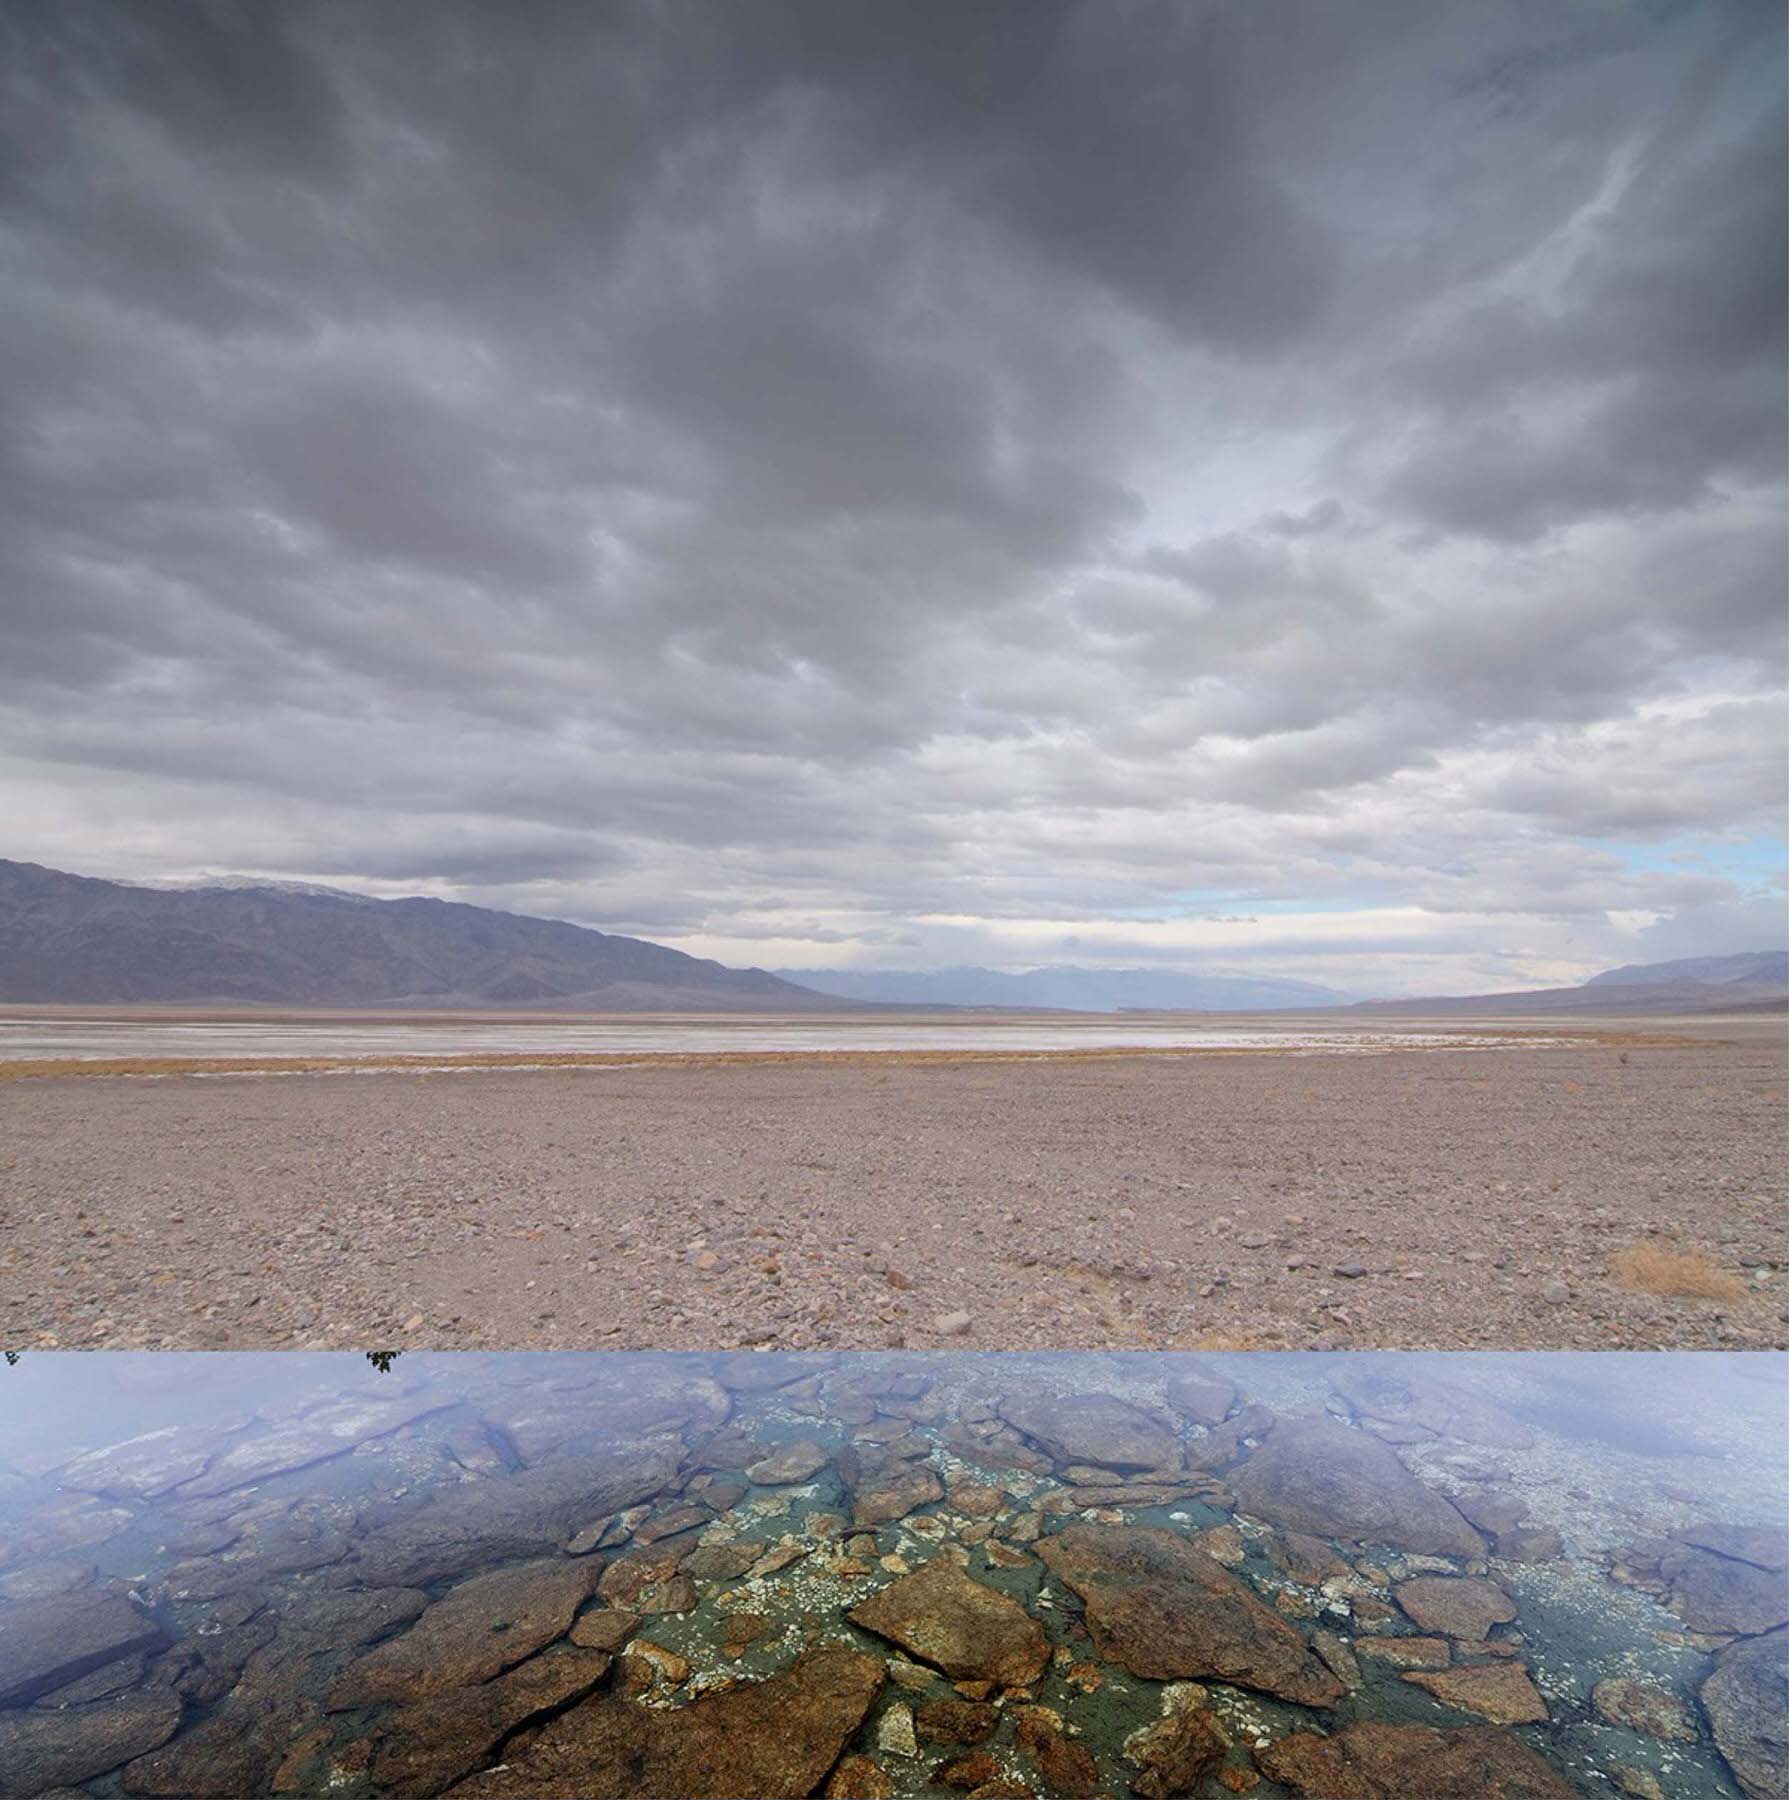
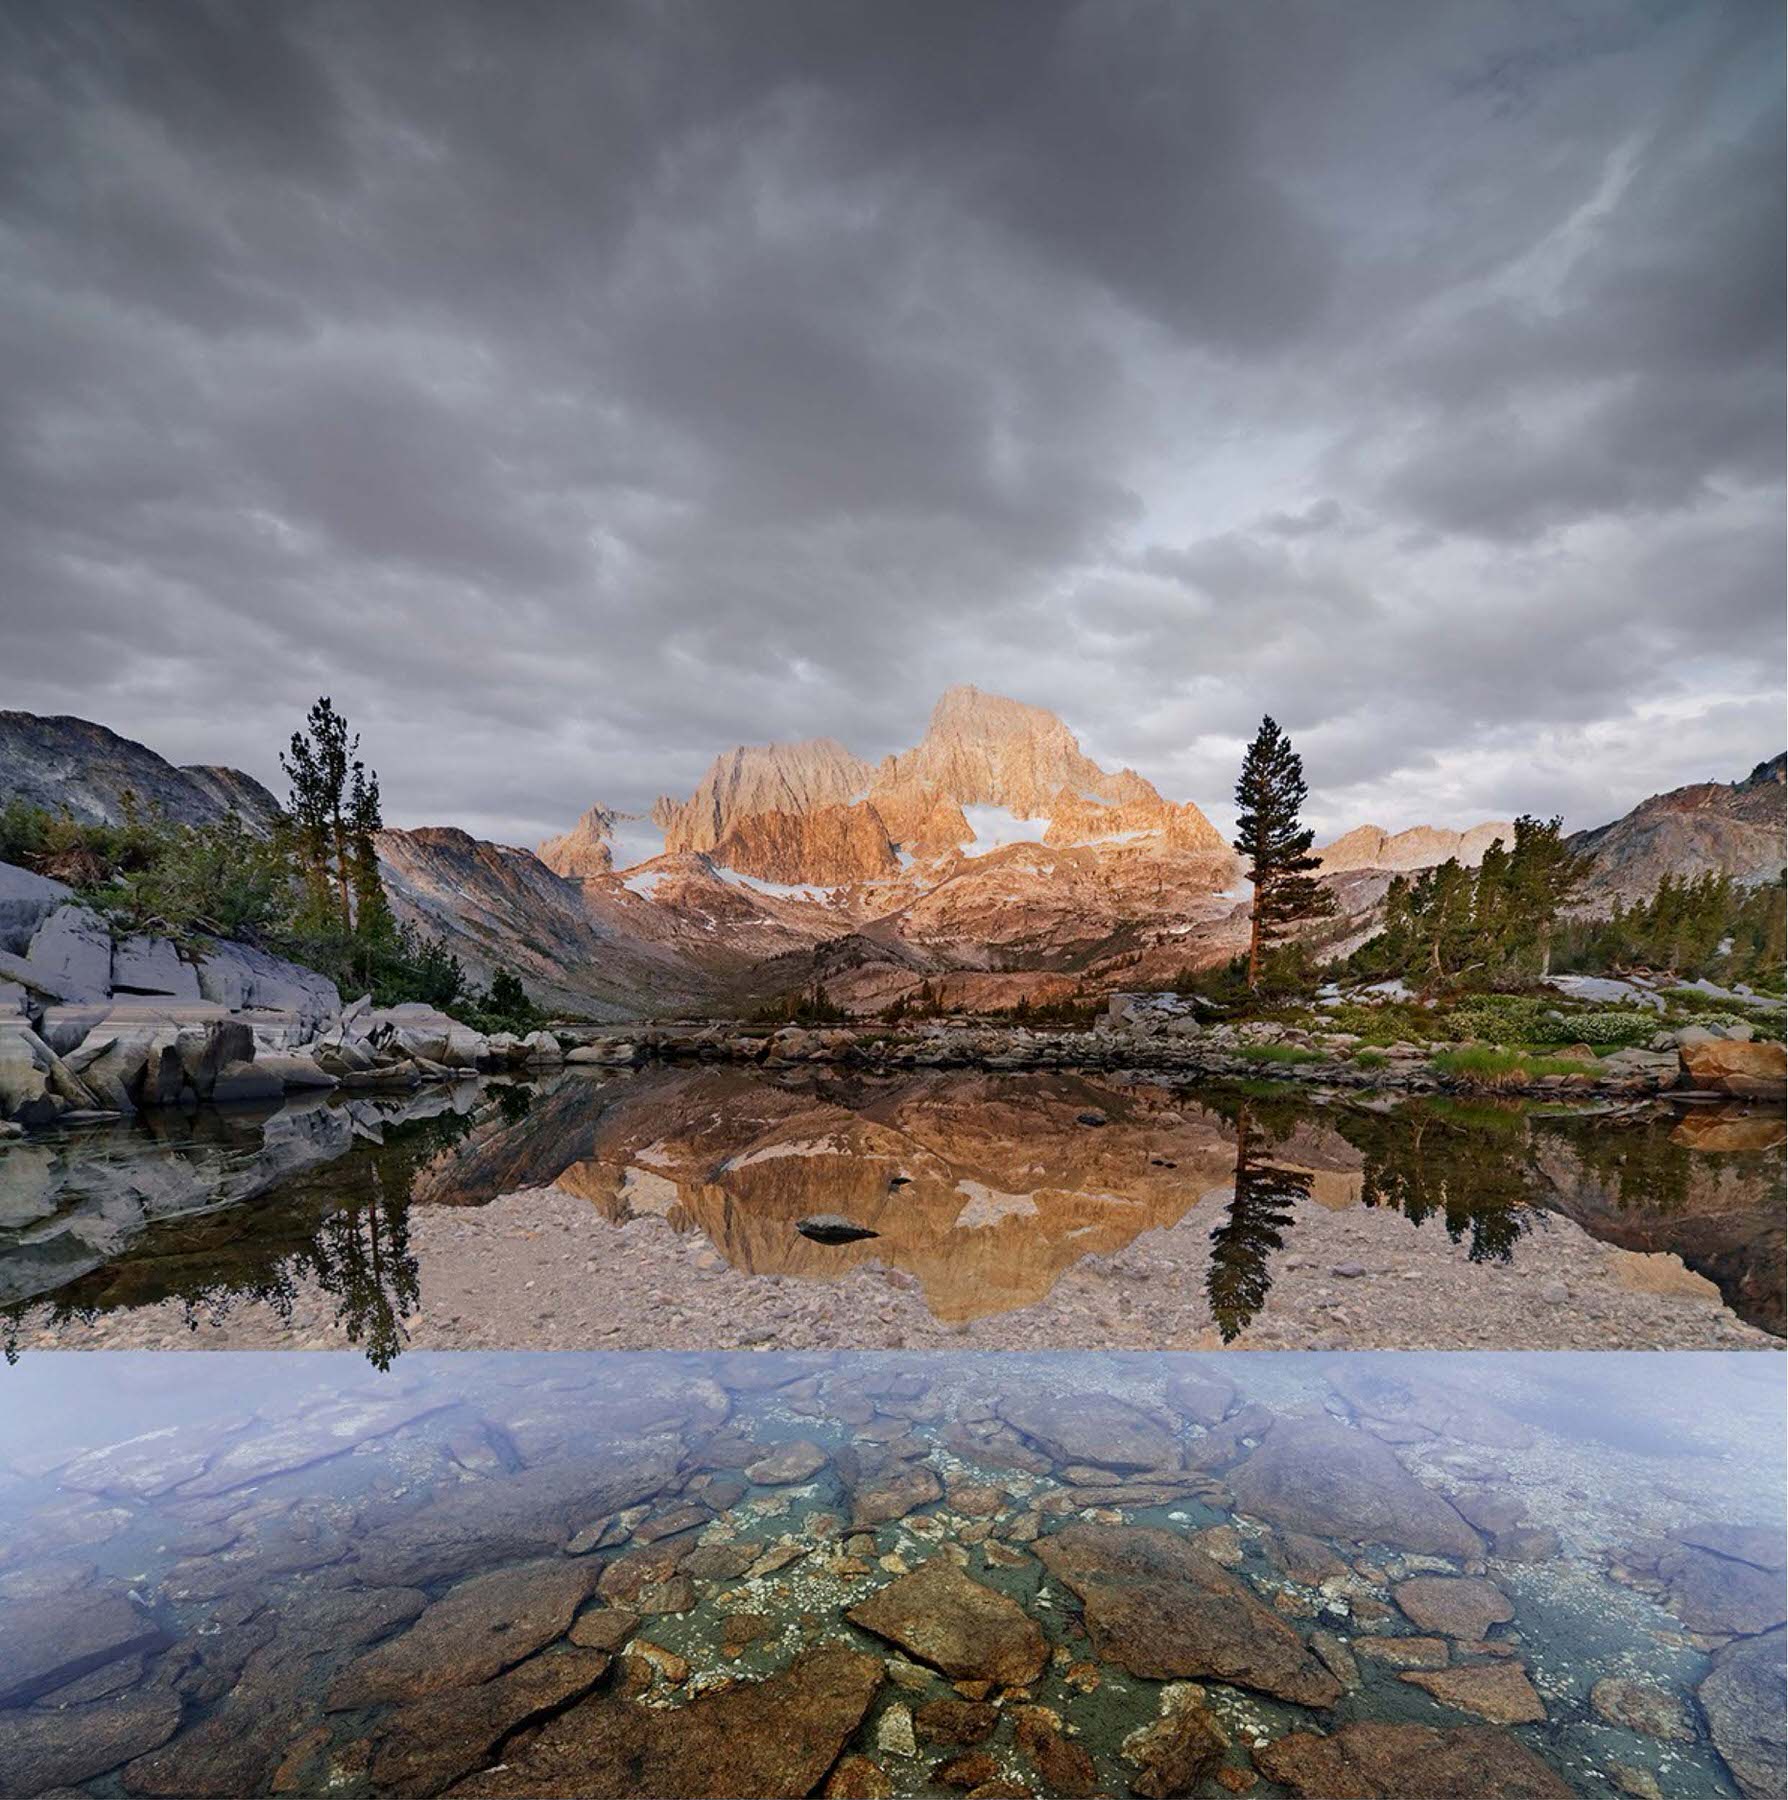
For my base image I’m using a photo I took in the incomparably beautiful Ansel Adams Wilderness in California. This is a dawn shot of Mt. Ritter and Banner Peak reflected in the still waters of Garnet Lake, and while the Landscape has a certain majesty to it, the sky could benefit from a little more oomph. So let’s add some dramatic clouds which I photographed in Death Valley. It’s important to note that in both photos the light is coming from the same direction (behind the camera, and fairly low down), and that the focal length of each photo is approximately the same.
Since the sky in the Banner Peak photo is a little tight, let’s first add some empty space to it by using the Crop Tool to expand the canvas, then paste the clouds as a New Layer on top.
Creating Your Layer Mask
Now it’s layer mask time. We could use something like the Quick Selection brush to select the blue sky to create a basic Layer Mask for our cloud layer, but you’ll notice right away that we’ll run into a problem with that method: the sky in the mountain photo, even though it’s boring blue, is actually very complex. Those trees stick up into the sky and create a lot of complexity which the Quick Selection Tool will never handle.
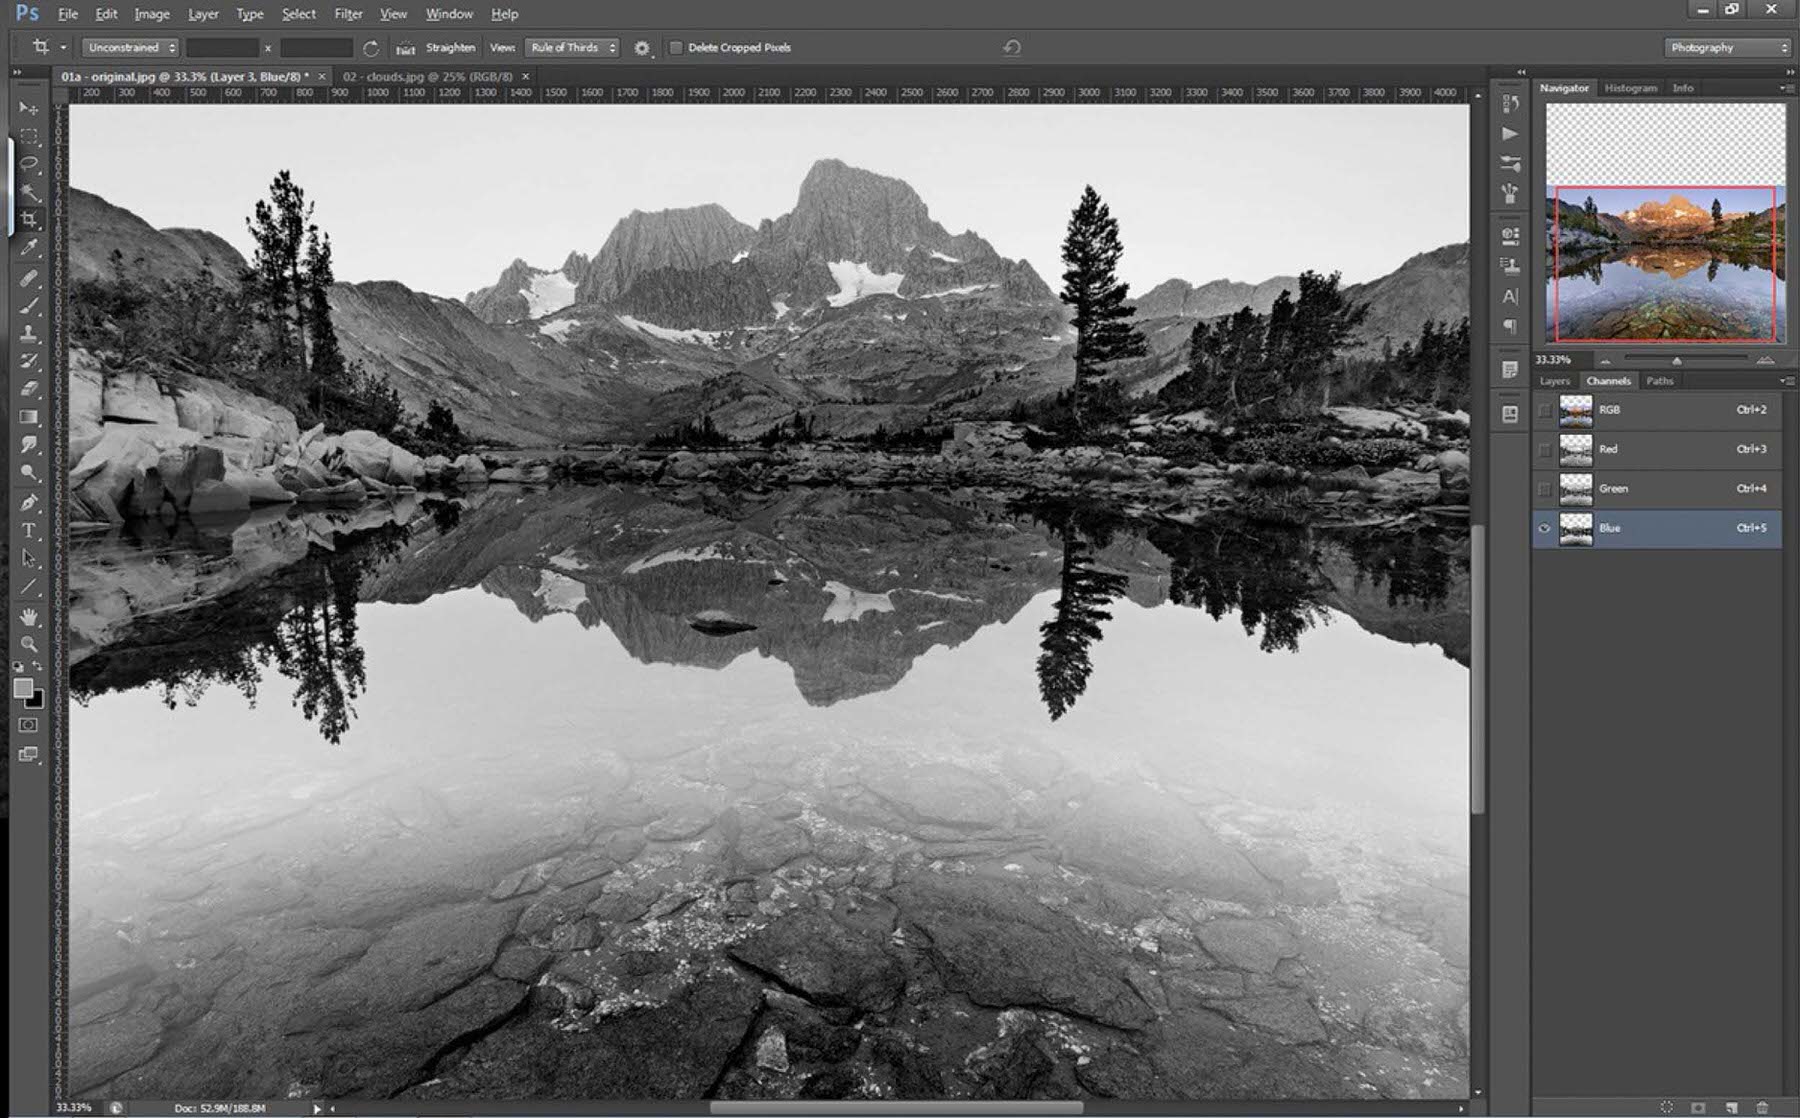
Now, I hear some of you in the back saying “use the Color select Tool!” And we could, but I don’t really like it because it’s not a very clean selection method and tends to create blockiness and posterization, especially when you’re editing 8-bit Jpegs. Instead we’re going to use Channels to make an initial selection. The trick to using Channels is to click through each channel (Red, Green, Blue) in the Channels palette and find the one that shows the greatest contrast between the thing you want to select (the blue sky in this case), and everything else (like the mountains and trees and such). In this case, the Blue Channel provides the most contrast between the sky and the rest of the Landscape.
Making Selections From Channels
When you turn a channel into a selection (via the Load Channel as Selection button at the bottom of the Channels Palette) it works like this: everything that’s pure white becomes 100% selected, everything that’s pure black is 0% selected, and all the gray stuff in between is proportionately selected based on how bright it is. So if I load this blue channel as is as a selection, the sky is going to be mostly selected, and the trees aren’t going to be selected much at all, which is pretty much what we want. But the mountains are fairly Light gray, which means that they’ll be somewhat selected, and that is no bueno, because that means when we make our mask for the clouds, they’re going to bleed over into the mountains.
What we need is a way to further refine the contrast in this channel to make a really good selection. Well it turns out that you can apply curves Adjustments to channels, which means we can make the blue channel even more contrasty. But rather than adjust the blue channel directly (which would affect the overall Color Balance of the image), we first need to make a copy of the blue channel by dragging it down to the Create New Channel button at the bottom of the palette.
This will create an Alpha Channel titled Blue copy. We can then hit Ctrl / Cmd + m to bring up a Curves Adjustment. By cranking the brights up and the Shadows down we can greatly enhance the Contrast of this Alpha Channel, which means we’re one step closer toward replacing our sky.

Now even though this is a much better starting point for our mask, it’s still problematic because you can see that some tones in the mountains and in the foreground are still gray, which means they’re going to be partially selected. But let’s go ahead and create a mask for our sky anyway so we can see what we’re working with. First we want to load our Blue copy channel as a selection via the Load Channel as Selection button at the bottom of the palette. Then, head back to the layers palette and making sure the cloud layer is selected, hit the Add Layer Mask button.

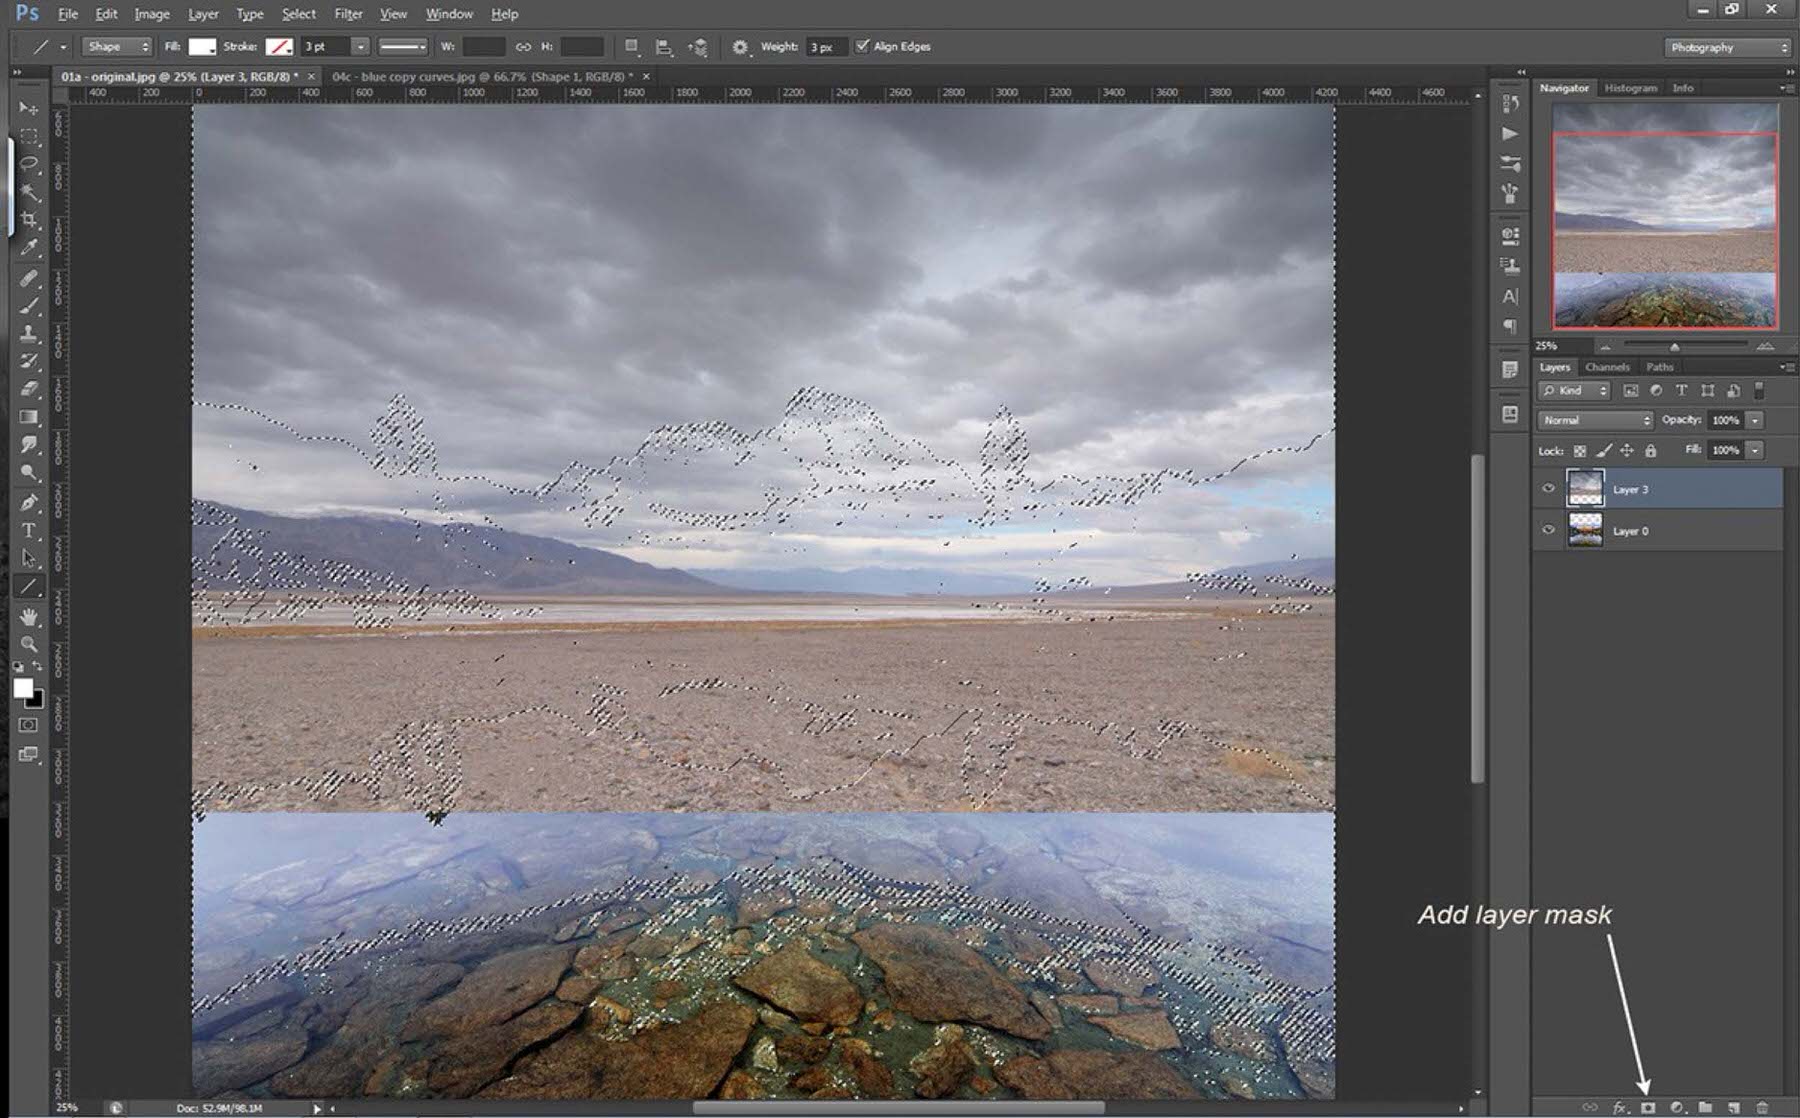
Now because parts of our mountains and foreground were partially selected via our Blue copy Channel, we should expect to see a funky result when we create this mask.
Refining The Mask
Yup, our image is looking a little weird. We replaced the blue sky alright, but there are bits of clouds showing through the mountains and the foreground reflection. So let’s clean up our mask a little to fix this.
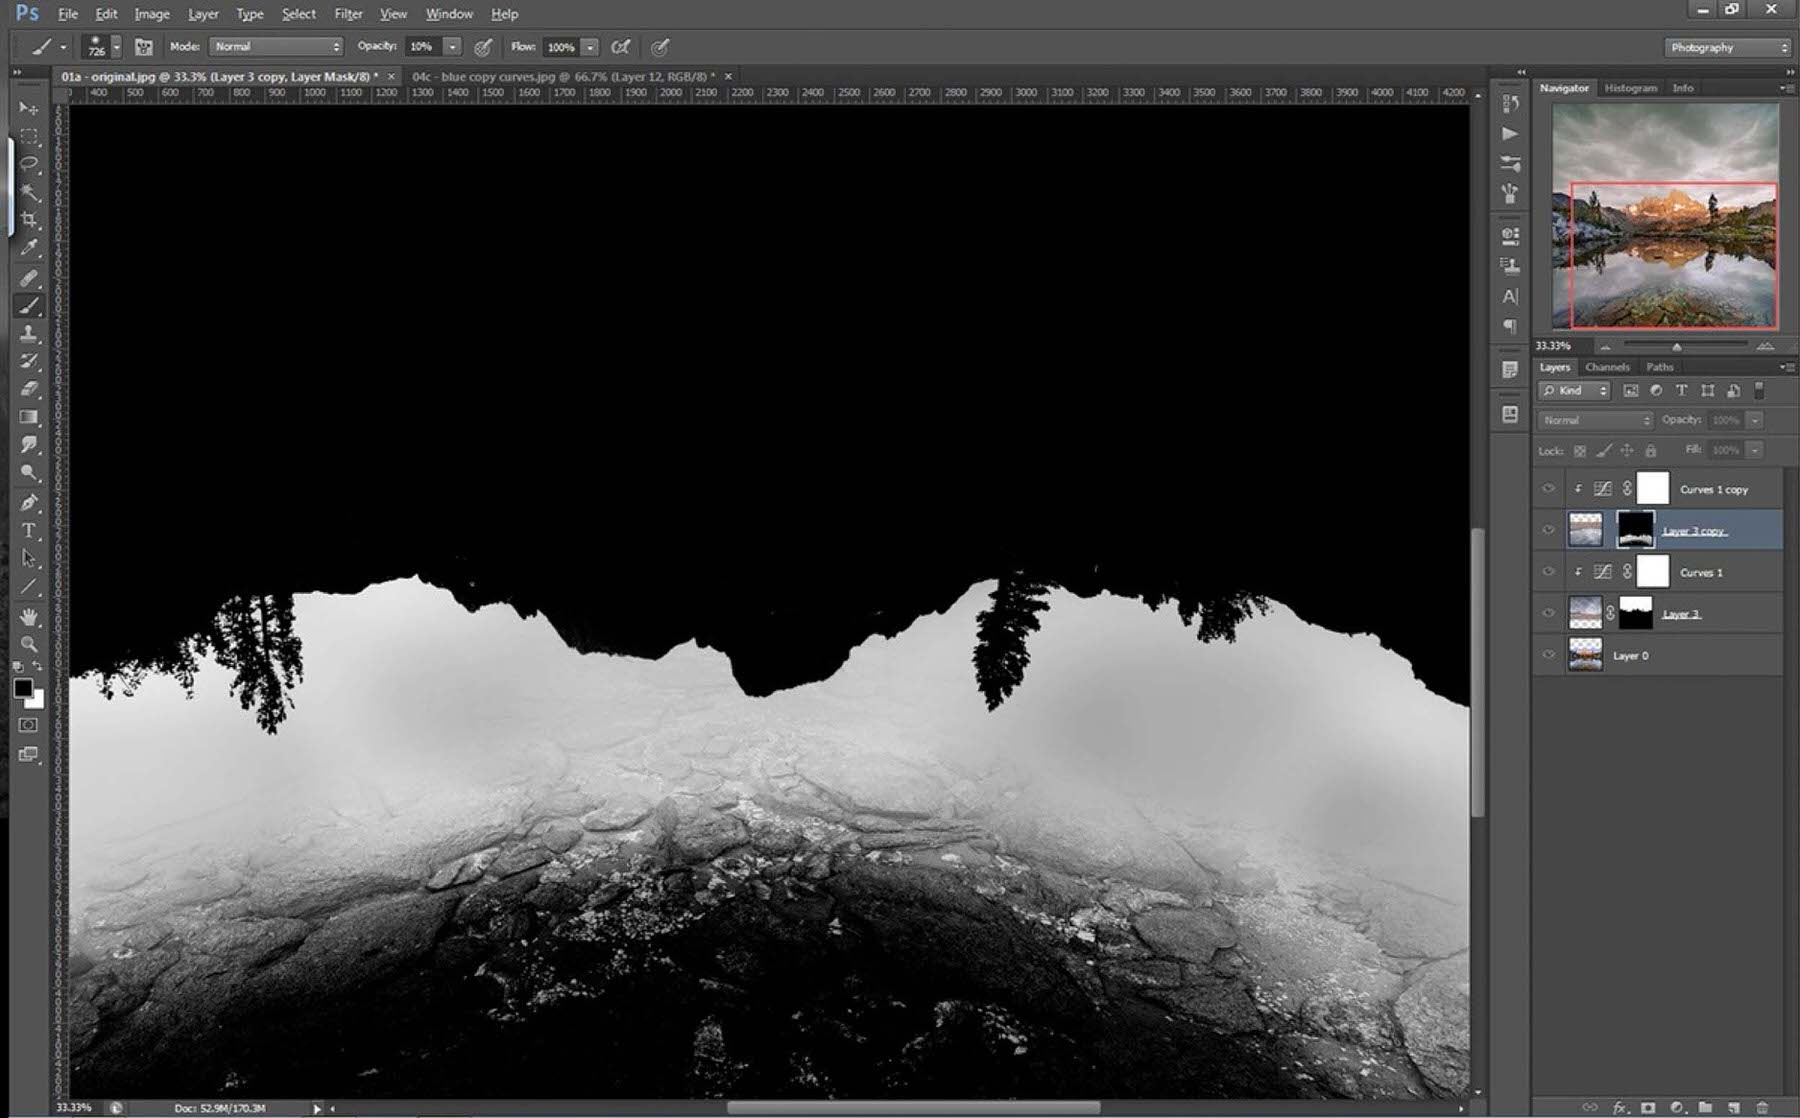
First, Alt / Option click on the layer mask thumbnail so that we can see what the layer mask actually looks like. Now we’re going to use a brute-force method to clean up most of the mask. Grab the Lasso Tool and make a selection covering the entire bottom half of the image, and roughly paralleling the tops of the mountains, as seen in the figure below.
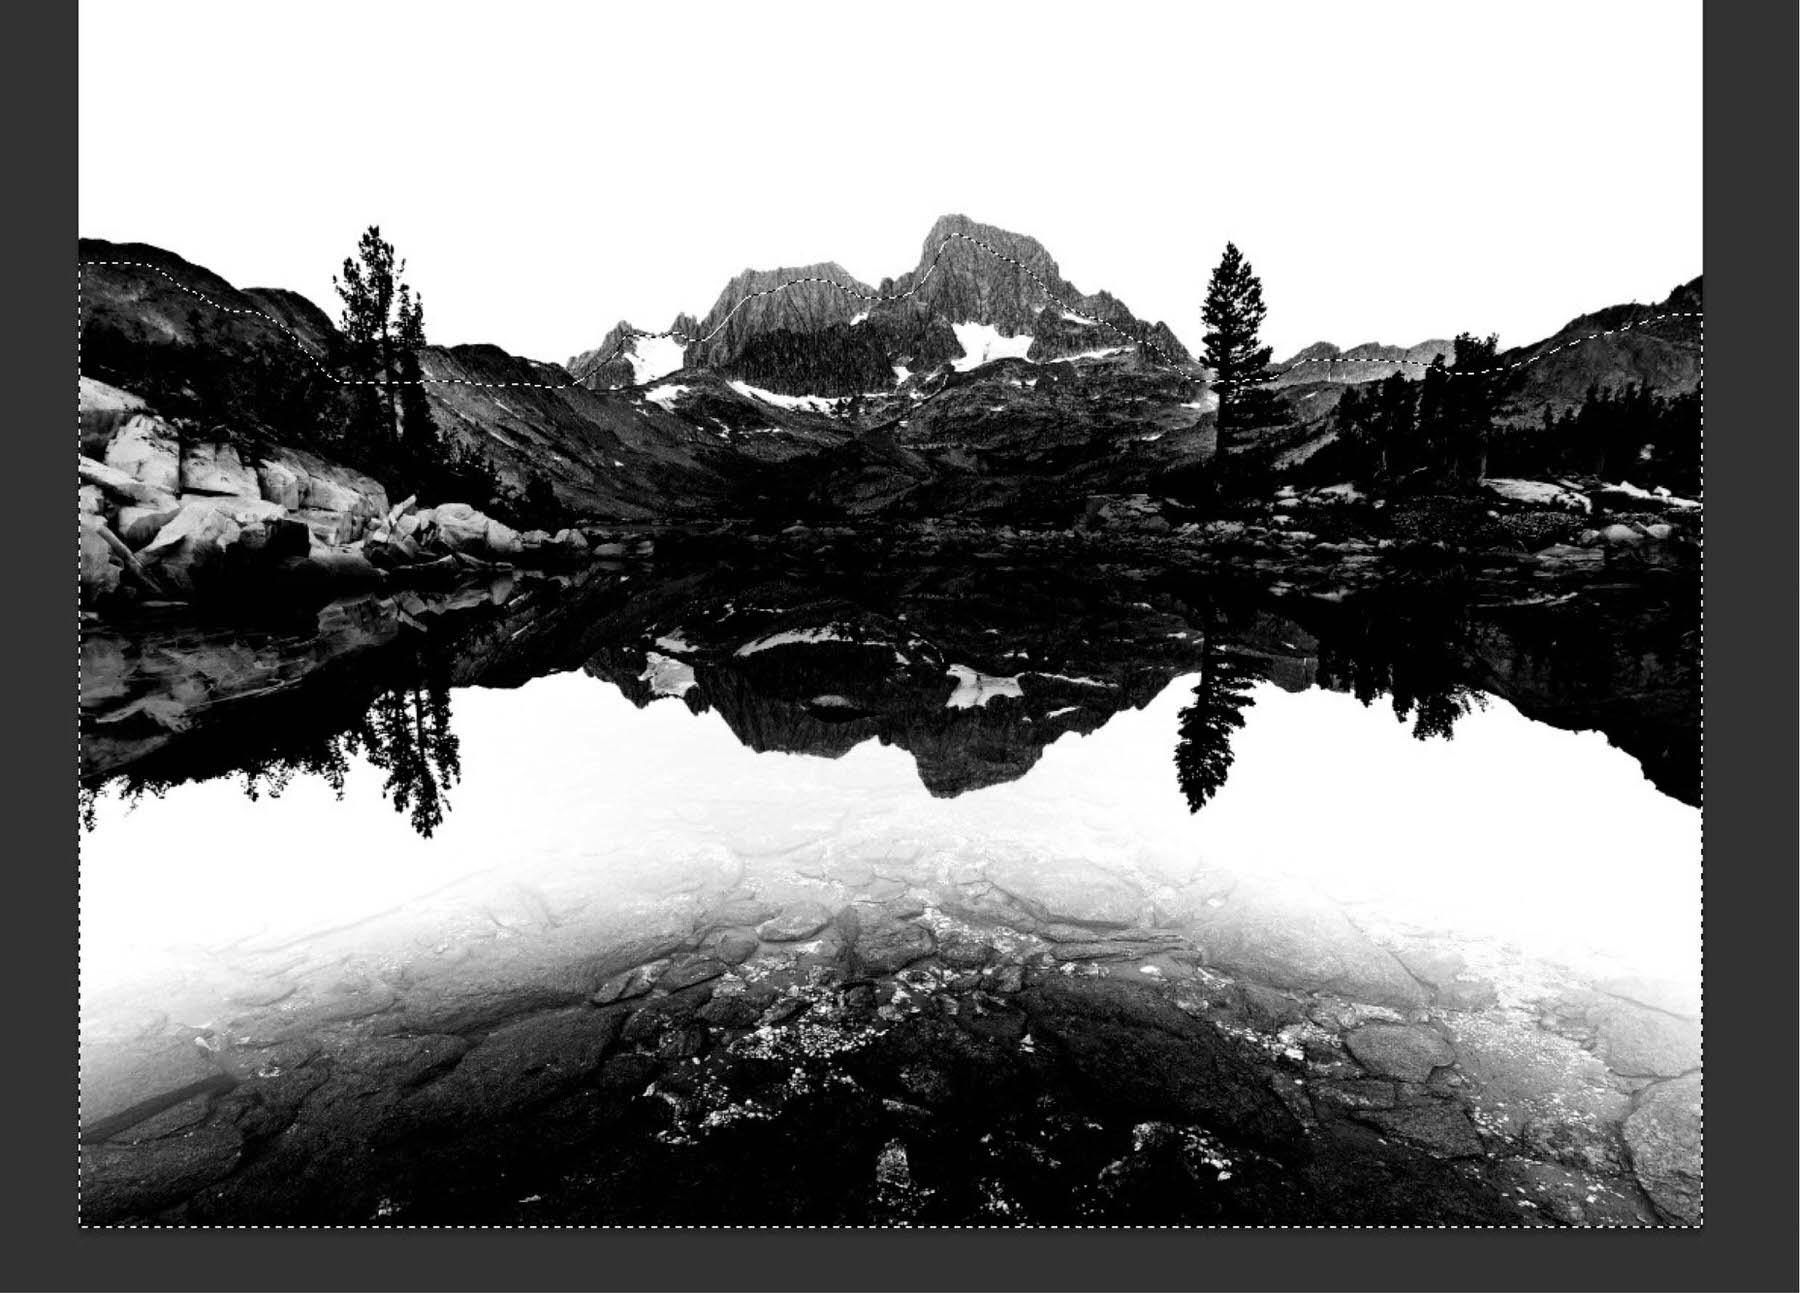
Now you can use Shift + F5 or Edit ? Fill to fill this selection with black.
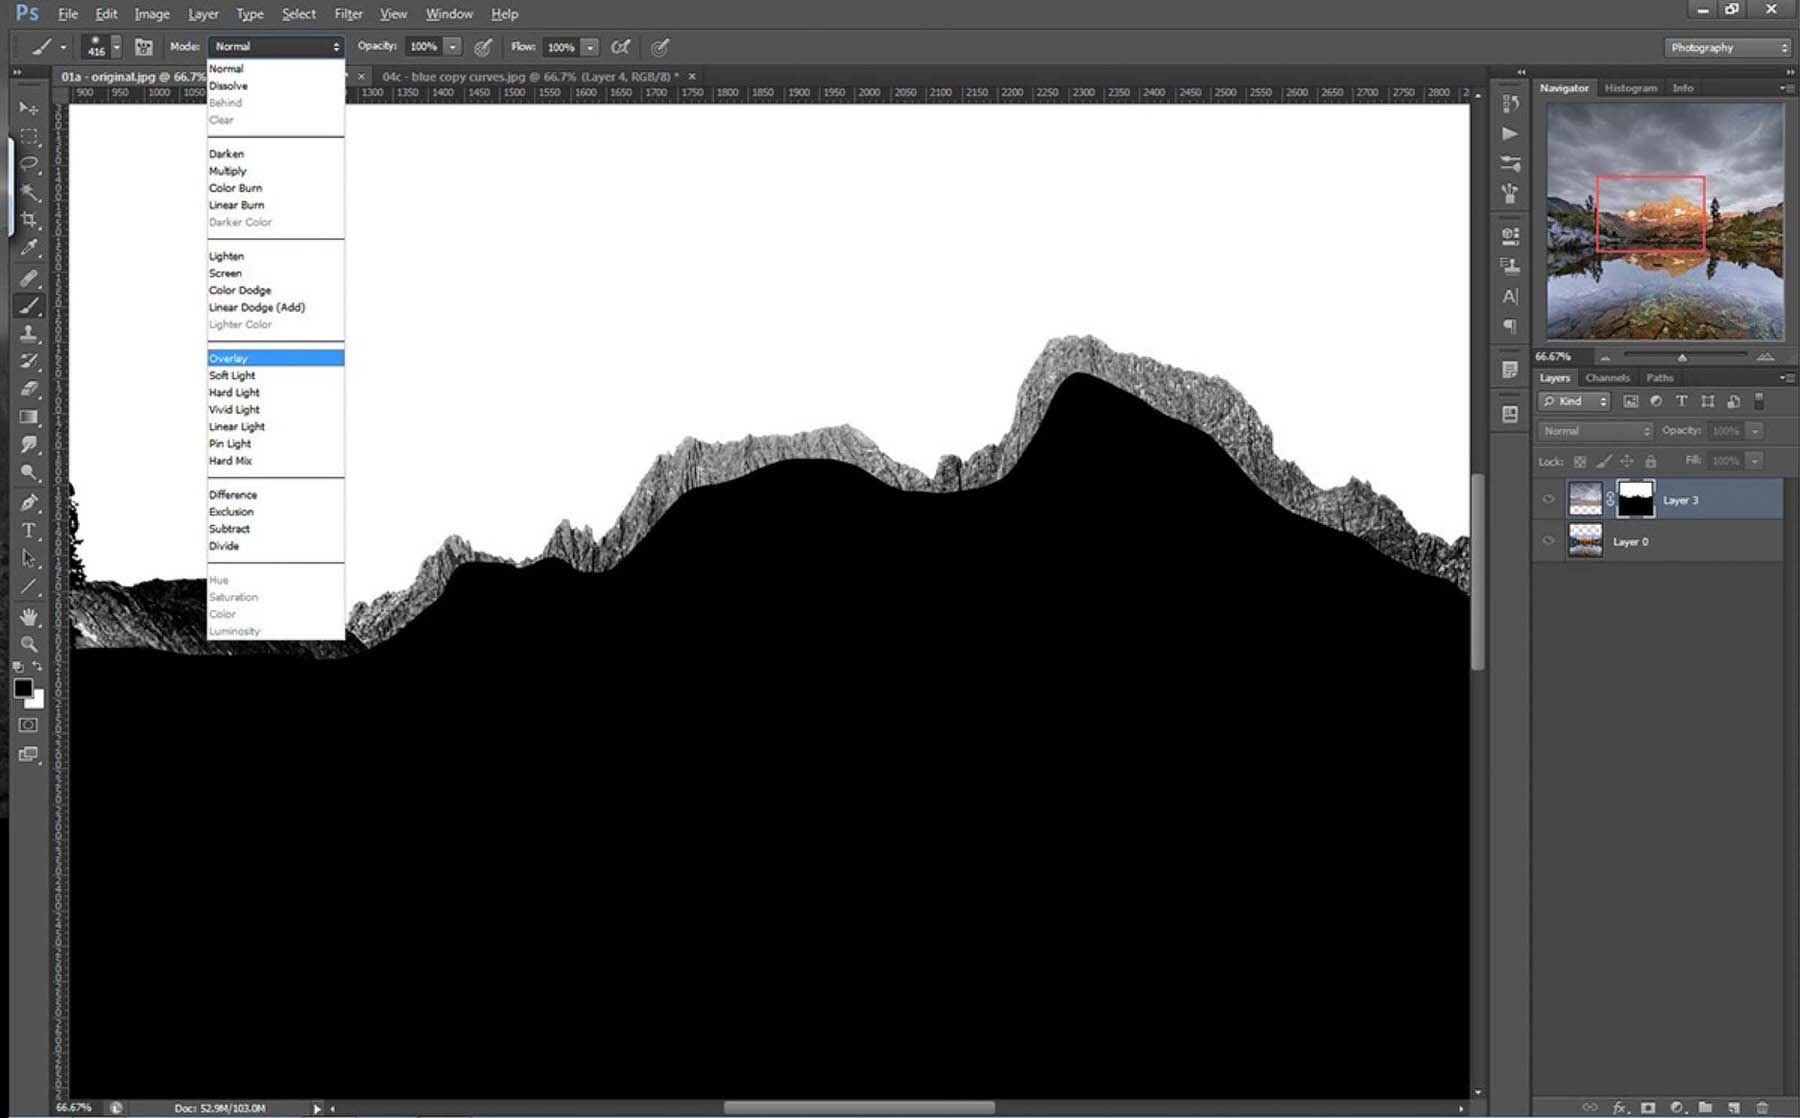
Pretty darn good, but we’ve still got to clean up the edges of those mountains. And this, my dear friends, is where our wonderful friend Overlay mode comes in. Grab your paint brush, make sure black is your foreground color, and start painting!
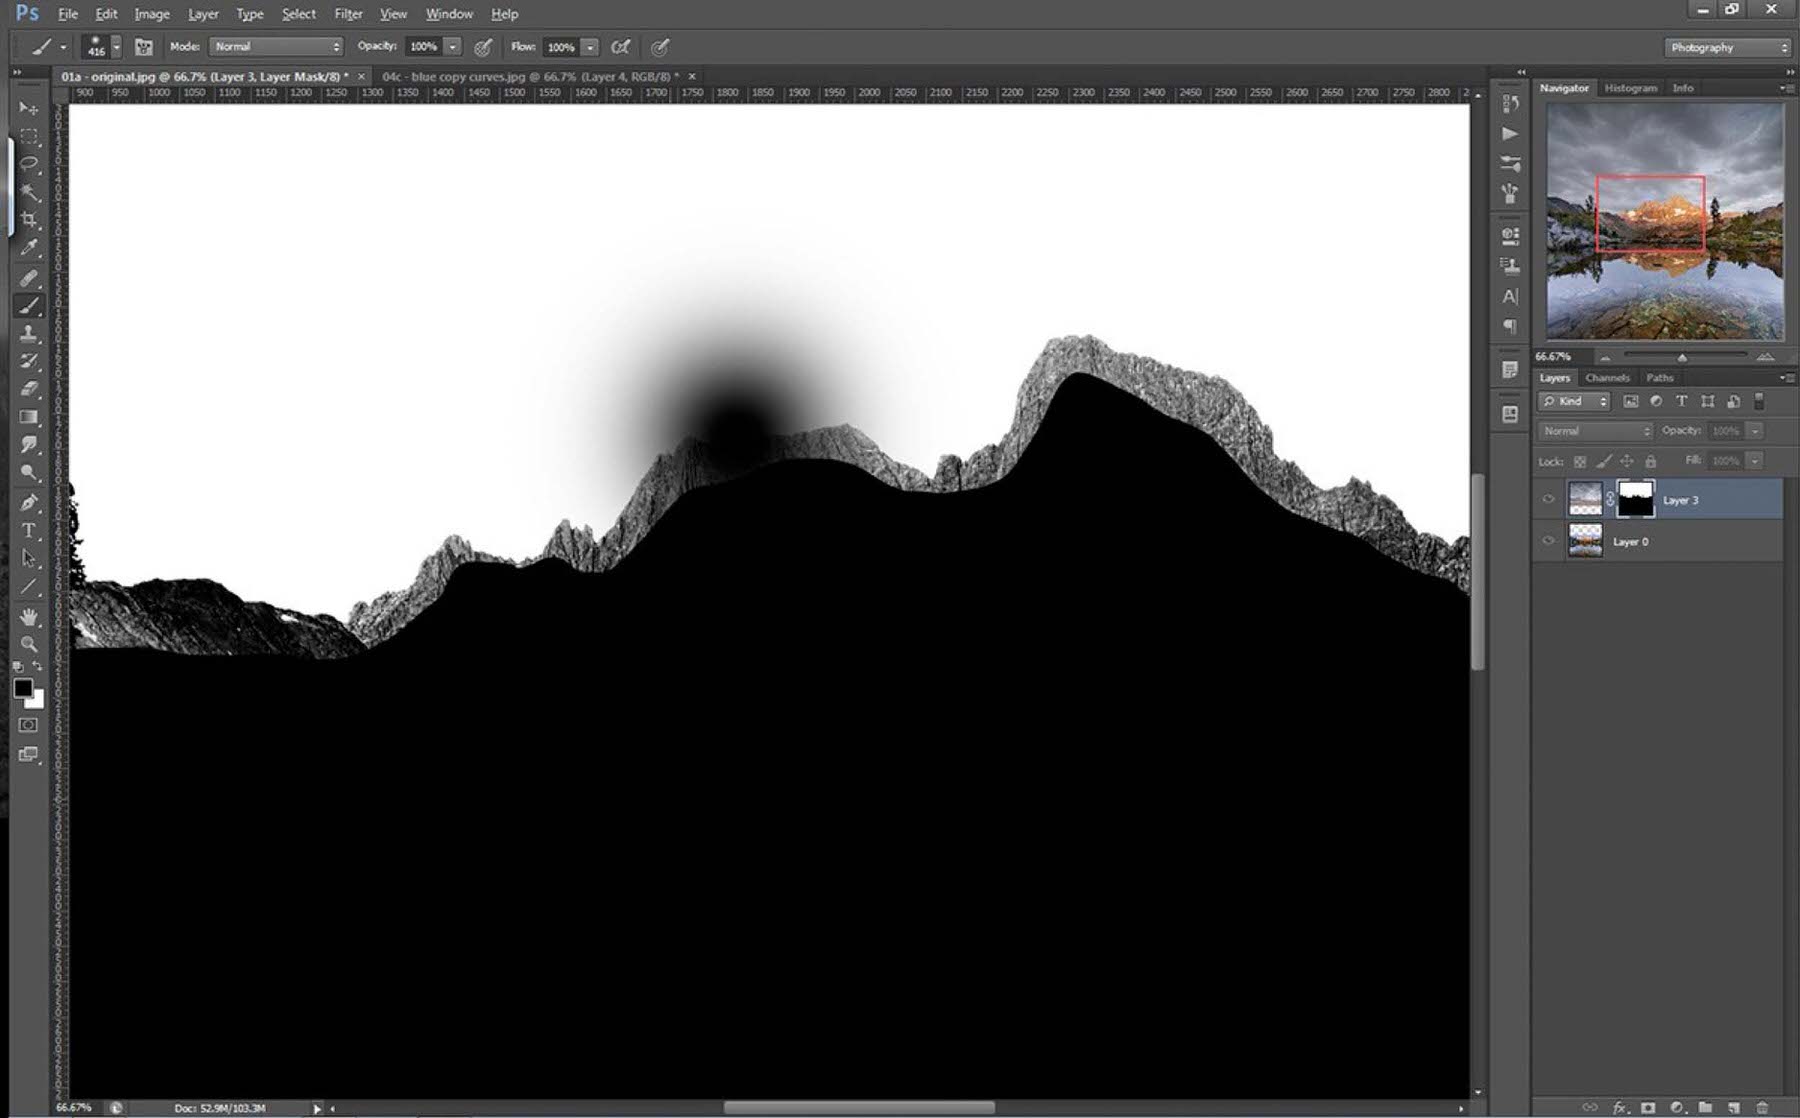
Oh shoot, what did we do? Right, our paint Brush is still in Normal mode. So of course it made a normal splash of black. Let’s undo that. Then in the tool bar click the drop down and select Overlay.
Now with our Brush in Overlay mode, let’s try that brush stoke again.
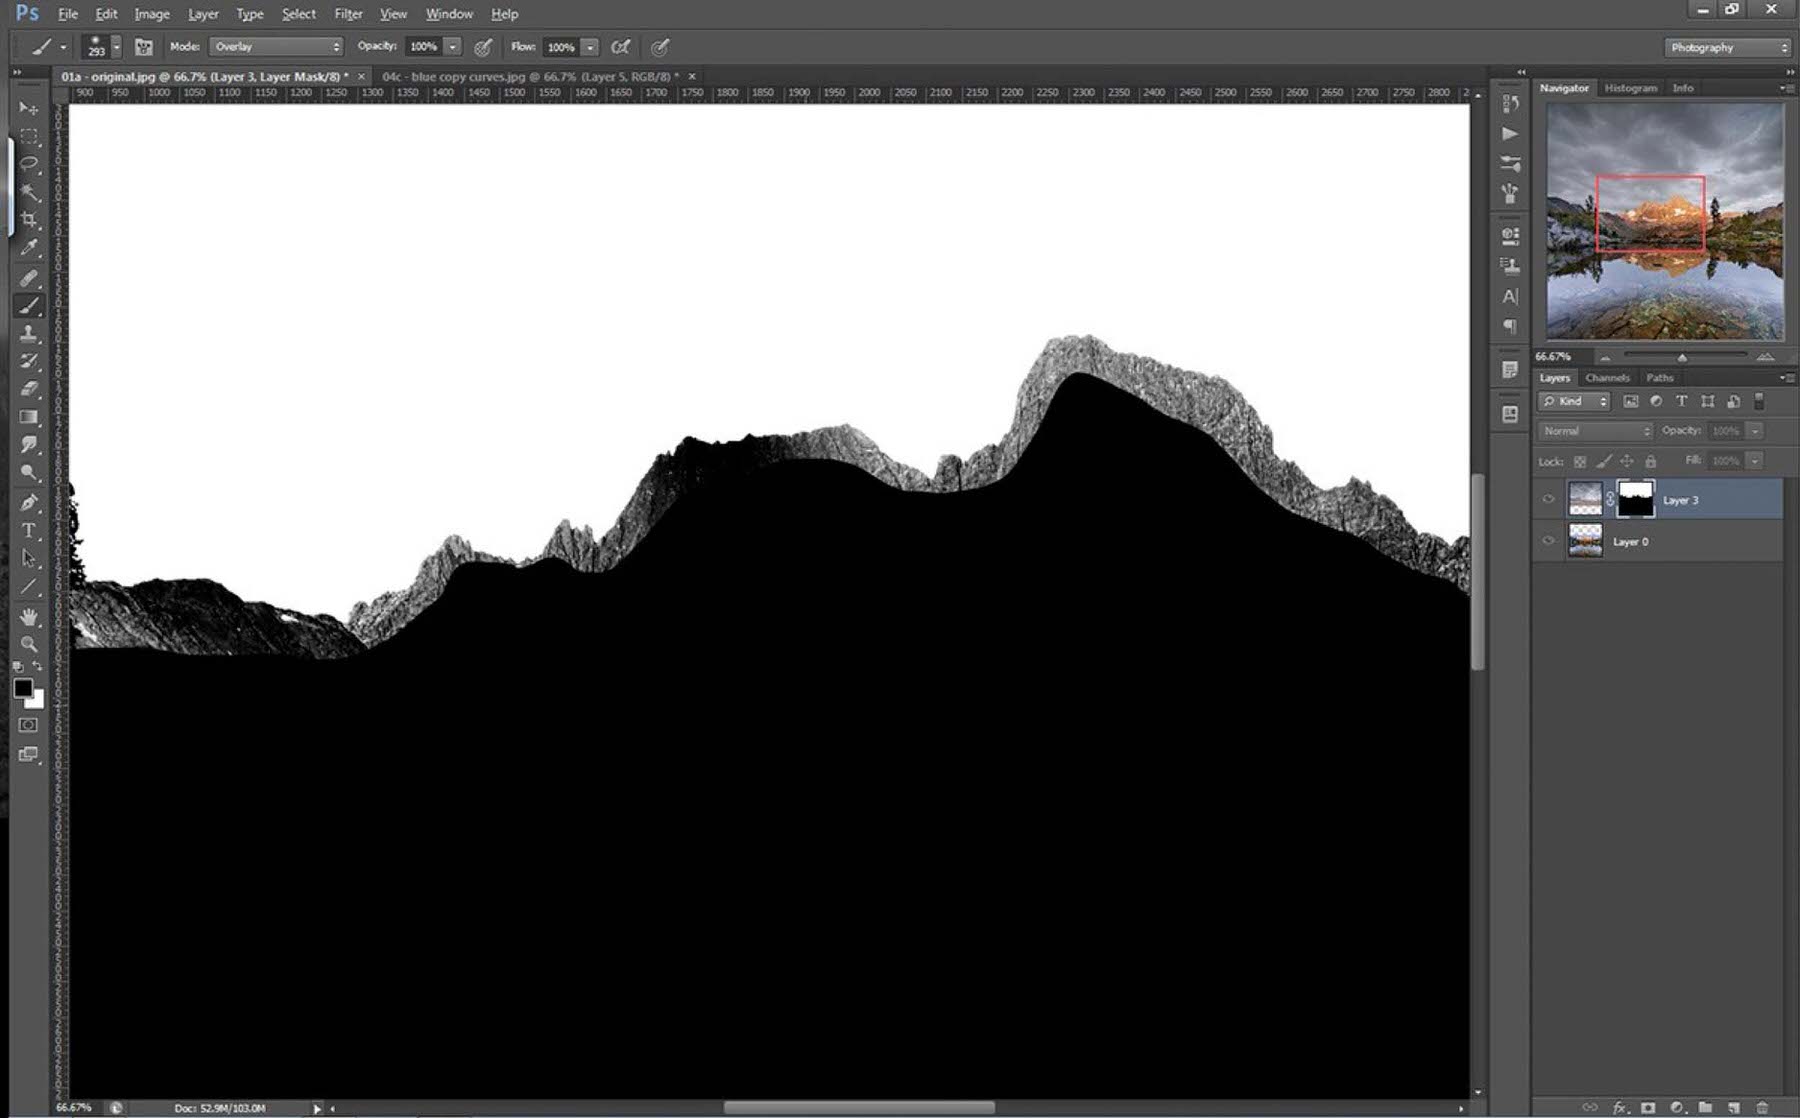
And holy crap, did you see that? Our brush stroke now only affected the mountains, and had zero effect on the sky. ZERO. See, I told you it was like magic. So what is going on here? In Overlay mode, when you paint with something brighter than middle gray, it brightens the underlying pixels; when you paint with something darker than middle gray it Darkens the underlying pixels. But the meat and potatoes of Overlay mode is this: no matter whether you’re darkening or lightening, pure white and pure black pixels are unaffected.
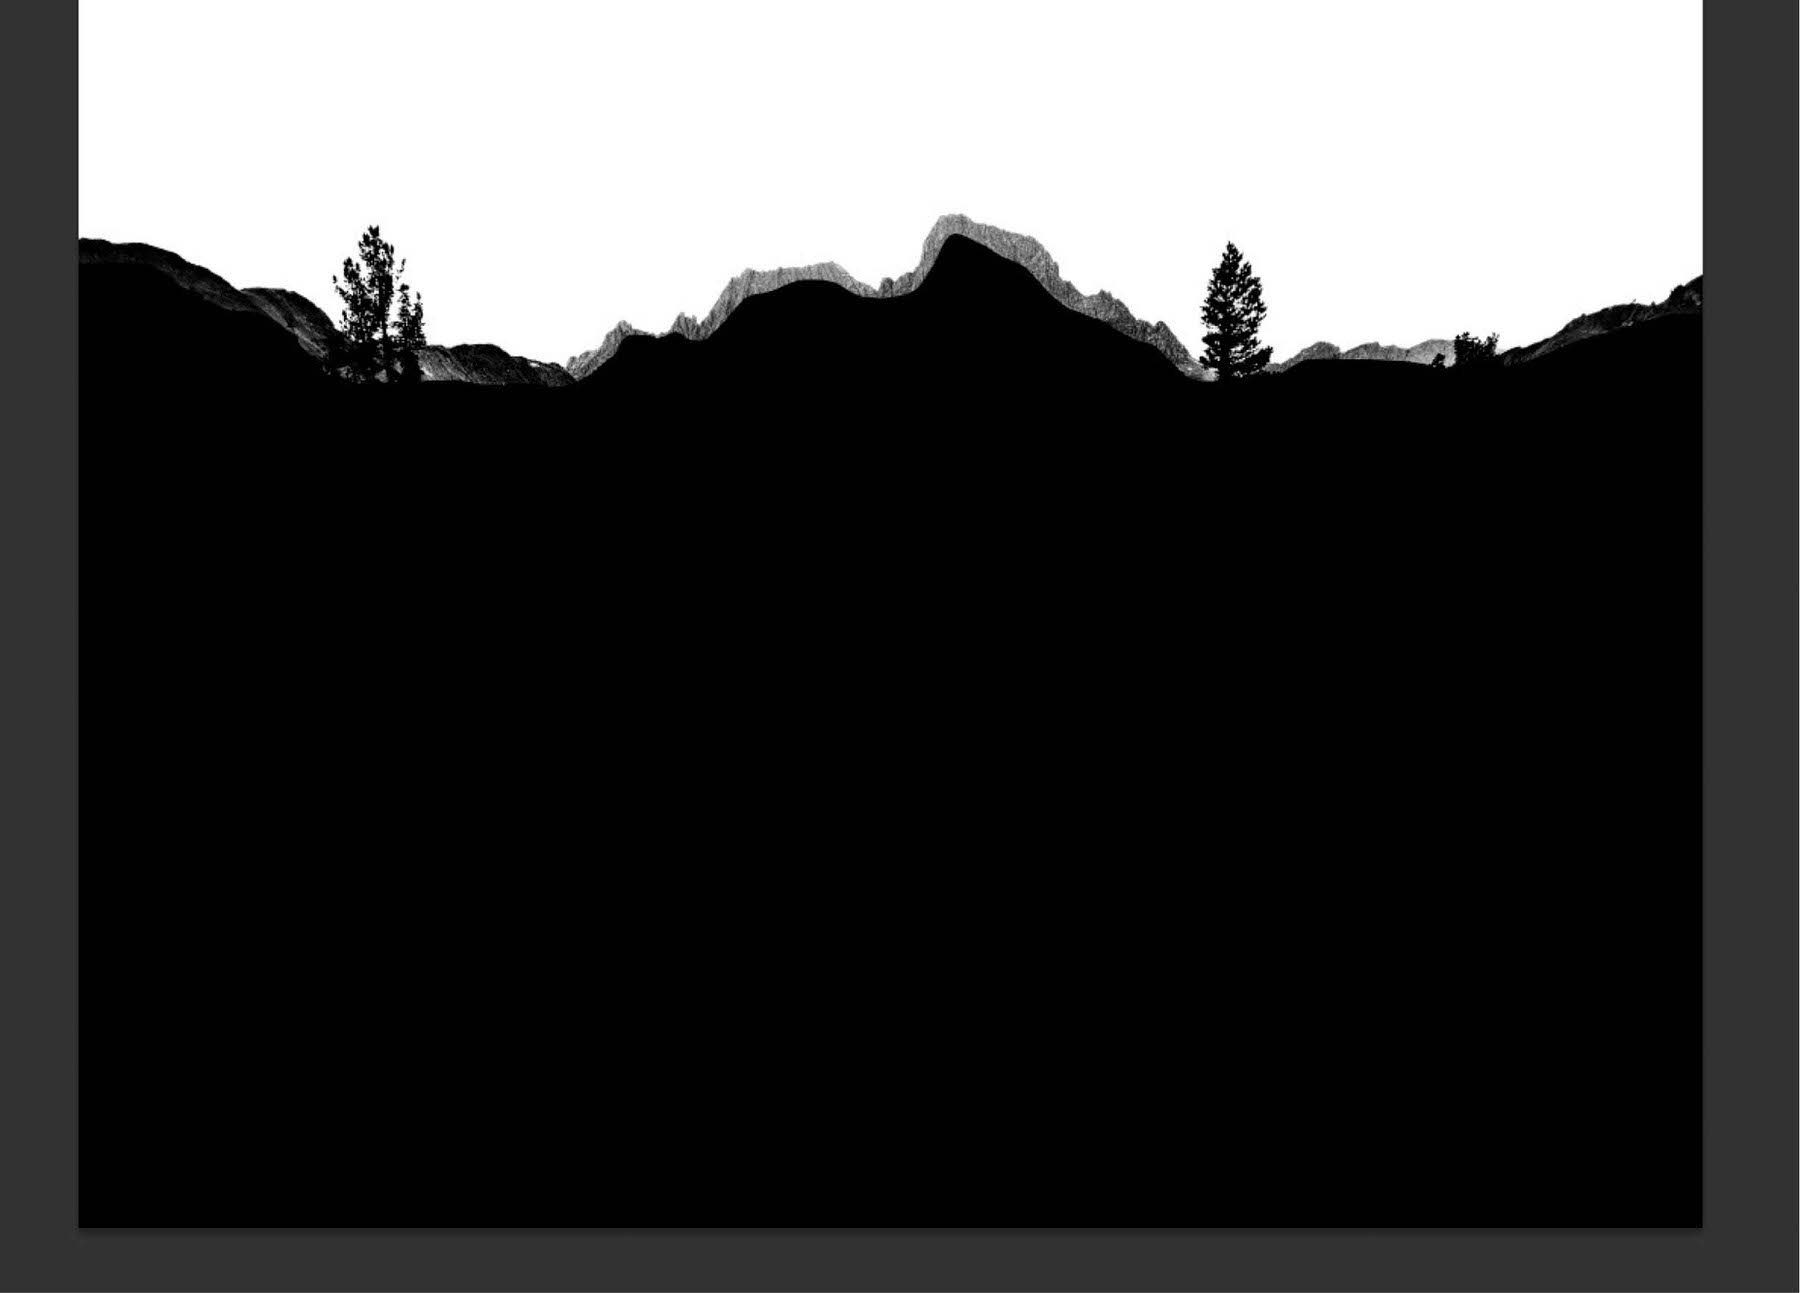
Since we increased the contrast of our Blue copy channel, we made all the sky pixels pure white in the mask, which means that we can paint over them as much as we want in Overlay mode and they will never be affected. Pretty amazing. Knowing this, we can now take our Brush Tool and paint over the rest of the mountain to create a final mask that looks like this:
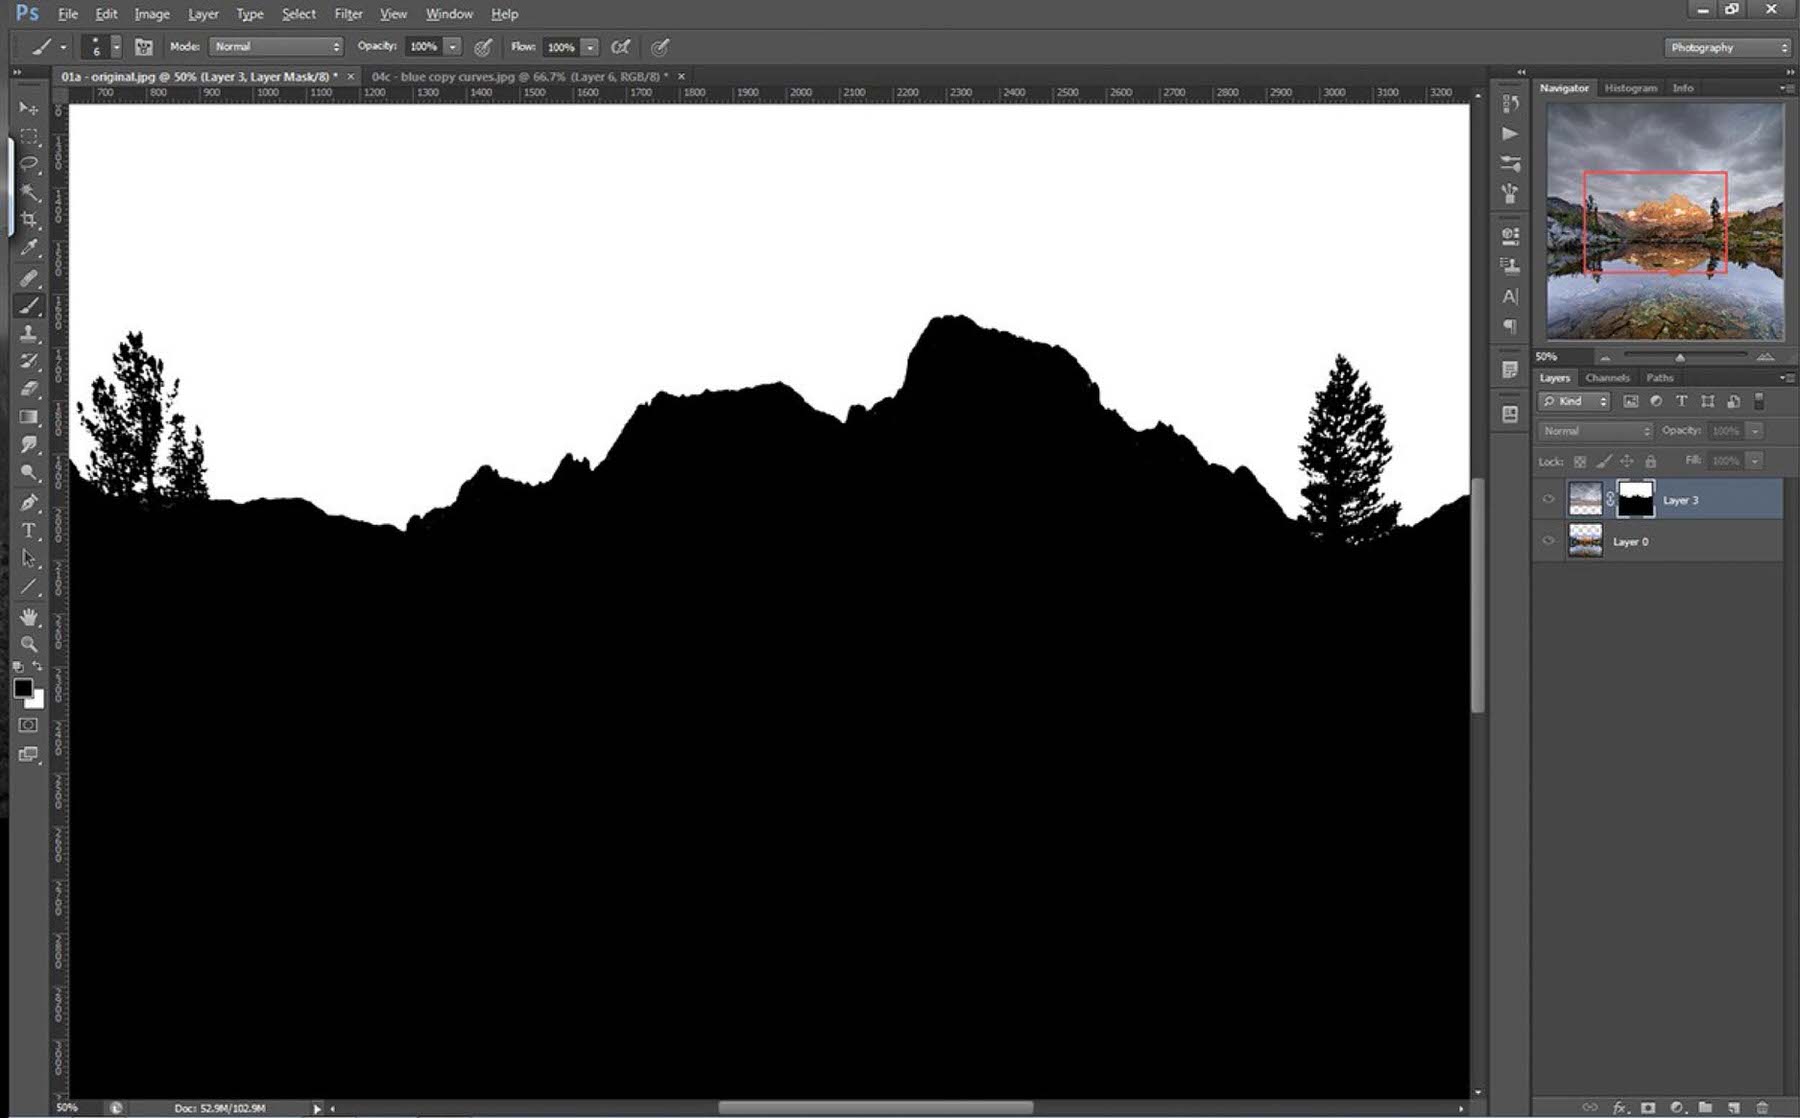
Now is that a mask or what?! Look at the beauty, the complexity, the detail! All those nooks and crannies have been preserved in the mountains and even in the branches of the trees. Most excellent. If we now Alt / Option click on the layer mask thumbnail again we should see a much cleaner sky.

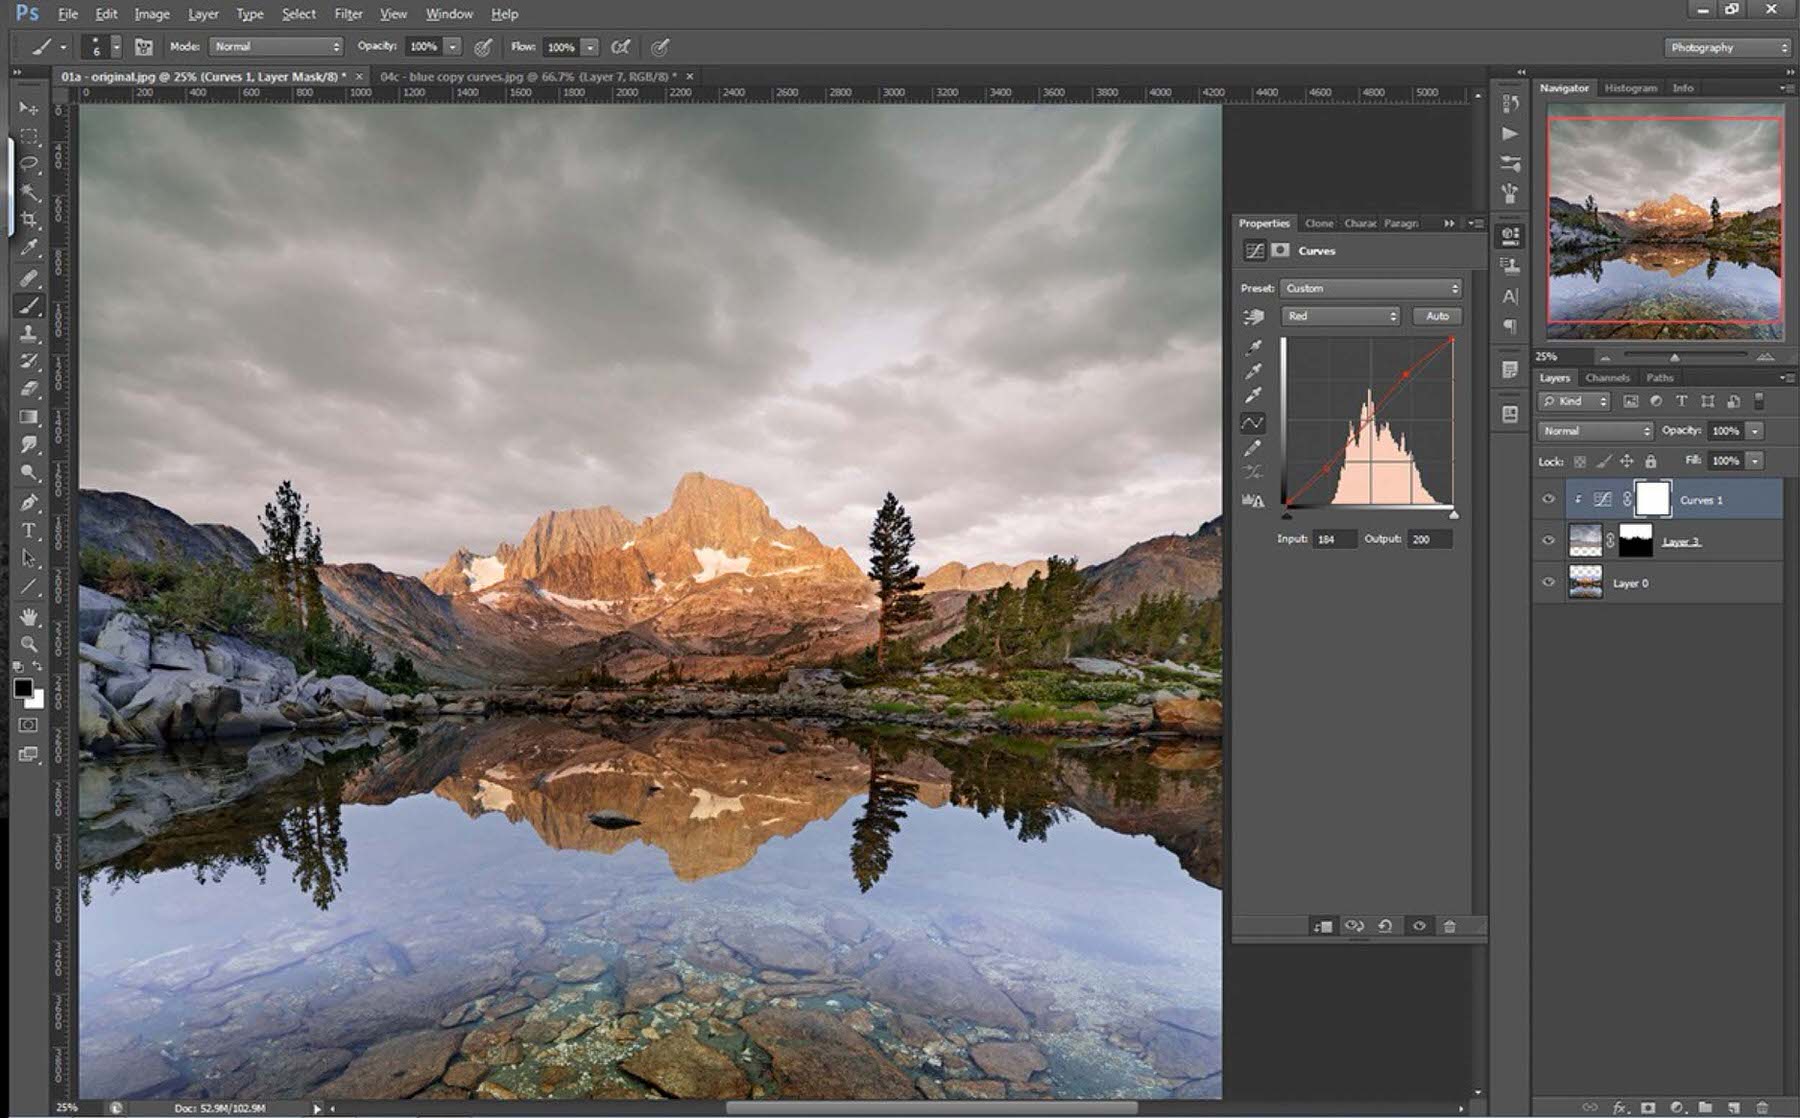
Now the cloud mask is razor sharp, but the color of the clouds isn’t quite right, so let’s add a Curves Adjustment Layer to increase the red in the Highlights. Then we can clip it (right click on the curves layer and select Create Clipping Mask from the drop down) to the cloud layer to make sure it affects only that layer.
Fixing the Foreground
This looks pretty great, except for one big, glaring issue: the foreground is still reflecting that lovely blue sky from the original photo. In order to fix that we’re going to take almost the exact same steps as before.
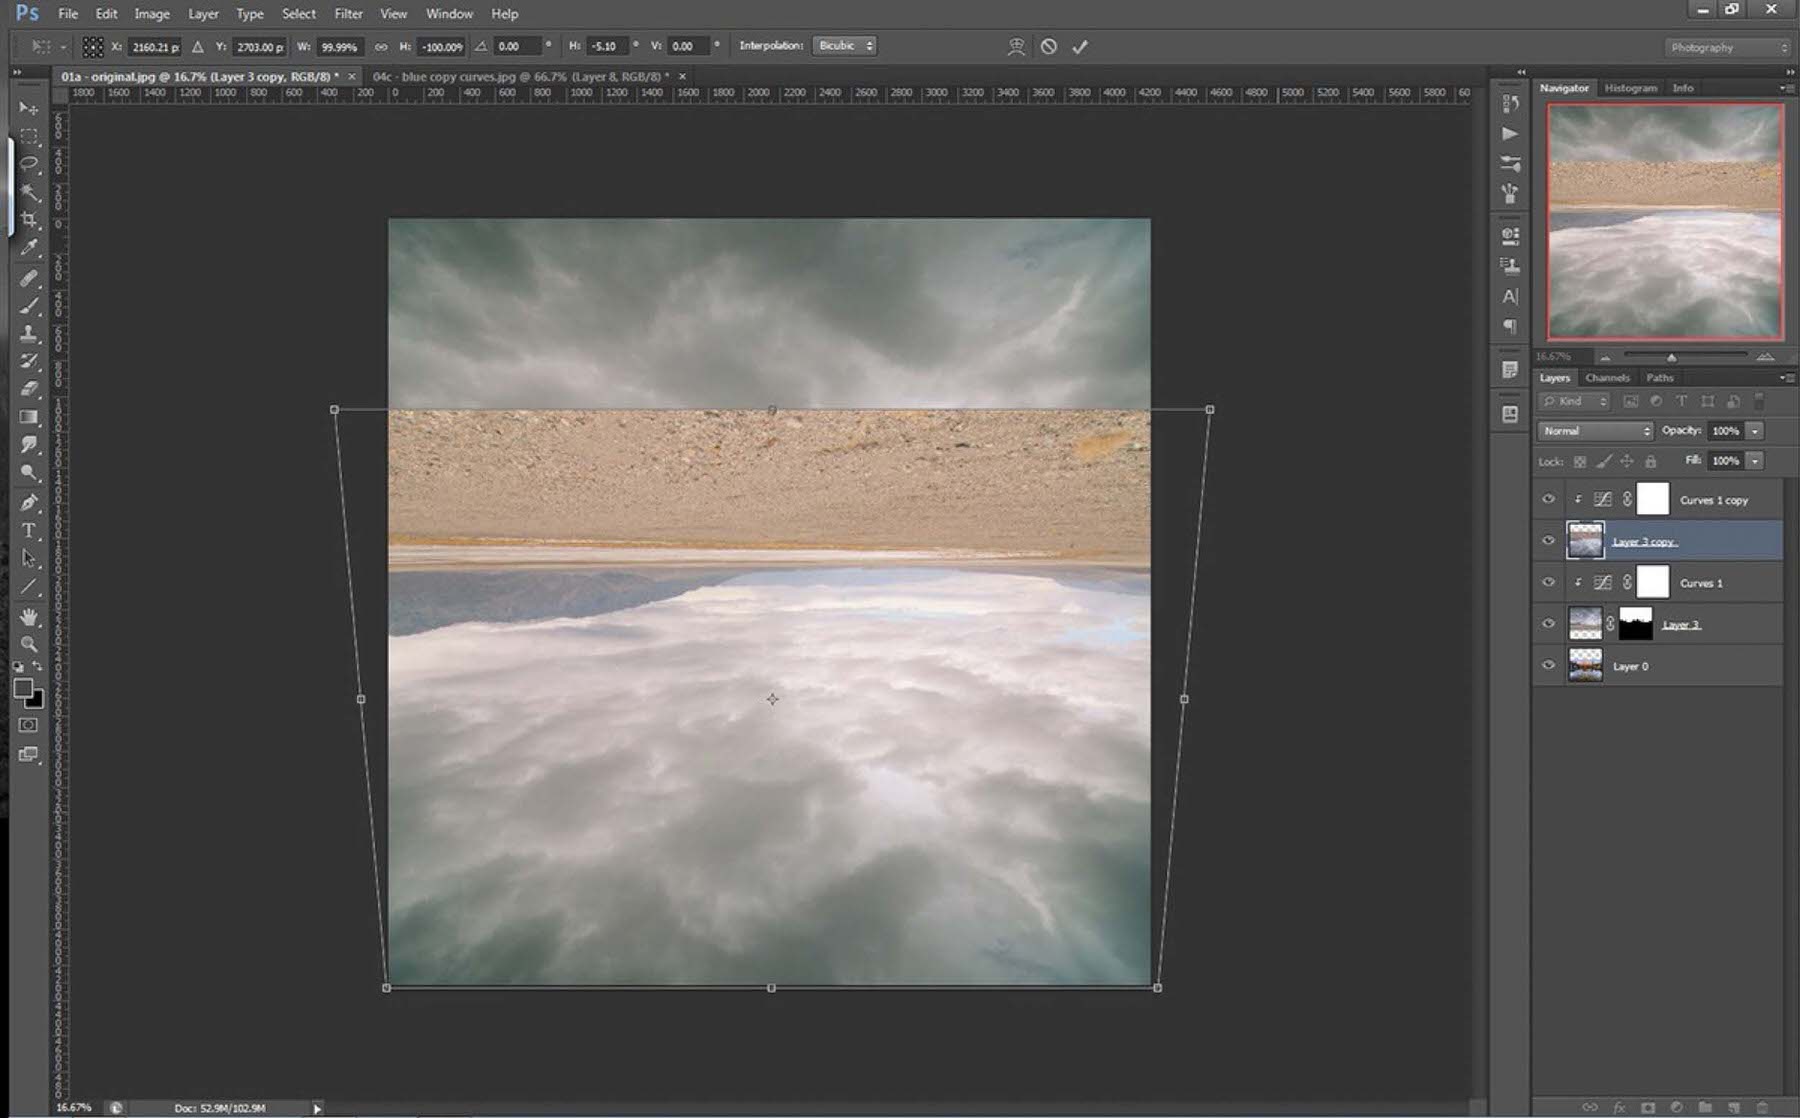
First I’m going to duplicate the cloud layer (and the clipped Curves layer as well in order to preserve the color matching). Then I’ll flip the clouds vertically, pull them down to the bottom of the image, and then add a little bit of Perspective Distortion to match the wide-Angle distortion of the original photo.
With the cloud Reflection in place, I’m going to add a layer mask to it and fill it with black (this can be done automagically by holding Alt / Option and clicking on the Add Layer Mask button in the Layers palette) in order to completely conceal the clouds.
Working With Channels
With our clouds masked out completely we need to paint them back in selectively into the Reflection. Again I’m going to use my Channels to create a selection, and again I’m looking for a channel where the Contrast between the blue sky reflection and everything else is the greatest. And in this case, the Blue copy channel we made before is an outstanding candidate because of its high contrast. But what makes this channel really excellent is that the rocks in the foreground Fade from black to white. Which means that when we create a mask using this channel, the clouds will Fade out gradually into the rocks, which will help preserve the transparency of the water.
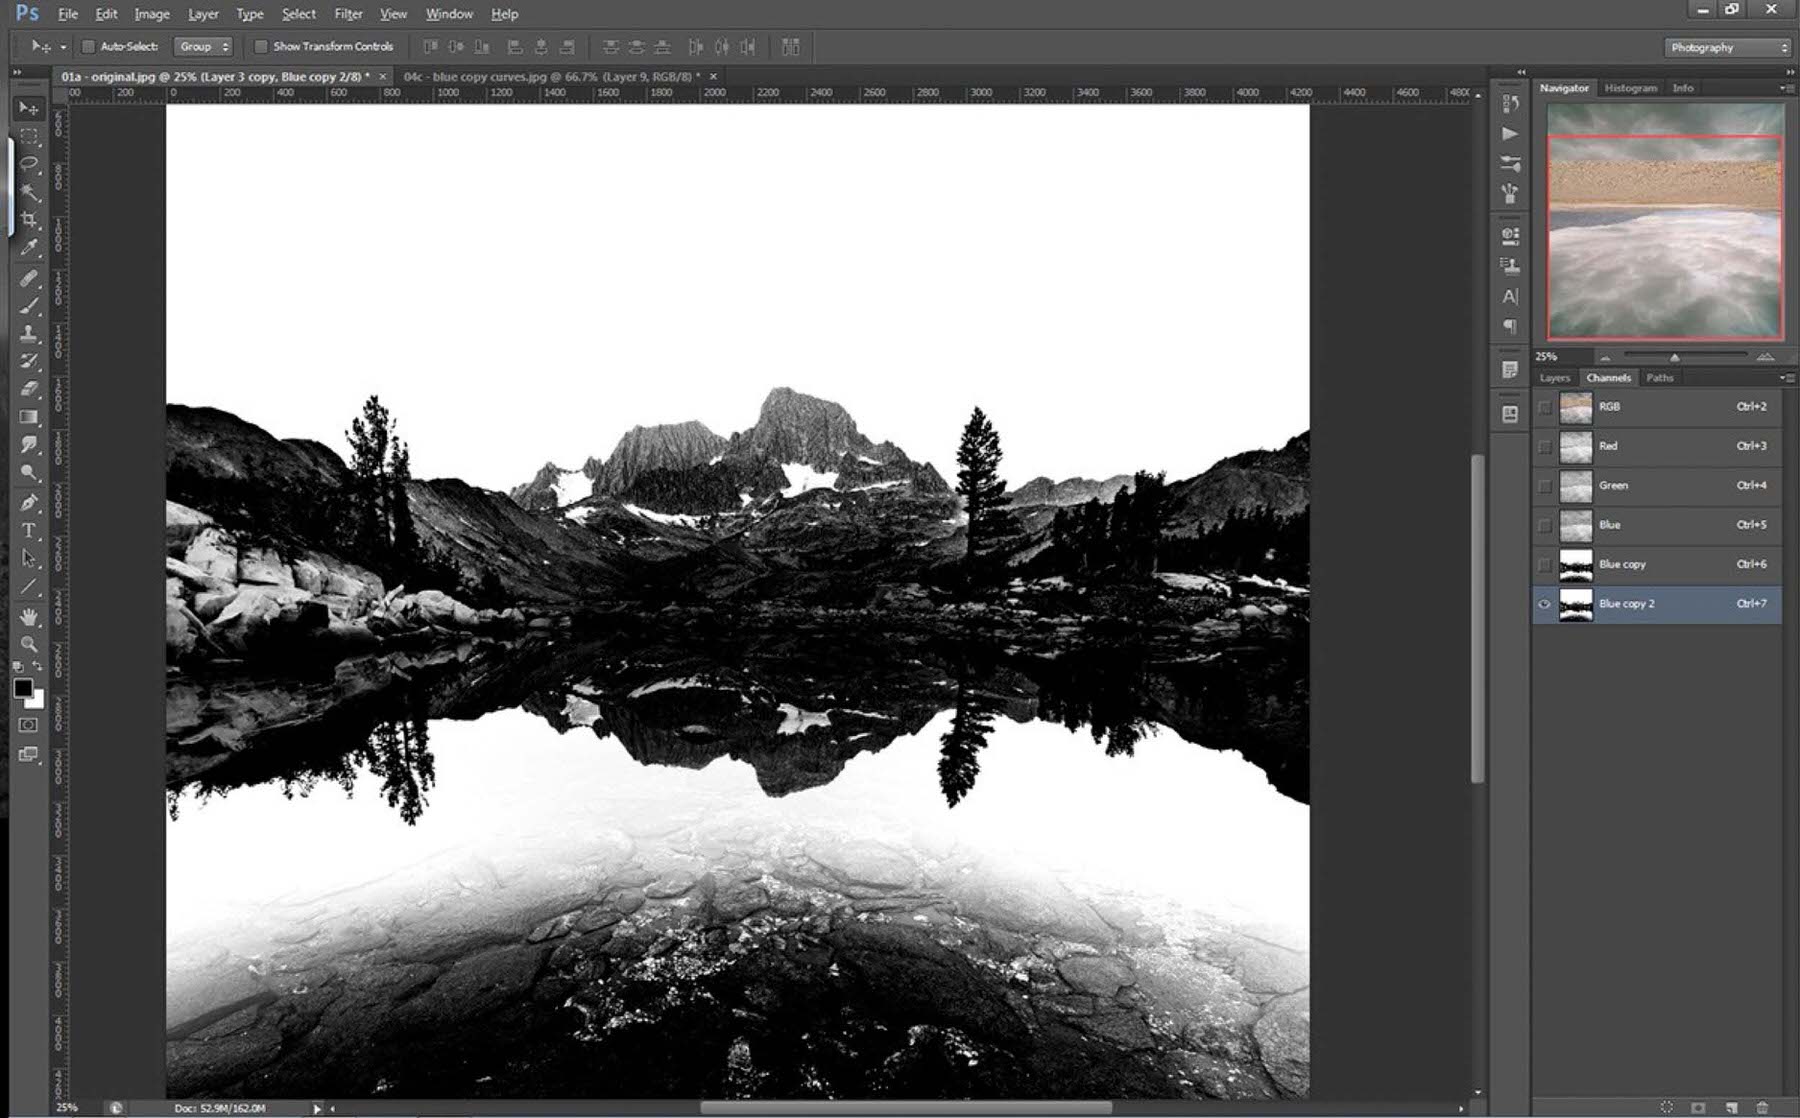
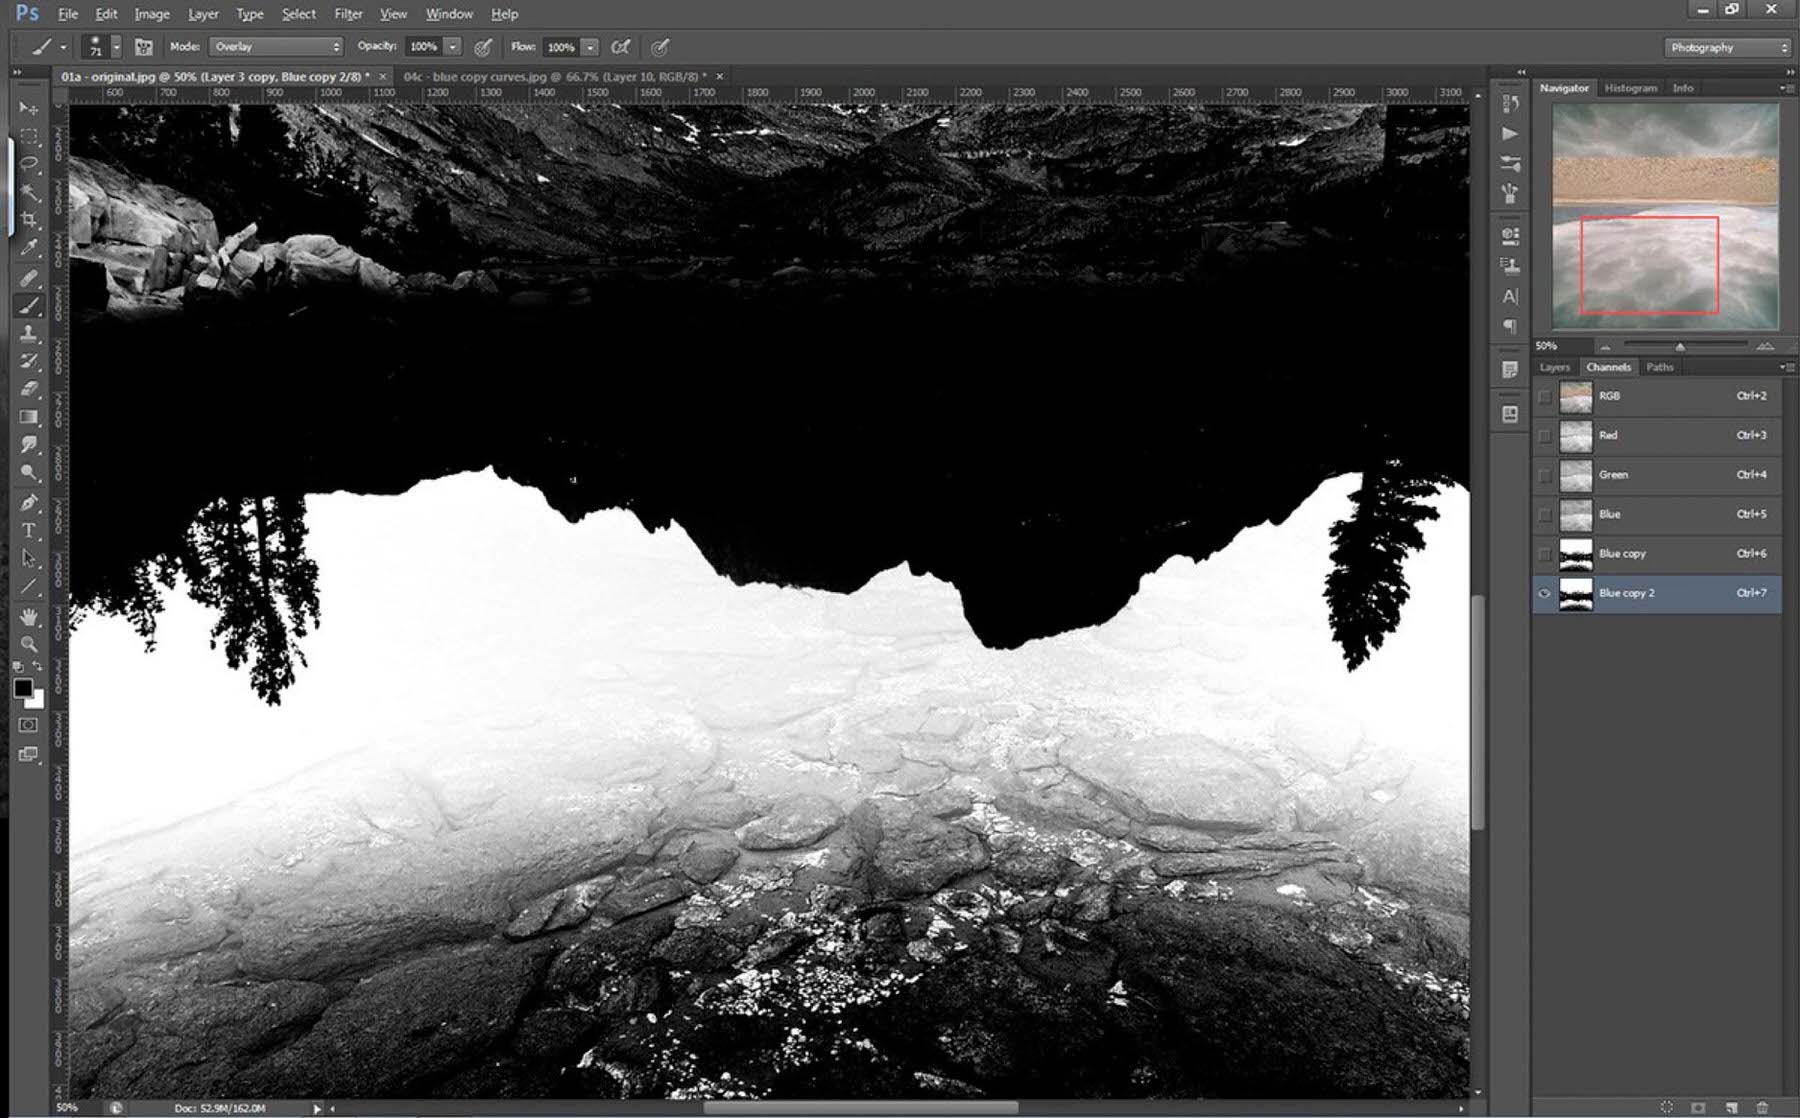
This time we’re going to do things a little differently, just to show you another technique. Instead of creating a mask from this channel, then refining the mask using Overlay brushing, this time we’re going to first paint directly on the channel using Overlay mode, then create the mask afterward. But I don’t want to change my Blue copy channel in case I need it again later, so I’m first going to make a copy of that channel, which Photoshop calls Blue copy 2.
Now with that Blue copy 2 channel highlighted in the Channels palette, I’m going to take my Overlay Brush and Darken all the mountains, trees, and rocks in the midground. I’m going to leave the foreground rocks alone, and I also don’t care about the rocks sticking up out of the water. After all, this mask is going to be for the reflection only, so I don’t care what’s happening outside of that reflection.
Ok, this is looking really good, so all that remains is to turn this channel into a mask. Just as before I’m going to click the Load Channel as Selection button in the Channels palette, then head back to my Layers palette. But since we already created a layer mask for our reflection and filled it with black, we can now take a white brush (be sure to switch your Brush’s Blend Mode back to Normal for this) and paint in the areas where we want the clouds to show up. Creating the mask this way gives us even more subtle and selective control over how we want the clouds to appear in the reflection. Here I used a large, soft brush with an Opacity of about 30% to gradually paint the clouds into the reflection.
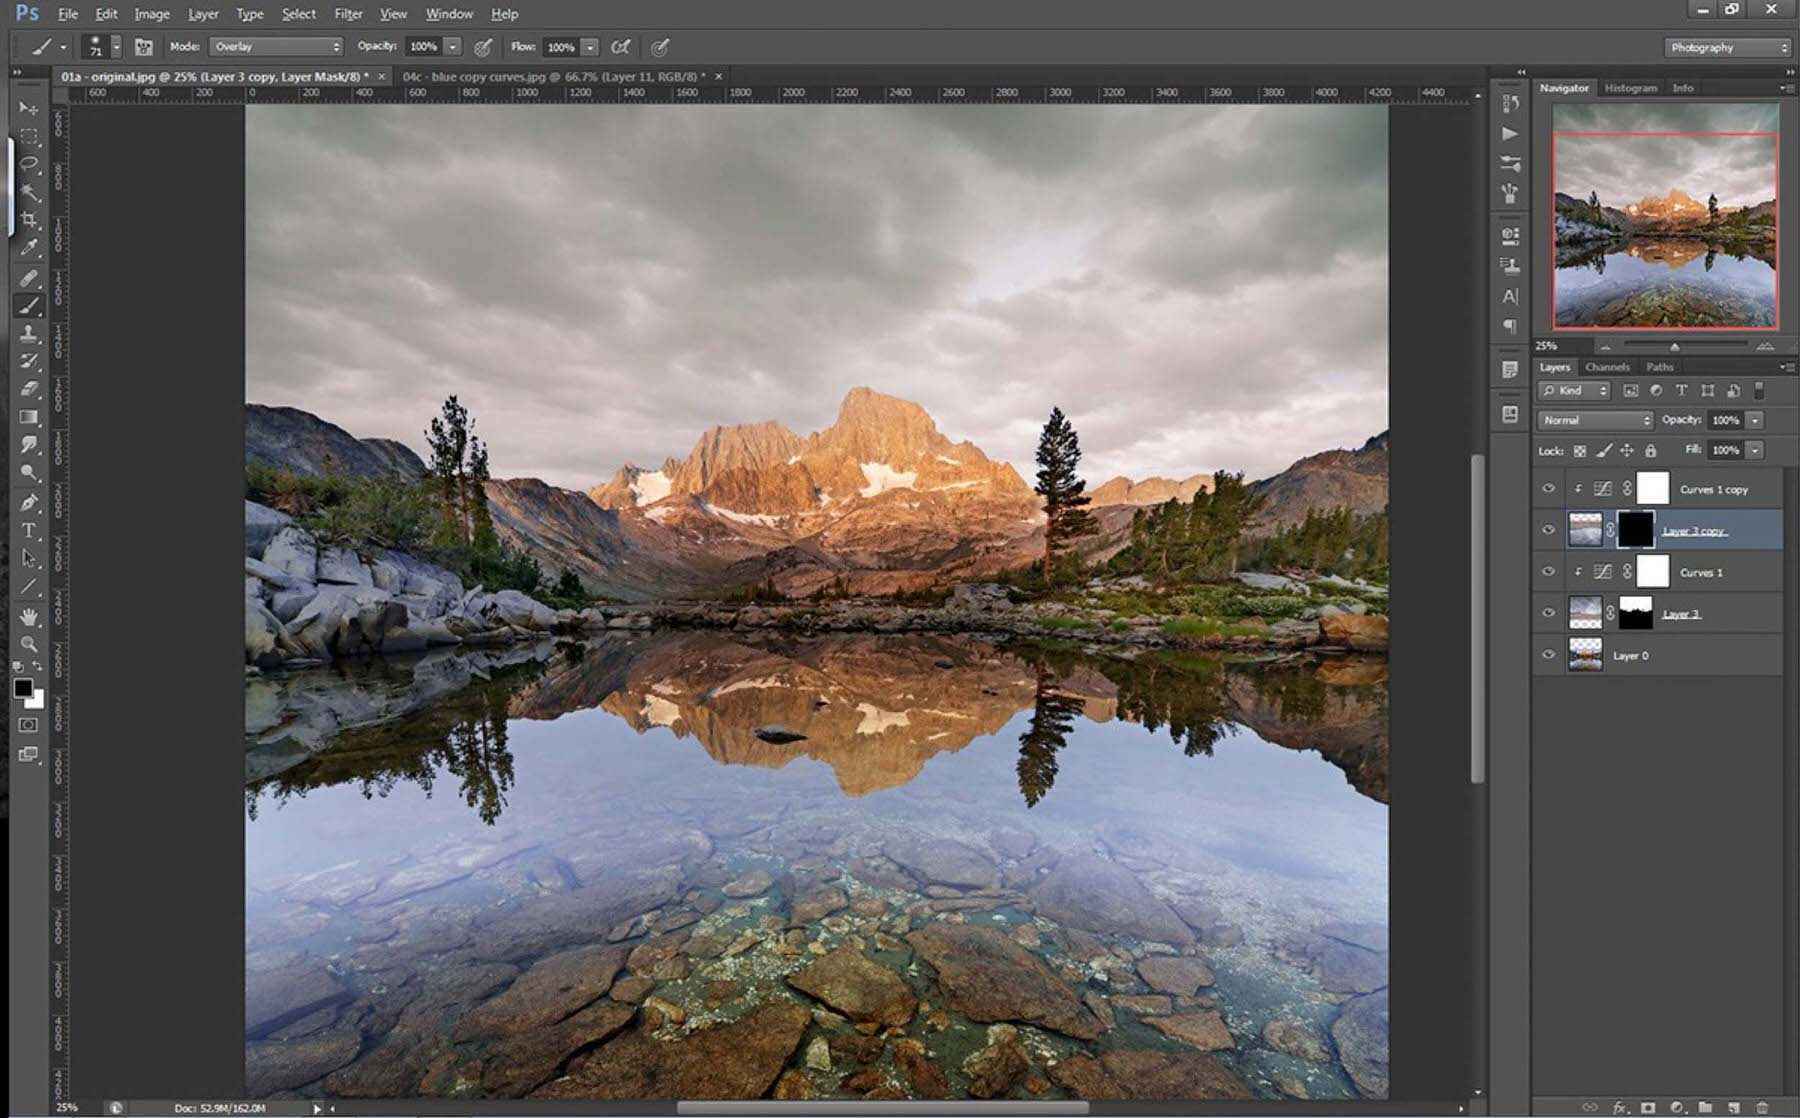
And here’s what the image looks like now with the reflective clouds masked in. Note how the water still looks Transparent even though we completely replaced the sky reflection. How sweet is that?!
Correcting Your Color
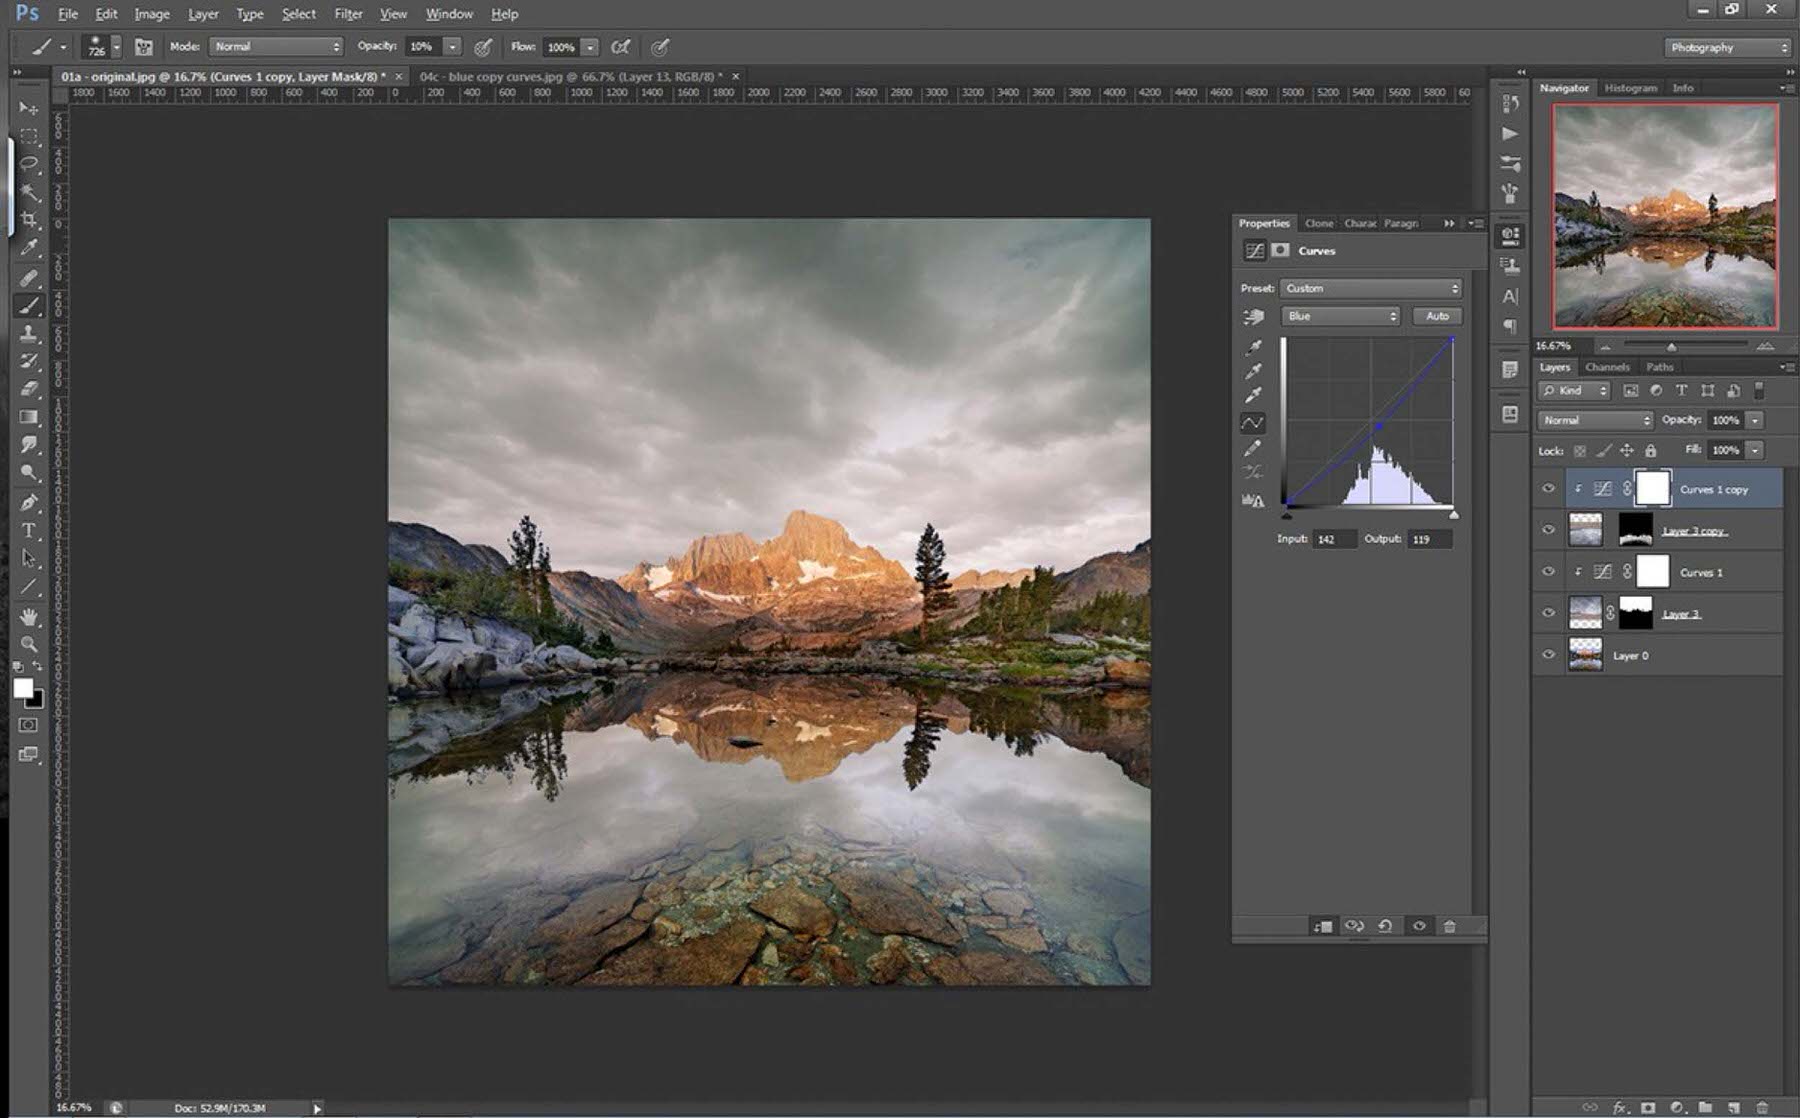
Because I didn’t paint the clouds in with 100% Opacity, there’s still a little blue leaking through from the Underlying Layer. But that’s an easy enough fix. In our curves layer above the clouds, select the blue Channel and drag it down a little bit, and that’ll pull any excess blue out of the reflection.
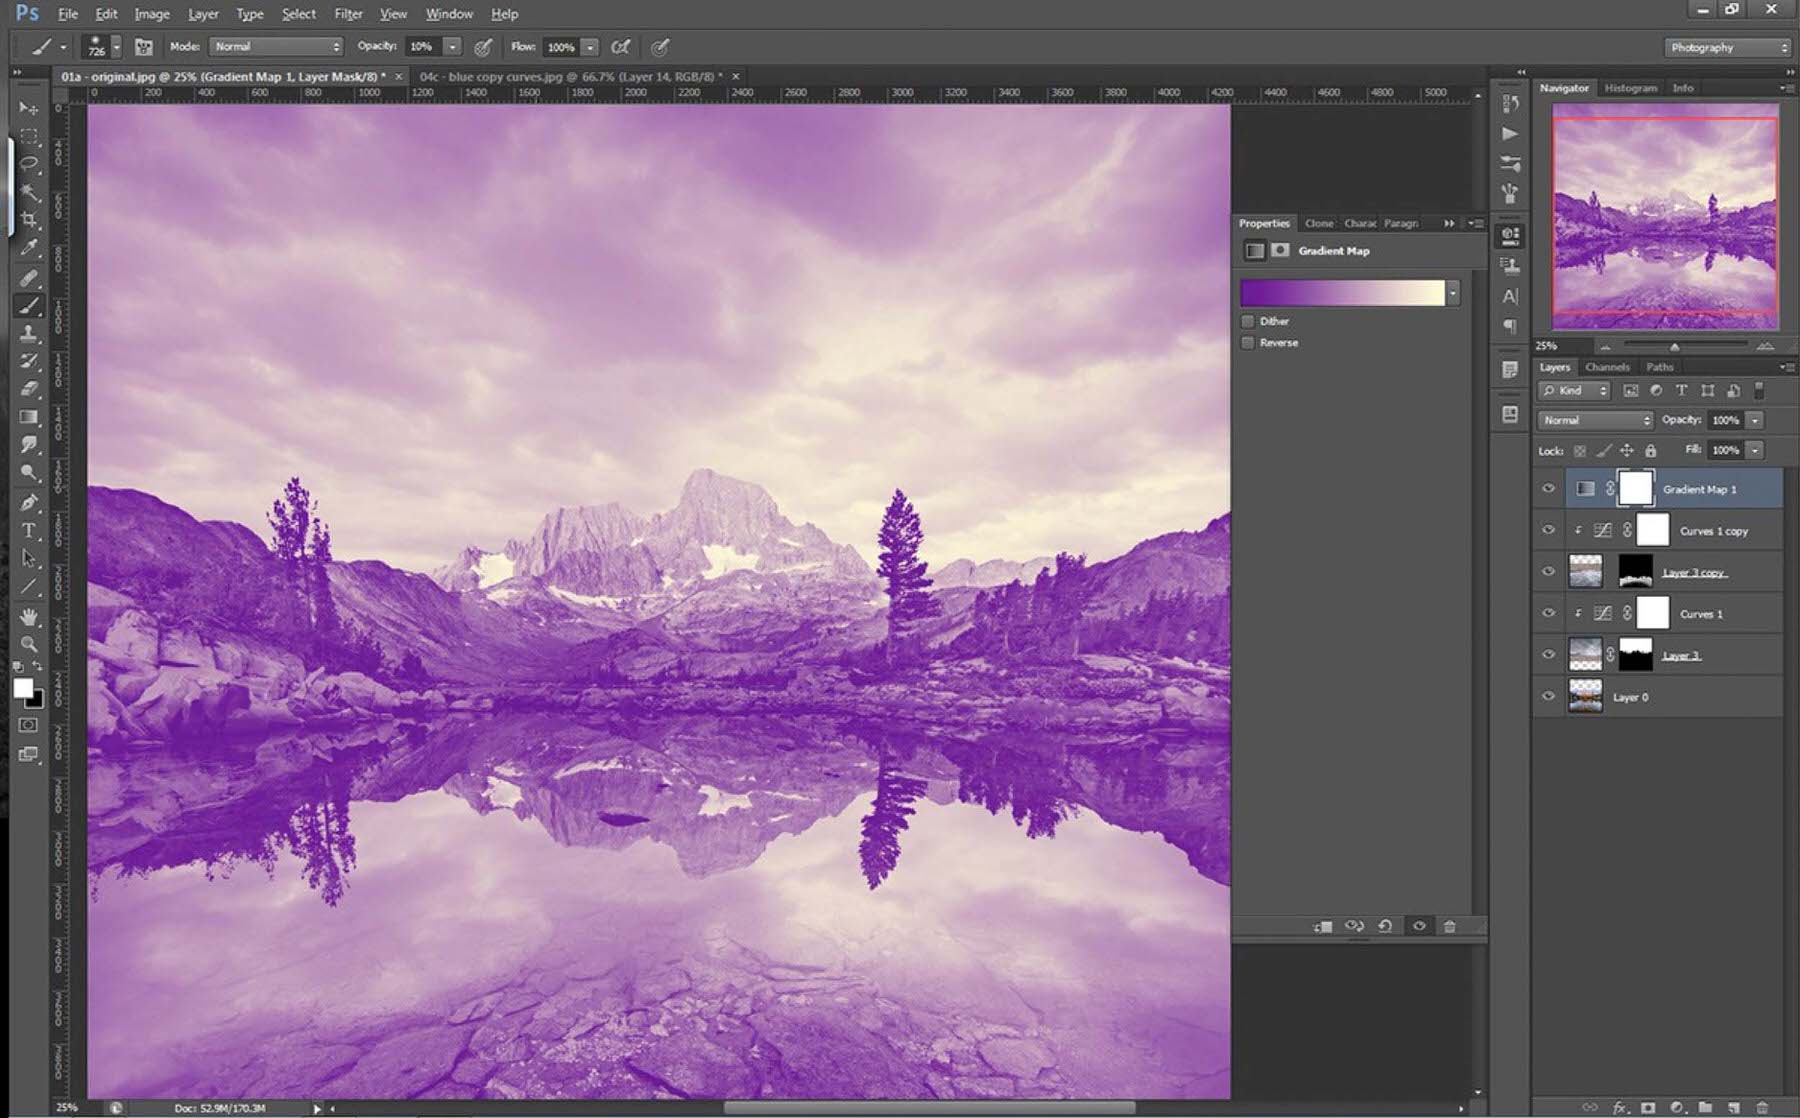
Now we could stop there and be totally happy with this image, but since we’ve gone through all the trouble of replacing the sky and the reflection, why not add a little more pop and Color as well? A quick, easy, and fun way to add Color and contrast to your images is with a Gradient Map. Grab a Gradient Map Adjustment Layer and in the properties window, choose a couple of Colors. Here I decided to have the gradient go from purple to Light yellow. You can add as many colors as you like and change each one, so fiddle around till you get something you like.
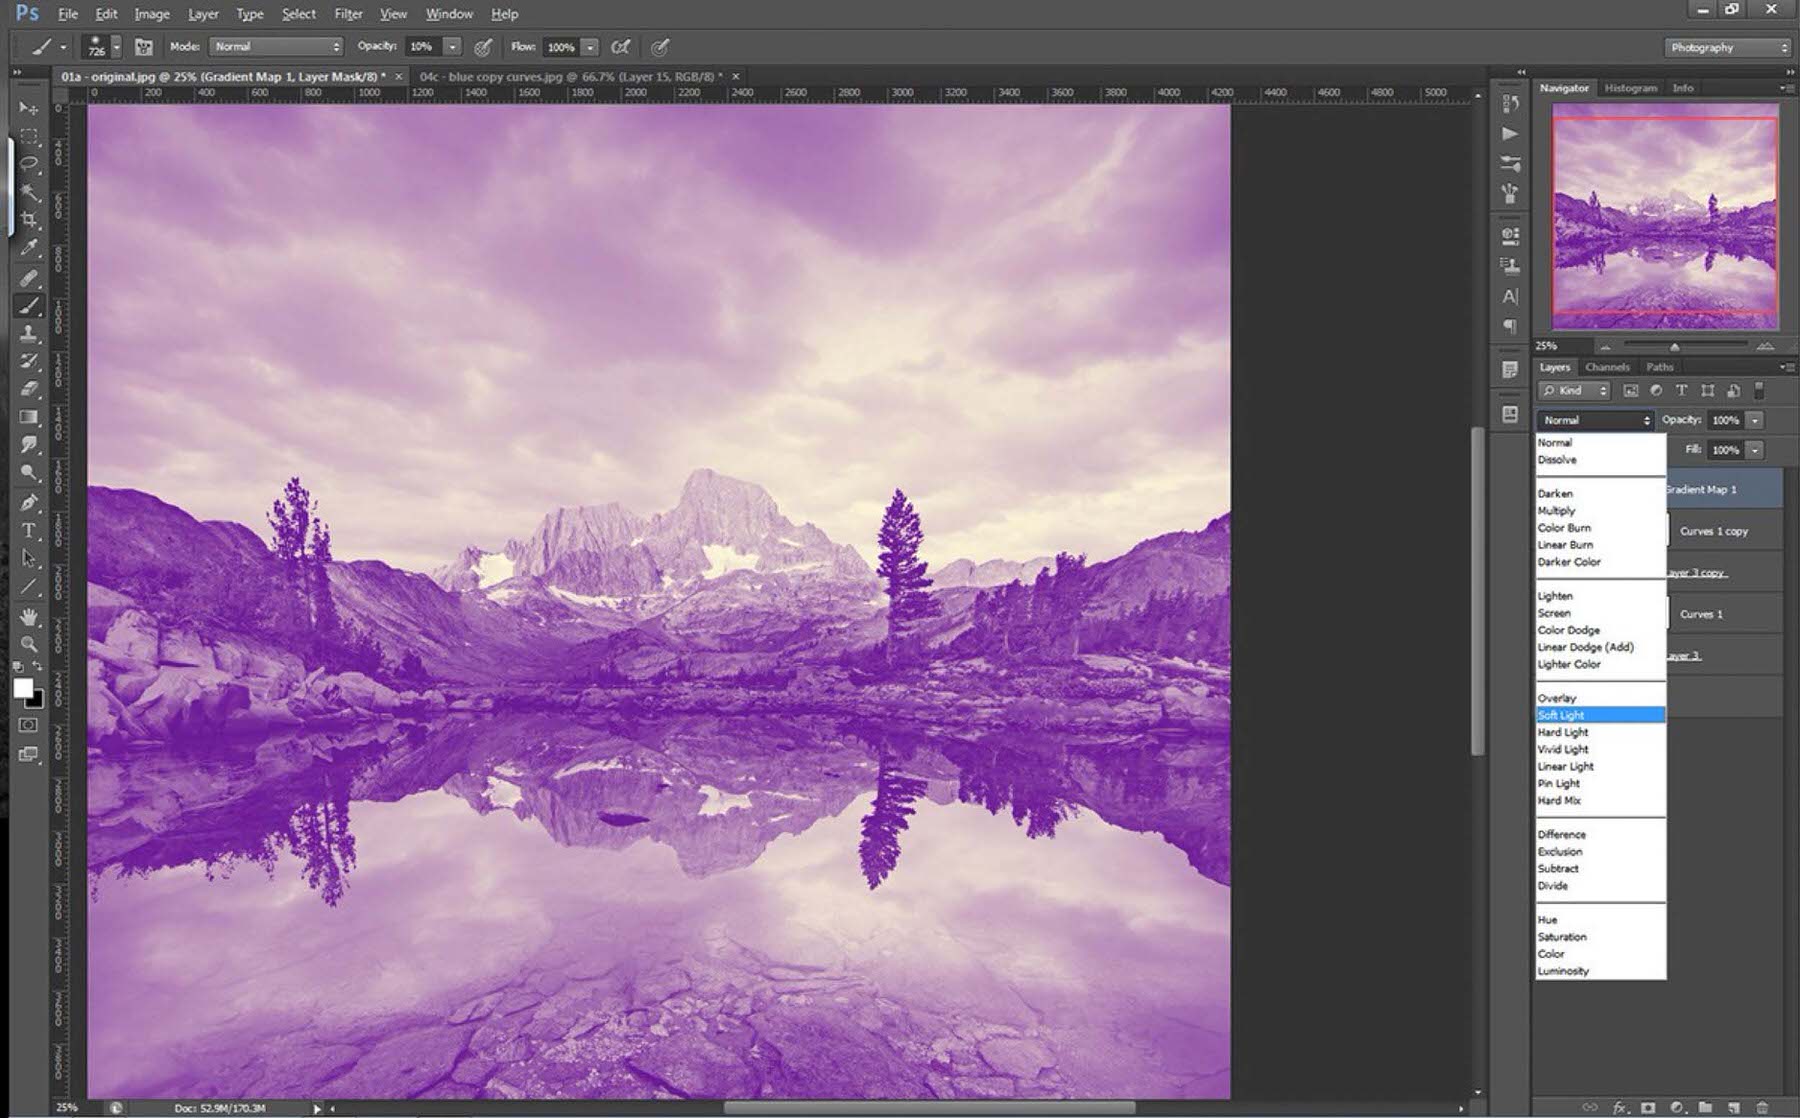
Now change the Blend Mode of the Gradient Map to Soft Light. This will boost the contrast of your image and lessen the impact of the Colors.
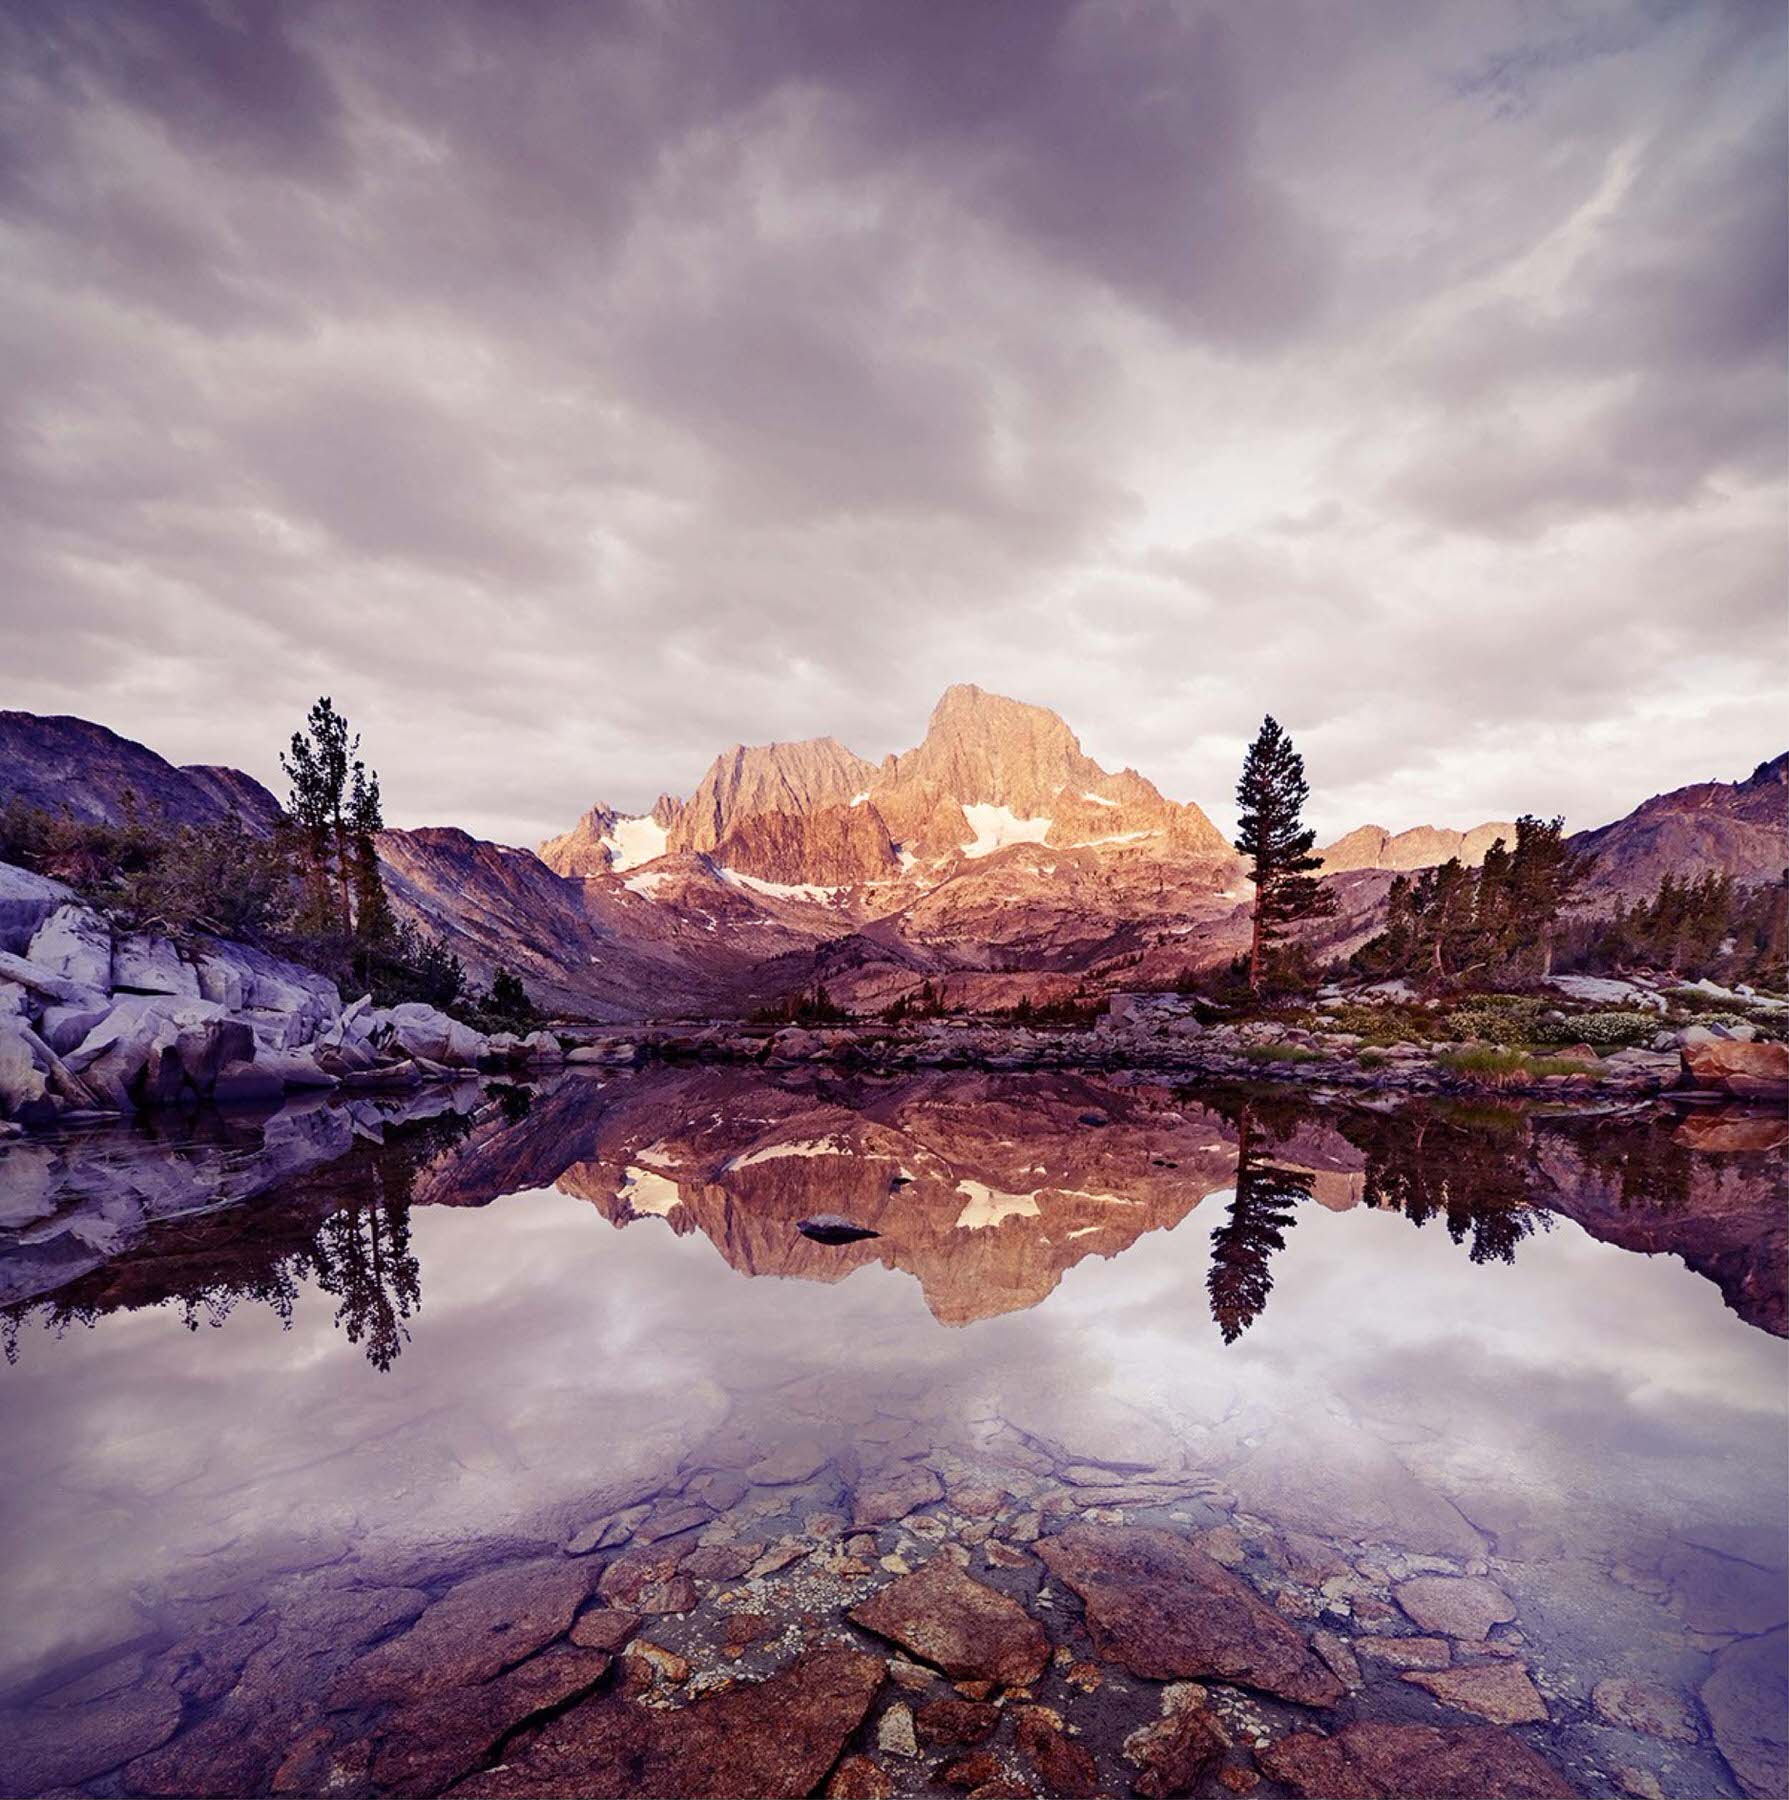
Final Result
The result of that is an image with lots of pop, and a groovy-looking Color scheme. And voila, we’re done!
Alrighty, guys and gals, thanks for taking the time to read this tutorial, and hope you enjoyed it! Until next time, happy shooting.