Managing Digital Noise: The Good, the Bad, and the Ugly
If you’ve ever wondered about the “grainy” look that keeps popping up in your digital photos, you’re in the right place. You may be aware that it’s called digital noise, and that there’s a lot of technology floating around to help photographers try and stamp it out of their images.
Although it’s often used to mimic the grainy appearance of traditional film photography, digital noise and film grain are completely different animals. Whereas grain is usually considered to add character to a photo, noise is generally regarded as… well, a nuisance at best. At worst, it’s seen as a sign of poor quality.
But if you look very closely, you’ll find that some level of noise exists in almost all digital photography. If it’s managed well and incorporated thoughtfully, we don’t even notice it. Sometimes, noise even has a positive impact on the finished photo. We’ll get to that in a moment, but first:
What Is Noise?
Although there are several different potential causes of noise in digital photography, the result is the same: artifacts that appear in your image. The word “artifact” can be confusing the first time you hear it in this context, but we aren’t talking about historical treasures here. Artifacts in this sense are imperfections. In the case of digital noise, that usually means thousands of little speckles that can muddy up details or create distracting patterns across the darker and lighter portions of your image. This is why, in most cases, noise is considered persona non grata.
Fortunately, there are ways to incorporate noise into your concept, avoid it altogether, or limit its appearance in post-processing. That’s what we’re going to talk about today. First, however, let’s talk about two kinds of noise all photographers should understand.
Luminance Noise
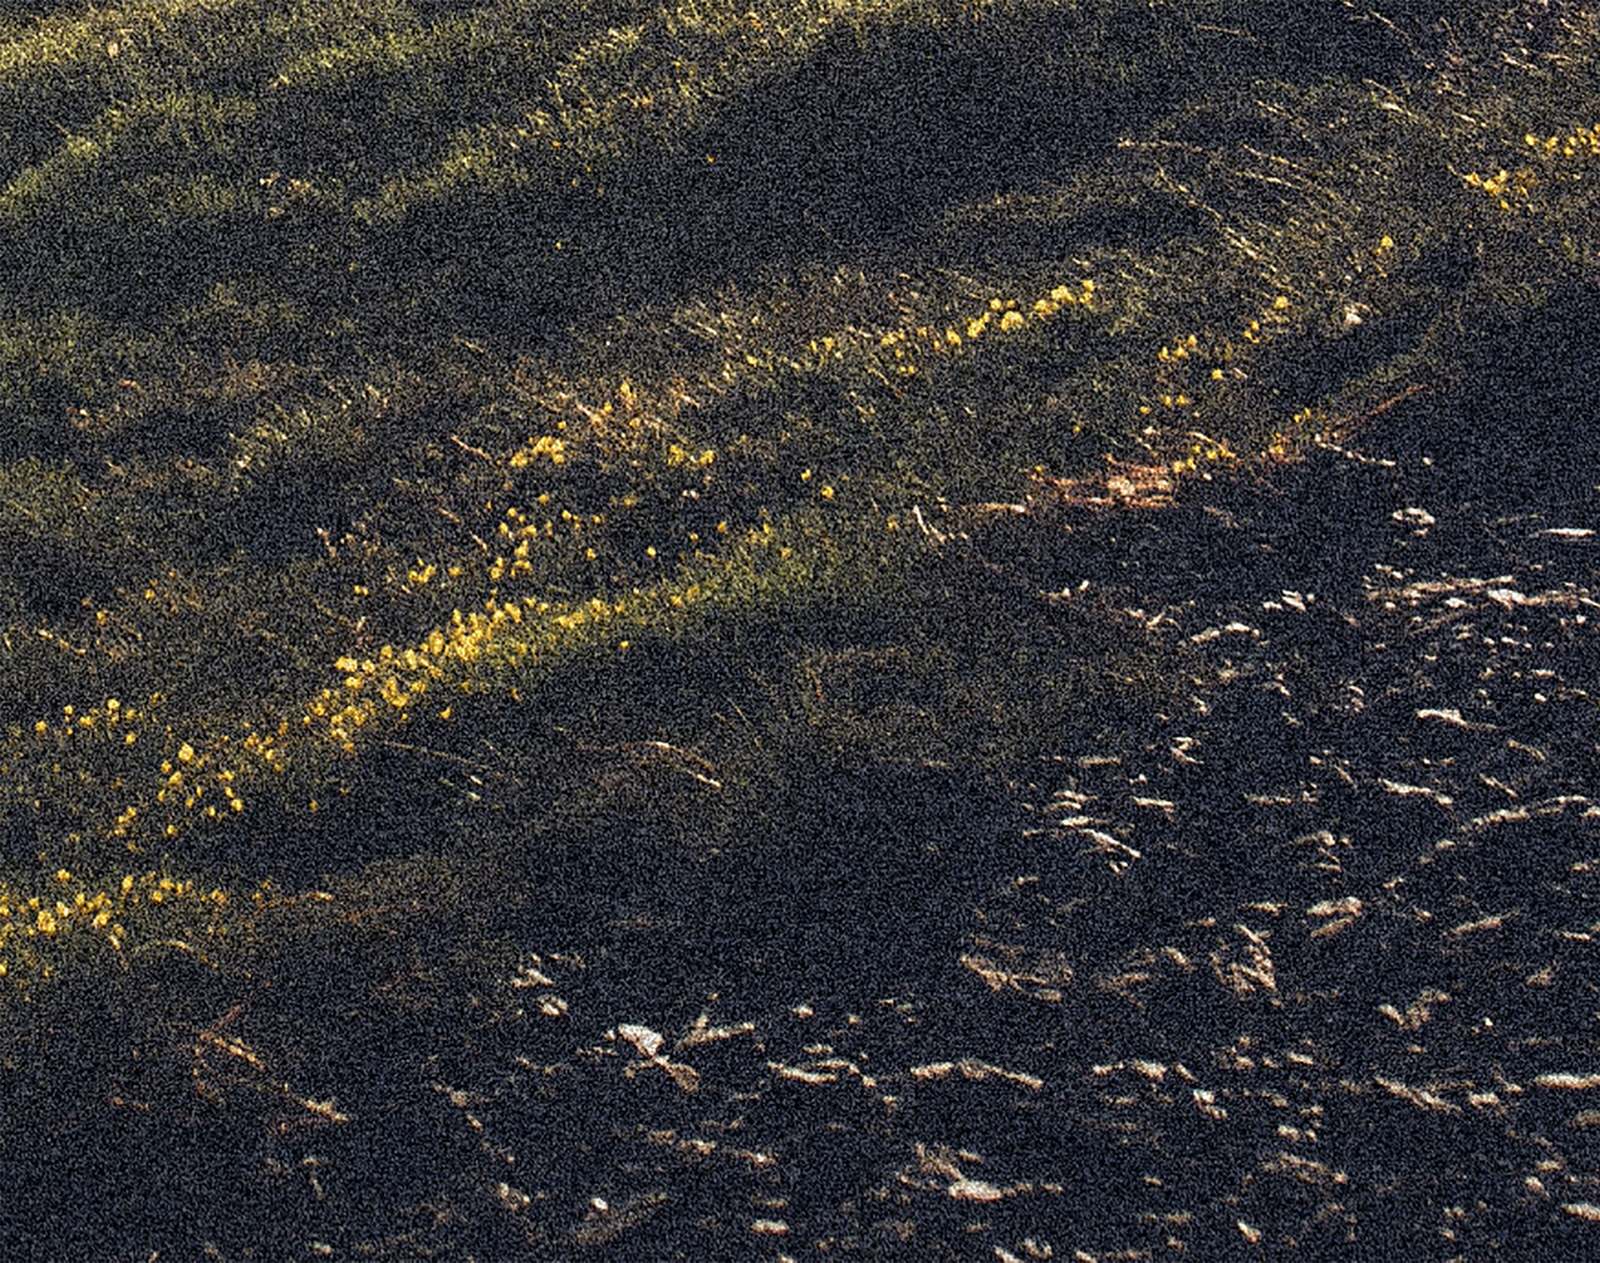
See those little specks everywhere? That’s what luminance noise looks like up close.
You may have gathered from the name that this variety of noise is related to the amount of light (or lack thereof) in your image. It doesn’t impact the hue of the affected pixels, only the brightness. Because of this, luminance noise tends to be the lesser evil of digital noise; it’s easier to minimize in post-processing without affecting the rest of the image.
Color Noise
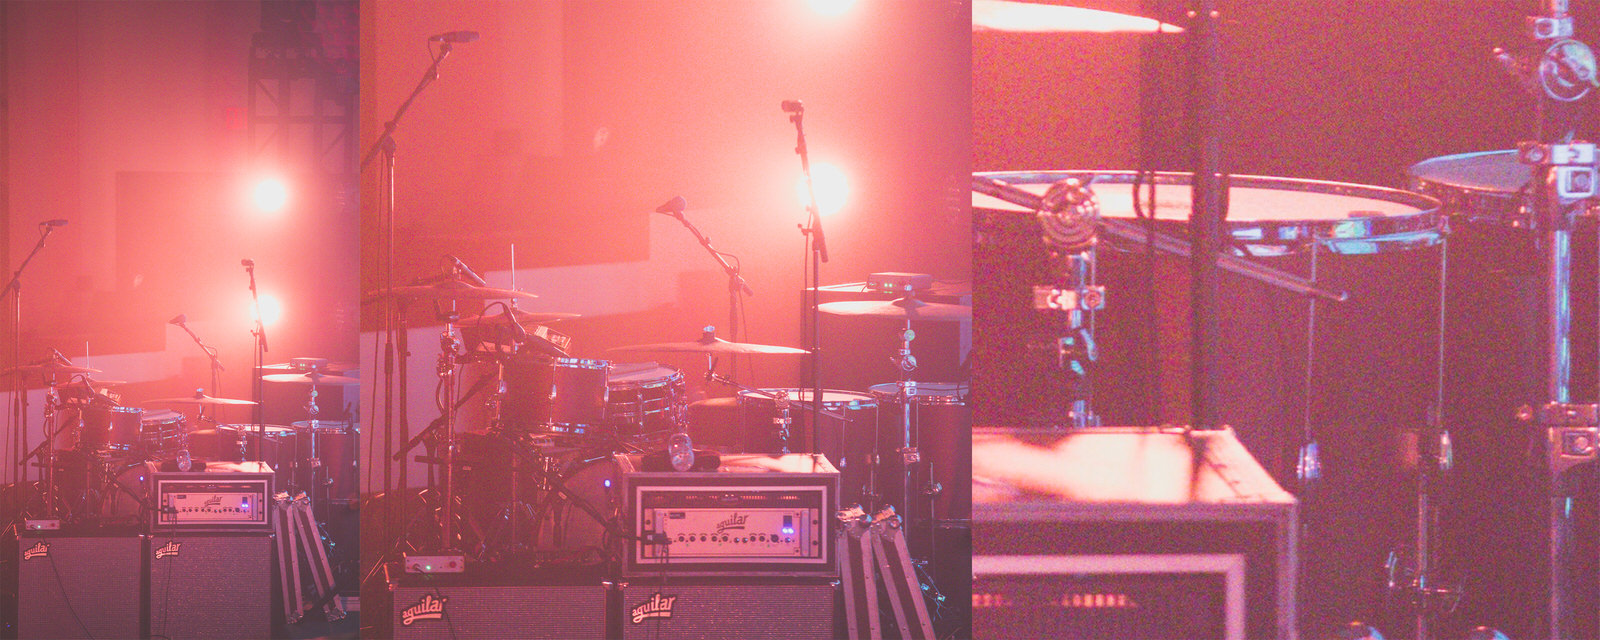
Color noise looks more like splotches of different colors grouped around each other.
Also known as chromatic noise, color noise is distinguished by the patterns of color that appear within otherwise monochrome (or mostly monochrome) areas of an image. Color noise gets more of a bad rap than luminance; it doesn’t have the advantage of blending in with its surroundings. To minimize color noise, you have to desaturate the affected pixels to some extent, which can be a delicate process if you don’t want to desaturate anything else in the photo.
Is Noise Always a Bad Thing?
Not at all! Sometimes noise works with an image. In fact, there are filters and presets that add noise to mimic film grain for a vintage effect. Sometimes, when it doesn’t interfere with the sharpness or detail in an image, noise is best left alone. It’s one of those things that might not be noticed if you don’t draw attention to it.
The Good: How to Use Noise to Your Advantage
Digital noise can result in some great, textural images. Of course, as we mentioned earlier, it’s also the go-to way to add a vintage feel to a photo since noise is the digital counterpart of film grain. No, they don’t look exactly the same, but the difference is negligible to most. If your audience cares enough about authenticity to nit-pick between film grain and noise, you might consider shooting in film to obtain “true” grain and scanning your images.
The most common cause of digital noise in modern cameras is using a high ISO number, particularly when shooting in a low-lighting situation. An easy exercise to practice harnessing ISO-related noise in-camera:
- Shoot in a low-lighting situation;
- Crank up your ISO;
- Perform some “pixel peeping” on your camera screen (we know, we know…) to see where you’re at with the effect;
- Walk your ISO number back if you’re seeing too much noise. Balance the new ISO number with the other corners of the exposure triangle until you’ve achieved the desired amount of noise;
- Adjust any color noise in post-processing to get a more authentic, film aesthetic.
When to Add Noise to a Photo
Noise has its advantages in post-processing, as well. When you’ve been making changes with a brush tool or clone stamp, it can smooth out the noise in the impacted area. That doesn’t sound like it’s a problem, but it essentially puts a spotlight on the edited areas of your image.
Now, if you’re okay with going over every inch of your image with the same little brush to get a consistent level of smoothing, be our guest. If you aren’t a glutton for punishment, though, you would probably rather use the Add Noise filter to the affected layer.
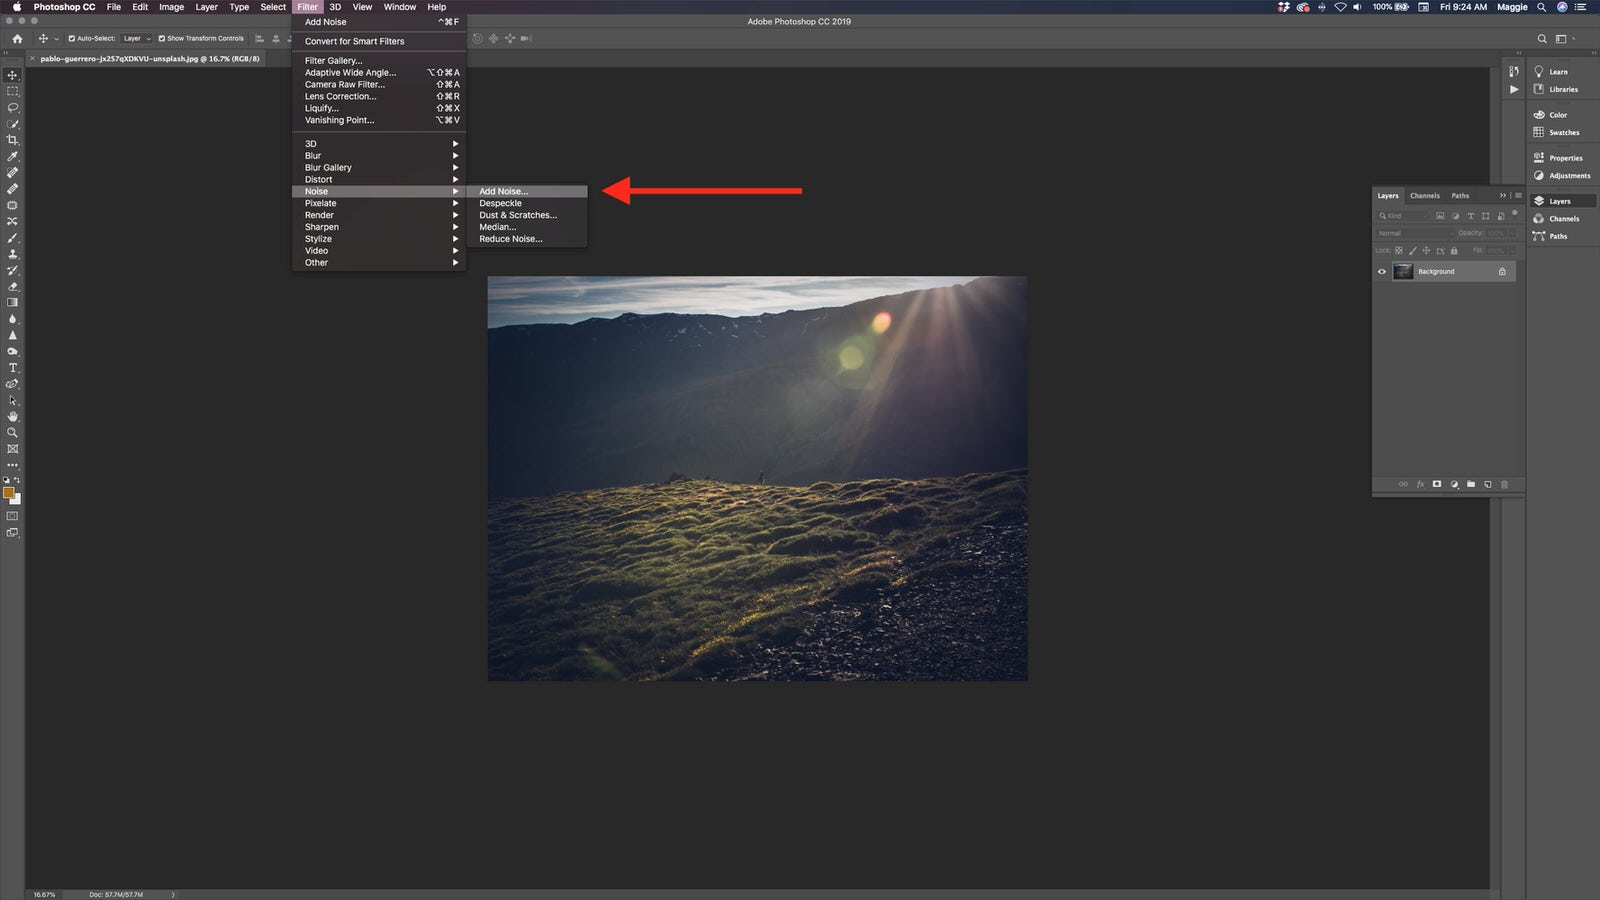
Here’s where you can find the Add Noise filter in Photoshop.
When you’re adding noise, zoom in on the preview screen and do a little more pixel peeping (we know). It’s a lot easier to match the size of the artifacts when you can compare them to the surrounding ones.
Pro Tip
If you’re not already using smart objects, now’s the time to figure them out. This way you can go back and make adjustments to your Add Noise filter if needed.
The Bad: How to Prevent Noise When You Don’t Want It
The best way to prevent garden-variety noise is with good lighting and a solid understanding of the exposure triangle. ISO is the side of the exposure triangle that most heavily impacts the level of noise in your image. To quote our own guide to ISO, noise, and color:
“When you increase your ISO, you are essentially trading a certain level of quality in your image for a brightness boost. In some cases, increasing your ISO setting will have little to no effect on the overall quality and clarity of your photos. In others, you’ll see a visible change in sharpness and detail.”
So while ISO is a quick and easy solution to low-lighting situations, once the number gets to a certain point you will probably start seeing a significant increase in digital noise. You can mitigate this by:
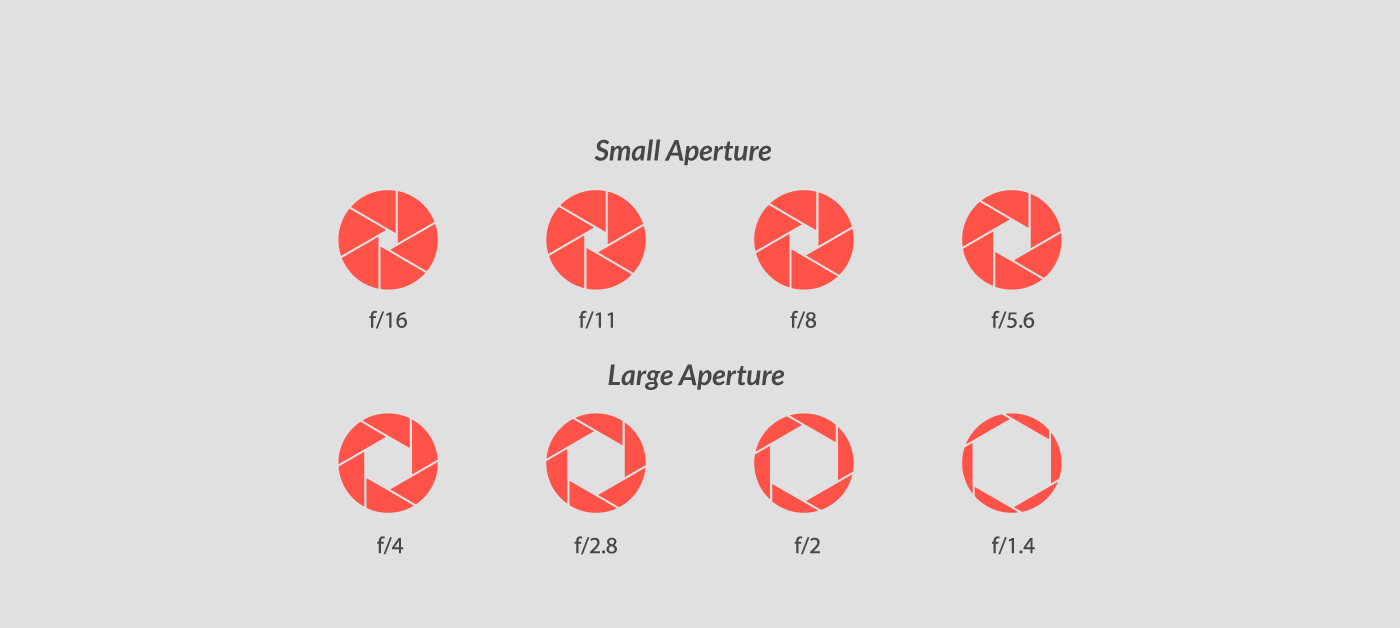
1. Using a Wider Aperture
This lets in more of the light that’s already available, allowing you to keep your ISO number lower. Keep an eye out for your depth of field though, as aperture is the deciding factor in your image’s level of focus.
2. Selecting a Slightly Longer Shutter Speed
This is another way to maximize available light and avoid raising your ISO number. Unfortunately, longer shutter speeds can generate heat, which can cause color noise. That’s why you should also be:
3. Watching Out for Heat During a Shoot
A high ISO number isn’t the only thing that can cause noise. Heat (especially heat from those long shutter speeds we just talked about) can introduce color noise, even if your ISO number is ideal. Overheating isn’t usually a problem for modern cameras, but if you are experiencing consistent issues with noise, it will help to note heat sources that could be avoided and see if the noise levels improve when you do so.
4. Knowing Your Camera’s Native ISO
This is the best setting for your camera in terms of maintaining detail and preserving quality. That doesn’t mean this is the only setting that will give you good results, it’s just the best possible one for the equipment you’re using. (Find your camera’s native ISO in your camera manual or by doing a quick Google search.)
5. Shooting in RAW
To allow yourself as much flexibility in post-processing as possible, capture as much information as you can in-camera. RAW files contain a lot of (wait for it) raw information that can be brought forward during the editing process. Skies that are slightly blown out can be walked back, details can be rescued from their muddy depths after a low-light photo shoot, and noise can be managed with a lot more finesse. Shooting in RAW isn’t always necessary but it’s advisable in low-light situations where you’re already at risk for noise.
Pro Tip
Sorry, crop sensors! A full-frame sensor can use available light more efficiently while capturing less noise. Although it’s not necessarily a reason to upgrade if you weren’t going to already, it’s a definite plus.
The Ugly: Fixing Undesirable Noise in Post-Processing
While the best way to avoid noise is to prevent it, that’s just not always possible. But even if you don’t include (or add) noise on purpose, you can still take steps to make it blend well enough that it won’t be the first thing viewers notice about your photo. Noise reduction technology can’t work miracles (not yet, at least), but it has become very sophisticated and there are a lot of different ways to go about it. We’ll talk about some of those in this final section.
Something to Know Before You Begin
Chromatic noise and luminance noise get “fixed” in different ways. Chromatic noise gets desaturated a little at a time, which can affect the saturation throughout your image. Sometimes the only way to really fix it is to desaturate the entire image and embrace it as black and white. Luminance noise gets smoothed, which can affect the sharpness throughout your image. So keep both of those things in mind as you use one of the following methods to remove or minimize noise in post-processing.
Lightroom
We’ll start with the method that is most user-friendly but affords the least amount of control. When you open your image in Lightroom, go into the Develop module. When you scroll down the Develop menu a bit, you’ll come across the Detail options. It will look something like this:
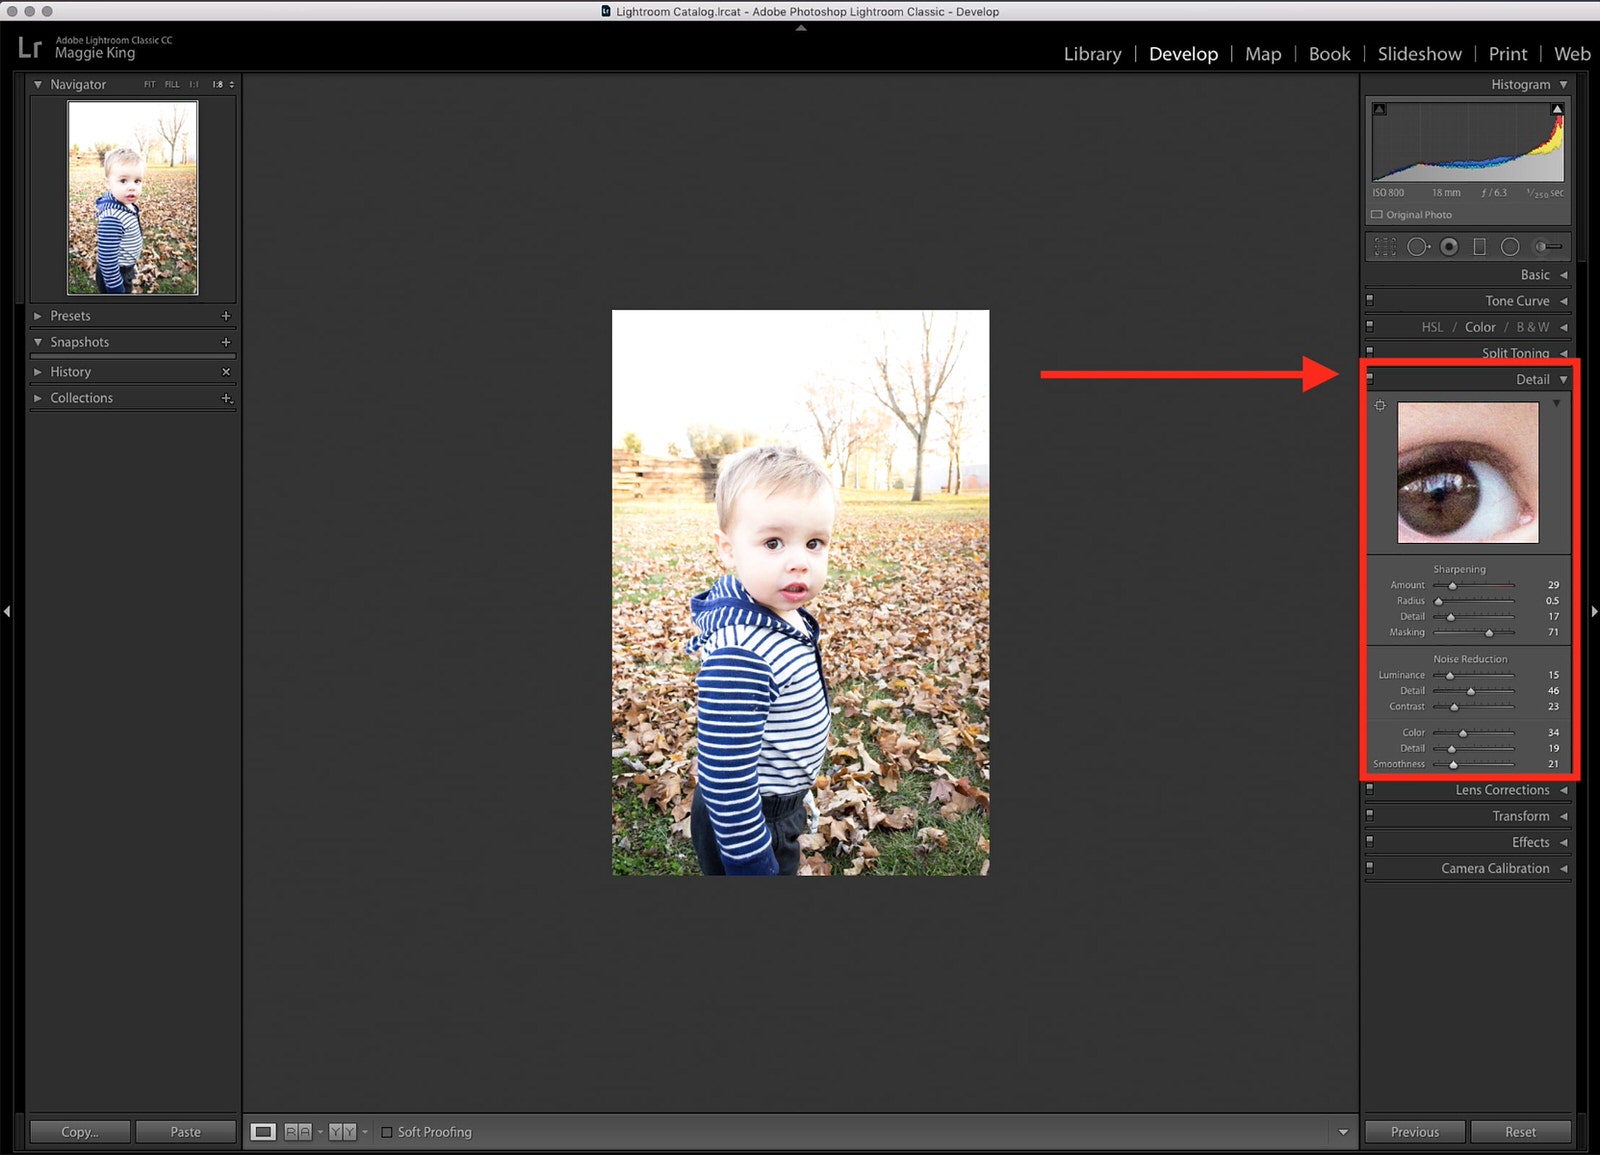
Detail is also where you can find the sharpening options. Used sparingly, this can be helpful to regain a little detail after noise removal.
You can see that there are three sliders for luminance noise and three for color noise. As you raise the main slider for the type of noise you’re working with, you may also want to raise the Detail slider as well. This brings detail back into the edges Lightroom finds in your image. For luminance noise, you also have a slider to bring back any contrast that is affected by your noise reduction. For color noise, you have Smoothness, which manages the transition between colors as you move the Color slider.
Photoshop
If you aren’t getting the results you hoped for in Lightroom, you can find more sophisticated options in Photoshop. The advantage here is the ability to mask the layer your noise reduction occurs on. That way, your color noise adjustments don’t desaturate the entire image. You can also bring back any tiny details that fall victim to over smoothing in your luminance noise adjustments.
Start with a Camera Raw filter (Filter > Camera Raw Filter), where you can make adjustments to your base image in the Detail menu. (Look for the two skinny triangle symbols.)
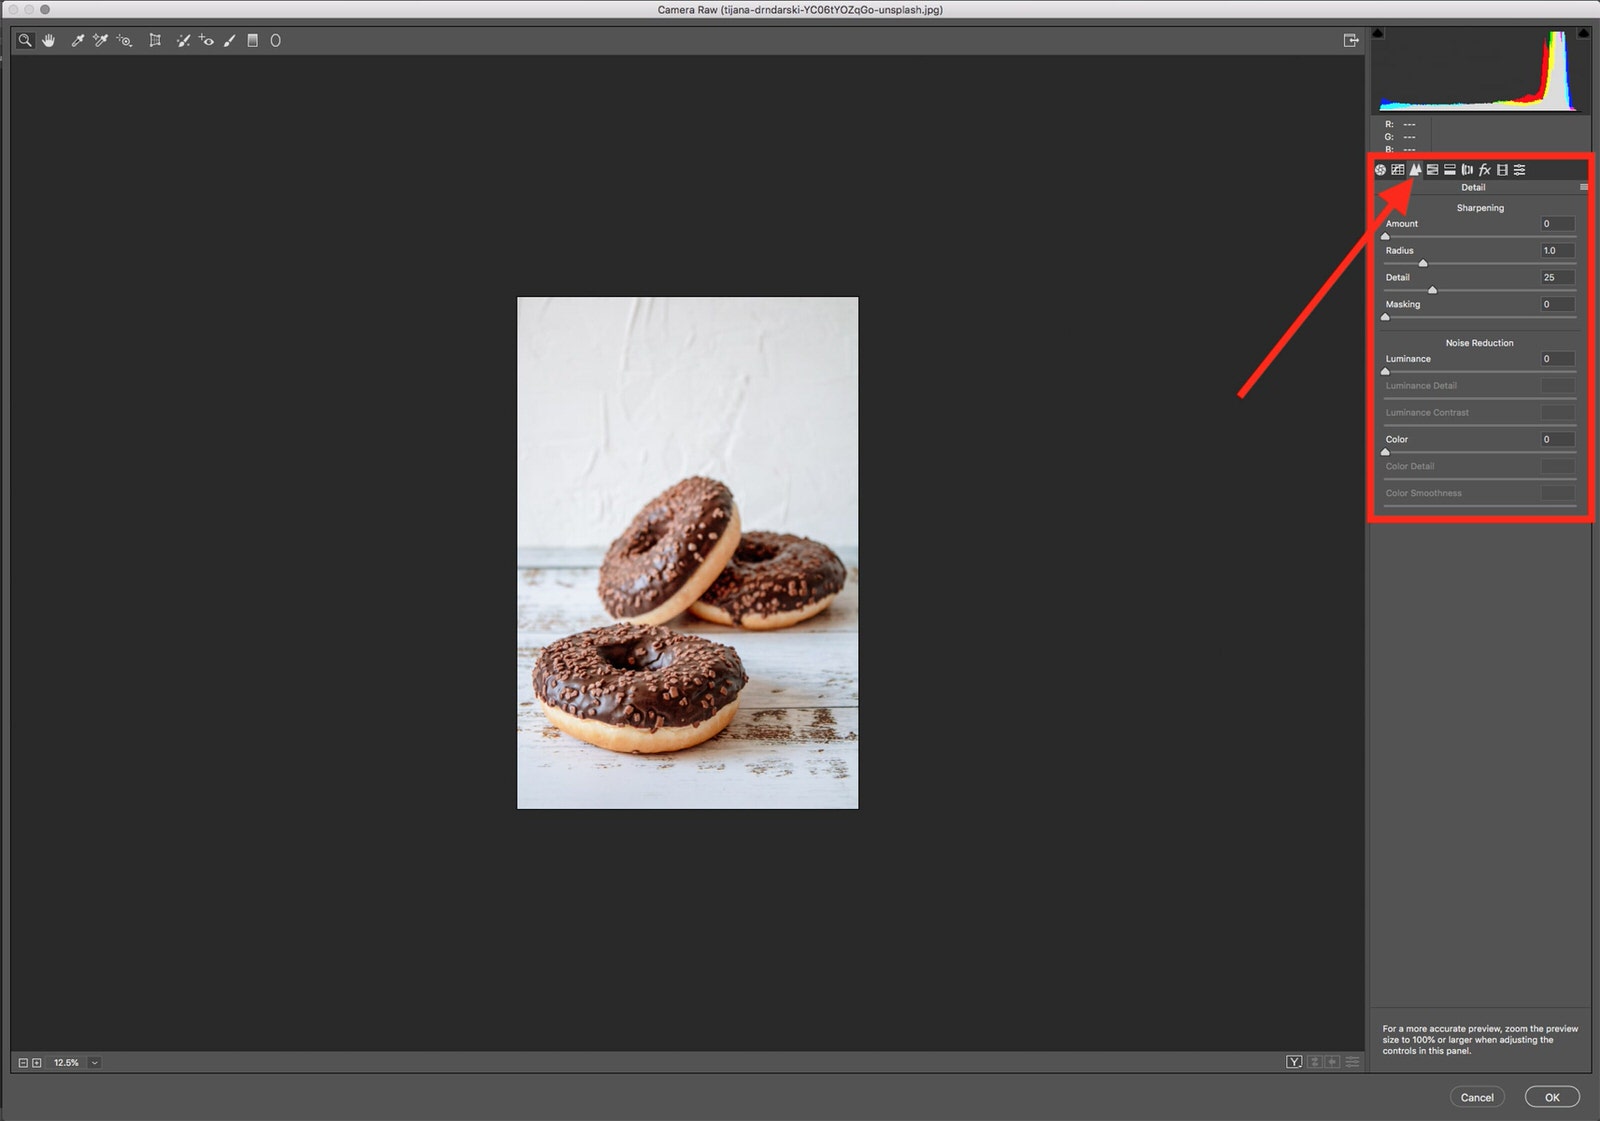
Here’s what the Camera RAW options look like. Also, donuts.
If you aren’t a fan of your results, you can move on to a Reduce Noise filter. Find this under Filter > Noise > Reduce Noise. It looks like this:
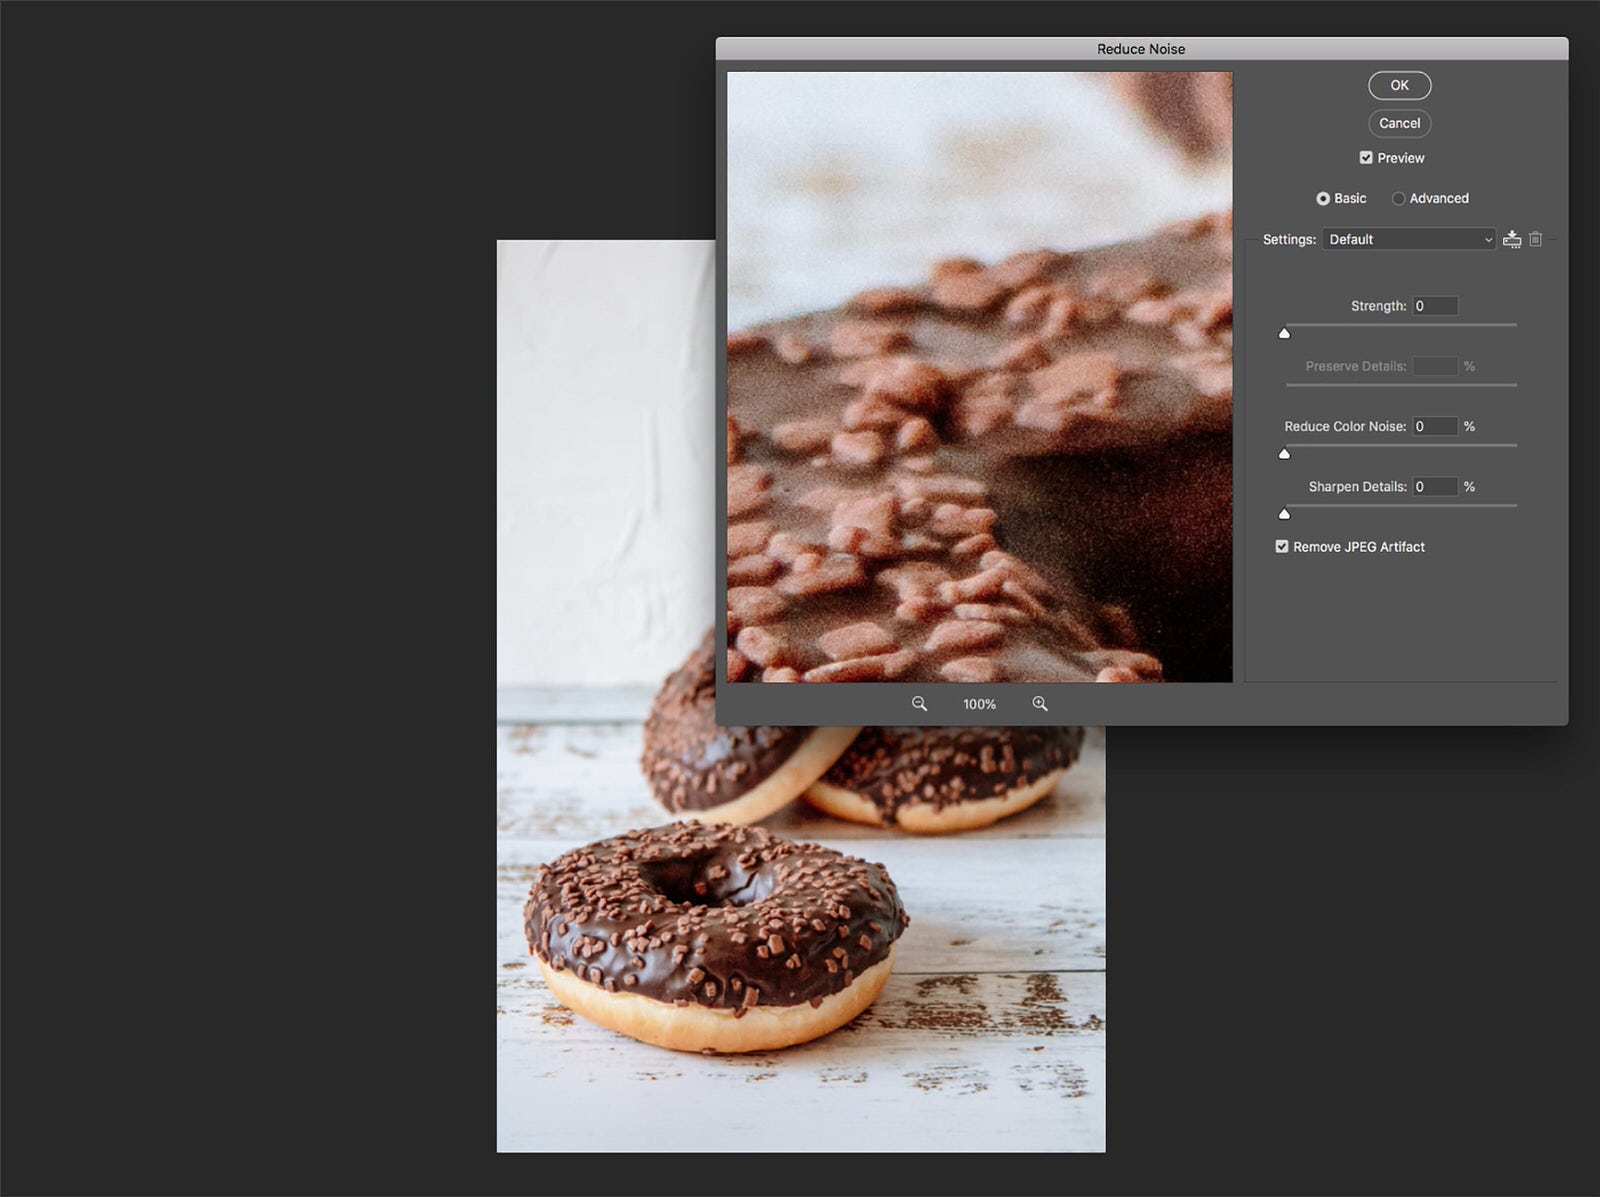
These are your options in the Reduce Noise popup.
Since you’re just getting started, stick with Basic for now. You have these options:
- Strength – Slide this to the right to increase the noise reduction.
- Preserve Details – This looks for edges as you reduce noise, so that (hopefully) you don’t smooth over all your details.
- Reduce Color Noise – This one is pretty self-explanatory, but watch out for desaturation throughout your image as the slider gets further to the right.
- Sharpen Details – This uniformly sharpens the entire image. Just don’t overdo it or you’ll start introducing new artifacts.
- A “Remove JPEG Artifact” Checkbox – That’s a special type of noise caused by the compression that occurs when saving into a JPEG format.
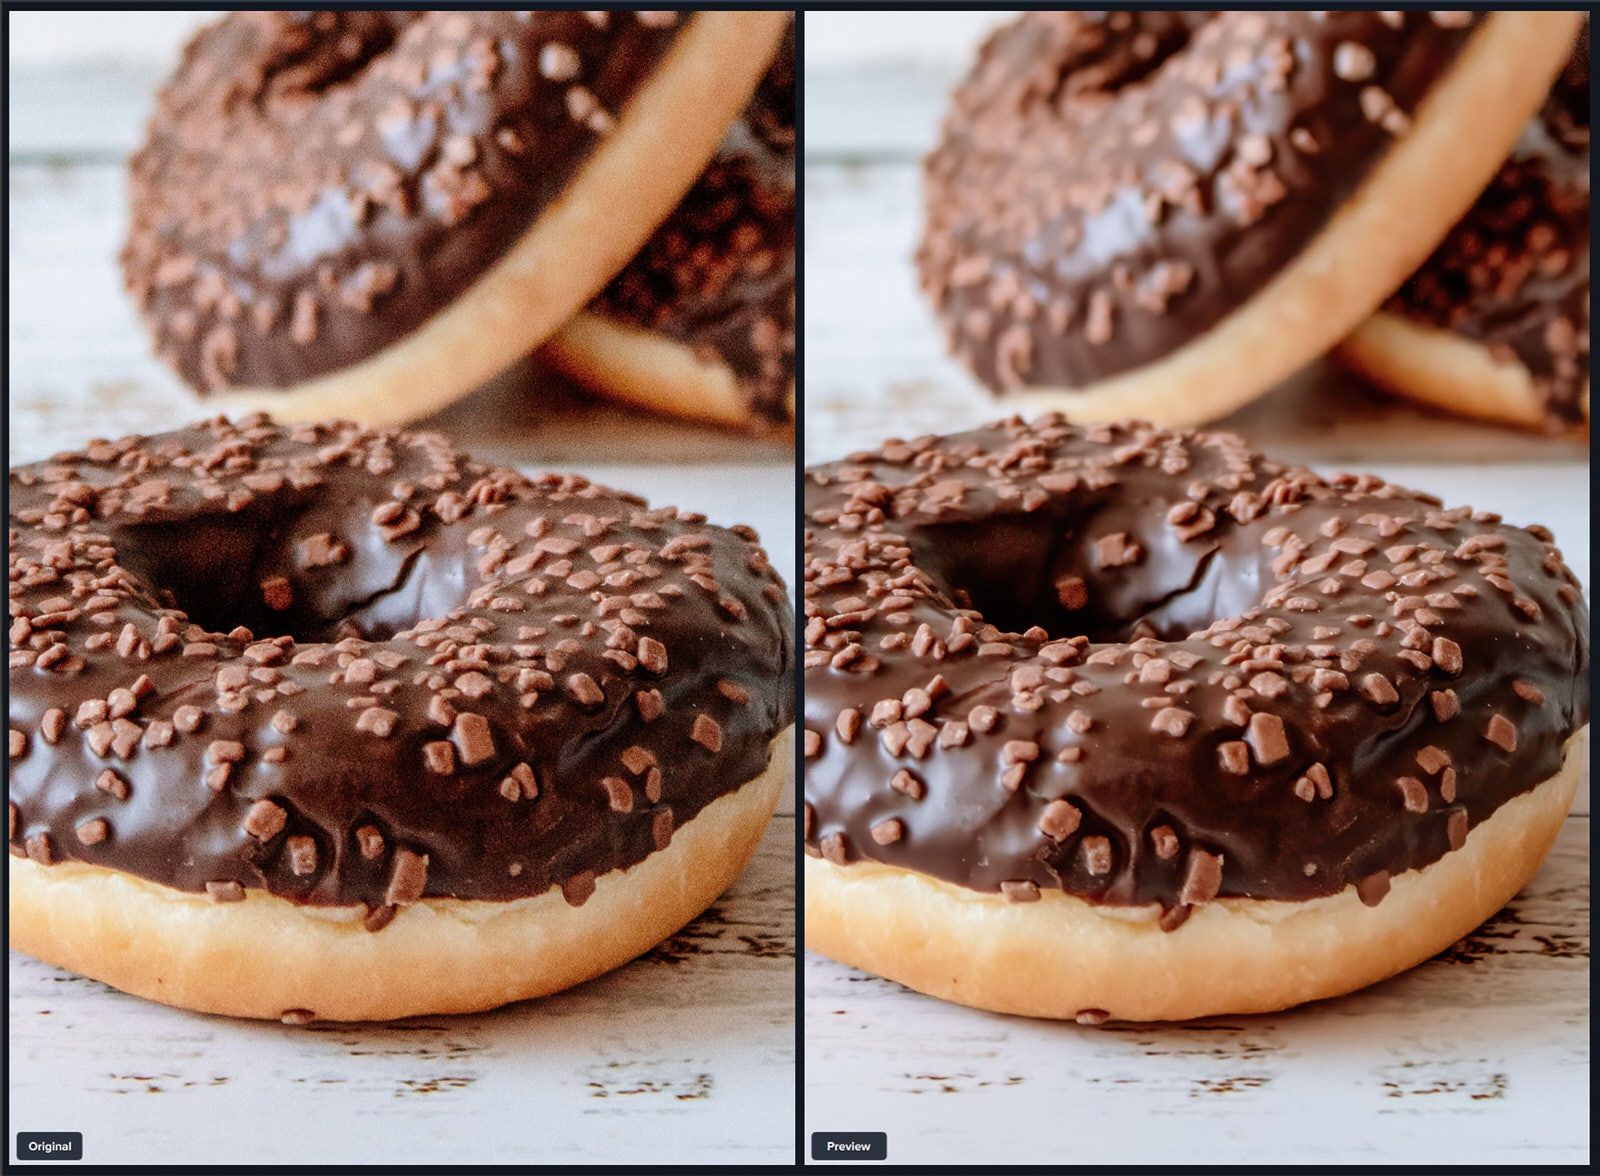
While you play around with these options, click and unclick the Preview checkbox periodically to get an idea of where you’re at.
If you’re still not happy with what you’re seeing, there’s a more involved technique you can try.
Plugins
If you’re new to plugins, they’re just little extras that play nice with Photoshop to make more in-depth changes without having to switch between editing platforms. A dedicated plugin is well worth the investment if you use noise reduction on most of your images. Most of the “good” ones live in the same price bracket, as you see below.
- Topaz DeNoise AI – $79.99
- Imagenomic Noiseware – $79.95
- Dfine (from the Nik Collection by DxO) – $149 (This one is pricier because it isn’t sold separately from the Nik Collection.)
You can see a real difference after just a quick tweak in Topaz DeNoise AI.
(Psst – if you’re not ready to dive into Photoshop, there are plugins that work with Lightroom as well, including two of the ones we listed above: Topaz DeNoise AI and Dfine from the Nik Collection.)
It goes without saying (but we’ll say it anyway) that Adobe products are not the only photo editing platforms that offer noise reduction. In fact, any photo editing software worth its salt should have at least a couple of basic sliders for it. So if you use a standalone editor like Photo Ninja, Affinity Photo, or Capture One, it’s a simple matter of learning their process.
Shooting with an iPhone?
iOS has a noise reduction slider in the Edit menu under the Adjust settings. There are also apps in the App Store that offer standalone noise reduction.
Pro Tip
Remember to zoom in and out while working on noise reduction. If you stay zoomed in too long, you may “overedit” and start to lose detail elsewhere in the photo. If you zoom out too far, you may not be able to see everything that needs to be addressed.
Digital noise can be a complex and technical topic, so we only covered the working details here. To get into the really technical talk about photons and wavelets, take a look at this detailed study on electronic noise in digital imaging.
In the meantime, you can now differentiate between luminance and color noise. You know how to integrate digital noise into your images effectively, manage it during a shoot, and minimize it in post-processing when necessary. Go out and shoot with confidence, and the right amount of noise for your photo.