Your Guide to Shooting Great Long Exposures
The ability to essentially freeze time with the snap of a finger (or in this case, a shutter) is a novel aspect of photography. Many of the photos you scroll past on social media were taken in under a second, and some of them are really good at showing just how cameras can capture the tiniest moment, essentially making it look like time has stopped. I’m sure we’ve all seen at least one mid-jump shot in our lives.
But what if I told you there was a way to both freeze time and capture its passage all at once? As contradictory as it sounds, there is – and you’ve probably seen examples of it dotted across your social feeds already. Or, you might already know what I’m talking about.
Long exposures. Photos with streaky clouds, misty waterfalls, or trails of light, all likely shot with a camera using this method. These beautiful and fascinating photos capture our world in a way our eyes can’t.
While long exposures happen to be heavily used among photographers who specialize in landscapes, this method can actually serve a wide variety of creative purposes, and knowing how, when, and why to take one can be a powerful asset to any photographer.
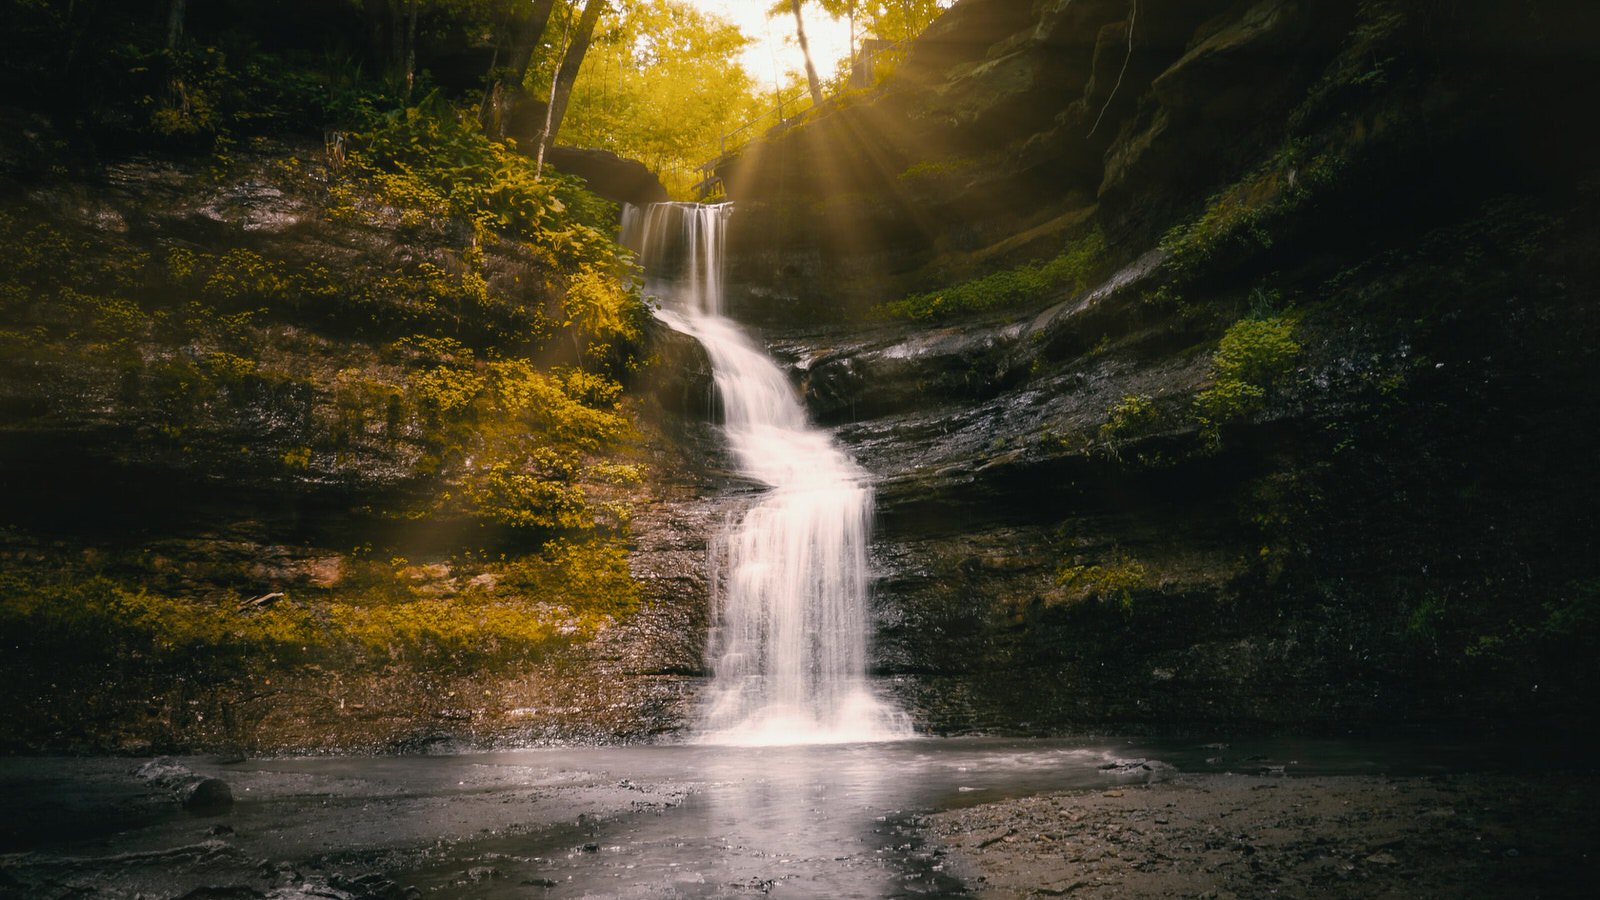
Photo by Todd Trapani from Pexels
We’ll be reviewing just that in this guide, which will walk you through the steps of how to get started taking your first long exposure and what subjects you might be interested in photographing.
The How
First Things First. What IS a Long Exposure?
Long exposure photography is a method of photography that involves slowing your shutter speed to the point where objects in motion end up visibly blurred in photos. The scenes these photos capture tend to have some sharp static objects and some moving objects.
This is not what most people believe cameras are used for, and they’re not wrong. Many of the photos you’ll encounter throughout your life will have been shot so quickly that everything in frame remains sharply in place. To a photographer that spends his or her days freezing droplets in the air or capturing the stationary midswing of a baseball bat, trying to capture a streak of motion might seem foreign.
The reality, however, is that truly stunning art can be created with long exposures. Aside from waterfall photos, long exposures can be used to make abstract art out of light and add mood and meaning to bustling city streets and busy skylines.
The task of successfully executing a long exposure happens to be more complicated than simply pressing a button. That being said, once you understand the basics, long exposures can become easy, fun, and interesting.
In order to fully grasp long exposures you’ll need to understand these two basic photographic concepts:
- ISO
- Shutter Speed
And need to own these two crucial pieces of equipment:
- Tripod
- ND Filter
- ISO
During the era of film cameras, ISO numbers were used to indicate a film roll’s sensitivity to light. Rolls with lower numbers detected less light, and, in the appropriate lighting, produced properly exposed photos with less grain.
Photo by Skitterphoto from Pexels
This measurement of sensitivity remained the standard when the industry switched over to digital cameras. The only thing that changed was the medium used to detect the light, from film, to an internal, adjustable digital sensor.
With the exception of compact cameras, bridge, mirrorless, and DSLR cameras all typically offer their users the ability to change the ISO. ISO settings normally range from 100 to at least 6400, but can, and do, go much higher.
To reiterate, lower ISO numbers means a camera’s sensor is less sensitive to light, but will also produce sharper photos with less grain. So, for long exposures, you’re going to want to keep your ISO as low as possible.
This low ISO is important to keep in mind for daytime or bright light exposures. In bright light, sensitive ISOs (such as those above 1600) can produce overexposed pictures. This is especially problematic since lower ISOs can also produce overexposed photos in bright light. In order to remedy this it’s best to use a lower ISO (from 100 to 400 being a safe range) and an ND filter (which we’ll touch on later in this guide).
Photo by Vandanni Hadai
Shutter Speed
Shutter speed is paramount to long exposures. After all, the whole idea behind a long exposure is to use a slow shutter speed!
The first most important thing to know about your camera’s shutter is that its speed setting is one of two factors that affect the amount of light that goes into a camera (the other being aperture). The second most important thing to note is that this setting also affects the amount of motion you see in a photo, either from moving objects, or a shaky handheld camera.
Technically, there isn’t a ‘correct,’ or specific shutter speed for long exposures. Instead, there is an array of choices for you to pick from. Most DSLRs provide their users with a wide range of shutter speeds, from seconds to fractions of a second.
Photos begin showing minimal blur at shutter speeds of 1/50, and then significant motion once exposure time gets as long as 1/15. For long exposures in particular, you’re going to want to go even slower.
Exposures one second and slower often produce great results. These lengths of time allow your camera to produce streaks and bands of motion, rather than just slightly shaky photos.
Most cameras can be manually adjusted to a slow shutter speed of 30 seconds, and can be further slowed by setting your camera to bulb mode.
Bulb mode allows the shutter to stay open for as long as the shutter release button is held down. So, for example, if you’d like a one-minute-long exposure, you would have to hold the shutter release button for one minute.
Sounds exhausting, doesn’t it? What if you wanted a 30-minute-long exposure? Surely your hand would fall off.
Well, never fear! Shutter releases are here to save the day!
No, seriously. Cable and remote shutter releases are awesome and cheap investments that are guaranteed to improve your experiences in photography.
They’re also an important part of reducing the amount of motion your camera is physically disturbed by. Just the action of pressing the shutter release button on your camera can cause enough disturbance to produce unwanted shakiness
These handy pieces of equipment eliminate that risk by allowing your shutter to go off while the body of your camera remains untouched. And they’re useful regardless of the length of your long exposure.
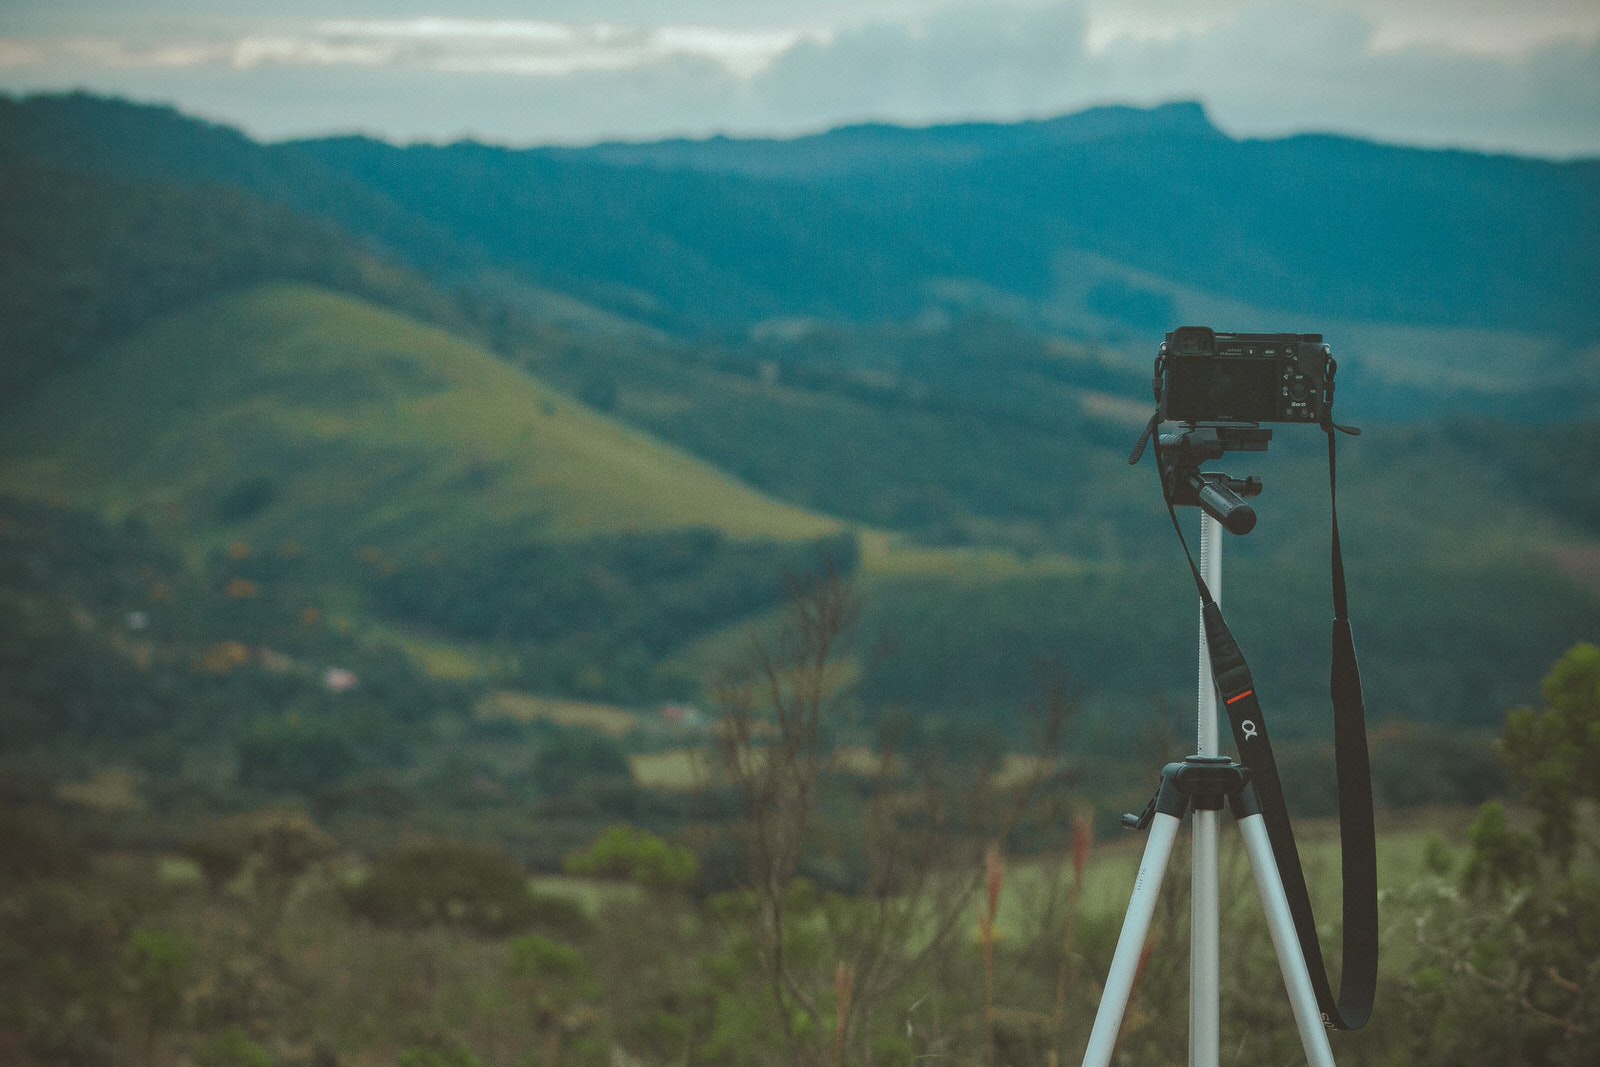
Photo by Lucas Pezeta from Pexels
Tripod
Tripods are a key part of long exposure photography. At slower shutter speeds, any amount of motion on your part can affect the quality of your photo, causing extra blurriness where you don’t want it. And while you might think you’re being still, small things like breathing, and tiny, seemingly imperceptible movements like the shaking of your hands, can cause your entire photograph to end up a blurry mess.
While you can occasionally get away with makeshift platforms, there’s nothing quite as good as having an actual tripod (trust me, I’ve tried it tripod-less before, and it just doesn’t work for very long).
The biggest issues with purchasing tripods tends to be their price, quality, and capabilities. Believe it or not, there are tripods more complicated than your simple three-stilt, aluminum frame, and there are accessories more complicated than what comes with your basic tripod. You might just be tempted into purchasing that neon-orange $100 tripod with the bendy legs.
Photo by Chait Goli from Pexels
Tripods with fancy legs like that are used by photographers who want to capture unique angles or set their camera up in odd spaces. If you’ve reached that point in your proficiency and would like to explore your capabilities further, then by all means, take the plunge.
That being said, if you’re a beginner or intermediate photographer who’s just testing your relationship with tripods, you can probably opt for a nice, unbending, regular tripod.
Remember that there is very little in photography that isn’t a monetary investment. That means always being clever with your cash. Your goal with your tripod should be to find one that is sturdy and long-lasting, but reasonably priced for your budget.
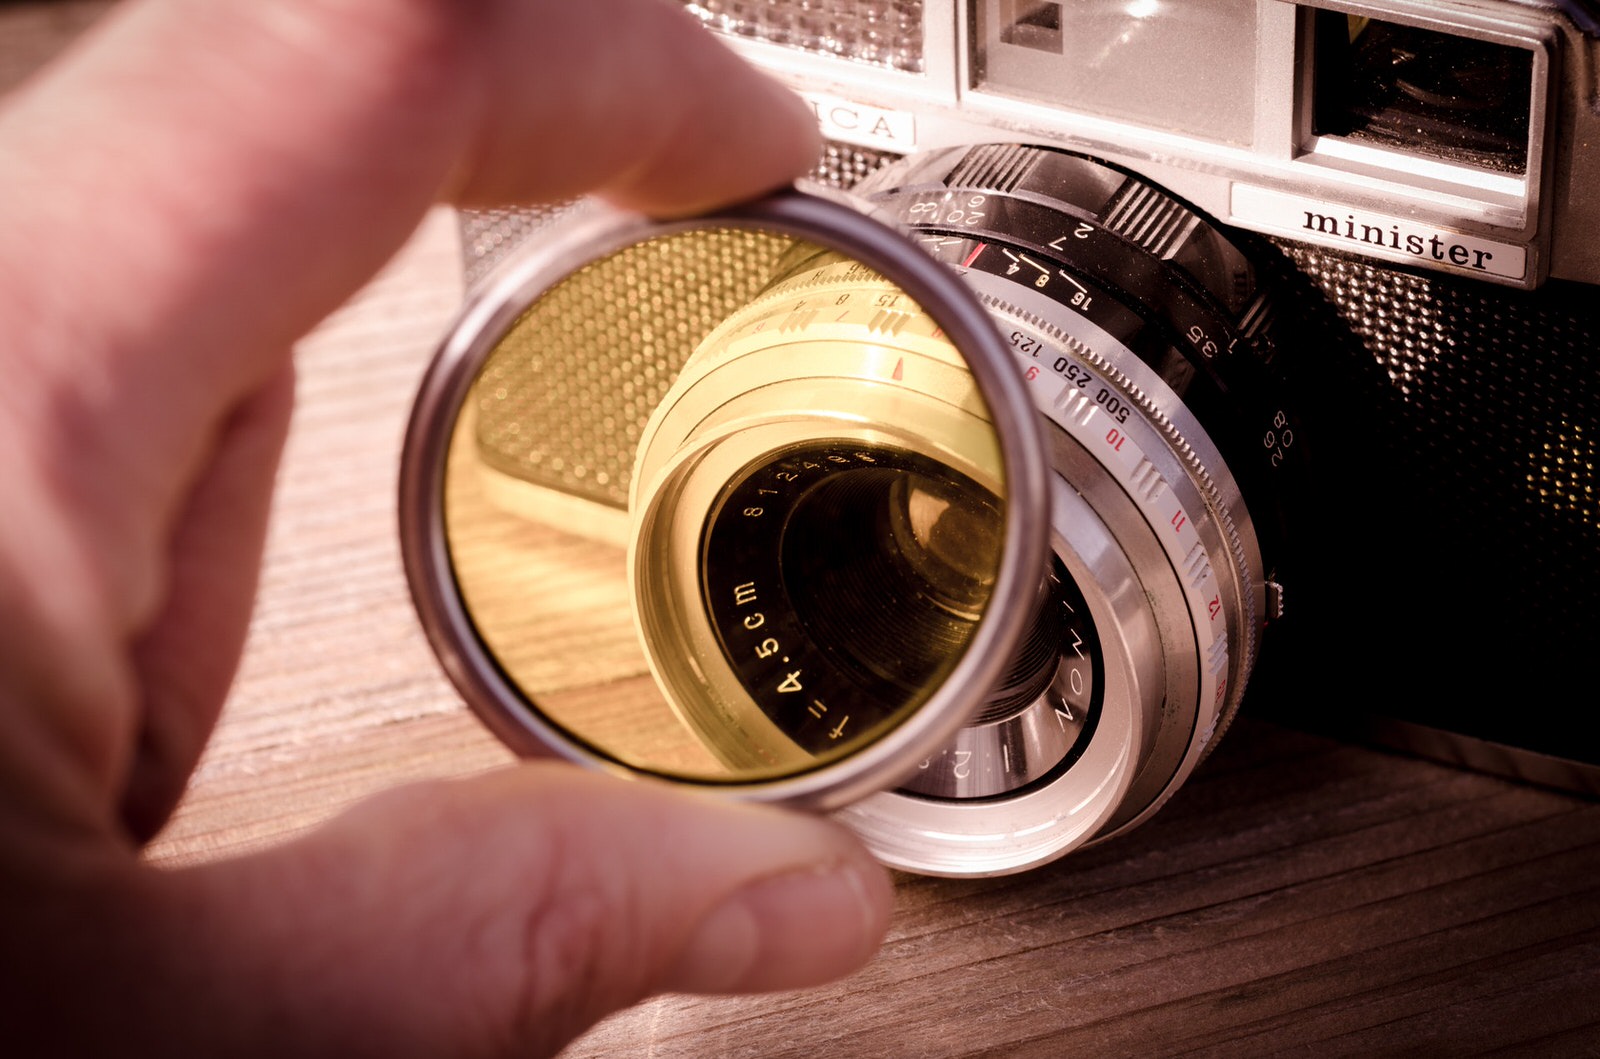
Photo by Skitterphoto from Pexels
ND Filter
If you’ve been photographing for a while, chances are you’ve either encountered or used filters before. For those of you who haven’t, filters are pieces of glass that are usually attached to the front of your lens, either directly onto the lens, or onto a holder than goes in front of the lens. They most commonly come in two shapes – circle and square – and are used for a variety of purposes. These nifty additions offer your lenses protection and adjust the lighting that is taken in by your camera.
For the purpose of long exposures, you’re going to want to invest in neutral density filters, otherwise known as ND filters.
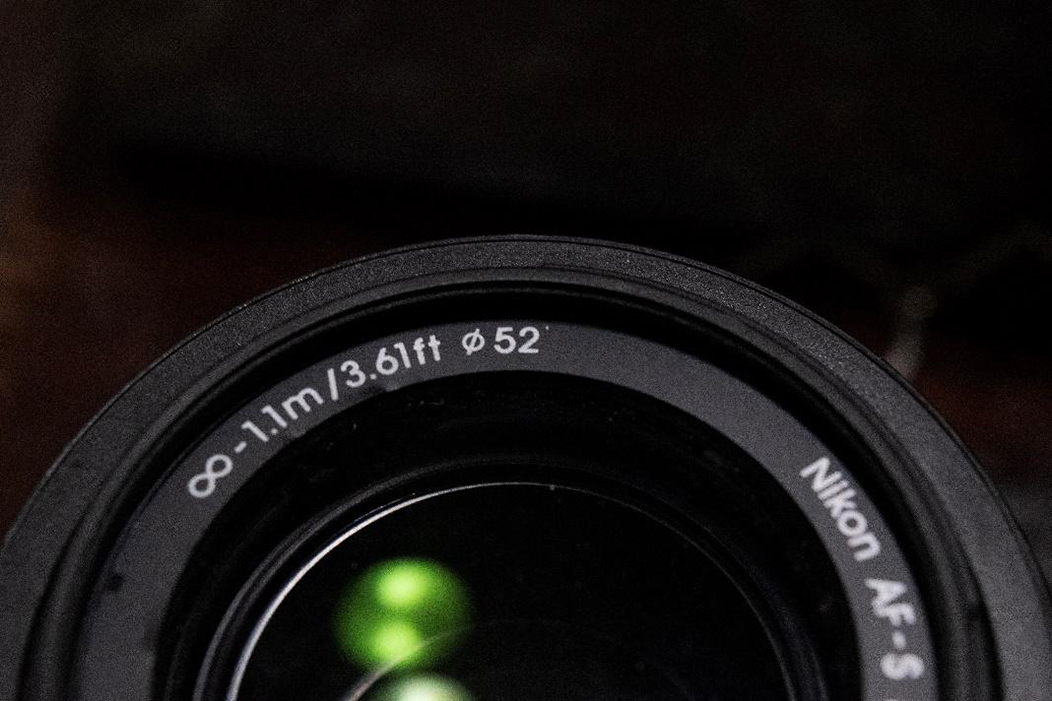
The shape of the filter comes down to your preference, though square filters are popular among landscape photographers. Square filters are mounted on an additional attachment to your lens, while round filters are screwed on directly to the front of the lens. If you go for round filters, you can find the thread of your lens by checking either the rim around its glass or underneath its barrel.

Photos by Vandanni Hadai
While you won’t necessarily need these ND filters in dark lighting, they’ll make all the difference for daytime exposures and can also come in handy if your goal is to take a particularly long long-exposure.
In normal or daytime lighting, it is very easy for photos to end up overexposed, even when the lowest ISO setting and smallest aperture opening are implemented. ND filters remedy this problem by bringing your stop down and allowing you to set your shutter speed for longer.
In simple terms, these filters reduce the amount of light that is taken in by your camera. They come in varying intensities, as well as a graduated version that fades or abruptly transitions from neutral density to a clear surface.
Higher numbered filters are darker and reduce more light. The number also indicates how much you can decrease your shutter speed by. The filter you use depends on the light conditions and the shutter speed you desire. For instance, the smallest aperture on your lens might still let in too much light for a 10-minute exposure. A strong ND filter would fix this by stopping your aperture down by one or more stops.
Calculating exposure time in bulb mode can be difficult, but I use this nifty chart from The School of Photography to cheat with:

The chart basically gives you the amount of seconds you should add onto your current exposure with varying ND filters.
Finally, bear in mind that ND filters can be really dark. Dark enough that your camera’s autofocus system won’t work. In those situations, before placing the filter on your lens, you’ll want to set your focus to manual and adjust it yourself.

Photo by Roman Koval from Pexels
The Why and The When
Now that we’ve got your technical basics down, let’s discuss some of the ways in which you can use long exposures. These topics are loose guidelines meant to steer you in the right direction. If you’re feeling confident in your knowledge, fiddle with them to your heart’s content.
Long exposures are most commonly used for capturing elements of night scenery, landscapes, and light trails.
Before you get started, there are a few generic rules you’re going to want to keep in mind for every subject you may choose to cover. The thing about long exposures is that, as we know, they take place over a period of time. They don’t just happen in a few fractions of a second.
That means you’re going to want to be precise and picky about the locations and times you chose to shoot. While there’s absolutely no saying you can’t just stumble onto an amazing scene for a long exposure, taking your time to carefully pick the spot for the perfect framing and conditions can go a long way to taking a great photo.
For almost all of these subjects, you’re going to want to:
- Pick a location.
- Envision the framing (doing test runs with your equipment will benefit you).
- Set up your tripod. Make sure it is firmly positioned. A shaky tripod will result in shaky photos.
- Calculate the aperture and shutter speed you will need to use.
- If you are using an ND filter, manually focus the photo.
- Place an ND filter on if needed.
With that in mind, here are a few subjects that are popularly chosen for long exposures.
Water
The flow of water is a popular subject for long exposure photography. The misty appearance that water often takes on in long exposures tends to appeal to the eye, and often adds a sort of mystic, even fantastical feel to intense landscape photos.
For these kinds of long exposures, choosing a location beforehand and envisioning the composition of your photo can be particularly helpful.
For instance, if you’re shooting a waterfall, nailing the framing before you take the photo can make for a much more compelling picture. While the rule of thirds is a popular and safe guide for shooting landscapes, you should feel free to experiment with the positioning of, for instance, this hypothetical waterfall.
The important thing to keep in mind is how the surrounding environment changes your photos. A gray-ish looking waterfall that takes up top-to-bottom of your photo might not be the most interesting to look at.
Search for scenes where elements work in tandem to create an interesting picture. Water ricocheting off of rocks, or a fall tucked into an alcove of trees can all make for great, compelling photos.
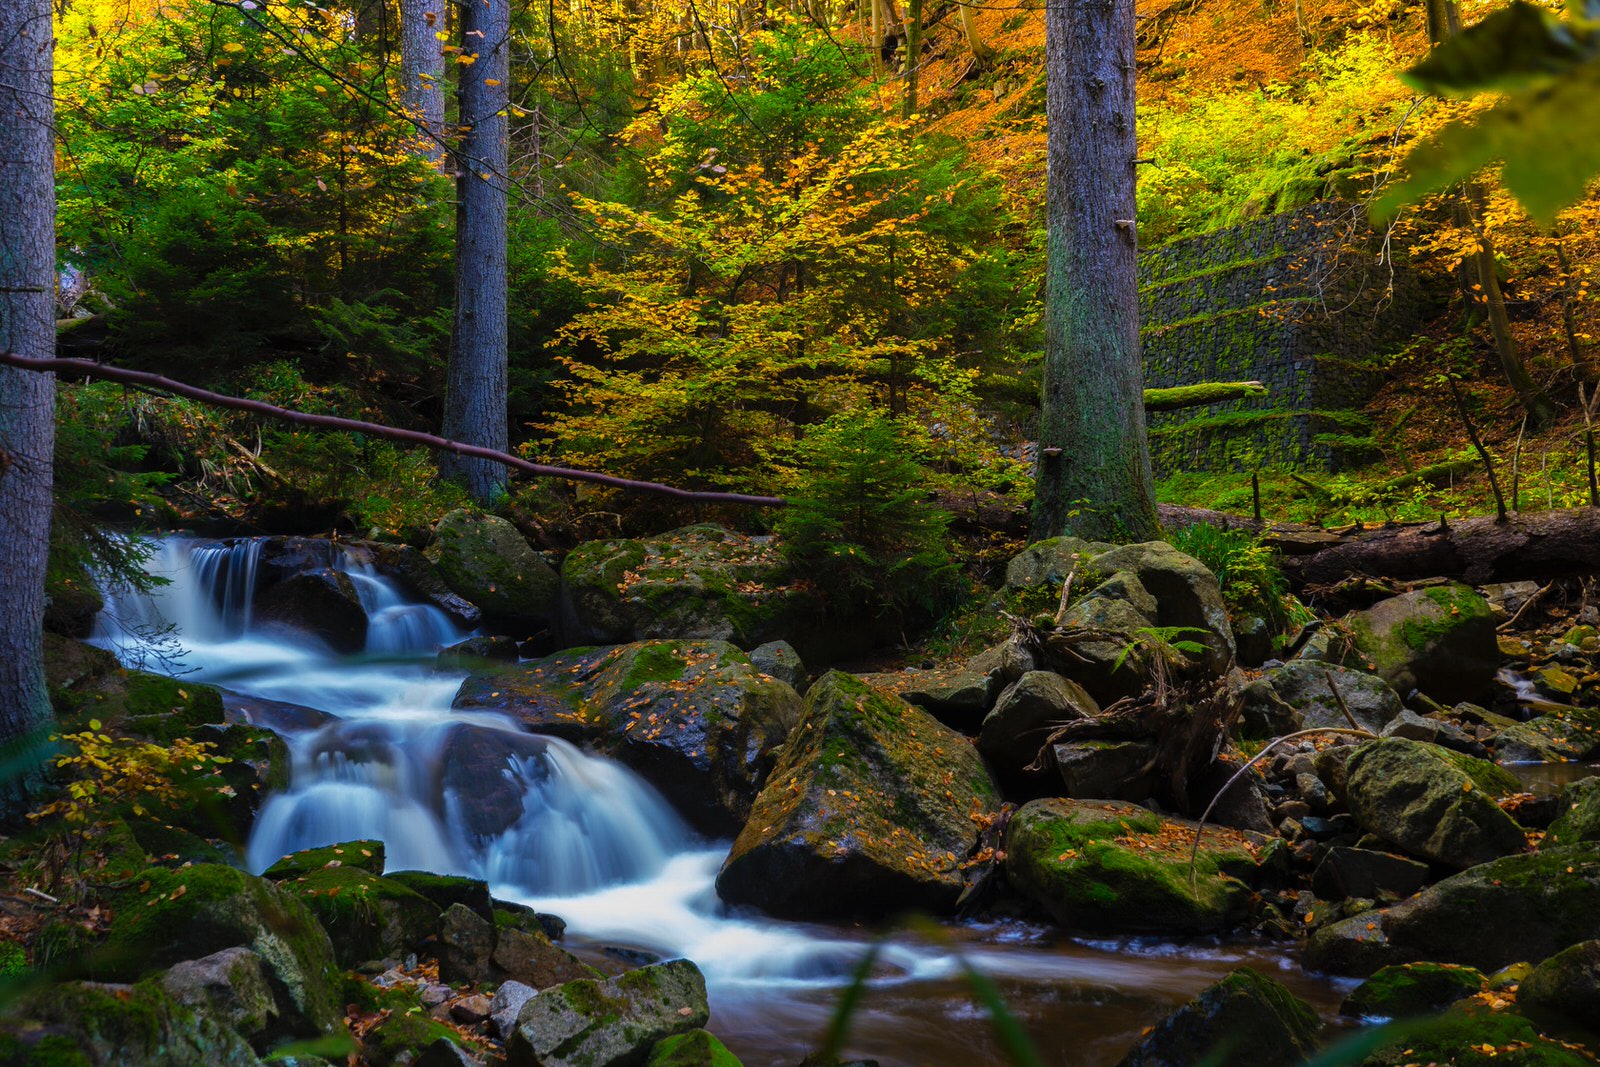
Photo by Fabian Reitmeier from Pexels
Keep in mind that the waterfall doesn’t need to be the focal point of your photo. It can be just as compelling to use it as an accent to your work, rather than the main subject.

Photo by John Westrock on Unsplash
If you choose to capture these photos in bright light, you want to be sure you have your composition and focus set before screwing your ND filter on.
Finally, if you want to capture water moving in any capacity, I’d recommend a shutter speed of one second or slower. These produce great, misty waterfalls, and capture just the right amount of movement to imply the passage of time.
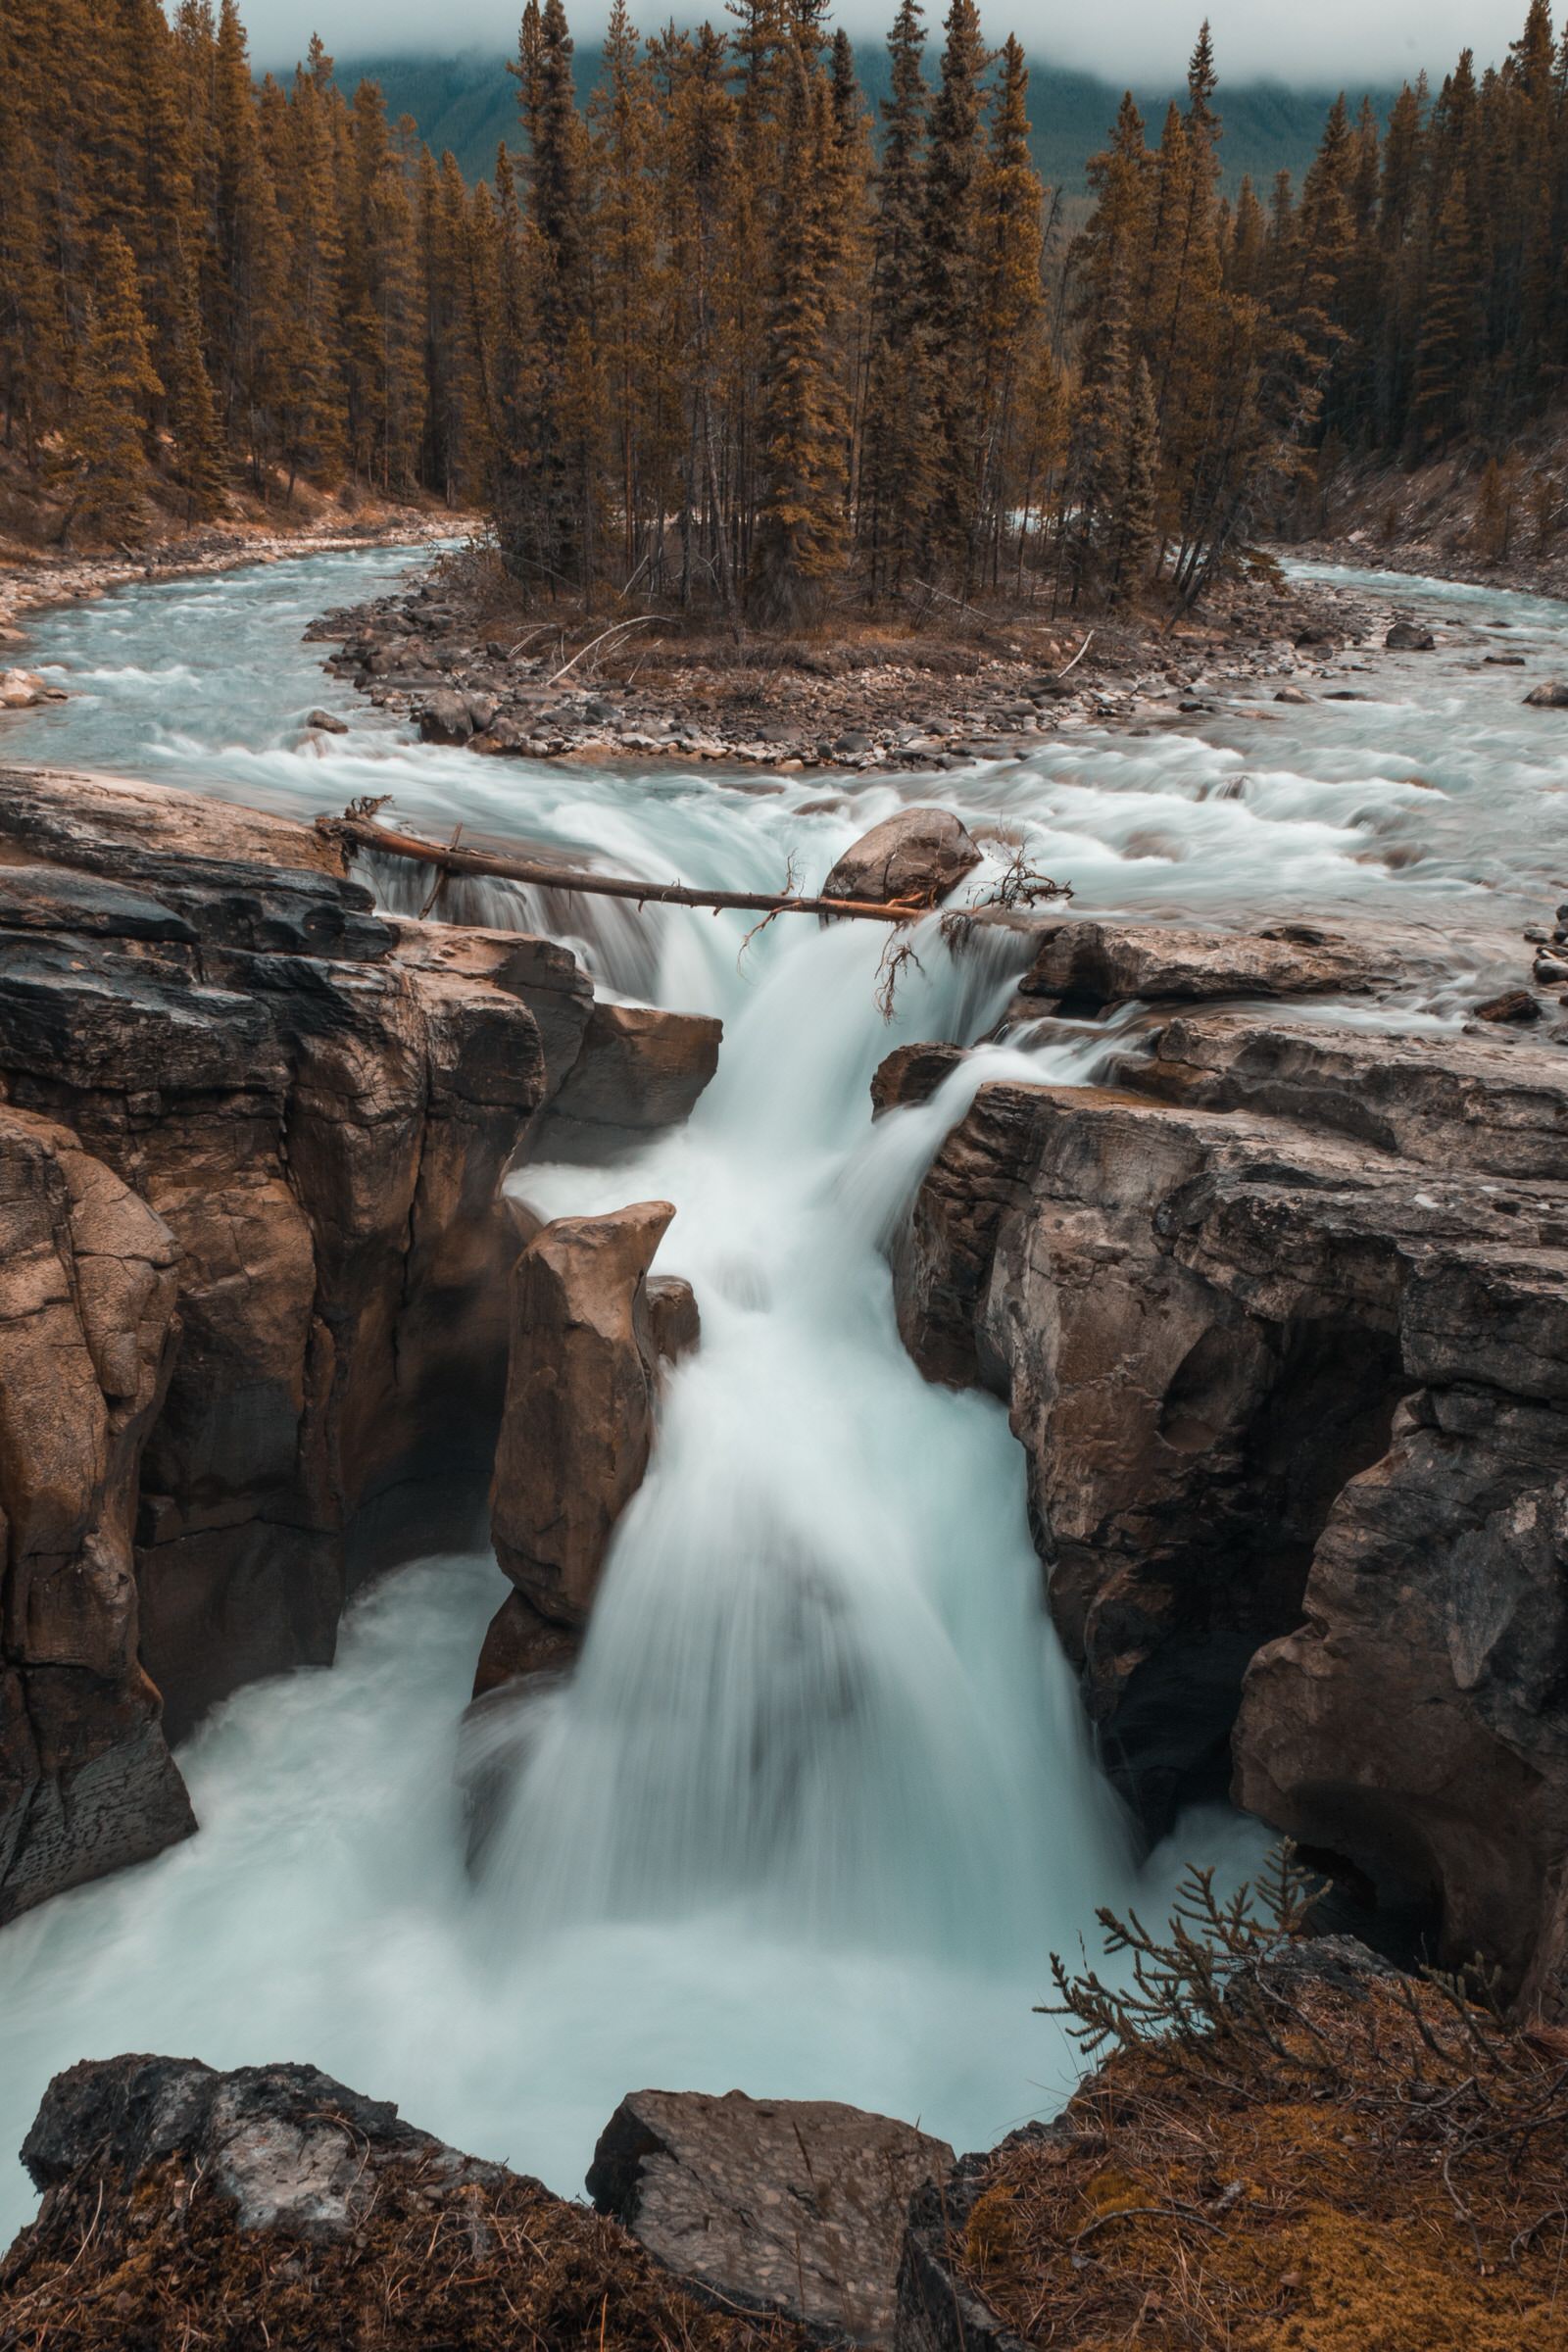
Photo by Mark Basarab on Unsplash
Clouds
Similarly to water, streaks of clouds can also add a dreamy effect to your photos. In the case of cityscapes, they can serve to draw attention to skyscrapers by pulling the viewer into the photo, or reduce the noise in a crowded city skyline by essentially fading into the background and serving as an accent to the photo.
When capturing clouds, you’re going to want to follow a lot of the same rules that apply to long exposures. Checking the weather also helps!
How much of the sky you choose to include in your photos is also up to you. For the best results, I’d suggest having the sky taking up at least one-third of your photo (horizontally), and at the very most, about two-thirds.

Original Photo by Owen Walters on Unsplash
The above photo shows a composition where the sky takes up about one-third of the photo. Two-thirds of the photo would be down to the second horizontal line.
Motion-blurred clouds do the best job as backdrops to beautiful scenery. So, for instance, a vast city skyline or a sprawling valley could benefit from the intensity and motion of clouds. Dark, tumultuous, stormy scenes can also be intensified by long exposures that include clouds.
Photo by Denis Lomme from Pexels
The direction the clouds are moving in also plays a huge role in how our eyes perceive the picture. Clouds moving towards the viewer create the illusion of an expanding photo, whereas clouds moving away from the viewer create the opposite effect.
Now, one of the major differences between water and clouds is that clouds tend to move much slower than water. This means you’ll have to use a pretty slow shutter speed. For the best results, I’d recommend a shutter speed of a minute or longer.
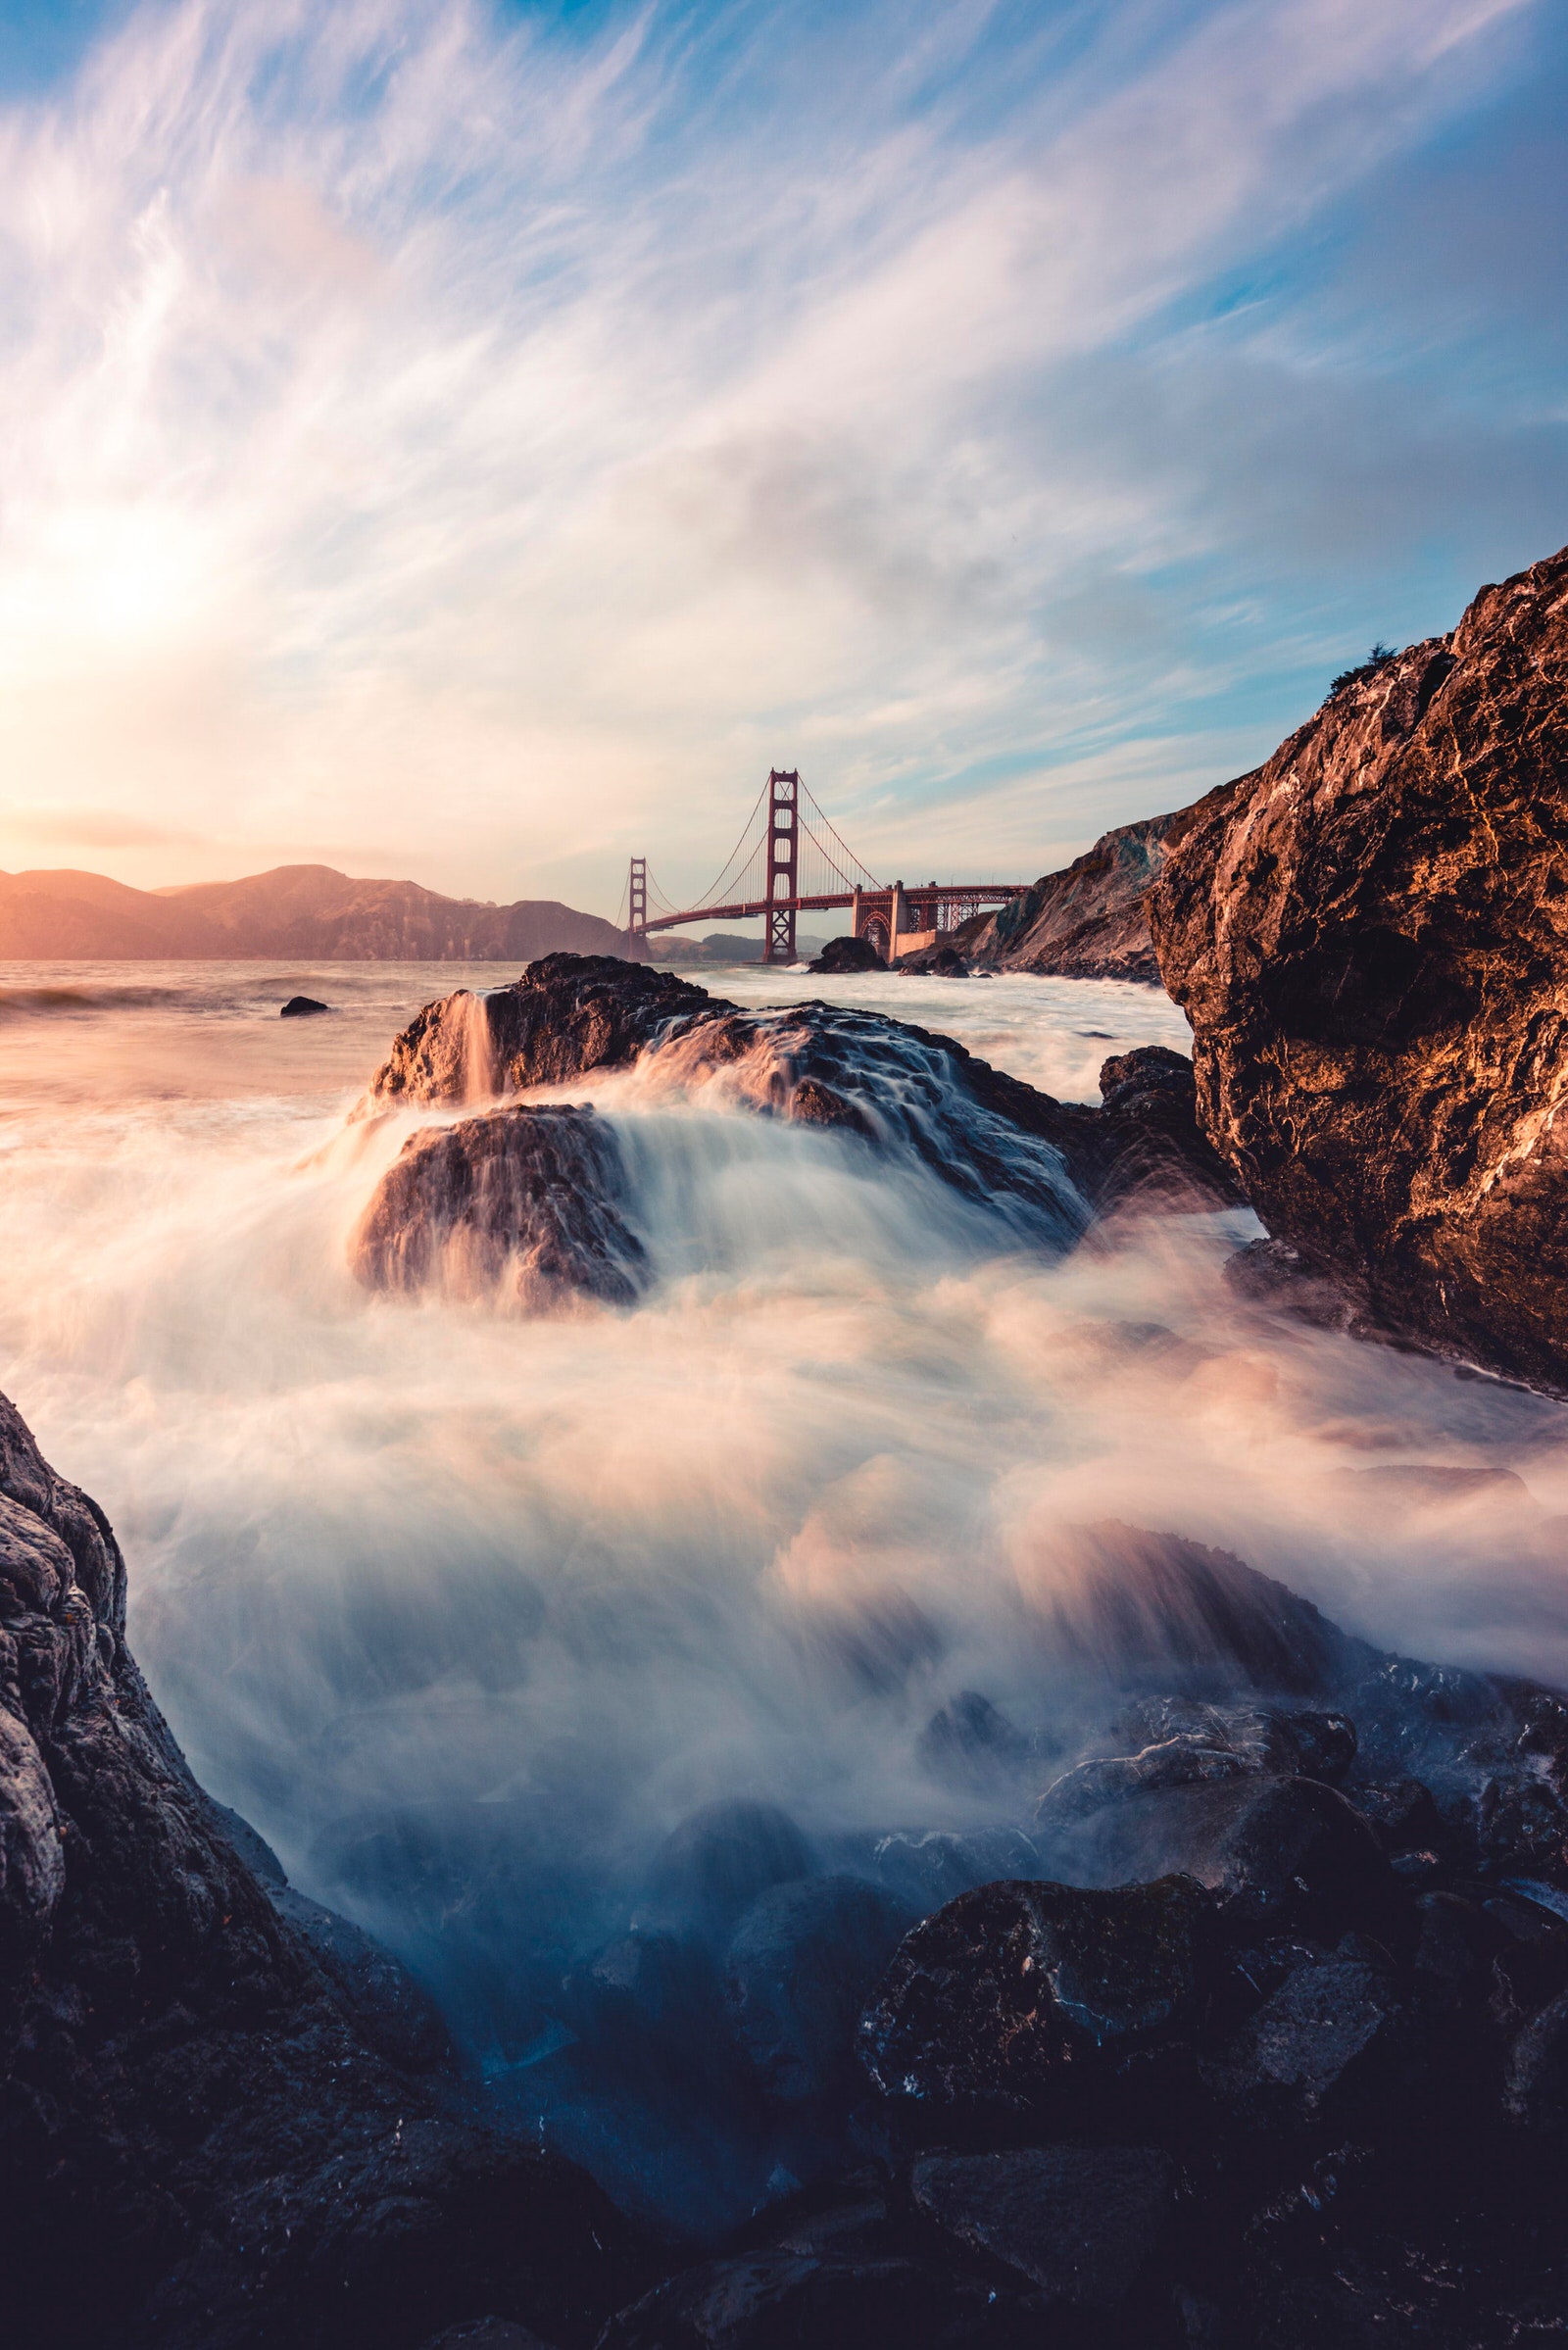
Photo by Ian Beckley from Pexels
People
Believe it or not, the blur of people going about their day can add tremendously to your photo. While the streak of clouds or the mist of flowing water might throw the average viewer off (after all, Photoshop exists, and many believe those effects are edits), the passage of people couldn’t scream more loudly that you’ve taken a long exposure. Even if your audience doesn’t understand how you’ve done it, they’ll get what you did.
Blurry people work especially well in cityscapes. Because it’s so typical for people to view cities as bustling, overcrowded metropolises, motion-blurred people fit right into that narrative, emphasizing the hustle and bustle of city life.
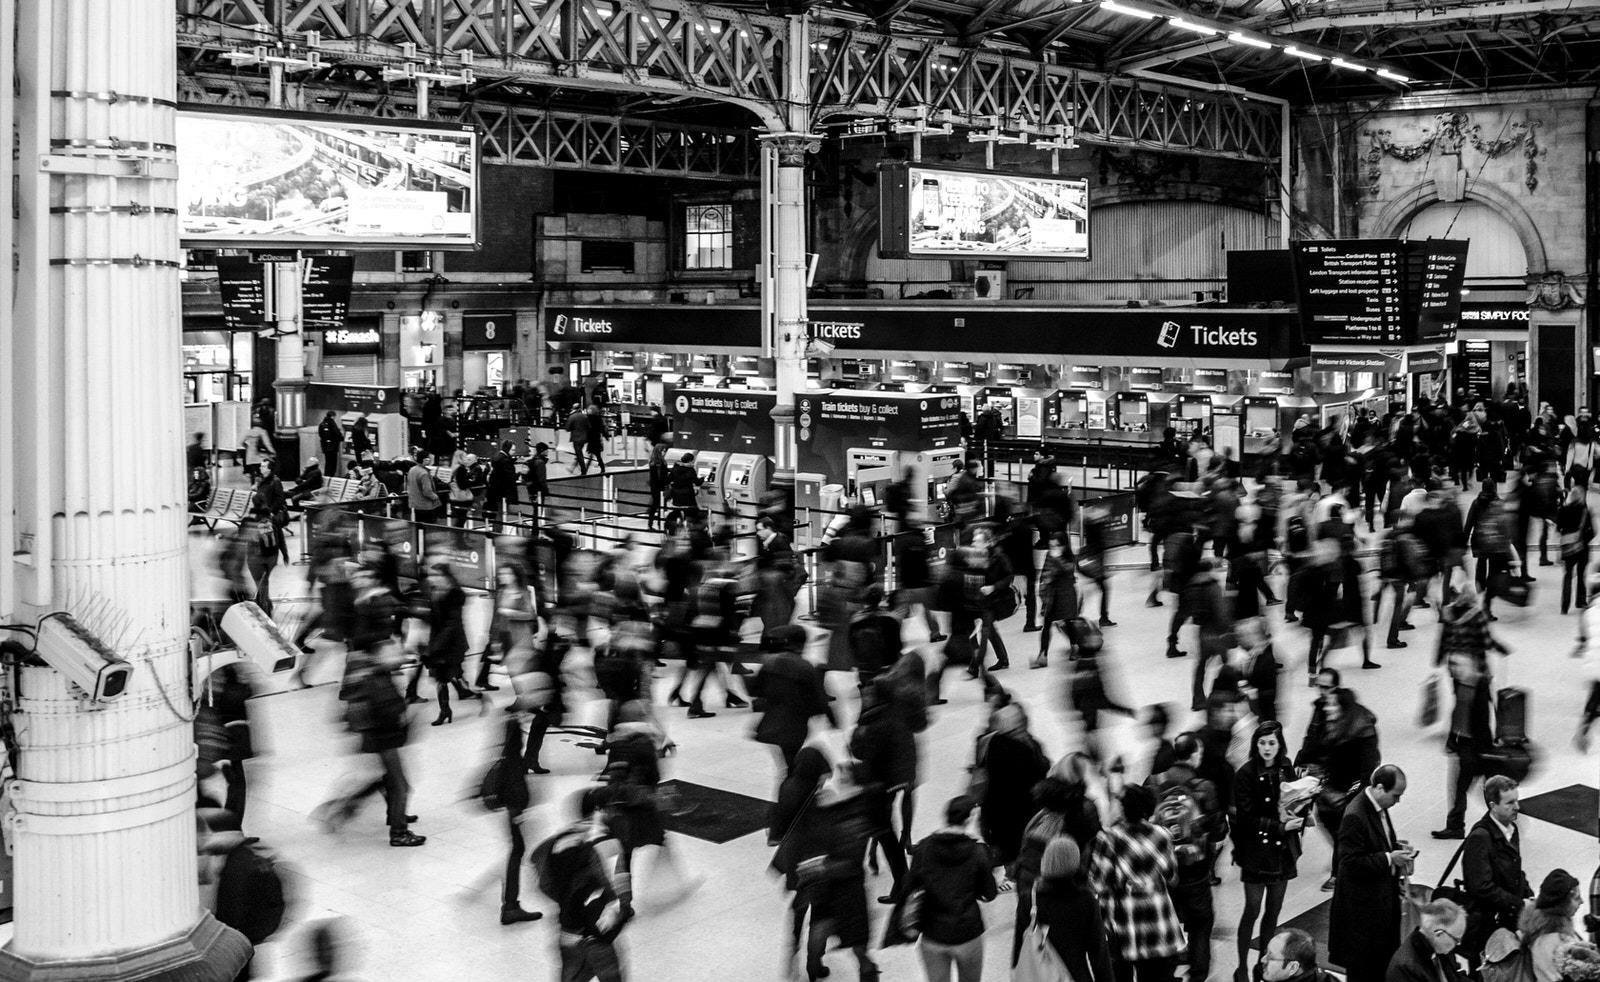
Photo by Skitterphoto from Pexels
Light
Finally, lights are one of the most commonly used subjects in long exposure photography. Using long exposures, a photographer can use lights to make trails on crowded roads, paths of stars, or paintings composed exclusively from streaks of light. There are many varying ways you can fiddle with lights and long exposures, and what you want to do with them rests in your hands.
For example, you could artificially set up your own light show. Light painting is a photographic practice wherein people use long exposures to draw pictures or scenes with a source of light directly manipulated by the photographer or someone assisting them.
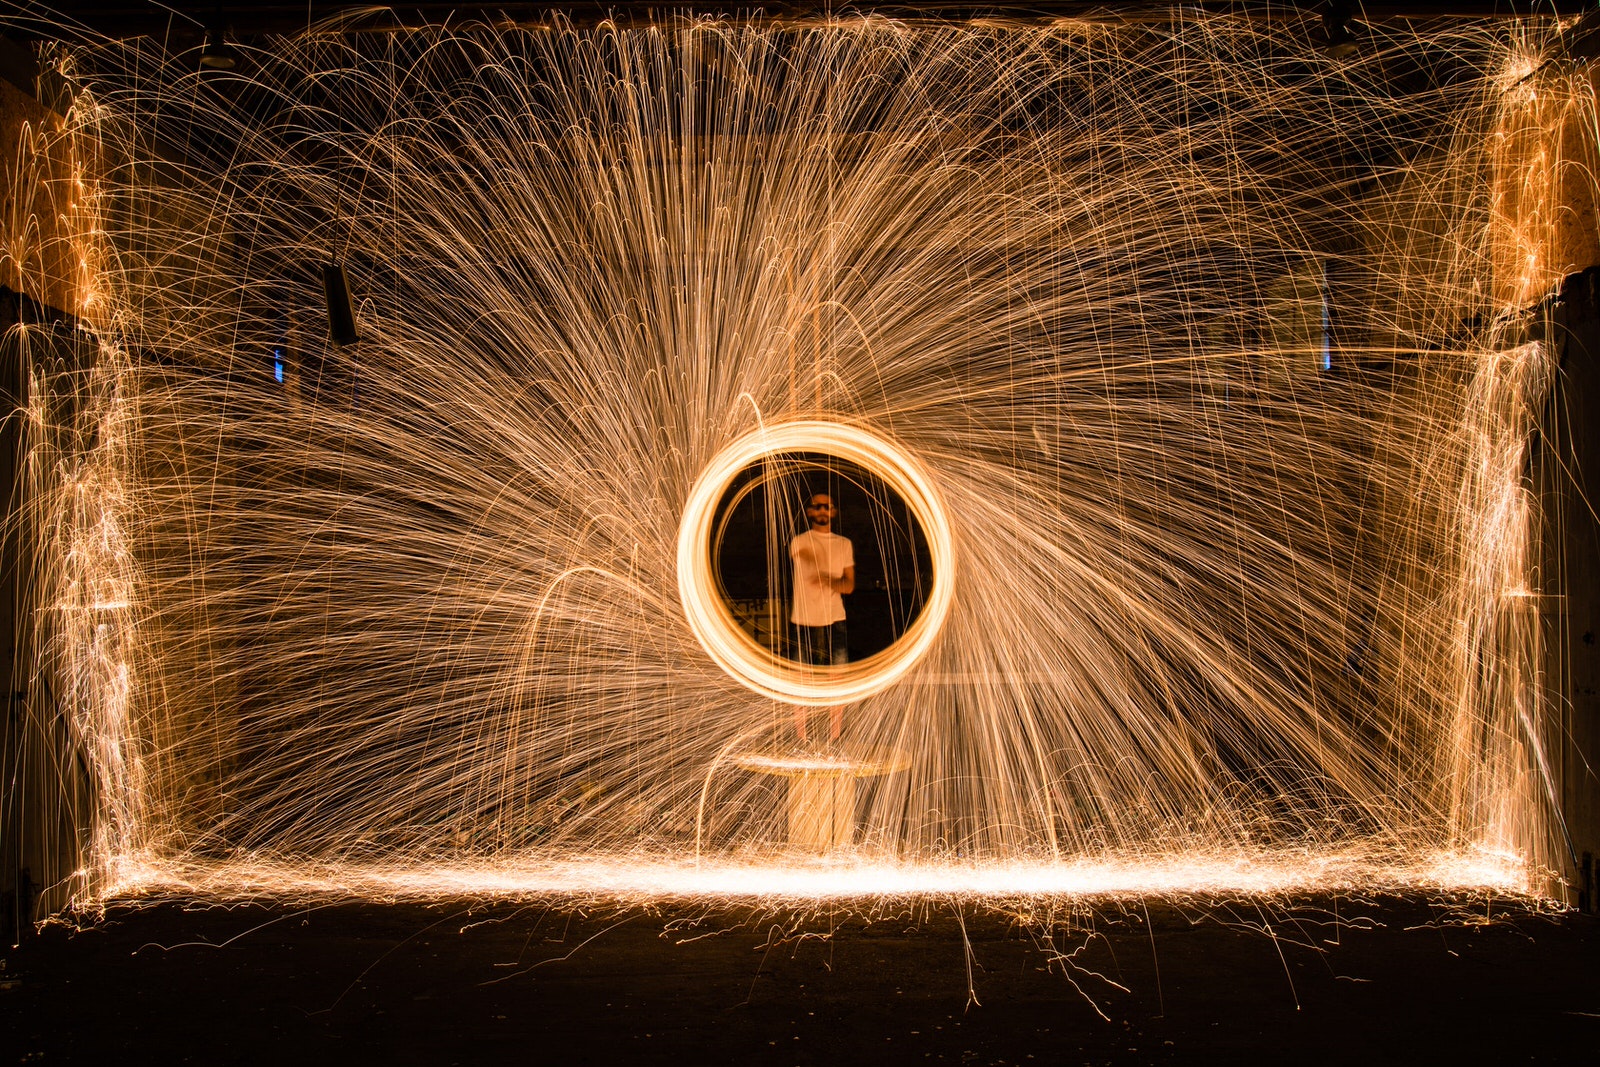
Photo by Ioannis Ritos from Pexels
You might also want to capture something you have less control over, like, for instance, star trails or light trails from a busy highway. For these photos, you most likely won’t need to use an ND filter.
For light trails, locations like busy highways make the perfect subject. These kinds of photos are framed nicely by cityscapes and skylines. For highways in particular, it helps to have an overhead vantage point, but it isn’t always necessary, like in the photo below:
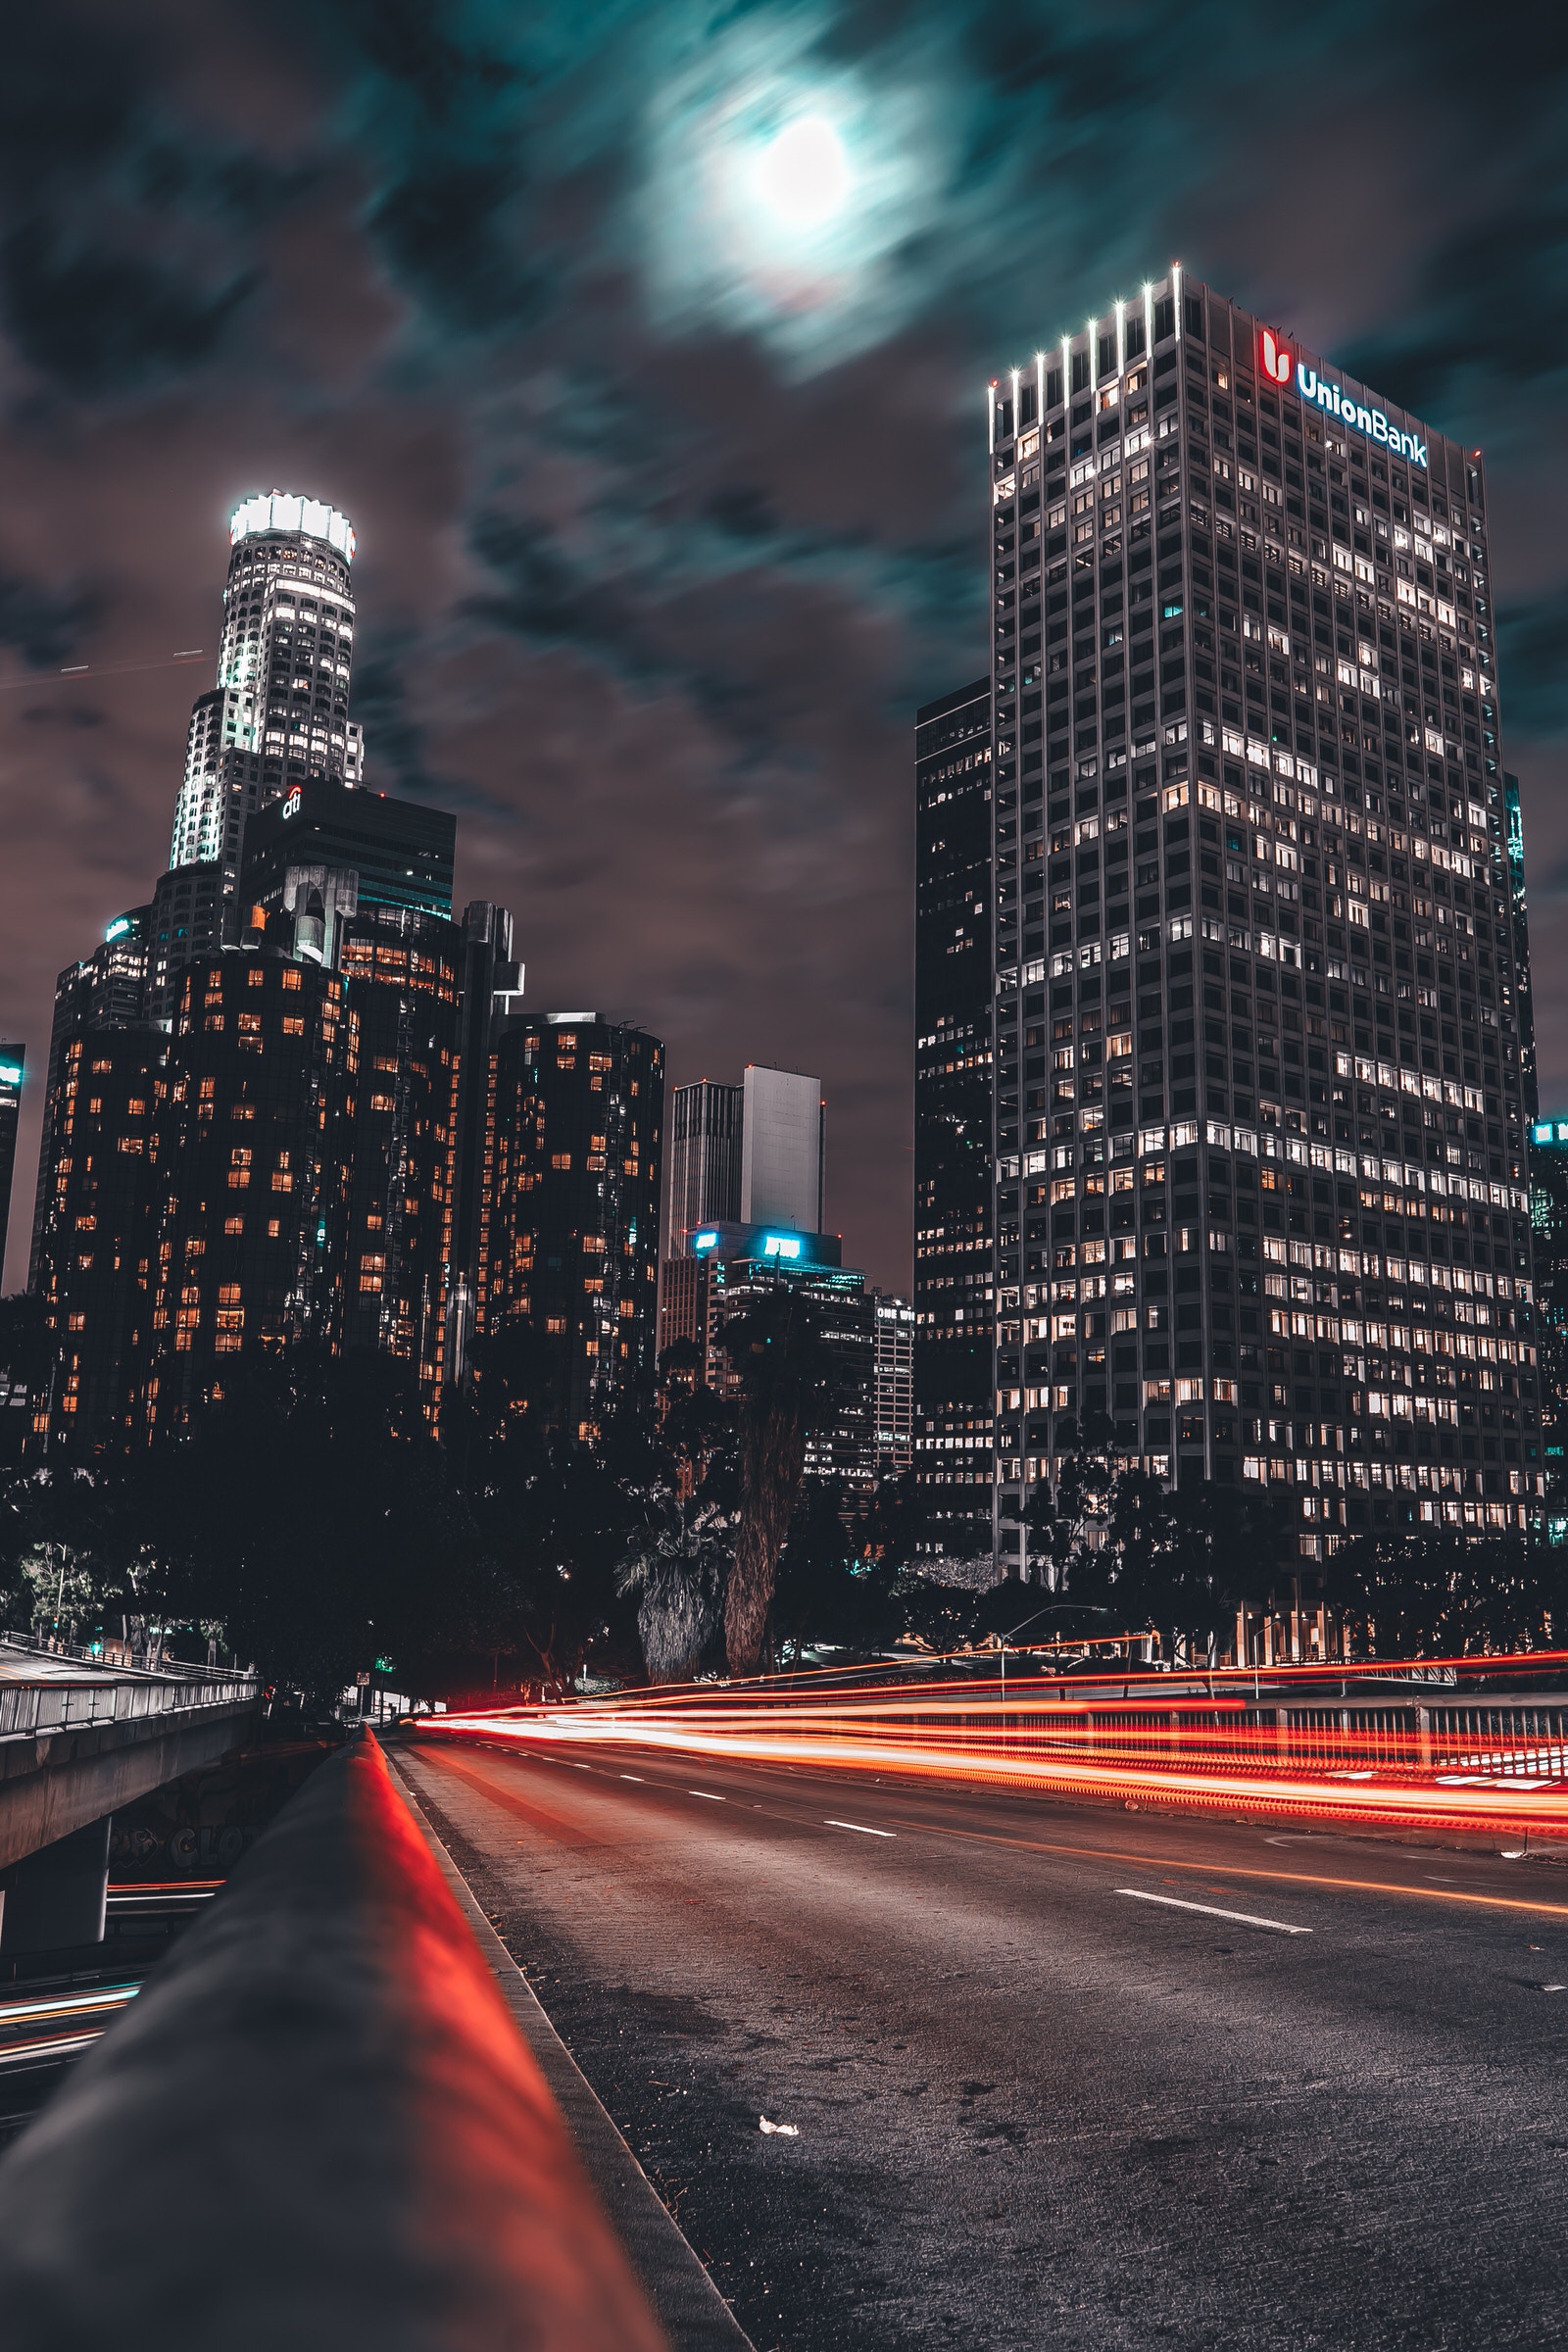
Photo by Moy Vazquez on Unsplash
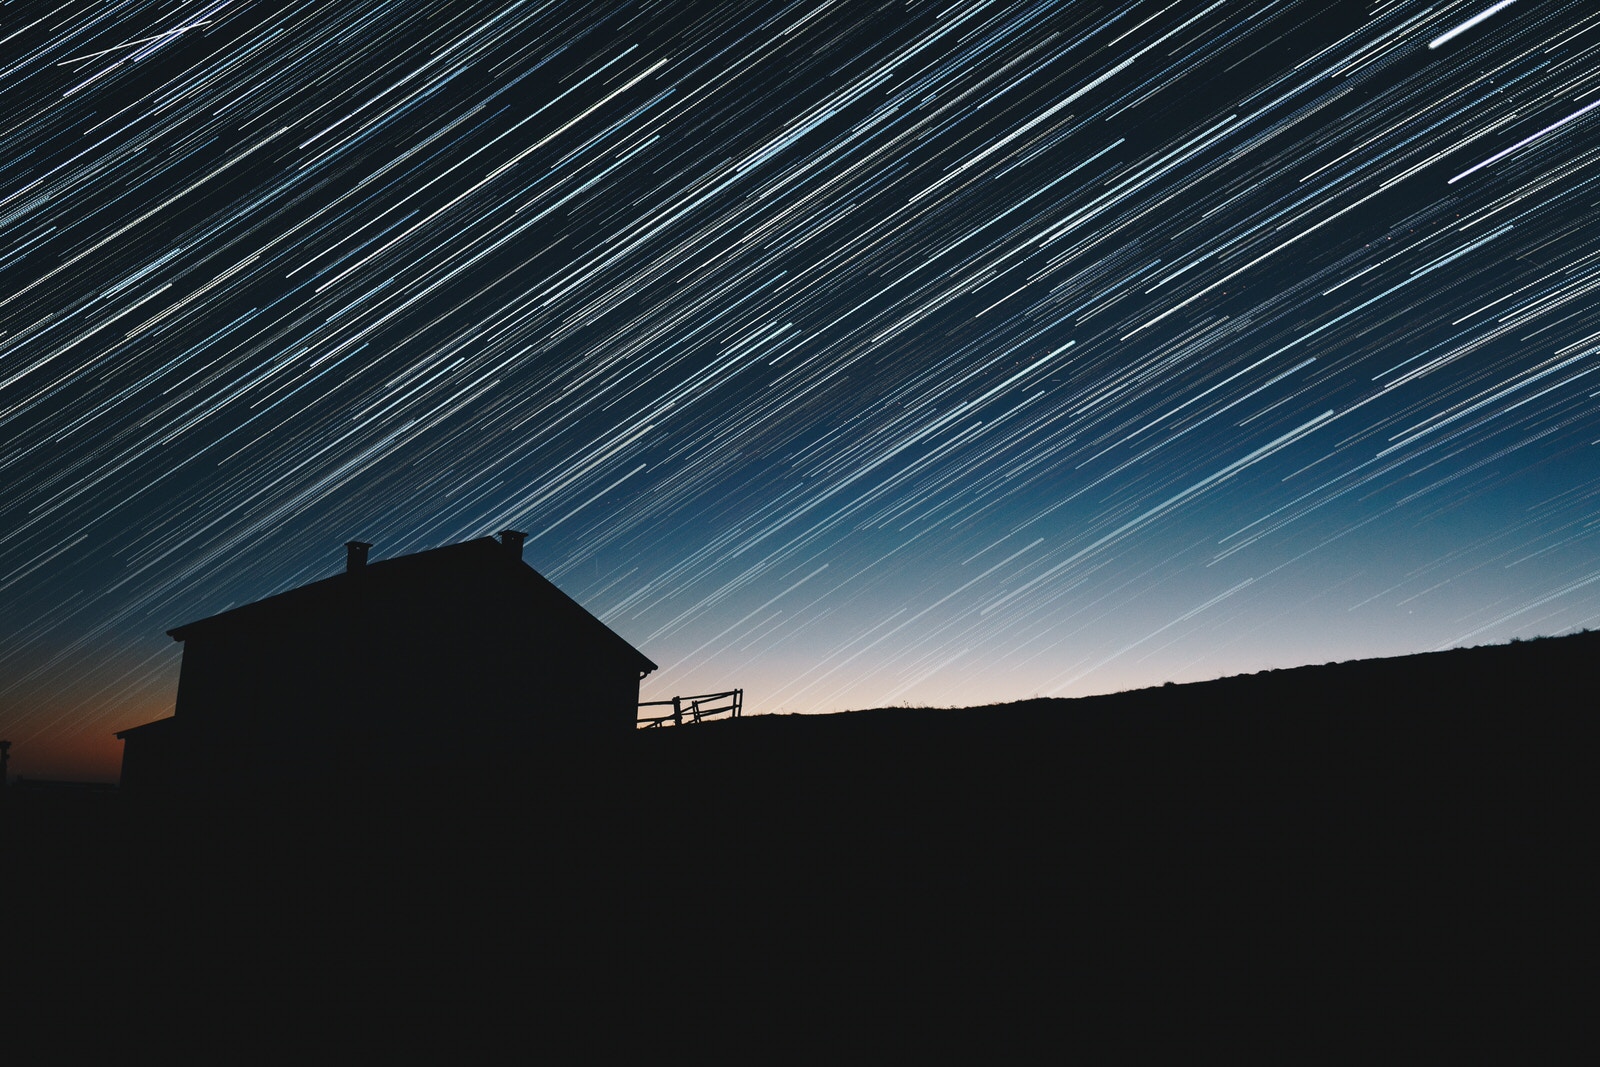
Shooting star trails is a little bit different. The first thing you’ll want to make sure you have access to is an actually starry sky. If you’re like me and live in New York City or some other big city, then the idea of seeing stars anywhere is a far off dream that forces you to travel many miles just for a decent night sky shot.
Hopefully you’re not like me.
But, it’s not enough to just locate the starry sky. You’ll also have to make sure the sky is cloud-free.
There are two common practices when it comes to capturing star trails. One involves stacking many photos captured throughout the course of a night, and the other is a long-exposure. Obviously, we’ll be looking at long-exposures.
In the case of starry long exposures, light from the moon can actually help (so long as your camera isn’t facing the moon). You’ll want to use a low ISO (around 400, and as high as 800) and a wide aperture (f/5.6, and preferably wider). For long exposures, if you want to capture the stars in movement, you have to be prepared to dedicate a very long time to the exposure. I’m talking 30 minutes and more. And unlike star trails that are popularly posted, these long exposures most likely won’t look like the picture below:
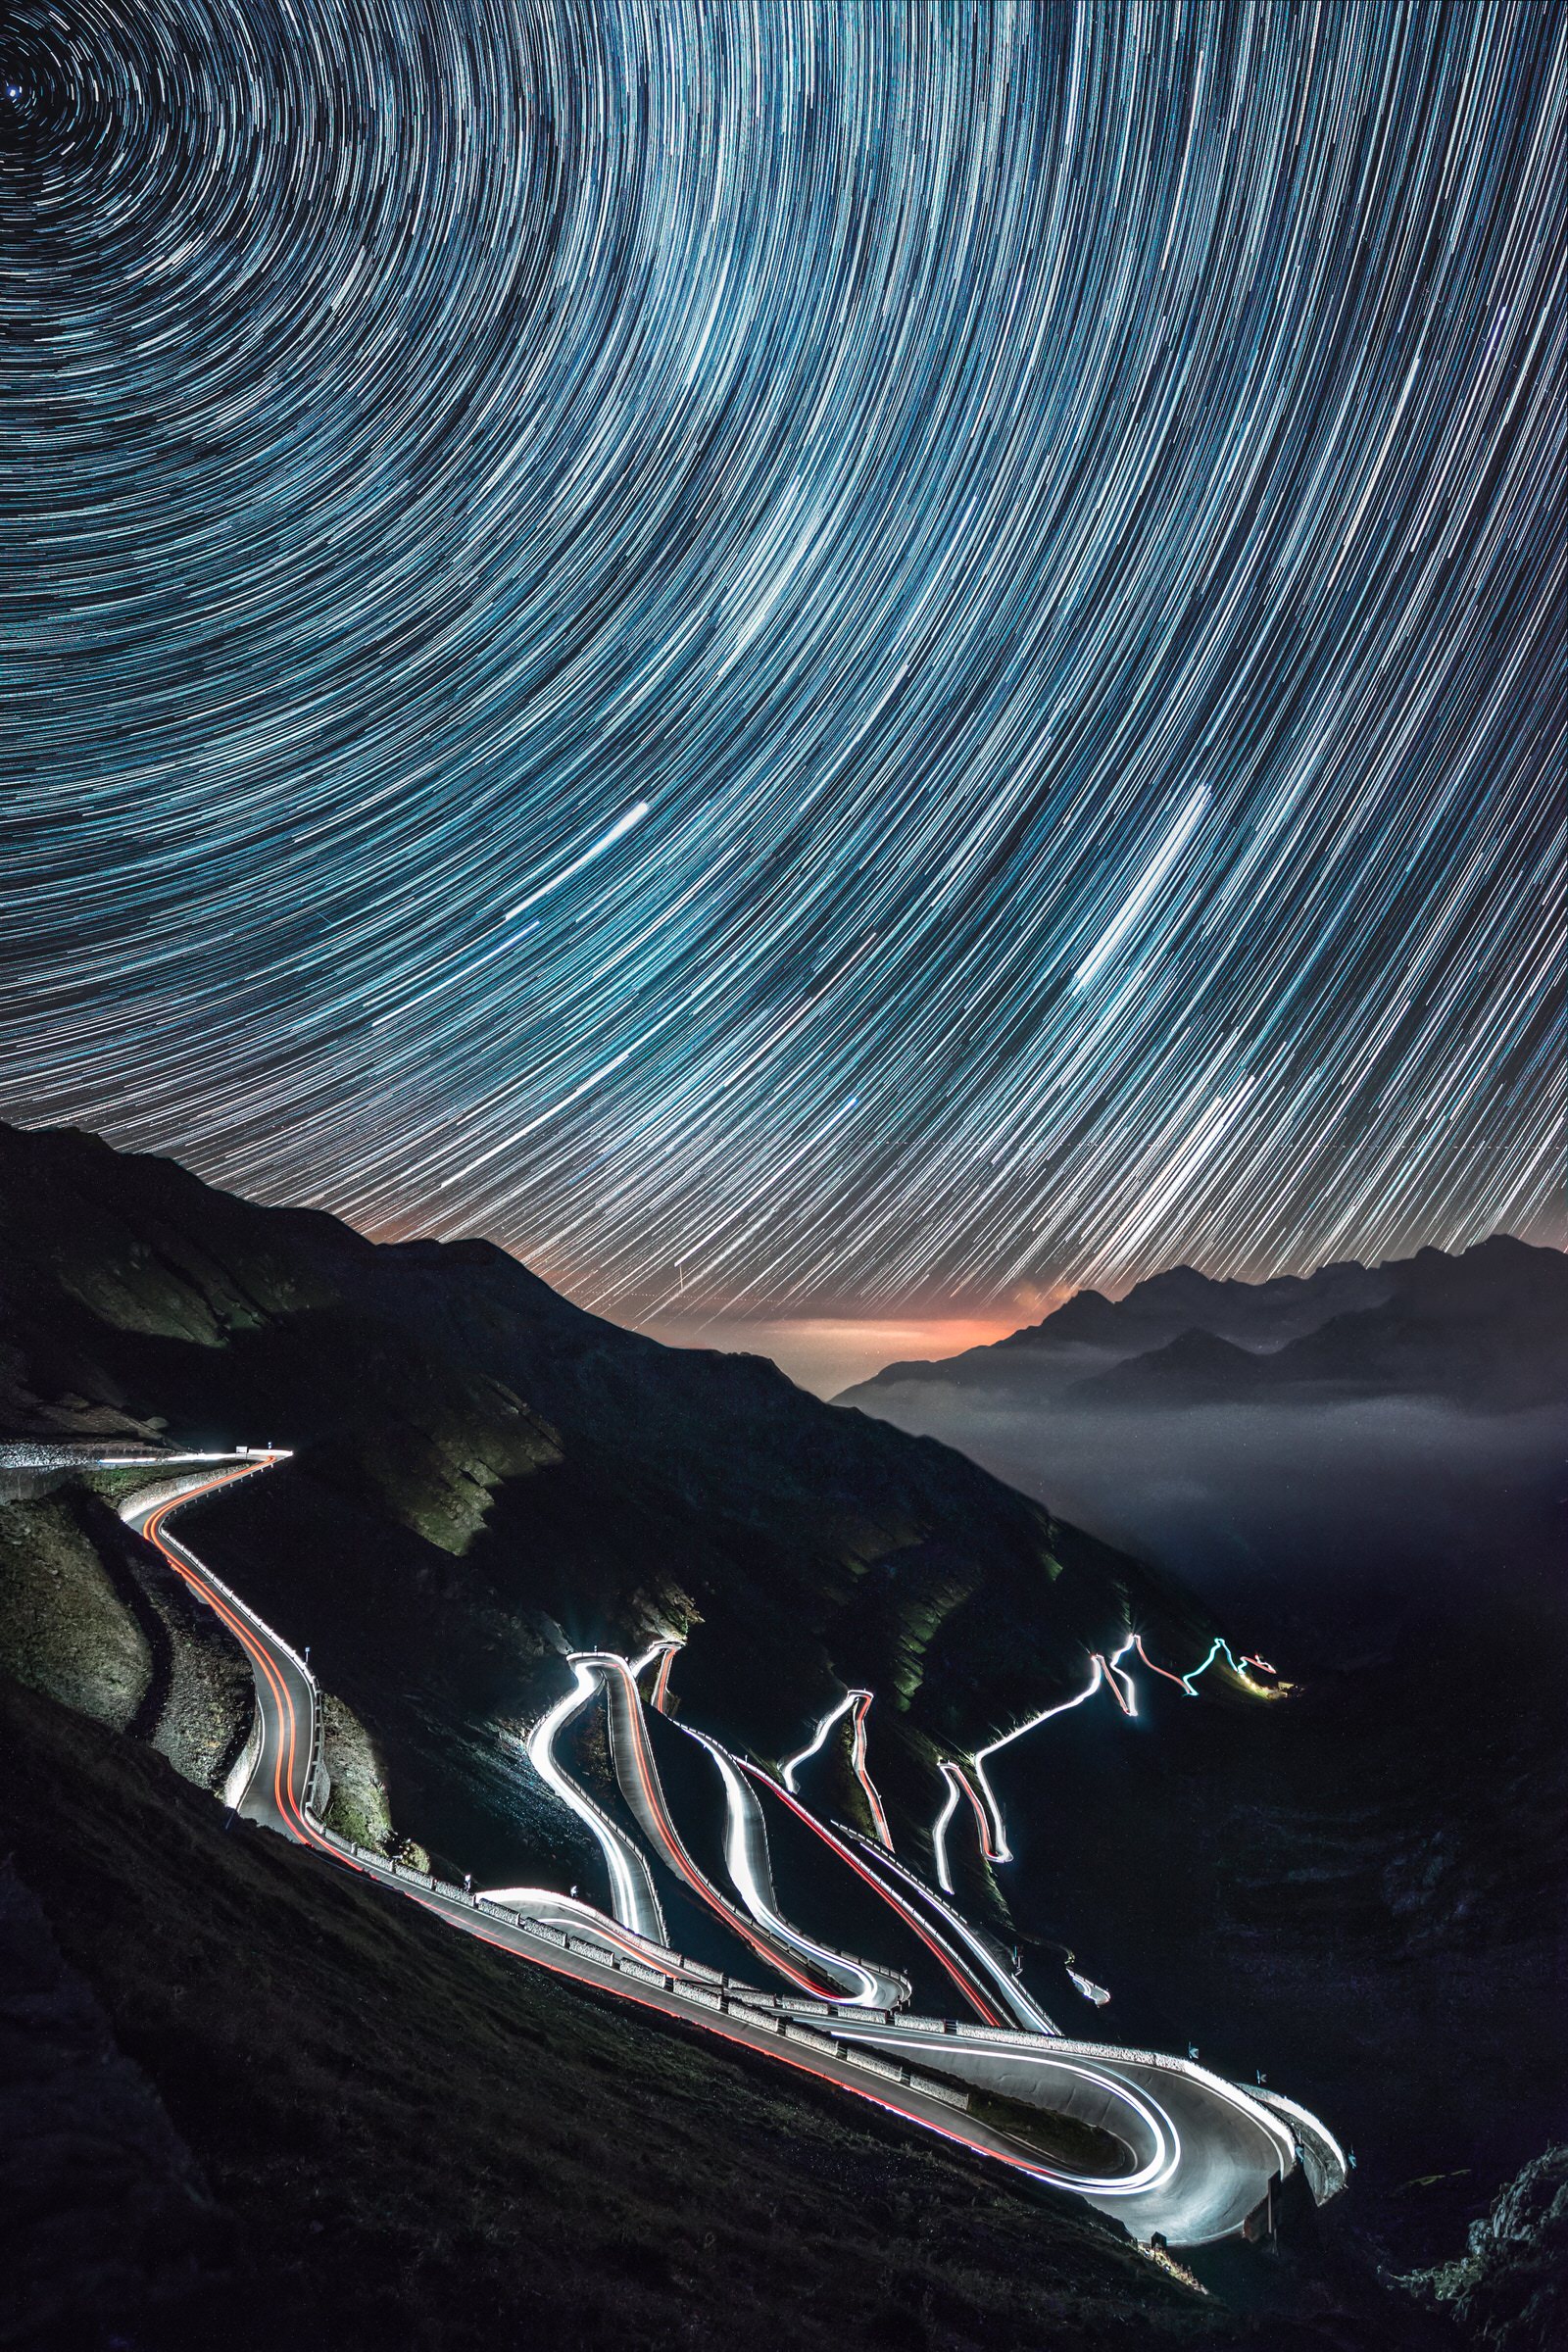
Photo by Samuele Errico Piccarini on Unsplash
Instead, they’ll probably look something like this:
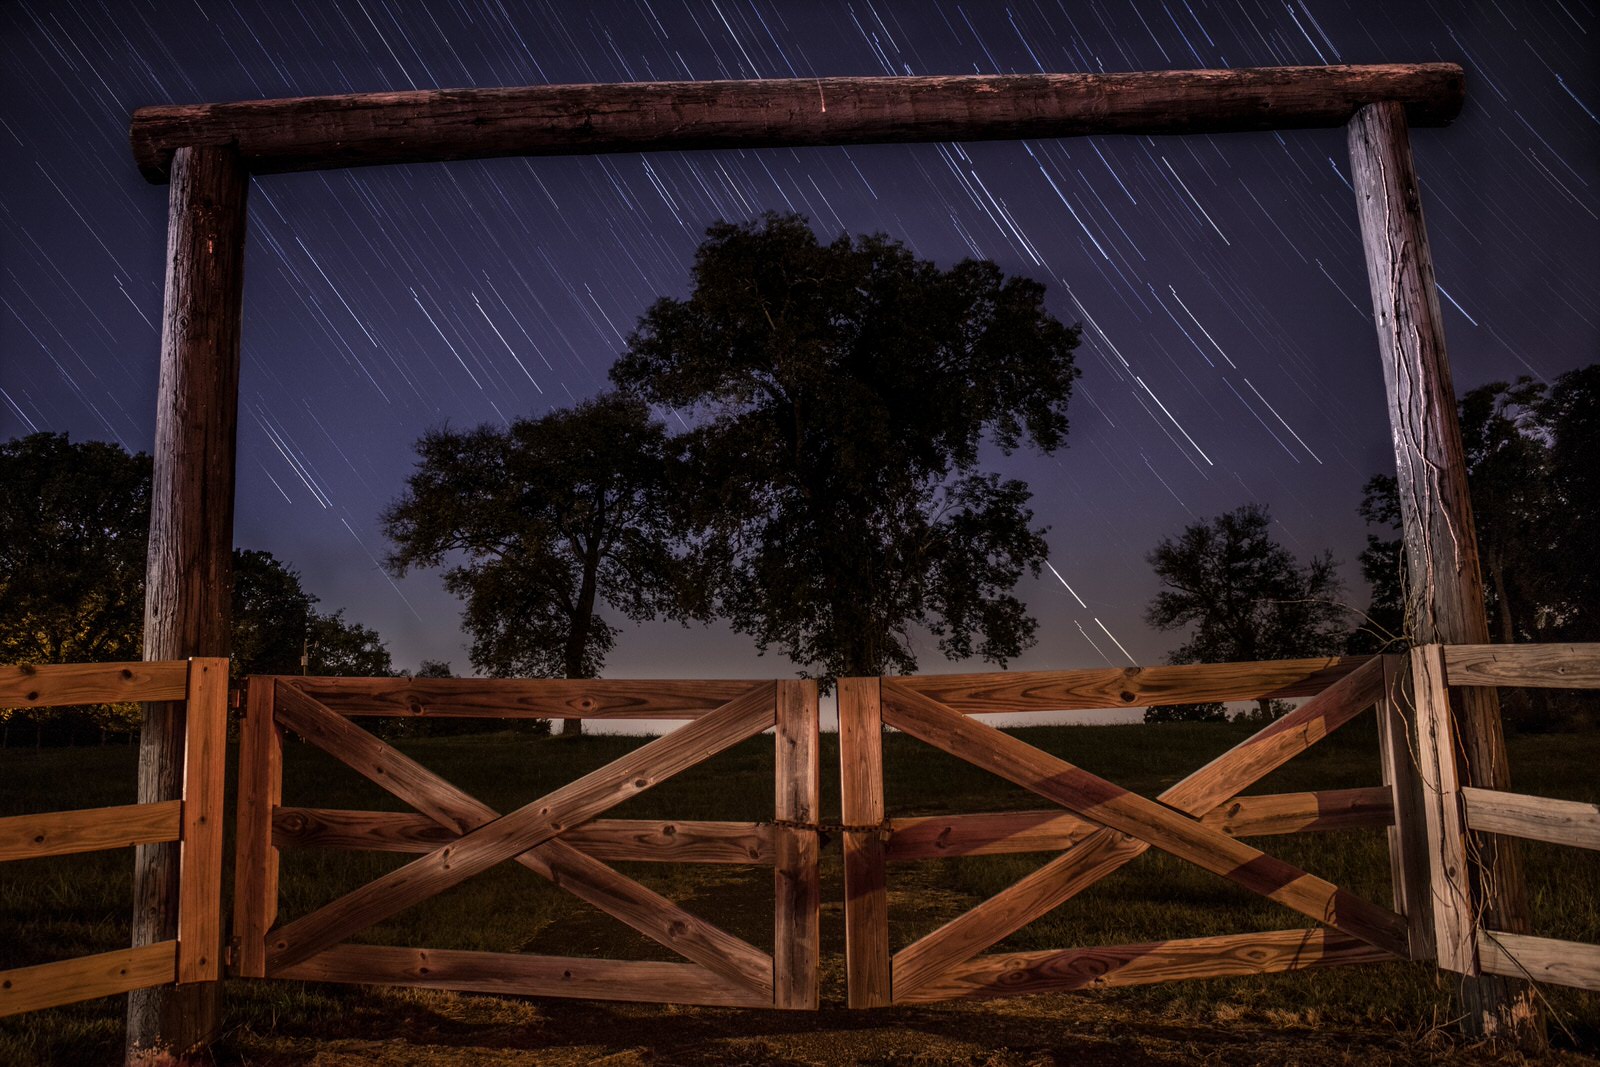
Photo by John Moore on Unsplash
You can definitely get longer trails by using a longer exposure, but you also have to factor in how long your camera’s battery will last in the circumstances. For a first night-time long exposure detailing stars though, this is a great place to start.
If you do want the trails of the first photo, those kinds of photos require lots of patience, pictures, and editing. The photo I happened to use as an example also contains a light trail that was most definitely taken using a long exposure, but the overall photo is likely a composite photo that was put together in something like Photoshop.
Get Snapping!
While long exposures might seem daunting at first, they are completely worth the effort it takes to execute them. Once you know your ins and outs of the whole method, you’ll be effortlessly shooting long exposures left and right. And the only way you’ll be able to learn is to get out there and take photos. Be patient and persistent, and in no time you’ll be shooting great long exposures!