Understanding Aperture: Controlling Light Based on the Exposure Triangle
“Photography isolates the world via an aperture and gives the photographer the means to see differently, to achieve a spontaneous vision that is direct and uncompromising.”
– Ellsworth Kelly (American painter, sculptor and printmaker)
Light and photography are like peas and carrots. The key to understanding photography lies in your ability to harness light. There are several different ways to control that relationship with your manual settings, and today we’re going to be talking all about one of the “big three” – aperture. Simply put, aperture refers to the opening in your lens that lets light into your image. You can choose to widen your aperture or narrow it depending on the amount of light you need in your scene.
The challenge here is that your aperture also controls your depth of field. Any change at all to your aperture will impact the amount of focus in your image. In this guide, we’ll talk all about the different ways your aperture settings affect your photography, and how to use it to its full potential.
What Is Aperture?
Your aperture is a hole in the lens of your camera, allowing light into your camera’s body. It’s kind of like one of those portals in one of your favorite sci-fi movies, the one that leads you into another dimension. You control how far this portal opens to let light travel through to that other dimension.
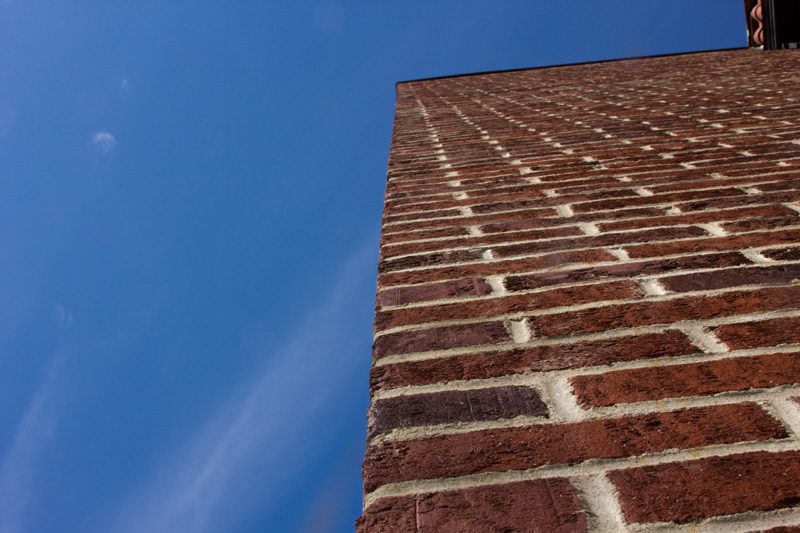
This unassuming little portal at the back of your lens can greatly change the outcome of a photo. The amount of light reaching your camera’s sensor at one time can create a shallow depth of field (where part of the image is blurry/fuzzy) or a wide depth of field (where most or all of your image is sharp and crystal clear). Here’s a good example:

Aleksandr Khomyakov [CC BY-SA 4.0 (https://creativecommons.org/licenses/by-sa/4.0)], from Wikimedia Commons
In the shot on the left, the aperture is wider (f/3.5), so you can see that there is a selective focus that’s sharpest about three or four bricks up. The fore- and backgrounds become less and less sharp the further you get from that point of focus. In contrast, on the right is that same shot with a smaller aperture (f/22). Here, the bricks of the building are in focus throughout the photo.
You may often hear of aperture in conjunction with the word f-stop. The f-stop is the measurement of the diameter of the aperture. Understanding how f-stops work will help you to control the size of the hole that light travels through.
F-Stops
The next thing you’ll want to understand is how to control the amount of light that travels through your camera. Back to our portal analogy, remember that everything to do with aperture is referring to an opening at the back of your lens, which your light will travel through to make an exposure.
When you press the shutter button on a DSLR camera, a mirror inside your camera body lifts to allow that light in for the amount of time you’ve set. There are also (usually) two curtains behind that mirror which slide out of the way in sequence to let the light hit the sensor, but that’s info for another article. We’re here to talk aperture, and aperture is all about f-stops!
When photographers refer to stops, they are talking about doubling or halving the light coming through their lens – you can add or take away stops by changing one of the three elements in the triangle. F-stops are specific to your aperture, and will only ever be used to refer to that point of the triangle.
Still, stopping up and down affects each part of the triangle. Each point of the triangle will control the amount of light that reaches your sensor, but they affect your image in different ways. We’ve already mentioned that your aperture controls the depth of field in your image, but remember that slowing down your shutter speed introduces motion blur into your image and increasing ISO introduces noise.
It’s important to note that doubling the f-stop is a little bit different than the other sides of the triangle, since it’s based on an equation. You don’t simply double or halve the numbers. For instance, f/4 does NOT let in double the light compared to f/8. But you don’t have to be a math whiz to get good exposures on the spot! A basic understanding of the theory paired with a little trial and error will help you develop good instincts about which f-stops will get the right result for your shoot.
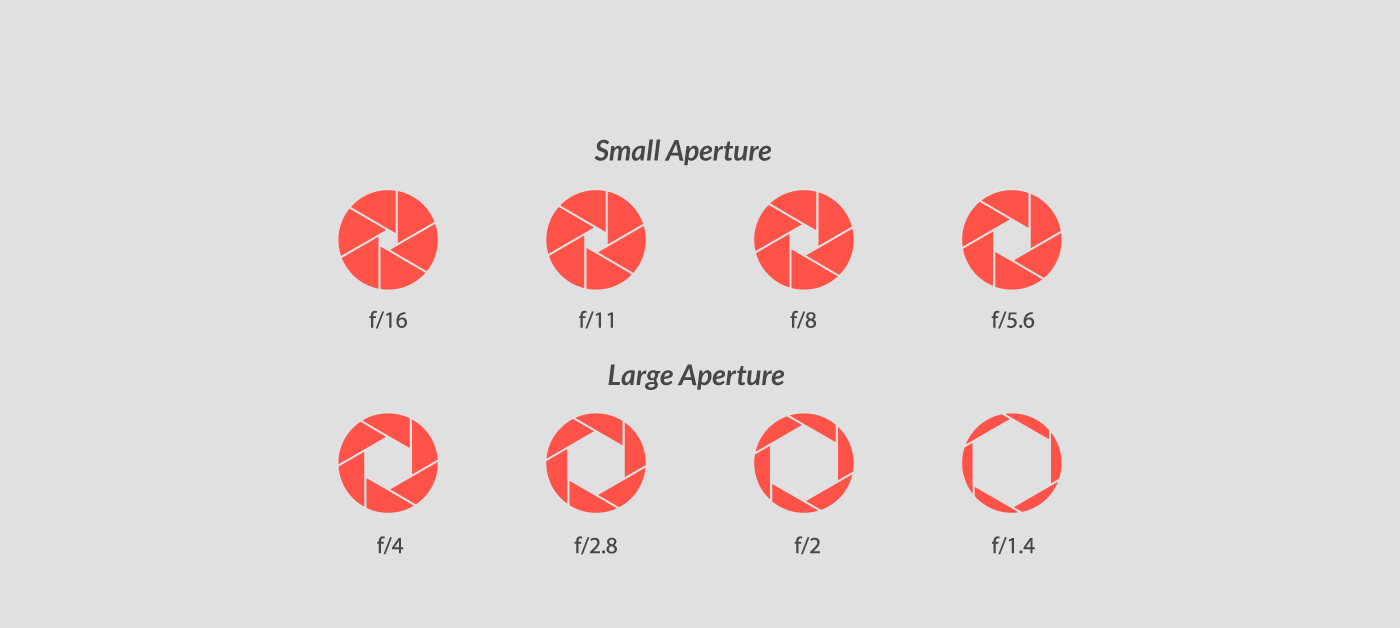
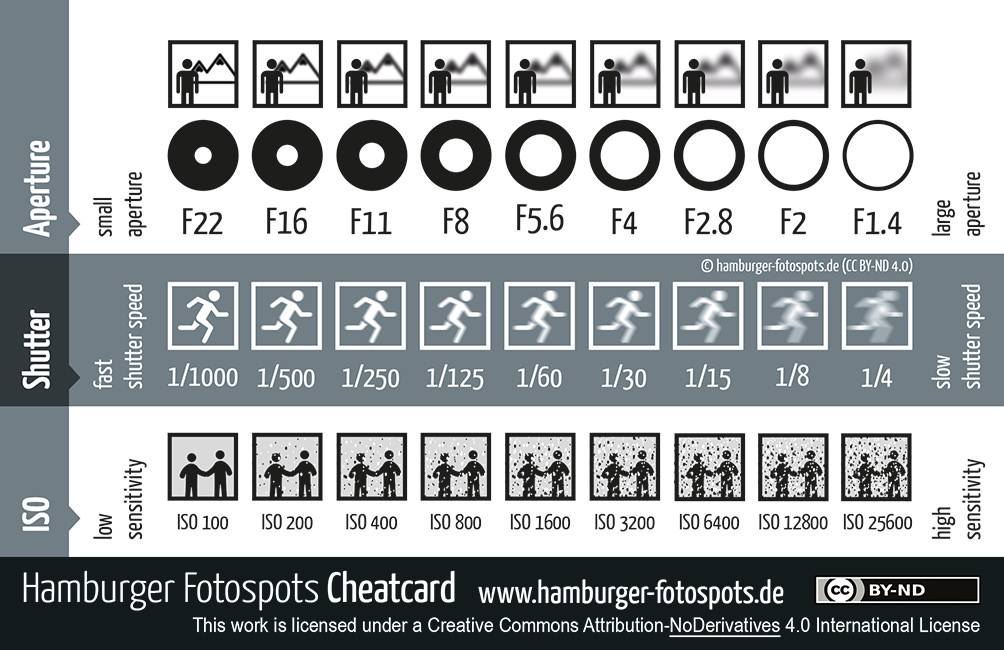
Larger aperture sizes (represented by smaller f-stop numbers) result in more light traveling through your camera lens; conversely, larger numbers and smaller aperture sizes result in less light reaching the inside of your camera. If that sounds backwards, it’s because we’re not talking about whole numbers here, we’re talking about fractions. Take a look at this graphic:

Notice that the wider our opening gets, the smaller the number behind the “f/.” An f-stop is actually a ratio of your lens’ focal length divided by the diameter of your aperture. In other words, an f-stop number represents a fraction of your lens’ aperture opening. For example, an f-stop of f/4 means the aperture open 1/4th of the way. If you are using a 100mm lens, f/4 is an opening of 25mm – or about an inch. In the same lens, f/8 represents an opening of 12.5 percent, or 12.5mm – about half an inch.
Don’t worry, you won’t have to bring a calculator to your shoot. This is all a very fancy way of saying that the larger the number behind your f-stop, the smaller your aperture opening will be, and vice versa. But now you understand why we use these numbers the way we do, and that’s pretty cool, right?
Moving Parts
Now let’s talk parts. It’s helpful to be able to visualize what’s happening inside your lens when you shoot. You can follow along with your own lens if you like, by watching the aperture grow or shrink as you change its setting.
The Blades
To create our portal, there is a series of blades arranged to block out any undesirable light. These blades recede or advance in increments as you change the f-stop setting on your camera. The opening that appears at the center of these blades is our aperture.


On the left, you can clearly see the aperture blades. They are set at a small aperture, so this lens is letting through a smaller amount of light. As we learned in the previous section, that means the number behind the “f/” is a larger number. F-stops are actually fractions, remember? So a higher number means a smaller opening. On the right, we see a wide open aperture. We can’t even really discern the blades. This means that the number behind the “f/” will be very low.
Sidenote: These photos are great for illustrating our point, but it’s always best to keep each side of your lens covered when not in use! Dust, sand, and other undesirables can squeeze in there and mess with your image quality, and it’s tricky to really clean out the interior of a lens without damaging it.
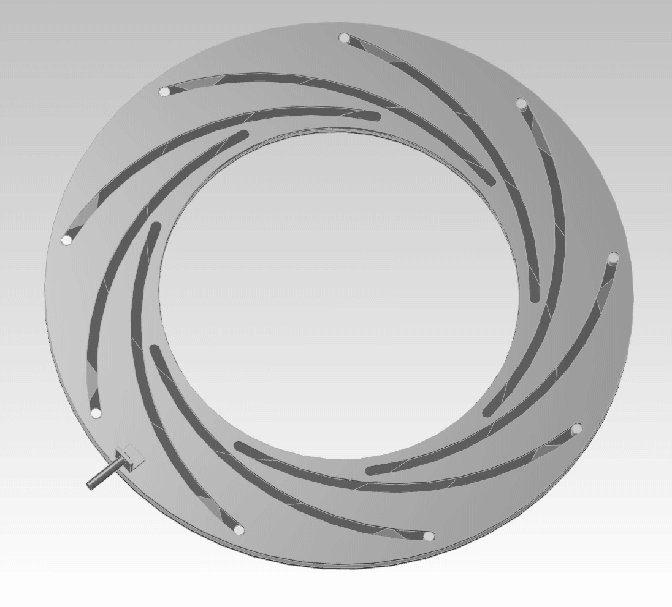
The Iris
The iris is the mechanism that allows the opening of your lens to contract or expand, allowing more or less light into the camera. The graphic below captures that movement. You can see that the aperture is adjusted through a circular motion. When you manually change your aperture by rotating the aperture ring on your lens, you’re essentially cranking those blades open or closed by hand.
Sometimes the word “iris” is used interchangeably with “aperture,” but as long as you know that they both boil down to how big or small that portal is, you’ll do just fine.
User:Catsquisher [Public domain], via Wikimedia Commons
The Exposure Triangle
Adjusting the amount of light that travels through your lens can be a matter of personal style, but before you can begin creating that style, you’ve got to learn the basic rules. Aperture is not the only way to alter the amount of light in your shot, so we’ll also need to touch on two more of the three fundamental elements (referred to as the exposure triangle) that help to control the light coming into your camera:
1. Aperture

We’ve covered this one already: the wider your aperture, the more light you’re letting in. The more light you’re letting in, the more shallow your depth of field will be.
2. Shutter Speed
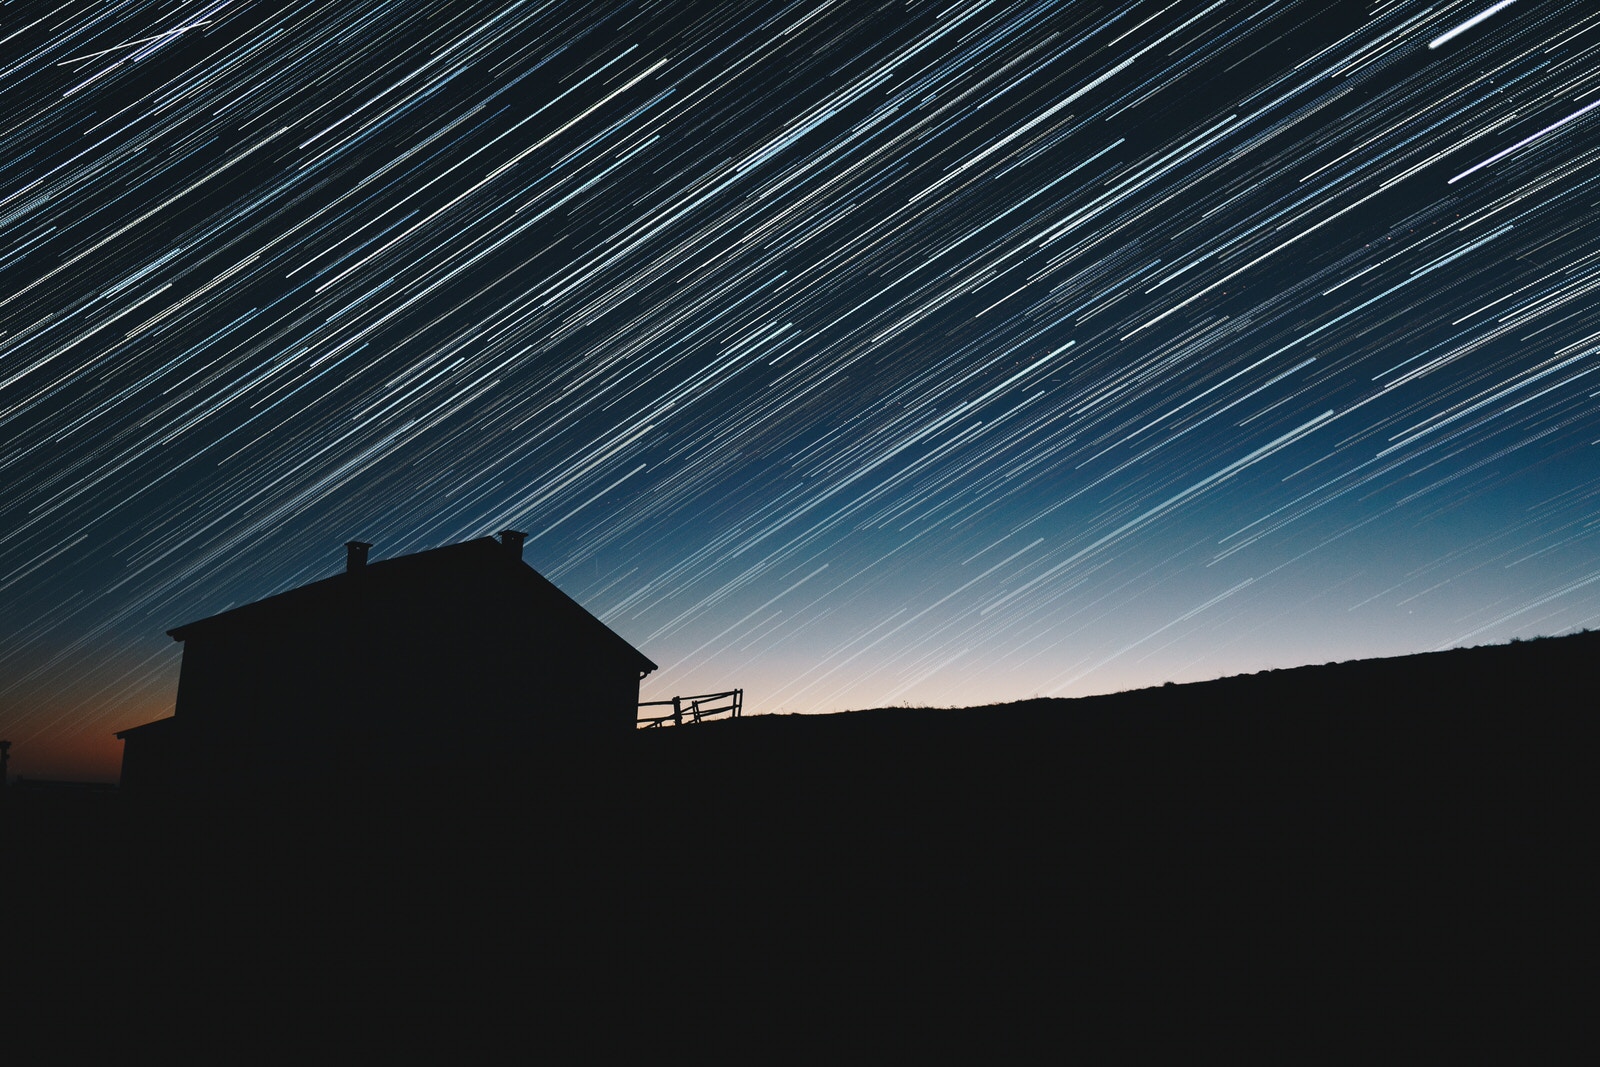
This refers to the amount of time your shutter curtain is open. It’s usually measured in seconds, or fractions of a second. A faster shutter speed will appear to freeze time, but will not let in as much light. A slower shutter speed will allow you to shoot in darker environments, but it can also blur motion. So for sports photography, a fast shutter speed will snag a shot of that amazing catch. To get an awesome photo of the night sky, you’ll need to go a lot longer.
3. ISO
This is a setting used to control your camera’s sensitivity to light. It harkens back to the days of film, when different films had different levels of light sensitivity. A film of 100 ISO would require a longer shutter speed or wider aperture to create the same exposure as a film with an ISO of 800. When it comes to digital photography, a high ISO will help you get a good shot in a low-light situation, but you may also see an increase in digital noise.
These three ways to manipulate light in your image are linked. Each one has its own pros and cons, but they have to balance in order to get an even exposure. The following graphic gives you a sense of what happens when you manipulate the elements of the triangle:
How to ‘Balance’ the Triangle
In any given photo, there is usually one exposure that looks the best – it is the elements you change within the triangle that allow you to express your creativity. Some photographers choose to “bracket” or take more than one exposure with different settings, to ensure that they get at least one perfectly balanced image. You can bracket with each part of the exposure triangle, which gives you a lot of options for attaining that perfect exposure.
When you take away a stop from one side of the triangle, you will usually need to compensate by adding a stop to one of the other two sides in order to keep the same exposure. For example, if you take two stops away from the aperture, you might need to add stops to your shutter speed and/or ISO to compensate for that change.
Tip
Your lens focal length will affect depth of field as well. The longer the focal length, the shallower your depth of field will be. A longer focal length allows you to capture a smaller area of your scene, creating a magnifying effect. This effect magnifies the blur in your photo, which makes your depth of field appear to be more shallow.
What Is Depth of Field?
Depth of Field (DOF) is a technical term for how much of your image is in focus. Think of the word “field” in terms of your field of vision. When you look at your image, how much of that field is in focus? (Or, if it’s not too on-the-nose for you, what is the depth of our vision in that field?) If it’s a very short range, you’ve got a narrow (or shallow) depth of field. If most or all of your image is clear, you have a wide depth of field.
Depth of field offers photographers a lot of artistic potential. You can draw attention to a certain element by placing it in the sharpest point of focus in a shallow depth of field, or you can use a wide depth of field to offer a clean slate for a detailed composition. Here’s a quick comparison:
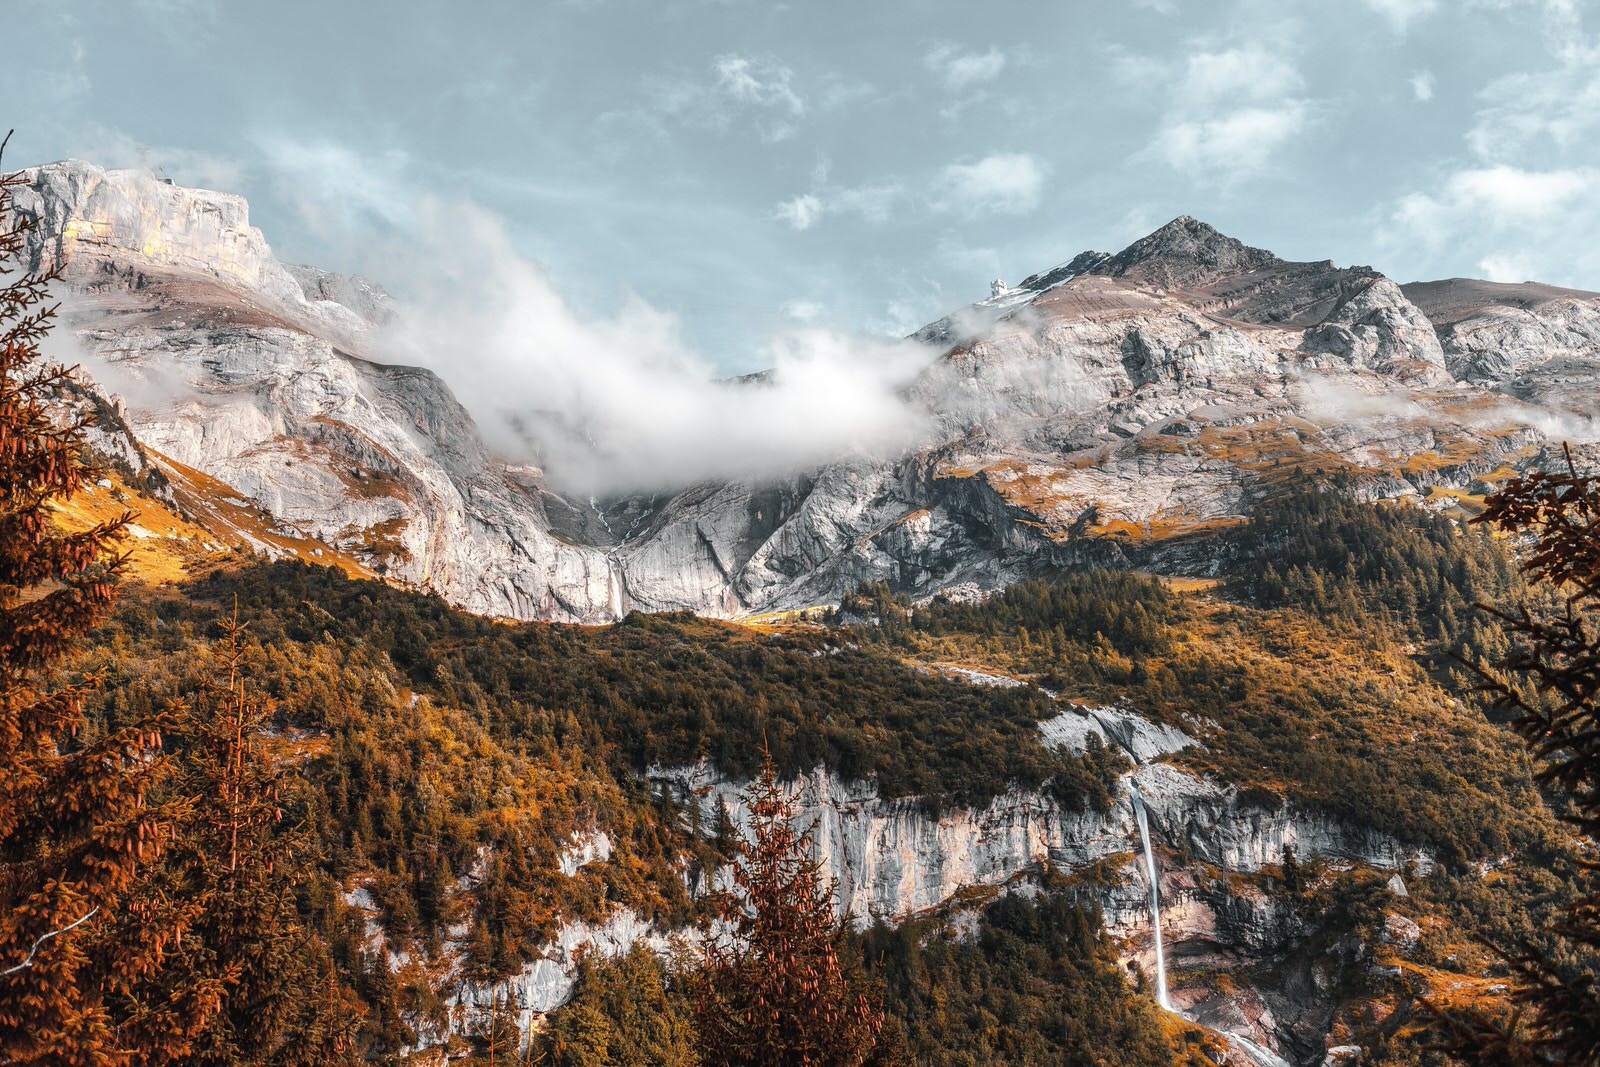

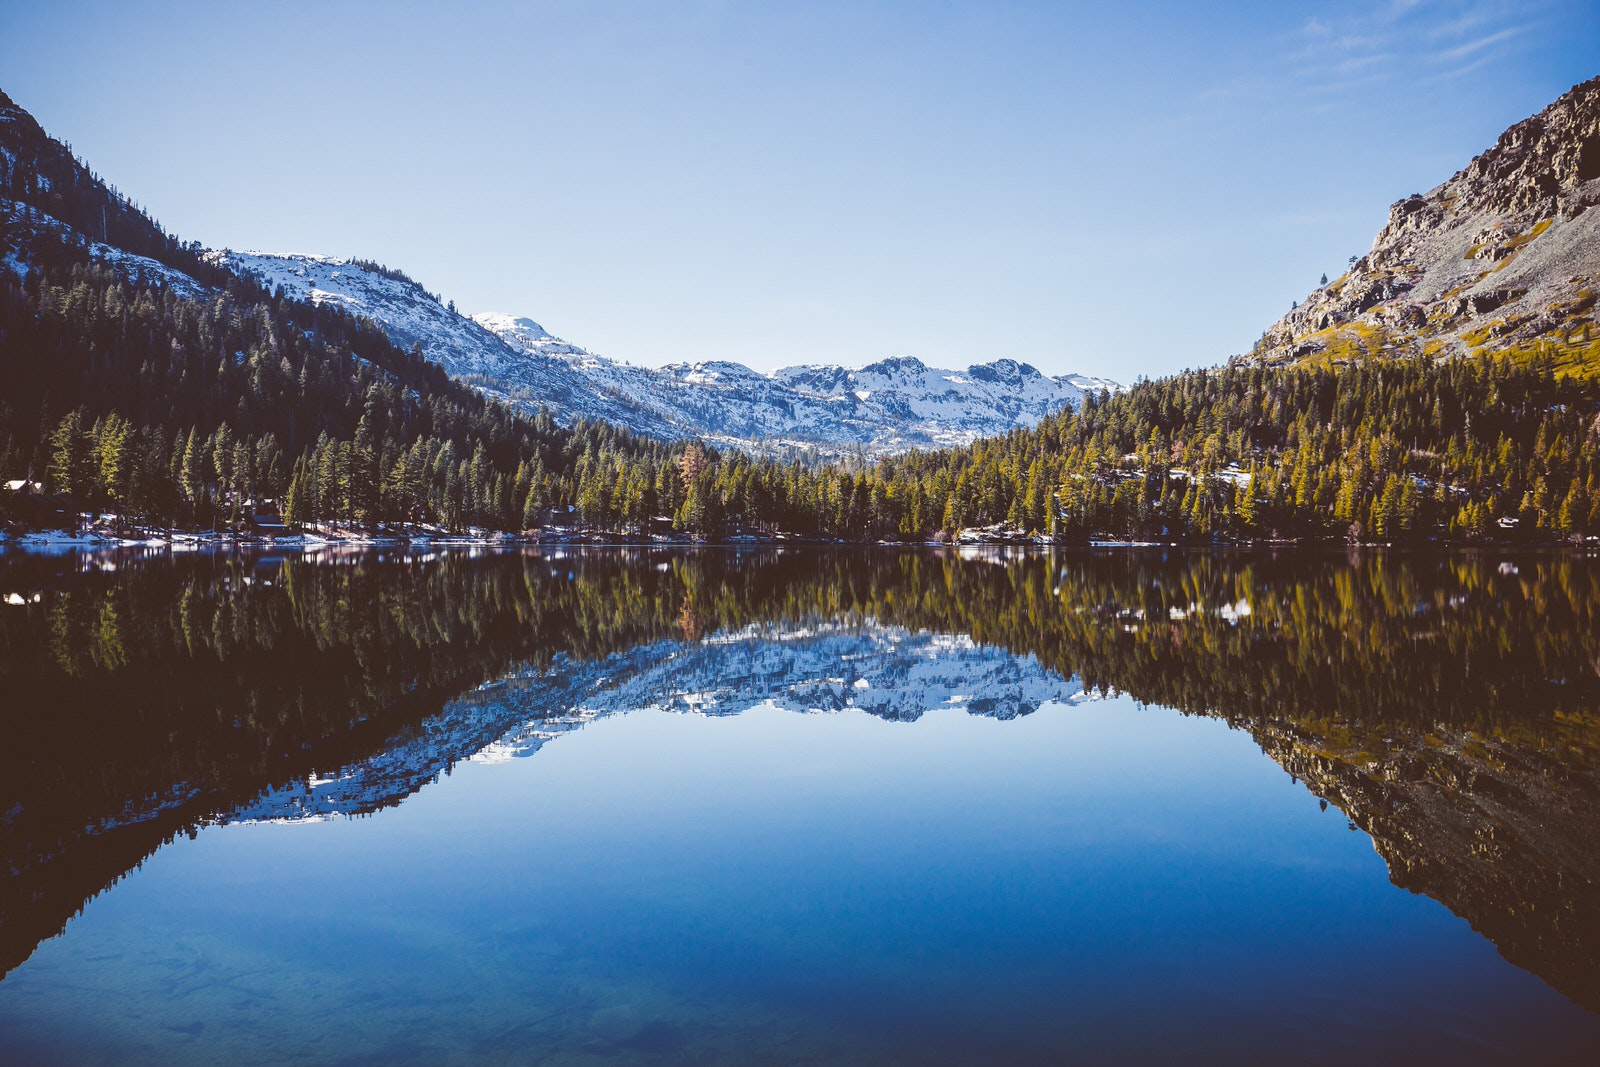
The photo on the left was taken at f/14. Notice how the mountains and trees are at a pretty consistently sharp level of focus throughout your field of vision. This would be considered a wide depth of field. On the right, we see an example of a shallow depth of field, shot at f/2.2. The boy’s eyes are at the sharpest point of focus, but the details of the pool are not important in this case so the photographer has chosen to leave them out of our field of focus.
Tip
Pair a narrow aperture with a wide focal length for extra-stunning starbursts and sun flares.
What Is Aperture Priority Mode?
Changing your f-stop in aperture priority (Av) mode will cause your camera to automatically adjust its shutter speed to accommodate it. This is a great mode for beginners, who can use it to get a clear understanding of how aperture affects shutter speed and ISO. More advanced photographers might choose aperture priority if a certain depth of field is essential to their vision. This allows them to focus – no pun intended – on their composition while still getting a good exposure.
Switching to Manual Mode
You’ll need a solid understanding of all three aspects of the exposure triangle to move on from aperture priority to manual. You’ve probably noticed by now, there’s a lot more to it than just picking the right depth of field! Environmental and technical factors will influence your final exposure settings and in some cases, you’ll have to compromise on one or more of your settings in order to get a usable exposure. In these cases, post-processing will be your best friend.
Let’s look at a few situations where the exposure triangle will impact your aperture setting:
Problem: You want to get a super clear shot at a fast-paced sporting event, but there’s not a lot of light to be had. You’ll need a fast shutter speed, but that leaves only a sliver of time for the light to enter your camera.
Solution: Use a wide aperture to compensate for the lack of light in your exposure. Keep a close eye on your subject to make sure he doesn’t slip out of focus!
Problem: You’re shooting a night scene and your high ISO is starting to result in a lot of distracting digital noise that’s really tanking your image quality.
Solution: Lower your ISO and open up that aperture. (Also, try shooting on a tripod if possible and use a remote shutter release to allow for longer shutter speeds.) You may need to do several test shots to find the right balance between the best image quality and the right depth of field for your idea.
Problem: You’re photographing a busy highway and want to keep the shutter open long enough to get some blurred motion from the vehicles. Unfortunately, this is letting in a lot of extra light and you’re getting one overexposure after another.
Solution: Decrease the size of your aperture as much as possible. Not only will it offset the light that’s blowing out your highlights, it will allow your viewer to see more detail in the highway as it winds around in the background.
Tip
The physical distance between objects in your image (and your own physical distance from those objects) will impact where they fall in its depth of field. It may help to either back up or pull your subject forward if you don’t like what you’re seeing.
It might seem obvious, but the best way to master any photographic technique is to practice, practice, practice! Go out into shooting situations that challenge you, and work on balancing the exposure triangle while getting the right depth of field for your shot. Once you feel confident on a good starter lens, move on to others and see how they vary. Try replicating the same shot with multiple lenses.
Remember that while aperture and depth of field are two very important factors in any image capture, they only represent one third of the exposure triangle. When you’re ready to get creative with motion, there’s still a lot to learn about shutter speed that will help you get the right effect. Your ISO can impact everything in your photo from color to clarity, so don’t forget to brush up on that as well. When you know how to use these three powerful tools together, put some of your old photos side by side with your new ones to see your progress!