

Watch the Full Series
description
Food editing is unusually consistent. Whatever is on the plate, the job is the same: make the food brighter, more saturated and more textured than everything around it.
On Day 18 of 30 Days of Lightroom Classic we quiet the background, lift the dish while protecting its highlights, add texture and clarity, and finish with a feathered vignette.
This is Day 18 of our 30 Days of Lightroom Classic series. Follow along with all 30 episodes as we explore the magic of Lightroom together!
Continue Watching 30 Days of Lightroom Classic
JOIN 30 DAYS OF LIGHTROOM (FOR FREE!)
Ready to jump in? Sign up and we’ll email you a printable calendar and daily class schedule so you can get started right away!
Image Source


AFTER
BEFORE
Elevate Your Visuals
Food editing is unusually consistent. Whatever is on the plate, the job is the same every time: make the food brighter, more saturated and more textured than everything around it, and make the background give way.
Day 18 works through a donut, and the same four steps transfer to any dish you will ever shoot. It is worth saying up front that a good food photograph is mostly made before Lightroom — in the styling, the plating and the light. Editing sharpens what is already there.
Quiet the Background First
A bright backdrop competes directly with the food. Fixing that before touching the subject means every later adjustment is judged against a settled frame.
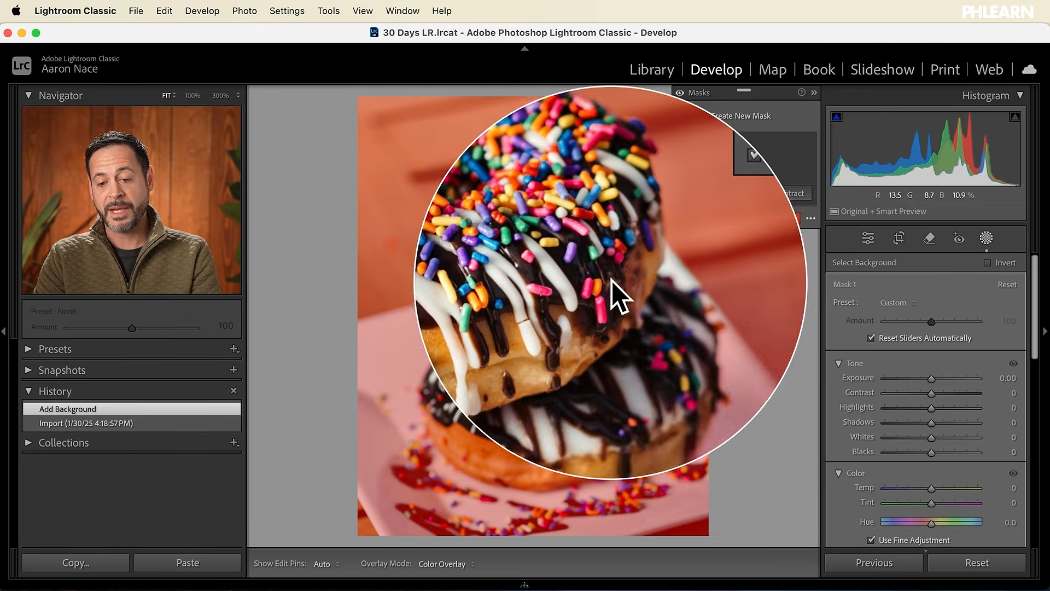
Select Background finds the food as the subject and takes everything else. Inside that mask, two small moves: lower the exposure a little and lower the saturation a little.
The saturation half is the one people skip, and it does as much work as the exposure. Colour attracts the eye independently of brightness, so desaturating a background makes a colourful subject stand out without either being touched further.
Protect the Food from Its Own Background Mask
Automatic background selections are good, not perfect. Toggle the mask and you will usually find the edges of the food have been caught and darkened along with everything else.
The fix is a subtracted brush. On that mask choose Subtract, pick Brush, raise the feather and flow, size it with the bracket keys, and paint the food back out. Any part of the plate that should stay bright can come out too.
Twenty seconds, and it is the difference between a clean separation and a slightly grubby-looking subject.
Lift the Food
Now the opposite treatment on the subject. Select Subject usually finds the dish cleanly; if it does not, a radial gradient or a plain brush over the food works just as well.
Inside that mask:
Raise the exposure — a little. Then pull the highlights back down. This pairing matters on food more than almost anything else. Glazes, sauces and anything wet catch specular highlights, and raising exposure blows them out instantly. Recovering the highlights inside the same mask lets you brighten the dish without losing the shine that makes it look appetising.
Raise the saturation — food is one of the few subjects where you can be generous.
Texture and Clarity, Where They Belong
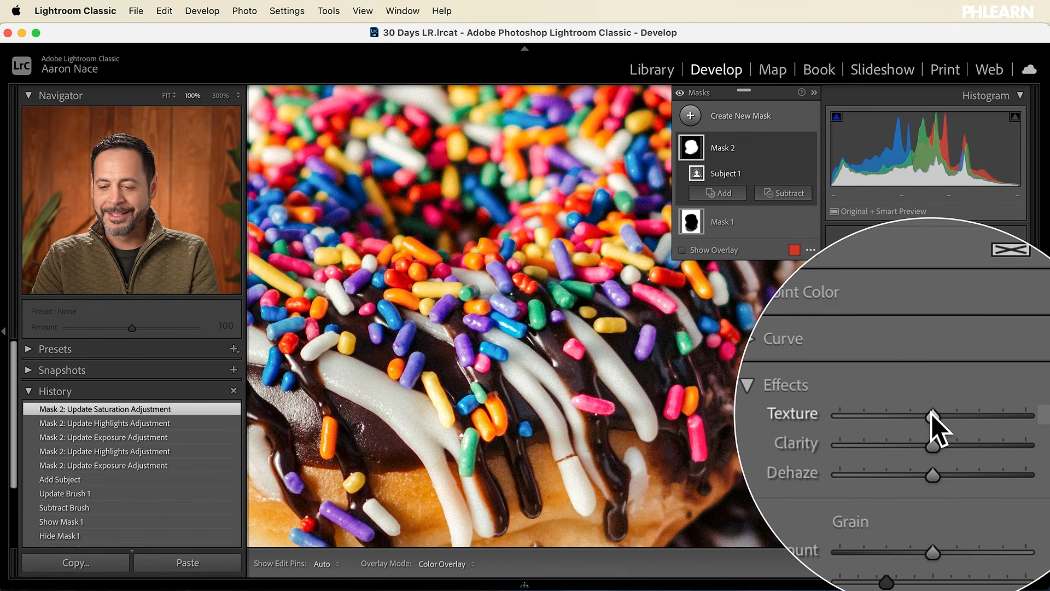
Open the Effects section inside the mask and raise Texture and Clarity. Zoom in first.
Texture sharpens fine detail — the crumb, the sugar, individual sprinkles. Clarity works at a larger scale, deepening the shadows between elements and brightening the highlights, which reads as three-dimensionality.
This is the reverse of portrait work, where both are used cautiously because they emphasise skin. On food, emphasised texture is the entire point. You still have a limit, and it arrives when the image starts to look crunchy rather than detailed.
A Feathered Vignette
Even with a darkened background, a soft vignette pulls the last of the attention inward.
-
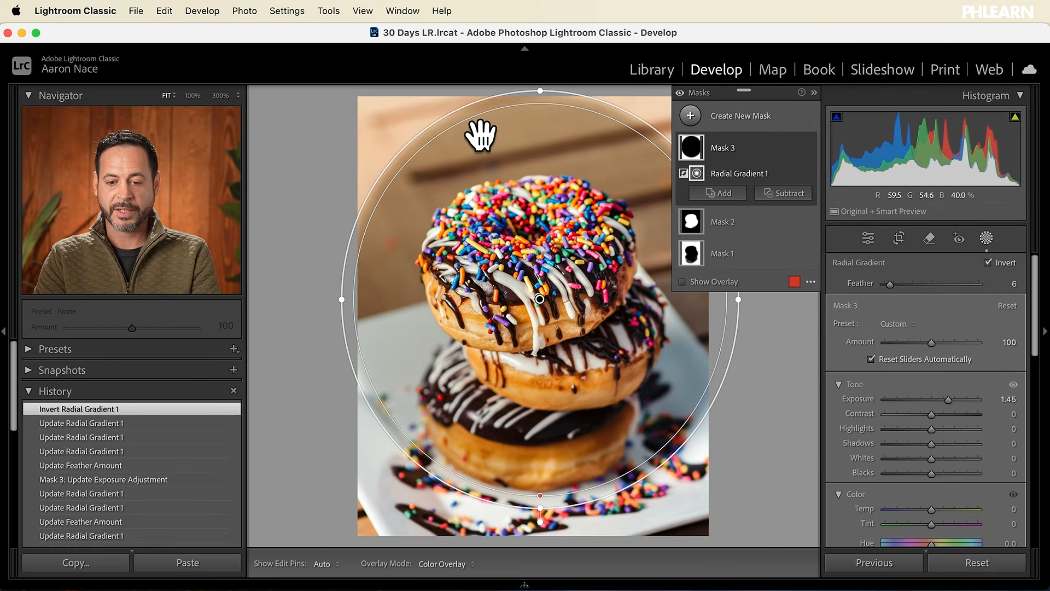
Create a radial gradient over the food
Roughly the area you want to stay bright.
-
Invert it
Either the three dots on the mask, or the invert icon beside the Feather slider. It now affects everything outside.
-
Lower the exposure
Not far. This should be felt rather than seen.
-
Dial in the Feather last
With the exposure set, adjust the falloff while watching. This is the step that decides whether it looks like light or like a filter.
Leaving Feather at its default is the most common shortcut, and it is worth breaking the habit. Too little and you get a visible circle; too much and the effect disappears. Somewhere in between it looks like a spotlight on the plate, which is exactly what a food photograph wants.
The gradient can be repositioned at any time, so move it around and watch where your eye goes.
The Recipe, Generalised
Every food photo, whatever the dish:
Background — darker and less saturated. Food — brighter, more saturated, highlights protected. Detail — texture and clarity, masked to the food. Frame — a feathered vignette to close it in.
None of these are large adjustments. Compare against the original and the total change is modest — the food simply looks like the thing you are meant to be looking at.
Where This Usually Goes Wrong
Raising exposure without protecting highlights. Glazes and sauces blow out first, and that shine is what makes food look good.
Over-texturing. Past a point bread looks like sandpaper. Zoom in while adjusting, then judge at fit.
Trusting the background selection blindly. Check the edges of the food and brush them back out.
A hard-edged vignette. The Feather slider exists for this. Use it after setting the exposure, not before.
Expecting editing to rescue bad light. Food photography is won at the table. Lightroom sharpens a good photograph; it does not create one.
Keep Exploring Lightroom
More free tutorials that apply directly to product and food work:
- Master Masking in Lightroom Classic
Cleaner selections around awkward edges. - How to Correct Exposure in Lightroom
Getting brightness right before any local work. - How to Adjust Colors in Lightroom
Saturation that stays believable. - Free Lightroom Presets and Photoshop Actions
Looks to adapt for a consistent menu or feed.
Take It From Here
Food is the most formulaic genre to edit, which makes it the fastest to get good at. Learn the four moves once and every dish afterwards is a couple of minutes — and the same treatment saved as a preset will carry an entire menu shoot.
Tomorrow we remove colour entirely: black and white editing in Lightroom Classic.







Enjoying This Free Tutorial? Go Further with PRO.
Unlock Full Sample Files, PSDs, and Hundreds of Masterclasses!

Download full project assets, original PSDs, and RAW images for every lesson
Unlimited access to our complete library of PRO Photoshop & Lightroom courses
Instant 4K Ultra HD streaming on all devices, anytime, anywhere
Full access to our entire library of Photoshop Actions, Presets, and LUTs
Flexible monthly and annual membership plans
Cancel anytime with zero hassle or commitments