

Watch the Full Series
description
For twenty years the rule was to keep ISO as low as possible, because noise was permanent. AI Denoise changes that arithmetic entirely.
On Day 22 of 30 Days of Lightroom Classic we clean up a high ISO RAW file, cover why the tool is RAW-only, and find the Amount setting that removes noise without turning skin to plastic.
This is Day 22 of our 30 Days of Lightroom Classic series. Follow along with all 30 episodes as we explore the magic of Lightroom together!
Continue Watching 30 Days of Lightroom Classic
JOIN 30 DAYS OF LIGHTROOM (FOR FREE!)
Ready to jump in? Sign up and we’ll email you a printable calendar and daily class schedule so you can get started right away!
Image Source


AFTER
BEFORE
Effortless Noise Reduction
For twenty years the rule was to keep ISO as low as you could get away with. High ISO meant noise, and noise was permanent.
AI Denoise changes the arithmetic. Noise is now largely a solved problem in post, which means the ISO decision can be made on the merits — freeze the action, get the shot in low light — rather than out of fear. Day 22 covers the tool, and the one setting that decides whether the result looks clean or plastic.
Why You Would Raise ISO at All
Exposure is a balance of three settings, and ISO is the one that buys you the other two.
The sample here was shot at 1/8000 second, f/2.8, ISO 3200. The very fast shutter eliminates motion blur entirely, the wide aperture throws the background out of focus — and neither is possible in that light without a sensitive sensor. The cost was noise, visible in the shadows at 100%.
That is the trade worth understanding. Noise is fixable; motion blur is not. If the choice is a slow shutter and a blurred subject or a high ISO and a grainy one, take the grain.
Denoise Only Works on RAW Files
This matters enough to be the first thing to check. Denoise operates on the unprocessed sensor data, so it needs a RAW file. Shoot JPEG and the option is unavailable — your camera already processed the image, noise reduction included, and there is nothing left to work with.
If your camera is set to JPEG, switch it to RAW or RAW + JPEG. This is one more entry on the list of things RAW buys you, alongside white balance and tonal headroom.
Running Denoise
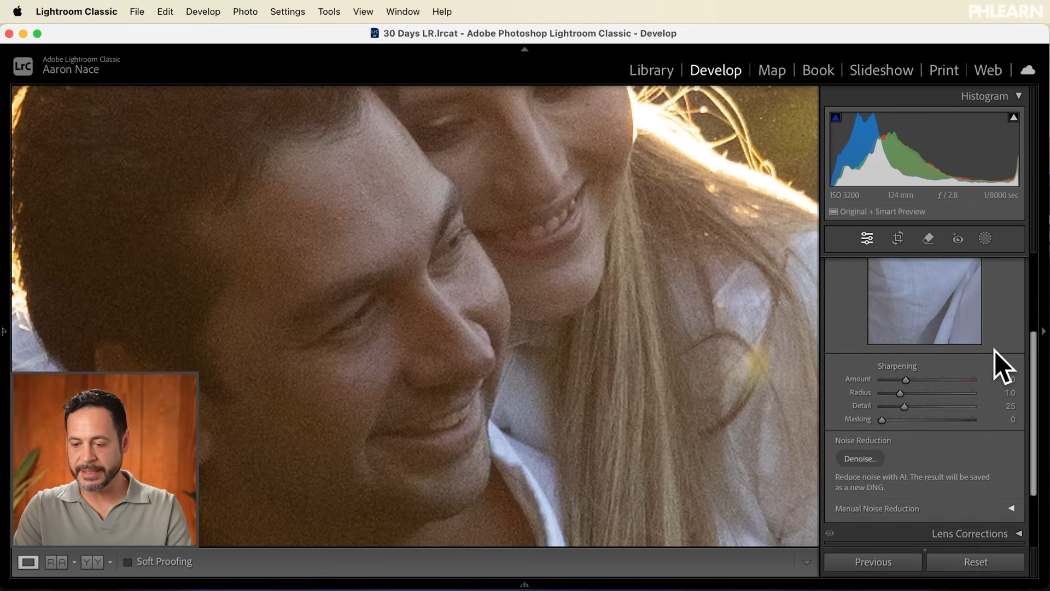
In the Develop module, open the Detail panel and find Noise Reduction. The Denoise button at the top is the AI version — distinct from the manual Luminance and Color sliders beneath it, which are the older approach and much blunter.
Clicking it opens the Enhance dialog with a live preview.
Setting the Amount
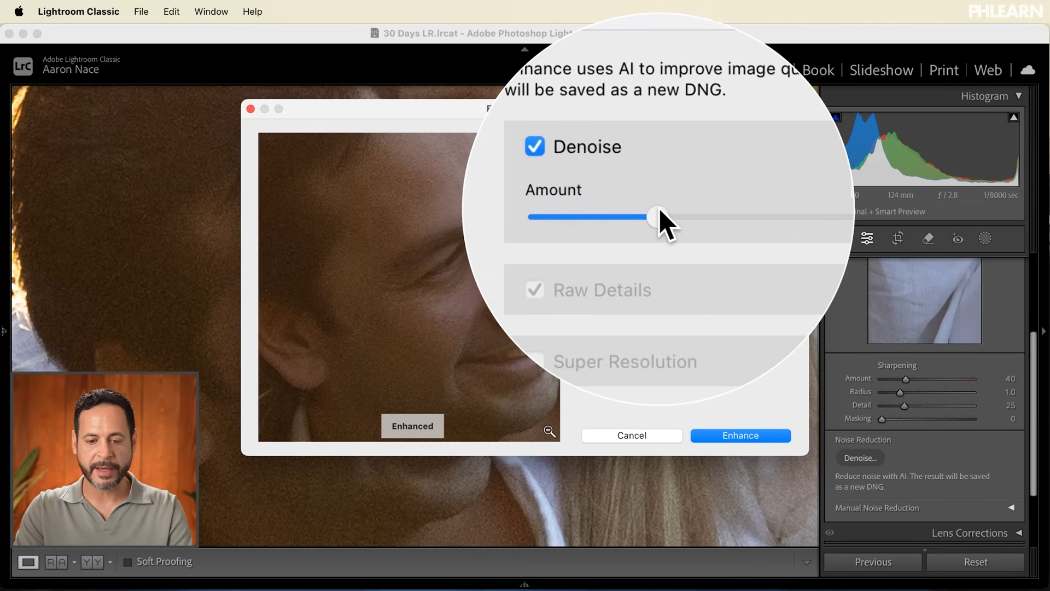
Two things to do before touching the slider.
Move the preview to a shadow area. Noise lives in the shadows; judging it on a bright part of the frame will mislead you. Drag inside the preview to reposition, and click to toggle the enhanced view on and off.
Start the Amount at zero and work up. Watch the preview as you go and stop where noise is gone but detail is not.
50 to 60 is usually the sweet spot. Pushing to 100 is tempting and it is where the result starts looking artificial — skin turns waxy, fine texture smears, and the picture reads as processed rather than clean. Denoise is not free; you are trading detail for smoothness, and beyond a point the trade is bad.
Leave Create Stack ticked so the new file groups with the original, then click Enhance. Processing takes a moment — it is doing real work.
You Get a New DNG
Denoise does not modify your file. It writes a new DNG beside the original, exactly as an HDR merge does.
That new file is still RAW, so everything you would normally do — exposure, white balance, masking — works on it as usual. Your original stays untouched, which means you can run Denoise again at a different Amount if you change your mind. To do that, go back to the original file rather than the enhanced one.
Both files live in the same folder on disk, so the DNG is real storage. Worth denoising the frames you are keeping rather than everything.
Comparing the Result
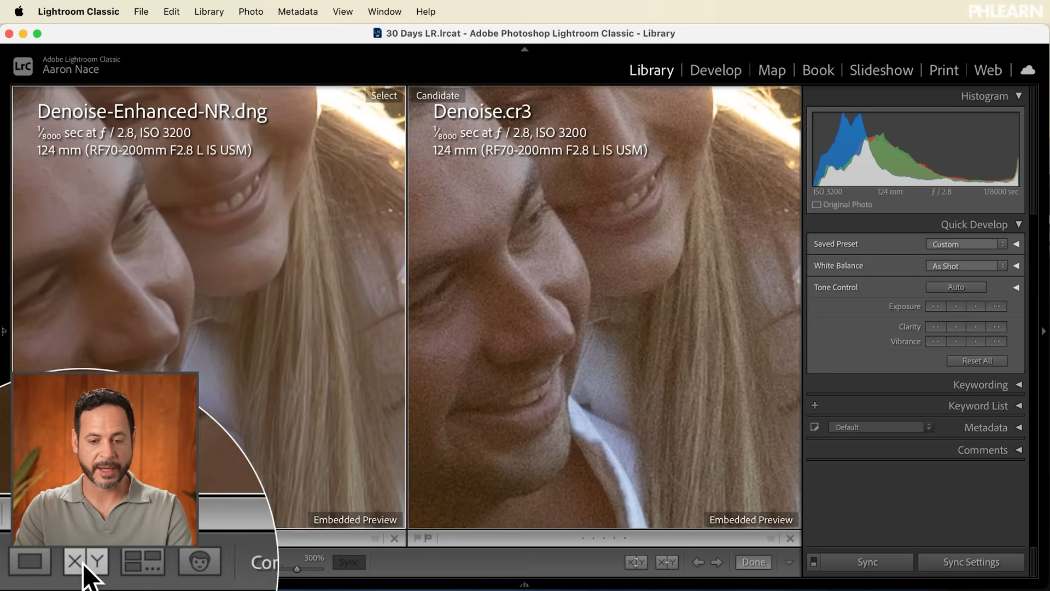
In Library, the stack badge shows two photos where you expect one. Expand it, Ctrl or Cmd-click both, and use the side-by-side view to compare properly at 100%.
The Detail panel on the enhanced file will confirm that Denoise has been applied.
Where This Usually Goes Wrong
Expecting it on a JPEG. RAW only. Check your camera setting before the shoot, not after.
Pushing Amount to 100. The most common mistake. Smooth is not the same as clean.
Judging on a bright area. Move the preview into shadow, where the noise actually is.
Denoising everything. Each run creates a full-size DNG. Cull first, denoise the keepers.
Re-running Denoise on an enhanced file. Go back to the original. Stacking the process on itself destroys detail.
Keep Exploring Lightroom
More free tutorials on image quality:
- How to Correct Exposure in Lightroom
Underexposing then lifting is what creates most shadow noise. - Dust Removal in Lightroom and Photoshop
The other cleanup pass worth doing on a keeper. - Adobe Camera Raw Explained
The same Denoise engine, reached from Photoshop. - How to Take Better Drone Photos
Small sensors at altitude, where noise is a constant.
Take It From Here
Denoise is one of the few features that genuinely changes how you shoot rather than how you edit. Stop protecting ISO. Choose the shutter speed and aperture the photograph actually needs, let the ISO land where it lands, and clean it up in a couple of clicks afterwards.
Tomorrow we send files the other way: integrating Lightroom Classic and Photoshop.







Enjoying This Free Tutorial? Go Further with PRO.
Unlock Full Sample Files, PSDs, and Hundreds of Masterclasses!

Download full project assets, original PSDs, and RAW images for every lesson
Unlimited access to our complete library of PRO Photoshop & Lightroom courses
Instant 4K Ultra HD streaming on all devices, anytime, anywhere
Full access to our entire library of Photoshop Actions, Presets, and LUTs
Flexible monthly and annual membership plans
Cancel anytime with zero hassle or commitments