
Download the Sample Image
description
We all get them; small pimples and blemishes that are here today and gone tomorrow. And while temporary, they always seem to find their way into our photos. Learn how to quickly remove blemishes in Photoshop and help your subjects look their best.
This is Day 23 of our 30 Days of Photoshop series. Follow along with all 30 episodes as we explore the magic of Photoshop together!
Watch Next
30 Days of Photoshop

Sign up to receive email updates to keep you going, sample images to follow along, and a printable calendar to keep track of your progress!
Share
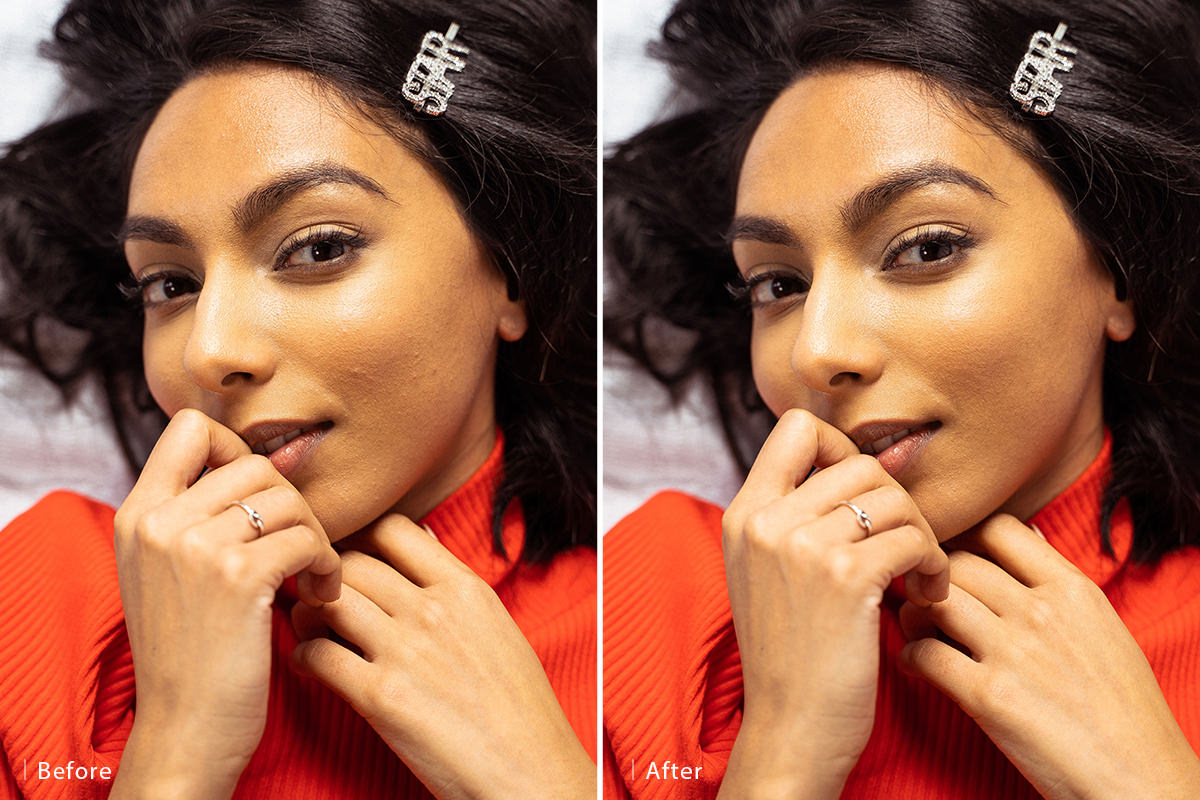
Quickly Remove Blemishes & Distractions
Spotlight on Spot Healing
The Spot Healing Brush Tool is the default healing tool in Photoshop and should be your go-to whenever you need to quickly clean up a photo. What makes it ideal is that it’s a ‘smart’ tool, meaning that Photoshop does all the heavy-lifting for you. When you paint over a blemish, Photoshop will intelligently identify and replace it, pulling information from the surrounding areas in the photograph.
It’s an extremely helpful tool, but we can make it even better by changing a couple important settings.
Content-Aware
After selecting the Spot Healing Brush Tool, you’ll notice a number of options in the toolbar at the top of the screen. The first, and most important option, is selecting the Type. For removing distractions, make sure Content-Aware is selected.
Content-Aware will instruct Photoshop to analyze the surrounding areas around wherever you paint, and use that information to fill in the blanks once something is removed.
Non-destructive Workflow
For working professionals, a nondestructive workflow is key. To make sure you can always get back to your original photo, be sure to create a new Layer for any Spot Healing Brush Edits. But before you do, you’ll need to check the Sample All Layers button. This will tell Photoshop to pull information from all of the Layers in your project.
Most importantly, the Sample All Layers option allows you to work with the Spot Healing Brush Tool on a new, blank layer, and then make edits without risk of damage to the original photo.


