
Plan it with Photoshop
Are you looking to get some photos up in your home or office, but don’t know where to start? Learn how to take the first step and place art on your walls in Photoshop, so that you can visualize the final product!
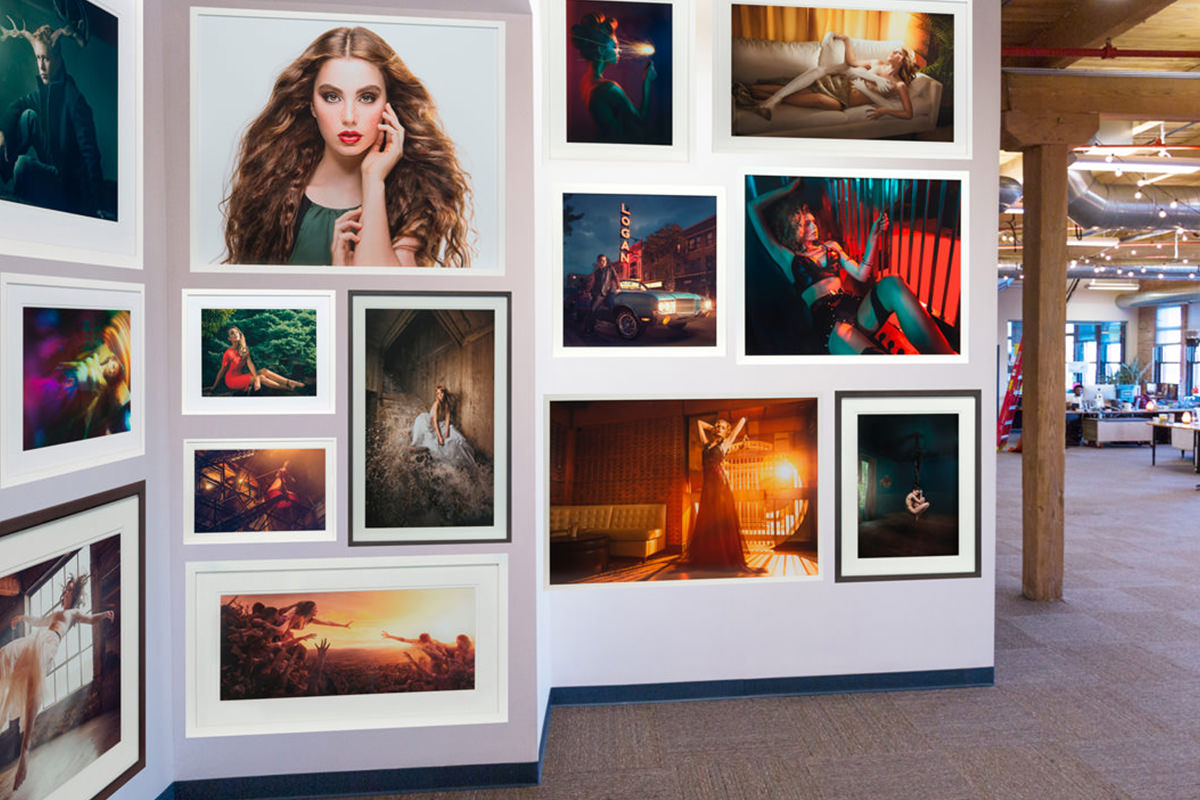
Start with a photo of the space you plan to decorate, as well as digital files of the photos you’re going to print.
Once your black wall image is opened in Photoshop, go to File – Scripts – Load Files into Stack. This allows you to select all of your digital photos and load them directly into the same document, as opposed to opening each image individually.
After those photos have loaded, you can begin placing them and playing around with Layouts that you like. Uncheck “Auto-Select” at the top left toolbar, and then hold down Ctrl/Cmd to click and drag individual layers.
Possibly the most important part of placing images on walls is getting them into the proper perspective! When you reach a good stopping point and like your Layout, select all of the layers and hold Ctrl/Cmd + T. Then, simply hold Ctrl/Cmd and drag the corners of the Transform box. Match the Angles of the Transform box to the Angles of the wall edges, and your photos will be perfectly in perspective.