
Download Assets
This tutorial includes 1 PDF guide. Downloads are free with a PHLEARN account.
- Download the sample files from every free tutorial on PHLEARN
- New free tutorials published every week
- One free account: sign up once, then download anything
Free PDF Guide · 2 Pages
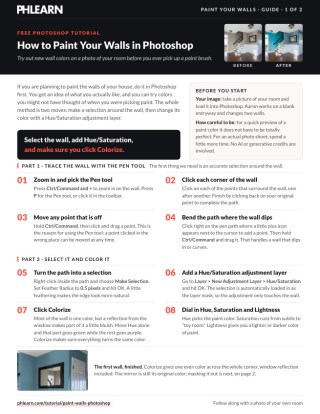
This Tutorial as a Step-by-Step PDF
This guide walks through tracing a wall with the Pen tool, Make Selection with a 0.5 pixel feather, a Hue/Saturation adjustment layer with Colorize on, Edit > Fill with Black on the mask to keep the mirror, and the Magic Wand with Contiguous off for the banister. Use it to preview paint colors on a photo of your room.
description
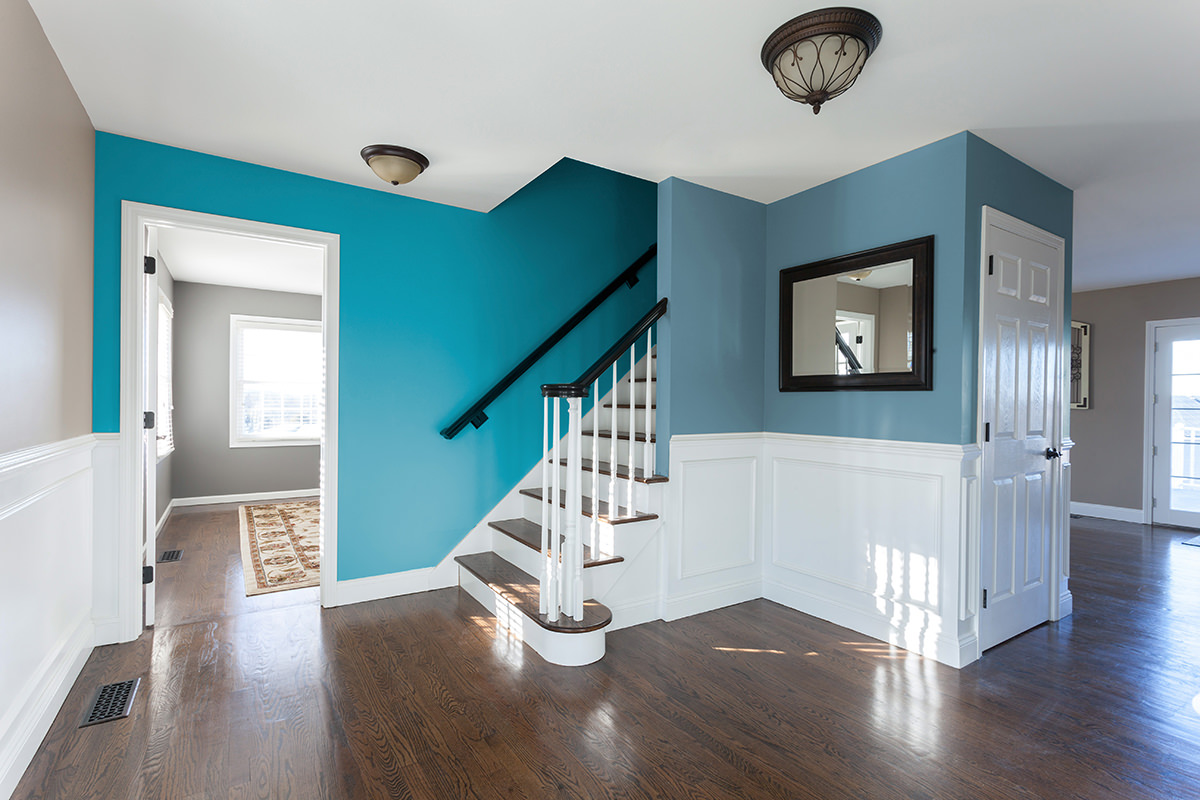
Picking a paint color is much easier when you can see it on your own walls first. Aaron traces a wall with the Pen tool, converts the path to a lightly feathered selection, and colors it with a Hue/Saturation adjustment layer set to Colorize so the whole wall shifts to one even tone. A mirror gets masked out in black, and the Magic Wand with Contiguous unchecked handles fiddly details like a banister.
Enjoying This Free Tutorial?
We publish a new free tutorial every week, each one with sample images and PSDs you can download and follow along with. Sign up and they land straight in your inbox, along with early word on sales, events and subscriber-only offers.
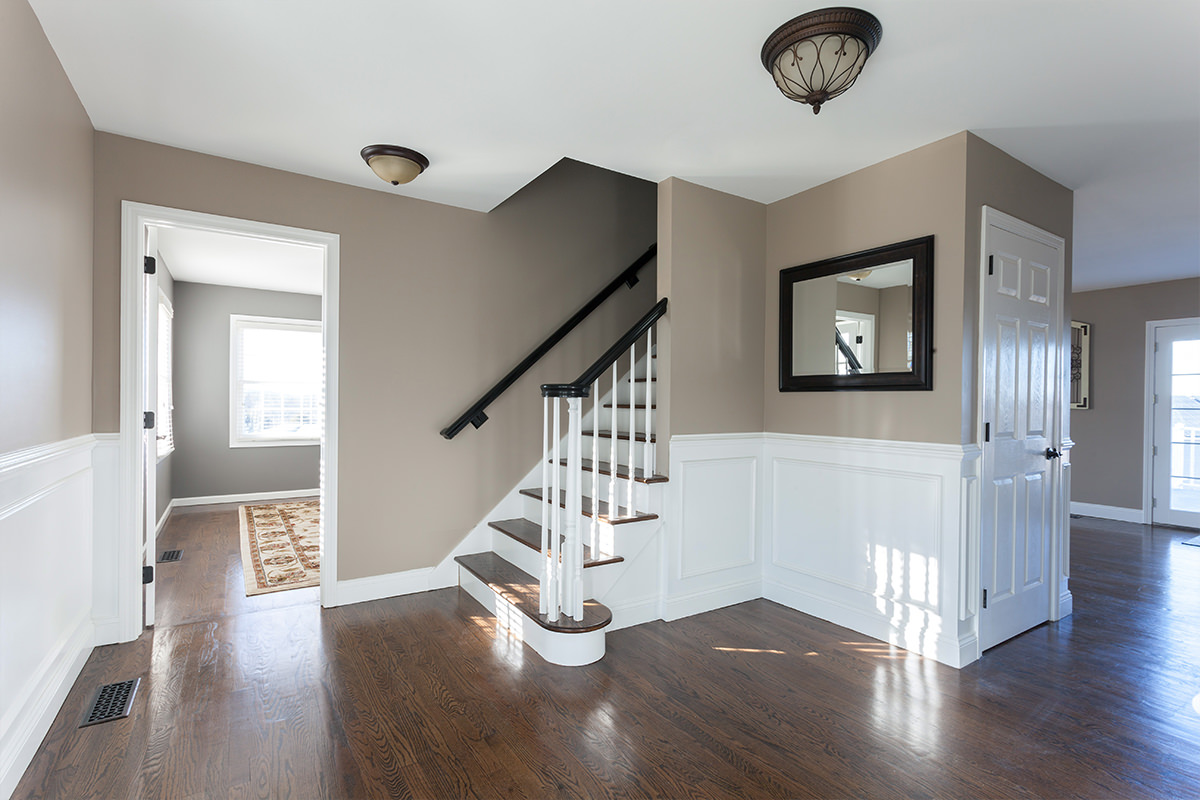
Trying out new wall colors in Photoshop before ever picking up a paint brush makes it easy to preview options that might not have come to mind while standing in the paint aisle. This tutorial traces walls accurately with the Pen tool, colors them using a Hue/Saturation adjustment layer, and shows a faster Magic Wand method for excluding smaller details like banisters from the selection.
Tracing a Wall’s Outline With the Pen Tool
The Pen tool builds an editable path around a wall’s corners, and because each point can be repositioned afterward, the selection doesn’t need to be perfect on the first pass.
-
Zoom In on the Wall
Press Cmd/Ctrl+Plus to zoom in on the wall that needs a new color.
-
Click Around the Wall’s Corners
Press P for the Pen tool and click each corner of the wall in sequence to build a path around its outline.
-
Adjust Points as Needed
Hold Cmd/Ctrl and click and drag any point on the path to move it if the selection needs refining.
-
Curve the Path for an Uneven Wall
Click directly on the path where a plus icon appears, then hold Cmd/Ctrl and drag to add a curve for a wall that isn’t perfectly straight.
Why Perfection Isn’t Necessary for a Preview Selection
A pen path meant purely to preview paint colors before an actual purchase doesn’t need the same precision as one built for a finished photo shoot. Spending only a few minutes clicking around the wall’s general outline is enough for this kind of quick visualization, which does not have to be totally perfect. For an actual photo shoot, spend a little more time on the path.
Converting the Path to a Feathered Selection
Right-clicking a finished pen path and choosing Make Selection turns it into an active selection, with a small amount of feathering softening the resulting edge.
-
Right-Click the Path
Right-click anywhere inside the finished pen path.
-
Choose Make Selection
Select Make Selection from the context menu to convert the path into an active selection.
-
Set a Small Feather Radius
Enter a small feather radius, such as 0.5 pixels, to soften the selection’s edge slightly before confirming.
Coloring the Wall With a Colorized Hue/Saturation Layer
A Hue/Saturation adjustment layer with the Colorize option enabled tints the entire selected wall to one consistent color, adjustable at any time.
-
Add a Hue/Saturation Adjustment Layer
With the selection active, go to Layer > New Adjustment Layer > Hue/Saturation.
-
Enable Colorize
Click the Colorize checkbox so the entire masked area shifts to a single, consistent color.
-
Adjust Hue, Saturation, and Lightness
Drag the Hue, Saturation, and Lightness sliders to dial in the exact wall color, from bold to subtle, light to dark.
Why Colorize Matters for an Even Wall Color
Without Colorize checked, changing the hue on a wall with mixed lighting or reflections, such as a bluish tint near a window, can shift different parts of the wall toward completely different colors instead of one unified tone. Clicking Colorize first forces the entire masked selection to a single consistent hue, after which the Hue, Saturation, and Lightness sliders adjust that one color reliably.
Excluding an Object Like a Mirror From the Color Change
Filling part of a Hue/Saturation layer’s mask with black hides that adjustment in just that area, which is useful for excluding something like a mirror sitting on the wall.
-
Trace the Object With the Pen Tool
Use the Pen tool to click around the corners of the object to exclude, such as a mirror, and close the path.
-
Convert the Path to a Selection
Right-click and choose Make Selection with the same small feather radius used before.
-
Fill the Layer Mask With Black
Go to Edit > Fill, choose Black, and apply it to the layer mask over the selected area.
Why Black on a Layer Mask Hides an Area
A layer mask works by making parts of a layer visible or invisible based on brightness: holding Alt/Option and clicking the mask thumbnail reveals exactly which areas are shown in white and which are hidden in black. Filling a specific selection with black on the mask hides the Hue/Saturation adjustment there specifically, leaving that object showing its original, unaltered color.
Repeating the Process on a Second Wall
Tracing and coloring a second wall the same way makes it possible to compare and contrast two different paint colors within the same room.
-
Zoom and Pan While Tracing
Hold the spacebar to temporarily switch to the Hand tool while zoomed in, making it easier to pan around a large wall while tracing it.
-
Trace the Second Wall’s Corners
Click each corner of the second wall with the Pen tool, undoing any misplaced point with Cmd/Ctrl+Z.
-
Close the Path and Make a Selection
Click back on the starting point to close the path, then right-click and choose Make Selection. Leave the dark banister inside the path rather than tracing around it; the color barely affects it, and the Magic Wand takes it back out next.
-
Add a Second Colorized Hue/Saturation Layer
Go to Layer > New Adjustment Layer > Hue/Saturation, enable Colorize, and choose a new color for this wall.
Excluding Small Details Faster With the Magic Wand Tool
Rather than tracing every small detail like a banister with the Pen tool, the Magic Wand tool with Contiguous unchecked selects every similarly colored area across the whole image at once.
-
Select the Magic Wand Tool
Hide the new Hue/Saturation layer first, then choose the Magic Wand tool and raise the tolerance slightly so it captures a fuller range of similar tones.
-
Uncheck Contiguous
Uncheck Contiguous so the tool selects every matching color throughout the image, not just the connected area under the cursor.
-
Click and Shift-Click to Build the Selection
Click on the detail to exclude, such as a banister, and hold Shift to click additional matching areas until the full detail is selected.
-
Paint Black on the Mask
Make the Hue/Saturation layer visible again, click its mask, then switch to the Brush tool and paint black over the selected detail to keep its original color. For the other rail, you can skip the selection and simply paint over it by hand with the Brush if you feel confident.
Why This Approach Works
Using the Pen tool for the main wall outline gives precise, editable control over the selection’s shape, while switching to the Magic Wand for repetitive small details like banisters saves the time it would take to trace every one of them individually. Enabling Colorize on the Hue/Saturation layer is what keeps a wall’s color shifting evenly, even across areas affected by reflections or uneven lighting. Masking out objects like a mirror or banister with black, rather than trying to trace around them perfectly in the first selection, makes it simple to exclude anything that shouldn’t change color after the fact.
Final Thoughts
Testing wall colors in Photoshop before buying paint turns what could be a guessing game into something that can actually be seen and compared side by side in a real photo of the room. The same selection and Hue/Saturation approach works for any wall, any room, and any number of colors being considered at once. Press F to see the finished image in full screen.
Quick Reference: Keys, Menus and Settings
- Trace the wallCmd/Ctrl + + to zoom, P Pen Tool, click each corner; hold Space to pan
- Fix a pointHold Cmd/Ctrl and drag it; click the path and Cmd/Ctrl-drag to curve
- Path to selectionRight-click > Make Selection, Feather Radius 0.5 px
- Color the wallLayer > New Adjustment Layer > Hue/Saturation, check Colorize, then Hue, Saturation, Lightness
- Keep the mirrorPen path, Make Selection, Edit > Fill with Black on the mask
- BanistersMagic Wand, Tolerance up, Contiguous off, Shift-click to add; paint black on the mask
No AI, no generative credits.
Free Downloads
Take the Guide With You
Get the PDF guide to previewing new wall colors, from the Pen Tool path and 0.5-pixel feather to the colorized Hue/Saturation layer and masks. Free with a PHLEARN account.
Changing Wall Color in Photoshop: Common Questions
Can I preview paint colors on my walls in Photoshop?
Yes. Take a photo of the room, select a wall and color it with a Hue/Saturation adjustment layer. You can try as many colors as you like before you buy paint.
Why use the Pen Tool to select a wall?
Walls have straight corners, so you just click each one. Every point can be moved later by holding Cmd/Ctrl and dragging, so the path doesn’t have to be right the first time.
What if the wall isn’t perfectly straight?
Click on the path where the plus icon appears to add a point, then hold Cmd/Ctrl and drag it to curve the path along the wall.
How do I turn the path into a selection?
Right-click inside the path and choose Make Selection. A Feather Radius of 0.5 pixels softens the edge just enough to look natural.
Why is my wall turning different colors?
Parts of the wall have different color already, like the blue reflection from a window. Check Colorize in the Hue/Saturation layer and the whole wall takes one color.
How do I keep a mirror or picture on the wall from changing color?
Trace it with the Pen Tool, make a selection, and use Edit > Fill with Black on the Hue/Saturation layer’s mask. Black on the mask hides the color change there.
Is there a faster way to leave out banisters?
Use the Magic Wand with Contiguous unchecked and the Tolerance raised a little, and Shift-click to add more of the banister. Then paint black on the mask over the selection.
Can I change the color again later?
Yes. Click the Hue/Saturation layer’s thumbnail and move the Hue, Saturation and Lightness sliders. Each wall on its own layer can be a different color.
Is there a free download?
Yes, with a free PHLEARN account. You get 1 PDF guide with the selection and Hue/Saturation steps from the video.
Master Photoshop, Lightroom and Photography
Join PHLEARN PRO for $12.99 a month or $99.99 a year. Cancel anytime, with a 100% money-back guarantee.





