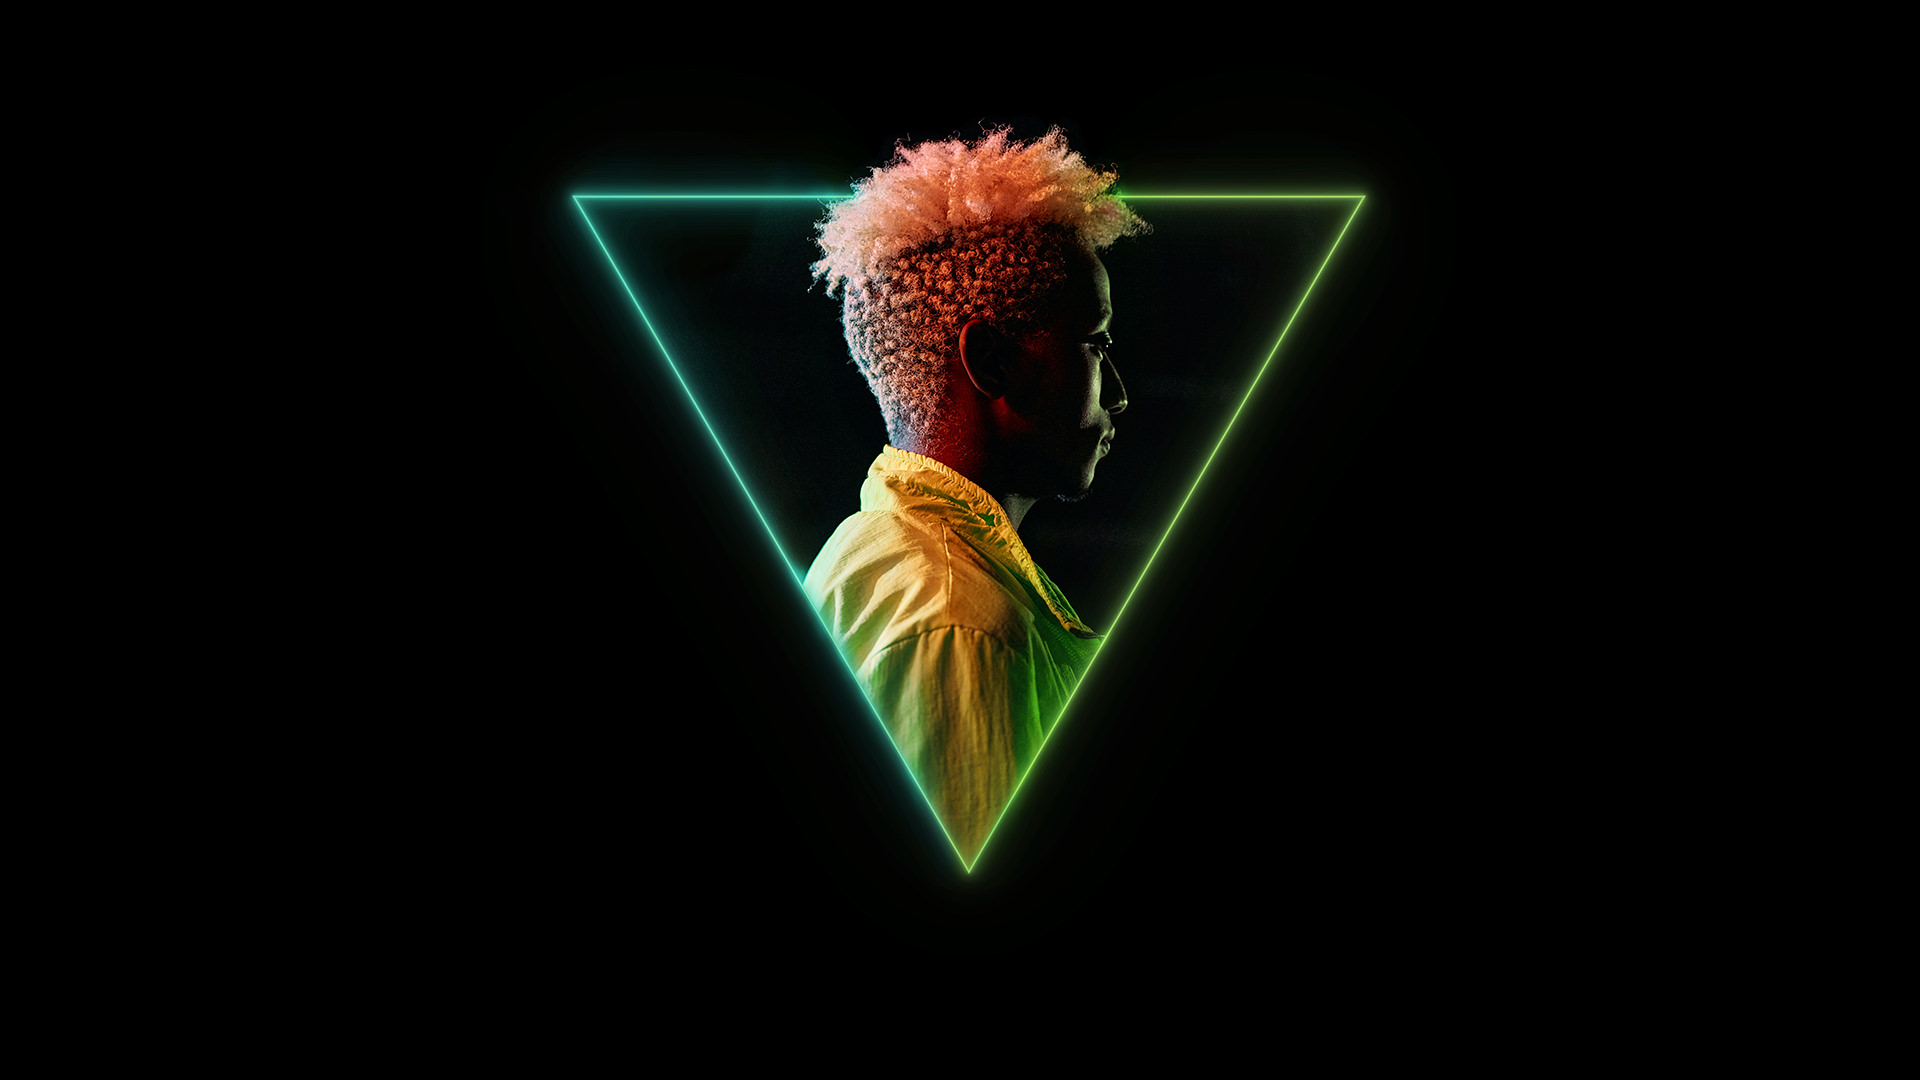

Download Assets
This tutorial includes 1 sample image, 1 sample PSD and 1 PDF guide. Downloads are free with a PHLEARN account.
- Download the sample images and PSDs from every free tutorial on PHLEARN
- New free tutorials published every week
- One free account — sign up once, then download anything
Free PDF Guide · 4 Pages
This Tutorial as a Step-by-Step PDF
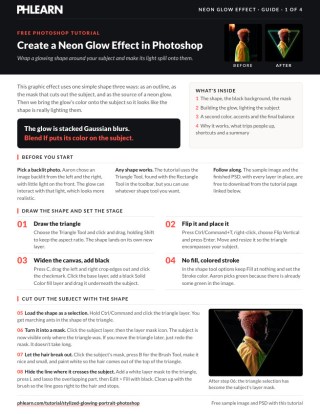
The 4-page guide walks through the Triangle Tool outline and the mask it makes, a glow from Smart Object copies with more Gaussian Blur each time and a Color Dodge core, then clipped Solid Color fills limited with Blend If, Colorize layers, Soft Light and Color Dodge paint, and the final give and take. Keep it next to your keyboard.
description
Learn how to create a neon glow effect in Photoshop by wrapping a colored geometric shape around a subject and letting its outline appear to light them from the side. This tutorial draws and positions the shape, adds a black background, uses the shape as a mask for the subject, builds the glow from stacked Gaussian blurs with a Color Dodge core, brings the color onto the skin’s highlights with Blend If, and layers in extra colors with Colorize adjustment layers.
Enjoying This Free Tutorial?
We publish a new free tutorial every week, each one with sample images and PSDs you can download and follow along with. Sign up and they land straight in your inbox, along with early word on sales, events and subscriber-only offers.
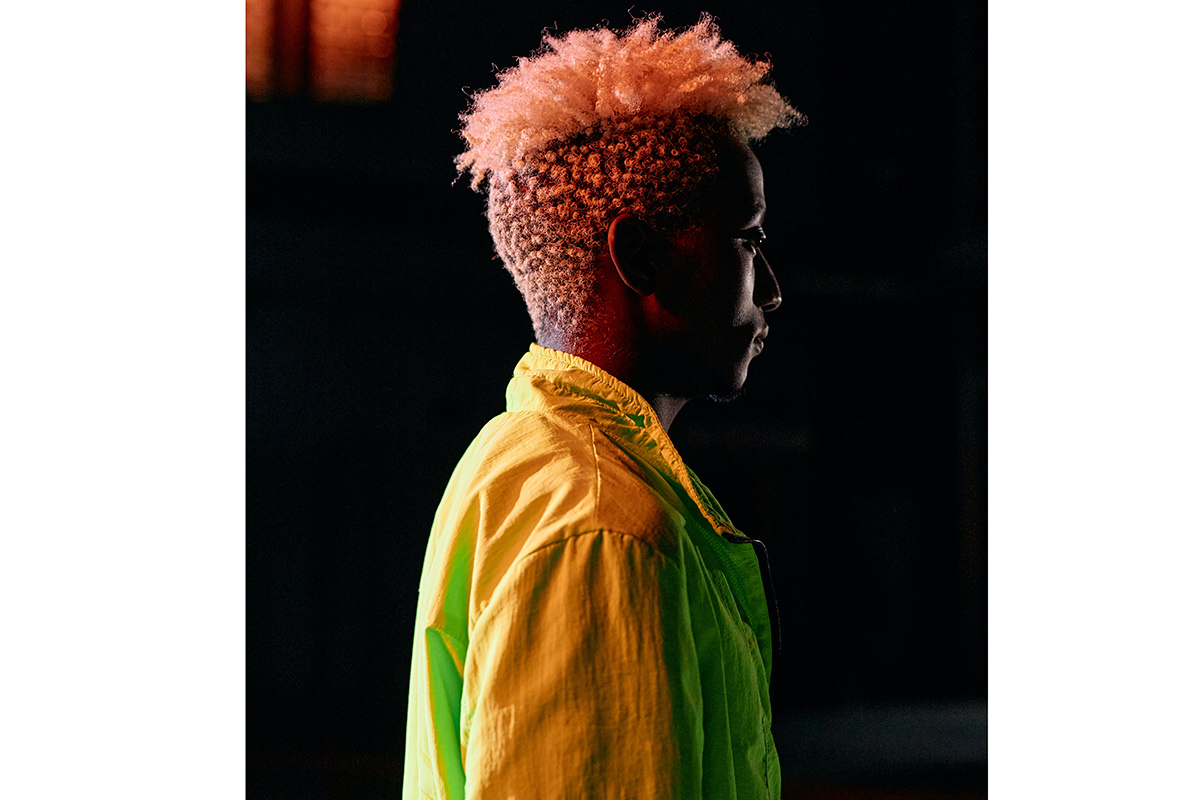
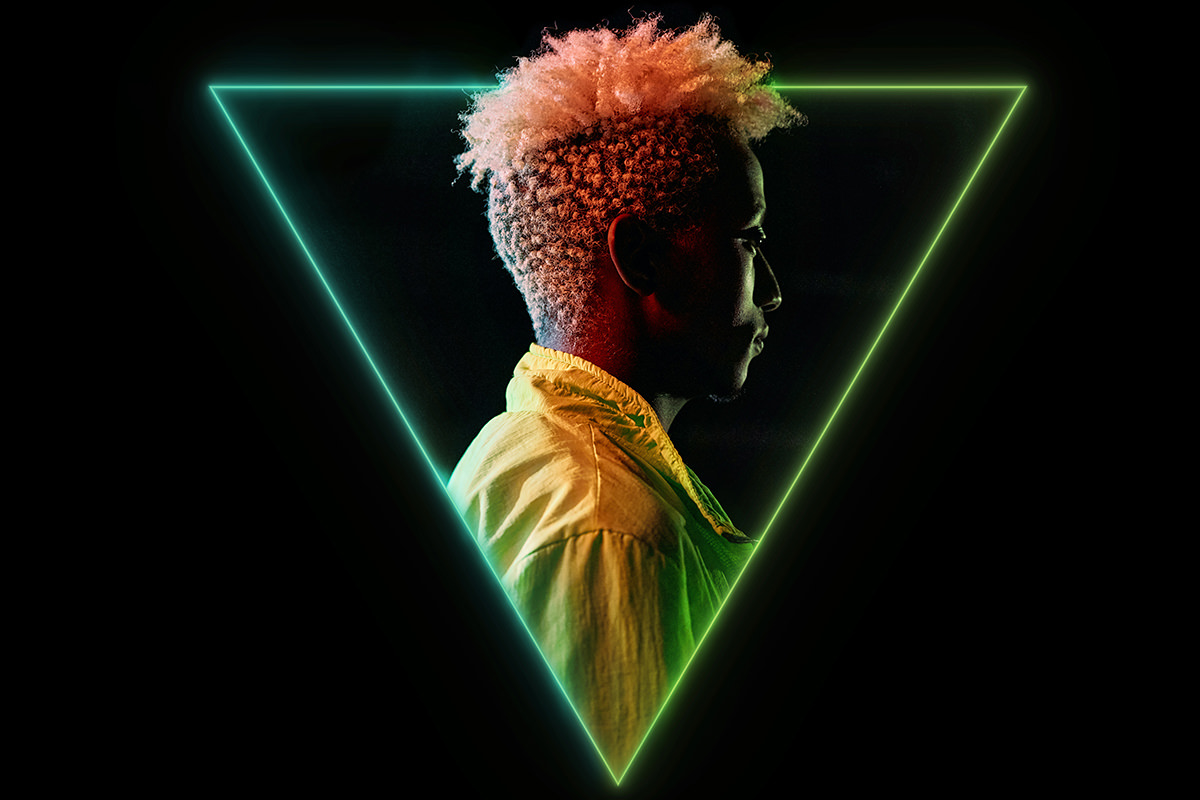
How to Create a Neon Glow Effect in Photoshop
This graphic glow effect wraps a colored geometric shape around a subject and lets its outline appear to light them from the side, using layered Gaussian blurs for the glow itself and Blend If to control exactly where that color reaches the subject’s skin. It’s a more hands-on alternative to a Layer Style glow, and the manual approach gives you far more control over how the light interacts with the photo.
Drawing and Positioning Your Shape
The shape you build the glow around doesn’t need to be a triangle — any simple geometric outline works, as long as it can wrap around your subject in an interesting way.
-
Draw Your Shape
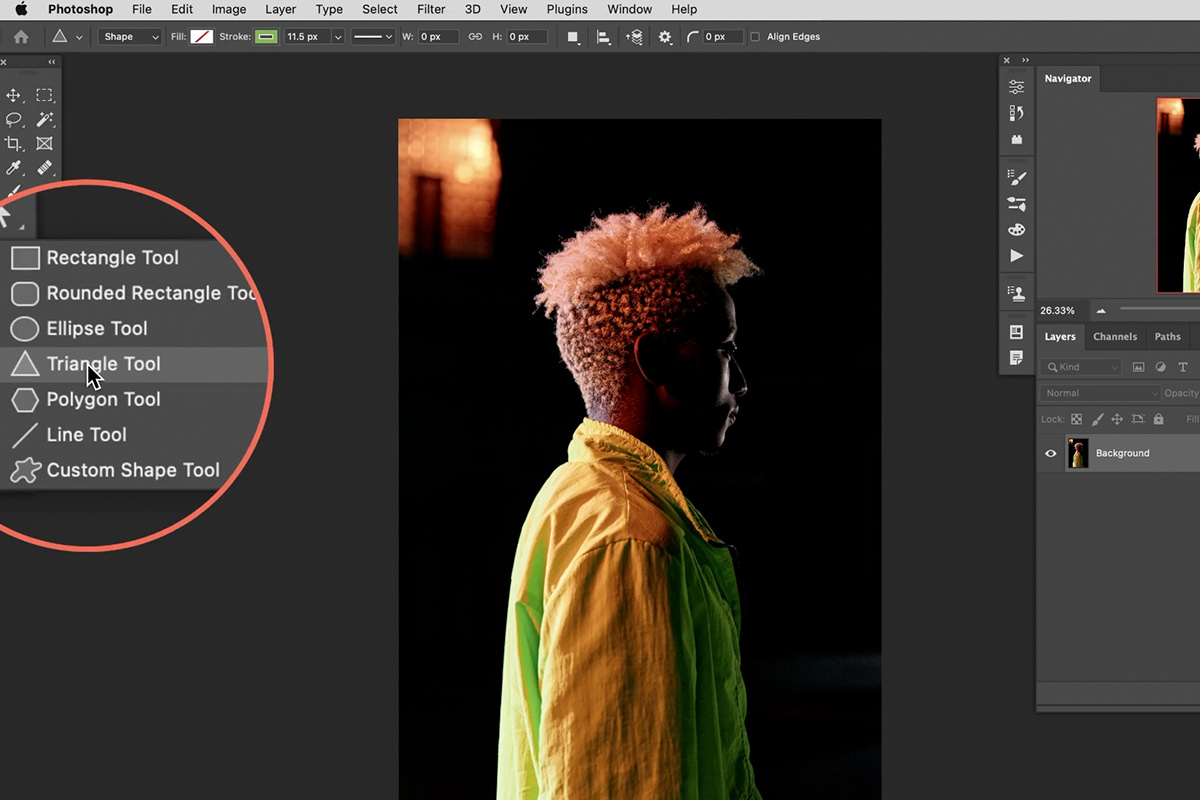
Select a shape tool — a triangle, in this example — and click-drag on the canvas while holding Shift to constrain its proportions.
-
Flip and Position the Shape
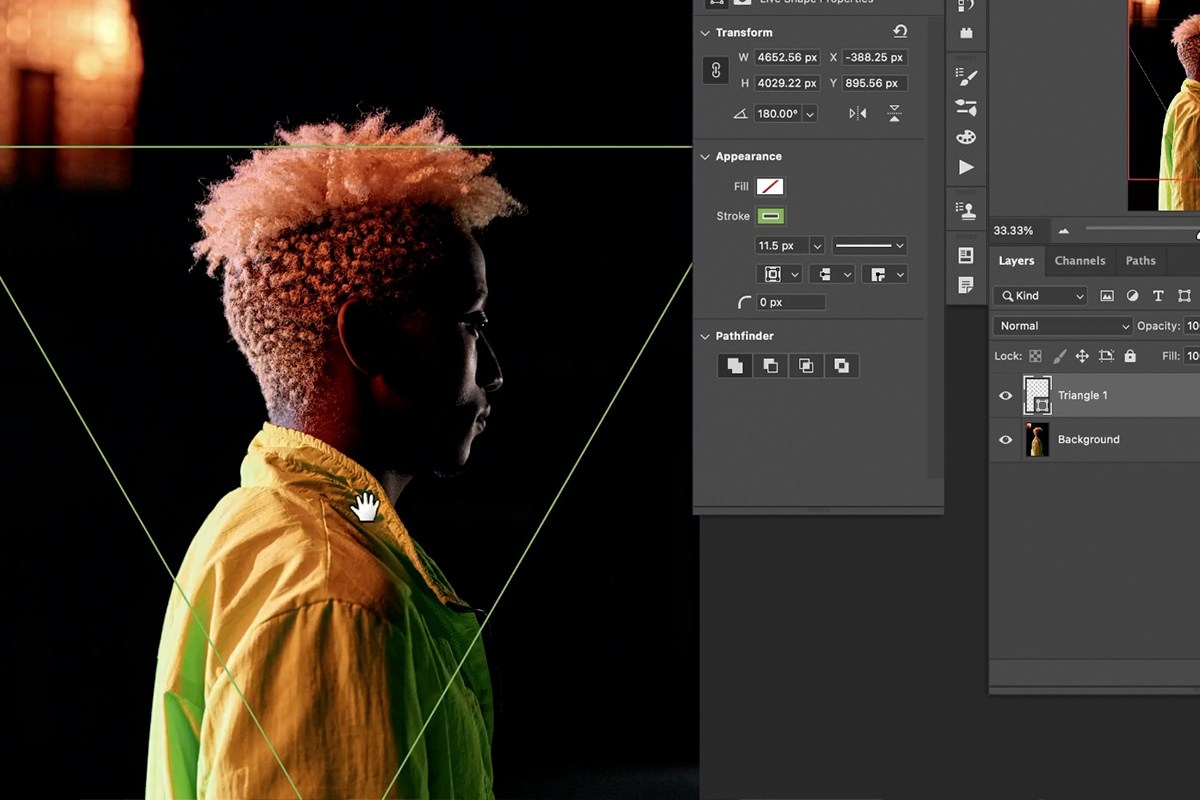
Press Ctrl + T on PC (Cmd + T on Mac), right-click, and choose Flip Vertical if needed, then use the Move tool to position the shape so it appears to encompass your subject.
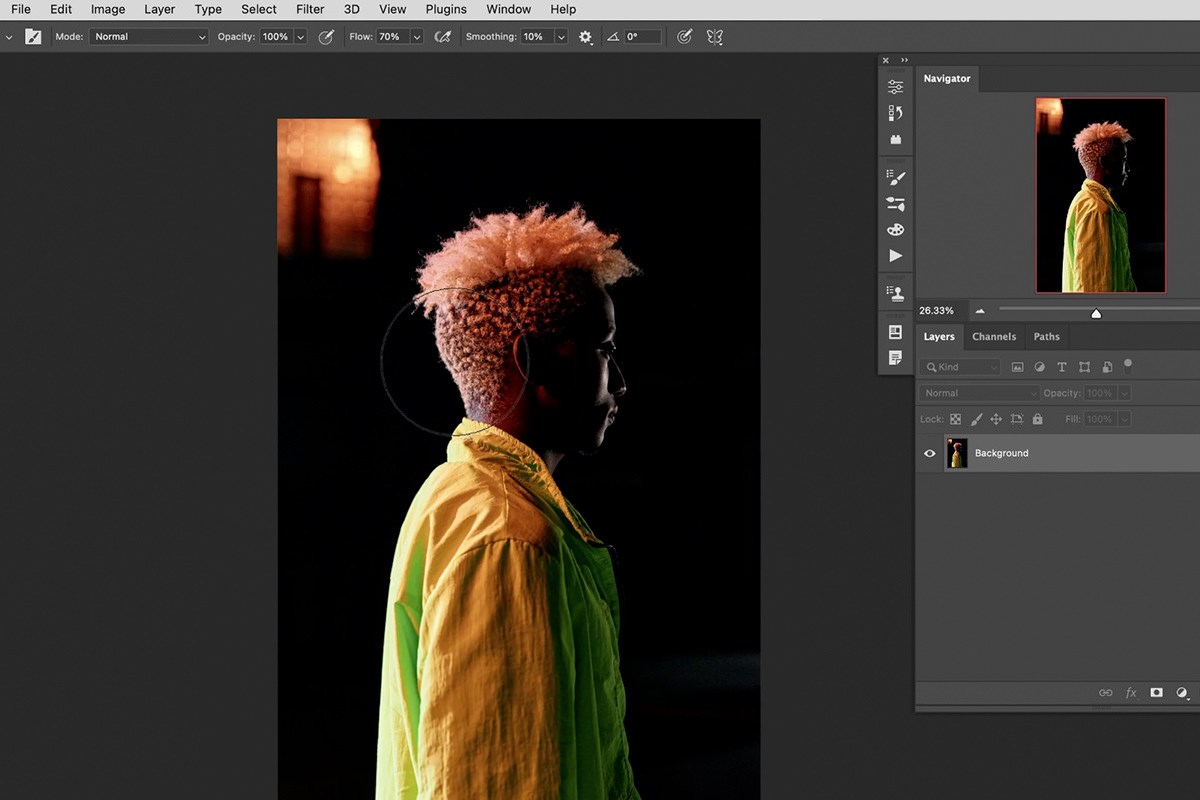
Expanding the Canvas and Adding a Black Background
A glow effect like this reads best against a solid dark background, and the canvas often needs a bit more room around the subject to fit the full shape.
-
Expand Your Canvas
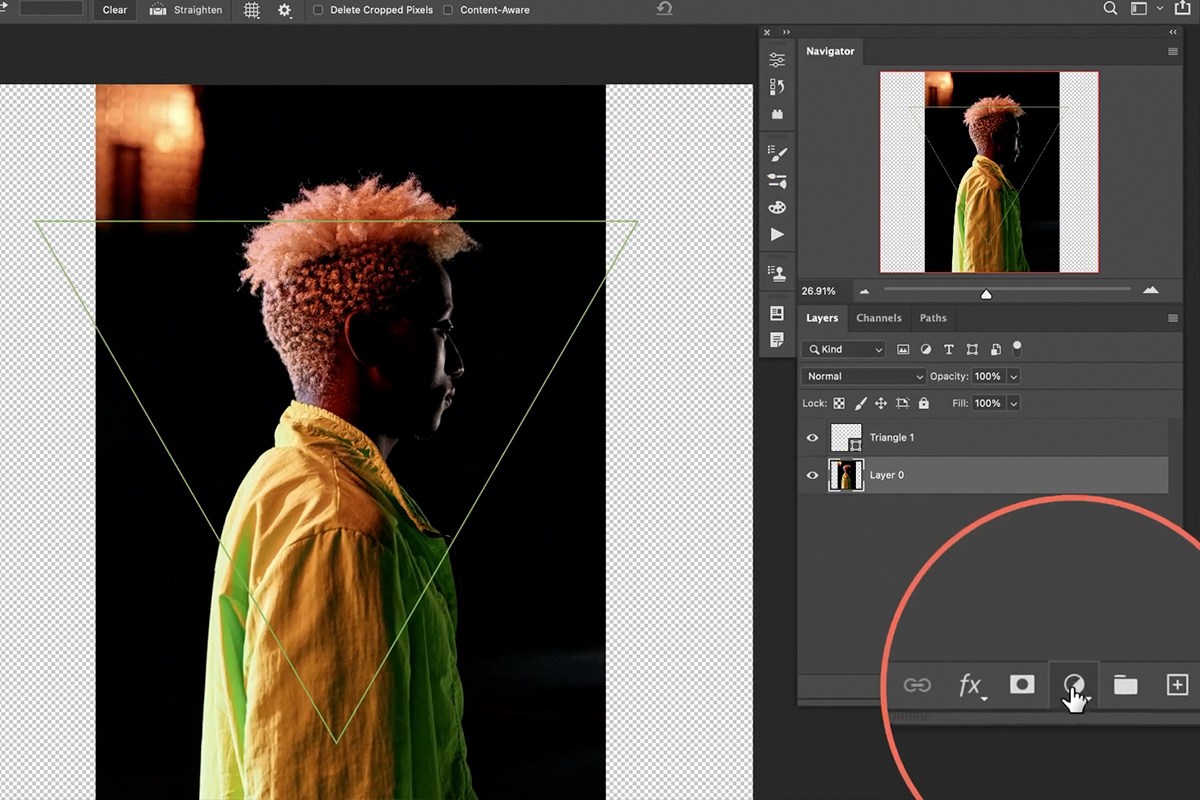
Press C for the Crop tool, drag the left and right edges of the crop boundary outward to give yourself more space, then confirm the crop.
-
Add a Black Background Fill
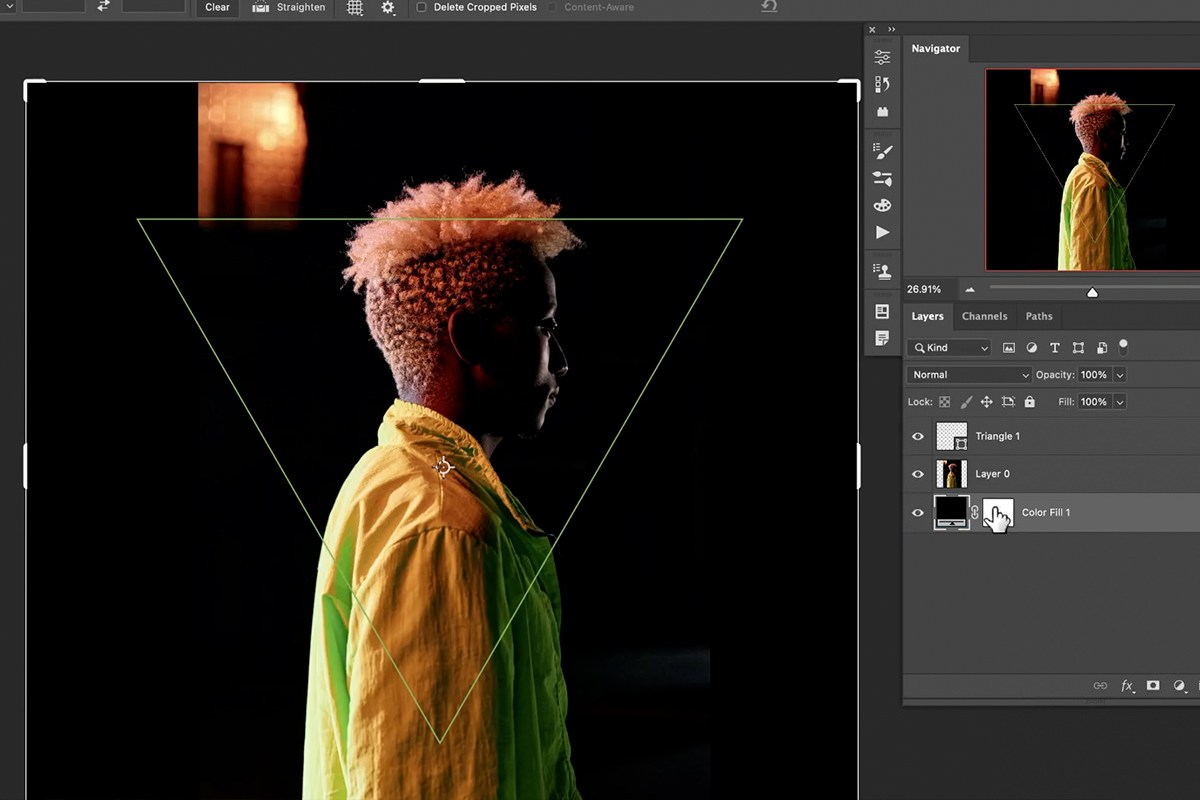
Select your base layer, add a Solid Color adjustment layer set to black, and move it beneath your subject layer.
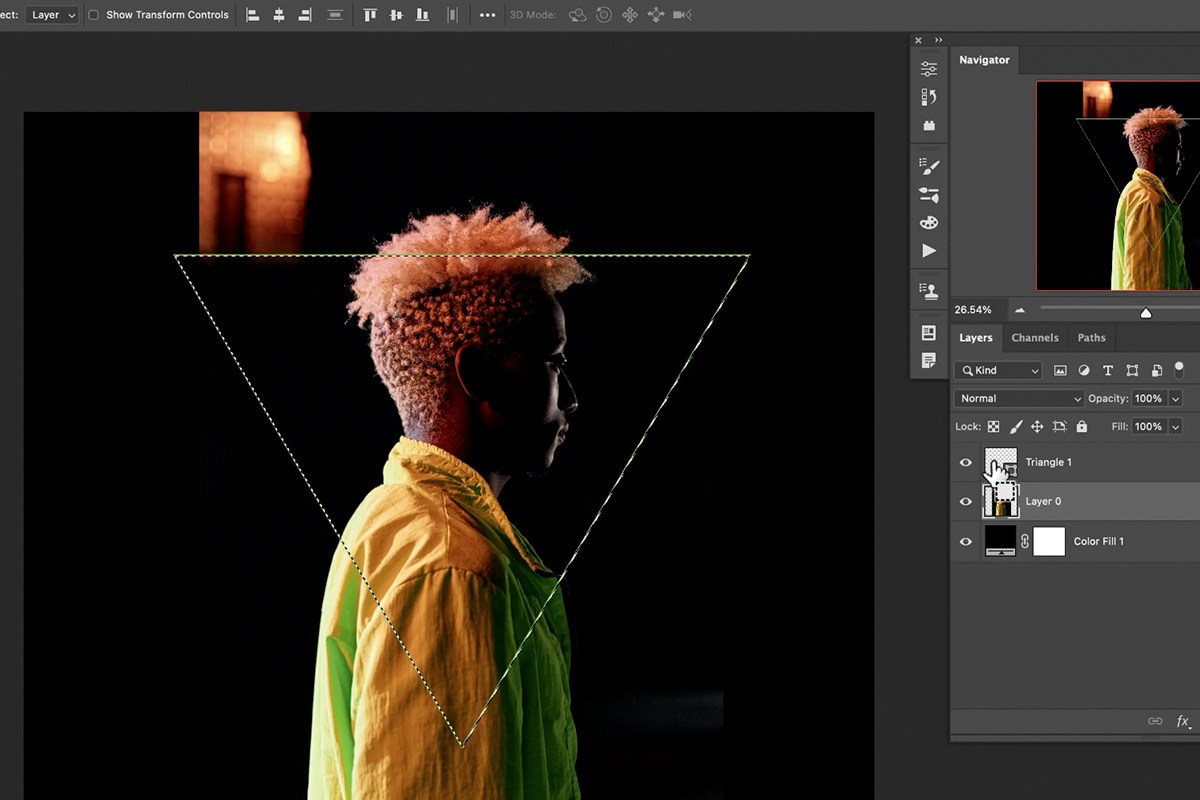
Styling the Shape’s Stroke and Fill Color
An outlined shape, rather than a solid one, is what creates the glowing frame effect around the subject.
-
Remove the Fill, Keep the Stroke
With your shape layer selected, open the shape tool’s options and set Fill to none, leaving only the Stroke visible.
-
Choose a Stroke Color
Double-click the shape layer’s thumbnail, or use the shape tool’s stroke color swatch, to choose a color that complements the existing colors already present in your photo.
Why a Backlit Photo Works Best for This Effect
A subject lit from the side or from behind, rather than straight-on, leaves natural shadow areas on the front of the face and body where a colored glow can convincingly appear to be adding its own light. Choosing a photo with existing side or rim lighting means the glow you build has real shadow detail to interact with, which is what makes the final effect look like actual light rather than a flat color overlay.

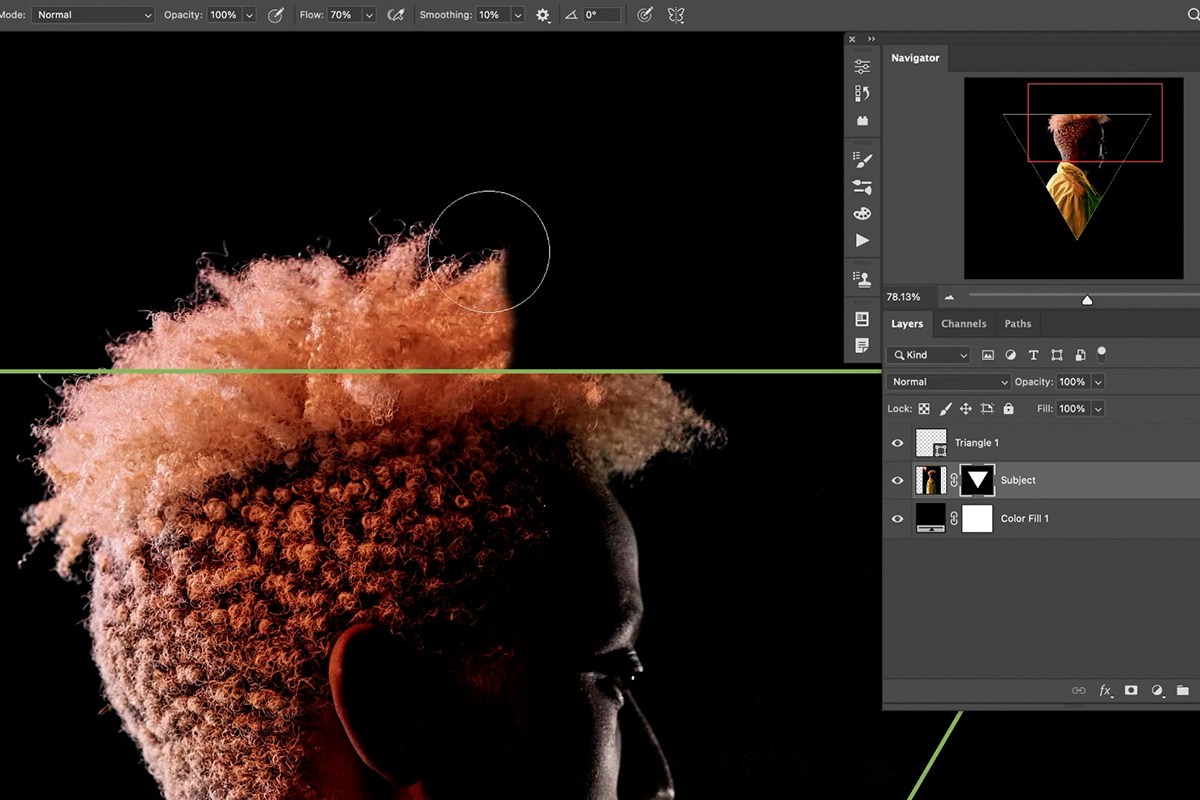
Masking Your Subject with the Shape
The shape you’ve drawn can double as the exact mask that cuts your subject out along its edge.
-
Turn the Shape into a Selection
Hold Ctrl on PC (Cmd on Mac) and click the shape layer’s thumbnail to load its outline as an active selection.
-
Apply the Selection as a Mask on Your Subject
Select your subject layer and click the Add Layer Mask icon, which converts the selection into a mask that shows your subject only within the shape’s boundary.

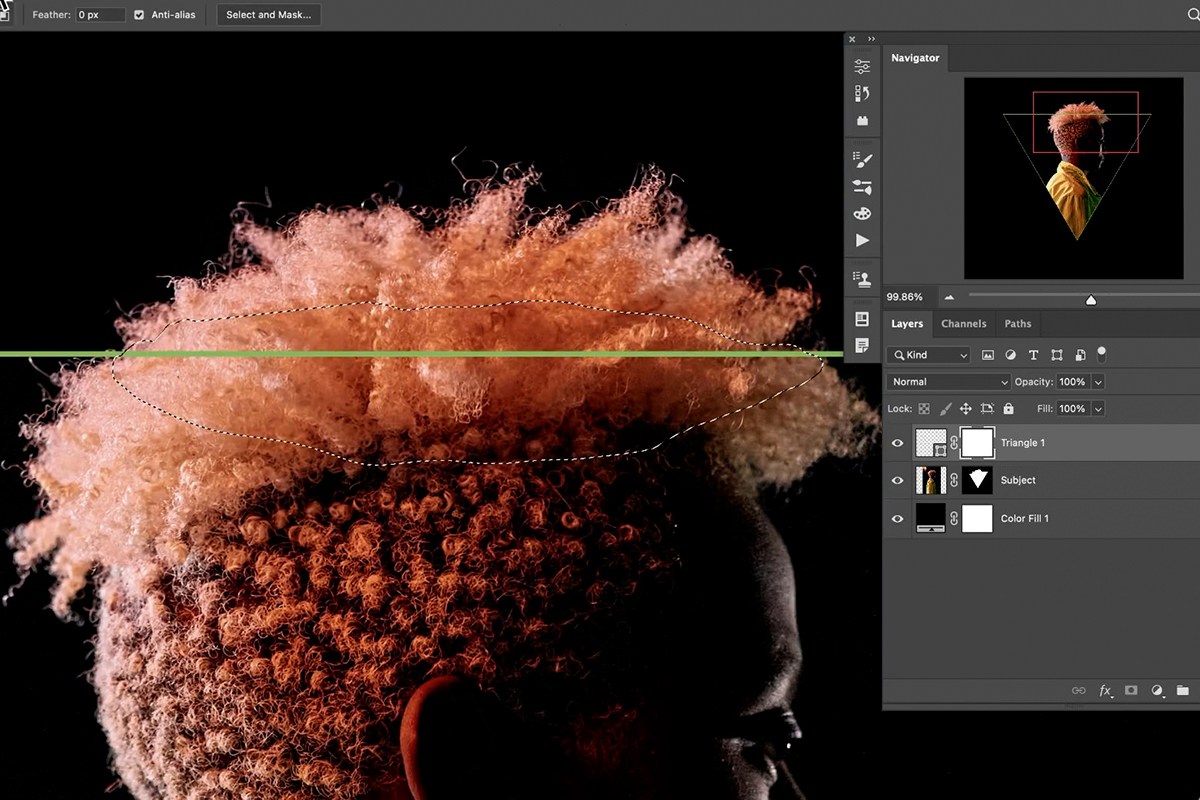
Allowing Detail to Break Through the Edge
A hard mask that cuts off cleanly at the shape’s edge can look too rigid, so letting a bit of natural detail — like hair — break through the boundary sells the effect as intentional rather than mechanical.
-
Paint White to Reveal Detail Past the Edge
Click your subject’s layer mask, select the Brush tool with a small brush, and paint white to let detail like hair extend past the shape’s boundary where it looks natural.
-
Mask the Shape Where It Overlaps the Subject
Add a mask to the shape layer itself, use the Lasso tool to select the area where the shape’s outline overlaps your subject, and fill that selection with black on the mask so the shape doesn’t visually cut across the subject’s face or body.
An Alternative for Busy Backgrounds
If your subject isn’t already on a clean background, click their layer mask and go to Select > Subject first to separate them from a more complicated background, then use that selection as the starting mask before combining it with the shape-based mask described above.


Building a Layered Glow with Blur and a Bright Core
The glow itself comes from stacking several blurred duplicates of the shape’s outline, plus one sharper, brighter copy at the center.
-
Convert the Shape to a Regular, then Smart, Layer
Duplicate your shape layer, merge the duplicate down onto a new empty layer with Ctrl + E on PC (Cmd + E on Mac) to convert it from a shape into a regular pixel layer, then right-click and choose Convert to Smart Object.
-
Apply a Gaussian Blur
Go to Filter > Blur > Gaussian Blur and start with just a little blur. This is the key to the glow: the more blur, the more effect.
-
Duplicate and Increase the Blur Multiple Times
Duplicate that blurred layer with Ctrl + J on PC (Cmd + J on Mac), then double-click its Gaussian Blur Smart Filter and increase the blur amount. Repeat this two or three more times, increasing the blur further each time, to build up several layers of glow at different softness levels.
-
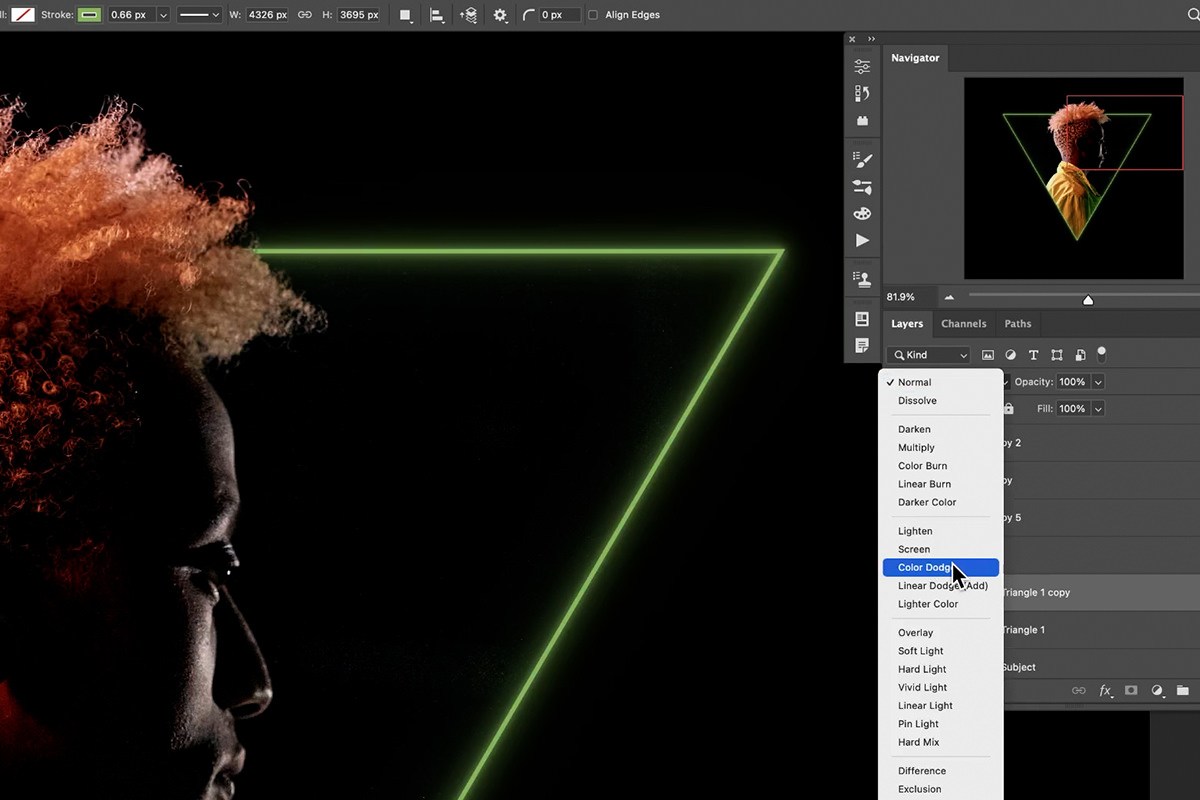
Add a Bright Core with Color Dodge
Duplicate the original sharp shape once more, reduce its stroke width slightly, and set its blending mode to Color Dodge to give the center of the glow a strong, bright core.
Shift-click all of the triangle layers and group them. Then press Ctrl/Cmd + J to duplicate the whole group and Ctrl/Cmd + E to merge that copy into a single layer, which simply adds to the glow.
Why Stack Multiple Blurred Layers Instead of One
A single blur applied once produces a flat, uniform softness, but real light falls off gradually — brightest and sharpest at its source, then progressively softer and dimmer further out. Layering several separately blurred copies, each blurred by a different amount, recreates that gradual falloff, and because each one is a Smart Filter, every layer’s blur amount stays fully editable if you want to adjust the balance later.
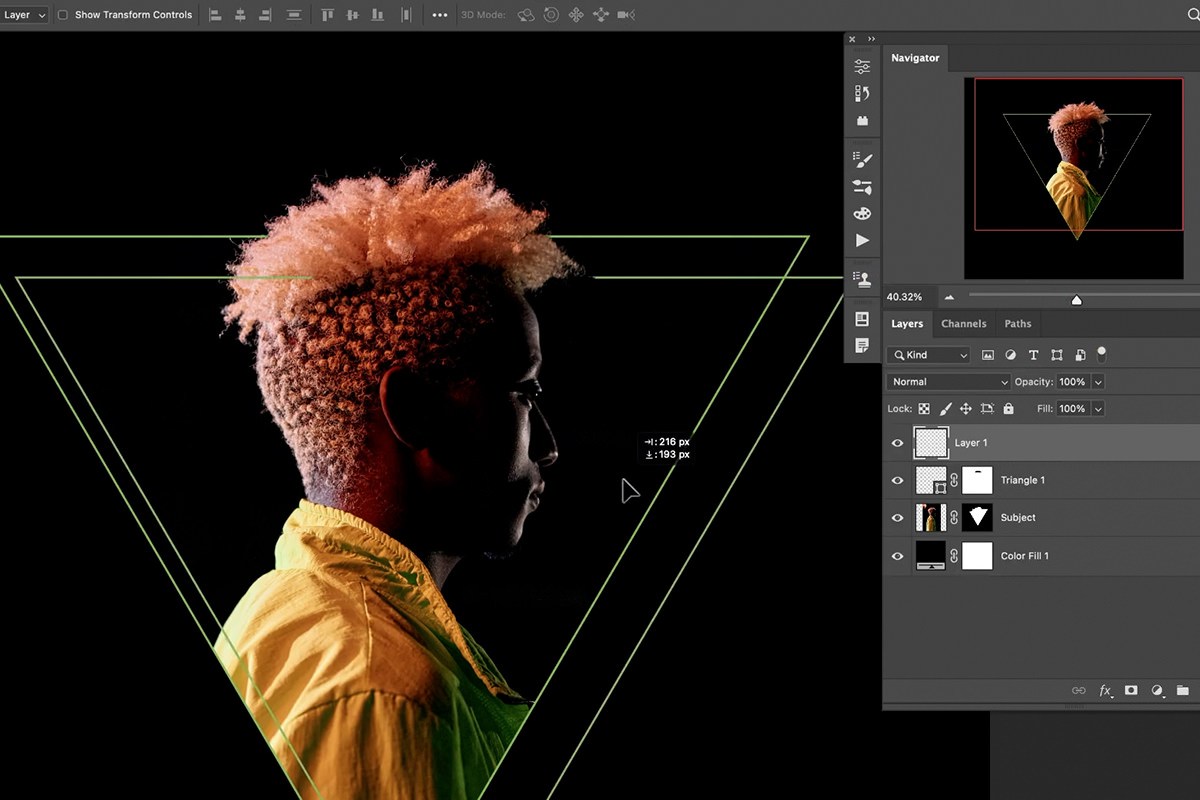


Bringing the Glow’s Color onto Your Subject with Blend If
For the glow to feel like it’s actually lighting the subject, some of its color needs to spill onto their face and skin — but only in the highlights, not the shadows.
-
Add a Clipped Solid Color Fill Layer
Create a new Solid Color fill layer above your subject, right-click it, and choose Create Clipping Mask so the color only affects your subject layer.
-
Restrict the Color to Highlights with Blend If
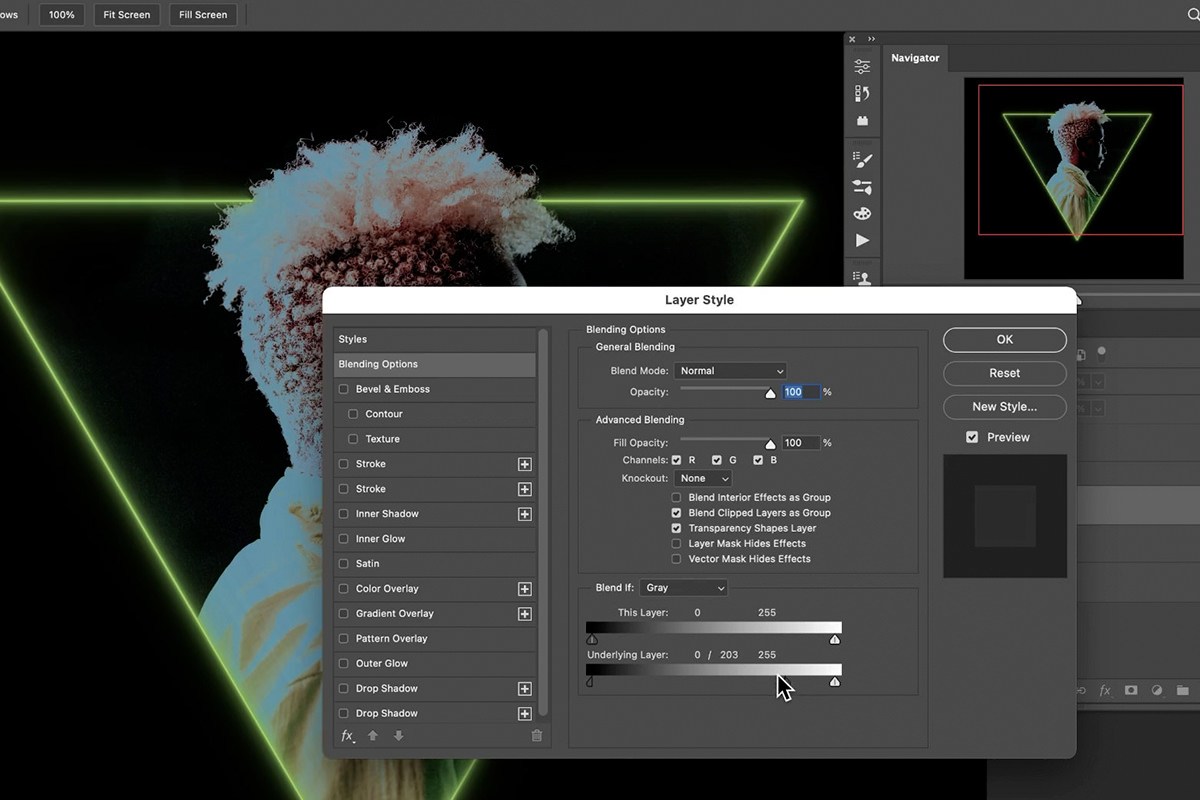
Double-click the layer to open Blending Options, and under Blend If, hold Alt on PC (Option on Mac) and drag apart the halves of the Underlying Layer slider to make the color layer disappear from the shadows and remain visible only in the highlights.
-
Choose a Blend Mode and Color
Try a few blend modes: Screen, Color Dodge (a little more color) and Overlay, which is used here. Double-click the fill and use the eyedropper to pick the green of the shape’s outline. Then click the fill layer’s mask, press Ctrl/Cmd + I to invert it, and paint white with the Brush tool around the hair and on the face, where the green would meet the light already on your subject.
What Blend If Is Doing Here
The split Blend If slider tells Photoshop to hide this layer wherever the layer underneath it is dark, and show it wherever the layer underneath is bright, creating a smooth transition instead of a hard cutoff. That’s exactly the behavior a real colored light source would have on skin — visible where light is already hitting, invisible in shadow — which is why it looks far more convincing than applying the same color everywhere and trying to mask it out by hand.

Adding Multiple Colors with Colorize Adjustment Layers
A single glow color rarely tells the whole story — adding a second or third color, painted in selectively, gives the effect more depth and variety.
-
Add a Colorize Hue/Saturation Layer
Add a Hue/Saturation adjustment layer, check the Colorize box, raise the Saturation, and choose a hue — a different color than your first glow, such as blue paired with an earlier green.
-
Invert the Mask and Paint In the Color
Press Ctrl + I on PC (Cmd + I on Mac) to invert the adjustment layer’s mask to black, then paint white with the Brush tool to bring that second color in selectively — on the background, in the hair, or wherever it complements the first color.
-
Repeat with Additional Clipped Color Fills
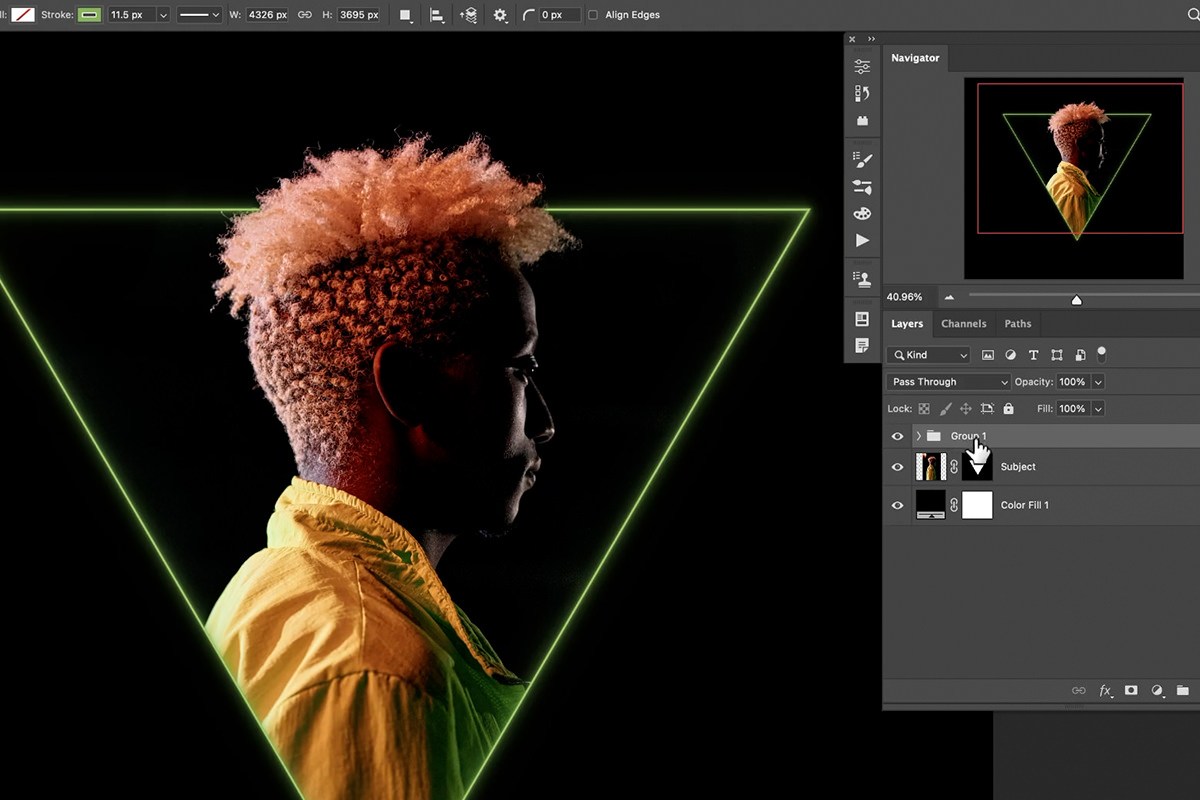
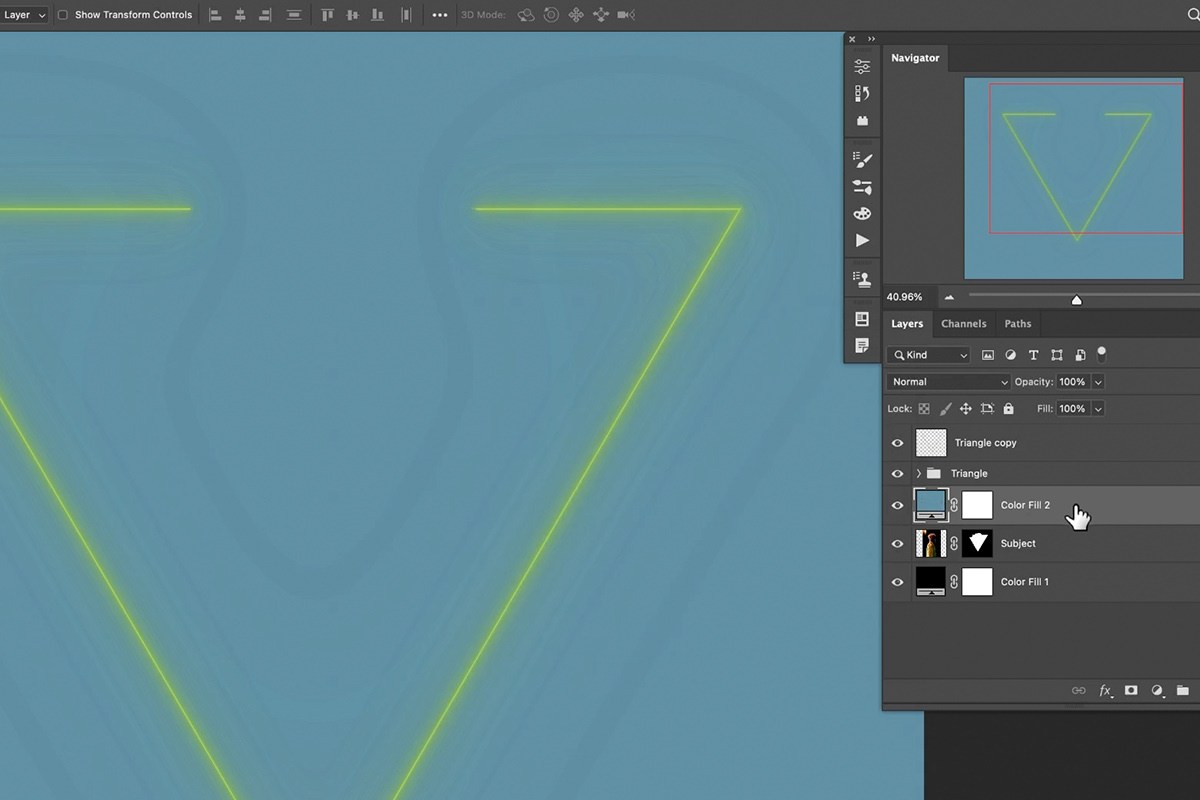
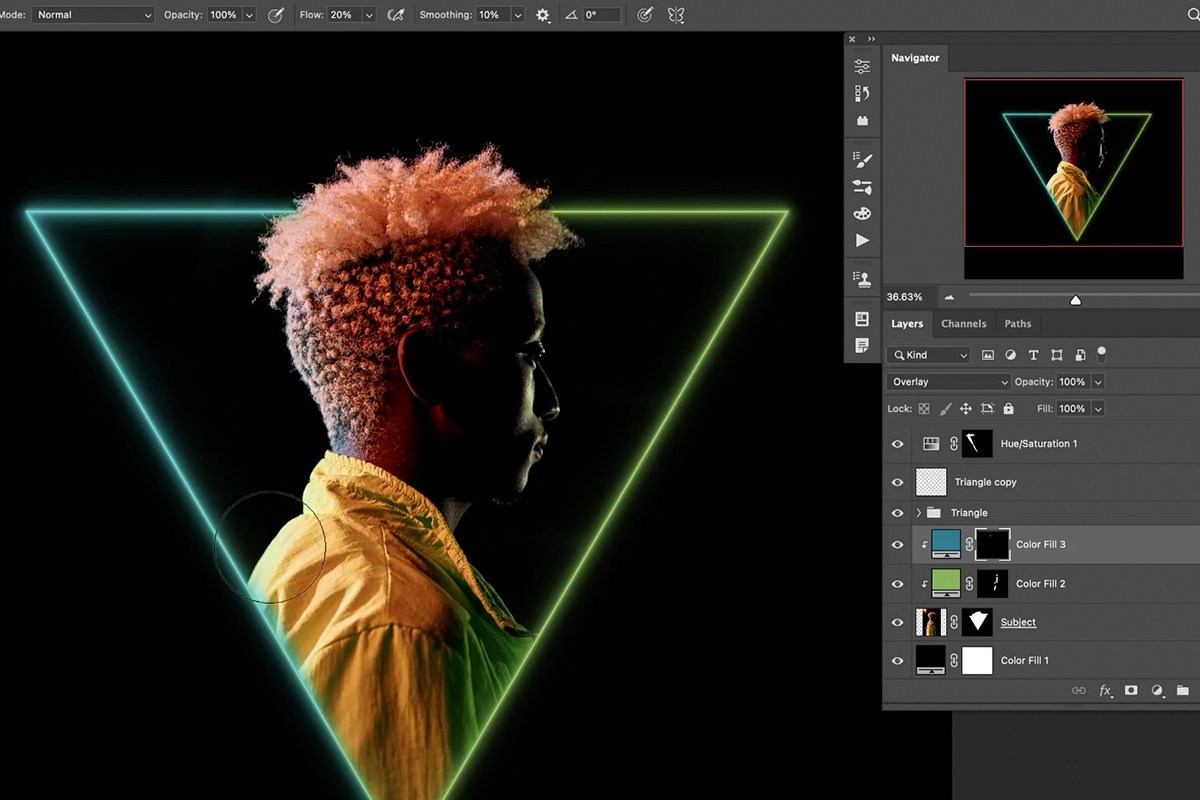
Right above your subject, add another Solid Color fill layer in blue. Clip it, limit it to the highlights with Blend If as before, and set it to Overlay. Make the blue a little darker and more saturated, invert its mask with Ctrl/Cmd + I, and paint it onto the left side of your subject so the blue glow appears to overlap them.
Then have some fun with it. On a new layer at the top, paint the green over the right side of your subject and change the layer from Normal to Soft Light, and paint a little blue on the left. One more Colorize Hue/Saturation layer, with its mask inverted, brings the blue onto the shirt; duplicate it with Ctrl/Cmd + J, fill the copy’s mask with black, change its Hue to green and paint it in on the right side.


Painting Extra Glow Accents and Balancing Your Layers
A final pass of hand-painted color dodge accents, followed by an honest review of every layer, is what pulls the whole effect together.
-
Paint Color Dodge Accents
Create a new layer set to Color Dodge, grab the Brush tool, sample colors from your glow, and paint small accents right along the edges where the glow and subject meet, for extra pop.
-
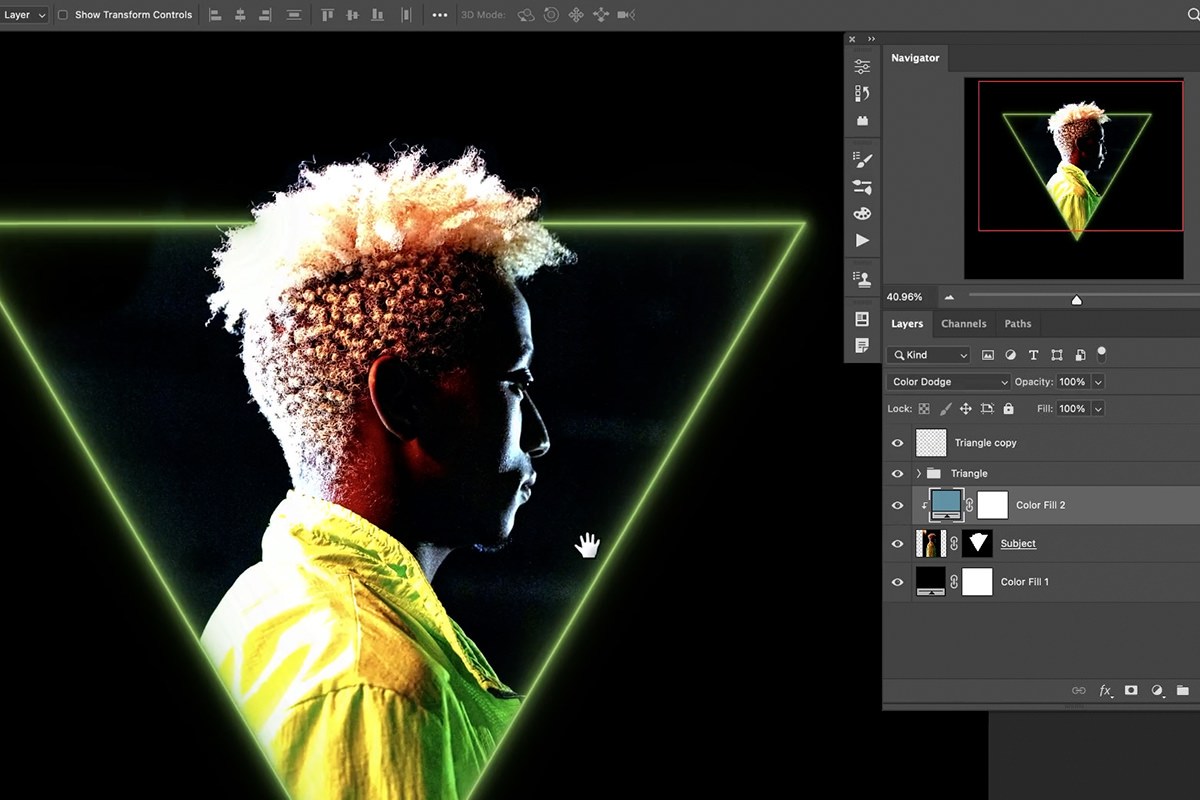
Group and Lower Opacity if Needed
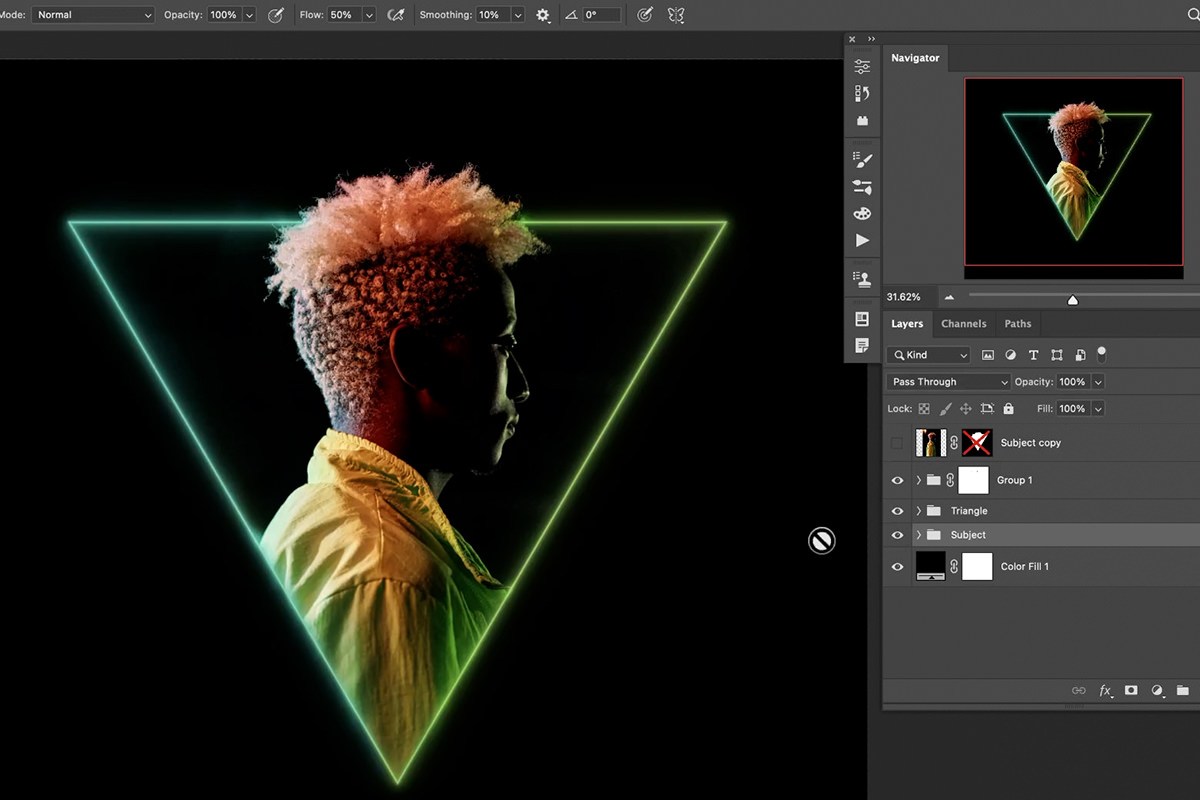
Select all of your glow and color layers and group them together with Ctrl + G on PC (Cmd + G on Mac). If the overall effect feels too strong, lower the group’s opacity rather than adjusting every layer individually.
-
Add a Mask to the Whole Group if Needed
If a specific area — like the hair — ends up overdone, add a layer mask to the entire group and paint black there, rather than hunting down every individual layer contributing to that area.
Why Toggle Layers Before Calling It Finished
With this many layers stacked on top of each other, it’s easy to lose perspective on which ones are actually helping and which are just adding noise. Turning each layer off and back on individually, and checking the group’s opacity as a whole, is the only reliable way to catch an area that’s been overdone before you finalize the image — and because every adjustment here lives on its own non-destructive layer, nothing needs to be redone from scratch to fix it.



Why This Effect Works
Every part of this effect is built around the same core idea: light behaves differently in highlights than in shadows, and a convincing lighting effect needs to respect that difference rather than applying color evenly across the whole image. The Blend If slider is what makes that possible — it lets colored light spill onto a subject’s highlights while staying invisible in the shadows, exactly the way a real colored light source would behave. Building the glow itself from several separately blurred layers, rather than one blur applied once, recreates the gradual falloff real light has as it moves away from its source. And keeping every adjustment on its own clipped, masked, non-destructive layer means the whole effect can be reviewed, toggled, and rebalanced at the end without redoing any of the earlier work — which matters, because an effect built from this many layers almost always needs that final pass of restraint.
Final Thoughts
A graphic glow effect like this looks complicated in the finished image, but it’s really just a handful of repeated techniques — a shape used as both an outline and a mask, layered Gaussian blurs for the glow, and Blend If to control where color reaches the subject — applied several times with different colors and settings. Once each of those individual pieces feels familiar, building an effect like this becomes a matter of experimenting with shape, color, and placement rather than relearning the technique each time, and the same Blend If and layered-blur approach transfers directly to plenty of other lighting and color effects beyond this specific graphic glow.
Quick Reference: Keys, Menus and Settings
- Draw and flipTriangle Tool, Shift-drag; Cmd/Ctrl + T, right-click > Flip Vertical
- Widen and go blackC, drag the left and right edges out; black Solid Color under the subject
- Mask from the shapeCmd/Ctrl-click the shape layer, layer mask icon on the subject; B, paint white for the hair
- Build the glowCmd/Ctrl + E with an empty layer, Convert to Smart Object, Filter > Blur > Gaussian Blur; Cmd/Ctrl + J, more blur each time
- Light the subjectClipped Solid Color; Blend If, Alt/Option-drag the Underlying Layer handle apart; Overlay; Cmd/Ctrl + I, paint white
- More colorHue/Saturation with Colorize; paint layers set to Soft Light and Color Dodge
- BalanceCmd/Ctrl + G, lower the group’s opacity, mask the group
Free Downloads
Follow Along on the Same Photo
Get the portrait from the video, the finished PSD with every layer in place and the 4-page PDF guide. Free with a PHLEARN account.
Neon Glow Effect: Common Questions
Do I have to use a triangle?
No. Any shape tool works. Aaron uses the Triangle Tool, found with the Rectangle Tool, and holds Shift while dragging to keep the aspect ratio. Set Fill to nothing and give the Stroke a color.
What kind of photo works best for a neon glow?
A photo lit from the sides, with little light on the front. The glow’s color can then sit where light already hits the subject, which looks more realistic.
How do I cut out my subject with the shape?
Cmd/Ctrl-click the shape layer to load it as a selection, click the subject layer and click the layer mask icon. Then paint white on that mask with a small brush so the hair can break out of the shape.
What if my subject isn’t on a black background?
Click the subject’s layer mask, go to Select > Subject, use that as the mask and paint black on the background.
How do I make the glow without a layer style?
Duplicate the shape, merge the copy with an empty layer using Cmd/Ctrl + E so it becomes a regular layer, and convert it to a Smart Object. Add a little Filter > Blur > Gaussian Blur, then press Cmd/Ctrl + J and make the blur bigger on each copy.
How do I get a bright center in the glow?
Duplicate the shape once more, adjust its stroke width and change its blend mode from Normal to Color Dodge for a strong, bright core.
Why clip the Solid Color fill to the subject?
So the color is only visible where the subject is visible. Right-click the fill layer and choose Create Clipping Mask; Aaron calls this really important.
How do I keep the glow’s color out of the shadows?
Double-click the fill layer and, under Blend If, hold Alt/Option and drag apart the halves of the Underlying Layer slider. The color disappears from the shadows and stays in the highlights, the way light would.
My glow effect looks overdone. How do I fix it?
Turn each layer off and on to see if it helped or hurt. Group the color layers with Cmd/Ctrl + G, lower the group’s opacity, and add a mask to the group to paint out areas like the hair.
Are the sample files free?
Yes, with a free PHLEARN account. You get 1 sample image, 1 sample PSD and 1 PDF guide: the portrait, the finished PSD with every layer in place and a 4-page guide.
Master Photoshop, Lightroom and Photography
Join PHLEARN PRO for $12.99 a month or $99.99 a year. Cancel anytime, with a 100% money-back guarantee.





