Description
For more than a decade, Ross Floyd has developed his skills and knowledge of product photography working with dozens of clients and taking over 70,000 professional images. In this tutorial, he breaks down the theory and fundamentals of lighting objects, how to accurately represent products in an image, and the business side of building and maintaining strong client relationships.
If you enjoyed this course, check out How to Retouch & Composite Product Photography where we take these images into Photoshop!
THIS COURSE INCLUDES
- 15 Sample Images
Share
Table of Contents
-
01 - What is Product Photography?5:00m
-
02 - Telling an Accurate Story3:22m
-
03 - Describing Material with Light5:49m
-
04 - The Client Side of Product Photography15:01m
-
01 - Choosing a Camera7:40m
-
02 - Choosing Lenses5:01m
-
03 - Backgrounds & Set Design6:33m
-
04 - Tethered Capture3:32m
-
05 - Lighting & Strobes7:16m
-
06 - Lighting Modifiers6:45m
-
01 - Shape & Structure3:12m
-
02 - Angle & Perspective4:59m
-
03 - Texture & Details7:08m
-
04 - Light, Shadows & Reflections4:24m
-
05 - Shooting for Composite5:08m
-
01 - Photoshoot Best Practices14:10m
-
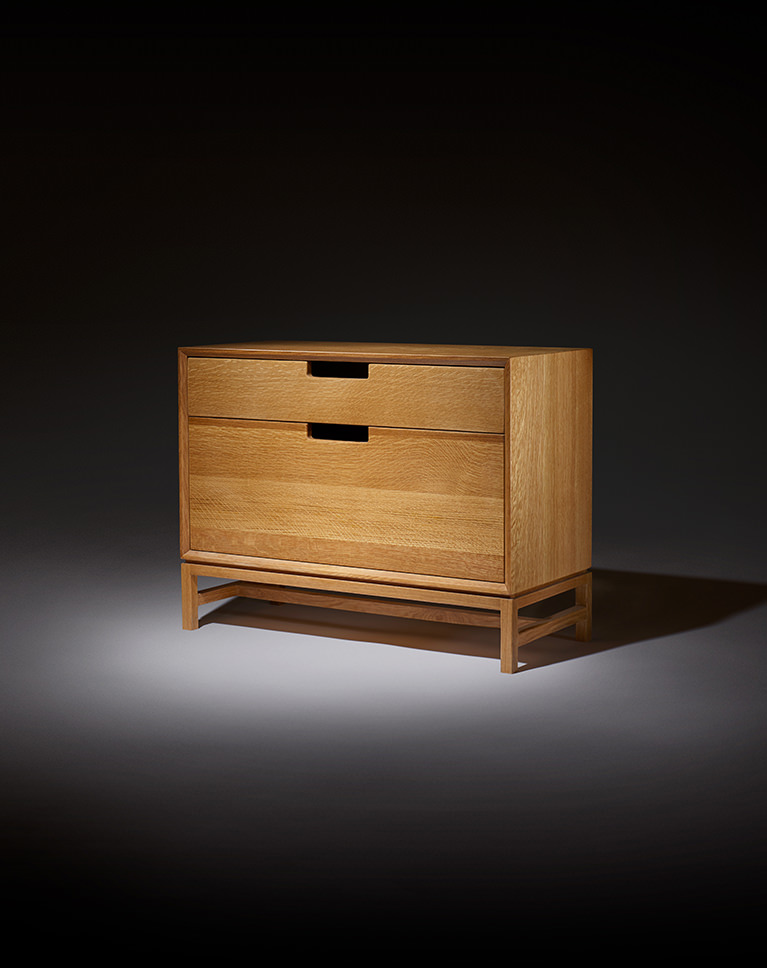
02 - Oak Cabinet - Quality of Light & Lighting Shapes10:48m
-
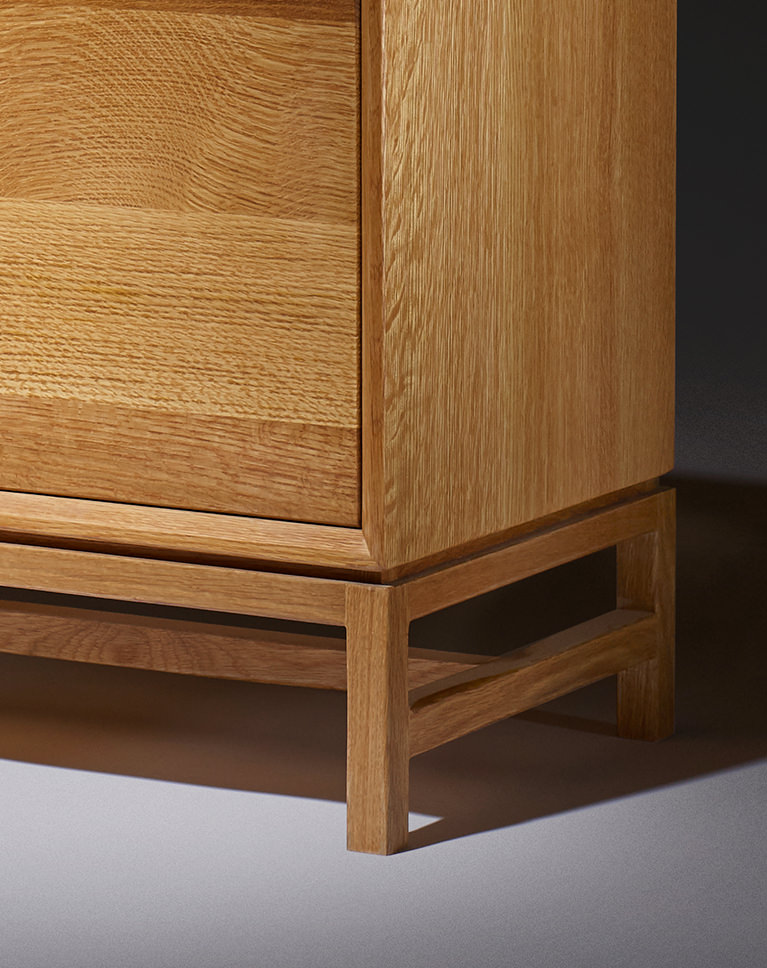
03 - Oak Cabinet - Hard Light for Dramatic Shadows & Texture8:24m
-
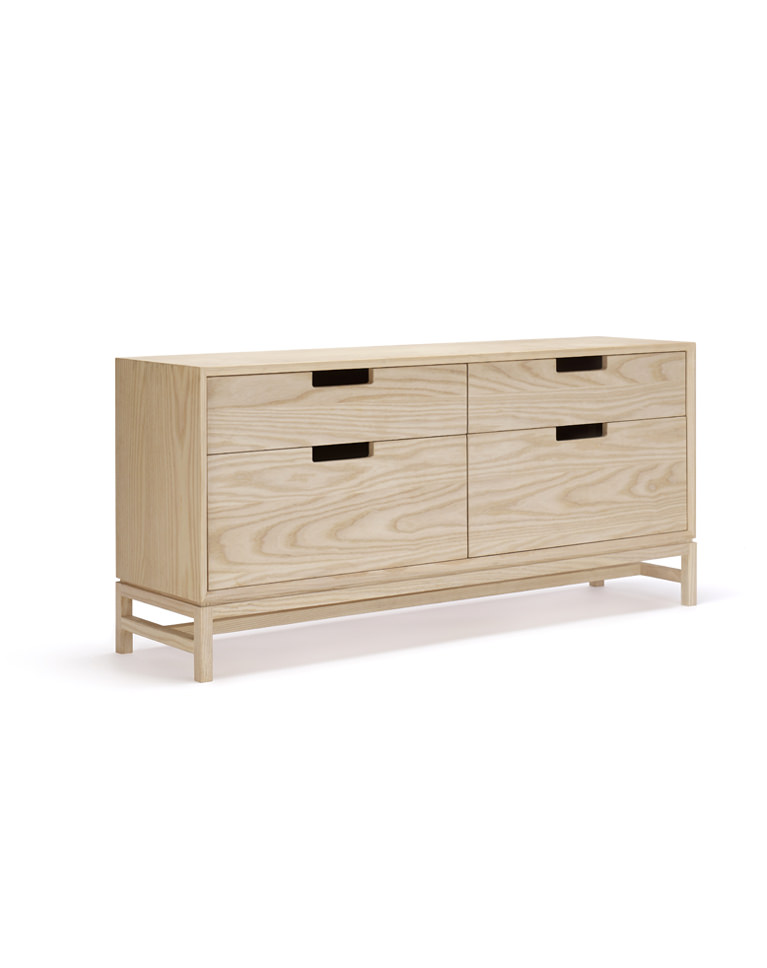
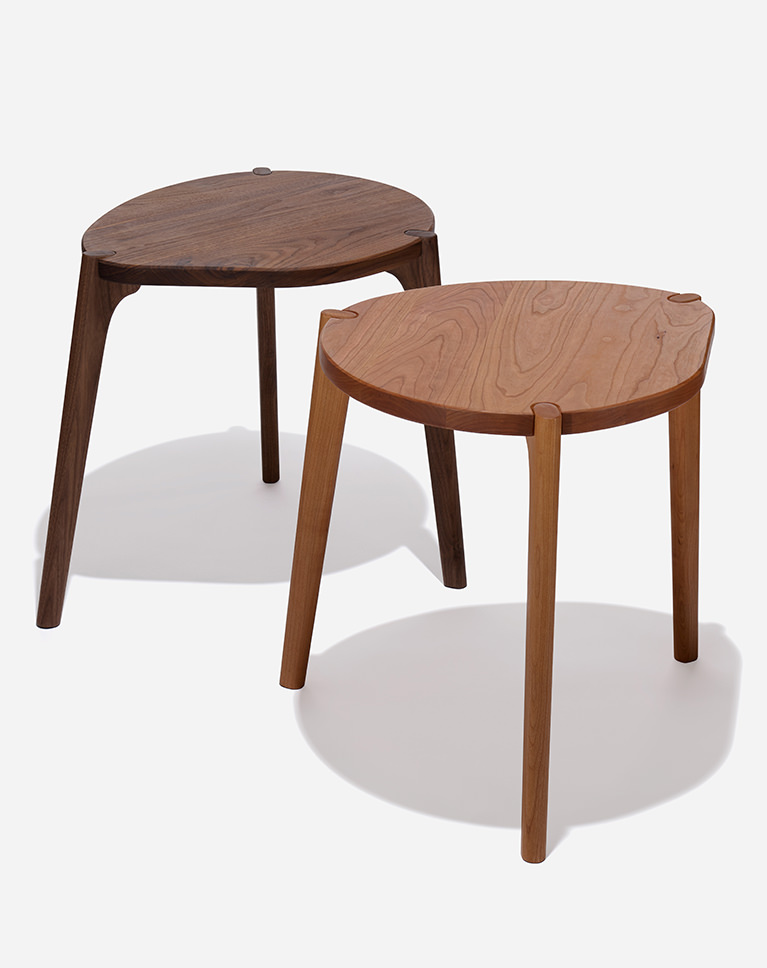
04 - Designer End Tables - Tension & Perspective6:31m
-
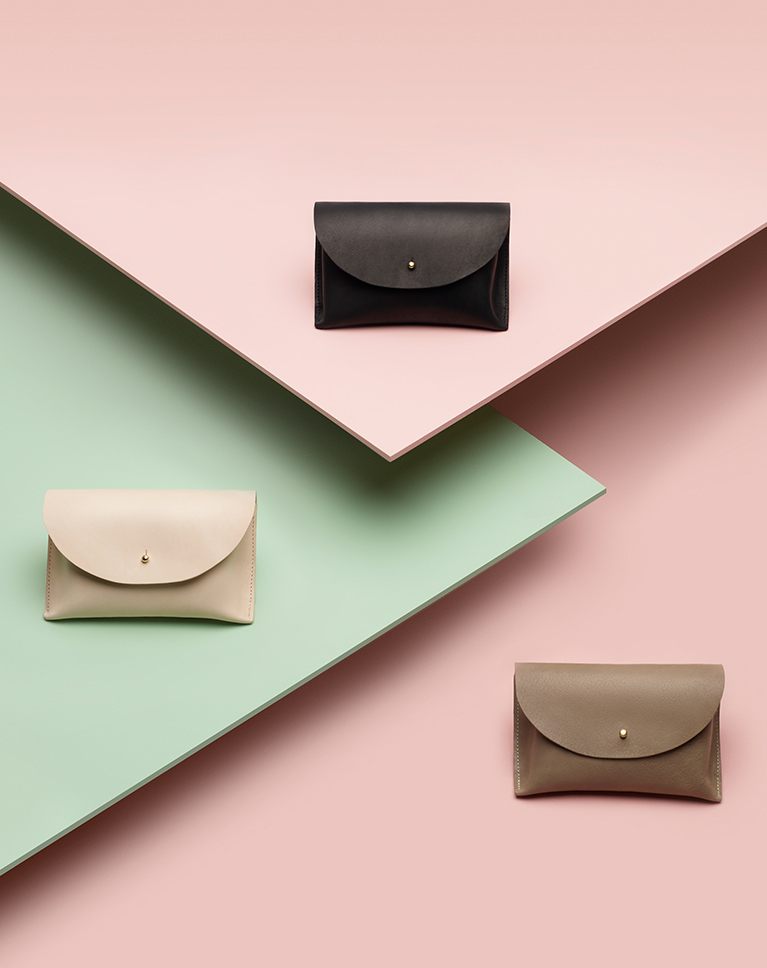
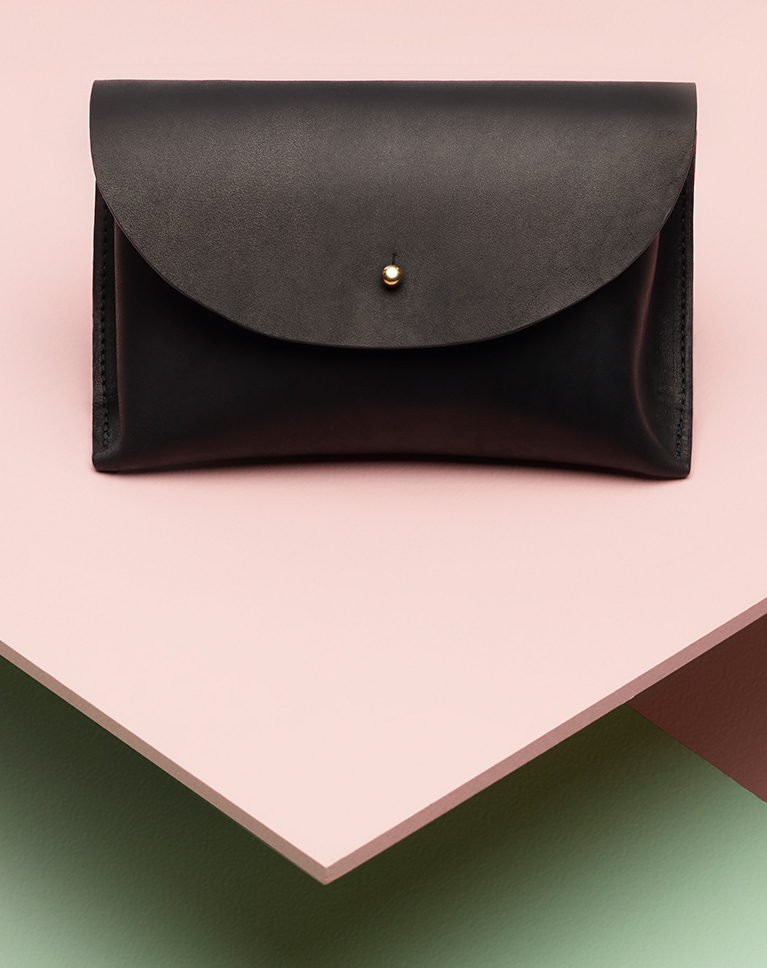
05 - Leather Handbags - Product Styling9:13m
-
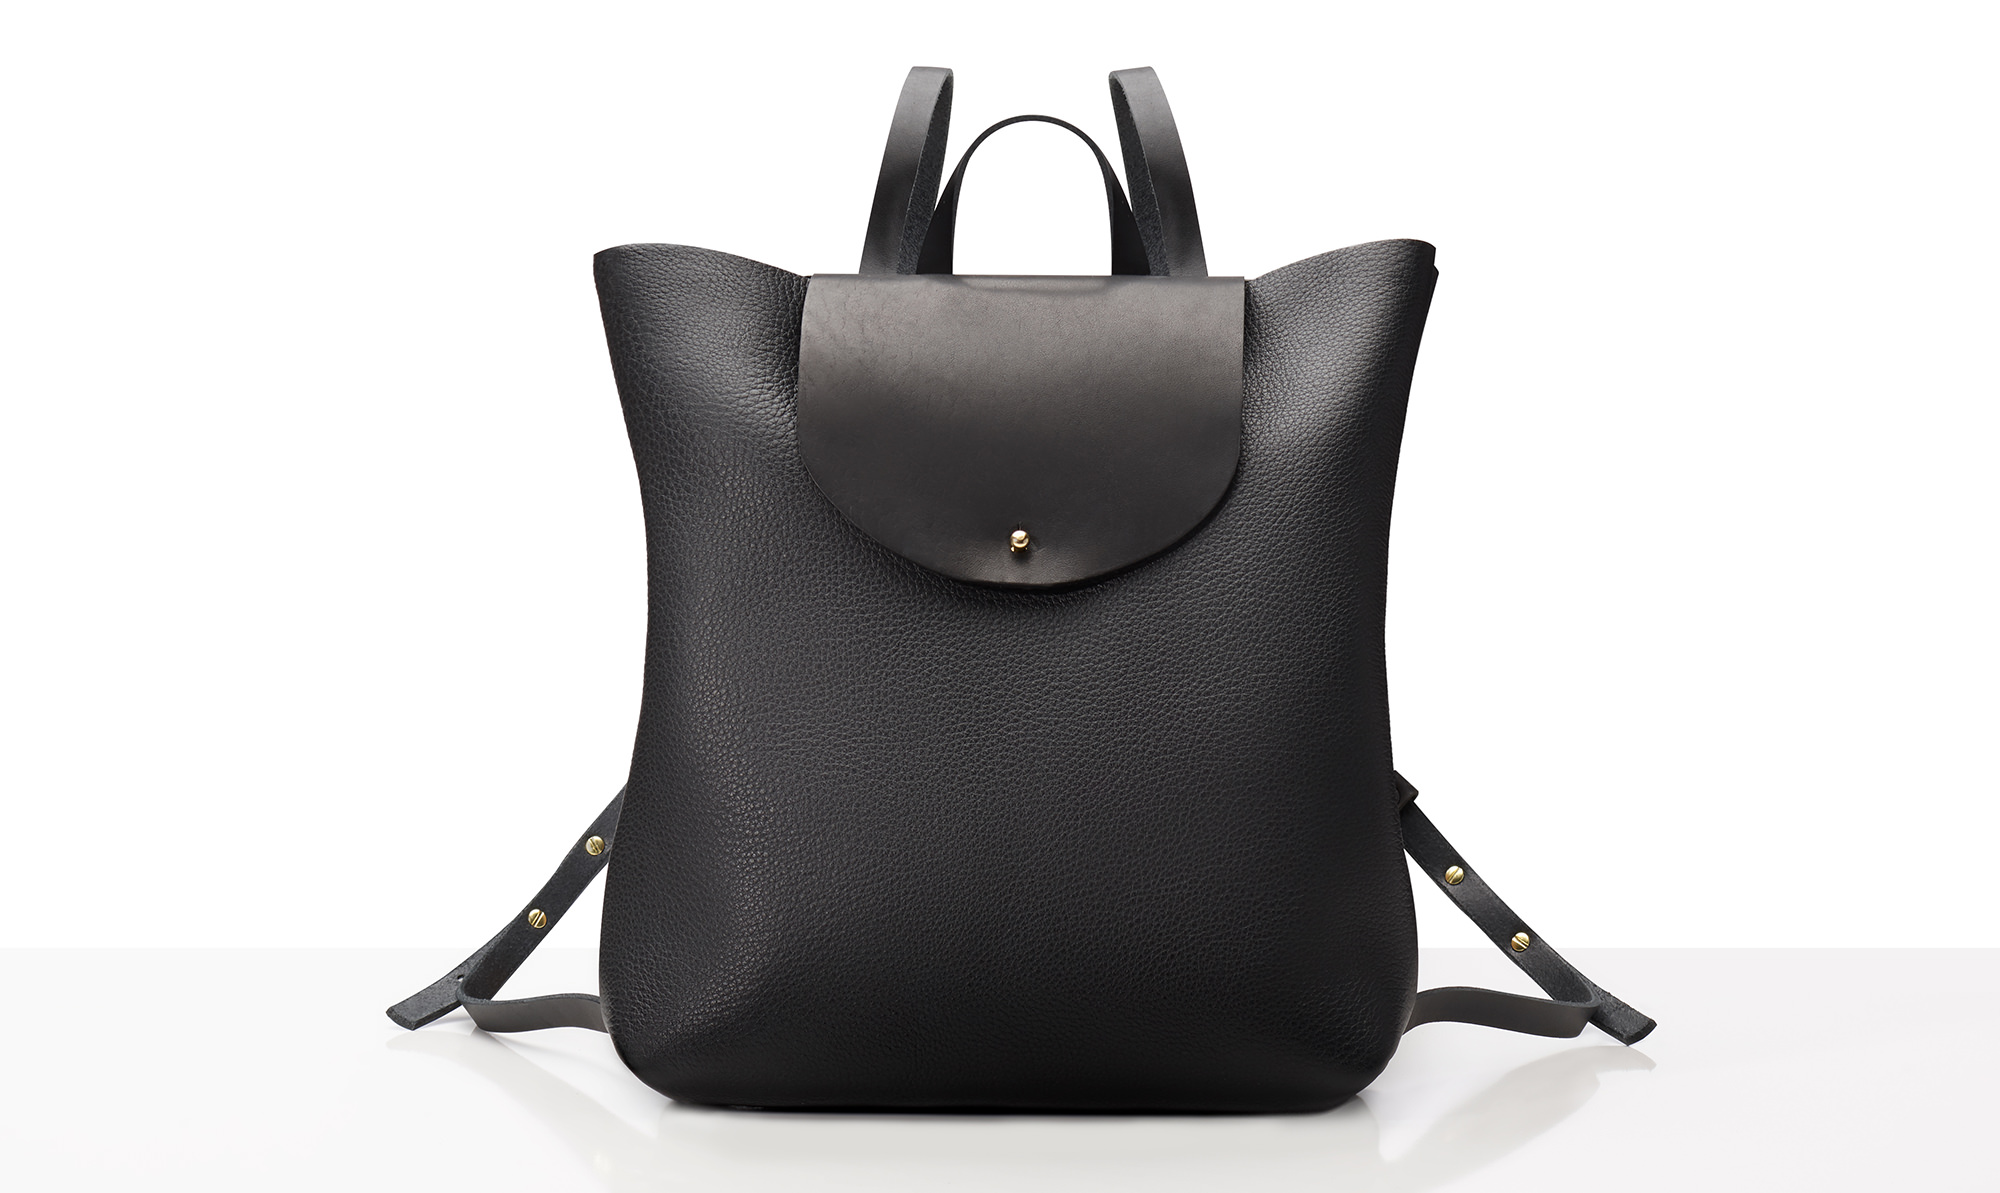
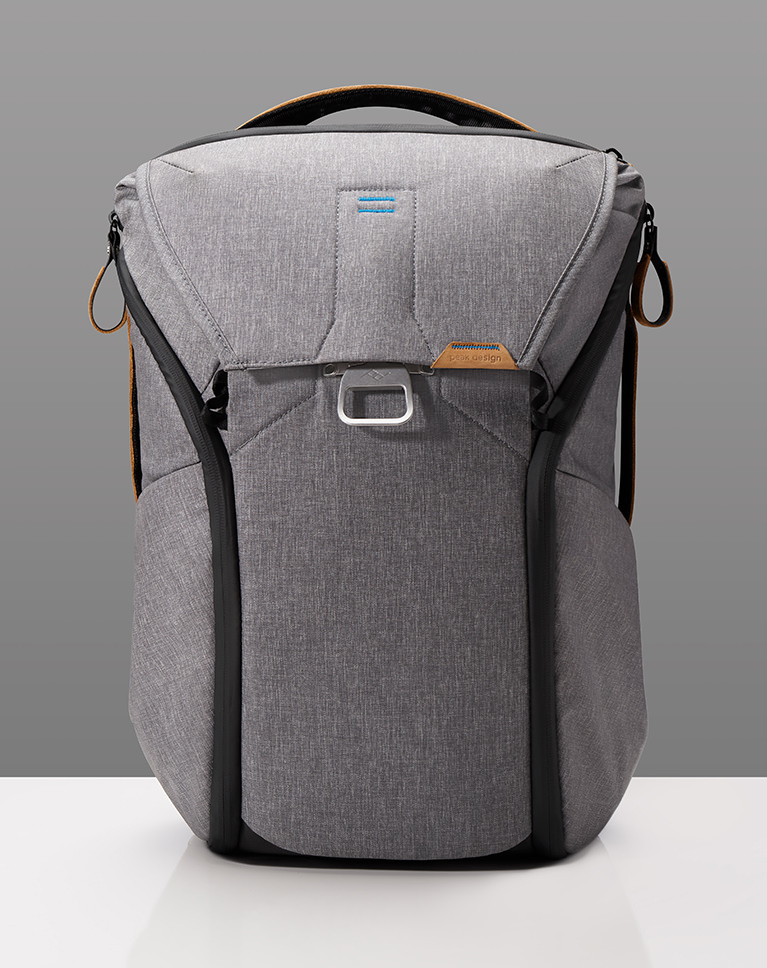
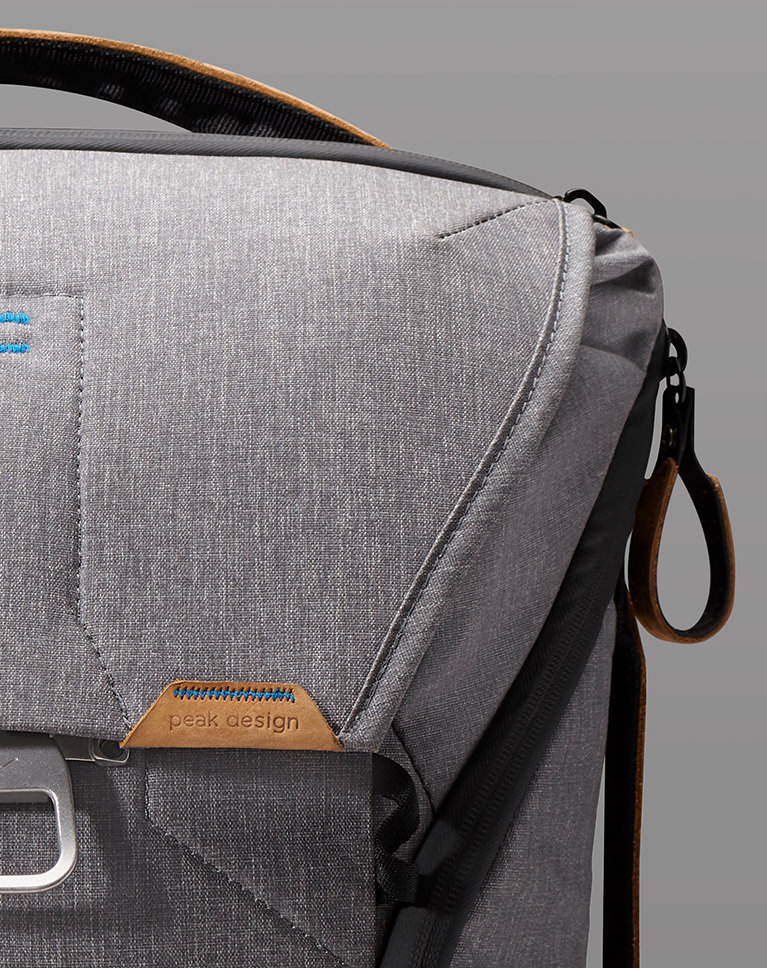
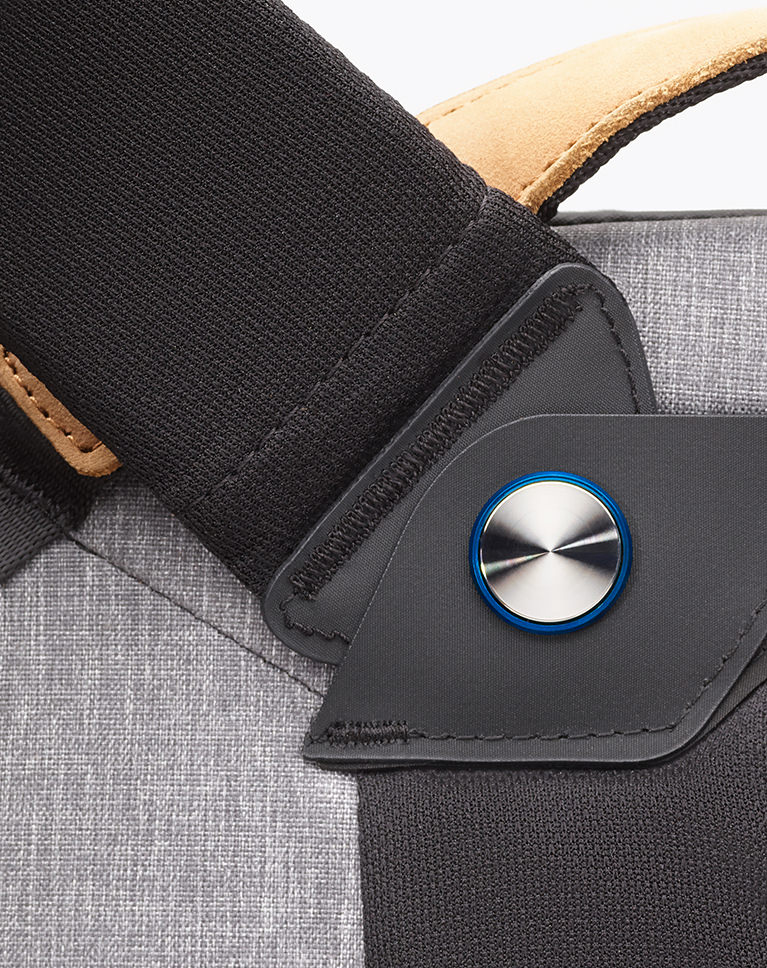
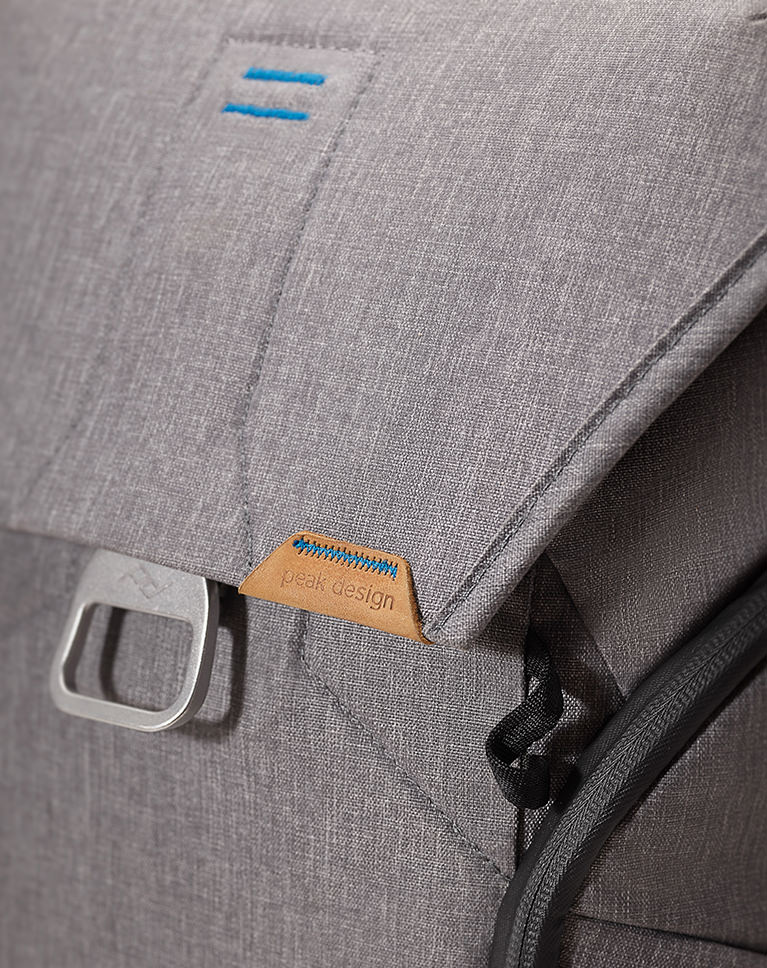
06 - Commuter Backpack - Capturing the Details9:31m
-
07 - Managing a Photoshoot - Clients, Talent & Creativity14:30m
Course Downloads
Master Product Photography
DETAIL
LEARN DARK AND DRAMATIC LIGHTING
What is Product Photography?
Think of your favorite bag or piece of furniture. What is it you like most about it? Maybe it’s the texture and feel of the materials. Maybe it’s the unique shape or design. Maybe it’s the small details and craftsmanship. We teach you how to express these ideas and more through the tools and techniques of photography.
Learn from a Professional Photographer
With over 70,000 images—from designer furniture to fine art, luxury bags to one-of-a-kind treasures—Ross Floyd has photographed it all. Learn from a master of the craft on how to capture the best images possible for eCommerce, print, and web.
Art & Business
Product photography is equal parts art and business. For every creative decision you make, there’s a dozen decisions being made by a client that needs you to help tell their story. Learn how to balance the craft of photography with the business side of finding, keeping, and collaborating with clients.
DETAIL
BUILD SIMPLE SETS TO ENHANCE PRODUCTS
Product Photography Tips & Techniques
We all know that to be a photographer, you’ll need some combination of cameras, lenses, and lights to capture images. But what about stands, lighting modifiers, and materials to create backgrounds? We break down everything a working product photographer uses to bring products to life in a photo.
Working with Clients
As a product photographer, your clients are creators, builders, and entrepreneurs. They are experts that need an expert to help them tell the story of their products through photographs. Get valuable advice from a working professional that knows how to take direction and build long-lasting relationships, all while exploring their own creative ideas.
Backgrounds & Set Design
The background is almost as important as the product itself. Need a pure white background for an eCommerce website? Use a white seamless. Your client needs to fill up a magazine spread? Time to build a set and tell a larger story. We even teach you tricks that will save you time, like turning a pure white sweep into a pitch black background by simply changing the lighting.

DETAIL
PHOTOGRAPH PRODUCTS ON PURE WHITE
Lighting & Theory
Having a strong grasp of lighting fundamentals will often separate a good product photographer from a great one. We break down how to use light to express the most information about the products you’re shooting. Learn about quality of light, modifying light, and how to use light to describe shape, dimension, and texture.
Quality of Light
In photography, there’s much more to light than ‘on’ and ‘off’. Light can be controlled, shaped, and sculpted in ways to reveal more about the objects you’re photographing. We show you how to utilize hard light, soft light, and every step in-between to bring out all of the beautiful details in a product.
Photoshoot Best Practices
As a photographer, your job isn’t just to take photos. You’re also in charge of making sure a photoshoot is safe, efficient, and comfortable for everyone involved. See how a professional balances working with clients, models, and crew all while working to capture the best images possible.
Capture Incredible Detail
DETAIL
LEARN TO USE STUDIO LIGHTING
Make Every Pixel Perfect
Learn to use the latest technology to capture stunning detail and create images that will look great at any size or crop.
DETAIL
PHOTOGRAPH FABRIC & SOFT GOODS
Choosing a Camera
Camera selection is important but not as important as making the most out of the gear that you have. See a side-by-side comparison of product shots taken with a Canon 5D and Phase One medium format camera. Then learn the fundamentals that will help you take great shots with any camera, whether it be an iPhone, a point-and-shoot, or a high-end DSLR.
Choosing Lenses
Lenses will have a huge impact on how products appear in a final image. How do you avoid lens distortion? How do you capture the most accurate shape of an object? We answer these questions and show you what lenses should be your go-to for any type of product photography.
Choosing Lights
Did you know you can take beautiful product photos with a single light? Whether you’re using one strobe or a dozen, learn to wrap products in light using a combination of professional gear and DIY tools.
LEARN TO CAPTURE DETAILS AND MULTIPLE VIEWS
LEARN TO CAPTURE DETAILS AND MULTIPLE VIEWS
Medium Format Photography
If you’re capturing images of high-end products, you’ll want to use high-end gear. Medium format photography allows for the highest resolution images, allowing for maximum fidelity, unmatched sharpness, and a more flexible post-production workflow.
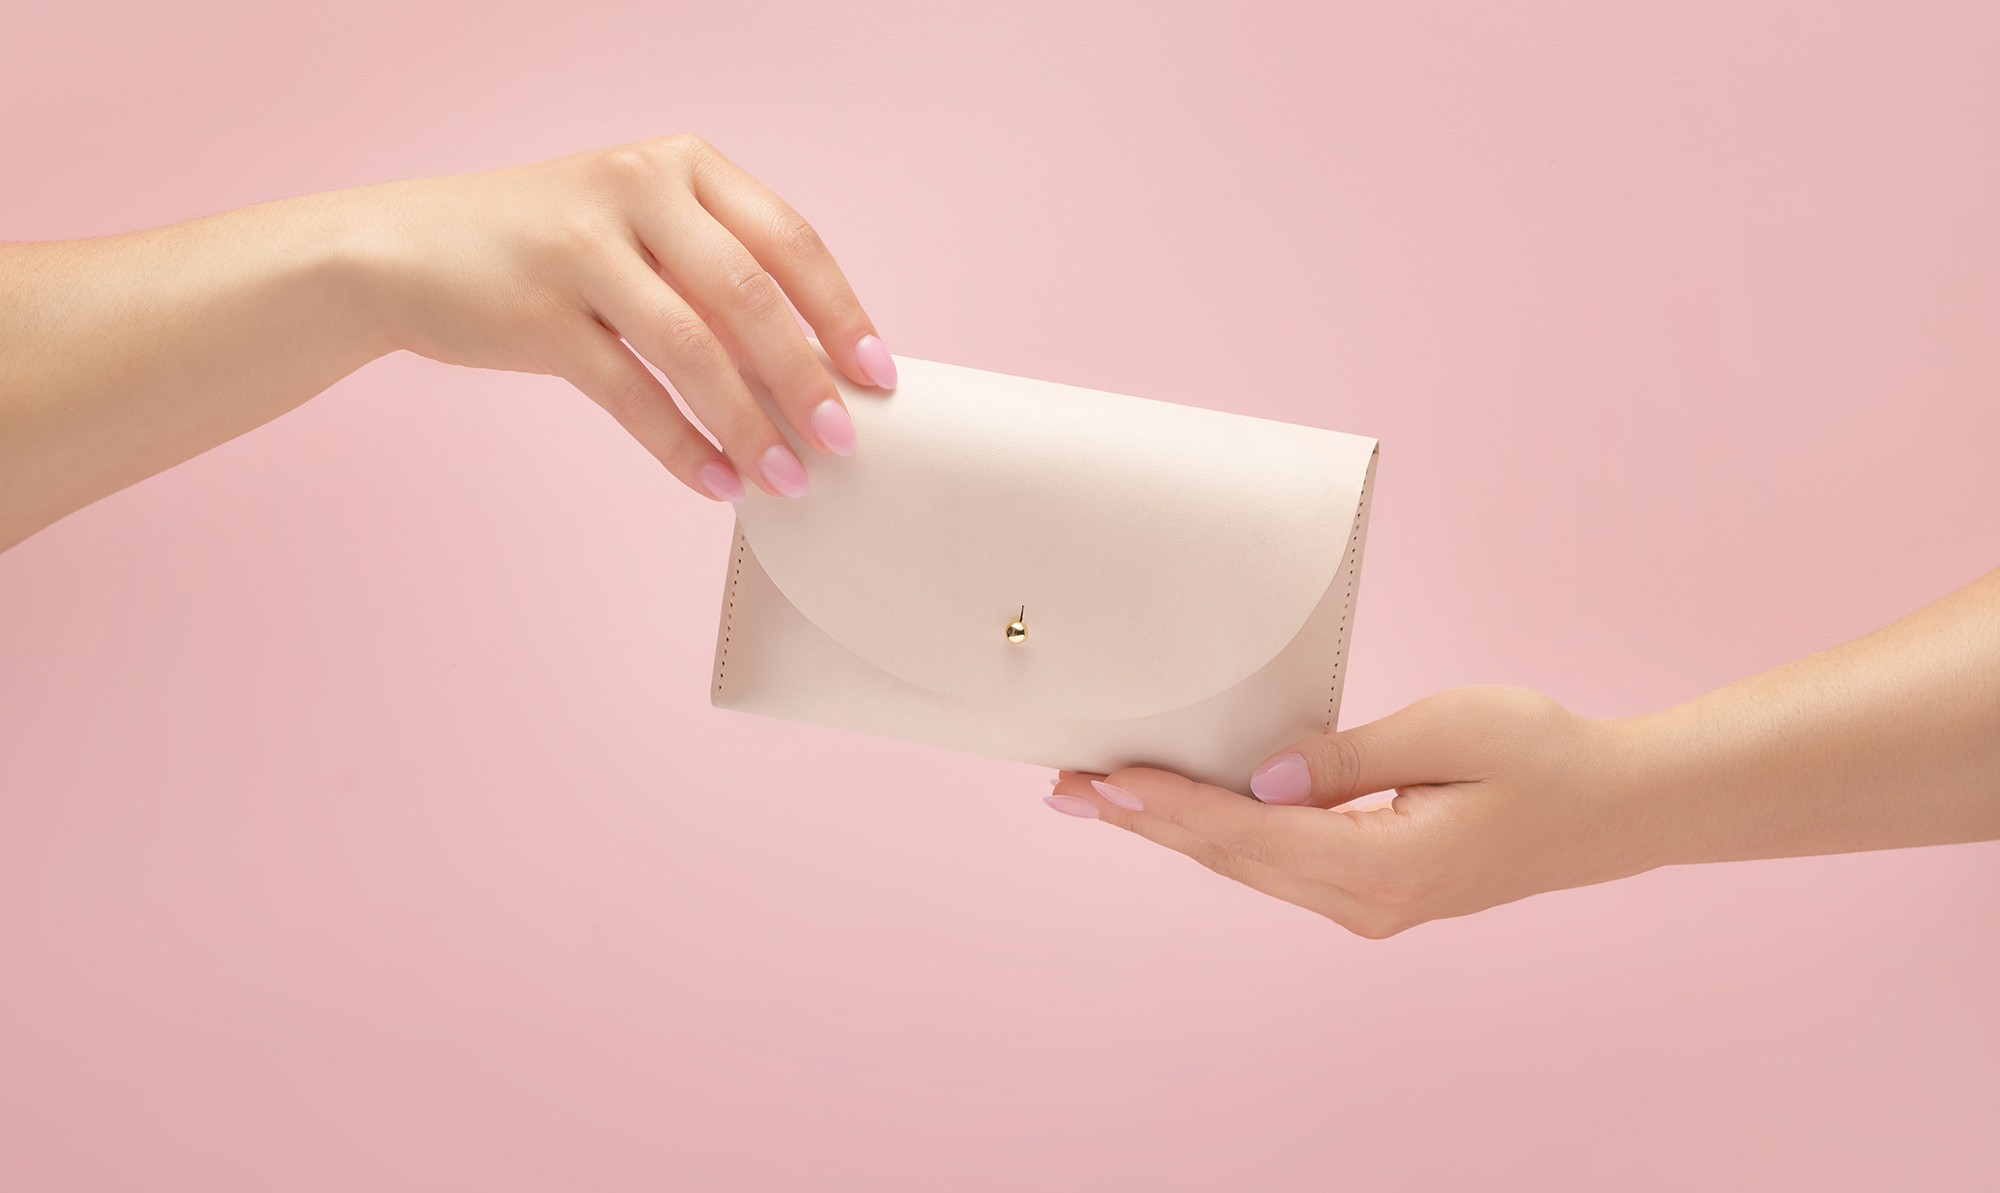
Product Styling
Most products will need a little help to look their best in front of the camera. We show you how to arrange and style products to give them shape, volume, and to show off their most unique features.
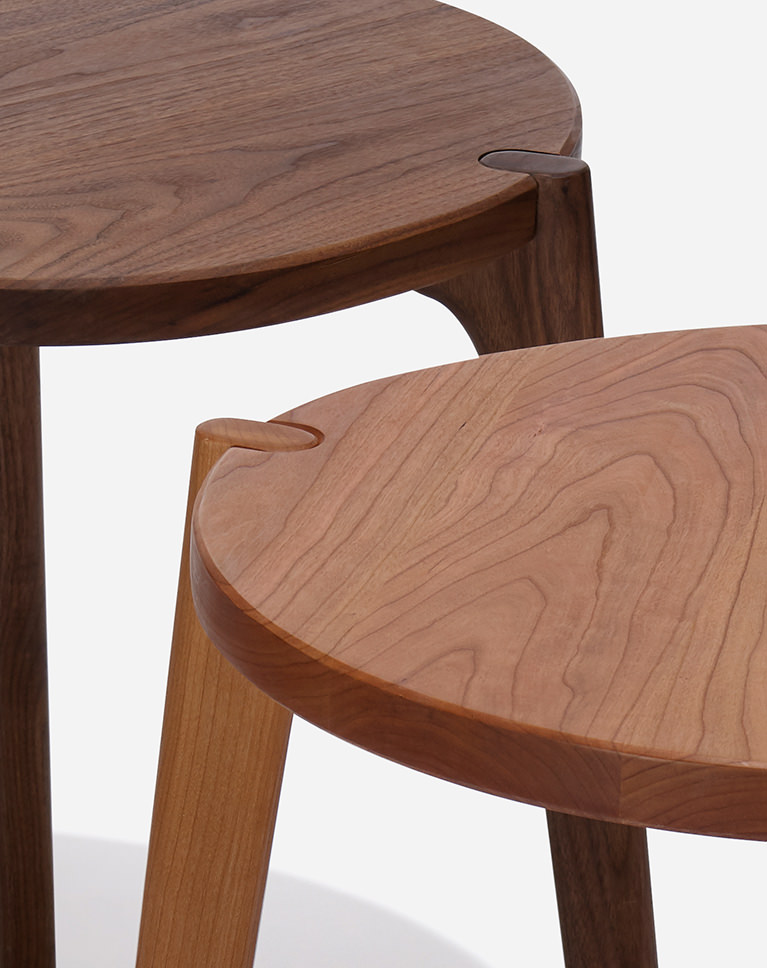
Capture the Details
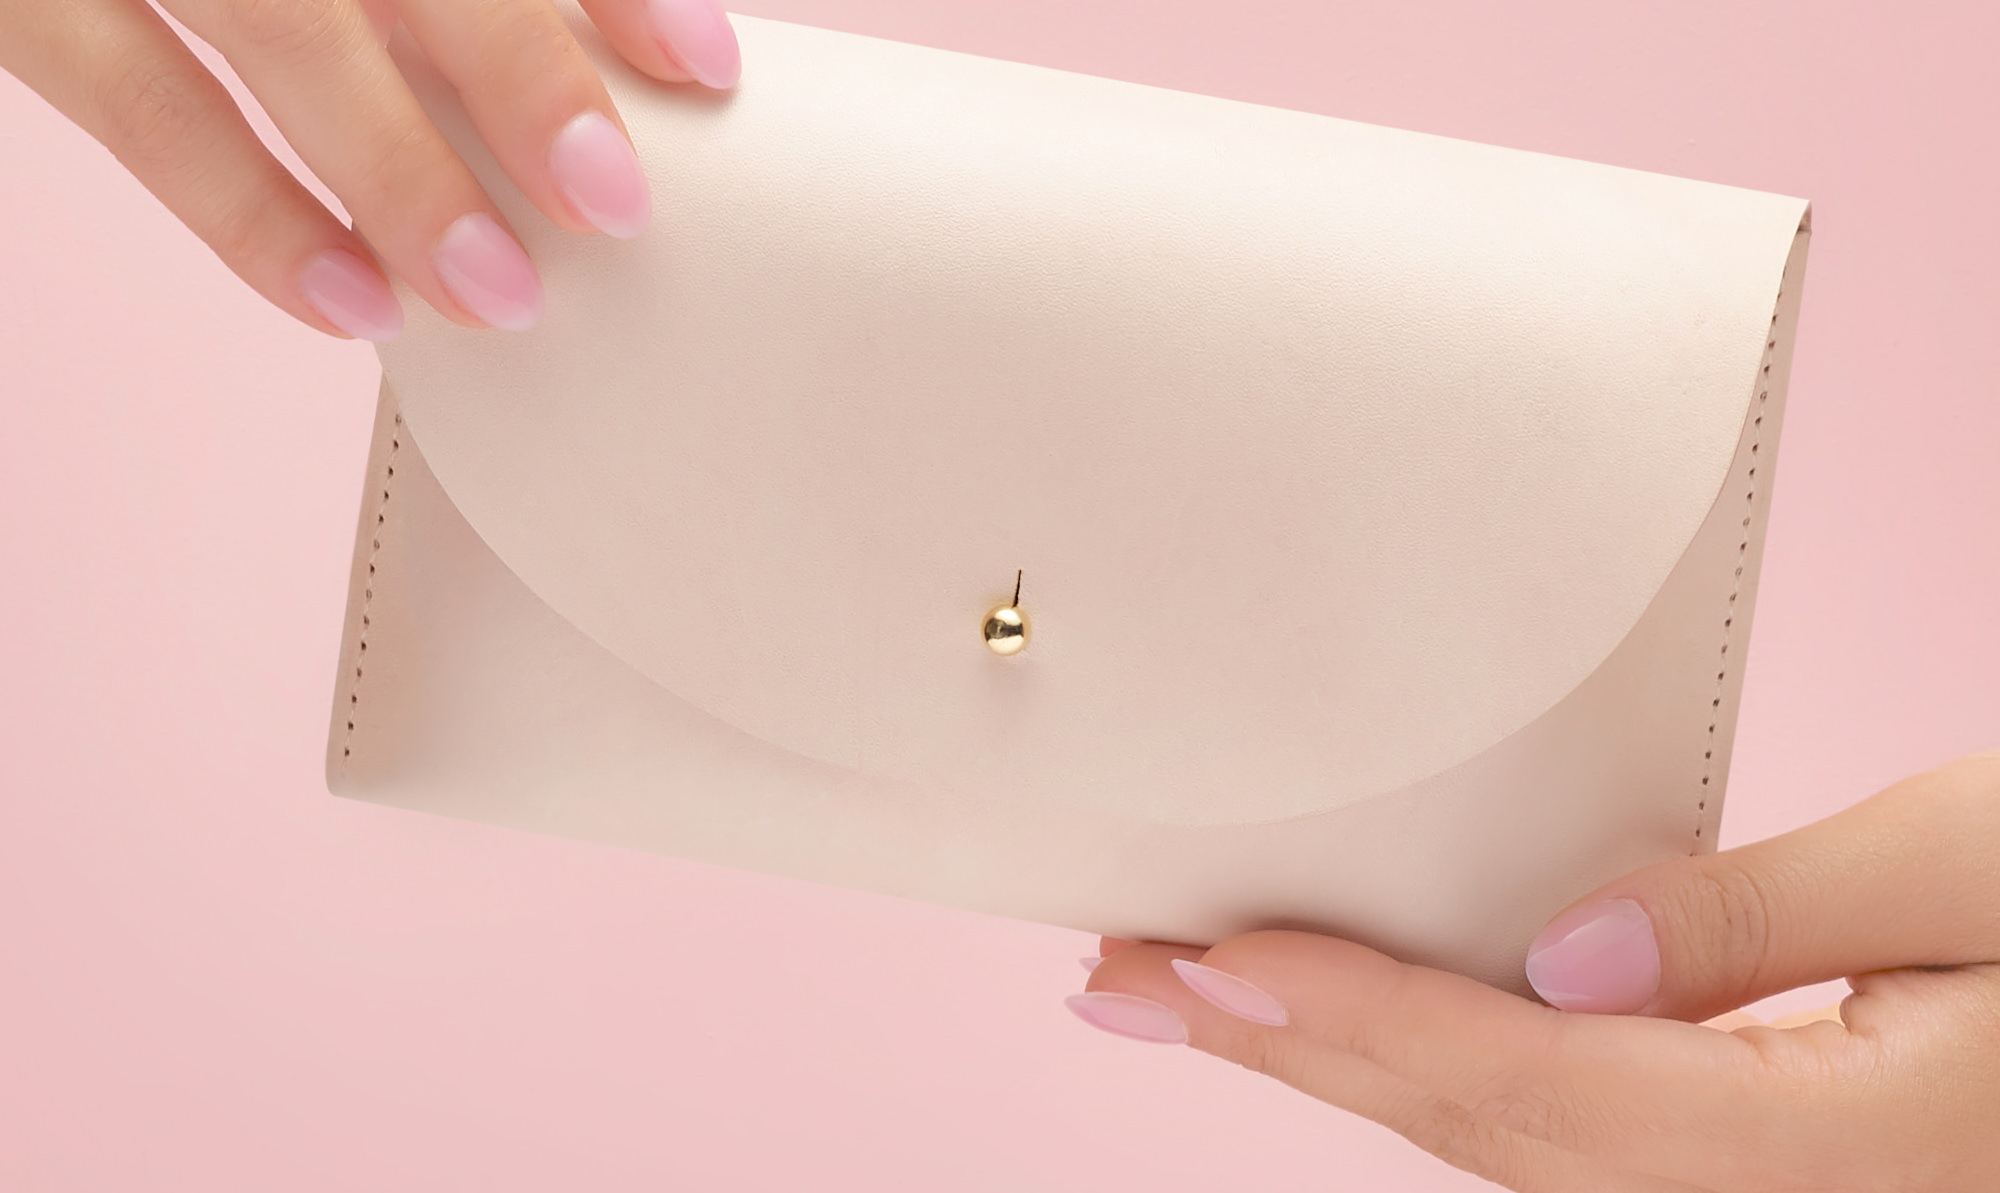
Product photography involves accurately representing the product as a whole and also getting in close to the see the little things that make it unique. Whether it be the materials, stitching, logo, or a useful feature, we show you how to look for and capture all the most important details.
DETAIL
PHOTOGRAPH GROUPS OF PRODUCTS
Angle & Perspective
The lights are set. The product is in place. But where should you put the camera? Maybe you want the product to look big and heroic. Or maybe you want to show as much of the product as possible. We break down how angle and perspective can be used to evoke a feeling, show more, and solve creative problems that might arise during a shoot.
Materials & Texture
Supple leather. Detailed stitching. Handcrafted Wood. Reflective glass. Every material you photograph presents a whole new world of challenges. Learn to use light, shadows, composition, and framing to accentuate quality and describe how a product feels.
Shape & Structure
Will that bag be able to hold everything you need for your daily commute? Will that table be sturdy once you get it home? A product’s shape and structure will reveal a lot about how it might fit into someone’s lifestyle. Learn to capture size, dimension, and build quality using common photography tools and techniques.


Ross Floyd
Professional Product Photographer – @rossfloyd – Portfolio
Ross Floyd is an award-winning product and interiors photographer and director based in Chicago, IL. He specializes in telling the story of the designed object and space. Ross uses bright and graphic imagery to elevate objects while emphasizing line, shape, form and material with light. He is hired by clients around the world for his ability to convey the experience of an object or space through brilliant images.

Aaron Nace
PHLEARN Founder
Aaron Nace is the #1 Photoshop instructor in the world reaching millions of students in 146 countries. Known for his unique vision and conceptual style, he prides himself most on making creative education affordable and accessible for anyone that wants to learn.
Reviews
New & Popular Tutorials


Training Site in
the World
Tutorials!
Ratings
and Counting
Subscribers
This is my first course here on Phlearn and I really liked it. A lot of stuff I already knew, but this is a very good introductory course for someone who is new to product photography, I look forward to seeing the rest of this series.
Some notes to download would be handy as well as a chart to convert medium, 35mm and close crop lens sizes. I found the lack of such a chart made some of the lessons rather confusing, especially the one on lens choice. Also rather than lessons focusing on particular items, some general theory on how to shoot products within certain categories such as products with shiny surfaces or strong textures would have been helped. Otherwise I personally like the layout of the two presenters using slides to give explanations. Made for more clarity rather than the usual format of someone working in studio where a lot of their attention is on getting stuff done than presenting lessons clearly.
That was amazing and great product photography tutorial. Thank for share this tutorial. Ross Floyd and Aaron Nance is creative photographer. Full guide of camera setting, possiting and background. can you let me know to to remove background in photoshop
This was a great tutorial! Thank you Ross & Aaron. Was really informative and made me view product photography in a whole new way. Particularly in focussing on showing what makes a product unique
This was a wonderful series of videos on product photography. I learned a lot. I would love to see something like this for Macro photography. I have a feeling a lot of the principles (lighting, etc.) are similar to product photography. Thanks for the great information!
I really enjoyed watching this tutorial, I think Ross is definitely an artist who can capture the beauty of the objects. The quality of the images he produced during for this tutorial is superb. He was able to explain how important is to capture the texture, details, colour etc. He definitely has an high-end approach working with product photography. I think it was great to show some examples when the light setting didn’t work and explain why showing images next to each other. The whole shot from above of the studio setup was really helpful to understand the position of lighting source. There are some great tips for styling as well. It’s really pretty tutorial, very stylish, designed for more premium product. However as someone who has worked in the studio for an e-com brand, dealing with product on daily basis, I can understand, reading some reviews, why some people were not satisfied with it. This tutorial is more clear for someone who has already some experience with the studio environment. I think there is a lack of deep explanation about light setting, how to operate the reflector for someone who is not familiar with them. Dealing with lighting on set it can be very intimidating and confusing, especially with strobe lights. After this tutorial I have an idea where the light should be placed but I wouldn’t be able to turn on the reflector and navigate the menu. Also the camera and lenses used in this tutorial are too expensive for most of the product photography studios so it would be great to see how to use popular cameras and lenses like Canon 5d Mark III or IV which from my experience is the standard. Another missing subject, and extremely important for a product photography, is how to deal with reflective objects like mirrors or glass, lighting, jewellery. I can tell, from my experience, that most of the e-commerce studio photographers struggle with this kind of product. Maybe this can be a proposition for another great PRO tutorial. Another issue with this tutorial is lack of explanation how to navigate the Capture One. It is so important to be able to work with this program, as it is required by most of the studios. Every single picture you review using CaptureOne, you do some adjustment, selection and then transfer the images to servers. I know that PHLEARN focuses on Lightroom but it would be fantastic to have a PRO tutorial about Capture One, as I have never heard of any professional studio using Lightroom. As a conclusion I would say that this tutorial is still brilliant but it’s more like a premium product photography guide for people who already are familiar with studio environment than ultimate guide to product photography.
Amazing tutorial, looking forward to seeing more product photography classes!
I highly recommend this tutorial, it is packed with interesting tips and has sharpened my product photography enormously.
Got hired for product photography for a start up company. This REALLY helped me sharpen my skills! I feel like I have a new and exciting perspective on light, shadows, and how to tell a better story.
A very comprehensive and detailed course with great inspiring examples!
Great tutorial. Similar structure to a podcast in that you are getting to sit on a conversation between 2 experts. I have yet to go through the photoshop tutorial but would have liked more time spent on some of their product photography gear and sets. Like those MDF colored boards, what color did you go with, were they spray painted or brush painted? Overall an excellent course, with great editing and tips.
Great tutorial. I really enjoy the explanations and depth of information pass across. Thank you, thumbs up
It’s been a while since I checked in. I’m as happy today as I was when I joined over a year ago. I’ve been a PS user for over 20 years, LR for about 10 and I always learn something new every time I watch one of Aaron’s tutorials. It feels good, there’s always something new to learn!
Very interesting course, Ross and Aaron both have a very comprehensive teaching method, very useful tutorial, thanks !
This guide is helpful as you can focus on the lighting and background as these are the two basic things which making the product clear and transparent and use you can use better visual studio effects for making the products more bright and transparent.
Amazing and very inspiring course! Wish there was a topic on how to price your product photography, how to get clients when you are starting out…
ROSS IS AMAZING <3 Thank you for the tutorial. super detailed lots of information!
While this covered an awful lot – I do wish there was a section that followed a full shoot instead of glossing over things interview style.
This was a very useful guide that provided some valuable insights regarding materials to use, lighting and how to style products for a photo shot. One aspect that was missing was a chapter on how products are edited in lightroom and photoshop. A couple of examples were needed. This would have made a very good tutorial into an excellent tutorial.
very informative but I wish it was mentioned whether there was any light metering involved or not ..
What a well thought out and informative tutorial, the genuine passion from both Ross and Aaron comes across perfectly and is a joy to watch from beginning to end. If you’re looking for an introduction into product photography with all the small details that will help you get the best from your shoot, this is well worth a look.
Thank you so so much guys! What a great tutorial!
I want to know what is the color board when shooting the leather bags?How to spell it?
Hi Phlearn, I have been waiting for this tutorial for a long time as I´m graphic designer who’d like to improve photography skills especially in studio. I have followed your photography tutorial which had really great, linear, in -dept, detailed and well explained lessons. Thank you very much again for that! I havent’t yet finished to follow this course as I must say so far it has left me a bit confused and unable to grasp the basic concepts. It is just a bit difficult to follow for a beginner as I think it lacks your usual linearity and clarity. The most challenging thing for me has been having to follow the conversation between two professionals without any kind of visual illustrations. Aaron’s interventions have helped me to understand better some of the contents but unfortunately the interventions were too few. I will keep on going and will try to fill the gaps with the help of the photography course that had some contents about how lights works in studio. I know you pay much attention to the quality of your work so please just consider this as a constructive remark for possible improvement. I think the tutorial was a good one, just not as good as your usual ones. Thank you for the attention and for your work!
Thank you very much to both of you… I have learned a lot. I am new to product photography and this tutorial gave me tons of information. Keep it up! Salamat! (Philippine Language of saying Thank you)
While the tutorial was interesting, and had some good content. I feel largely like some of the other reviewers, in that I felt way too much of the course was spent sitting discussing what was done, rather than showing the shoot. I would definitely have preferred more of the course been spent filming in the studio, showing how you processed the setting of the lighting, seeing you needed a flag here and showing the changes there with flag addition, etc…. Also, throughout the video, it was often commented that “we’ll take care of this in post (photoshop)”…..and yet the course ended, with no post work in PS. I wrote into PHLEARN customer support and they gave me links to the post production work, which I’m going to watch through today. I would recommend that possibly that should be added TO this course, or at least on the course pages, give very clear links to the continuation of the course since the post work is VERY important here, especially the compositing of shots that were discussed in these videos. Anyway, just some constructive criticisms. I have learned so much from PHLEARN and Aaron’s lessons. I subscribed to annual PRO membership, and hope the suggestions help here.
A useful tutorial to be sure. PHLEARN seems to be really open to ways to improve their tutorials, so I’ll list my suggestions for “The Ultimate Guide to Product Photography Part 2” here: 1. ) I’d like to see real-time, hands-on, in-the-studio instruction instead of interview-style, sitting-behind-the-desk discussion; I want to feel like I’m job shadowing a professional working in their studio 2.) Drop one of the bags, and/or furniture pieces, and add a couple of photoshoots of smaller products, like cosmetics or something 3.) Add a photoshoot of a product that is highly reflective, like stainless steel 4.) Add a photoshoot that requires photo stacking 5.) Use a more accessible camera, preferably a full-frame camera in order to simplify focal length equivalency 6.) Use screen overlays to list specifications of equipment
Awesome job guys! Learned a lot from this, and I am even starting to shop some lights to create my own setup.
Disappointed!! I was expecting some real time on set shooting, I bought my phlearn Pro subscription because I was very much impressed by seeing some of the episodes on youtube. Aaron definitely is very impressive while he explain the photoshop tutorials and I liked those episodes because of the approach of teaching by Aaron. Just sitting behind a desk discussing a subject is not the Aaron’s way of teaching, Ross you bored me and I am more disappointed because I was not expecting this from Phlearn!! Sorry for being Harsh, I love Aaron and my expectations are always high when it comes to Phlearn !!
Awesome!!! So informative!!! Great job guys!!! Now time to give it a try!
Another great tutorial!! Thanks guys for making this so clear and easy to follow
I really love the format of your tutorials. It is concise and clear. I have really enjoyed the way Ross explains his process and approach.
Great lesson with amazing photographers. What a way to bring advanced concepts to an understandable level. Would love to work with ya!
Love this tutorial, thank you so much.
Excellent tutorial! The information was conveyed in the very clear way that I have come to expect from PHLEARN, and Ross and Aaron seemed to have fun shooting it, which made it fun to watch. Great job guys! Looking forward to the part 2 Retouching tutorial when it comes out.
This is such a great class, thank you for answering so many questions I had. Terrific video!!
Good tutorial, As someone who does not photograph still life (products) it has encouraged me to try and I think it will make me a better overall photographer.
This was an excellent video. WRT the format – I like the shorter direct and to the point discussions of each of the individual topics. I also like the flow of the topics from the basic discussion of the equipment to the product and presentation details. As I watched, I found myself with questions that were soon answered as the progression of the explanations continued. It’s always good to hear and see it from the experts.
I had hopped that this course would live up to it’s title. Unfortunately this course falls way short. This is also the first photography related course I have seen/purchased where the photographer spends at lease 98% of the time sitting behind a desk discussing a subject instead of on set of the shoot. The course name ‘The Ultimate Guide to Product Photography’ is very inappropriate here. It is at best an introduction to product photography for beginners. There are also some very key concepts that can be used in product photography that were ether missing or barely mentioned such as: A common tool that can be used to improve the focus/dept-of-field is focus stacking. I find this very useful when shooting small objects where you need to get in close to the subject. I am fine with the idea of pulling back from to improve depth-of-field, but that often isn’t enough if you need to capture detail. Another tool used by some product photographers (especially when shooting subject with highly reflective surfaces) is the use of polarizing filters. This includes both on lens, as well as over lights. This can be very helpful in controlling difficult highlights. One of the most valuable tools a product photographer can use is shooting for composite. While this is discussed in a 5:08 minute video, this did not come close to truly demonstrating how powerful it is or how to approach it’s use. This can be used to take a shoot to the next level. I was very disappointed in the nearly complete lack of actual on set shooting. A huge part of any area of photography is how you approach a project and the workflows that can be used.
Excellent !! I really enjoyed this tutorial. Ross explains at my level which makes it both enjoyable and instructive. Much like Aaron.
Amazing! Ross and you led a real spectacle of interactivity. You managed to make it look like we were in a face-to-face workshop. One more time, congratulations! I’ll “Phlearn you” in the next video, for sure!
Thanks. It was a clean, simple and precise tutorial
I recently resubscribed to phlearn when they came out with this course. It was perfect timing since I was curious about product photography as a genre. Loved every minute of this tutorial. Aaron definitely has a talent for teaching in an engaging way and Ross’s skill is enviable. Definitely will recommend this website and tutorial to everyone who needs to learn photography.
Been shooting products for 25 years and still picked up some great tips … excellent. Looking forward to the post production
Great tutorial, thank you so much for blessing us yet again. Was so happy to see this released as it is very relevant to me, working at a furniture store just about to set up a photography studio. This will really come in handy, and i hope to see more photography tutorials with Ross!
High quality tutorial as always, really great to see something different and lots of learning points. I hope you will do some retouching videos based on these shoots too. Thanks team!
So awesome. Hope to see lots of photography tutorial in the future :).
Yet another great tutorial.
Excellent review, really learned a ton out of it! You have really analysed pretty much every aspect there is into product photography! And really, it’s super simple to start, just take care of these crucial steps… Looking forward for your next tutorials team!!!
Great tutorial. As a Sony ar73 I grind my teeth when PhaseOne and Cannon are discussed and my camera is not. I dare to say you will not need any additional editing(over the PhaseOne) from the Sony. The colors are superb out of the box with GM lenses and correct lighting…
Excellent tutorial! Learned way more than I even knew there was to learn! Can’t wait to try out my new skills 🙂