


Download Assets
This tutorial includes 1 PDF guide. Downloads are free with a PHLEARN account.
- Download the sample files from every free tutorial on PHLEARN
- New free tutorials published every week
- One free account: sign up once, then download anything
Free PDF Guide · 3 Pages
This Tutorial as a Step-by-Step PDF
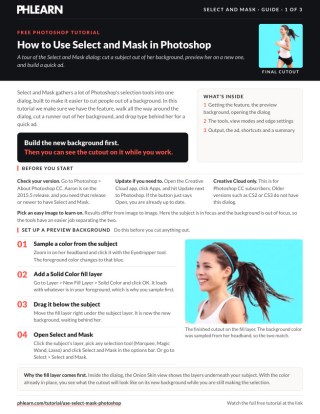
This 3-page guide walks through Select and Mask: check Photoshop > About Photoshop CC for 2015.5 or newer, sample the headband for a Layer > New Fill Layer > Solid Color, paint with Quick Selection in Onion Skin, clean hair with Refine Edge, set Edge Detection Radius and output to a Layer Mask. Keep it next to your keyboard.
description
Select and Mask gathers Photoshop’s selection tools into one dialog built for cutting a subject away from its background. Aaron sets up a solid color fill layer first so the Onion Skin view previews the real result, builds the selection with Quick Selection, Refine Edge, the Brush and the Lasso, then tunes edge detection, smoothing and Decontaminate Colors before outputting a layer mask.
Enjoying This Free Tutorial?
We publish a new free tutorial every week, each one with sample images and PSDs you can download and follow along with. Sign up and they land straight in your inbox, along with early word on sales, events and subscriber-only offers.

Select and Mask brings a whole collection of Photoshop’s selection tools together into one dedicated dialog, purpose-built for cutting a subject cleanly out of a background. This tutorial builds a solid color fill layer to preview a new background, walks through Select and Mask’s quick selection, refine edge, brush, and lasso tools, adjusts advanced settings like edge detection and decontaminate colors, and finishes by placing the cut-out subject over new text for a simple ad composition.
Updating Photoshop to Access Select and Mask
Select and Mask was added in Photoshop CC 2015.5, so confirming the installed version and updating through the Creative Cloud app comes before anything else.
-
Check the Current Version
Go to Photoshop > About Photoshop CC to confirm the installed version number, since Select and Mask requires Photoshop CC 2015.5 or newer.
-
Update Through Creative Cloud
Open the Creative Cloud desktop app and click Update next to Photoshop if a newer version is available.
Why Older Photoshop Versions Don’t Have This Feature
Select and Mask was introduced in a specific Creative Cloud release, so anyone using an older, non-subscription version like Photoshop CS2 or CS3 won’t be able to access this dialog at all. Staying current on a Creative Cloud subscription is what keeps a copy of Photoshop able to receive newer tools like this one.
Creating a Solid Color Fill Layer to Preview the Background
Sampling a color from the subject, such as a headband, and filling a new solid color layer with it gives an immediate sense of how the cutout will look once placed on a new background.
-
Sample a Color From the Subject
Use the Eyedropper tool to sample a color from an element on the subject, such as a headband.
-
Add a Solid Color Fill Layer
Go to Layer > New Fill Layer > Solid Color, which automatically loads the sampled foreground color.
-
Position the Fill Layer Behind the Subject
Move the solid color fill layer beneath the subject layer so it acts as a placeholder background.
Opening the Select and Mask Dialog
Select and Mask can be reached either from any active selection tool’s options bar or directly from the Select menu.
-
Choose a Selection Tool
Select any selection tool, such as the Marquee, Magic Wand, or Lasso tool.
-
Open Select and Mask
Click Select and Mask in the options bar, or go to Select > Select and Mask.
Making an Initial Selection With the Quick Selection Tool
The Quick Selection tool, combined with the Onion Skin view, builds out the main selection while previewing exactly how the subject will look against the new background color.
-
Choose the Onion Skin View
Select the Onion Skin view mode to preview the cutout against the solid color background layer beneath it.
-
Paint Over the Subject With Quick Selection
Click and drag with the Quick Selection tool over the subject’s main areas, such as clothing and legs, to build the selection.
-
Subtract Overselected Areas
Hold Alt/Option to temporarily switch to subtract mode, or click the Subtract icon, and paint over any background area that was selected by mistake.
Refining Hair and Fine Detail With the Refine Edge and Lasso Tools
The Refine Edge tool, painted directly over hair or other soft, complex edges, automatically determines which fine detail belongs to the subject and which belongs to the background, while the Lasso tool cleans up any remaining shaped areas the other tools missed.
-
Select the Refine Edge Tool
Choose the Refine Edge tool from the Select and Mask toolbar.
-
Paint Over Hair and Complex Edges
Paint directly over areas like hair to let the tool automatically separate fine detail from the background.
-
Restore Missing Detail With the Brush Tool
Switch to the Brush tool to paint back in any area, such as a strap, that became incorrectly transparent.
-
Add or Subtract With the Lasso Tool
Select the Lasso tool to draw around any remaining area that needs to be added to the selection, or hold Alt/Option while drawing to subtract an area instead.
Why the Onion Skin Preview Is Worth Building a Background For
Judging a cutout’s quality against a plain checkerboard transparency background makes it hard to tell how well the edges will actually blend into a real new background. Setting up a solid color fill layer beforehand and viewing the selection in Onion Skin mode gives a much more accurate preview of the final composited result while the selection is still being refined.
Adjusting View Modes and Edge Detection
Cycling through Select and Mask’s view modes and adjusting the Edge Detection radius fine-tunes exactly how soft, hair-like edges blend into whatever background is behind them.
-
Cycle Through View Modes
Press F to cycle through the available view modes, or X to temporarily disable the current one, to check the selection under different previews.
-
Adjust the Edge Detection Radius
Raise or lower the Edge Detection radius to control how much soft detail, such as flyaway hair, blends into the new background. Watch the rest of the edge while you move it: at one setting it started cutting off her hand, so Aaron adjusted it until the hair and the hand both looked right.
Applying Global Refinements to the Selection Edge
Smoothing, feathering, contrast, and edge-shifting sliders under Global Refinements make broad adjustments to the entire selection’s edge quality at once. Aaron shows each one but notes that cutting a person out usually doesn’t need them, and he leaves Shift Edge at zero.
-
Smooth Rough Edges
Increase Smooth to reduce any jagged or rough areas along the selection edge.
-
Feather and Add Contrast if Needed
Add Feather for a softer edge transition, and increase Contrast afterward to sharpen that edge back up if it becomes too soft.
-
In the Output Settings, Try Decontaminate Colors
Below Global Refinements, in the output settings, check Decontaminate Colors to remove residual background color, such as green spill, from the edges of the subject. Watch the rest of the image when you do: here it changed the face, so Aaron leaves it unchecked.
Why Decontaminate Colors Matters for Certain Backgrounds
A subject photographed against a strongly colored background, such as green screen fabric, can pick up a faint color spill along its edges, especially in hair or other fine detail. Decontaminate Colors specifically targets and removes that residual tint, which a simple edge refinement alone wouldn’t fully address.
Outputting the Finished Selection as a Layer Mask
Choosing an output option sends the finished selection to a new layer, a layer mask, a new document, or a new document with a layer mask, depending on how the result will be used.
-
Choose an Output Destination
Select an output option, such as sending the result to a layer mask on the current layer.
-
Confirm the Output
Click OK to apply the selection as a layer mask, completing the cutout.
Building a Simple Ad Composition With the Cutout
With the subject cut out and free of its original background, dragging in pre-made text and positioning it behind or around the subject builds a quick, simple ad-style composition.
-
Drag In Existing Text
Use the Move tool to drag a group of pre-made type layers into the document with the cutout subject.
-
Position the Text Behind the Subject
Scale and position the text so the subject appears to overlap it naturally, such as standing in front of a letter.
Why This Approach Works
Creating a solid color preview background before starting the selection is what makes it possible to judge exactly how a cutout will look against a new background in real time, rather than guessing until the very end. Combining tools like Quick Selection, Refine Edge, the Brush tool, and the Lasso tool within one dialog is what lets a single selection be built up and refined from multiple angles instead of switching between separate, disconnected tools. Adjusting edge detection and global refinements afterward is what handles the fine, complex detail, like hair, that a rough initial selection alone could never capture convincingly.
Final Thoughts
Select and Mask consolidates what used to be several separate selection tools and dialogs into one streamlined workflow for cutting a subject cleanly out of its background. The same combination of quick selection, edge refinement, and global adjustments works on any subject with a background that needs replacing, not just this specific portrait.
Quick Reference: Keys, Menus and Settings
- Check the versionPhotoshop > About Photoshop CC (2015.5 or newer)
- Preview backgroundEyedropper on the headband, then Layer > New Fill Layer > Solid Color, under the subject
- Open itSelect and Mask button with any selection tool, or Select > Select and Mask
- Quick SelectionPaint over the subject; Alt/Option to subtract
- HairRefine Edge tool over the hair, then Edge Detection Radius
- ViewsF cycles the views, X turns them off; Onion Skin with Transparency
- OutputOutput To: Layer Mask, then OK
Free Downloads
Take the Guide With You
Get the PDF guide to Select and Mask: the color fill preview, the Quick Selection and Refine Edge tools, Onion Skin, Edge Detection and output to a layer mask. Free with a PHLEARN account.
Select and Mask: Common Questions
How do I open Select and Mask?
Pick any selection tool, like the Marquee, Magic Wand or Lasso, and click Select and Mask in the options bar. Or go to Select > Select and Mask.
Which Photoshop version has Select and Mask?
The video uses Photoshop CC 2015.5 and says you need that release or newer. Check under Photoshop > About Photoshop CC; CS2 and CS3 don’t have it.
Why make a color fill layer before cutting out?
So the Onion Skin view shows your subject on the new background while you work. Sample a color with the Eyedropper, go to Layer > New Fill Layer > Solid Color and drag the fill layer under the subject.
How do I remove background that got selected?
Hold Alt/Option, or click the subtract icon in the options bar, and paint over it with the Quick Selection tool.
How do I get hair right?
Paint over the hair with the Refine Edge tool; it works out what is hair and what is background. Then raise or lower the Edge Detection Radius until the hair blends into the new background.
Part of my subject went see-through. How do I bring it back?
Paint it back in with the Brush tool in Select and Mask; hold Alt/Option to subtract instead. The Lasso tool adds or subtracts any shape you draw.
How do I switch view modes?
Press F to cycle through the views and X to switch them off for a moment. Onion Skin, with its Transparency slider, shows the cutout over the layers underneath.
Should I turn on Decontaminate Colors?
Only if the old background color shows in the edges, like green in the hair from a green background. In the video it changed the face, so it stays off.
How do I get the result as a layer mask?
Under Output To, choose Layer Mask and click OK. The other choices are Selection, New Layer, New Layer with Layer Mask, New Document and New Document with Layer Mask.
Is there a free download?
Yes, with a free PHLEARN account. You get 1 PDF guide with the steps from the video, from the color fill preview to the finished layer mask and the text behind the subject.
From the Magazine View all
Stories, interviews and guides for photographers, new every week.
 EditingLightCraft vs Lightroom: I Edited the Same RAW Files in BothThe free clone on the same RAW files: what matches, what breaks and who should switch.
 InspirationRare Historical Photos: 13 of the Rarest Pictures Ever TakenFrom the earliest surviving picture of a person to the last passenger pigeon: who took each one and why it survives.
 EditingArtCraft: Photoshop Cloned by AI in Two Weeks. Is It Legal?ArtCraft cloned Photoshop and Lightroom with AI and gave them away. Any good? Legal? Safe?
Master Photoshop, Lightroom and Photography
Join PHLEARN PRO for $12.99 a month, or $99.99 a year (save 36%). Cancel anytime, with a 100% money-back guarantee.





