
LUT Downloads
Install Guide
How to Install Your LUTs
A short PDF that walks you through loading this pack in Photoshop, Premiere Pro, DaVinci Resolve and Final Cut Pro, plus two tips for better results.
DESCRIPTION
Help colors pop off the screen in your photos and videos with our Bold & Vibrant Color Grading LUTs! Instantly brighten up a scene while enhancing color and lifting shadows.
All five keep clean whites: Cobalt Turquoise, Crisp Appleblossom and Gold Greens warm the image, add strong saturation to reds, yellows and greens and push greens toward yellow, while Iris Blues and Sweet Sunshine stay neutral and brighten the midtones, with Sweet Sunshine making yellows richer. After you apply one, lower the layer opacity in Photoshop or the LUT intensity in your video app if the look is too strong.
One zip holds the 5 LUTs as .CUBE files for Photoshop’s Color Lookup, the same 5 in .3DL, .CSP, .CUBE and .ICC for video and other apps, plus 4 sample images to practice on and the PDF install guide.
TRY THEM FOR FREE
Want to try our LUTs before you buy? Check out our FREE Premium LUTs Sample Pack that includes some our favorite Warm Tone, Cool Tone, Film Tone, and Moody Vibe looks.

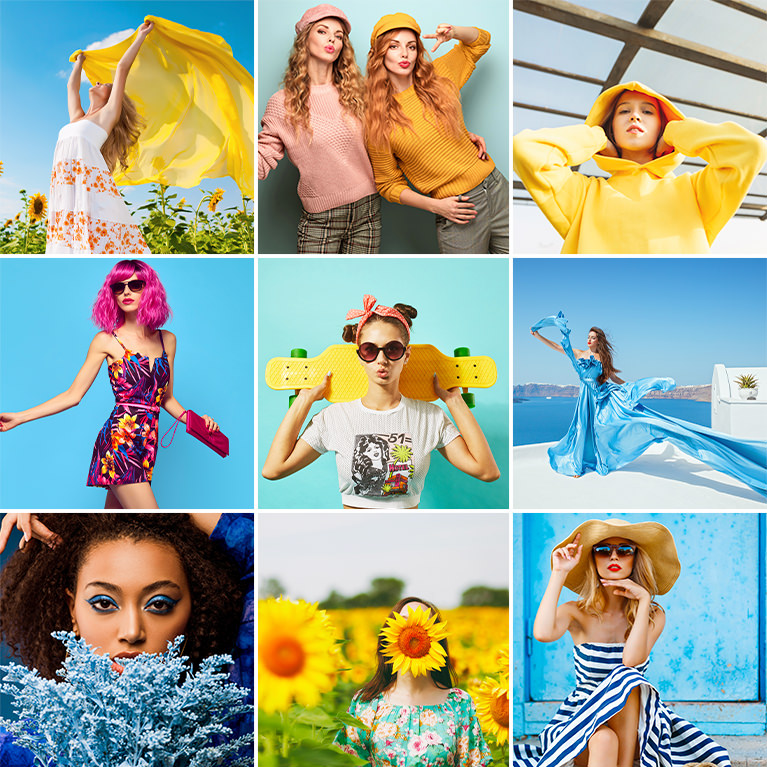
PHLEARN PRO · LUTs
Bold and Vibrant LUTs
5 LUTs4 sample imagesPhoto & video apps
Bold and Vibrant LUTs · 5 Looks
Saturated Color With Natural Skin
Five LUTs that boost color and brighten the scene while keeping skin warm and natural. Use them on photos and video in Photoshop, Premiere, Final Cut, DaVinci Resolve and other apps that read LUTs.
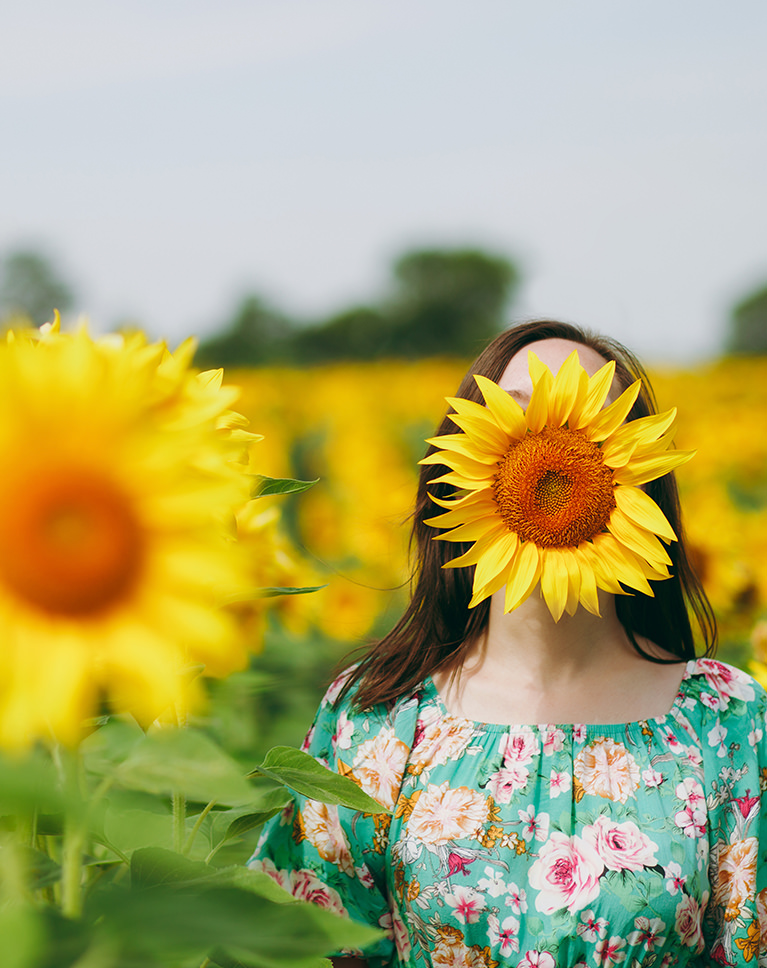
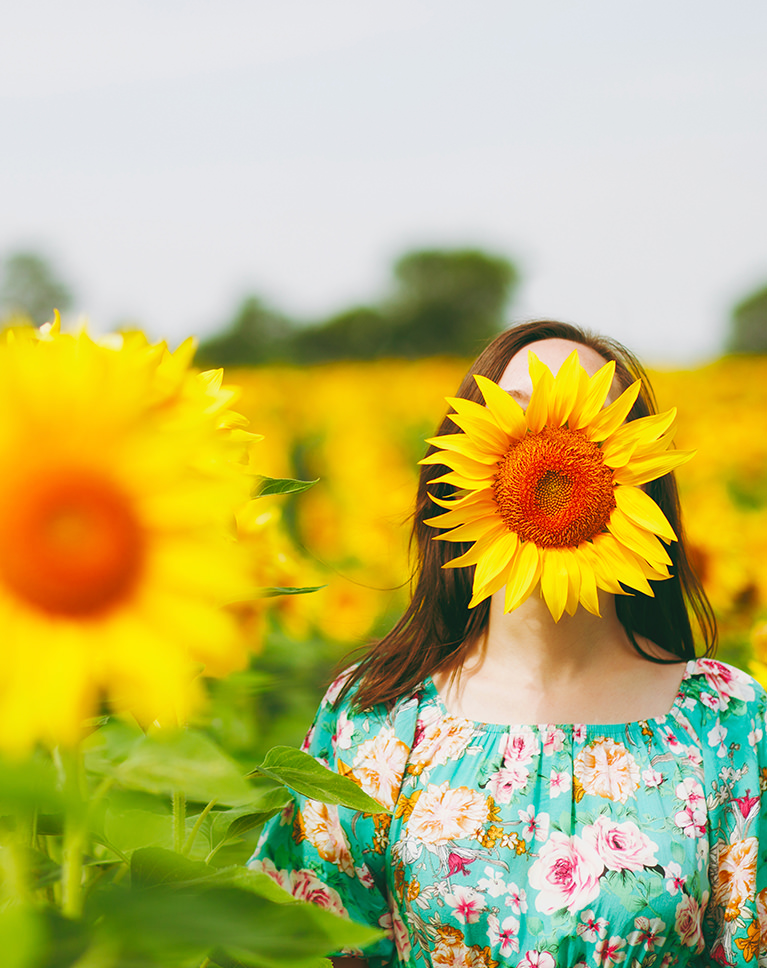
Gold Greens
Gold Greens turns a sunny field into a warmer, richer scene. The sunflowers deepen from lemon yellow to a strong gold, the leaves go a fuller green and the teal flowered dress gets more color, while the pale sky stays soft.
Brighter Midtones, Warm Shadows
Midtones and highlights are lifted, so middle gray rises from 50 to 58 percent, and black lifts to 6 percent, the only lifted black in this pack, with a clear orange tint in the shadows. Oranges gain about a third more saturation, yellows and reds about a quarter and greens about a fifth, leaning slightly toward yellow.
Skin That Glows
Lighter skin tones come out brighter and a little warmer, so skin stays fresh next to all that green and gold instead of turning orange. Deeper skin tones brighten as well and gain noticeably more color.
Best on: sunflower and wildflower fields, summer gardens, and outdoor portraits full of yellow and green.
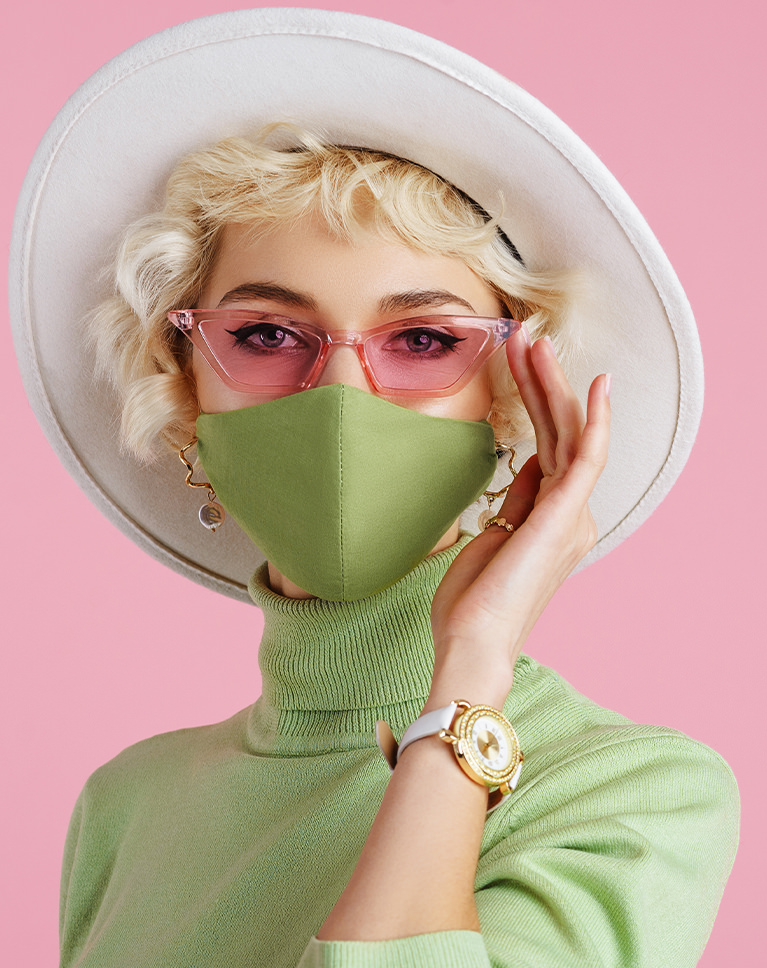
Crisp Appleblossom
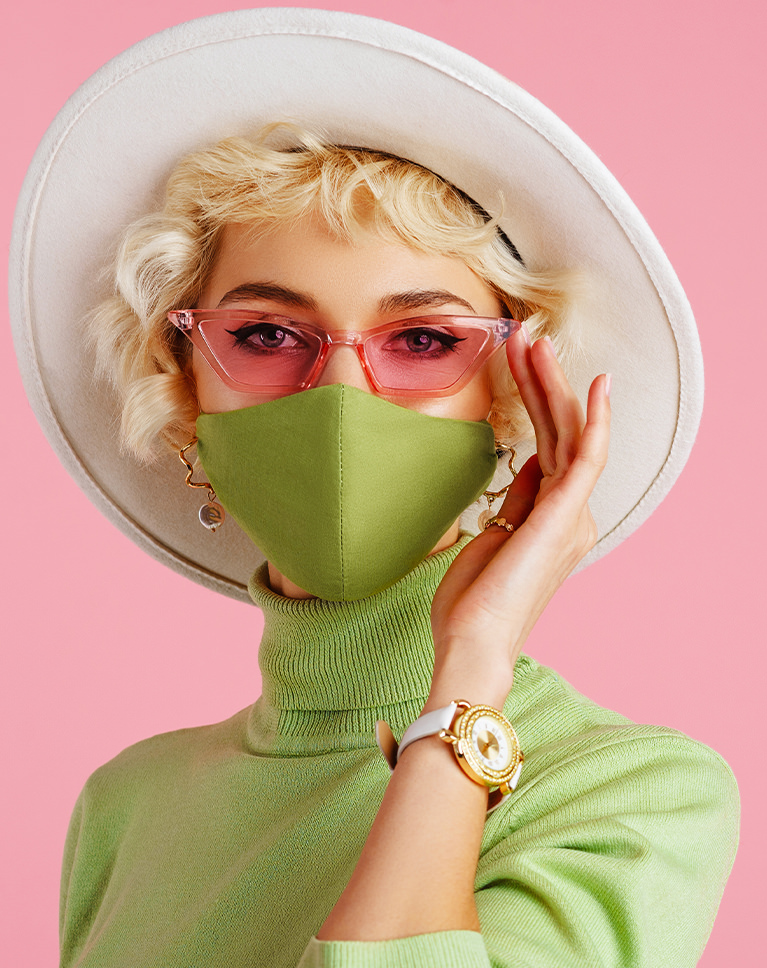
Crisp Appleblossom makes pastel colors read richer and cleaner. The pink backdrop turns a deeper, more even pink and the sage sweater and mask go a fuller green, while the white hat stays clean. Contrast rises a little, which helps the colors look crisp.
Deeper Shadows, Steady Highlights
Shadows and midtones dip slightly, with middle gray settling at 48 percent, and a warm orange cast runs through the midtones. The brightest tones stay where they were, and pure black and white do not move. Reds and oranges gain about a third more saturation, and yellows, greens and aquas about a fifth, while blues barely change.
Warm, Rosy Skin
Skin picks up more warmth and color and gets only slightly darker, which suits a pink and green palette like this one. Deeper skin tones gain the most color.
Best on: studio portraits on colored paper, pastel fashion and beauty shots, and pink or green backdrops.
Cobalt Turquoise
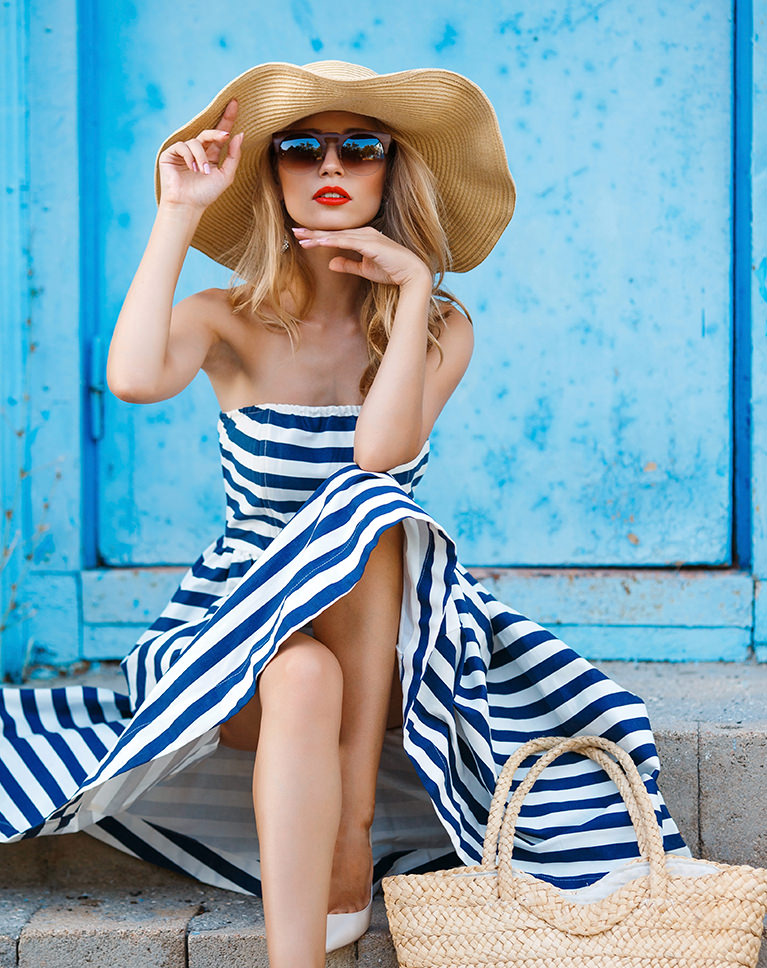
Cobalt Turquoise pushes painted blues toward a stronger turquoise. Here the door and wall turn a more vivid cyan blue, the navy stripes stay crisp and the straw hat and bag pick up a warmer gold. Overall contrast stays almost exactly as it was.
Rich Color, Warm Midtones
Reds, oranges, yellows, greens and aquas get about a fifth to two-fifths more saturation and sit slightly lighter, while blues get only a small boost. Oranges gain the most, and reds lean a little toward orange. Midtones brighten a little, with middle gray rising from 50 to 53 percent under a clear orange cast, and pure black and white don’t move.
Bold Lips, Tanned Skin
Skin turns warmer and more tanned, and the red lipstick gets punchier against the cool wall. Both light and deep skin gain a good deal of color and lighten slightly.
Best on: painted walls and doors, summer travel portraits, and striped or color-blocked fashion.
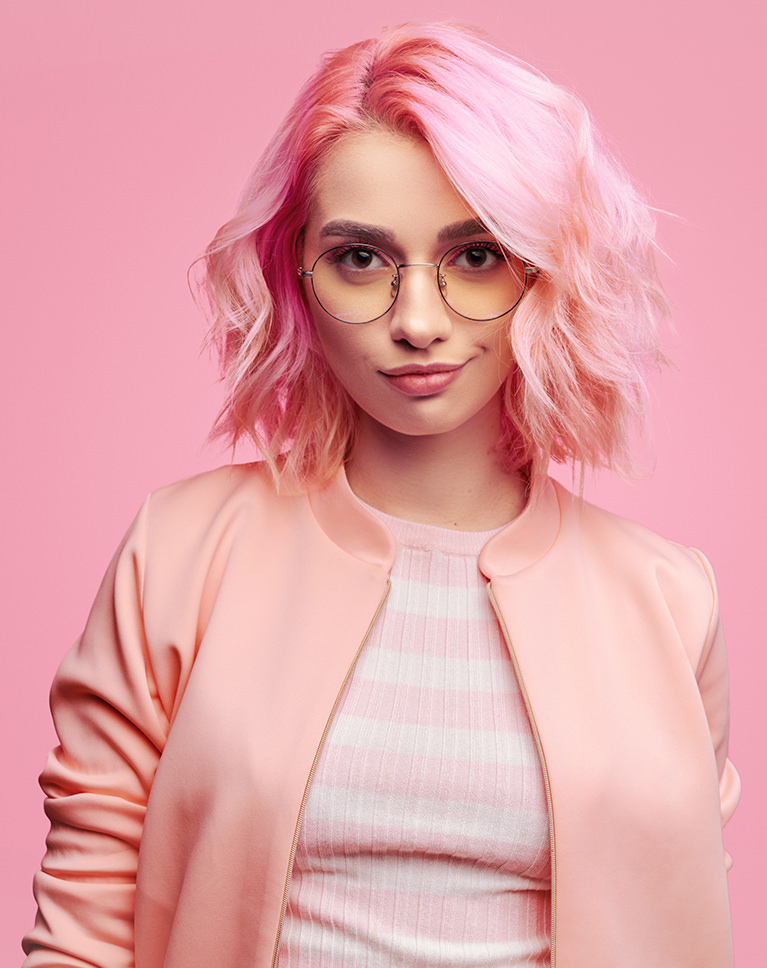
Sweet Sunshine
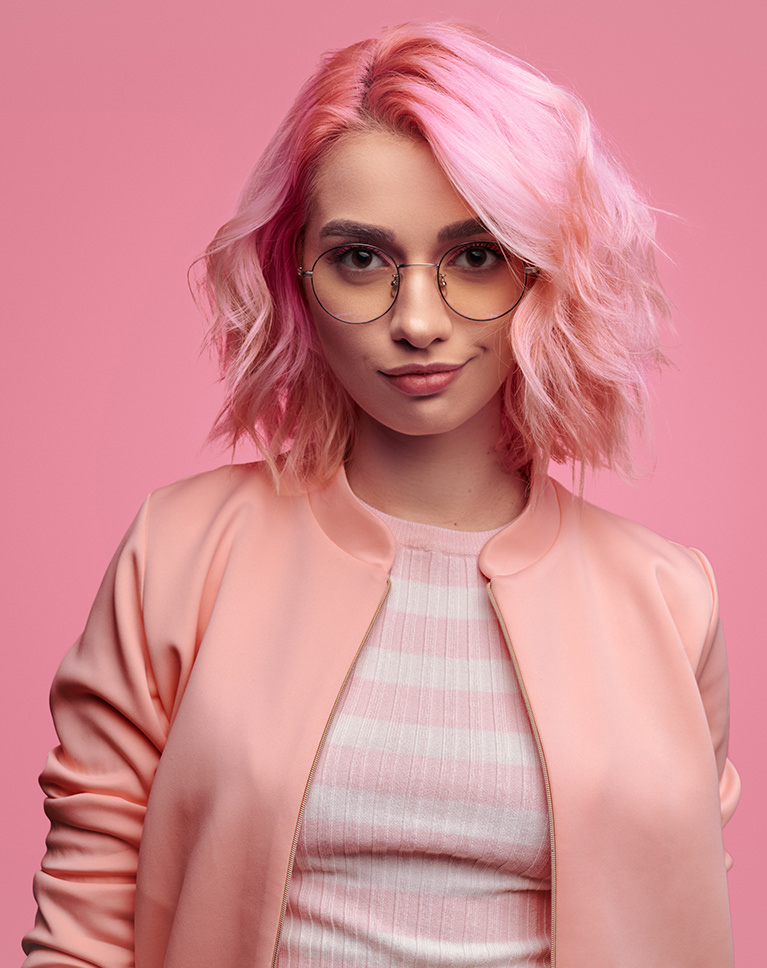
Sweet Sunshine brightens the whole frame and keeps it soft. The pink hair, jacket and backdrop turn lighter and more pastel, and her face gets brighter without losing its warm tone. The grays stay neutral, so the brightening adds no color cast.
A Big Lift in the Midtones
Middle gray rises from 50 to 60 percent, the biggest lift in this pack, and the upper midtones climb from 75 to 82 percent, while black and white barely move, so the photo gets lighter without looking faded. Reds brighten a lot but gain only a little color.
Strong Yellows and Greens
Yellows gain about a quarter more saturation, and greens and aquas about a sixth, so any accent in those colors stands out against the pinks. Light skin brightens with a little less color, while deeper skin gains some.
Best on: bright studio portraits, pink and peach color schemes, and playful beauty and fashion shots.
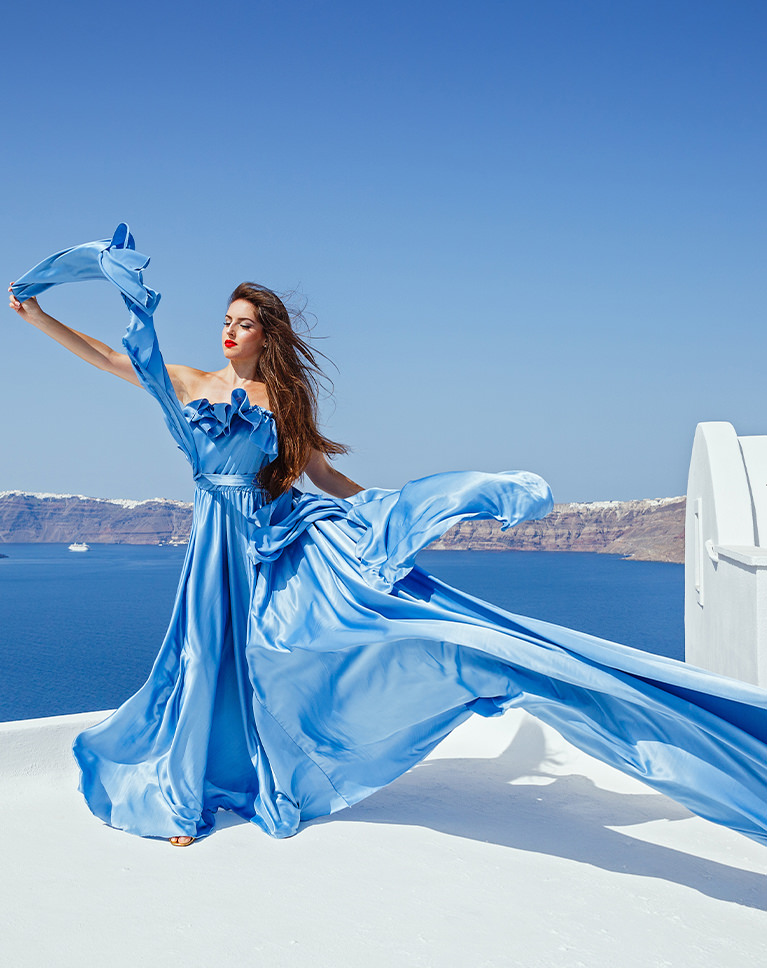
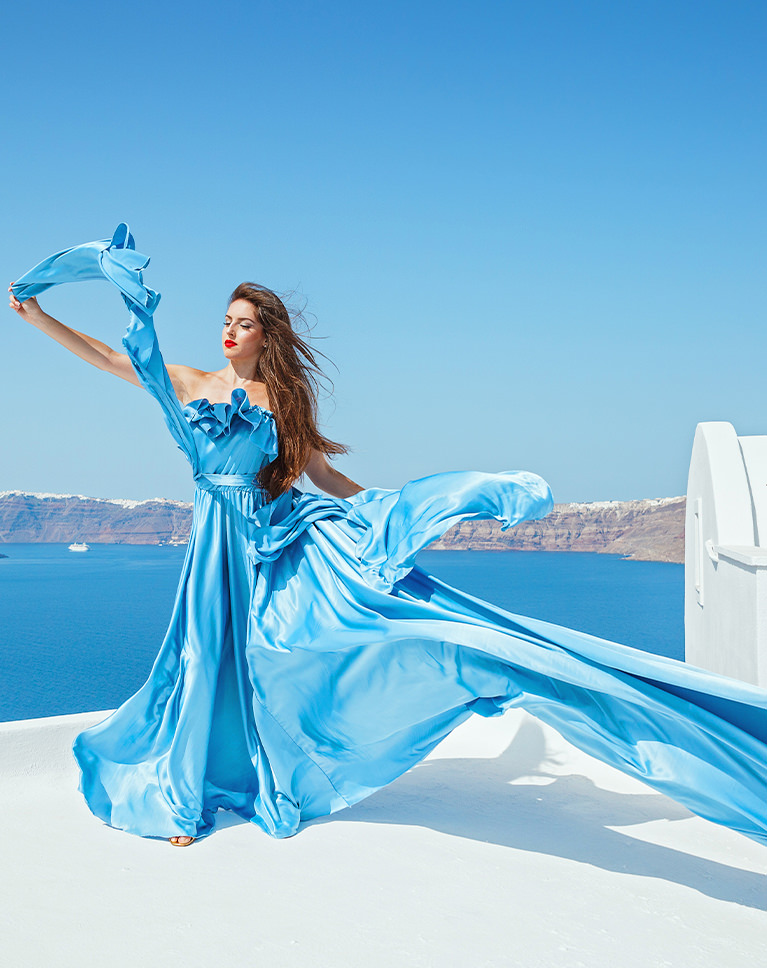
Iris Blues
Iris Blues brightens the scene and gives blues a lift. The flowing dress turns a lighter, more vivid blue, the sky and sea lean toward turquoise and the white rooftop gets brighter. Contrast softens slightly, which keeps the bright scene gentle.
Blues Nudged Toward Cyan
Blues get much lighter and shift toward cyan while losing a little saturation, and aquas gain a little more color. Other colors lose a little too. The midtones brighten with no color cast, as middle gray rises from 50 to 58 percent and the shadows open up, while black and white stay put.
Natural Skin in Bright Light
Skin gets lighter but keeps nearly the same color, so her arms and face look natural against the blue dress and sky. Lighter skin loses a touch of color, and deeper skin brightens the most.
Best on: seaside and rooftop portraits, blue clothing, and sunny travel photos with lots of sky and water.
What’s in the Download
5 LUTs, every format
One zip with the 5 LUTs as .CUBE files for Photoshop, plus each one in .3DL, .CSP, .CUBE and .ICC for video and other apps, and 4 sample images to practice on. In Photoshop they load through a Color Lookup adjustment layer.
- ZIPPHLEARN Bold and Vibrant LUTs 2026.zipEvery LUT in every format, one download, 8.5 MB
- CUBEPhotoshop Quick Install (.CUBE)The 5 LUTs ready for a Color Lookup layer
- 3DLAll Formats (.3DL, .CSP, .CUBE, .ICC)The same 5 for Premiere Pro, After Effects, Resolve, Final Cut and Capture One
- JPG4 Sample ImagesFree-to-use practice photos
- PDFPHLEARN LUTs - Install Guide (2026).pdfInstall steps for Photoshop and video apps, plus two tips
- PHLEARN-Bold & Vibrant-Cobalt Turquoise.CUBE
- PHLEARN-Bold & Vibrant-Crisp Appleblossom.CUBE
- PHLEARN-Bold & Vibrant-Gold Greens.CUBE
- PHLEARN-Bold & Vibrant-Iris Blues.CUBE
- PHLEARN-Bold & Vibrant-Sweet Sunshine.CUBE
The 4 sample images


Photos by Anurag Jamwal, Mohammad Hossein Mirzagol, Margo Evardson and Job Vermeulen on Unsplash
LUT Questions, Answered
What’s included in the Bold & Vibrant LUTs?
The pack includes 5 LUTs: Crisp Appleblossom, Cobalt Turquoise, Gold Greens, Iris Blues and Sweet Sunshine. Each LUT comes as .CUBE, .3DL, .CSP and .ICC files, so it works in Photoshop, Premiere Pro, DaVinci Resolve, Final Cut Pro and most other editors.
What kind of look do the Bold & Vibrant LUTs give?
They are made for photos and videos where you want color to pop off the screen. The LUTs brighten the scene, lift shadows and turn up saturation and vibrance, so colors look stronger. The featured look on the page, Gold Greens, shows this bright, saturated style.
How do the Bold & Vibrant LUTs handle skin tones?
Even though these LUTs raise saturation and vibrance across the frame, they are designed to preserve the natural tones in skin. That way the colors around your subject get stronger while the people in your photos and videos keep a natural look.
Are LUTs included in my PHLEARN PRO subscription?
Yes. A PHLEARN PRO membership includes every LUT pack, plus PRO Tutorials, Lightroom Presets, Photoshop Actions and Photoshop Brushes.
Which programs do the LUTs work in?
Photoshop, Premiere Pro, DaVinci Resolve, Final Cut Pro, After Effects, Lightroom Classic and most other photo and video editors. Use the .CUBE file unless your software asks for .3DL, .CSP or .ICC.
How do I use a LUT in Photoshop?
Choose Layer > New Adjustment Layer > Color Lookup, open the 3DLUT File menu in the Properties panel, choose Load 3D LUT and pick a .CUBE file from the Photoshop Quick Install folder. Set the strength with the layer’s Opacity.
How do I install LUTs in Premiere Pro, DaVinci Resolve or Final Cut Pro?
The PDF install guide in your download has a page for each one, and every step for every program is on our How to Install LUTs page.
The LUT looks too strong. What do I do?
Turn it down: lower the layer Opacity in Photoshop, the Intensity slider in Premiere Pro or the Mix slider in Final Cut Pro. In DaVinci Resolve, reduce Key Output Gain for that node.
Should I correct my photo before adding a LUT?
Yes. Set exposure and white balance first, then add the LUT on top. A LUT grades color; it does not correct it.
My LUTs don’t show up in DaVinci Resolve.
Skipping Update Lists is the usual reason. Open Project Settings > Color Management, click Update Lists, then Save.
Do you offer refunds?
Because these are downloadable products, all sales are final and we are not able to offer refunds.
Terms of Use
These LUTs are licensed for personal and professional use by the individual who purchased or downloaded them. The license does not extend to companies or partnerships, and the files may not be resold, loaned, gifted, shared, copied or redistributed. All PHLEARN LUTs are copyright protected.
Master Photoshop, Lightroom and Photography
Join PHLEARN PRO for $12.99 a month or $99.99 a year. Cancel anytime, with a 100% money-back guarantee.





