Course Downloads
How to Use the Patch Tool in Photoshop
-
Add to
favorites
-
DifficultyMedium
-
Videos1
-
Software
Description
The Patch Tool is like a giant healing brush, use it to remove large blemishes from photos.
In this tutorial, learn how to remove and duplicate elements of a photo using the Patch Tool.
THIS COURSE INCLUDES
- 1 Sample Image
Share
What is the Patch Tool?
The Patch tool is one of the most used and most helpful tools for photo editors. If you want to remove something distracting from the background of an image or even out an area that appears irregular, such as acne on a model’s face, you’re going to want to use this tool. Check out this quick overview of how this tool works and the best times to use it in your image editing.
What Does the Tool Do?
This tool is similar to the Healing tool, but it uses a free-form selection instead of a brush to duplicate another area on an image. Once you’ve made your selection, you can drag it over the area that you want to patch the selected area onto. This is where the magic comes in. Instead of having an irregular patch, Photoshop feathers out the patch and, hopefully, creates a seamless area where the selection overlays and naturally merges with the original image.
When to Use It
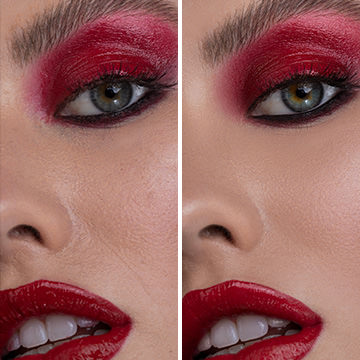
The tool can be used to fix a variety of problem areas in a photograph, but it’s especially helpful when dealing with skin imperfections. Skin isn’t completely smooth, and if you just use a skin tone color to paint over a blemish, it’s going to be pretty obvious. Using this tool, the natural variations in a person’s skin tone and texture are replicated. This tool is also a great solution when you’re trying to remove unwanted objects or shadows from a landscape image.
Common Problems with the Tool
One of the downsides of using this tool is that the patch algorithm isn’t always perfect. In some cases, if you make a selection that’s near an irregular area of an image, the irregular area will end up being patched in even if it wasn’t actually selected. For instance, say you’re trying to edit a boat out of an image of the ocean. If you make a selection of the ocean that’s near the shoreline, parts of the shoreline may be patched in where you’re trying to edit out the boat, making the image look irregular.
To deal with this issue, try to make your selections near the center of the area that you want to copy or avoid selections that are near significantly different colors or textures from what you’re wanting to patch in. Using the feathering option when making your patch selection can help with this.
Do you want to learn more about how to use the Patch tool to edit your images? Check out our tutorial video about this helpful tool, and view our variety of other Photoshop tutorial videos too. You’ll be editing like a pro in no time.
Reviews
There are no reviews yet.
New & Popular Tutorials
Training Site in
the World
Tutorials!
Ratings
and Counting
Subscribers


