DESCRIPTION
There are countless ways to edit your photos. Some changes will be corrective, for when you didn’t quite nail the shot in camera. Some will be stylistic, applying the finishing touches to bring an image to life. Shooting in RAW opens up a whole world of editing options and in this tutorial, we’ll show you how to get started. Follow along with the included RAW Photos.
THIS COURSE INCLUDES
- 213 Sample Images
Share
RAW Processing
RAW Processing
Shooting in RAW will yield the complete, uncompressed data captured by your camera’s sensor. This gives you a ton of flexibility and control in post-production. You’ll be amazed at how much information your camera can actually capture and how easily it can be manipulated to create the exact look and tone you want in your images.
Local Editing
If you’re looking for a tool that’s as versatile as it is precise, the tone curve in Lightroom should be one of your go-to editing staples. From adjusting the luminosity of specific color channels, to adding a vintage fade effect to your shadows and highlights, the tone curve handles it all with ease.
Global Editing
Global edits will affect your entire image. You’ll want to edit globally when you need to adjust things like exposure, highlights and shadows, and the color of your photograph. We’ll walk you through all of the tools in the Develop Module which provide a great foundation when starting your edits.
Compositing
Editing comes in a lot a varieties. Sometimes you’ll need to perform quick global edits to your photos to help you with the culling process. Sometimes more detailed edits are required when you’re working with clients. We’ll show you how to build the editing process into multiple steps of your workflow.
Imagination to Reality
Throughout this series, we’ll take you through everything from creating your first Lightroom catalog, to sending photographs over to Photoshop for external editing. We’ve developed our process over the years to help you work faster, stay organized, and never have to worry about losing or misplacing any files.
External Editing in Photoshop
Lightroom is powerful but sometimes certain edits require a bit more depth. We’ll show you our workflow for working between Lightroom and Photoshop. While in Photoshop, we’ll cover how retouch environments and remove unwanted objects.
Professional Coloring
Subtle color adjustments can make a big impact in your images.
Synchronize Settings
If you’ve taken a bunch of pictures in the same environment, you can make exposure adjustments to one, and then apply those adjustments to all of the other images in that group. The Synchronize Settings option will speed up your workflow and help get all of your images on even ground.
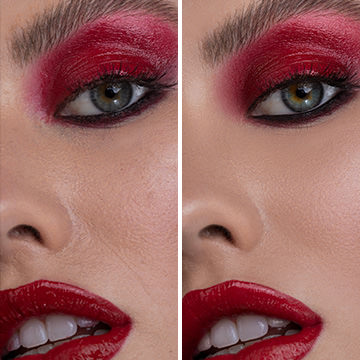
Retouching
After editing images to perfection, it’s time to export them and deliver to a client or upload them to the web. Learn exporting workflow to make sure your images display properly no matter where they end up.

Aaron Nace
PHLEARN Founder
Aaron Nace is a photographer, Photoshop artist and founder of PHLEARN. He is the #1 Photoshop instructor in the world with millions of YouTube subscribers.
Reviews
New & Popular Tutorials
Training Site in
the World
Tutorials!
Ratings
and Counting
Subscribers










Im so glad i got the pro subscription everything is explained very clearly and watching these i now have an understanding on how to use Lightroom! thanks!
Superb tutorial. I love the step by step process.
This is such a fantastic tutorial, especially for someone learning to use Lightroom!