Download Sample Images
description
Learn how to create seamless panoramas for Instagram using some quick math and easy-to-use Photoshop tools!
Share
CREATE SEAMLESS PANORAMAS
Create Panoramas on Instagram
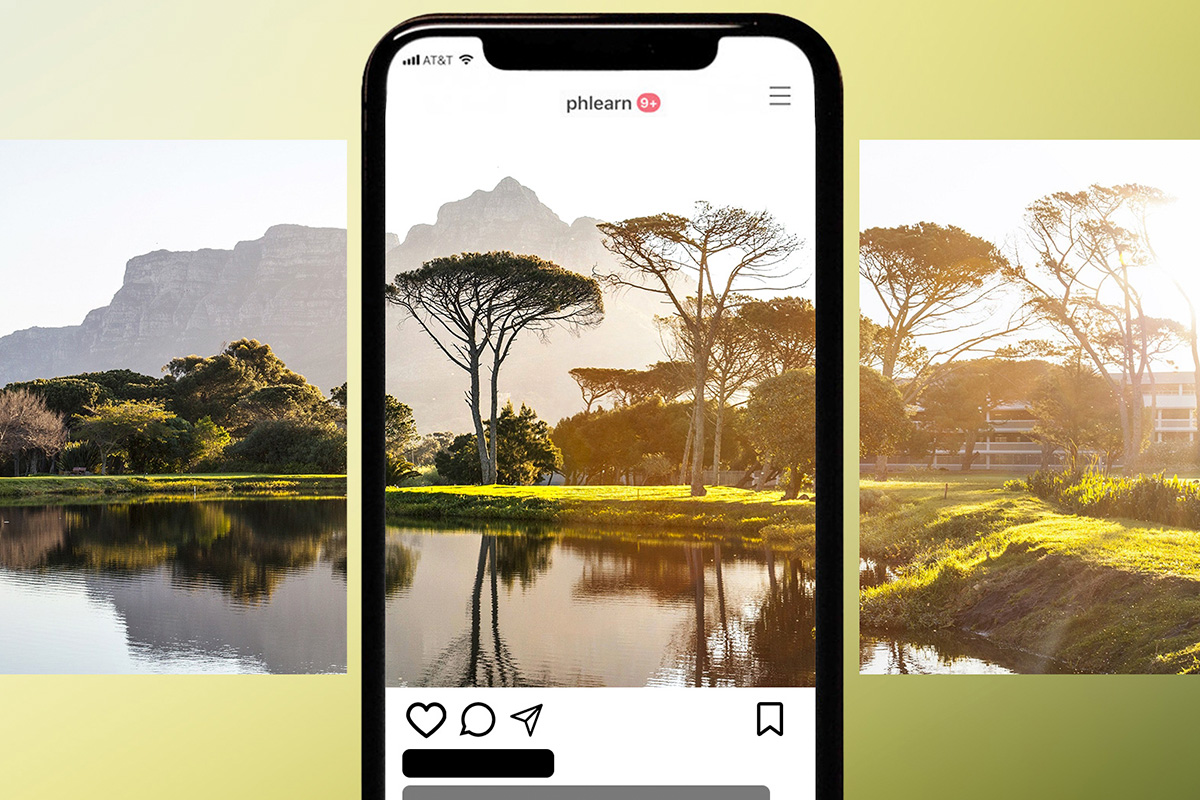
Seamless Panoramas for Instagram
If you’ve ever wondered how to make seamless multi-posts on Instagram (those posts where you’re able to swipe across a single, panoramic image), we’re here to show you how it’s done!
The best part is that it can be done in just a couple of minutes with some very easy-to-use, automated tools.
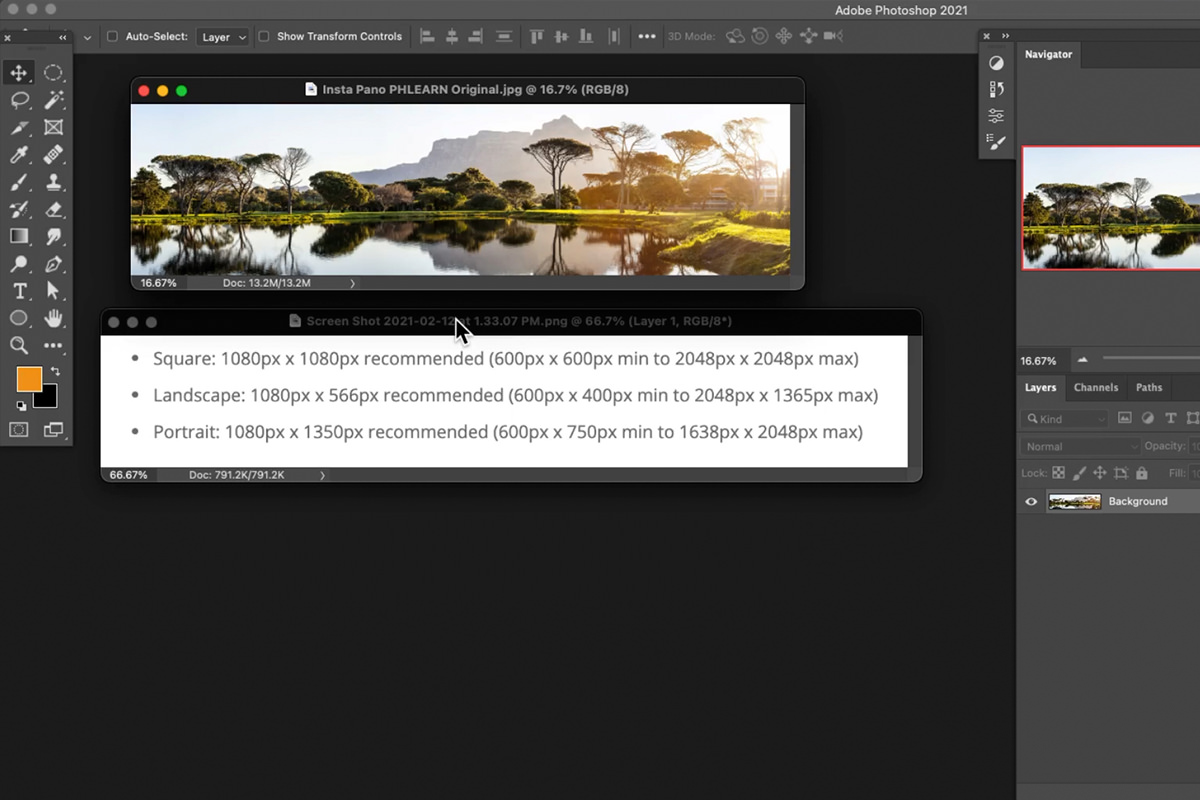
The Best Image Dimensions for Instagram
Before uploading to Instagram, you’ll want to know the best dimensions and proportions to use so that your images display properly. Here’s a short list for reference:
- Square: 1080×1080 pixels recommended (600×600 minimum to 2048×2048 maximum)
- Landscape: 1080×566 pixels recommended (600×400 min. to 2048×1365 max.)
- Portrait: 1080×1350 pixels recommended (600×750 min. to 1638×2048 max.)
With these dimensions in mind, we can figured out how to divide an image into multiple sections of equal width. Let’s take a look at our example and see how it’s done!
Resizing an Image for Instagram
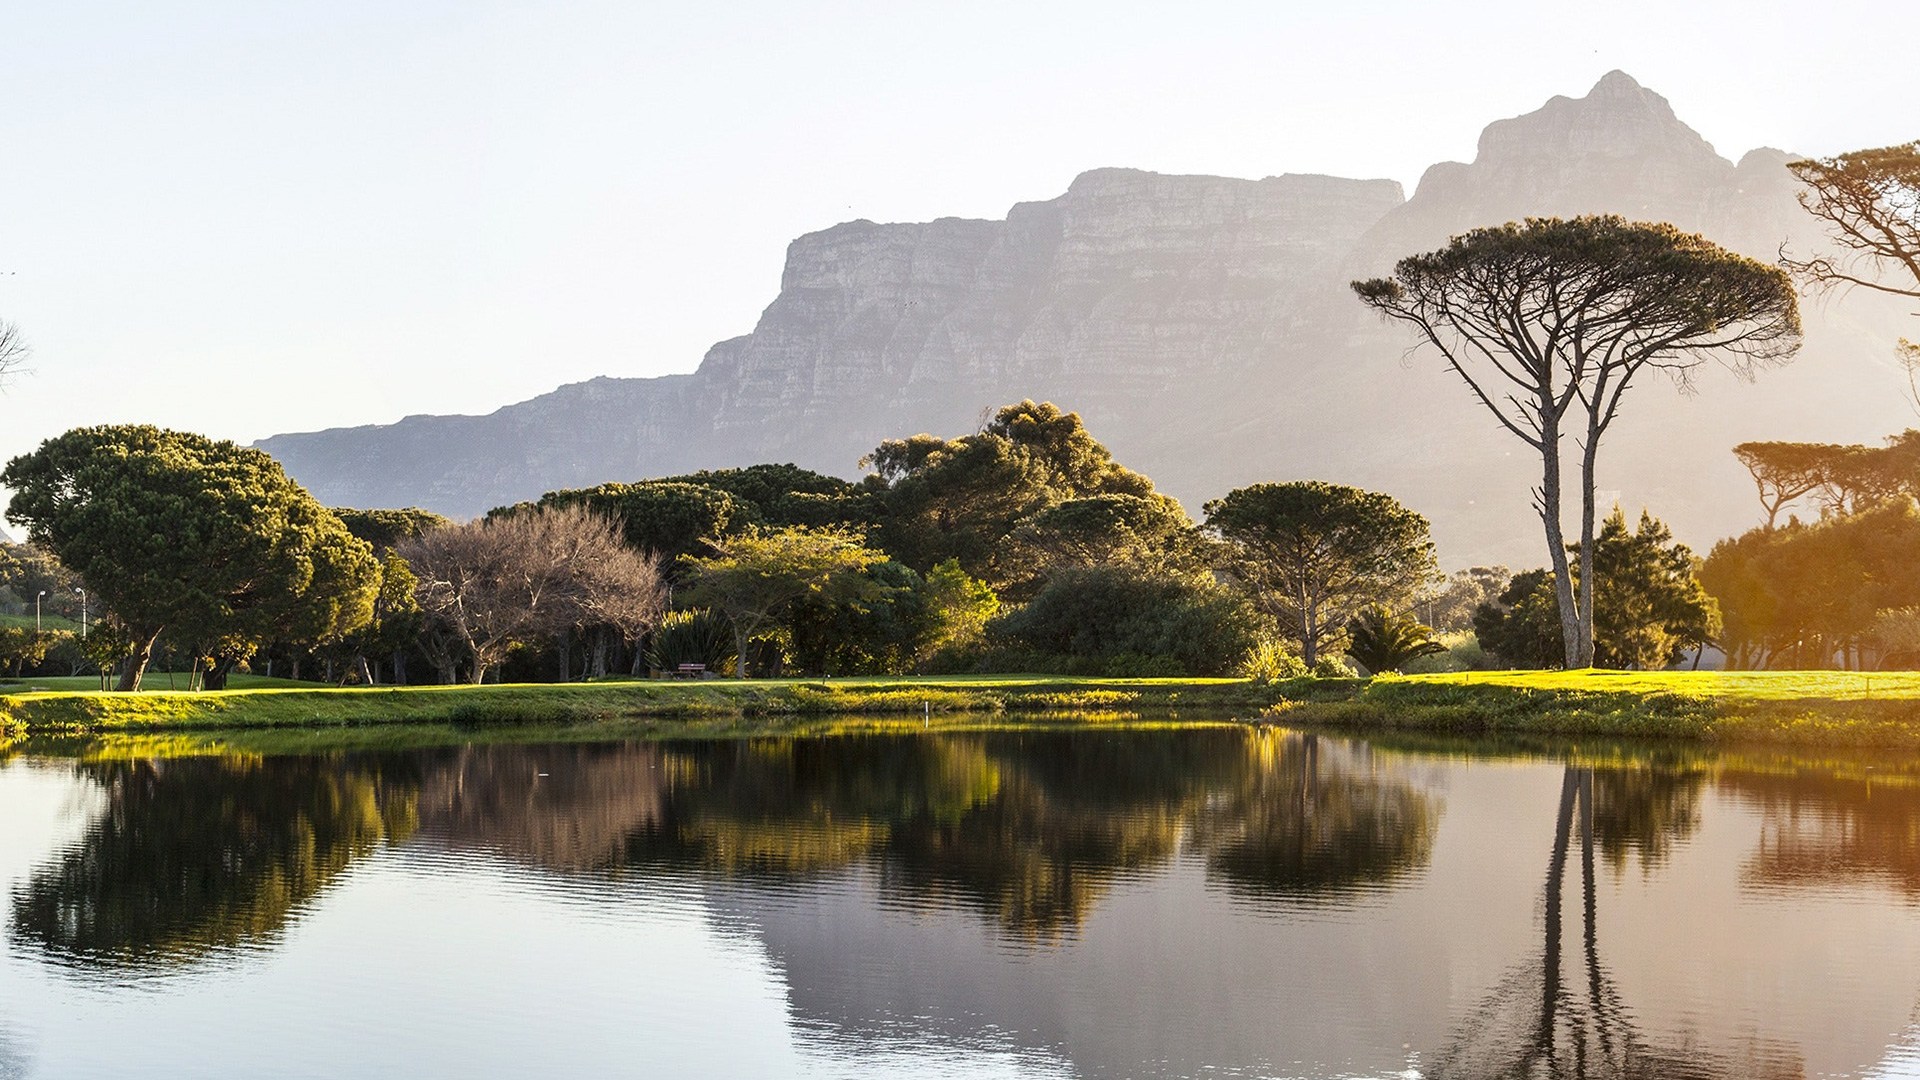
For our example, we’re using a panoramic image that’s very, very wide. There’s no way we could post this to Instagram as-is without having to crop quite a bit of the image away.
But, using those dimensions listed above, we can split the image into multiple sections, where each section is the perfect width for an Instagram post.
This is relatively easy to figure out, and just requires some quick math. We decided that we want to spread this image across 5 Instagram posts. The recommended width for a single post is 1080 pixels. Since we’re aiming for 5 posts, we need our image to be 5 times the width of a single post.
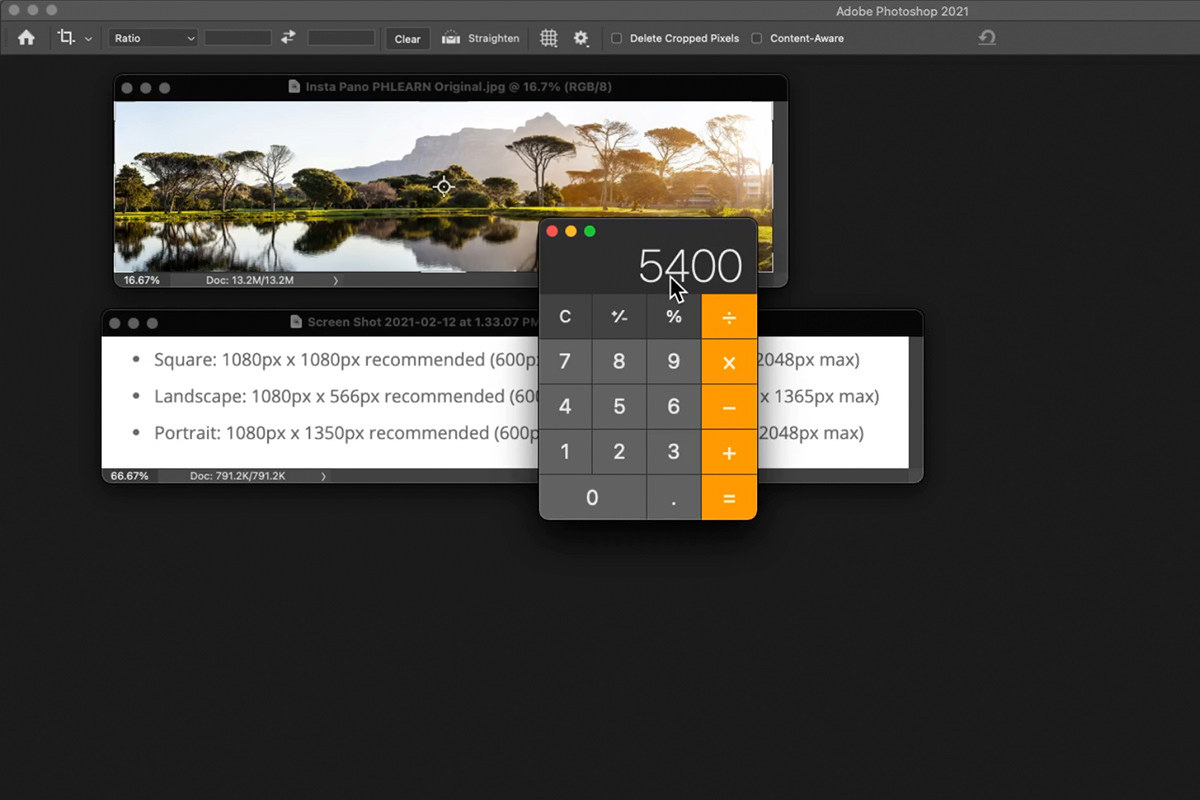
So: 5 x 1080 pixels = 5400 pixels. Now we can take that number of 5400 pixels, and resize the example image to match.
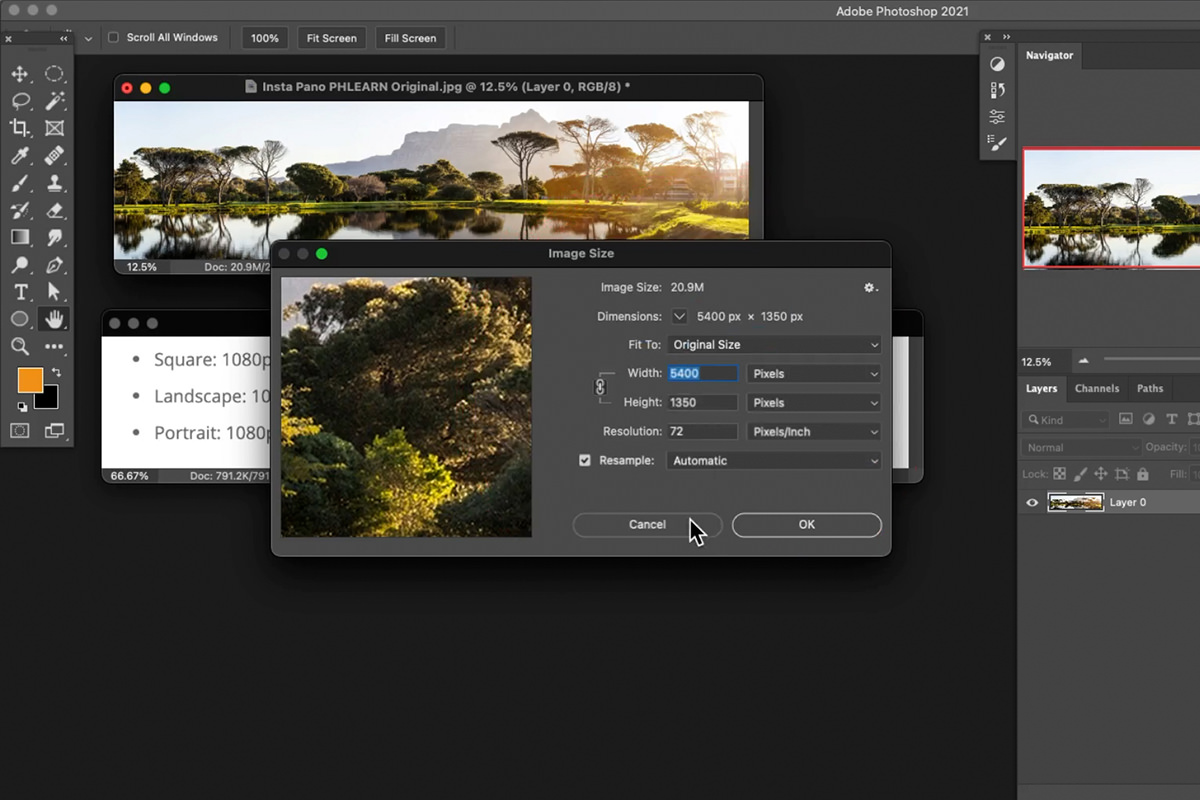
Go to the Image Menu and select Image Size. Set the Width to 5400 and click OK. We now have an image that is exactly 5 times the width of a single Instagram post.
Keep in mind that the height may not match the recommended dimensions, so some additional cropping may still occur when you upload the final photos.
Splitting an Image with Guides
Now that we have a 5400-pixel-wide photo, we need to divide it into 5 equal parts (since we’ll need 5 individual posts that are 1080 pixels wide each).
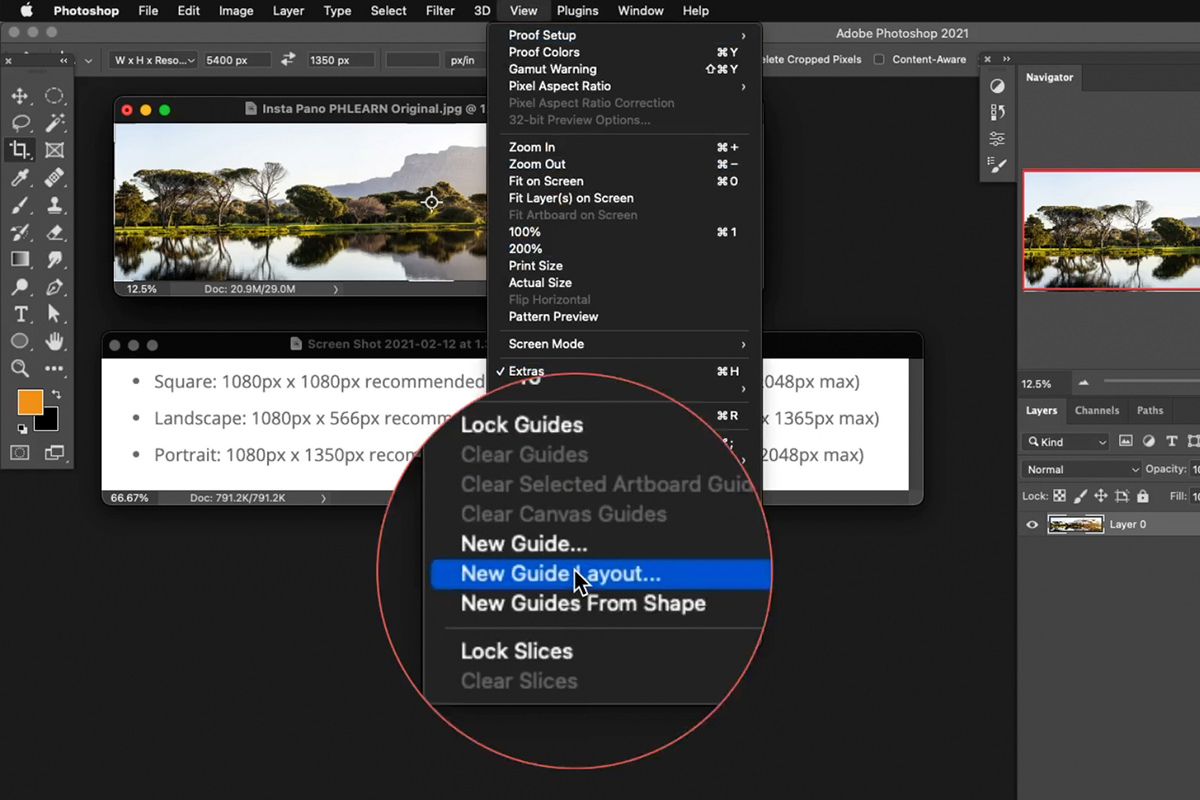
Photoshop makes divisions like this pretty painless. Open the View Menu and select New Guide Layout near the bottom of the list.
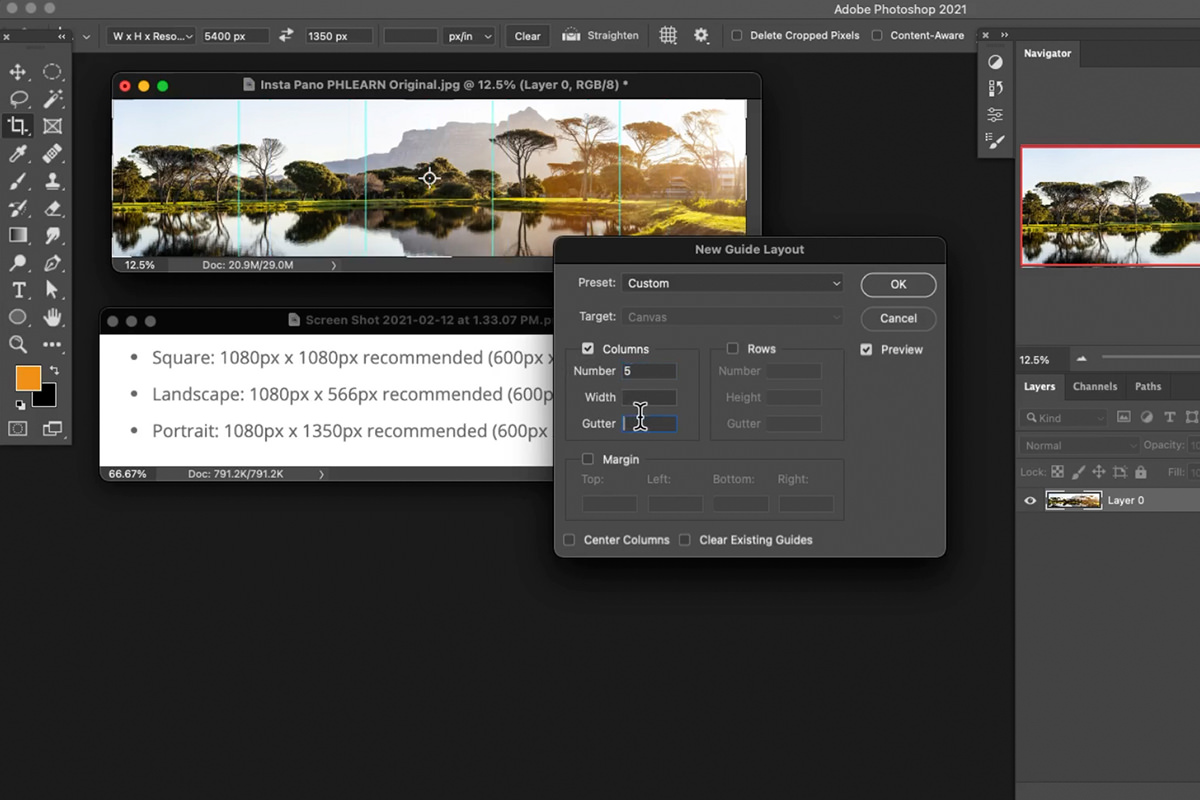
Then set the number of columns to equal the number of sections you want–in our case, 5.
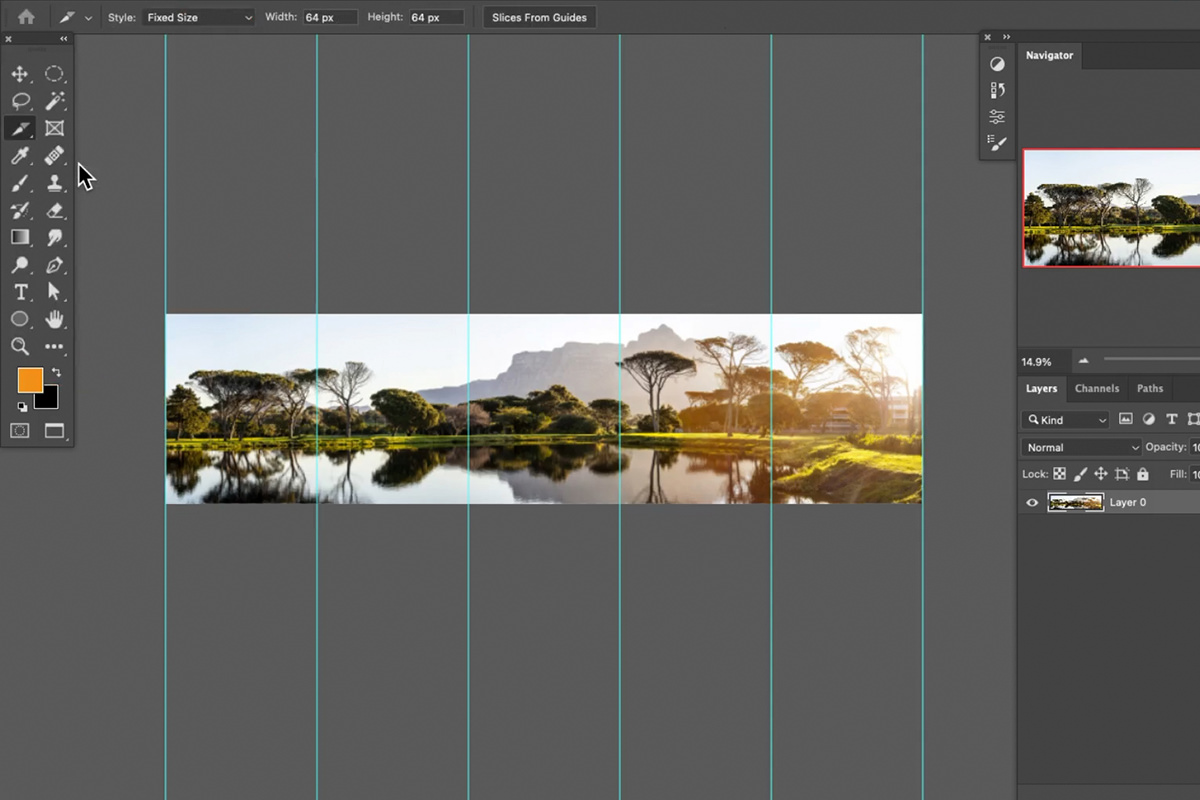
Photoshop will automatically create Guides that show where the image can be split to create 5 equal parts.
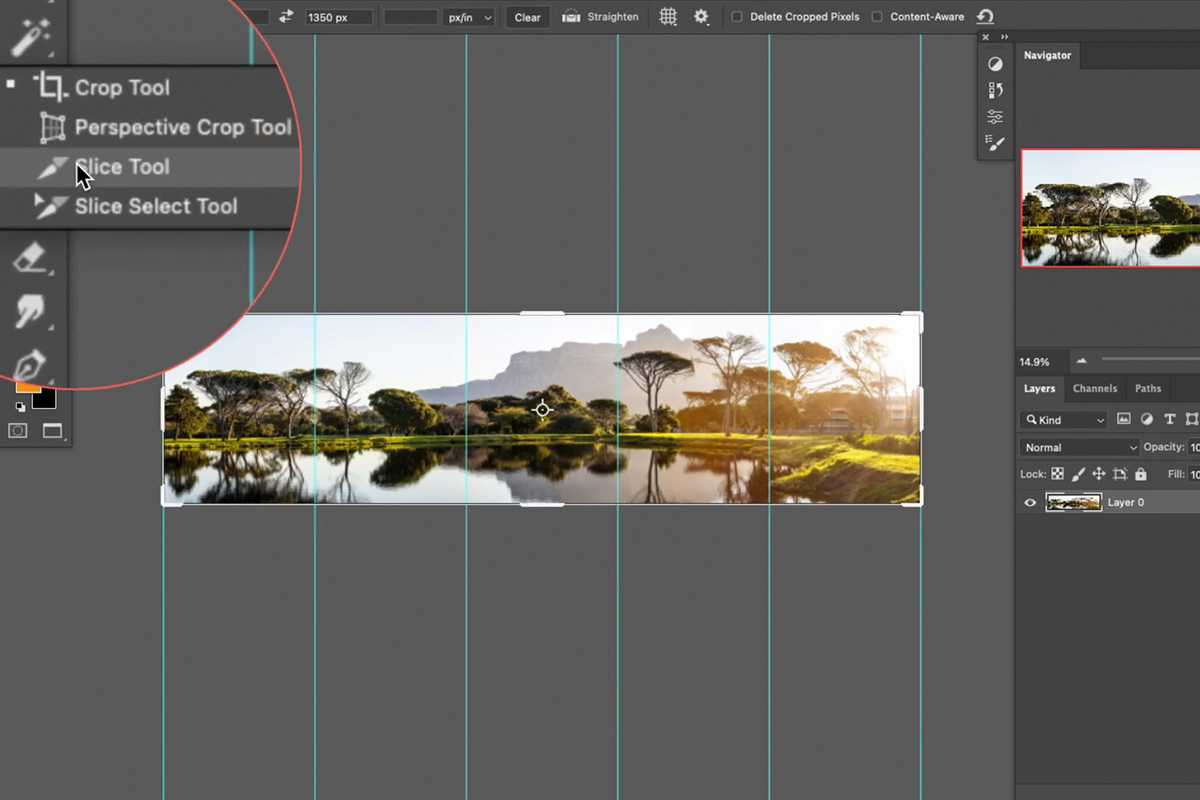
Then, to actually split the image, select the Splice Tool.
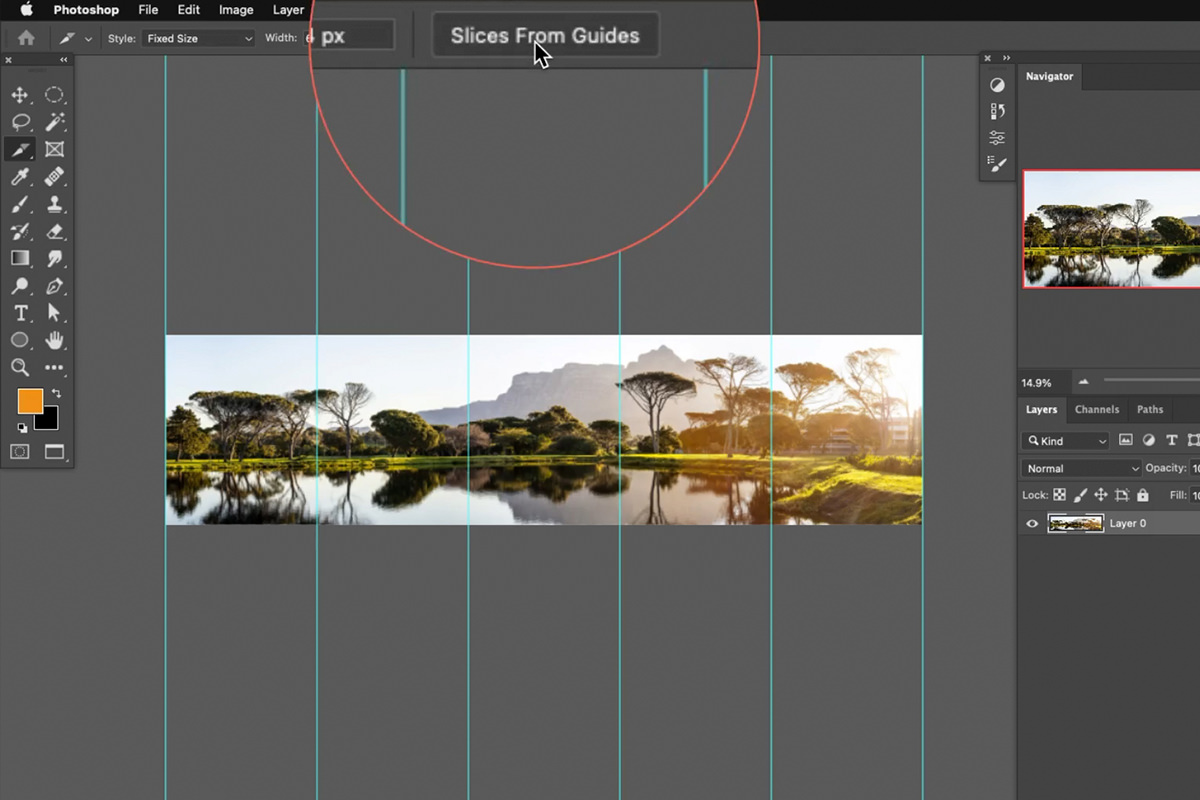
With the Splice Tool selected, click on the button in the toolbar above that says Slices From Guides. Photoshop will automatically separate the image exactly where each Guide falls.
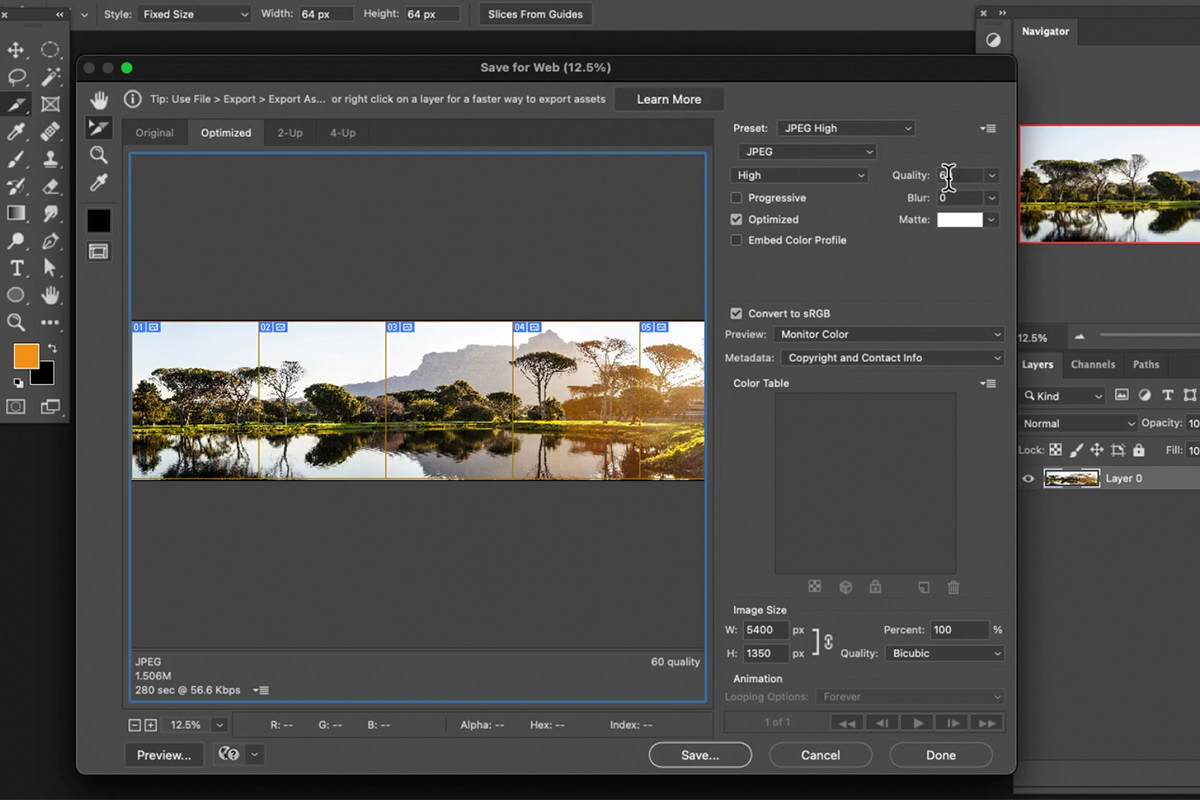
Now the images are ready for export. Open the File Menu, go to Export, and then select Save for Web (Legacy). Hold SHIFT and click on each of the individual sections of the image, double check the rest of the export settings, and then click Save.
Photoshop will export 5 individual images that are each 1080 pixels wide. Simply upload these to Instagram as a multi-post and your seamless panorama is complete!