
Watch the Full Series
30 Days of Photoshop · 2025 EditionOur most-watched series, updated for 2025 — watch all 30 free
description
Free Transform looks like four corner handles and a rotate gesture. It is actually a distort, skew and perspective tool with a set of modifier keys almost nobody learns, plus a numeric field that beats dragging every time.
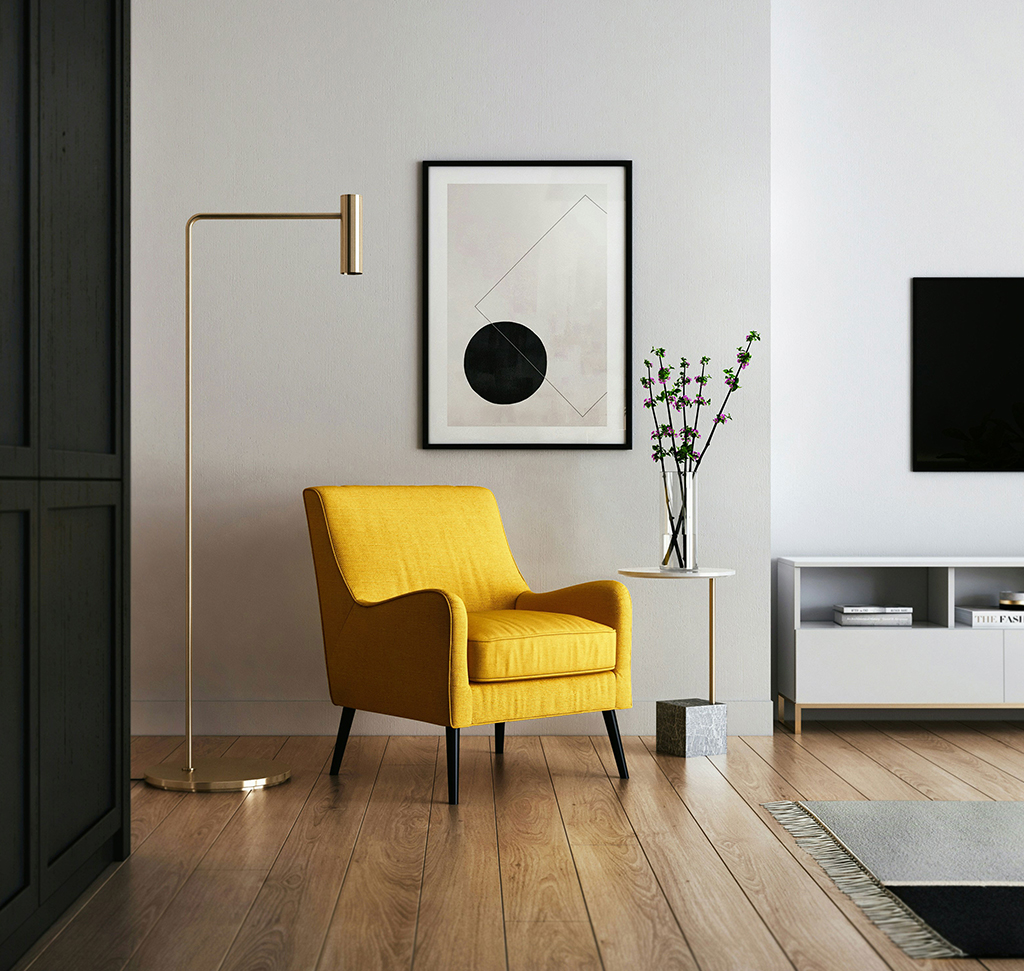
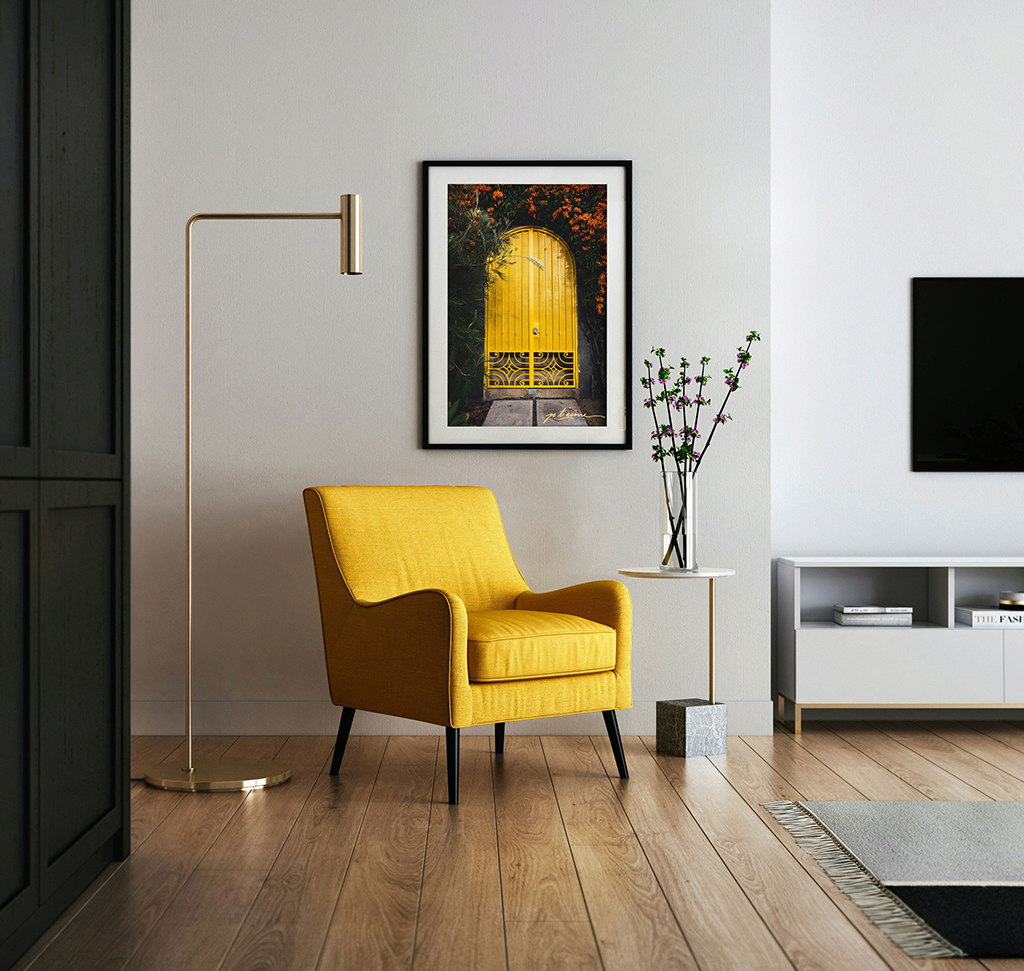
Day 12 puts a photograph inside a picture frame on a wall — scaled, distorted to match the perspective, masked, and finished with an inner shadow — then extracts hand-lettered text from a flat JPEG and aligns it precisely inside the frame.
This is Day 12 of 30 Days of Photoshop, 2025 Edition — our most-watched series, rebuilt from the ground up for today’s tools.
Continue Watching 30 Days of Photoshop
JOIN 30 DAYS OF PHOTOSHOP (FOR FREE!)
Ready to jump in? Sign up and we’ll email you a printable calendar and daily class schedule so you can get started right away!
Image Source


Get Your Layers In Line
Most people use Free Transform the same way for years: grab a corner, drag, hope. There is quite a lot more in there, and the parts that are hidden behind modifier keys are the ones that make a composite sit properly in perspective.
This one builds toward a finished image — a photograph placed inside a picture frame hanging on a wall — so every control gets used for something real rather than demonstrated in isolation.
Why Everything Starts as a Smart Object
Drag an image into an open document and Photoshop places it as a Smart Object automatically. That badge on the thumbnail is doing more than you might think.
Here is the demonstration worth running yourself. Press Ctrl/Cmd + T, type 1 into the width field, press Enter twice. The image is now a postage stamp with essentially no detail left. Now transform again and type 100. It comes back perfectly.
A normal pixel layer would be ruined — scaling down throws pixels away and scaling back up cannot invent them. A Smart Object stores the original and re-renders from it every time, so the transform values are instructions rather than damage. Convert anything you plan to resize: Layer > Smart Objects > Convert to Smart Object.
Free Transform Is More Than Corner Handles
Type Exact Numbers
The options bar shows width and height, switchable between pixels and percent. Typing 50% is faster and more repeatable than dragging toward roughly half, and it tells you what an image came in at — useful for knowing how much headroom you have.
Move the Reference Point
Tick the reference point box in the options bar and a small target appears at the center of the bounding box. Everything scales and rotates around it, and you can drag it anywhere — a corner, an edge, or off to one side. Anchoring at the bottom edge so an object grows upward is the sort of thing that is fiddly by hand and trivial this way.
The Chain Link and the Shift Key
The chain between width and height locks the aspect ratio, and it should stay locked. Holding Shift temporarily inverts whatever the chain is set to, so you can stretch one dimension for a moment without changing the setting and forgetting to change it back.
The Modifier Keys Nobody Learns
All of these work while a Free Transform is active, and together they replace the entire Edit > Transform submenu.
Ctrl/Cmd + drag a corner distorts — that corner moves freely and the others stay put. Ctrl/Cmd + drag an edge moves that whole edge, keeping it parallel. Ctrl/Cmd + Alt/Opt + drag a corner skews, moving the opposite corner symmetrically. Ctrl/Cmd + Shift + Alt/Opt + drag a corner gives you perspective, converging the two corners on that side.
Distort is the one you will use constantly in compositing, because matching a rectangle to a surface photographed at an angle is exactly what it does.
Rotating and Flipping
Move the cursor just outside a corner handle and it becomes a curved arrow — drag to rotate. Hold Shift and it snaps in 15-degree increments. Or type the angle into the options bar, which is the only way to be exact.
The contextual task bar carries the quick commands: rotate 90 degrees clockwise or counter-clockwise, flip horizontal, flip vertical.
Escape Cancels, Enter Commits
Nothing in a transform is applied until you commit it. Escape abandons everything and returns the layer exactly as it was, no matter how far you have wandered. Enter, or the check mark in the options bar, applies it.
Knowing Escape is there is what makes it safe to experiment with the modifier keys above — you can distort something into nonsense and be back where you started in one keystroke.
Put a Photograph Inside a Frame
-
Rough It Into Position at Lower Opacity
Drop the layer opacity to around 50% so you can see the frame underneath while you scale and place the image.
-
Select the Inside of the Frame With the Polygonal Lasso
Hide the new layer, click the background layer, and take the Polygonal Lasso (nested with the Selection Brush). Click once at each corner of the frame’s opening and press Enter to close the shape. Straight-sided tool for a straight-sided object.
-
Turn the Selection Into a Mask
Turn the photo layer back on, bring opacity to 100%, and click the layer mask icon with the selection still live. The photograph now exists only inside the frame.
-
Unlink the Mask and Fine-Tune the Image Behind It
Click the chain between the two thumbnails. Now you can transform the photograph freely — scale it, and Ctrl/Cmd + drag a corner to distort it until its own edges line up with the wall’s perspective — while the mask stays exactly where it belongs. Relink when it looks right.
-
Add an Inner Shadow
Double-click the layer to open Layer Styles and switch on Inner Shadow. A small distance is all it takes. It reads as the mat board casting a shadow onto the print, and it is the detail that stops the composite looking pasted on.
Extract Artwork From a Flat JPEG
A useful side quest: lifting hand-lettered text off a white background so you can use it as a graphic.
-
Use Select > Color Range
Click on the color of the lettering. Set the Selection Preview dropdown to Grayscale — white is selected, black is not, and it is far easier to judge than the default.
-
Sample a Color and Fill on a New Layer
Make a new empty layer. Take the Brush and Alt/Option-click to sample a color from elsewhere in the composite so the lettering belongs. Then Edit > Fill > Foreground Color with the selection still active.
-
Clean Up the Strays
Color Range works across the whole image, so it will have grabbed similar colors elsewhere. Marquee just the lettering, invert the selection (Shift + Ctrl/Cmd + I), press Delete, then deselect. What remains is the artwork on transparency.
-
Convert It to a Smart Object Before Resizing
It is an ordinary pixel layer at this point, so scaling it down and back up will destroy it. Convert first, then transform freely.
How Alignment Actually Works
Between Two or More Layers
Shift-click the layers, press V for the Move tool, and the alignment buttons appear in the options bar. Align left, center, right, top, middle, bottom.
The behavior that confuses people: Photoshop aligns to the combined bounding box of everything selected, so if the layers do not already overlap, both of them move. Once the smaller object sits inside the larger one, only the smaller one moves.
To an Active Selection
Make a selection and the alignment buttons change meaning entirely — they now align a single layer to the selection. Center-center with a marquee active drops that layer into the exact middle of the marquee.
Load a Layer Mask as a Selection
This is the one that ties the whole tutorial together. Ctrl/Cmd-click a layer mask thumbnail and its shape becomes a live selection.
So the mask you cut for the picture frame can be loaded as a selection, and then any other layer aligns perfectly inside the frame — centered, or bottom-right, or wherever you want it — without measuring anything.
Then Nudge With the Arrow Keys
Alignment puts an element flush against an edge, which is rarely where you want it to sit. Deselect with Ctrl/Cmd + D and press an arrow key — one pixel per press. Five taps left and five taps up gives you an even five-pixel margin off the corner, exactly, every time.
Build the Whole Thing
Download the three sample images and work through it end to end. The two habits worth keeping are converting to a Smart Object before you scale anything, and Ctrl/Cmd-clicking a mask when you need its shape as a selection. Both come up constantly once you know they exist.
Day 11 removed distractions from a photograph. Tomorrow, Day 13 covers cropping and expanding the frame. For a deeper pass on Smart Objects, our PRO Ultimate Guide to Smart Objects goes considerably further.
Enjoying This Free Tutorial? Go Further with PRO.
Unlock Full Sample Files, PSDs, and Hundreds of Masterclasses!
Download full project assets, original PSDs, and RAW images for every lesson
Unlimited access to our complete library of PRO Photoshop & Lightroom courses
Instant 4K Ultra HD streaming on all devices, anytime, anywhere
Full access to our entire library of Photoshop Actions, Presets, and LUTs
Flexible monthly and annual membership plans
Cancel anytime with zero hassle or commitments