Mastering the F-Stop: A Guide for Photographers Who Don’t Love Math
When you’re mastering photography, your first stop will probably be the f-stop. Don’t let all those numbers on your lens intimidate you! The concept may feel counterintuitive at first if you’re not mathematically minded, but we can promise you that the f-stop is a cinch once you’ve got your head wrapped around it. Coming from some pretty non-mathy people, that means a lot.
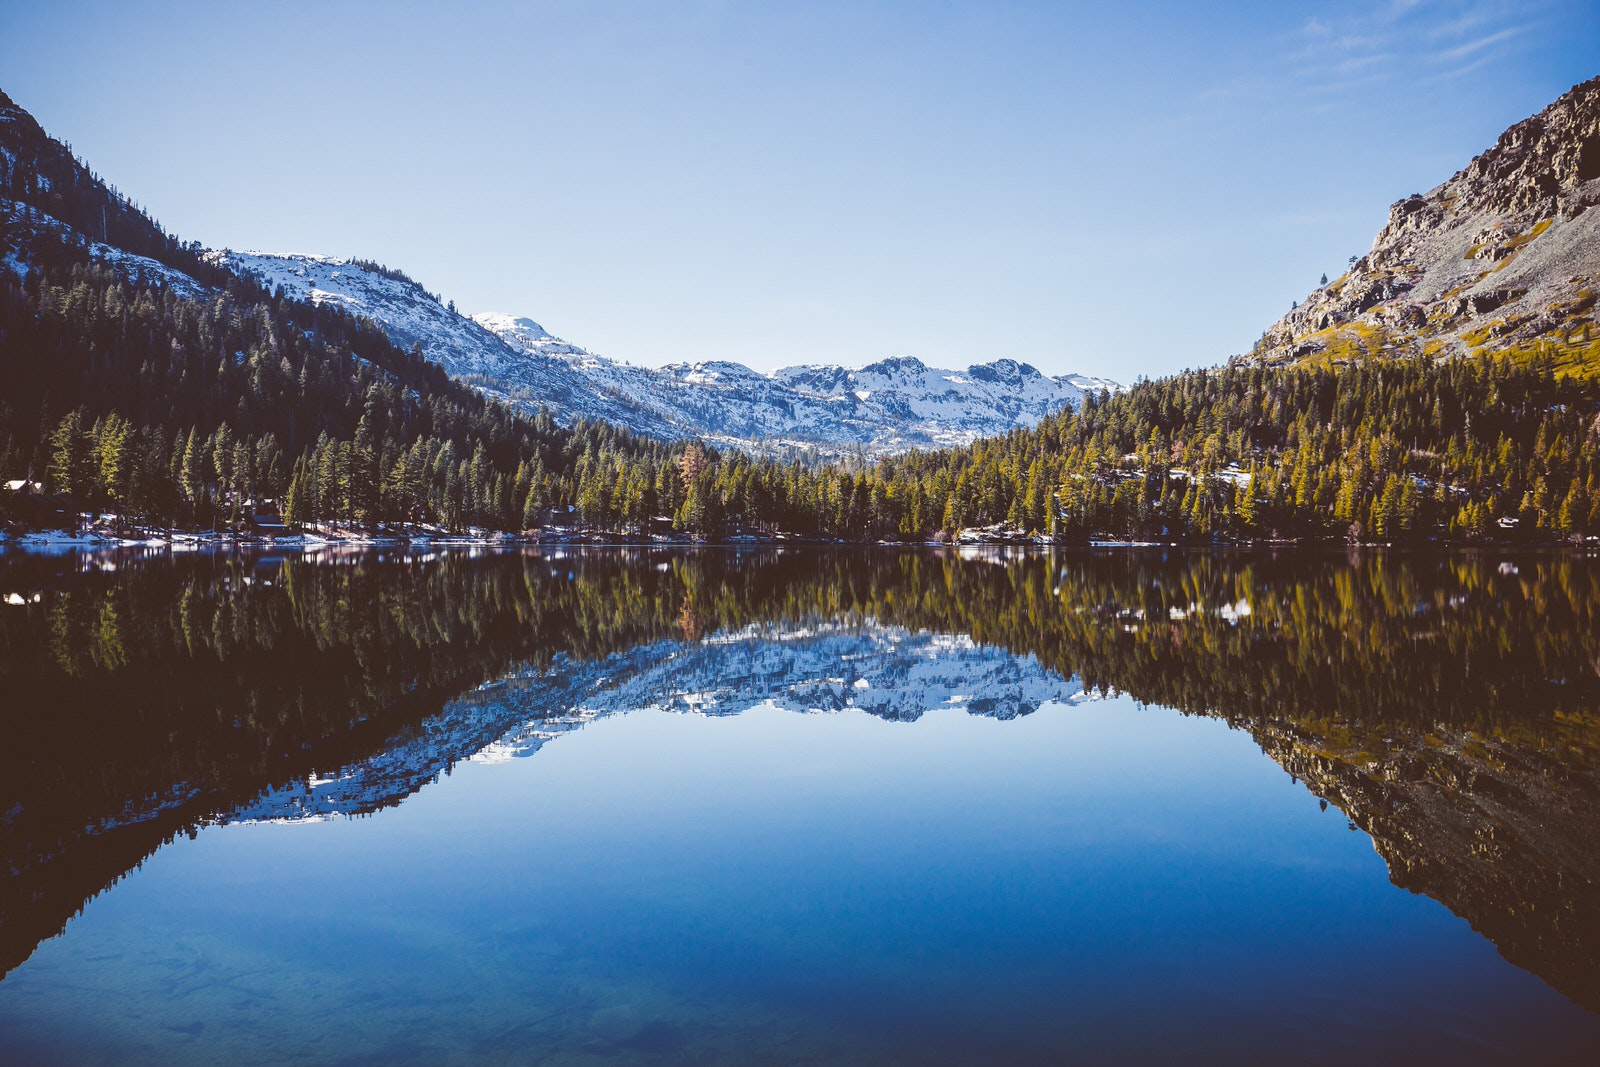
Let’s start with a pretty photo to illustrate our topic:
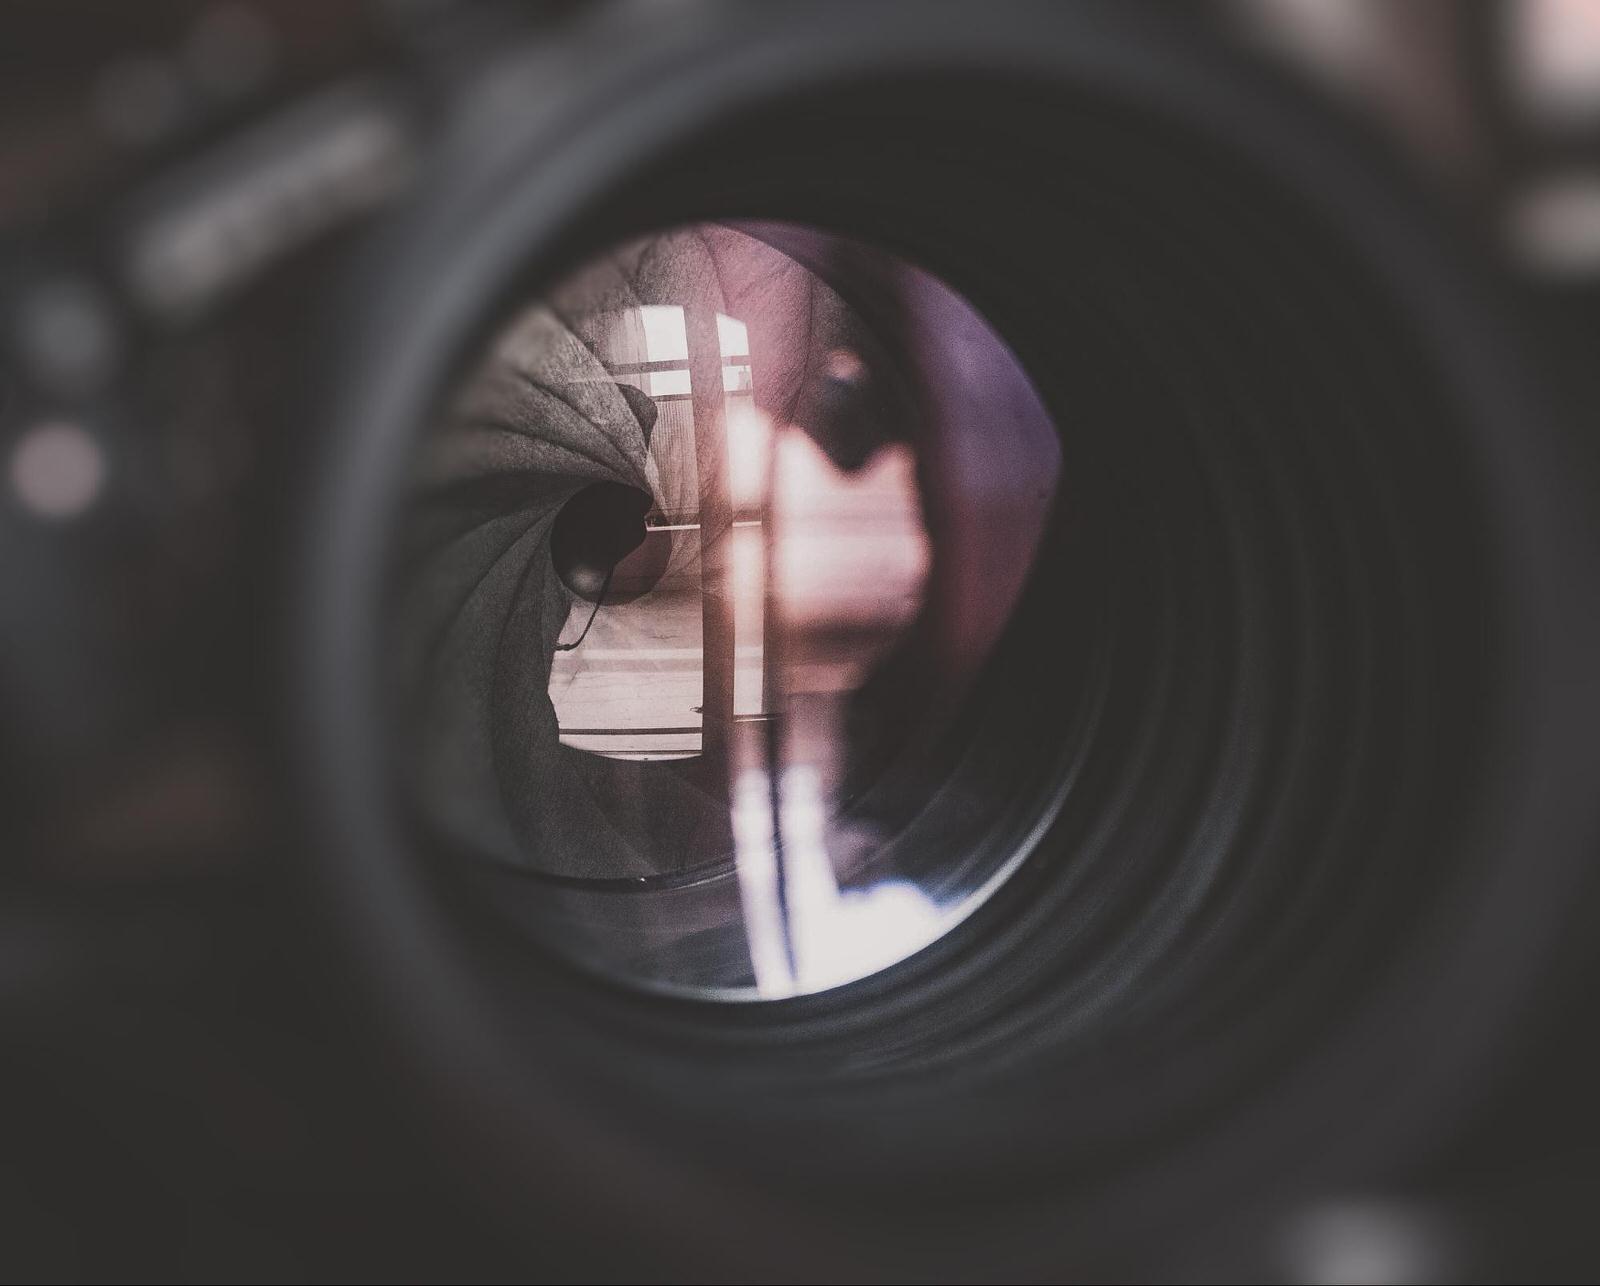
This shot gets us up-close and personal with the f-stop. Here you can spot two features that’ll help you to understand what an f-stop is:
- The Aperture – The small hole at the back of the camera’s lens. This hole lets light travel through the lens. The f-number (also known as the focal ratio, f-ratio, or the f-stop) is the word we use when we’re measuring the aperture’s diameter.
- The Blades – These bad boys close in or retract in a circular motion to make the aperture larger or smaller, according to your adjustments.
You’ll want to use your f-stop for two things:
- Adjusting the amount of light in your photo;
- Adjusting the amount of clarity or blur present in your photo (the depth of field).
It’s important to note that f-stop calculations are made for you when your camera is in automatic mode. That might take some extra mental gymnastics off your plate, but remember that in this mode your camera adjusts the f-number with mathematical, not artistic, intelligence.
Imagine you’ve been asked to take photos at a friend’s graduation. For one shot, you’ve decided to snap a candid photo of your friend during the ceremony. Since there are other grads standing nearby, they are also in the shot. But you’d really like to focus on your friend (you’re there to capture his moment, after all).
If you’ve opted to shoot the scene in automatic mode, your camera’s calculations will be geared toward providing the best exposure for the entire scene. That means it will focus on the whole crowd, instead of just your friend. In order to manifest your creative vision, you’ll have to adjust the f-stop on your camera manually. In manual mode, you’ll be able to selectively focus on the grad.

See what a dramatic impact it makes?
This is the kind of stuff we’re going to talk about in this guide. You will learn how to manipulate your f-stop to reach your artistic goals, so you don’t have to rely on your camera’s calculations to get the outcome you’re looking for. Let’s get started!
Tip
The f-stop is only one kind of stop. Any of the three elements in the exposure triangle can be “stopped up” or “stopped down.” When you’re reading about photography techniques, just remember that the f-stop exclusively refers to aperture, while the more generic, plain “stop” can refer to other aspects of photography.
What’s an F-Stop?
Your camera f-stop controls two things:
- How much light can enter your lens;
- The depth of field (DOF) in your image.
Here’s the thing that trips most people up at first:
The smaller your f-stop number is, the bigger the opening of your aperture.
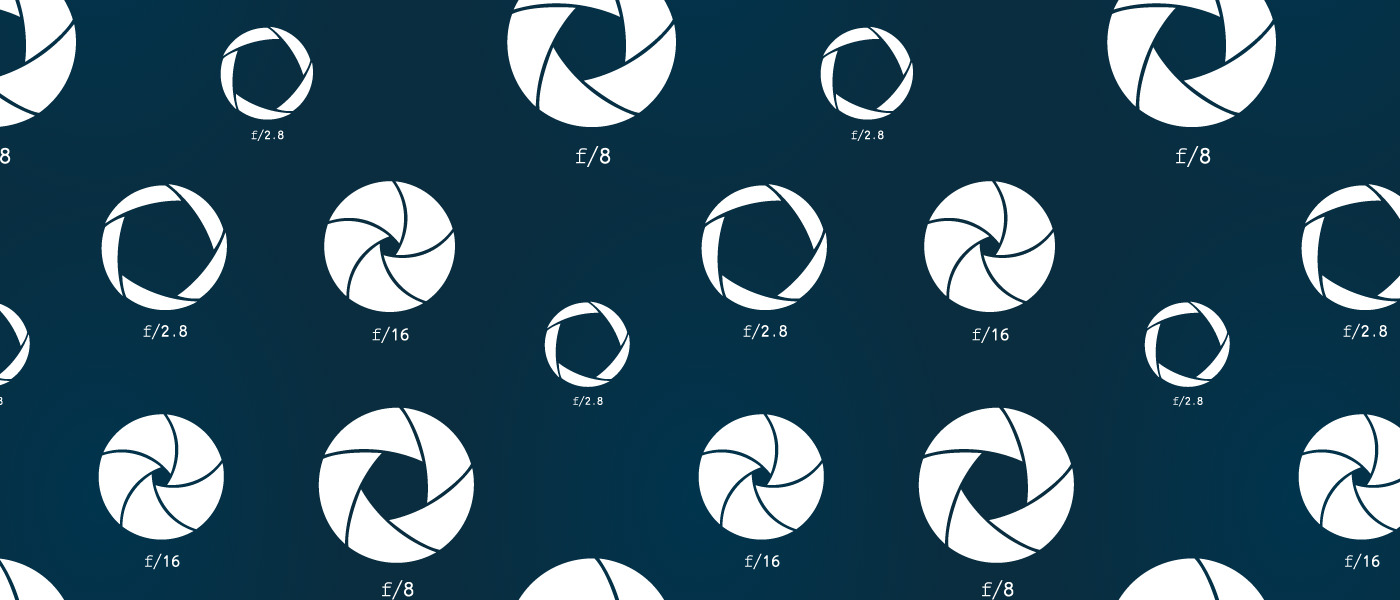
We know this is counterintuitive, so let’s start by illustrating the concept:
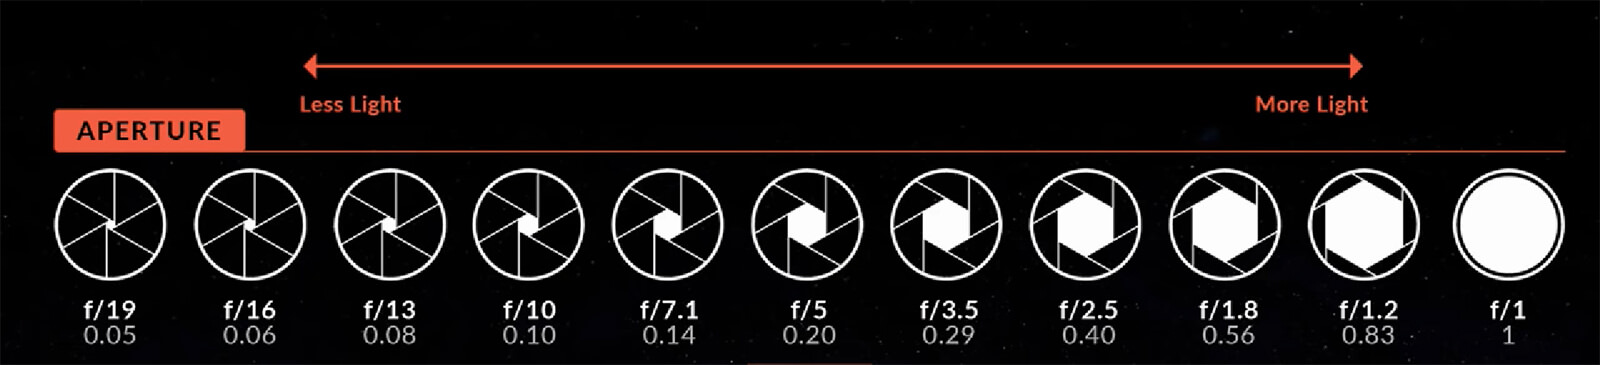
A stop is one way photographers like to talk about measuring light. Each movement up a stop doubles the amount of light entering the camera, but decreases the numerical value (for example, going from f/8 to f/5.6 is one stop up). That’s right friends, here comes the math.
Each movement down a stop halves the amount of light that comes through your lens, but increases the numerical value (for example, going from f/2 to f/2.8 is one stop down). We’ll cover this concept in greater detail later.
These numbers might seem strange until you understand what they mean exactly. Without getting too much into the complicated math behind f-stops, here’s an easy explanation that may help you get a grasp on why f-stops are written as they are:
F-stops are actually ratios. They are derived from your lens’ focal length divided by the diameter of your aperture. They represent a fraction of your aperture opening. For instance, an f-stop of f/4 means 1/4th or 25 percent of the lens is open. On a 100mm lens, f/4 would measure 25mm or about an inch.
This fraction is why a lower number is actually a bigger aperture than a higher number. Think of it like a pie – 1/4th of a pie is obviously much larger than 1/8th of a pie (or f/8). A larger opening of f/4 lets more light into your lens than a smaller opening of f/8.
Still, you’re probably wondering why f-stops aren’t all whole numbers. Your f-stop scale includes more numbers than just those halving and doubling exposure. For instance, between f/2 and f/4 you also see f/3.2 and f/3.5. These are thirds of a stop, and they’re there to give you more control.
It’s worth noting that this is probably not information you will use at every shoot. Once you get a feel for shooting in manual or aperture priority, you’ll get a lot better at eyeballing the right setting. But understanding the theory behind it is never a bad thing, and now you do. Or if you don’t yet, you’re about to.
Give it a try yourself by filling in the blanks here – and remember, the answer is the opposite of what you might expect! (Scroll down to the bottom of the article for the answers.)
- An f-number of f/1.4 lets in _______ light than an f/4.
Fill in the blank with either: more or less - _____ lets in way more light than ______.
Fill in the blanks with either: f/2.8 or f/16 - _____ lets in way less light than ______.
Fill in the blanks with either: f/2 or f/10
Tip
Your lens will come equipped with a certain range of apertures, so confirm before buying that your new piece of equipment will do what you need it to do. You can usually find the aperture range along the outside of your lens barrel.

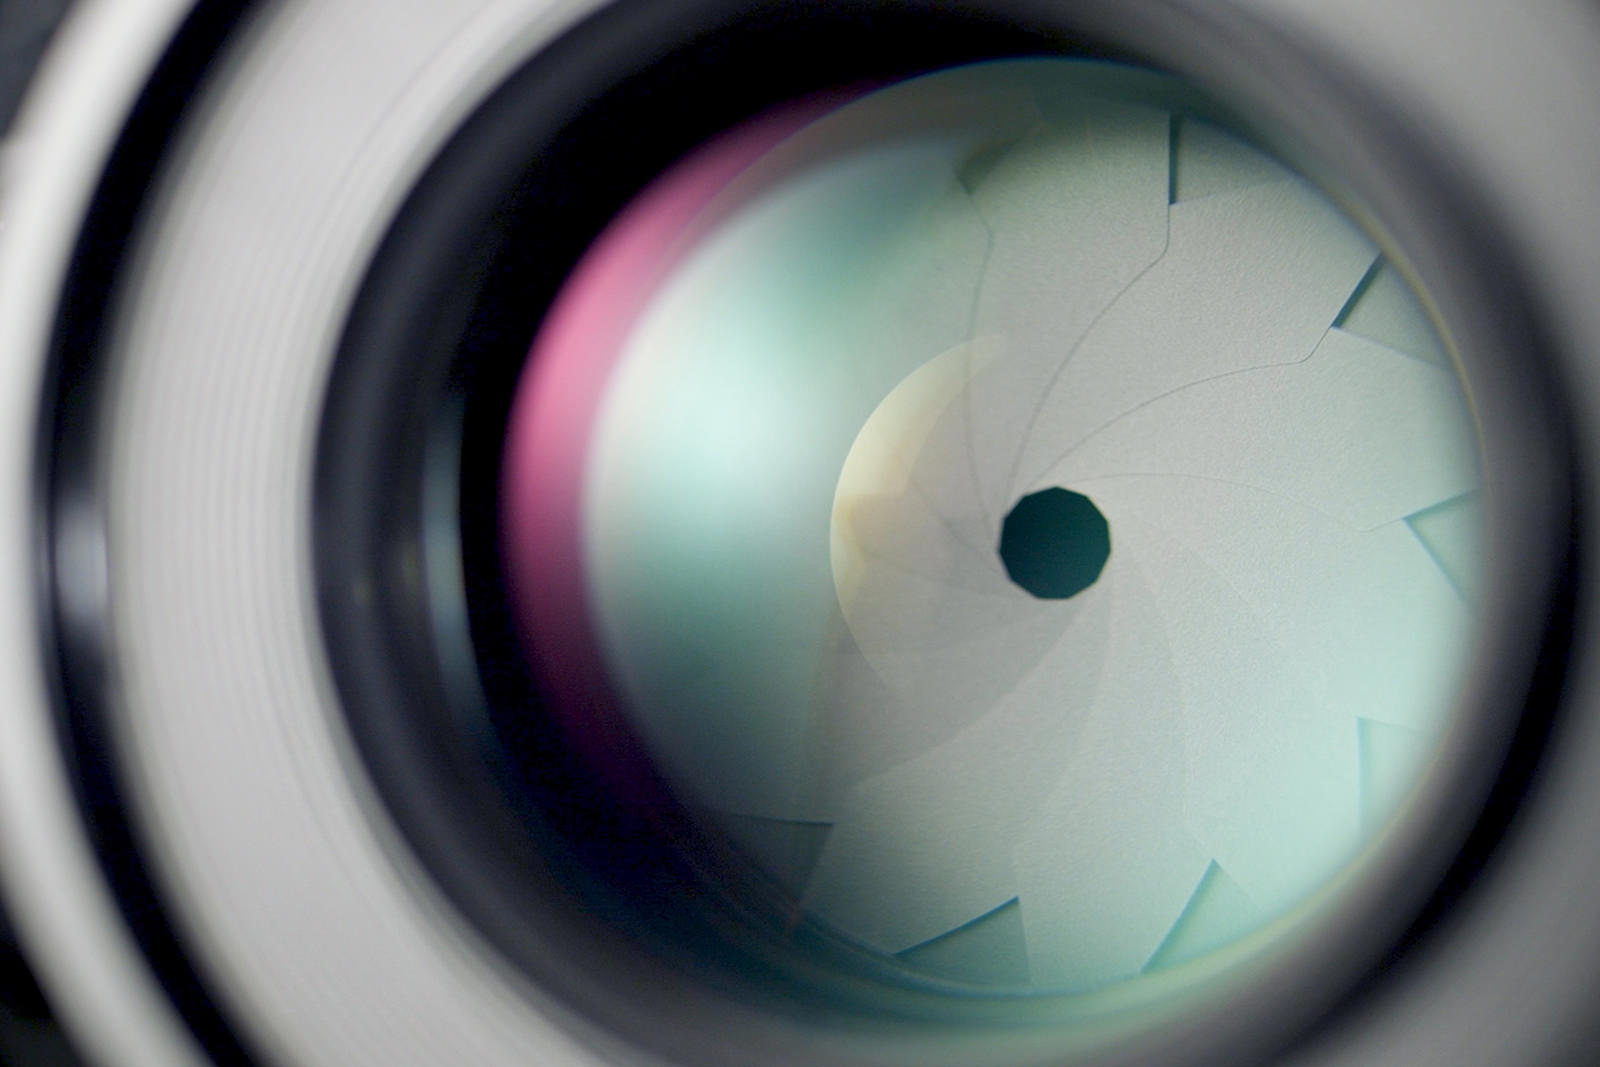
Aperture Basics
As we mentioned previously, the aperture is the hole that allows light to shine through your lens (and the f-number measures the diameter of that hole). It’s basically the eye of your camera (think of the shutter as your eyelid), and it’s similar to your eye in a lot of ways. Think about how your pupils expand to let more light in when you’re in the dark. This is exactly how aperture works.
A larger aperture (lower stop number) allows more light into your camera lens, as shown in the image on the left. While a smaller aperture (higher stop number) allows less light into your lens, as shown in the image on the right:
A larger aperture lets more light into the camera’s sensor to produce less focus and a shallow depth of field. Conversely, a smaller aperture forces light into a narrow beam that produces more focus and a wider depth of field. (Don’t worry, we’ll get into depth of field a little further down.)
You can probably gather from this that darker scenes will usually require a wider f-stop, while bright scenes require a more narrow f-stop, to avoid overexposure. That’s really the most crucial thing to understand about aperture: how to use it to maintain detail and definition in your highlights and shadows, regardless of the light you’re contending with at any particular moment.
Tip
In some lenses, maximum aperture is fixed, but there are lenses on the market (called variable aperture lenses) on which your maximum aperture can change. In variable aperture lenses, your maximum aperture depends on how far you zoom in.
The F-Stop Scale
Now it’s time to grab your camera for some hands-on experience. Quickly find a scene you’d like to capture (it doesn’t have to be fancy; anything that’s at your fingertips will do at this point). Now snap several photos, changing your f-stop each time. Have a look at the resulting photos – notice how the levels of crispness and light change in each image.
By completing this exercise, you’ve taken photos along the f-stop scale.
Depth of Field
Simply put, depth of field is how much of your image is in focus compared to how much of your image is out of focus (or blurry).
Shallow DOF
Shooting with a shallow DOF simply means that less of your image is in focus.
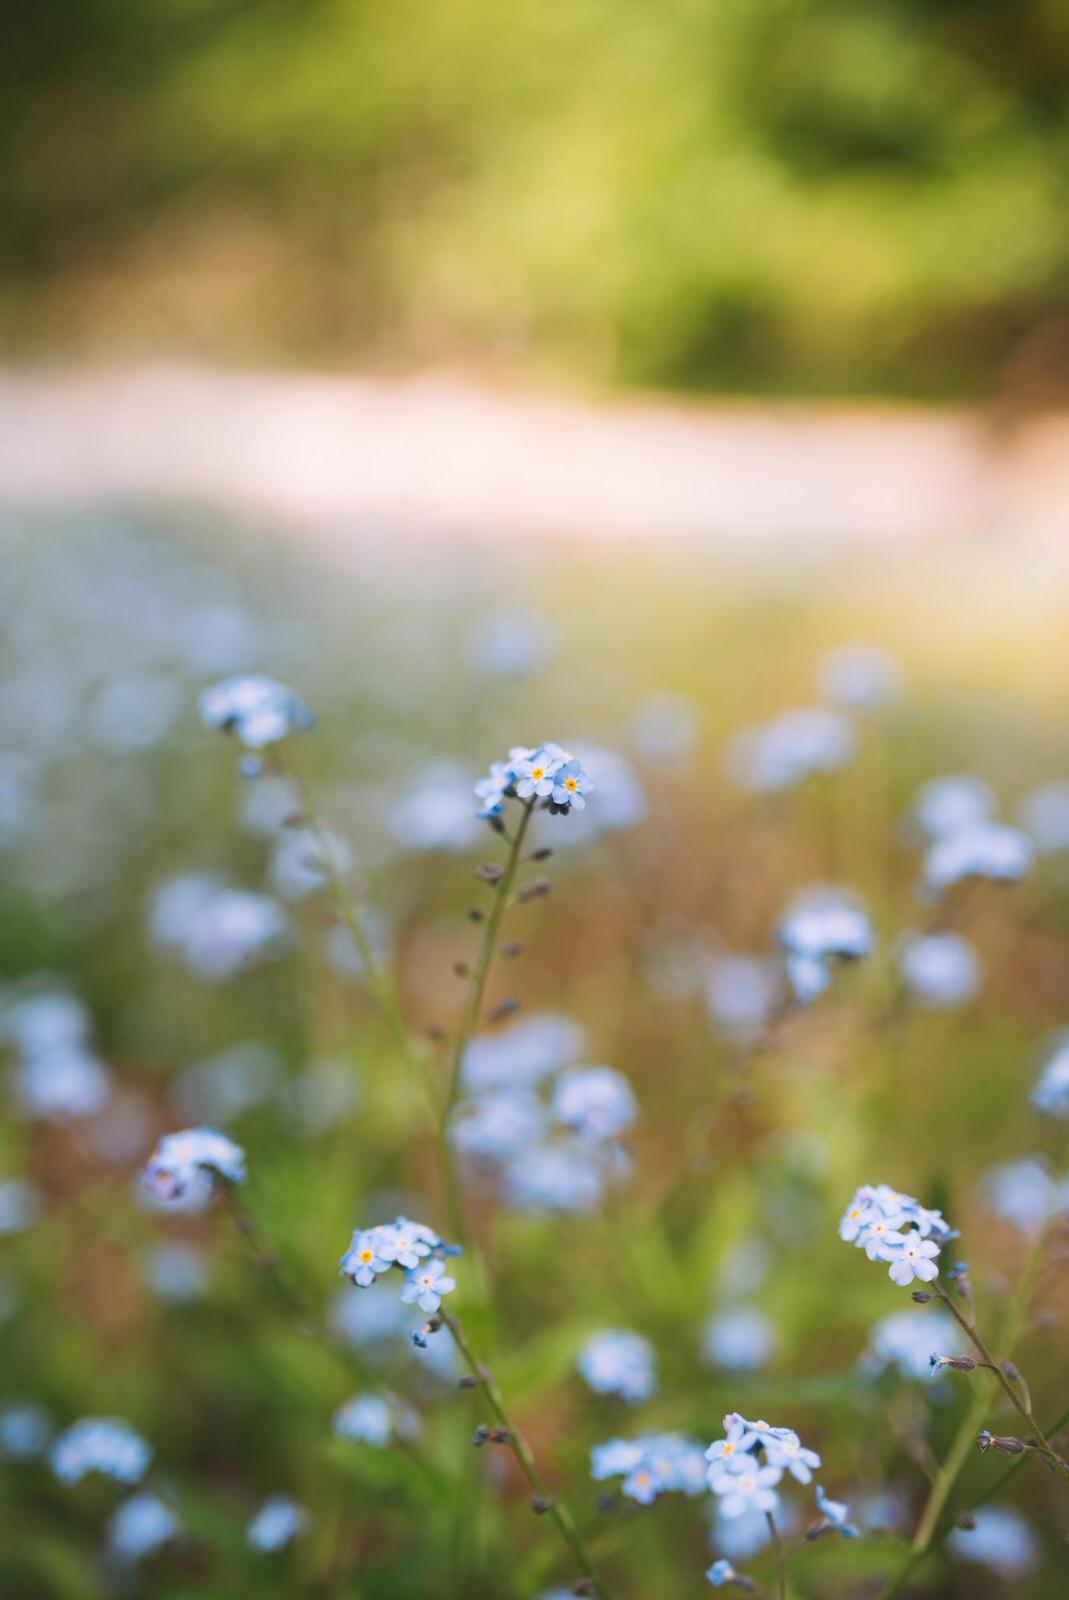
Photo by Kelen Loewen on Unsplash
Lenses with a wide aperture (and smaller f-stop number) like f/1.2 or f/1.4 are best for shallow depth of field.
Deep DOF
Shooting a wide depth of field means most – or all – of your image is in focus.
The sharpness and clarity in this photo of roaming elephants exemplify a wide depth of field:
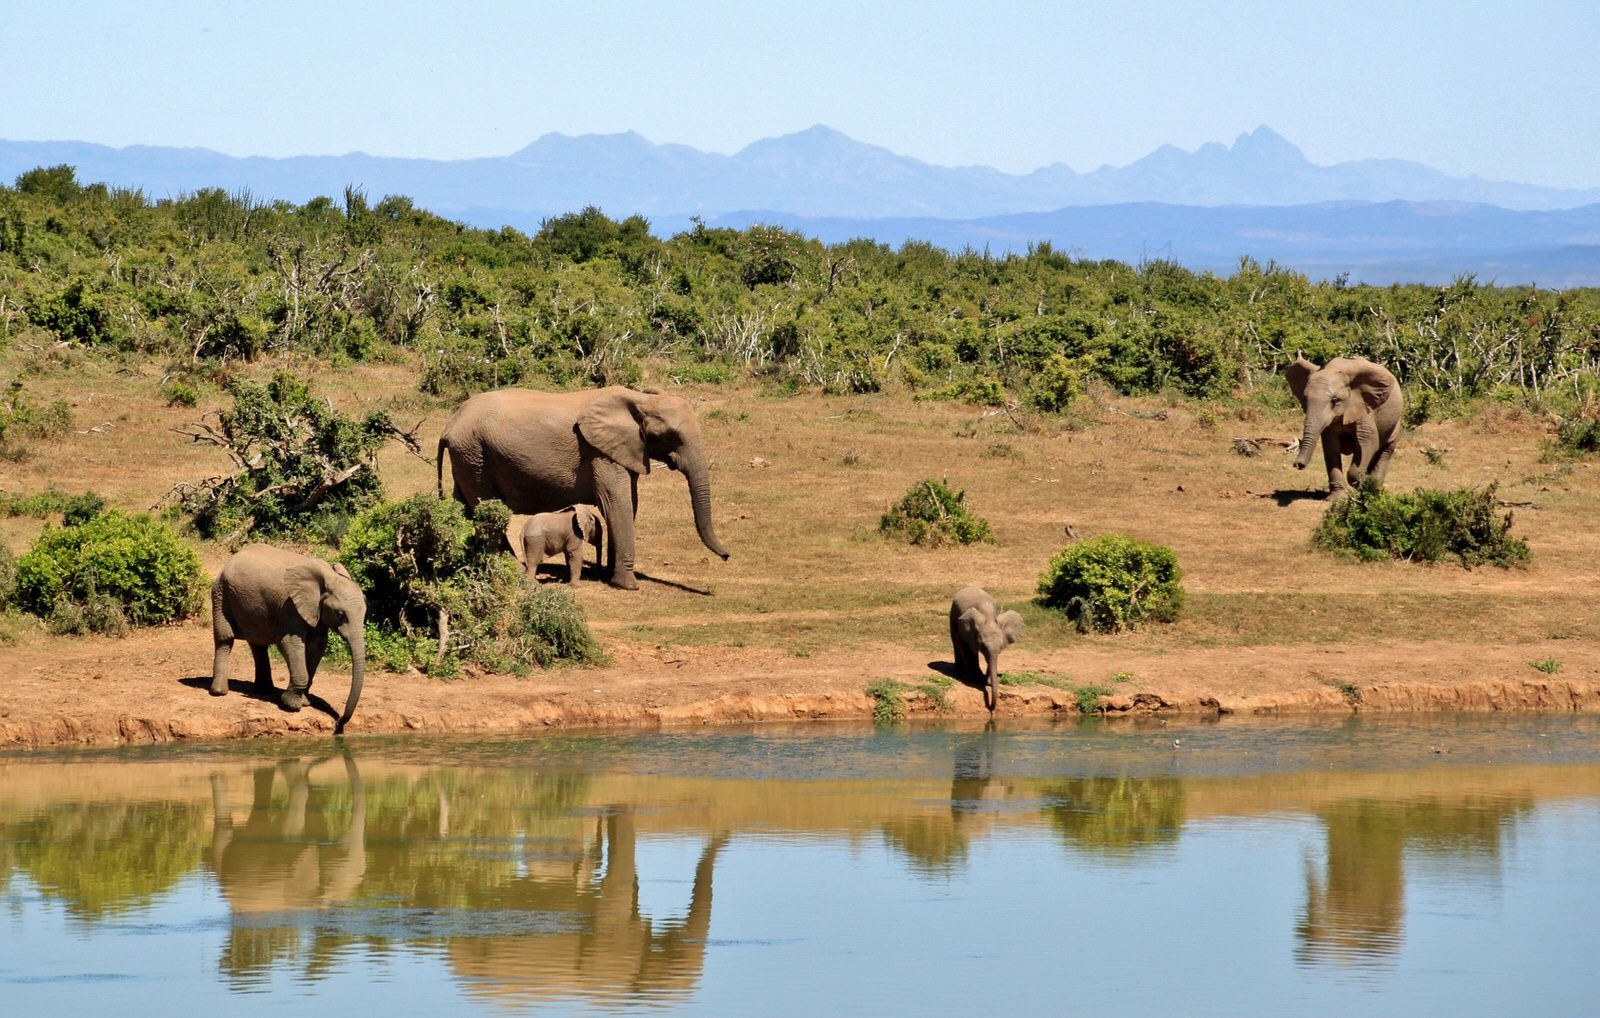
Image by cocoparisienne from Pixabay
To keep both the foreground and the background in focus for a photo spanning a lot of distance like this one does, try using stop settings of f/16 or f/22 (definitely over f/11). Also, when you’re in the wide depth of field range, use the Sunny 16 Rule: On a sunny day, it’s best to use stops of f/16 or higher.
Tip
If you love shooting with a wide depth of field, you are not alone. During the Great Depression, there was a group of photographers who called themselves Group f/64. Famous photographers, including Ansel Adams and Imogen Cunningham, were members. The group’s mission was to make sure they captured their subjects realistically, so they were committed to wide depths of field to reveal sharp (and therefore, more realistic) images. They were against the Pictorialist movement of their time because Pictorialists favored images with softly focused subjects and preferred portraits that resembled drawings or paintings.
Focal Length (and How It Impacts Depth of Field)
Lens focal length can also affect the depth of field in your images. Your focal length controls your field of view (FOV), which is what you see in your viewfinder:
- The longer your focal length, the smaller your field of view (this is good for isolating a particular subject, like a person in a crowded place).
- The shorter your focal length, the wider your field of view (good for capturing a wider scenes like landscapes).
“OK, great,” you might say. “But how does this affect depth of field?” Well, a wider field of view tends to also yield a wider depth of field. So in general:
Short Focal Length = Wide Field of View = Wide Depth of Field
Whereas:
Long Focal Length = Small Field of View = Shallow Depth of Field
Sounds pretty simple right? But focal length is all about comparisons. It’s possible to still get similar results (with regard to depth of field) from different focal lengths by adjusting the settings we’ve already covered here. Yes, this does add yet another element into the mix, and you can feel free to ignore it if you’re still getting your sea legs. Once you’re feeling confident with adjusting stops to control depth of field, you can start adding lens focal length to your depth of field toolkit.
A few tips to get you started:
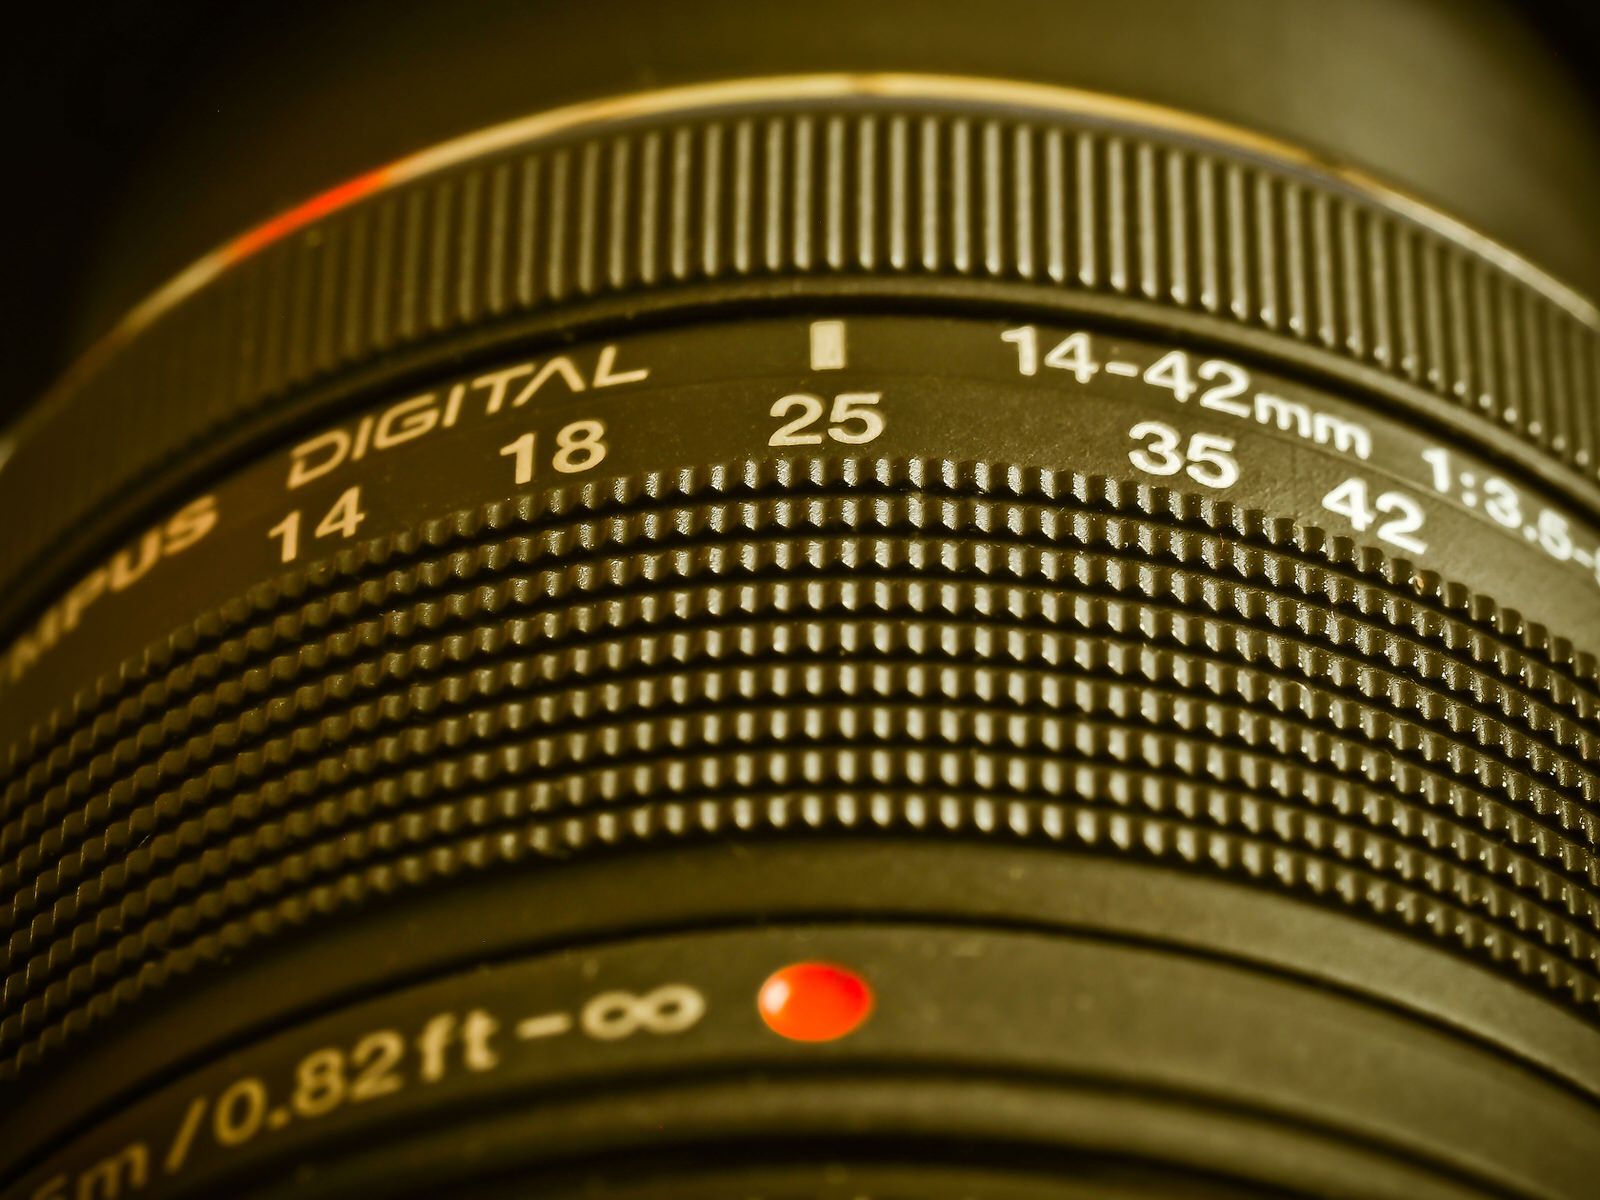
- To change the focal length of your lens, turn your lens to zoom in or out.
- To see how far you’ve zoomed in, look at the scale. It’s usually located at the end of the lens that attaches to the camera.
- If you snapped a great shot where you loved the focal length you used, you can go back into the properties of the photo to see where your focal length was so you can replicate the same focal length later.
What It Means to Stop Up and Stop Down
Pop quiz! If someone asks you to “stop down,” you:
a. Increase your stop number.
b. Decrease your stop number.
c. If you’re photographing your subject on a staircase, tell them to go down a step.
d. Realize that it’s time for another tricky photography vocabulary learning moment.
If you chose A, you’re technically right, but if you chose D, we’ll still give you the point.
If someone asks you to “stop down,” you’ll increase your f-number. If someone were to ask you to “stop up,” you would decrease your f-number. Think of stopping up in terms of aperture size, not the actual number.
Here’s a handy cheat: when you hear “stop up,” think “open up,” because that’s what you’re doing. Don’t worry visual learners, we’re coming at you with a chart:

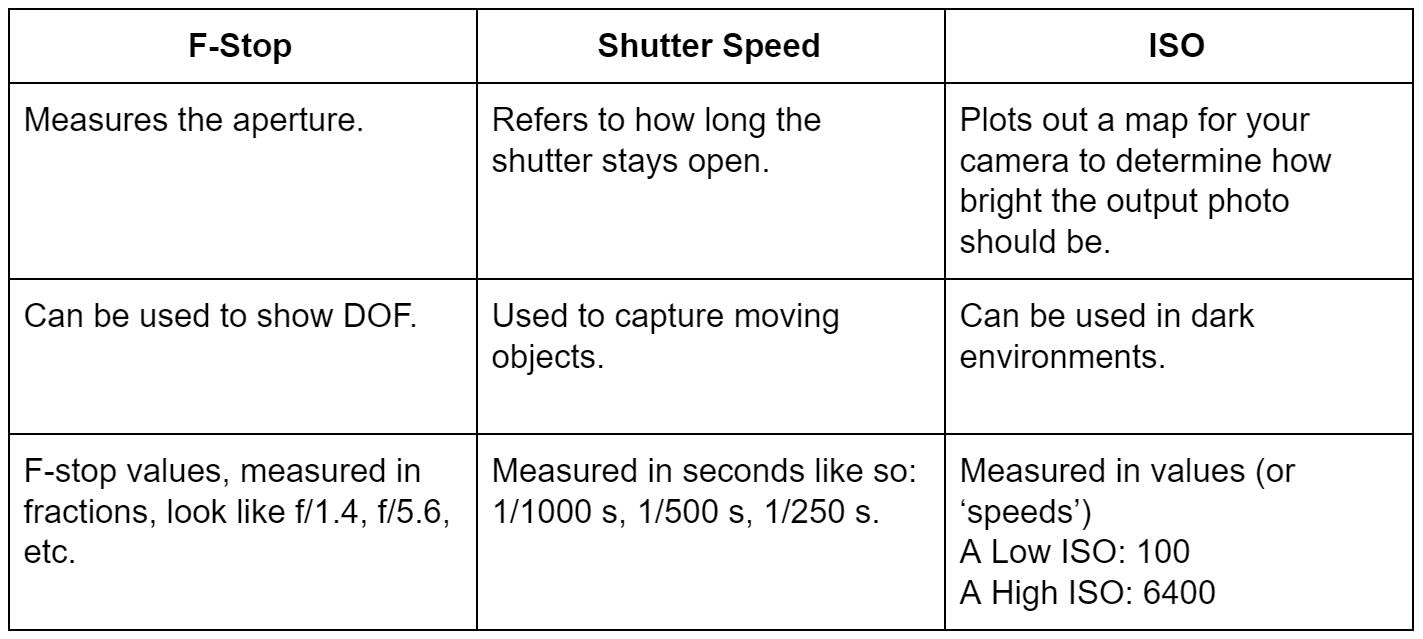
What’s the Exposure Triangle?
We mentioned it briefly above, but here’s the full story on the exposure triangle. For proper exposure, you need three elements working in tandem: shutter speed, ISO, and aperture. These elements all control the amount of light entering your camera, but they each do so in their own unique way.
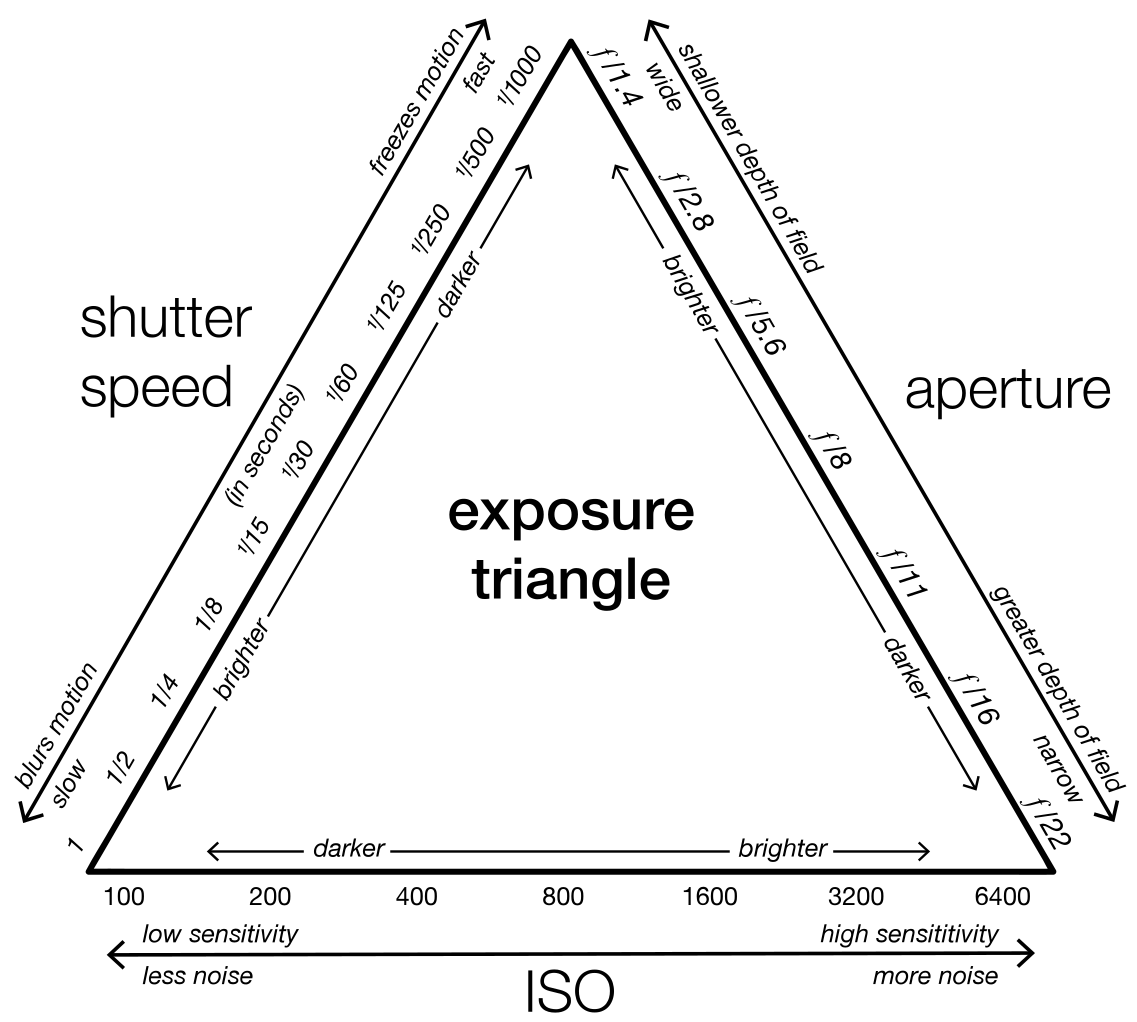
By WClarke [CC BY-SA 4.0 ], from Wikimedia Commons
We’ve already talked about what aperture is (the opening that allows light to travel through your lens and hit your camera sensor). Now, let’s briefly review ISO and shutter speed.
Your ISO is the sensitivity of the digital sensor in your camera. When the ISO value is higher, your camera doesn’t need to collect as much light for the right exposure.
To learn about ISO using LEGO, check out this PHLEARN video:
Your shutter speed refers to the amount of time your shutter is open, allowing the light from your lens to hit the sensor. This is measured in seconds, or fractions of them. A faster speed (where the shutter is open for a shorter amount of time) lets in less light. A slower speed (where the shutter is open for a longer time) allows more light in.
Check back in with Aaron (and LEGO) with another PHLEARN video on shutter speed:
Let’s go back a ways and elaborate on a loose comparison from earlier to help you visualize what each point of the triangle does: if your eye is the camera, the aperture is your pupil. It expands and contracts to accommodate the amount of light you need in a particular situation. The shutter is your eyelid. When it’s open, light can travel through for your brain to interpret into a scene. When it’s closed, you’re out of luck. The ISO is how much light your eye can stand at a time. You know how some people can look right at bright lights while others squint and tear up? Think of that when you think of ISO.
The main similarity between changing your f-stop to adjust aperture and changing your ISO or shutter speed is that all three will impact the exposure of an image. If you change one for artistic purposes, you may need to make adjustments somewhere else to keep the light balanced in your image.
What do we mean by “artistic purposes?” Changing your f-stop for light balancing will also change your depth of field. But for artistic reasons you may want exactly the depth of field you already have. In this case, you will need to change something else to get the right exposure. ISO and shutter speed have their own little quirks as well:
- Changing ISO can change the noise level in a shot. The higher your ISO, the more digital noise you will see in the end product. That’s why ISO on its own isn’t always the magic cure for a low-lighting situation.
- Shutter speed affects how motion is captured. The longer a shutter is open, the more motion and blur it will capture. That’s why sports photographers use super, super quick shutter speeds that will freeze that Play of the Week into a newsworthy action shot.
As you can see, playing with each of these settings to get the proper exposure is an art form in and of itself. To master the triangle, you are going to have to experiment and practice. Thankfully, there’s a shortcut (see the next section on Aperture Priority Mode) you can use while you brush up on your triangle techniques.
Tip
F-Stop vs. T-Stop
By now you know a lot about the f-stop, but have you heard about t-stop? It would be understandable if you haven’t, because it’s most commonly found on a cinematographer’s lenses.
Essentially, the t-stop, which stands for transmission stop, is more accurate at determining exposure than an f-stop. This is because each t-stop lens is tested by the manufacturer being sold. F-stops can be off by about a third of a stop (at most), which can be fixed in post-production. However, many cinematographers may prefer a t-stop lens to help save money in post-production.
Aperture Priority Mode
Aperture priority is a semi-manual mode – to use it, turn the dial on the top of your camera to ‘A’ or ‘Av.’ This allows you to select the aperture, while your camera’s computer calculates the shutter speed for proper exposure.
Troubleshooting Tips:
- Use a tripod in case your camera selects a slower shutter speed. This will eliminate camera shake and allow for a more stable long exposure. A remote shutter release will offset any shake caused by your finger pressing the actual shutter button.
- If you opt to go tripod-free, and the camera selects a shutter speed that’s too slow, you can increase the aperture to compensate. Then your camera will select a faster speed to correspond with the new aperture you’ve selected.
To Wrap Things Up…
We’ve covered a lot of ground in this guide. You should have a good grasp on how f-stops affect your aperture, how to control exposure and depth of field by stopping up or down, and have a solid understanding of the theory behind f-numbers and focal lengths.
If there’s one thing we hope you take away, is that the wider your aperture, the smaller your f-number will be. It’s not rocket science, but can take a little getting used to when you want to shoot fast without thinking. Start practicing with some stationary subjects or still life setups to give you plenty of time to make adjustments and play around. Your comfort level will grow with every shot, and soon you’ll be ready to move on to your next photography adventure!
Answers to Exercises:
- More
- f/2.8 lets in way more light than f/16.
- f/10 lets in way less light than f/2.