Tutorial Description
How best to make your images look their sharpest has always been a key aspect of our craft. One of the quickest ways to make your photos look more “professional” is by making them critically sharp.
No matter how amazing your lens a digital image can always benefit from some sort of post process sharpening. But be careful! If you are too cavalier in your sharpening you may quickly find that that you have shredded the quality of your image.
How Sharpening Actually Works
For the most part we associate sharpening with just making an image “clearer” but it isn’t often that we look beneath the hood to try to figure out exactly how the various sharpening tools actually accomplish this task.
At it’s core sharpening is actually very simple. All that happens when we you Photoshop sharpen an image is that photoshop is increasing the Contrast where there are sudden shifts in tone or Color.
However, in order to avoid increasing the contrast of the entire image this contrast bump only happens along the edges of these shifts. (And depending on the particular complexity of the sharpening routine in question the nature of how this contrast bump is applied can be very different)
Various Sharpening Methods And Which Is Best
In addition to the basic sharpening Tools in camera RAW (and the various tools we never use such as “Sharpen More” the most commonly used sharpening techniques are the following: Unsharp Mask Unsharp mask has been a staple of the Photoshop sharpening game for many years. Unsharp Mask became popular because it gave the freedom to leverage greater control over the edge contrast than other sharpening Tools which allowed photographers choice over how an image is sharpened.
Unsharp mask to this day remains an effective sharpening Tool that many photographers consider the industry standard for sharpening. High Pass High Pass sharpening is the easiest method for sharpening that still can produce good results. High pass works by increasing the amplitude of tonal shifts by an degree equal to the amount set by the user.
Simply put high pass finds edges and makes them edgier. The drawback is that High Pass has very limited control over the specifics of the process which can leave some details looking “great” and others looking “not so great”. Smart Sharpen Smart sharpen is essentially an upgraded unsharp mask. It is often ignored by photographers as we tend to think that anything with “smart” in the title is meant for noobies. This isn’t true, the Smart Sharpen Tool offers all the benefits of Unsharp Mask with even greater precision over your sharpening.
According to Bryan Hughes (Project Manager for Photoshop) the most advanced and effective sharpening tool in Photoshop is now Smart Sharpen.
How To Make The Most Out Of Smart Sharpen
In order to maximize your benefit from using Smart Sharpen you first must learn what the various parts of it do.
For the purpose of this demonstration I will be sharpening the following split grey image. By using this image rather than a photo it becomes obvious what each aspect of the Tool does. I urge you to download this image and try it out for yourself.

Once in Smart Sharpen the first setting that you should edit is to change the “Remove” option from “Gaussian Blur” to “Lens Blur”. The Difference between the two is that “Gaussian Blur” corrects for general blurring of all pixels (generally caused by scanners) whereas “Lens Blur” corrects for blurring caused by reflective Light. (generally caused by lenses)
The “Amount” slider is the first option you have control over in regards to sharpening. Amount determines how much the contrast is increased along edges. The higher the amount, the more contrast is added. Hover over to see how increasing Sharpness “amount” changes the image.

The “Radius” slider is the second option and it controls how far from the edge the Contrast increase radiates out from the edge itself. The amount of radius you will want will depend on the resolution of the image. If your radius is too low the sharpening effect will not be noticeable. If your radius is too high all your details will look like they have an ugly glow around them. Hover over to see how increasing Sharpness “radius” changes the image.

The “Reduce Noise” slider allows your to reduce any Noise that might have become noticeable as a result of the contrast shift along the edges caused by the sharpening.
With “Shadows/Highlights” you are given the opportunity to apply what could be defined as “Reverse sharpening” to adjust the Shadows or the Highlights of your image. This gives you better control over the extremes of either range allowing you to avoid clipping which can create the “over-sharpened” look in certain extreme regions of your image. (Such as along edges that already are very high contrast). Hover over to see how Shadow/Highlights can be used to make the contrast less harsh.

The Importance Of Luminosity Blend Mode
As you no doubt have noticed whenever you increase the contrast of a photo you also increase the saturation. Sharpening is no different. Since the goal of sharpening is to increase edge contrast it will also symptomatically increase edge Saturation which can cause strange looking Color fringing in your photo.
The easiest way to avoid this is by adding your sharpening to a new Stamp Visible Layer which you then change to the Blend Mode of Luminosity. When a Blend Mode is set to Luminosity the Saturation of the layer is ignored when blending tonal changes. Hover over to see how using the luminance blend mode can help maintain Color consistency.

Why You Should Be Masking Your Sharpen Layers
A common mistake made by photographers is that we apply the same amount of sharpening across an entire image. This global sharpening can reveal unwanted details in regions that are not meant to be sharp.
Sharpening out of focus areas of the image often can make a photo look muddled or unnatural which in most cases is not a desirable effect. Hover over to see how sharpening out of focus areas can harm an image.

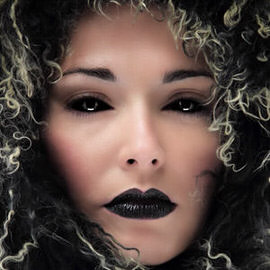
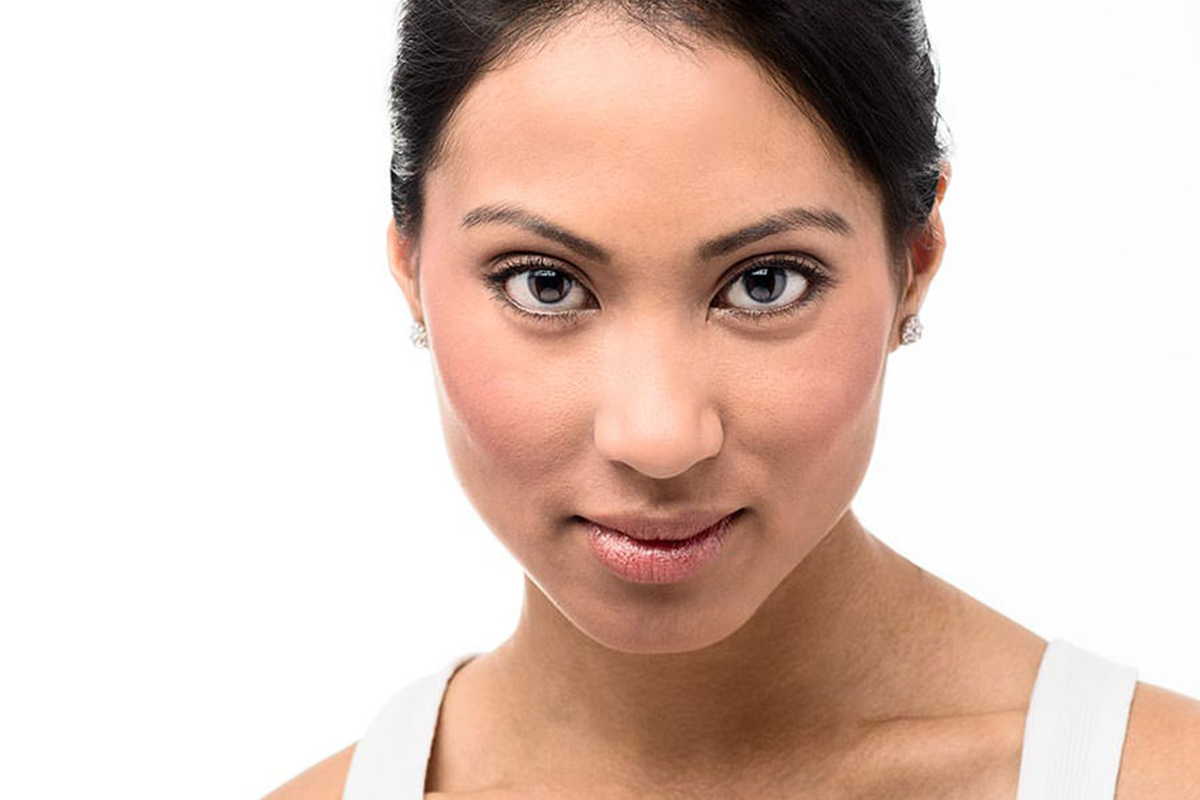
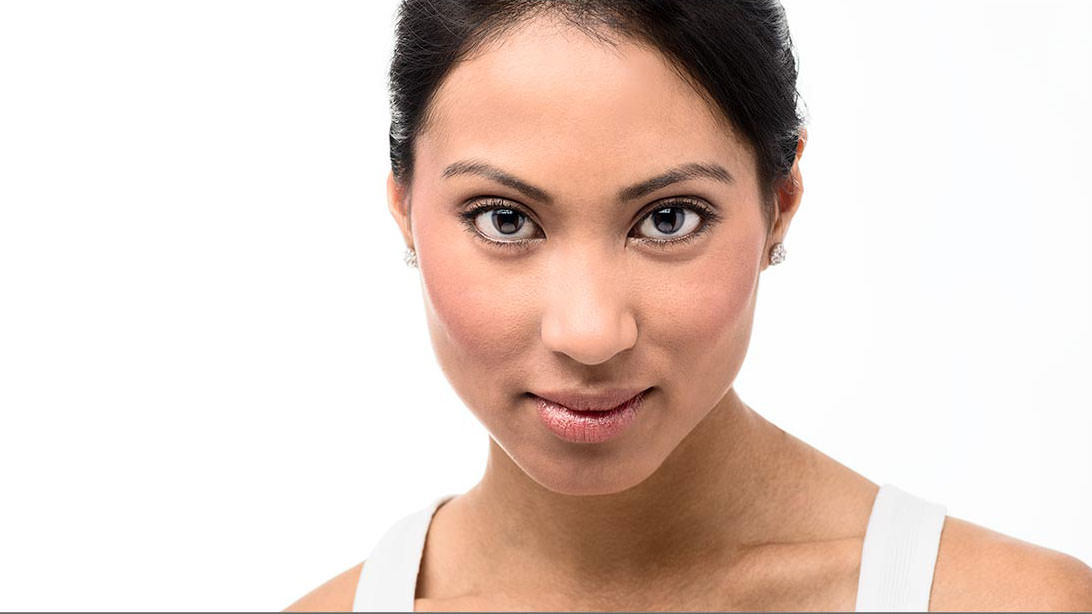
Sharpening subtle Textures such as Skin can also harm an image as it can make those Textures appear to be much rougher than intended. Hover over to see how masking your Sharpen layer can help fix over-sharpened Skin.

In almost all cases tremendous benefit can be gained from creating a Layer Mask and painting black over any region of the photo that does not need to be sharpened.