
Download Sample Images
Description
Nothing is worse than a landscape photoshoot when the weather doesn’t cooperate. But if you end up with a sky that’s gray and dreary, you can swap it with one full of color and detail in Photoshop! Learn how to make a selection of a landscape, bring in a new sky, and then match the color and lighting to tie it all together. Picture-perfect landscapes, every time!
This is Day 30 of our 30 Days of Photoshop series. Follow along with all 30 episodes as we explore the the magic of Photoshop together!
Watch Next
30 Days of Photoshop

Sign up to receive email updates to keep you going, sample images to follow along, and a printable calendar to keep track of your progress!
Share
REPLACE A SKY
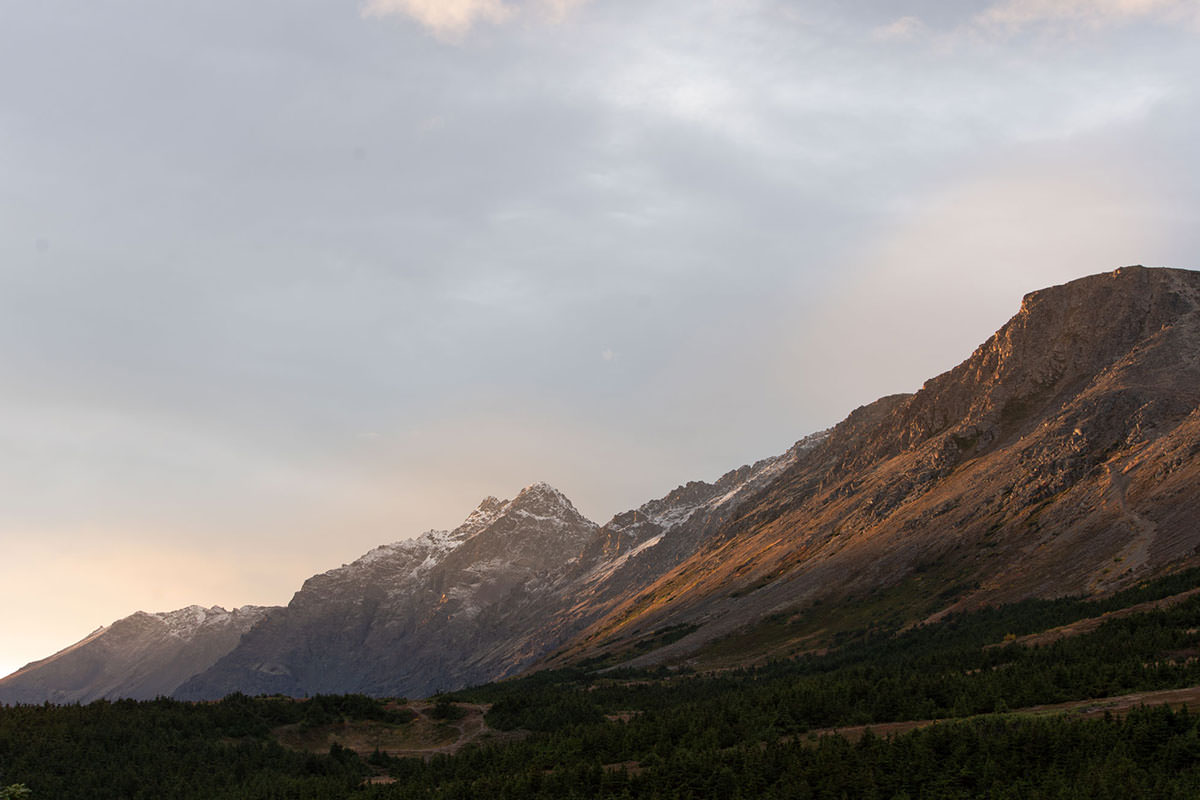
BEFORE
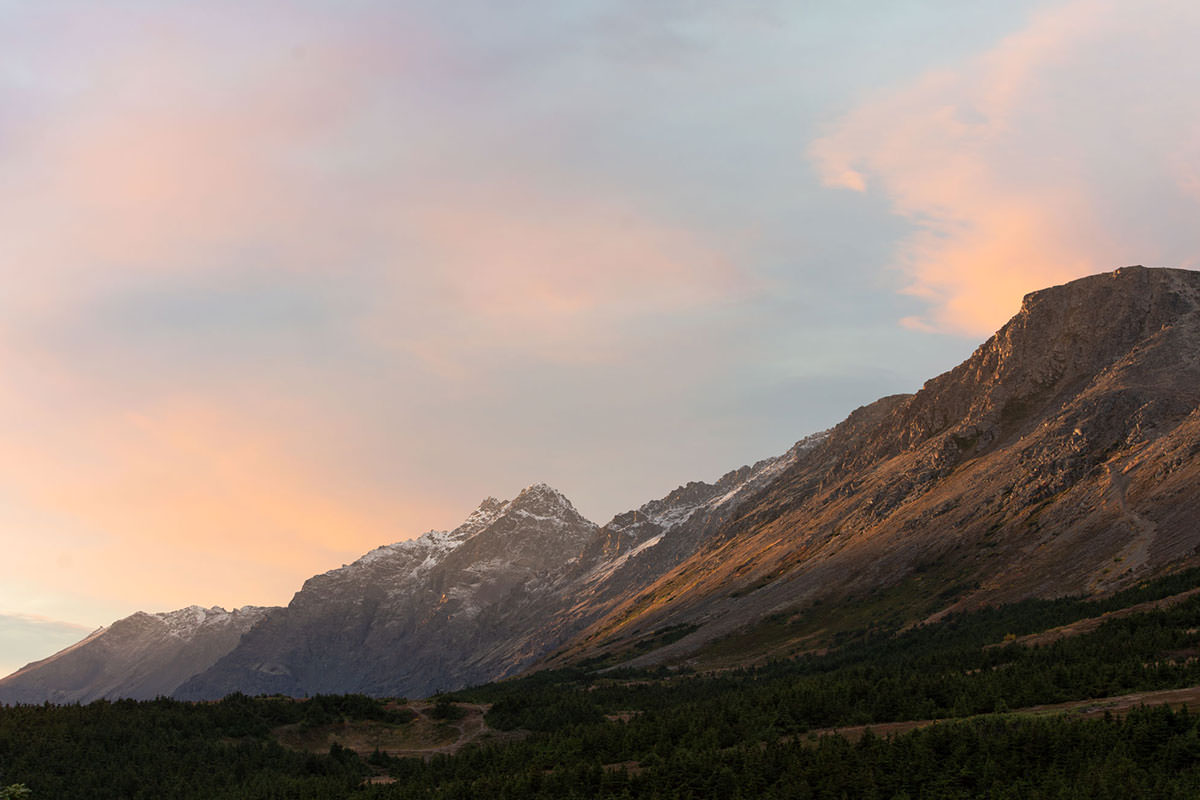
Picture Perfect Skies
Starting with Adobe Camera RAW
If you’ve been following along with 30 Days of Photoshop, you probably know that we love Adobe Camera RAW. The ability to work with RAW files within Photoshop and make changes and adjustments at any time gives us a ton of power and flexibility to create powerful images.
In this example, we’re going to use ACR to make some early adjustments to both images. Our end goal is to combine the two, creating an image with beautiful color and detail throughout the sky and landscape. Since we’re focusing on the sky in one and the ground in the other, we should keep this in mind as we edit. For the image with the nicer sky, make adjustments that will enhance the qualities in the sky. For the image with the nicer landscape, make adjustments that will bring out the color and details in the ground and foliage.
Use tools like the Graduated Filter, Radial Filter, and Adjustment Brush when you want to focus on specific parts of each image. And remember, since we’re going to load each RAW file as a Smart Object, we can get back to Adobe Camera RAW at any time to make further changes and adjustments.
Once you’ve made your initial edits, make sure to open each RAW file as 16-bit, in Adobe RGB 1998 color space, and as a Smart Object. This provides the most amount of information to work with as you edit, and also allows you to get back to Adobe Camera RAW at any time.
Selecting the Sky
In our example, we’re using two RAW images that were captured in the same location. This is ideal, making it a little easier to match the lighting and perspective in the final composite. Landscapes are also more forgiving when making selections since they often contain very rough edges that don’t require a ton of precision to cut around.
The Magic Wand Tool is a fantastic choice for selecting the sky above a rough-edged landscape. It’s fast, and since we don’t need to worry about crisp and perfect edges, it can usually get the job done with only a little bit of extra help. If you do end up with inconsistencies around the edges of the selection, try tools like the Lasso Tool to hand draw additional areas to add to the selection, and Select and Mask which will help you refine the edges of the selection.
Once the sky has been cut out, feel free to move it, scale it, and even stretch it until it fits the scene.
Light & Color
We’re almost to the end! Now that the new sky is in place, we just need to get the light and color to match better between the two photos. The example images were photographed at the same location, but at slightly different times of day. The overcast sky has an overall cooler temperature, and the other is warmer and has a bit more contrast and saturation.
We recommend using Adobe Camera RAW to make color adjustments since it’s going to give us the most room to work. If you prefer to work with Adjustment Layers and Clipping Masks to adjust the light and color, that works too!
Use your eye to analyze what each image needs to get closer to the light and color from the other. We prefer warmer landscapes, so we adjusted the color temperature of the overcast image to warm it up, and also used some local editing tools to add splashes of light on the mountains. You’ll also want to adjust highlight and shadow levels, as well saturation and vibrance, to get a photorealistic composite of the two landscapes.
This process will take a bit of time, and will most likely require a bit of guess-and-check. But have fun with it, and use as many of the tools you’ve learned over the past 30 days to bring it to life!


