
Download Assets
This tutorial includes 6 RAW sample images and 1 PDF guide. Downloads are free with a PHLEARN account.
- Download the sample images and PSDs from every free tutorial on PHLEARN
- New free tutorials published every week
- One free account — sign up once, then download anything
Free PDF Guide · 2 Pages
This Tutorial as a Step-by-Step PDF
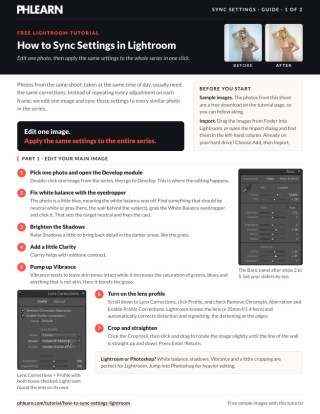
The 2-page guide walks through the whole sync: import, the White Balance eyedropper on a neutral wall, Shadows, Clarity and Vibrance, Lens Corrections > Profile, a straightening crop, then G for Grid, Ctrl/Command-click the series, Sync Settings, Check All, uncheck Crop and Synchronize, and R to straighten each photo. Keep it next to your keyboard.
description
Photos from one shoot usually need the same white balance fix, the same shadow lift, the same lens profile. Edit one representative frame properly, then select the series with that image first and use Sync Settings to push the whole set of adjustments across in one click — unchecking Crop, since rotation is the one correction that genuinely has to differ from frame to frame.
Enjoying This Free Tutorial?
We publish a new free tutorial every week, each one with sample images and PSDs you can download and follow along with. Sign up and they land straight in your inbox, along with early word on sales, events and subscriber-only offers.
How to Sync Settings in Lightroom
Photos from the same shoot often need nearly identical corrections — the same white balance fix, the same shadow lift, the same lens correction. Rather than repeating every adjustment on each image individually, Lightroom’s Sync Settings feature lets you perfect one photo and apply that exact same set of changes to an entire series in seconds.
Editing Your Main Image First
Start by importing the series: drag the photos from Finder into Lightroom, or open the Import dialog and find them in the left-hand column. Since they are already on your hard drive, choose Add, then click Import. Then double-click one representative image from the series to fully edit in the Develop module — this becomes the reference that every other photo in the group will match.
Fixing White Balance with the Eyedropper
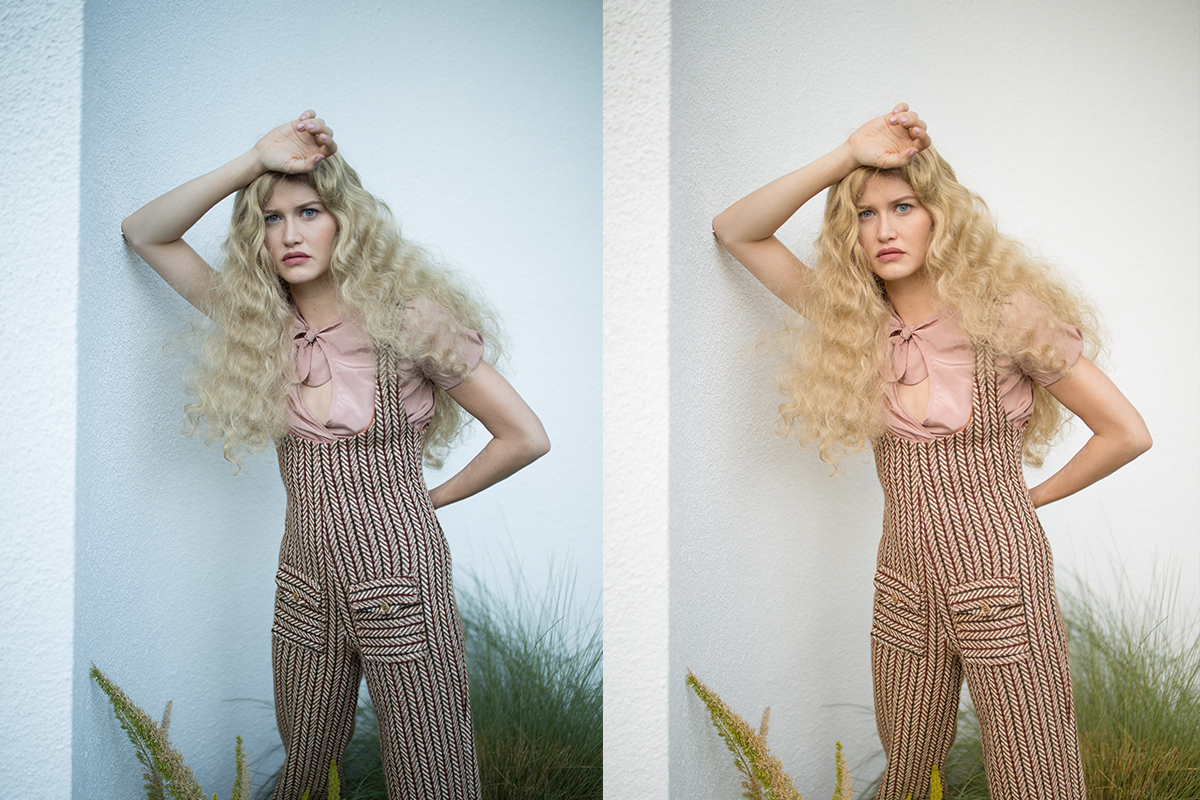
If a photo has an obvious color cast, like an overall blue tint from an incorrect white balance, find a neutral gray or white area in the frame — a wall behind a subject, for example — and click it with the White Balance eyedropper tool. Targeting that neutral point corrects the color cast across the entire image.
Adjusting Shadows, Clarity, and Vibrance
With color corrected, brighten the Shadows slider to bring out more detail in darker areas of the frame. Adding some Clarity boosts midtone contrast, giving the image more definition. Vibrance is worth reaching for over straight Saturation in most cases, since it tends to leave skin tones intact while it increases the saturation of greens, blues and anything that isn’t skin (here, the grass), avoiding the unnatural, oversaturated skin that a global saturation boost can produce.
Correcting Lens Distortion and Vignetting
Scroll down to Lens Corrections and switch to the Profile tab, then enable both the profile correction and chromatic aberration removal checkboxes.
Enabling Profile Corrections for Your Specific Lens
Lightroom automatically detects the lens used to shoot the photo and applies a matching correction profile, fixing lens-specific distortion and vignetting — the natural darkening that occurs toward the edges of a frame with many lenses. Comparing the image before and after enabling this correction usually shows a noticeably flatter, more even result, with straighter lines and more consistent brightness across the frame.
A final crop and slight rotation, straightening a line in the scene that should be perfectly vertical or horizontal, rounds out the edit — corrections like white balance, shadow and vibrance adjustments, and lens profile fixes are exactly the kind of editing Lightroom handles well, reserving heavier retouching work for Photoshop.
Selecting Your Series and Opening Sync Settings
Once the reference image is fully edited, switch back to the Library module and press G for Grid view to see the whole series at once. Click the edited image first, then hold Ctrl or Cmd and click every other image in the series you want to match it — the first image you click becomes the source that the others will sync from. With all the images selected, click Sync Settings at the bottom of the right-hand column in the Library module.
Choosing Which Settings to Sync
The Sync Settings dialog lists every adjustment category individually, letting you choose exactly which changes carry over to the other images rather than syncing everything indiscriminately.
Excluding Crop When Angles Differ Between Shots
If the reference image was cropped or rotated to fix an angle issue specific to that one shot — for instance, straightening a line because the camera wasn’t perfectly level — that crop shouldn’t be forced onto every other photo in the series, since each one may need its own slightly different rotation. Uncheck Crop in the sync dialog (using Check All first if nothing is checked, then unchecking just Crop) so every other adjustment — white balance, shadows, vibrance, lens corrections — syncs across the whole series while cropping is left for each photo individually.
Re-Cropping Individual Images After Syncing
After clicking Synchronize, every selected image instantly picks up the synced adjustments, and it scales: with 100 more photos from the same shoot, they would all get the changes at the exact same time. For any image that still needs its own crop or rotation, press R to bring up the Crop tool, adjust the angle until any relevant lines are straight, and press Enter. Moving through the filmstrip and repeating this for each image only takes a moment, since every other correction is already in place — cropping is the only step left to handle individually.
Why This Approach Works
Sync Settings works because most of the corrections a photo shoot needs — white balance, shadow and vibrance adjustments, lens profile corrections — are consistent across every photo taken under the same lighting conditions with the same camera and lens, which is exactly what a single shoot usually looks like. Editing one image carefully and syncing the result to the rest means every correction only has to be figured out once instead of repeated by hand across dozens or hundreds of photos. Selectively excluding settings like Crop, which genuinely does need to vary from photo to photo when shooting handheld, keeps the sync targeted to only the adjustments that should actually be identical across the series.
Final Thoughts
Syncing settings in Lightroom turns what could be a repetitive, time-consuming editing session into a matter of perfecting one photo and applying that same work across an entire series in a few clicks. Being selective about which settings to sync — keeping shared corrections like white balance and lens profiles together while leaving photo-specific adjustments like cropping for individual attention — gets you a consistent, polished set of images with a fraction of the manual editing work.
Quick Reference: Keys, Menus and Settings
- Fix white balanceDevelop > Basic: White Balance eyedropper on a neutral wall
- Lens profileLens Corrections > Profile: Remove Chromatic Aberration and Enable Profile Corrections
- Grid viewG in the Library module
- Select the seriesClick the edited photo first, then Cmd/Ctrl-click the rest
- SyncSync Settings (bottom of the right-hand column) > Check All, uncheck Crop > Synchronize
- Straighten each photoR for the Crop tool, drag outside the image to rotate, Enter/Return
No AI, no generative credits.
Free Downloads
Follow Along on the Same RAW Files
Get the six RAW photos from the same outdoor shoot and the 2-page PDF guide, so you can edit one frame and sync the rest. Free with a PHLEARN account.
Syncing Settings in Lightroom: Common Questions
What does Sync Settings do in Lightroom?
It copies the edits from one photo to every other selected photo. Edit one image from a series, then apply the same settings to the whole set in one click.
Where is the Sync Settings button?
In the Library module, at the bottom of the right-hand column. Select your photos first, then click Sync Settings.
Which photo do the settings come from?
The one you click first. Click the edited photo, then Ctrl/Command-click the others. The main image is highlighted a little lighter than the rest.
Which photos are good candidates for syncing?
Photos from the same shoot, taken at the same time of day with the same light, usually need the same corrections, like white balance, shadows and lens fixes.
How do I fix a blue color cast first?
In the Develop module, grab the White Balance eyedropper and click something that should be neutral white or gray, like the wall behind the subject. That sets the target neutral and fixes the cast.
Why use Vibrance instead of Saturation?
Vibrance tends to leave skin tones intact while it increases the saturation of greens, blues and anything that isn’t skin. In this photo it boosts the grass.
Why uncheck Crop before syncing?
The photos were shot without a tripod, so each one needs its own rotation. Click Check All, uncheck Crop and click Synchronize; everything else carries over.
How do I straighten each photo after syncing?
Click a photo, press R for the Crop tool, click outside the image and drag to rotate until the line is straight, then press Enter/Return. Move down the filmstrip and press G when you are done.
Do lens corrections sync too?
Yes. With Remove Chromatic Aberration and Enable Profile Corrections checked under Lens Corrections > Profile, the distortion and vignetting fixes go to every synced photo.
Are the sample files free?
Yes, with a free PHLEARN account. You get 6 RAW sample images and 1 PDF guide: the photos from the shoot in this tutorial and a 2-page step-by-step guide.
Master Photoshop, Lightroom and Photography
Join PHLEARN PRO for $12.99 a month or $99.99 a year. Cancel anytime, with a 100% money-back guarantee.





