How to Photograph & Retouch Athletes
-

-
Add to
favorites
-
DifficultyMedium
-
Length7.25 hours
-
Videos21
-
Software
DESCRIPTION
In this tutorial, we’re working with health and fitness coach Nile Bratcher to explore the ins and outs of athletic photography and deliver images that are both stunning and representative of the spirit of his business. We’ll take you into the photoshoot as we build four different studio lighting setups from the ground up. Then it’s on to Photoshop where we’ll teach you everything from masking and cutting out your subject to effective dodging and burning.
THIS COURSE INCLUDES
- 9 Sample Images
- 1 Photoshop Gradient
- 1 Photoshop Action
- 1 Photoshop Brush
Share
Table of Contents
-
01 - Tutorial Introduction1:54m
-
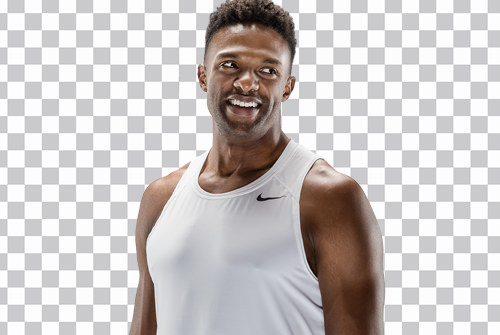
02 - Athletic Headshot: Introduction1:17m
-
03 - Athletic Headshot: Camera Settings3:39m
-
04 - Athletic Headshot: Lighting17:10m
-
05 - Athletic Headshot: Photoshoot11:46m
-
06 - Athletic Headshot: Masking36:24m
-
07 - Athletic Headshot: Retouching30:17m
-
01 - Action Photoshoot: Introduction1:45m
-
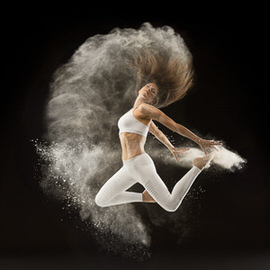
02 - Jumping Photoshoot: Lighting15:51m
-
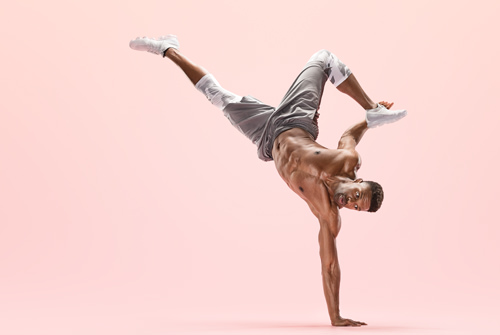
03 - Handstand Photoshoot: Lighting6:02m
-
04 - Jumping Photos: Masking & Color41:40m
-
05 - Jumping Photos: Retouching & Graphics31:39m
-
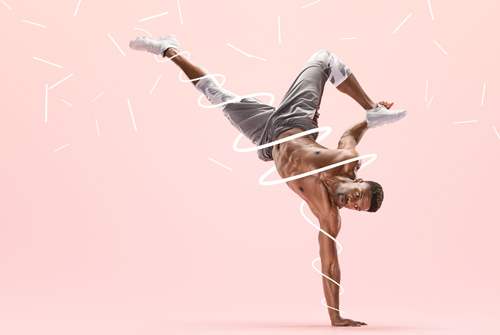
06 - Handstand Photos: Masking & Color34:34m
-
07 - Handstand Photos: Retouching & Graphics55:12m
-
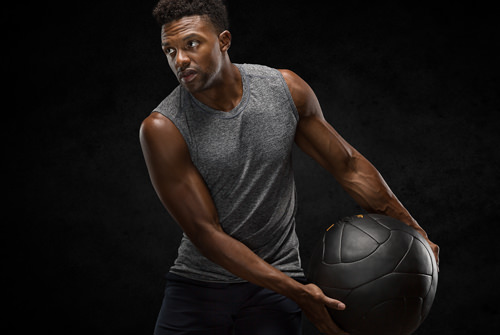
08 - Athletic Detail: Introduction1:46m
-
09 - Athletic Detail: Lighting6:12m
-
10 - Athletic Detail: Retouching & Color47:11m
-
11 - Portraits on a Black Background: Introduction1:45m
-
12 - Portraits on a Black Background: Masking a Series29:02m
-
13 - Portraits on a Black Background: Retouching a Series41:49m
-
14 - Portraits on a Black Background: Coloring a Series16:59m
Course Downloads
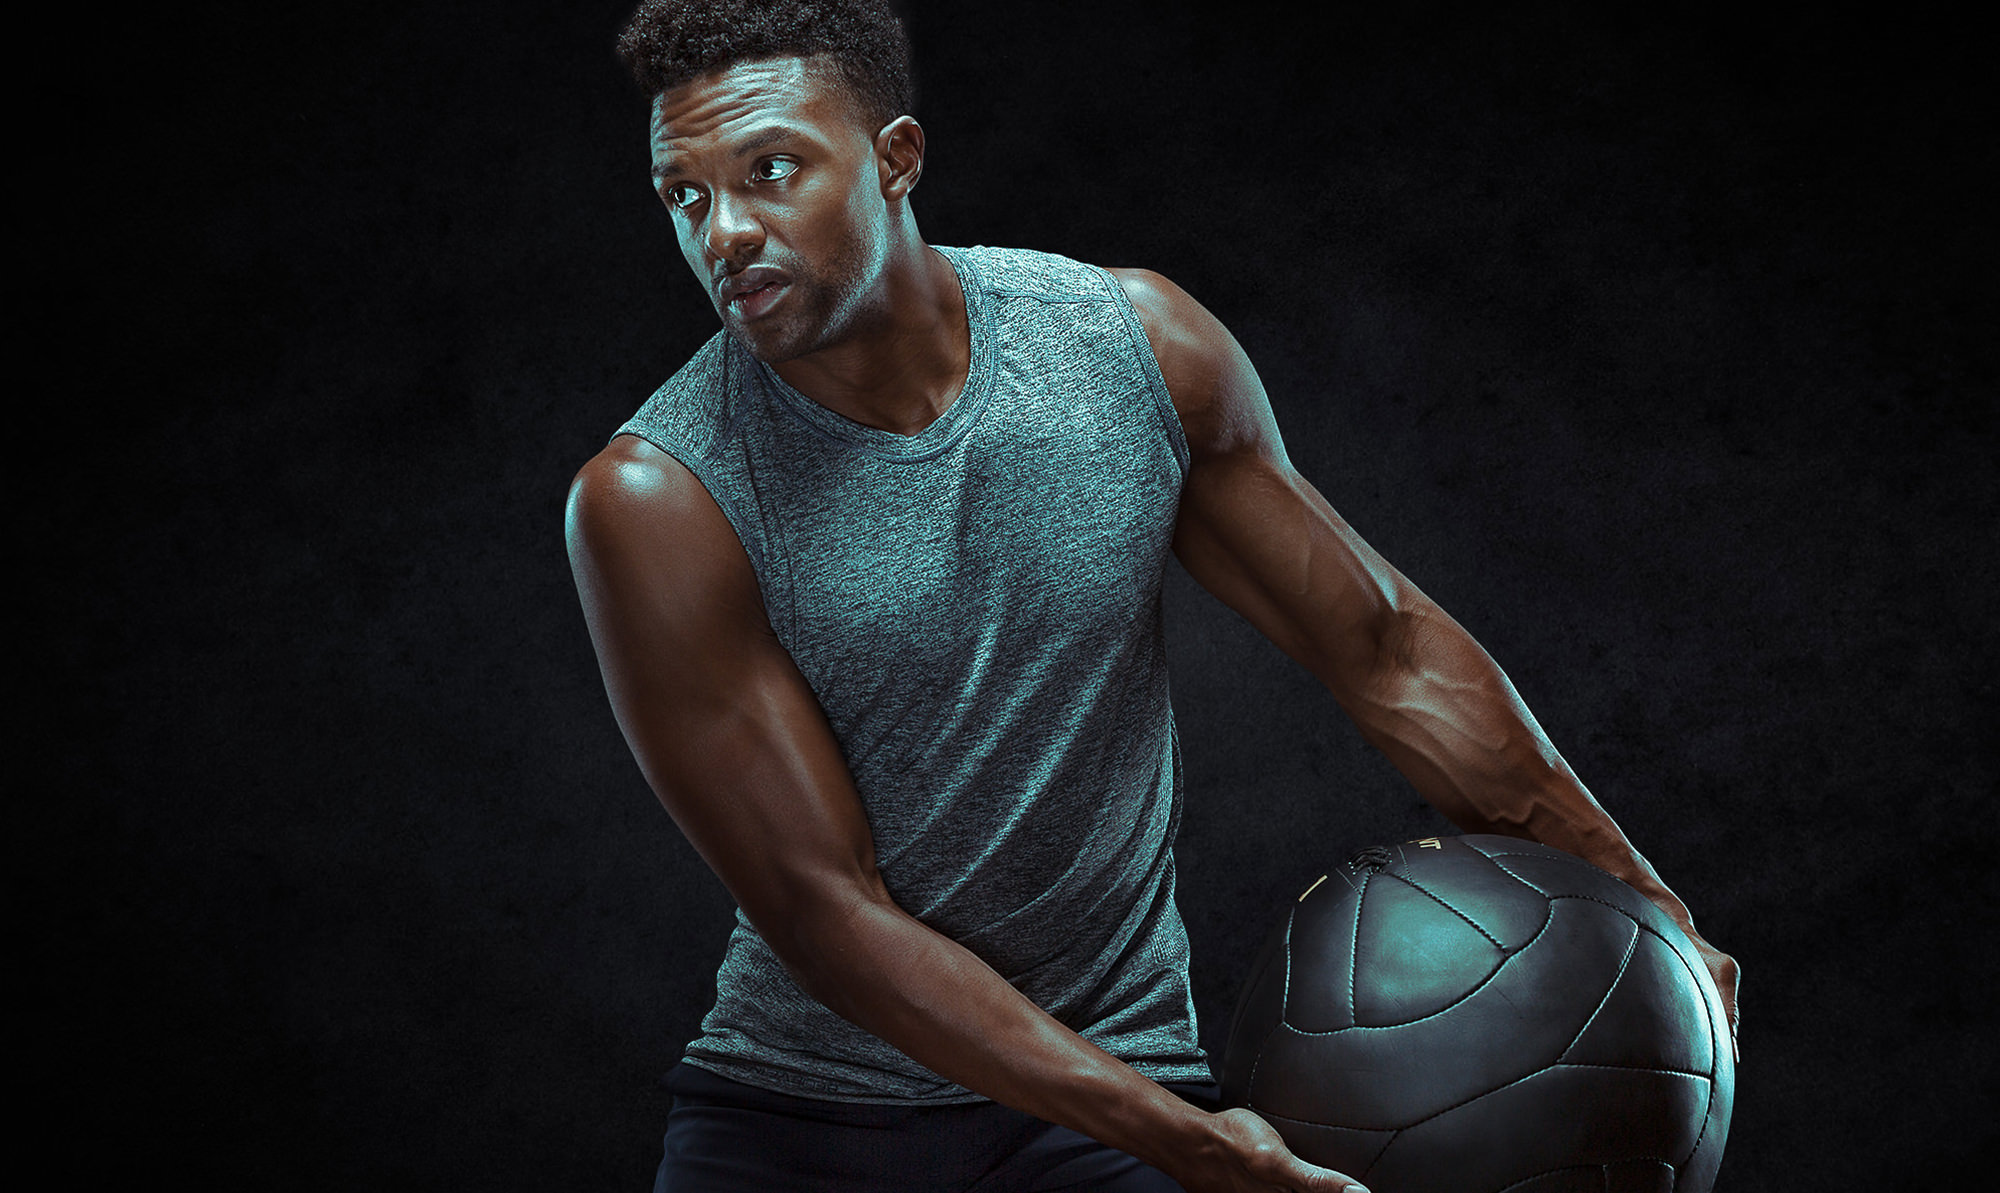
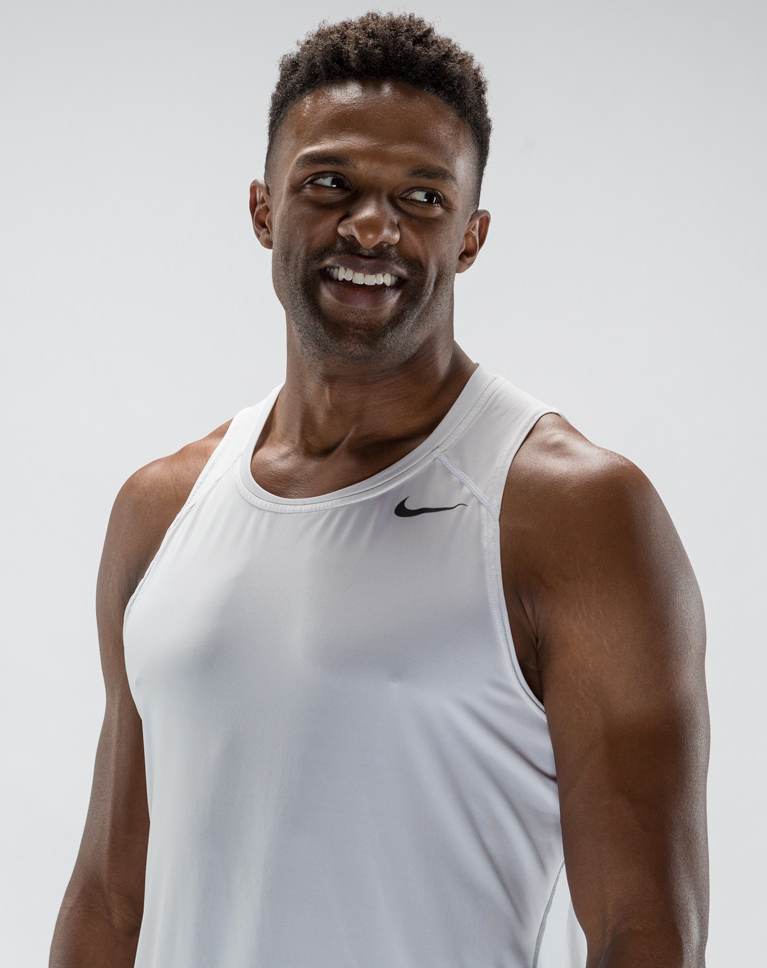
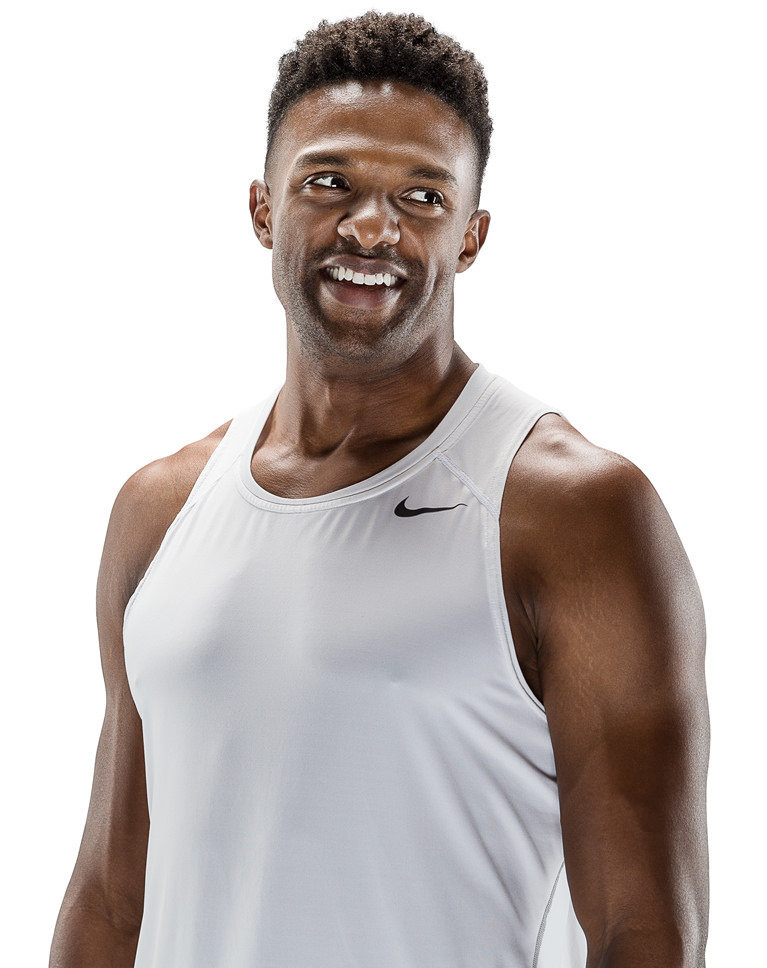
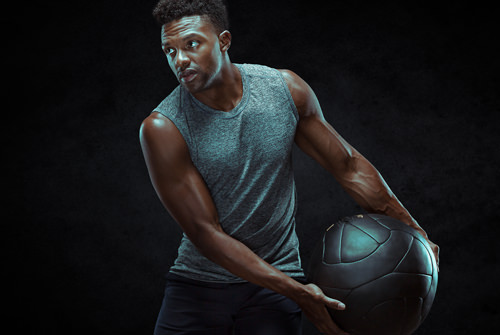
Retouching for Athletic Images
Athletic Photography
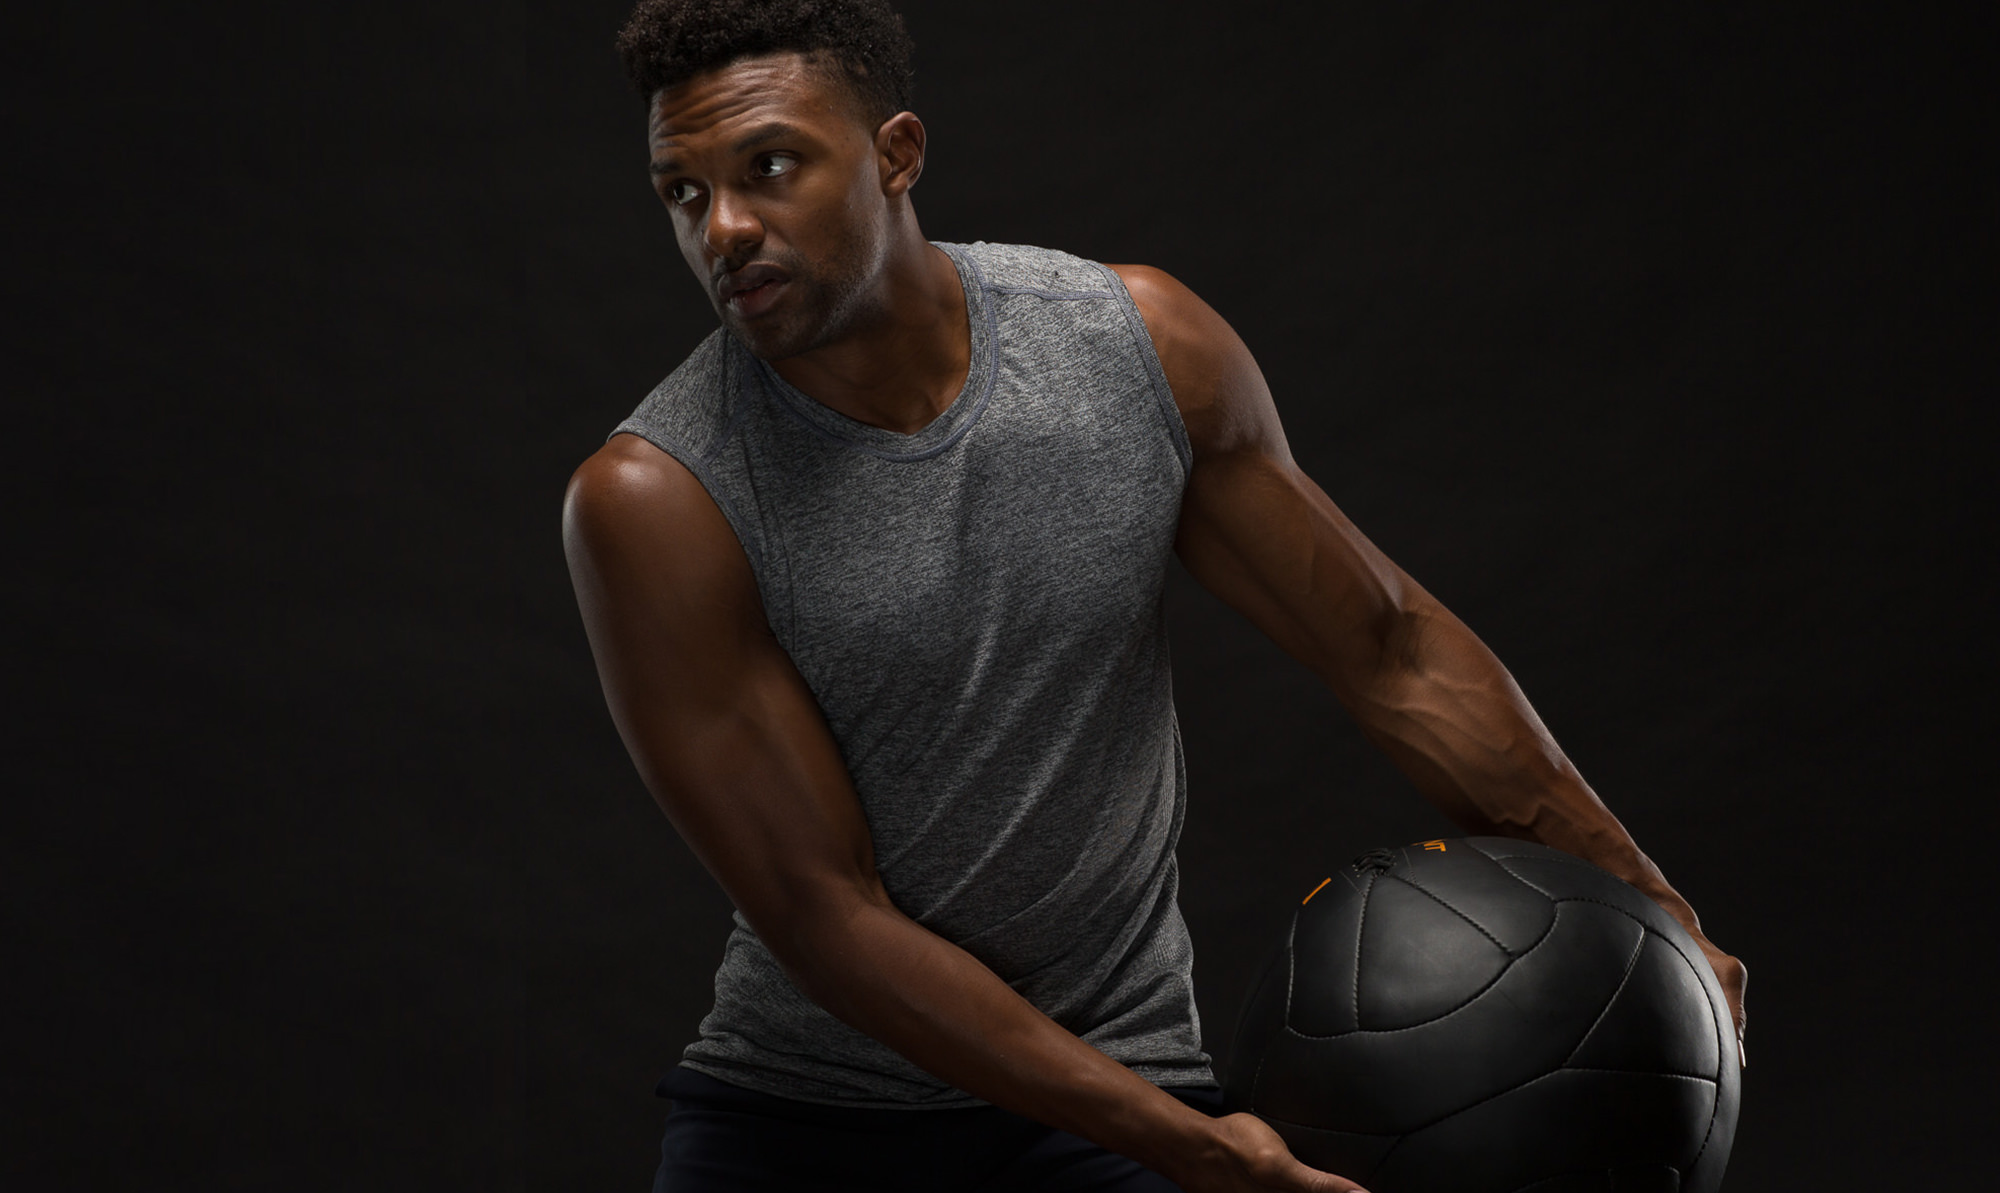
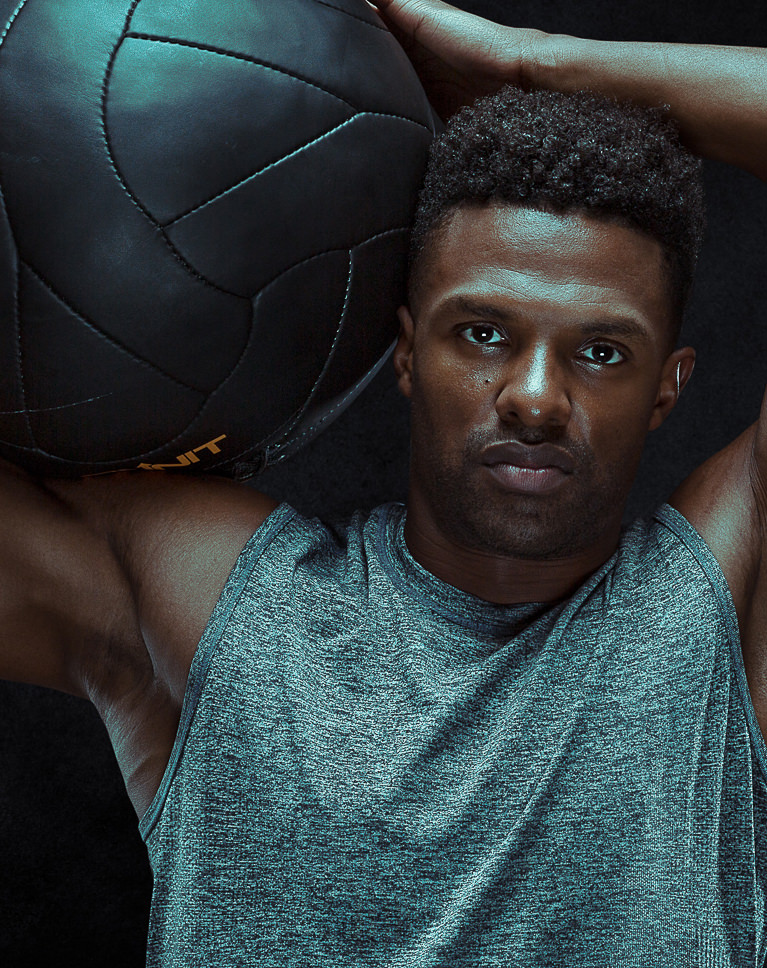
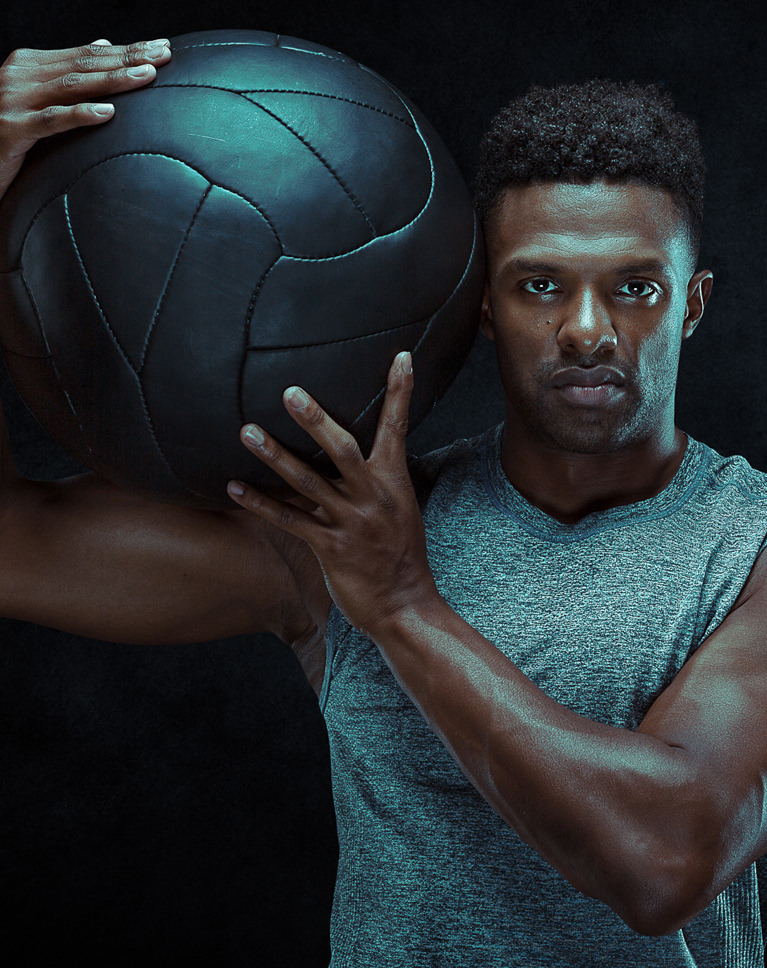
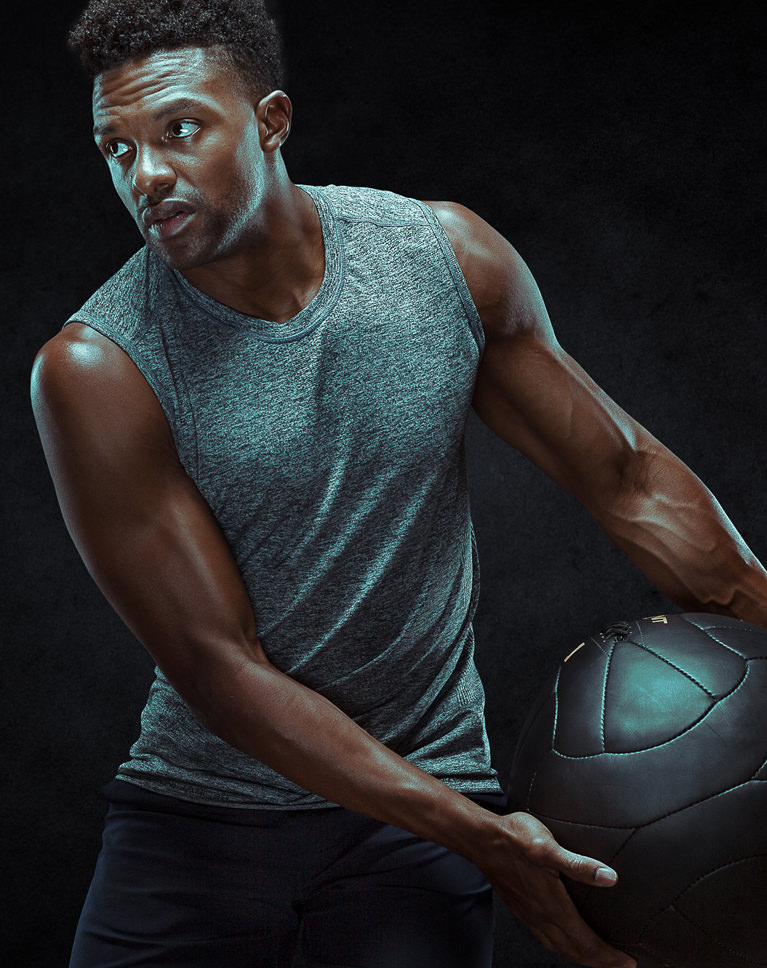
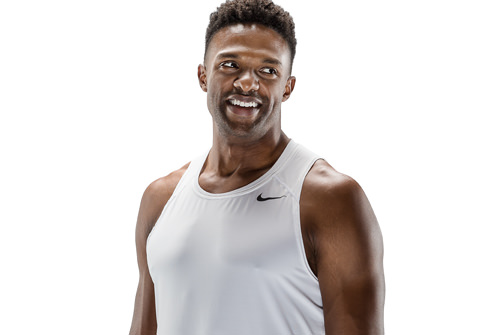
Picture an athlete. What words would you use to describe them? Fitness, action, energy, strength, and physique are all characteristics that need to be present in any athletic portrait. We’ll demonstrate photographic techniques to highlight muscle definition, form, and motion that will help you bring the spirit of an athlete to life.
Studio Lighting Techniques
Beginning with a single light, we’ll construct several unique lighting setups piece by piece – each ideal for capturing a different concept, mood, or pose. We’ll also demonstrate how to position lights to capture and enhance muscle definition and motion.
Photographing Non-Models
One of the greatest challenges a photographer can face is making an uncomfortable situation – a studio photoshoot – a comfortable one. See first-hand how to help your clients relax and get the most natural images possible.

Client Interaction
Having your client present at a photoshoot can be a huge advantage. See how to bring them into the process for ideas and feedback so you both can feel confident that you’re nailing the right shots.
Meet Needs & Deliver Variety
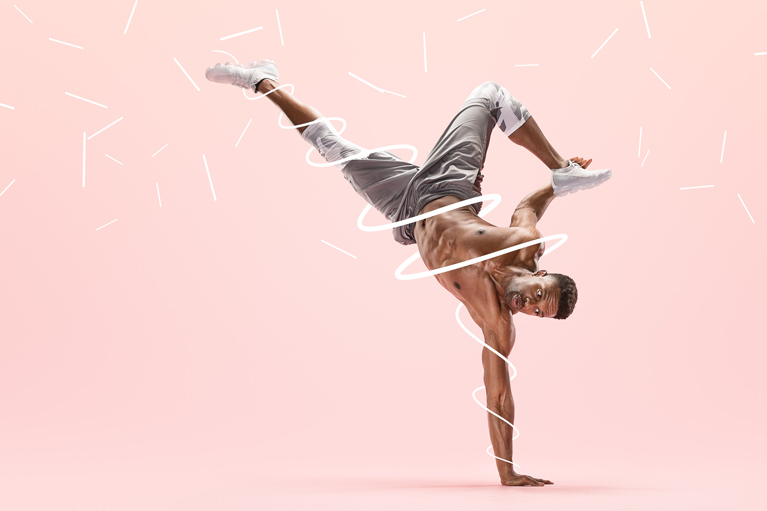
The best way to leave a client wanting more is by meeting their needs and giving them options. In this tutorial, we capture everything from simple portraits to kinetic action shots in several different colors, styles, and moods. Learn how to get a wide assortment of photos with only a few subtle changes.
From Capture to Export
See the creative process from end to end. Join us as we go in-depth during several photoshoots and then bring the images into Photoshop for retouching and styling. This is one of our most comprehensive tutorials to date covering studio lighting, client interaction, photography, and post-production.

Action, Energy, Strength
Learn to create images as stunning as your subjects.
Athletic Retouching
As important as it is to highlight the features of an athlete when capturing a photo, it’s equally as important to maintain and enhance those features in post-production. We’ll show you how to remove blemishes, increase definition, and add creative effects to ensure an athlete is at their peak performance.
Dodging & Burning
We’ll teach you advanced techniques to sculpt highlights and shadows around your subject, providing more shape and definition. This can be especially impactful during athletic retouching, greatly enhancing musculature and form.
Color & Style
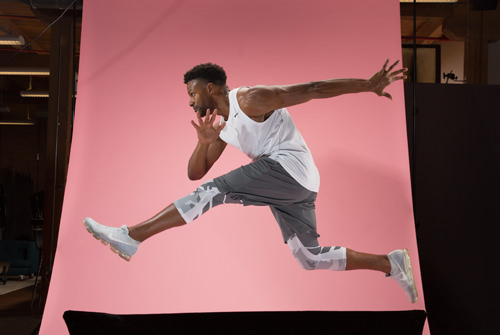
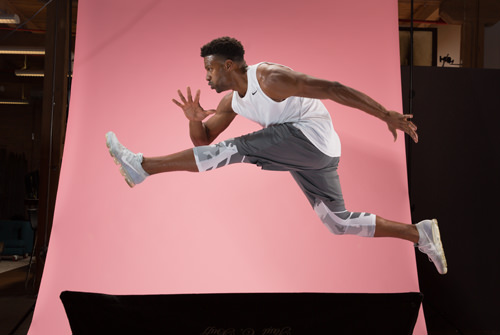
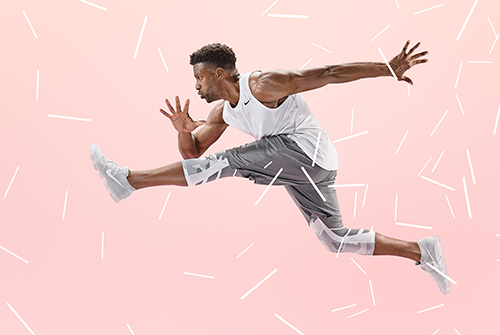
Since we shot on three different colored backgrounds, we have three totally different perspectives when coloring and stylizing our photos. From a bright pink, brimming with energy and abstract shapes, to black, where we’ll make things a bit more intense and dramatic. We’ll show you how to capture and magnify the tone of an image.

Aaron Nace
PHLEARN Founder
Aaron Nace is a photographer, Photoshop artist and founder of PHLEARN. He is the #1 Photoshop instructor in the world with millions of YouTube subscribers.
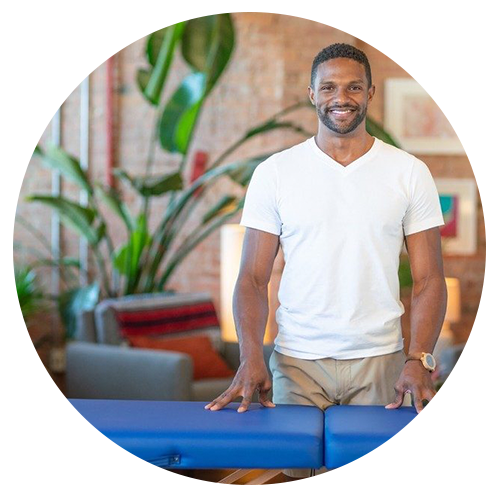
Nile Bratcher
Physical Therapist/Strength Trainer – Featured Artist
A lifelong dedication to dance & martial arts led to helping others improve their health, reduce their pain, & empower their lives. Nile has studied with many industry leaders since his early career beginning at the age of 17.
View Nile’s Site
Reviews
New & Popular Tutorials


Training Site in
the World
Tutorials!
Ratings
and Counting
Subscribers
wait. I’m an addicted phlearner.
“If you haven’t seen it before you probably have your mouth open now because it’s magic!” says Aaron while working on masking out curly hair. Yes, at this point I’ve had my mouth open, you guessed it right, Aaron! I couldn’t wait until I finish the whole tutorial before writing the review. Yes, I have to admit it’s magic and this is only the first part I’m going through! It’s mind-blowing,
Aaron has many very special gifts – to transform good images into phenomenal images, it is one thing- but the true gift is that he has the ability to teach in a manner that we can actually do the same edits – very creative, practical teaching that can be sold and stand out in the crowded market. Thank you!
Outstanding learning resource. Aaron clearly loves imparting knowledge, and impart knowledge he does. The quality of this learning resource is second-to-none. You are taken from go to wo. From the shoot (lighting setup, camera settings & collaborating with the subject) through the editing process to a finished and polished image. The video interface is set up so you can rewind, speed up or slow down the audio visual. The real kicker, the price. Well within reach of the majority of hobby photographers. So, a world class learning resource, well presented by a likeable guy who loves what he does at an affordable price. As we say down-under, beudy mate!
I heard about Phlearn on the podcast “This Week in Photo,” and figured I’d check it out. Wow am I glad I did! Working in athletics, I immediately knew this was the first tutorial series I wanted to watch. Upon completion, I can’t wait to apply some of these techniques and methods to my own work and use it to help bolster our department’s brand. Great stuff!
You are just brilliant! There were many little techniques in this tutorial which just blew my mind… I’ve been doing things the hard way for way too many years! Thank you, this was totally worth the price of purchase. Alldaron
Awesome tutorial as always! I’m now off to go practise what I’ve learnt! Thank you Phlearn & Aaron!
Amazing!!!
Suuuuuper cooool, useful and easy to follow! Love Aaron and all the team for these tutorials! <3 <3 <3
Super! Beyond a very good photographer you ar a Didactic Star! One of the best investments I did on photographic tutorials was to be a PHLEARN subscriber! Hugs from Brazil!
My goodness. I’m so glad I discovered Aaron and Phlearn. I’m brand new to photography (I didn’t even own a camera two months ago, and joined Phlearn a week ago), and I feel like I have years of experience because of tutorials like this. Not only is Aaron a great photographer, but he’s an outstanding teacher! He covers literally everything. Every step, every click, EVERYTHING you need to know. This tutorial is just ridiculous. (I did indeed have my mouth open during the clipping section) Mind. Blown. I’ve messed with PaintShop Pro for years (I just downloaded Photoshop), so I’m familiar with a lot of things, just on a different platform, but again, Aaron points out exactly what buttons or options you need to click to do whatever so you’re not in the dark about anything. This is only about the 5th or 6th video I’ve watched, but being able to download all the files and do it yourself while following along to the video is just….it’s really the best thing ever! I literally schedule hours out of my day now for some Phlearn lessons, just like school classes, and can’t wait to learn something new every day. So Aaron, seriously, thank you SOOOOO much!!! I know you’ve helped a billion people, and I’m just another newbie, and you’ve never met me, but you’ve taught me more about photography and editing than I knew even existed! Best. Teacher. Ever!
This was an awesome tutorial. Going so in depth it was hard to keep up. Going more in depth with the changes to Photoshop, really added some meat to it. Making one’s usage of the changes easier to accomplish. At times it was a bit hard to keep up, but that’s one of the good things about going ‘Pro,’ I can always come back and revisit. Then there’s always the possibility of purchasing it out right, so as to always have it on hand if needed!!! Great work, keep it up, cause I’m hungry for more :{)))