

description
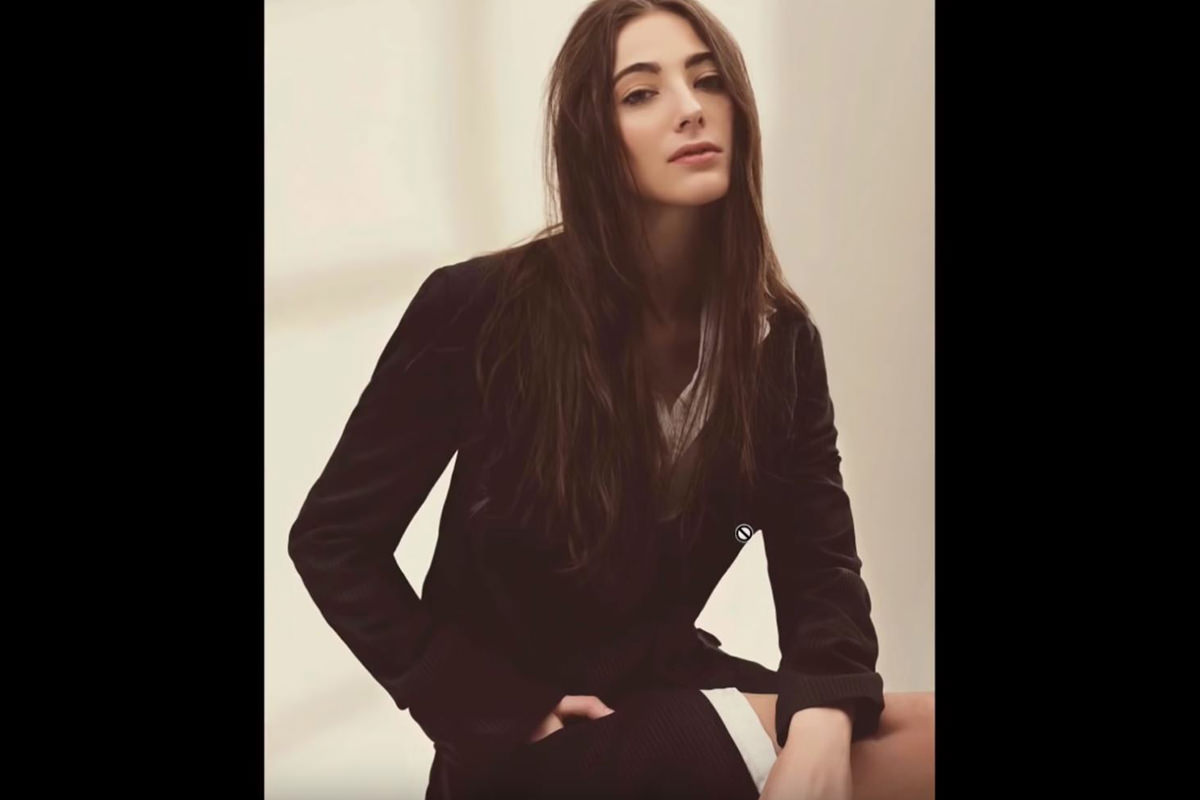
The Liquify tool is usually associated with reshaping a body, but it is just as useful for fixing wardrobe that does not fit right or smoothing out a hairstyle, all without touching the person underneath it. This tutorial color tones a fashion portrait with Levels first, then works through Liquify Forward Warp and its brush size, pressure, and density settings, plus the Freeze Mask, to bring an oversized jacket in for a much better fit.
Enjoying This Free Tutorial?
We publish a new free tutorial every week, each one with sample images and PSDs you can download and follow along with. Sign up and they land straight in your inbox, along with early word on sales, events and subscriber-only offers.
Photoshop Liquify Brush Settings: Size, Pressure & Density
The Liquify tool is usually associated with reshaping a body, but it’s just as useful for fixing wardrobe that doesn’t fit right or smoothing out a hairstyle, all without touching the person underneath it. This tutorial color tones a fashion portrait with Levels first, then dives into Liquify’s Forward Warp tool, its brush size, pressure, and density settings, and the Freeze Mask, to bring an oversized jacket in for a much better fit.
Color Toning Shadows and Highlights With Levels
Levels’ individual color channel sliders push specific colors into an image’s shadows or highlights, which is a common way editorial photographers achieve a distinctive color palette.
-
Add a Levels Adjustment Layer
Add a Levels adjustment layer above the image.
-
Add Color to the Shadows
Switch to an individual color channel, such as Red, and drag the left output slider from left to right to introduce that color into the shadows.
-
Add Color to the Highlights
Drag the right output slider on the same channel to introduce the opposite color into the highlights.
-
Repeat Across Other Channels
Repeat the process on the Green and Blue channels, pushing and pulling each slider until the overall color tone feels intentional.
Stacking and Masking Multiple Levels Layers
Several Levels adjustment layers can be stacked for more complex toning, and a masked gradient can localize a color shift to just part of the frame.
-
Add a Second Levels Layer
Add another Levels adjustment layer and push different midtone or highlight colors for a more layered tone.
-
Mask a Color Shift Into One Area
Invert the layer mask, then use the Gradient tool to reveal an extreme color shift only in a specific corner, such as the bottom left, for a stylized editorial look.
-
Group the Color Layers
Group all the Levels layers together and name the group Color.
Preparing a Stamp Visible Layer for the Liquify Tool
The Liquify filter needs actual pixel information to work with, so a merged stamp of everything visible gives it something to reshape.
-
Create a Stamp Visible Layer
Press Shift+Option/Alt+Cmd/Ctrl+N to create a new layer, then Shift+Option/Alt+Cmd/Ctrl+E to stamp a merged copy of everything visible onto it.
-
Open the Liquify Filter
Go to Filter > Liquify.
Why Use a Stamp Visible Layer Instead of the Background for Liquify
Liquify needs an actual layer with visible pixels to reshape, so applying it directly to a blank layer wouldn’t do anything at all. Using a stamp visible layer keeps the reshaping non-destructive and reversible, since the original background and color layers underneath stay completely untouched and can still be edited independently afterward.
Adjusting Forward Warp Brush Size, Pressure, and Density
The Forward Warp tool does the vast majority of the work in Liquify, and getting its brush settings right matters more than exploring the dialog’s other specialized tools.
-
Increase Brush Size
Set the brush size larger than seems necessary at first, since a larger brush produces smoother, more natural pushes and pulls.
-
Lower Pressure
Lower the Pressure setting so each stroke moves pixels more subtly and stays controllable.
-
Raise Density
Raise the Density setting so the effect reaches further toward the edge of the brush circle rather than concentrating only near the center.
-
Change Brush Size on the Fly
Hold Control+Option (Mac) or Alt+right-click (PC) and drag left or right to quickly resize the brush without leaving the tool.
Why Brush Size Matters More Than the Advanced Liquify Tools
Liquify includes several specialized tools like Twirl, Pucker, and Bloat, but these tend to be unpredictable and hard to control precisely once a stroke starts moving pixels. Constantly varying the Forward Warp brush’s size, using it larger for broad areas and smaller for detail work, accomplishes nearly everything those other tools attempt, with far more control over the result.
Restricting Changes With the Freeze Mask
The Freeze Mask protects specific areas from being affected at all, which is essential when reshaping something like hair without risking any change to the face beside it.
-
Paint a Freeze Mask Over Protected Areas
Select the Freeze Mask tool and paint over any area, such as a face, that should stay completely unaffected.
-
Push and Pull With Forward Warp
Switch to the Forward Warp tool and reshape the unprotected areas, such as hair, knowing the frozen area can’t be changed no matter how close the brush gets.
-
Erase the Freeze Mask When Done
Use the Freeze Mask’s eraser option to remove the protection once it’s no longer needed.
Reshaping a Too-Large Garment With the Forward Warp Tool
Comparing where a subject’s actual shoulder and arm line up against a bunched-up, oversized garment shows exactly how much extra fabric the Forward Warp tool needs to push in.
-
Identify the Subject’s Real Shoulder Line
Judge roughly where the subject’s actual shoulder and arm should fall underneath the oversized fabric.
-
Smooth Bunched Fabric With a Large Brush
Use a large Forward Warp brush with lower pressure to smooth out bunching and creases in the fabric.
-
Push the Sleeve and Underarm In
Vary the brush size to push the sleeve and underarm cut inward, bringing the garment closer to the subject’s actual body shape.
-
Refine Details With a Smaller Brush
Switch to a smaller brush to even out remaining bits of fabric without needing to remove every small wrinkle.
Fixing Edge Distortion With a Pen Tool Selection and Clone Stamp
Pulling pixels in from near the edge of the frame can leave a gap or odd distortion that a pen tool selection and the Clone Stamp tool can rebuild.
-
Trace a Selection Around the Distorted Area
Use the Pen tool to trace a rough selection around the area that needs to be rebuilt, such as part of a leg near the frame’s edge.
-
Clone Stamp Within the Selection
With the selection active, use the Clone Stamp tool to sample and rebuild detail inside it.
-
Invert the Selection to Paint the Background
Press Shift+Cmd/Ctrl+I to invert the selection, then sample and paint the surrounding background color to clean up the new edge.
Why Pulling Pixels in From the Edge Can Create Gaps
When Liquify pushes pixels inward from near the edge of the frame, there isn’t always enough surrounding image data to fill in what gets left behind, which can create a strange gap or distortion. Rebuilding that specific area afterward with a pen tool selection and the Clone Stamp tool patches the gap cleanly, without having to undo the useful reshaping work done everywhere else.
Why This Approach Works
Working on a stamp visible layer keeps the Liquify reshaping fully non-destructive, since the original background and color adjustments underneath remain completely intact and editable afterward. Prioritizing brush size, pressure, and density over Liquify’s more specialized tools is what keeps the reshaping controllable, since a large, low-pressure Forward Warp brush accomplishes most of what those other tools attempt with far less unpredictability. Fixing edge distortion with a pen tool selection and the Clone Stamp, rather than avoiding edge work altogether, is what makes it possible to push fabric in confidently even near the frame’s border.
Final Thoughts
The Liquify tool’s reputation for reshaping bodies undersells what it can actually do for wardrobe, hair, and other everyday retouching problems that have nothing to do with body shape at all. A wedding dress that pushes out oddly in a few spots, an oversized jacket, or an unruly hairstyle can all be improved with the same large-brush, low-pressure, high-density approach shown here.
Quick Reference: Keys, Menus and Settings
- Tone shadows and highlightsLevels: pick a channel, move the output sliders
- Stamp visibleShift + Alt/Option + Cmd/Ctrl + N, then Shift + Alt/Option + Cmd/Ctrl + E
- Open LiquifyFilter > Liquify; Forward Warp tool, advanced options
- Brush settingsSize larger than you think, Pressure low, Density high
- Resize the brushCtrl + Option drag (Mac)
- Protect an areaFreeze Mask tool; erase it when done
- Rebuild an edgePen tool selection, Clone Stamp; Shift + Cmd/Ctrl + I to invert
Liquify Brush Settings: Common Questions
How do I color tone shadows and highlights with Levels?
Add a Levels layer and pick a channel. In Red, dragging the left output slider right puts red in the shadows, and dragging the right output slider left puts cyan in the highlights. Do the same in Green and Blue until the tone feels right.
Can I use more than one Levels layer for toning?
Yes, stack them. You can also invert a layer’s mask and drag a gradient to bring a strong color shift into one corner, like the bottom left.
Why doesn’t Liquify work on my new layer?
Liquify needs pixels, and a new layer is empty. Press Shift + Alt/Option + Cmd/Ctrl + N, then Shift + Alt/Option + Cmd/Ctrl + E to stamp everything visible onto it, then go to Filter > Liquify.
Which Liquify tool should I use?
The Forward Warp tool, at the top left, does almost all the work. Twirl, Pucker and Bloat are hard to control once they start moving pixels.
What brush settings work best in Liquify?
Make the brush a bit larger than you think you need, keep Pressure low and Density high, and change the brush size often as you work.
What does Density do?
Low Density only moves pixels near the center of the brush. High Density carries the push out toward the edge of the circle, which looks smoother.
How do I stop Liquify from moving the face?
Paint over the face with the Freeze Mask tool. Frozen areas don’t move, even if the Forward Warp brush passes over them; erase the freeze when you’re done.
Can Liquify fix clothes that don’t fit?
Yes. Work out where the real shoulder and arm are, smooth bunched fabric with a large, low-pressure brush, then push the sleeve and underarm in. You don’t need to remove every wrinkle.
What if Liquify leaves a gap near the edge?
Trace the area with the Pen tool, rebuild it with the Clone Stamp inside the selection, then press Shift + Cmd/Ctrl + I and paint in the background color. A fresh stamp visible layer lets you liquify the new edge.
Master Photoshop, Lightroom and Photography
Join PHLEARN PRO for $12.99 a month, or $99.99 a year (save 36%). Cancel anytime, with a 100% money-back guarantee.





