

description
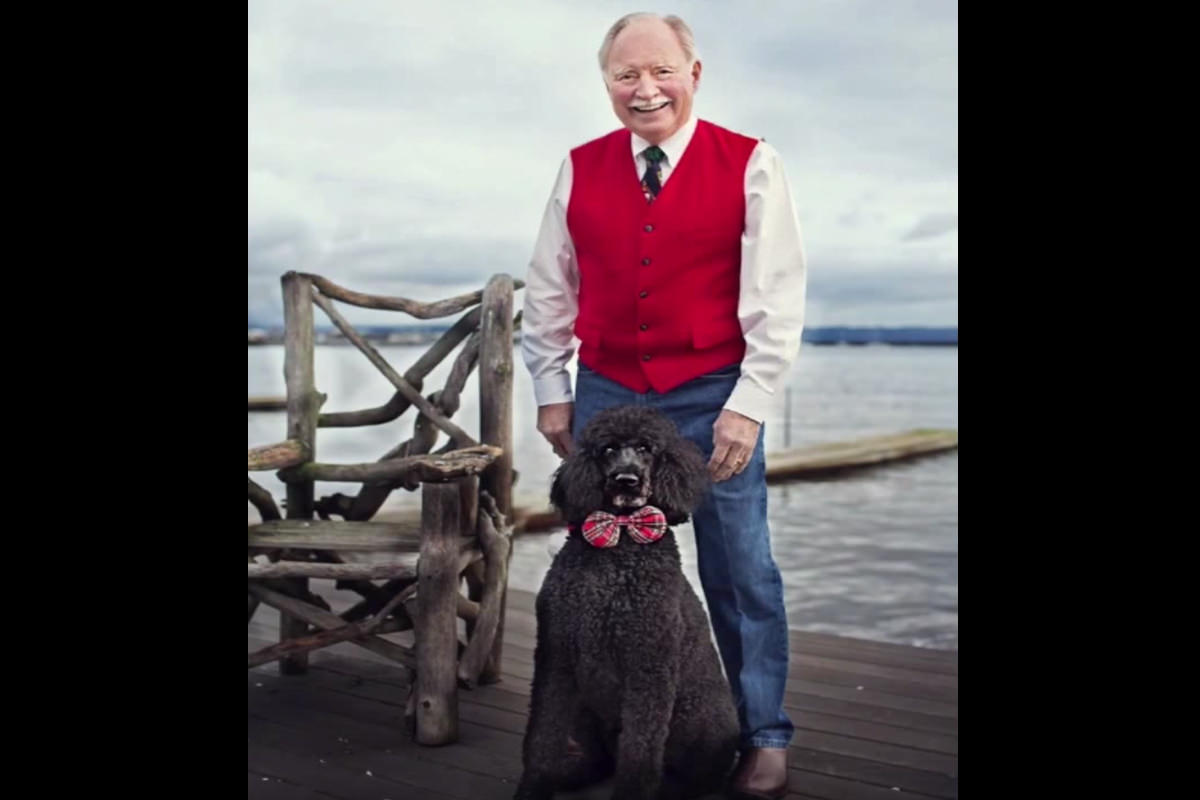
A blown-out sky and blocked-up shadows can usually be pulled back. This free tutorial starts with Shadows/Highlights to recover detail at both ends, then cuts the subject out with a saved Pen tool path so the sky’s color can be pushed with a masked Levels layer — while still letting a little of that color fall on the subject. The same path, inverted, contains the Clone Stamp for halo cleanup, and two masked High Pass layers finish the sharpening.
Enjoying This Free Tutorial?
We publish a new free tutorial every week, each one with sample images and PSDs you can download and follow along with. Sign up and they land straight in your inbox, along with early word on sales, events and subscriber-only offers.
How to Recover Detail from a Blown-Out Sky in Photoshop
An otherwise great portrait can still lose real detail in an overexposed sky or overly dark shadows. This tutorial recovers that detail with Shadows/Highlights, cuts the subject out with the Pen tool to add convincing sky color, removes a telltale compositing halo, and finishes with a darkened foreground, layered sharpening, and a final color grade.
Recovering Detail With Shadows/Highlights
Both the darkest and brightest parts of an image can be hiding real, recoverable detail.
-
Duplicate the Background Layer
Press Cmd/Ctrl+J to duplicate the background layer.
-
Open Shadows/Highlights and Show More Options
Go to Image > Adjustments > Shadows/Highlights and click Show More Options to reveal the full set of sliders.
-
Brighten Shadows and Recover Highlights
Increase the Shadows amount to brighten dark areas, then increase the Highlights amount to bring back detail in a blown-out sky.
-
Adjust Tonal Width and Radius by Eye
Adjust the Tonal Width and Radius sliders for each, judging purely by whether the result looks natural rather than following a fixed formula.
Cutting Out the Subject With the Pen Tool
A precise selection around the subject is what makes it possible to work on the sky’s color independently afterward.
-
Trace the Subject With the Pen Tool
Press P for the Pen tool and click-and-drag around the subject’s outline, holding Alt/Option to create sharp corner points where needed and Cmd/Ctrl to reposition existing points.
-
Convert the Path to a Feathered Selection
Right-click inside the completed path, choose Make Selection, and set a small feather, around 0.3 pixels, so the edge isn’t perfectly hard.
-
Save the Path for Later
Save the path in the Paths panel with a descriptive name so it can be reloaded again later in the edit.
Why Feathering the Selection Matters Before It Becomes a Mask
A selection converted straight from the Pen tool with no feather produces a mask with a perfectly crisp, computer-generated edge that doesn’t match the slightly soft edges present in a real photograph. Adding even a small feather before converting the path keeps the transition natural enough that later adjustments don’t create an obvious cutout line.
Adding Sky Color With a Masked Levels Layer
With the subject selected, a Levels adjustment can push color into the sky without touching the person in the foreground.
-
Load the Saved Path as a Layer Mask
With the path’s selection still active, add a Levels adjustment layer; the selection loads straight into its mask (Alt/Option-click the mask thumbnail to see it).
-
Invert the Mask to Target the Background
Click the layer mask and press Cmd/Ctrl+I to invert it, so the adjustment affects the sky and background instead of the subject.
-
Push Color Into the Sky
Adjust the Blue, Green, and Red channel sliders until the sky reads with a natural, appealing color.
-
Paint Some Effect Back Onto the Subject
Select the layer mask, choose a soft brush at around 40% flow, and paint black over the subject to reduce the effect there, while leaving a small amount visible since a large colored sky would naturally reflect some of that color onto anything beneath it.
Why the Sky’s Color Should Still Touch the Subject a Little
A sky this large functions as a giant light source, so in reality its color would reflect at least a little onto anyone standing beneath it. Masking the color adjustment out completely, rather than just reducing its opacity where it lands on the subject, would leave the person looking lit by a different environment than the one they’re actually standing in.
Removing a Compositing Halo With the Clone Stamp
A faint glow or halo around the subject’s edge is a common giveaway that a sky has been swapped or heavily adjusted.
-
Reload the Saved Path and Invert It
Select the saved path again, convert it to a selection, then press Shift+Cmd/Ctrl+I to invert it so only the background is selected.
-
Clone Stamp From Outside the Halo Inward
Press S for the Clone Stamp tool, sample an area farther from the subject, and paint over the halo, working from the outside in.
Why This Cleanup Uses an Inverted Selection
Inverting the selection before cloning means the Clone Stamp tool can only affect the background around the subject, not the subject itself, so there’s no risk of accidentally painting over any part of the person while cleaning up the halo.
Darkening the Bottom of the Frame for Balance
A darker foreground helps direct the eye back up toward the subject.
-
Add a Darkening Curves Layer
Add a Curves adjustment layer and drag the curve down to darken the image.
-
Invert the Mask and Paint White at Low Flow
Press Cmd/Ctrl+I to invert the mask, then use a large soft brush at around 10–20% flow to paint white into the lower part of the frame.
Adding Midtone Depth With a Soft Light High Pass
A masked High Pass pass at Soft Light can add a bit of contrast and dimension right where it’s wanted, like the subject’s face and shoes.
-
Stamp a Visible Layer and Desaturate It
Create a new layer, press Shift+Option/Alt+Cmd/Ctrl+E to stamp a merged layer, then press Shift+Cmd/Ctrl+U to desaturate it.
-
Set to Soft Light and Apply High Pass
Change the layer’s blending mode to Soft Light, then go to Filter > Other > High Pass and choose a radius somewhere in the middle for a noticeable midtone contrast effect.
-
Mask It Down to Specific Areas
Hold Alt/Option and click Add Layer Mask to hide the effect everywhere, then paint white over just the areas that should pick up the extra contrast, such as the face and shoes.
A Second, Tighter Sharpening Pass on the Eyes
A separate, more targeted High Pass layer sharpens just the eyes.
-
Stamp Another Visible Layer and Desaturate It
Create another stamped visible layer and desaturate it.
-
Apply a Lower-Radius High Pass
Go to Filter > Other > High Pass and choose a smaller radius than the previous pass, since this one is meant purely as sharpening.
-
Mask It to the Eyes
Add a black layer mask and paint white directly over the eyes, adjusting the High Pass radius to whatever suits how close or far the subject is from the camera.
Final Color Grading and Group-Level Refinement
A last color grade and a round of revisiting earlier layers pulls the whole edit together.
-
Add a Levels Layer for Shadows and Highlights
Add a Levels adjustment layer, push blue into the shadows and yellow into the highlights, and add a touch of red overall.
-
Desaturate Slightly for a Classic Look
Lower the overall saturation a little for a more classic color feel, and reposition the layer if it’s drawing too much attention to something like a piece of clothing.
-
Add a Final Painted Brightness Layer
Add a Curves layer, brighten it, invert the mask, and paint white where a bit more brightness is wanted, lowering the effect if it looks too strong.
-
Group Everything and Adjust as a Whole
Shift-click every layer, press Cmd/Ctrl+G to group them, then revisit individual layers inside the group, or lower the entire group’s opacity, to fine-tune the balance of the final result.
Why Lowering an Entire Group’s Opacity Is a Useful Final Check
After several individual adjustments, it’s easy to lose track of whether the cumulative effect has gone too far in one direction. Grouping every layer together and lowering the group’s overall opacity gives a quick way to meet in the middle between the original image and the fully edited version, without having to second-guess and readjust each layer individually.
Why This Approach Works
Saving the Pen tool path once and reloading it for both the sky color adjustment and the halo cleanup avoids retracing the same selection twice, and inverting that same selection each way is what lets one path serve two completely different purposes. Letting a little of the sky’s color reach the subject, rather than masking it out entirely, is a small but important realism check, since a real light source this large would never leave the subject completely untouched. Layering two separate High Pass passes, one broad for midtone depth and one tight for the eyes, gives more precise control than a single sharpening layer could, and finishing by grouping everything together turns individual layer opacity into one simple final adjustment.
Final Thoughts
Shadows/Highlights, a saved Pen tool path, and a couple of masked High Pass layers cover most of what’s needed to rescue an otherwise great photo that lost detail to exposure. Reviewing the full group’s opacity at the end, and being willing to walk an effect back if it turns out to be too strong, is a habit worth carrying into any heavily layered edit.
Quick Reference: Keys, Menus and Settings
- Recover detailCmd/Ctrl + J, Image > Adjustments > Shadows/Highlights, Show More Options
- Cut out the subjectP; Alt/Option for a corner, Cmd/Ctrl to move a point; right-click > Make Selection
- Color the skyLevels with the selection active, Cmd/Ctrl + I on the mask; Blue up, a little Green, Red down
- Remove the haloShift + Cmd/Ctrl + I, new layer, S, clone from outside in
- Darken the floorCurves down, Cmd/Ctrl + I, white at 10 to 20% flow
- Depth and sharpeningShift + Alt/Option + Cmd/Ctrl + E, Shift + Cmd/Ctrl + U, Soft Light, High Pass; Alt/Option-click the mask button
- FinishLevels: blue in the shadows, yellow in the highlights; Cmd/Ctrl + G, lower the group opacity if needed
Recovering a Blown-Out Sky: Common Questions
How do I bring back detail in a sky that’s too bright?
Duplicate the background with Cmd/Ctrl + J and go to Image > Adjustments > Shadows/Highlights. Click Show More Options, start the sliders at zero, then raise the Highlights amount to pull detail back into the sky. The Shadows amount does the same for dark areas.
What Tonal Width and Radius settings should I use?
There is no formula. Aaron moves the Amount, Tonal Width and Radius sliders until the result looks natural; here he keeps the highlight Radius low because higher values looked wrong.
How do I cut out the subject with the Pen tool?
Press P, then click and drag point by point around the subject. Hold Alt/Option to make a corner, and Cmd/Ctrl to move a point. Take the most care where a light subject meets a light sky, like the arms.
How do I turn the path into a selection and keep it?
Right-click inside the path, choose Make Selection and use a small feather. Save the path in the Paths panel so you can make the same selection again later.
How do I add color to the sky only?
With the selection active, add a Levels layer; the selection becomes its mask. Click the mask and press Cmd/Ctrl + I so it affects the sky, then push the Blue channel, add a little Green and pull Red down.
Should the sky color touch the subject at all?
A little. The sky is a giant light source, so its color would show on the people under it. Paint black on the mask at about 40% flow to reduce it, and lower the layer opacity so the blue doesn’t overwhelm.
How do I remove a white halo around the subject?
Make a selection from the saved path, press Shift + Cmd/Ctrl + I to inverse it and work on a new layer. Press S for the Clone Stamp, sample from outside and paint in toward the subject; the selection keeps the clone off the person.
Why darken the bottom of the frame?
Eyes move away from dark areas toward light ones. A Curves layer pulled down, its mask inverted, and white painted along the floor at 10 to 20% flow sends the eye up to the subjects.
Why use two High Pass layers?
The first, on Soft Light with a middle radius, adds midtone contrast to the faces and shoes. The second, at a lower radius, sharpens the eyes. Both get black masks, and the right radius depends on how far the subject is from the camera.
Master Photoshop, Lightroom and Photography
Join PHLEARN PRO for $12.99 a month or $99.99 a year. Cancel anytime, with a 100% money-back guarantee.





