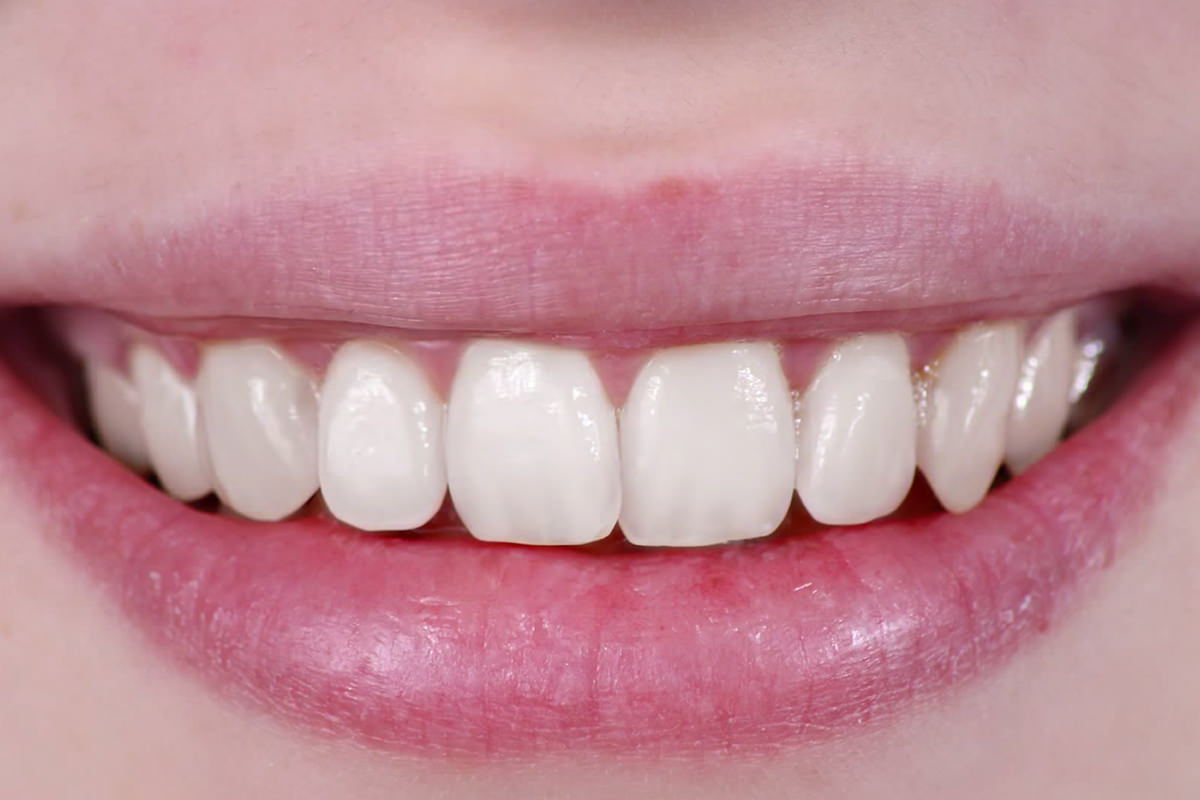

description
Teeth have real depth, with darker inner layers and a bright sheen on top, so whitening them convincingly means treating color, shadow, and highlight as three separate problems rather than one flat brightness adjustment. This tutorial builds all three inside a single grouped layer mask, using Colorize for even tone and Blend If to target depth and sheen, then finishes with a Liquify pass to straighten irregular teeth.
Enjoying This Free Tutorial?
We publish a new free tutorial every week, each one with sample images and PSDs you can download and follow along with. Sign up and they land straight in your inbox, along with early word on sales, events and subscriber-only offers.
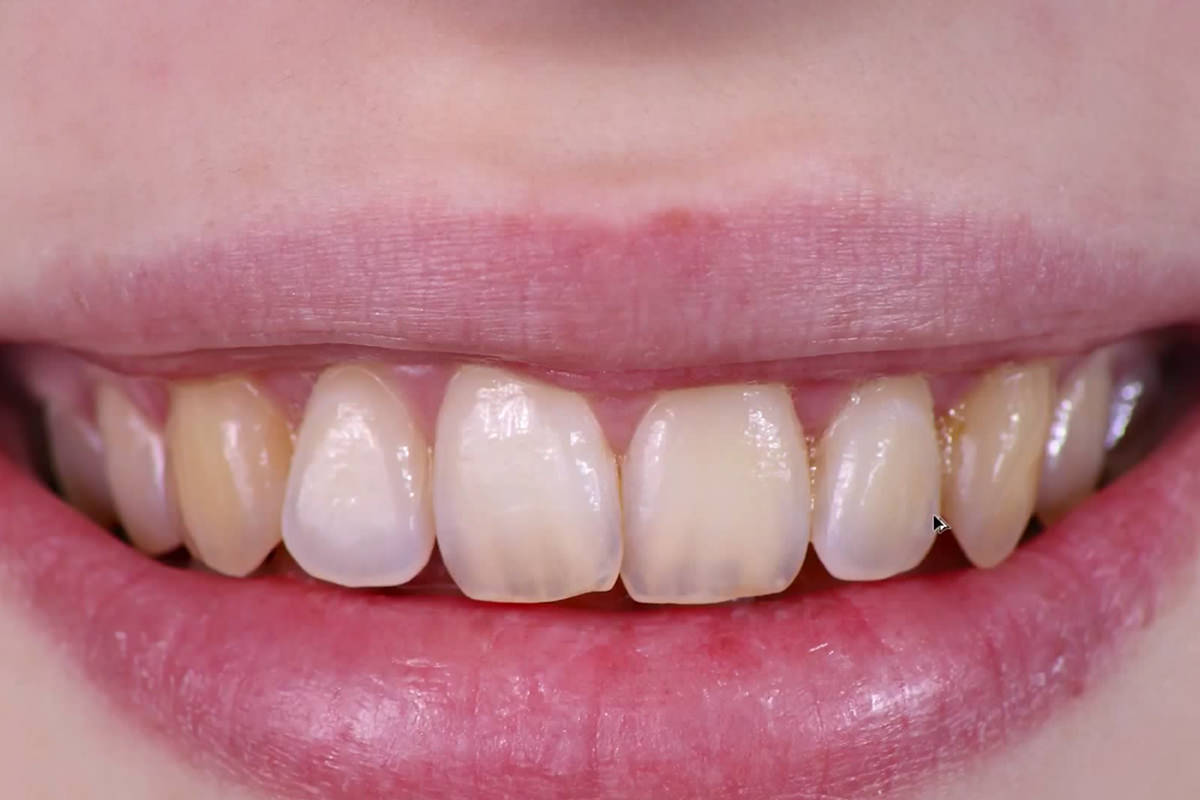

How to Whiten and Straighten Teeth in Photoshop
Teeth have real depth, with darker inner layers and a bright sheen on top, so whitening them convincingly means treating color, shadow, and highlight as three separate problems rather than one flat brightness adjustment. This tutorial builds all three inside a single grouped layer mask, then finishes with a quick pass in the Liquify tool to straighten out any irregular or asymmetrical teeth.
Making a Loose Lasso Selection of the Teeth
A quick, rough Lasso selection is enough to get started, since the selection can always be refined further once it’s turned into a layer mask.
-
Trace the Teeth With the Lasso Tool
Select the Lasso tool and trace loosely around the visible teeth, without worrying about being perfectly precise.
-
Add or Remove From the Selection
Hold Shift to add missed areas to the selection, or hold Alt/Option to remove any area that was selected by mistake.
Refining the Selection Edge
Refine Edge softens the boundary of the rough Lasso selection so it doesn’t leave a harsh, obviously cut-out line around the teeth.
-
Open Refine Edge
Go to Select > Refine Edge with the selection active.
-
Increase Feathering for a Smoother Edge
Raise the Feathering amount slightly for a smoother, more natural-looking edge, then confirm.
Turning the Selection Into a Group Layer Mask
Loading the finished selection onto a group, rather than an individual layer, means every adjustment placed inside that group automatically stays restricted to the teeth.
-
Create a New Group
Create a new layer and press Cmd/Ctrl+G to group it.
-
Load the Selection as the Group’s Mask
With the selection still active, click the layer mask button to load it directly onto the group.
Why Adjustment Layers Belong Inside One Group Rather Than Separate Masks
Placing every color and brightness adjustment inside a single masked group means the same selection only has to be made once, no matter how many separate layers end up inside it. Any adjustment layer added inside that group automatically stays confined to the teeth, without needing its own individual mask recreated from scratch.
Correcting Tooth Color With a Colorized Hue/Saturation Layer
The Colorize option in a Hue/Saturation layer replaces uneven, discolored teeth with one consistent, natural tooth color rather than removing color altogether.
-
Add a Colorized Hue/Saturation Layer
Add a Hue/Saturation adjustment layer inside the group and check the Colorize option.
-
Set the Hue to a Yellowish-Orange Tone
Drag the Hue slider toward a subtle yellowish-orange tone, around a value of 10, rather than a blue or gray tone.
-
Set Saturation to a Moderate Level
Set saturation somewhere between 15 and 20, avoiding both an overly gray, fully desaturated look and an overly vivid one.
Why Teeth Need Some Color Rather Than Full Desaturation
Fully desaturated teeth look strange and unnatural, since real teeth always carry a subtle underlying color rather than being pure gray or white. Using Colorize to apply one consistent, muted yellowish-orange tone across every tooth is what evens out discoloration while still looking like real teeth.
Filling In Darker Areas With a Blend If Restricted Curves Layer
Blend If lets a brightening Curves adjustment show up only in the darker, deeper areas of the teeth, without flattening out the sheen and highlights already there.
-
Add a Curves Layer and Brighten It
Add a Curves adjustment layer inside the group and drag the midpoint up to brighten it.
-
Open Blending Options
Double-click the Curves layer to open its Blending Options.
-
Restrict Visibility to Darker Underlying Areas
Hold Alt/Option and drag the underlying layer’s white slider from the right toward the left, splitting the slider for a smoother transition, until the brightening only affects darker areas of the teeth.
Why Blend If Targets Depth Instead of Flat Brightness
A regular brightness adjustment applied to the whole selection would flatten out the natural depth of the teeth, brightening highlights and shadows equally. Restricting the Curves layer with Blend If so it only affects darker underlying areas keeps that sense of depth intact while still filling in the darker, recessed parts of each tooth.
Refining the Mask for Missed Areas
A quick pass with the Brush tool on the group’s mask cleans up any spillover onto gums or lips that the original Lasso selection missed.
-
Paint Black to Exclude Missed Areas
Click the group’s layer mask and paint black with the Brush tool over any area, such as gums or lips, that shouldn’t be affected.
-
Paint White to Include Any Missed Teeth
Paint white on the same mask to bring back any part of the teeth the original selection missed.
Building a Sheen on Top of the Teeth With a White Fill and Blend If
A white-filled layer, restricted with Blend If to only the brighter areas, recreates the glossy sheen that naturally sits on the front surface of teeth.
-
Fill a New Layer With White
Create a new layer inside the group, select around all the teeth with the Marquee tool, and press Shift+Delete to fill with white.
-
Restrict Visibility to Lighter Areas With Blend If
Open Blending Options, hold Alt/Option, and drag the underlying layer’s black slider from the left toward the right so the white fill only shows up over already-bright areas.
-
Adjust Opacity to Add Dimension
Lower the layer’s opacity to control how strong the sheen looks, helping the teeth read with more dimension rather than looking flat.
Straightening Teeth With the Liquify Tool
A stamp visible layer run through the Liquify filter’s Forward Warp tool can nudge individual teeth into better alignment without touching the original layers.
-
Create a Stamp Visible Layer
Create a new layer and press Shift+Option/Alt+Cmd/Ctrl+E to merge everything currently visible onto it.
-
Open Liquify and Select Forward Warp
Go to Filter > Liquify and select the Forward Warp tool, adjusting brush size, density, and pressure as needed.
-
Nudge Individual Teeth Into Place
Use a relatively small brush to click and drag any tooth that sticks out or sits at an awkward angle back into better alignment.
Balancing Smile Symmetry With Forward Warp
A slightly larger brush applied to the lips and gum line can quickly balance a smile that looks more open or uneven on one side than the other.
-
Adjust the Lip Line for Balance
Increase the brush size and gently pull the lip line down or up on the side of the smile that appears larger or smaller than the other.
-
Compensate on the Opposite Side if Needed
Pull the opposite lip line slightly to compensate, keeping the overall smile looking natural rather than overcorrected.
Why This Approach Works
Loading one selection onto a group’s mask, rather than remaking a mask for every layer, is what makes it practical to stack color, shadow, and highlight adjustments without any of them leaking outside the teeth. Using Blend If to target only the darker or only the lighter areas of the teeth is what preserves their natural depth, instead of flattening everything into one uniform brightness. Finishing with a stamp visible layer in Liquify keeps the straightening adjustments separate from the color and light work already done, so a tooth can be nudged into place without disturbing anything else.
Final Thoughts
Between the colorized Hue/Saturation layer, the two Blend If restricted layers for depth and sheen, and a quick Liquify pass, this whole process moves fast once the group and mask are set up. The same layered, Blend If based approach works on any image with discolored or uneven teeth, not just the one used here.
Quick Reference: Keys, Menus and Settings
- Select the teethLasso tool; Shift adds, Alt/Option subtracts; Select > Refine Edge, raise Feathering
- Masked groupNew layer, Cmd/Ctrl + G, then the layer mask button
- Even the colorHue/Saturation, Colorize: Hue about 10, Saturation 15 to 20
- Fill the darksCurves midpoint up; double-click the layer, Alt/Option-drag the white Underlying Layer slider left
- Add the sheenMarquee, Shift + Delete to fill white; Alt/Option-drag the black Underlying Layer slider right; lower opacity
- Stamp visibleNew layer, Shift + Alt/Option + Cmd/Ctrl + E
- StraightenFilter > Liquify, Forward Warp, Density and Pressure about 60
No AI, no generative credits.
Whitening Teeth in Photoshop: Common Questions
How precise does my teeth selection need to be?
Not very. A quick Lasso selection is enough; hold Shift to add and Alt/Option to subtract. It becomes a layer mask, so you can paint it cleaner later.
How do I keep a hard line from showing around the teeth?
Go to Select > Refine Edge and raise Feathering a little before you make the mask. The softer edge blends into the lips and gums.
Why put the mask on a group?
Every layer inside the group is limited to the teeth, so you mask once instead of on every adjustment layer. Make a new layer, press Cmd/Ctrl + G, then click the layer mask button with the selection active.
Why not just desaturate yellow teeth?
Fully gray teeth look strange; real teeth have some color. Use a Hue/Saturation layer with Colorize checked, Hue around 10 for a yellowish orange, and Saturation between 15 and 20.
How do I brighten only the darker parts of the teeth?
Add a Curves layer and drag the middle up. Double-click the layer for its layer style, then Alt/Option-drag the white Underlying Layer slider from the right toward the left so the brightening shows only in the darks.
The whitening spilled onto the gums. How do I fix it?
Click the group’s layer mask and paint black with the Brush tool over the gums or lip. Paint white to bring back any tooth the selection missed.
How do I add a shine to the teeth?
On a new layer in the group, draw a Marquee around the teeth and press Shift + Delete to fill with white. In Blend If, Alt/Option-drag the black Underlying Layer slider toward the right so the white shows only on the brightest areas, then lower the opacity.
How do I straighten crooked teeth in Photoshop?
Make a stamp visible layer with Shift + Alt/Option + Cmd/Ctrl + E, open Filter > Liquify and use the Forward Warp tool with a small brush to nudge each tooth into line. Density and Pressure are about 60 in the video.
Can I fix a lopsided smile?
In the same Liquify pass, use a larger Forward Warp brush to pull the lip down slightly on the side that shows less, then pull the other side up to compensate.
Master Photoshop, Lightroom and Photography
Join PHLEARN PRO for $12.99 a month or $99.99 a year. Cancel anytime, with a 100% money-back guarantee.





