Download Sample Image & Texture
description
Learn how to create a sci-fi-inspired hologram effect using some easy Photoshop techniques and the included hologram texture!
Click here to download the complete PSD file (315MB).
Share
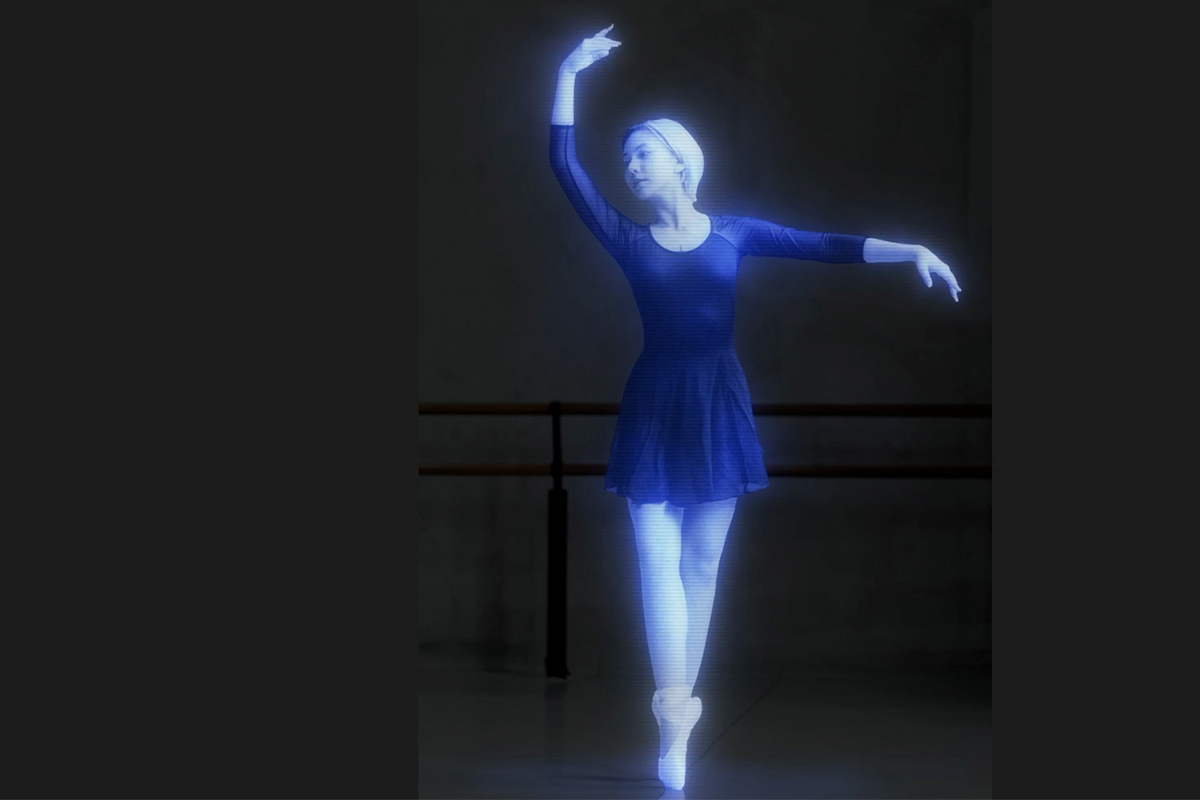
CREATE A SCI-FI HOLOGRAM EFFECT
Futuristic Hologram Effect
Special Effects in Photoshop
If you know PHLEARN, you know just how much we like to create wild effects in Photoshop. Alien worlds, glowing objects, and levitating people are just a few of our favorites.
Thanks to classic movies like Star Wars, hologram effects have always been a popular Photoshop trick–and after this short tutorial, you’ll be able to create your own holograms in just a few minutes!
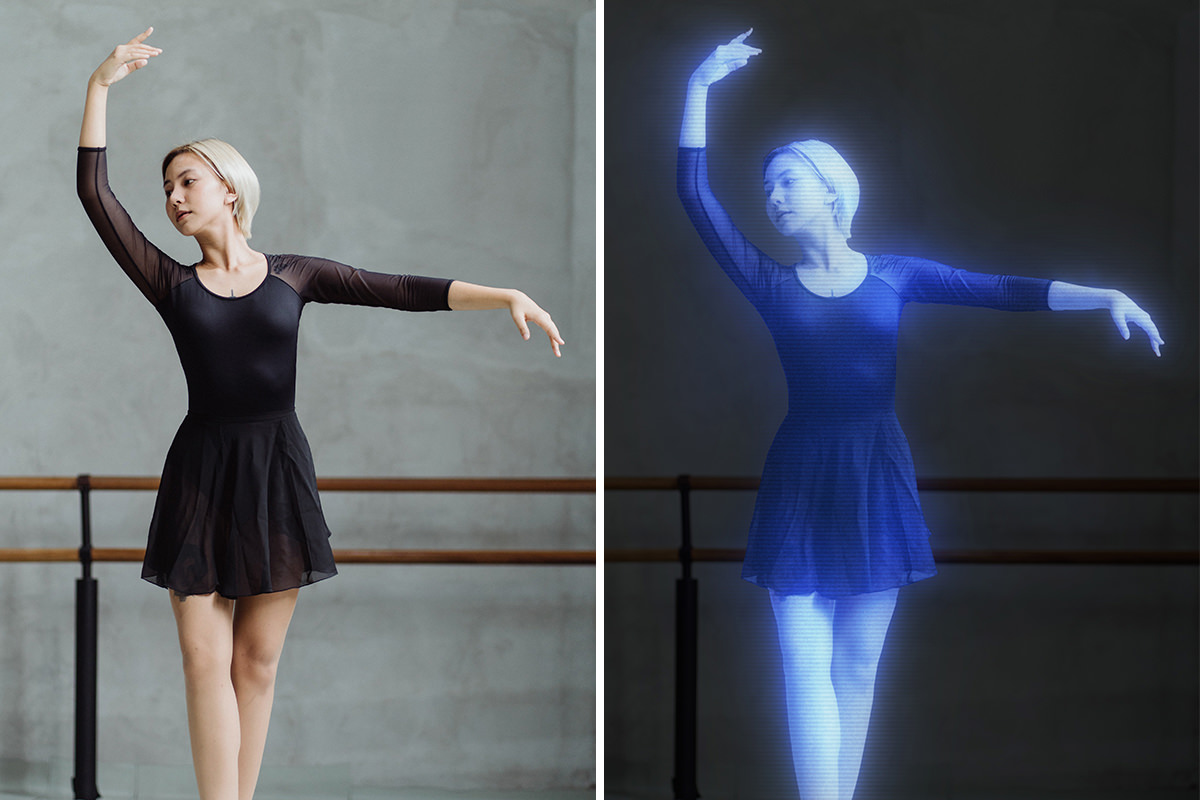
Cutting Out the Subject
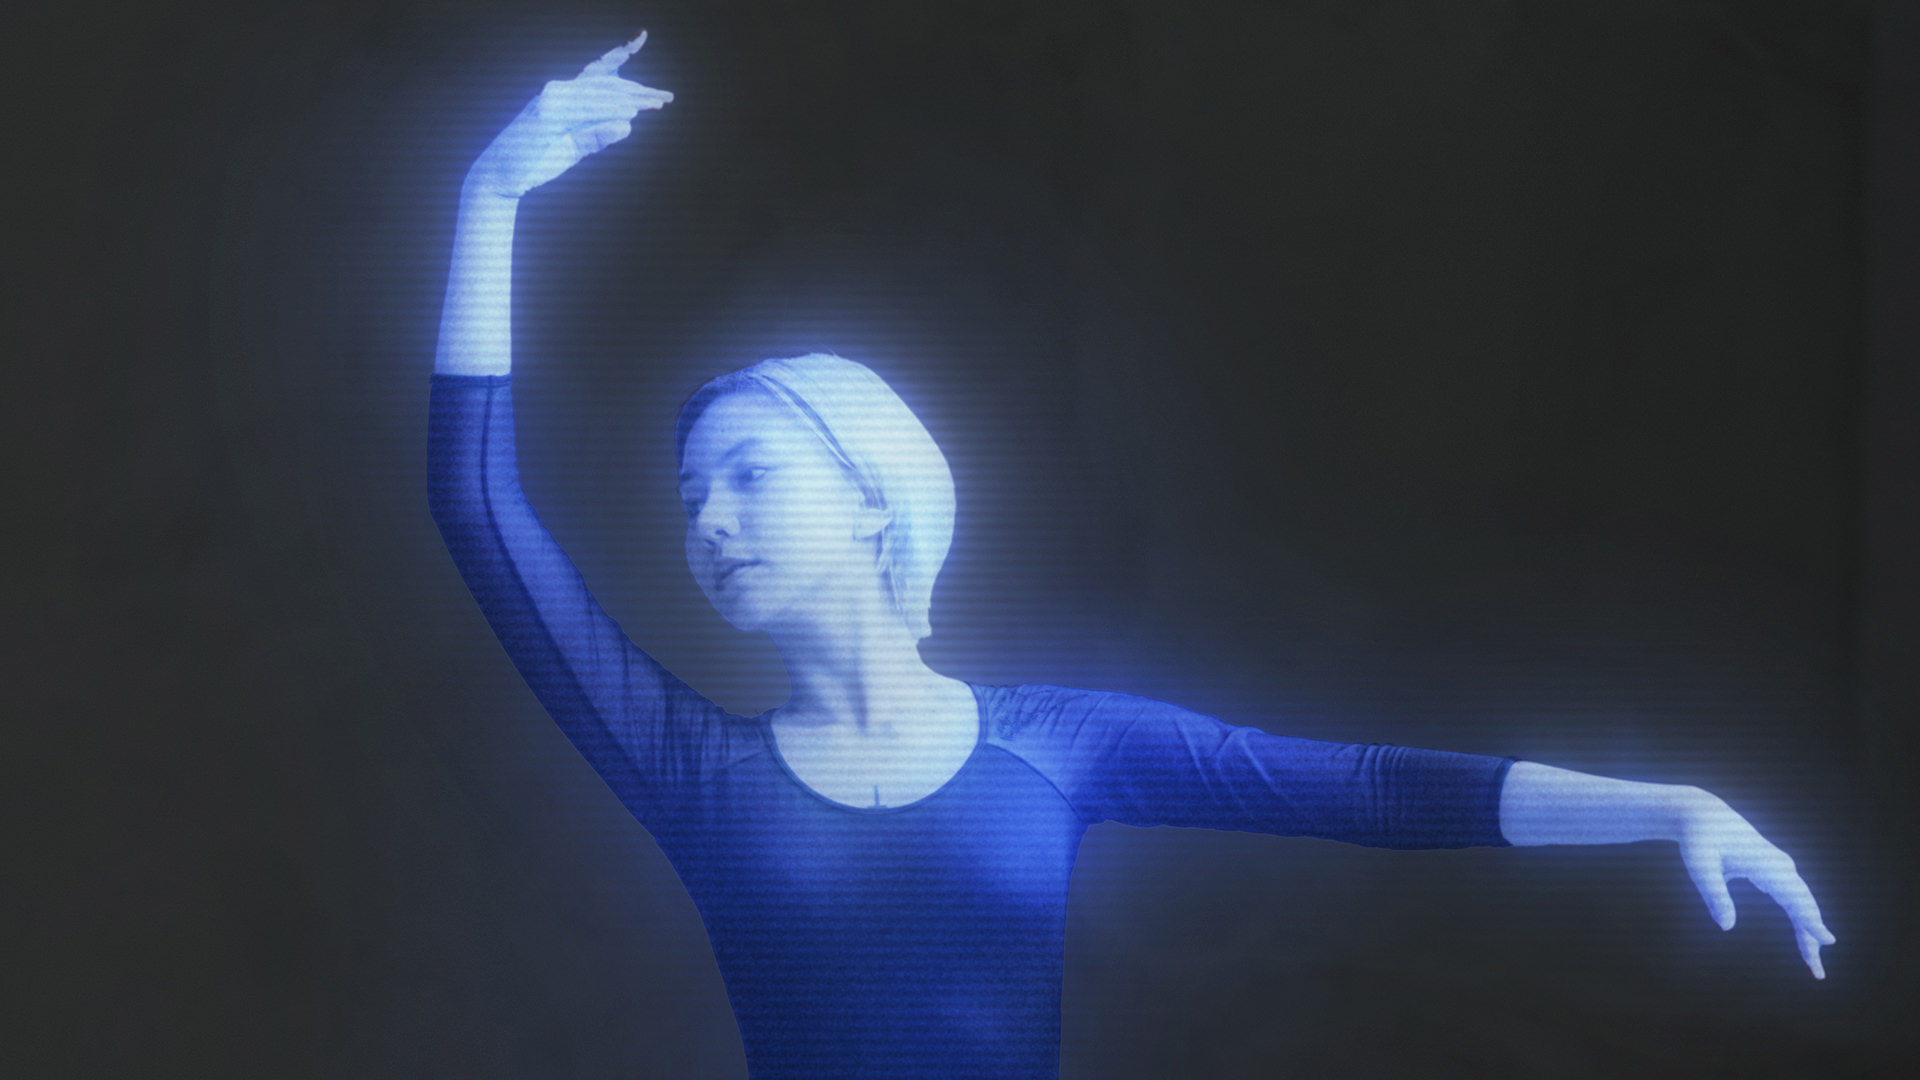
This effect usually involves a hologram of a person being emitted in an environment.
So, we’ll need to cut out the subject and place them on their own layer that’s separate from the background.
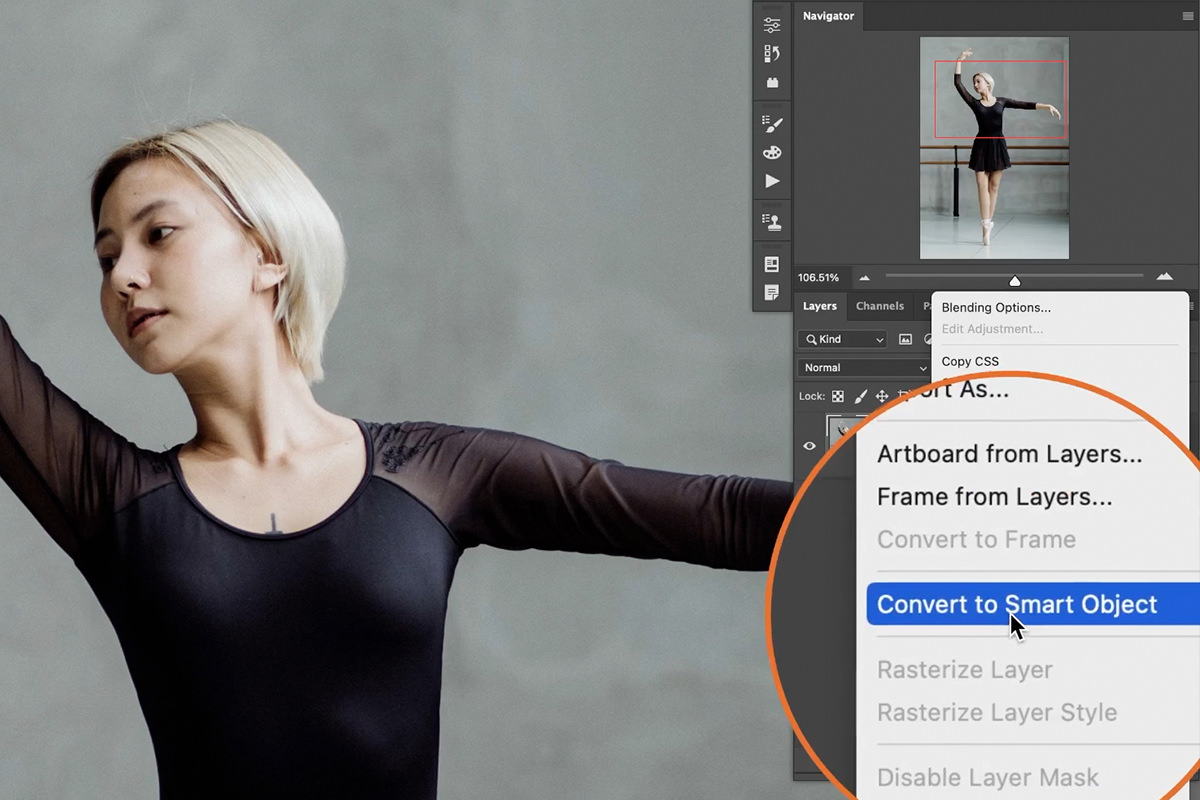
Duplicate the background image but hitting CTRL or CMD + J. Then, right-click on the duplicate and select Convert to Smart Object. This will allow us to apply special filters to the layer that can be adjusted, or removed, at anytime without damaging the original image.
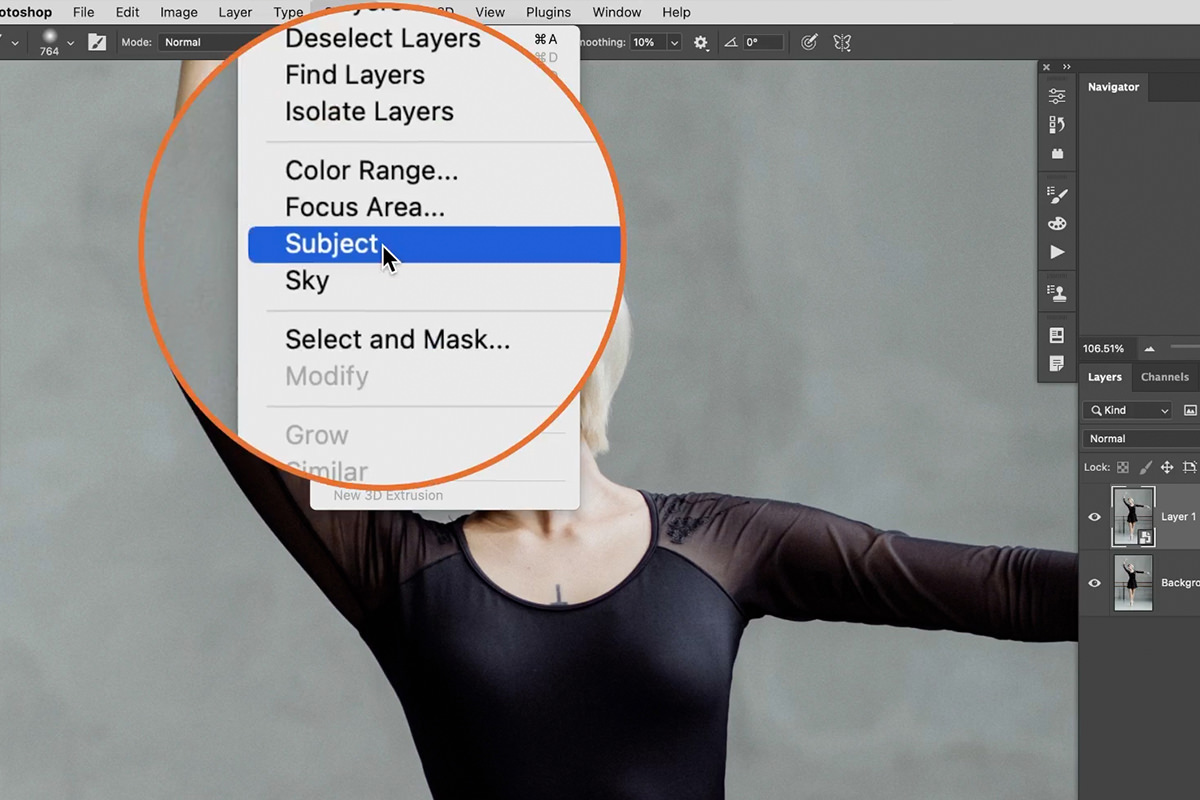
With the duplicate layer active, open the Select menu and choose the Subject option.
Photoshop will automatically detect and create a rough selection around the subject. We chose an image with a relatively simple background to make the selection process easier.
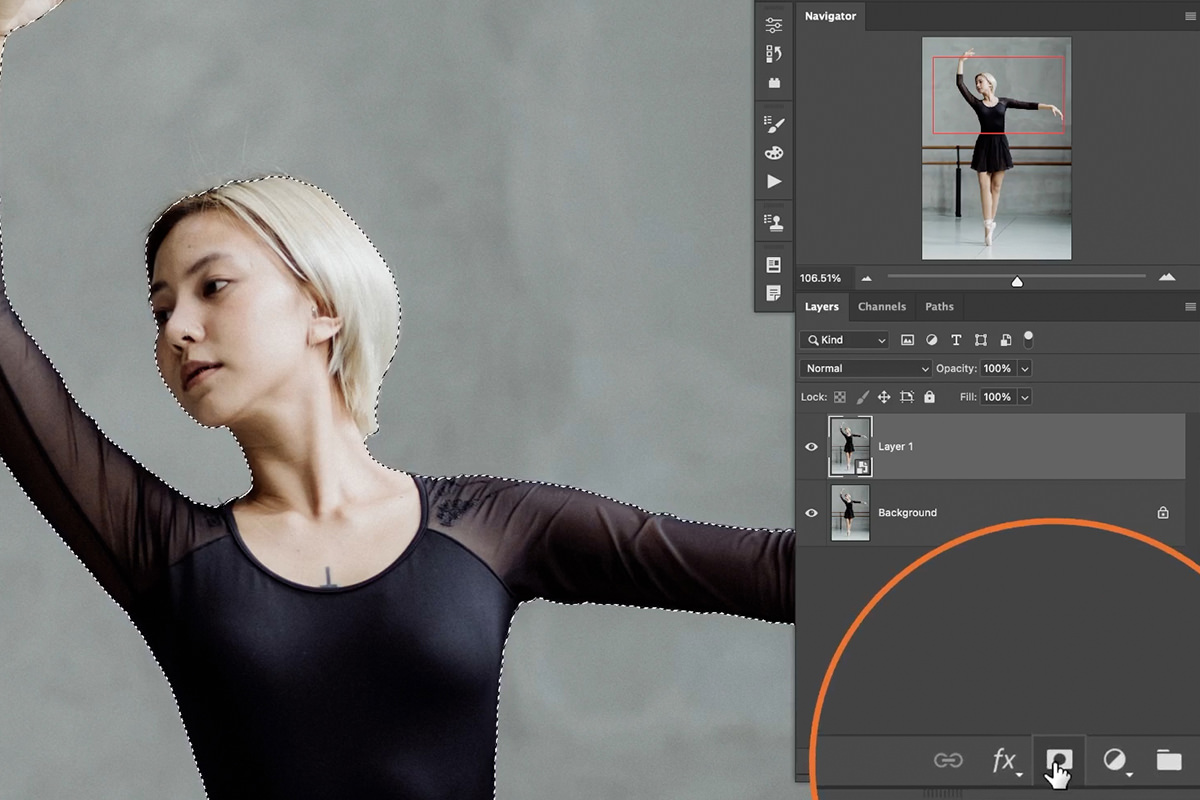
With that selection active, click on the Layer Mask icon below the Layers Panel.
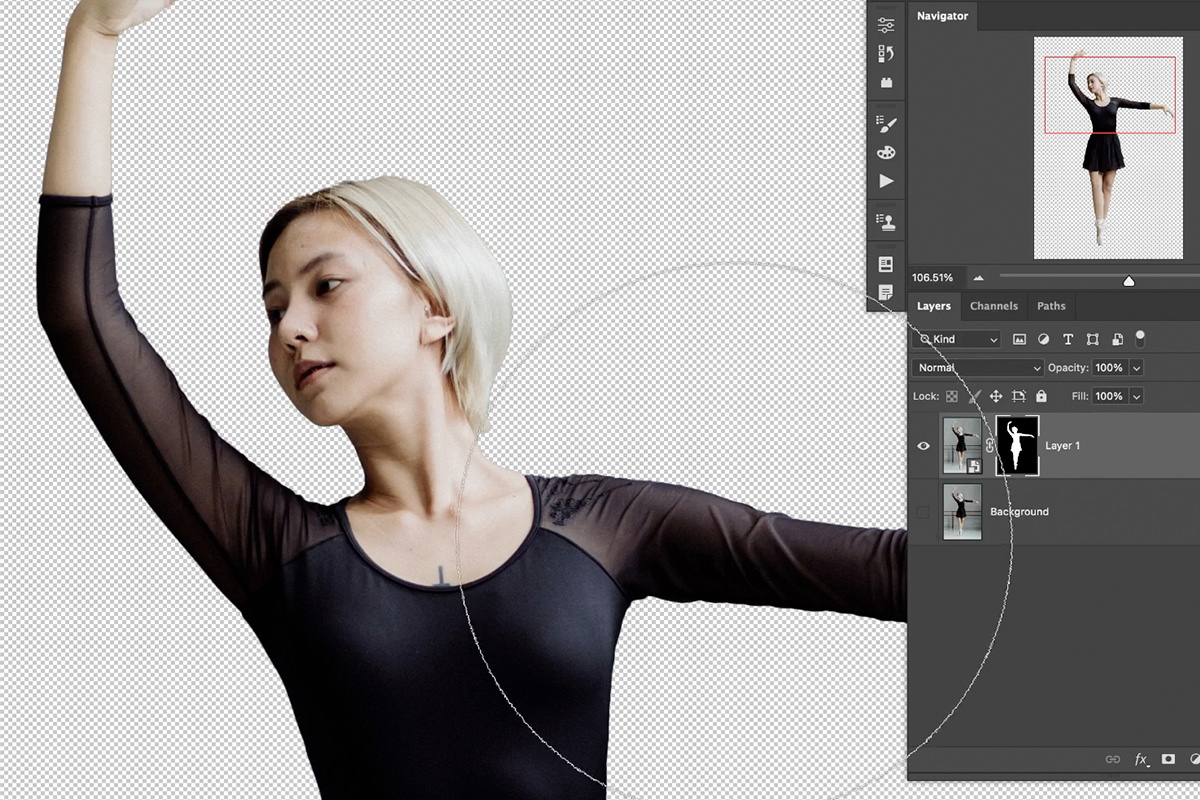
This will load the selection as a Layer Mask on the layer. If you make the background image invisible, you can see that our duplicated layer is now just a clean cutout of only the subject.
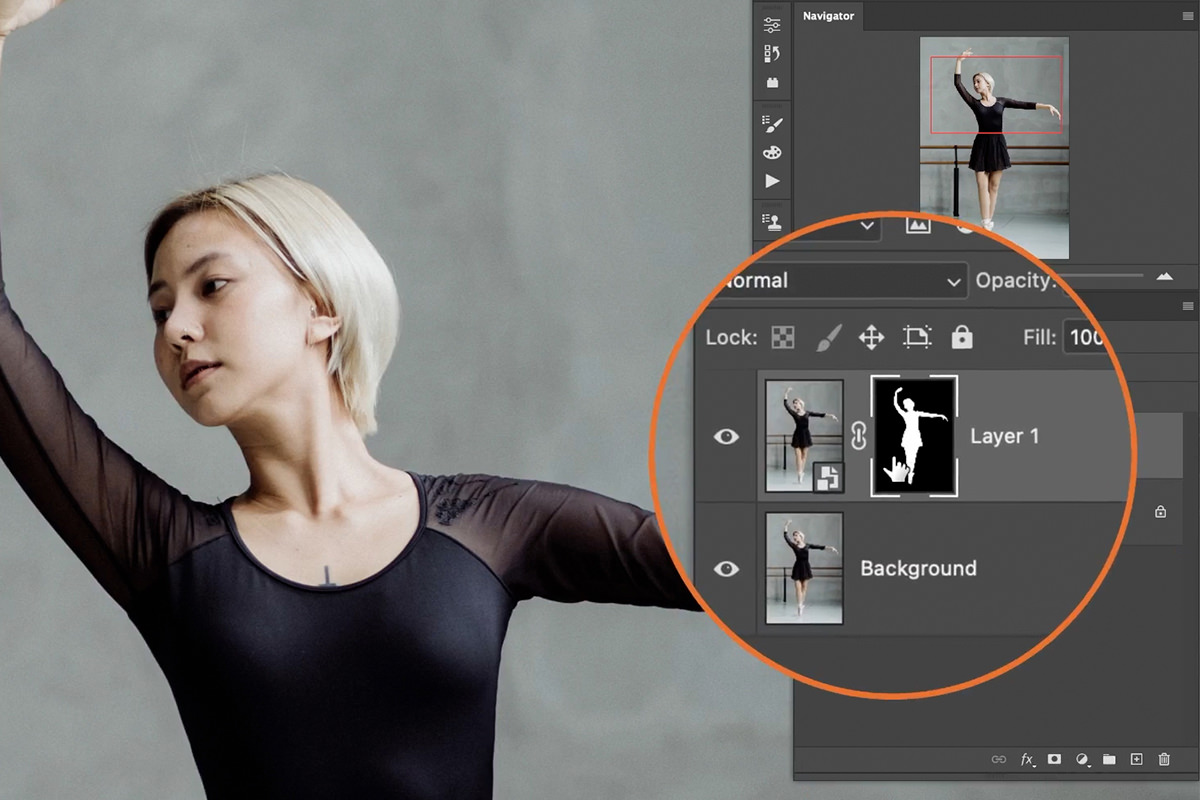
Now that we have the subject isolated on a separate layer, let’s move on to building the effect!
Creating the Glow
Similar to how we create other glow effects, we’re going to use the natural, bright lighting from the image to make it appear like the subject is glowing.
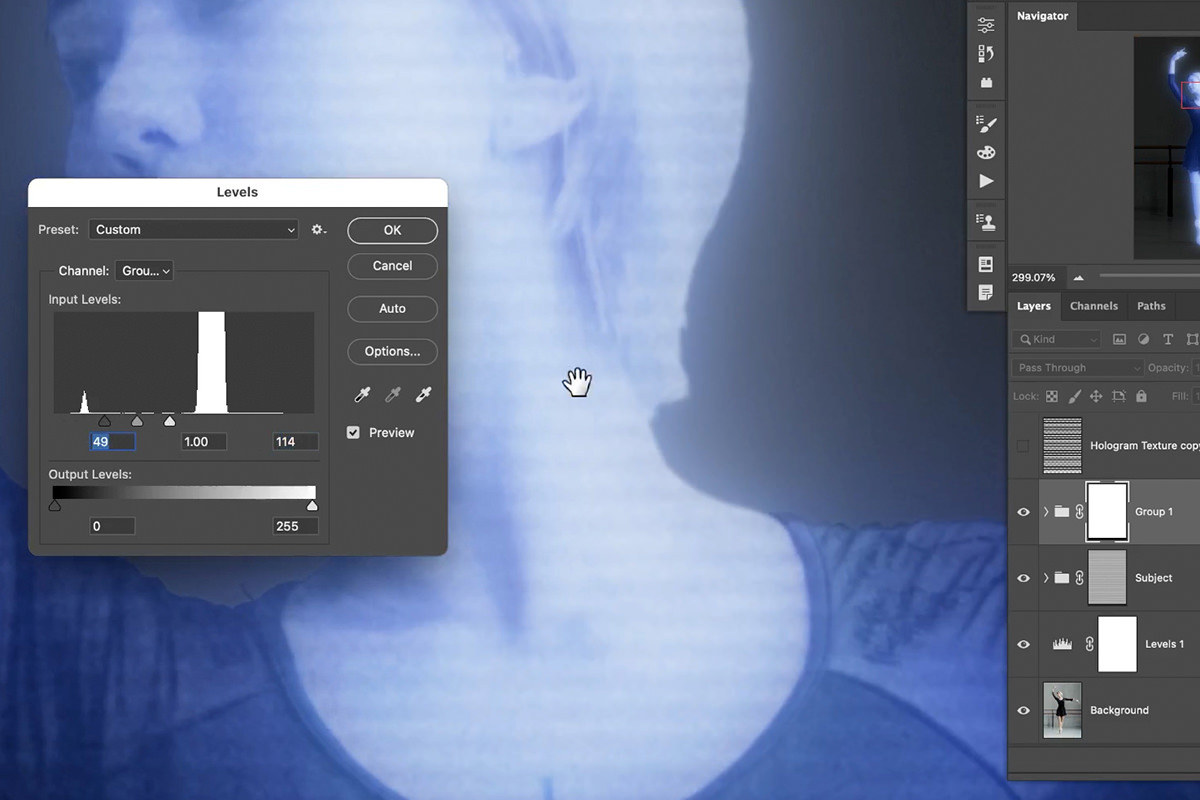
In order to do that, we need to first make the background much darker.
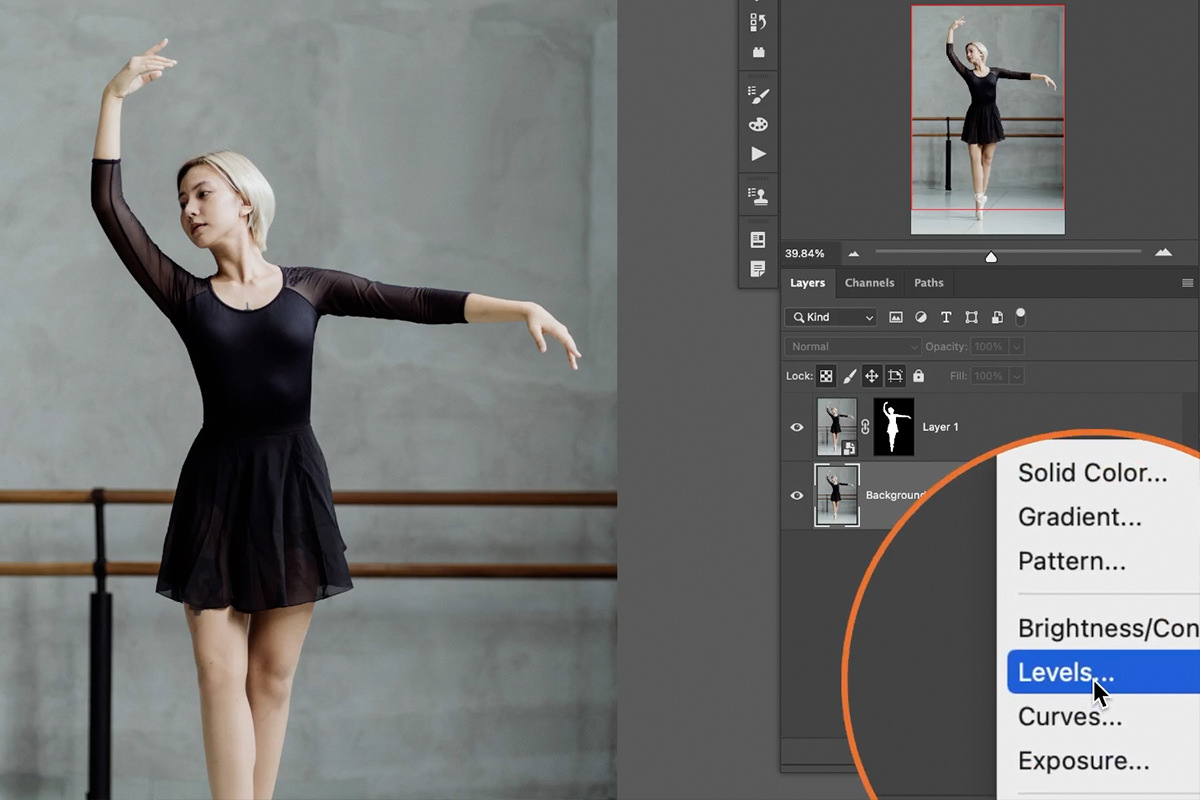
Create a Levels Adjustment Layer above the original background image, but below subject layer.
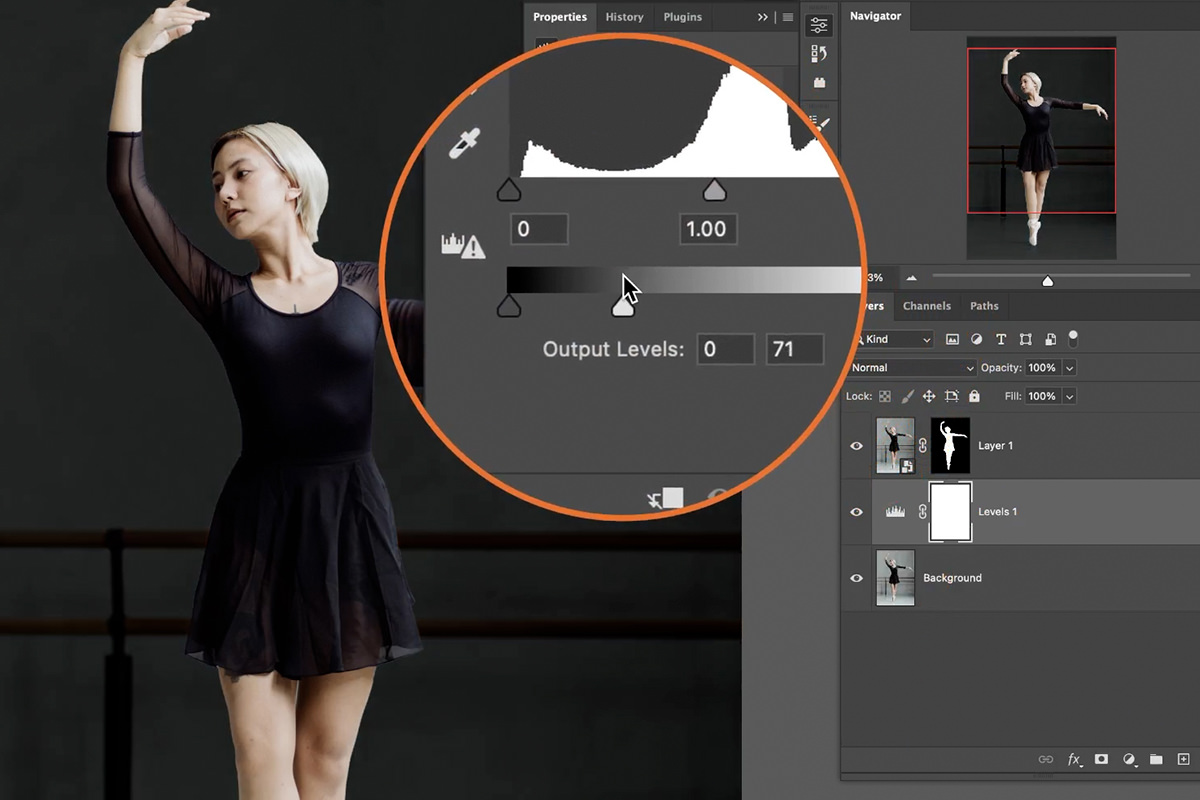
Click and drag the highlight slider to the left until the background is much darker. Notice that our subject is still nice and bright since she’s on a separate layer that’s not being affected by the Levels Adjustment.
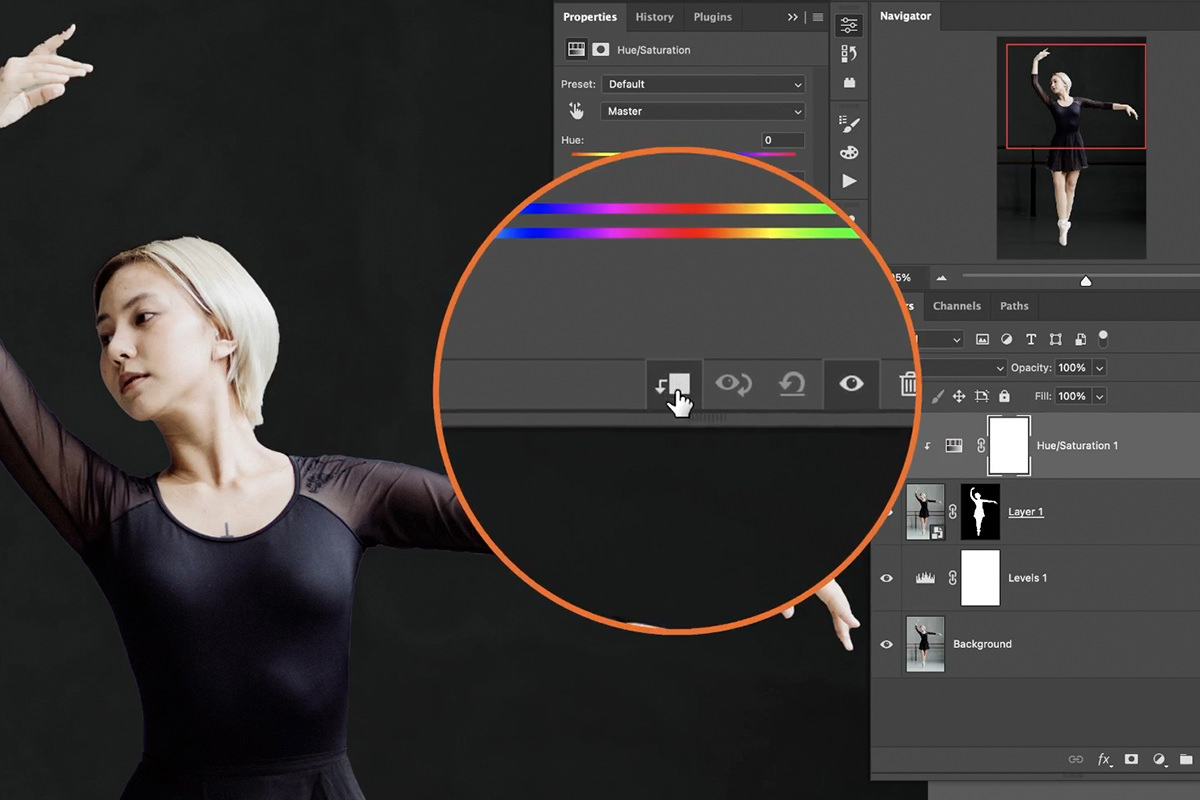
Now that the background is nice and dark, let’s give add the classic blue hologram color to the subject.
Create a Hue/Saturation Adjustment Layer above the subject layer and click on the Clipping Mask icon. This will make it so that the color change only affects the layer directly underneath it in the Layers Panel.
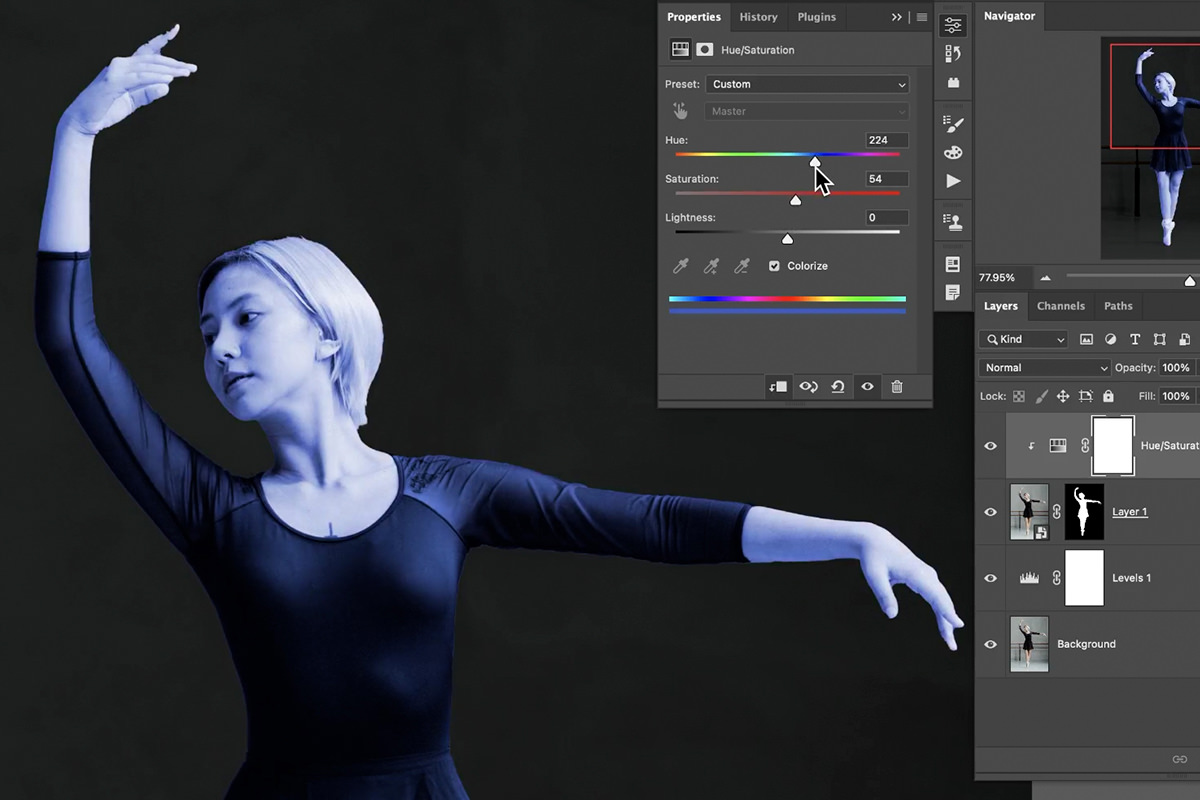
Once it’s clipped to the subject layer, change the color. We chose that Star-Wars-blue look, but feel free to create a hologram in any color you want.
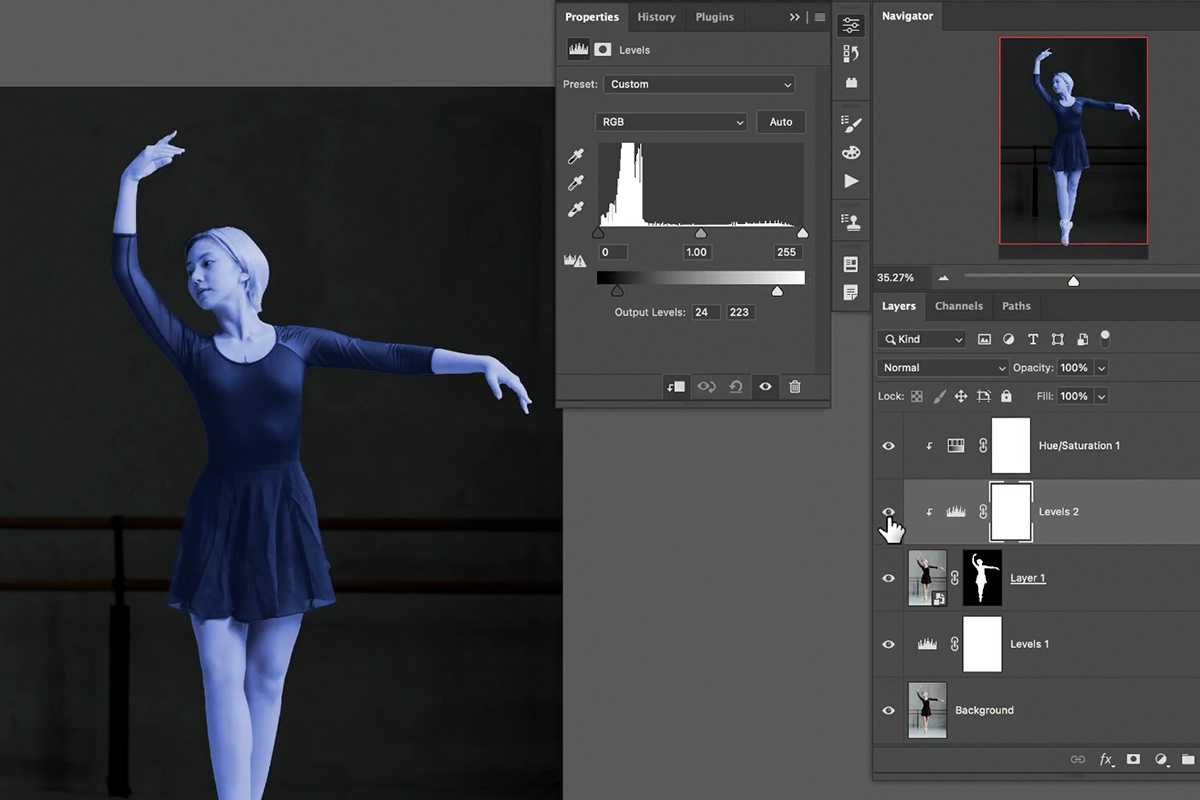
Next, add another Levels Adjustment Layer, but this time place it above the subject layer, clipping it to the layer like we did with the Hue/Saturation Adjustment.
Adjust the highlights and shadows to create a soft, glow-like look.
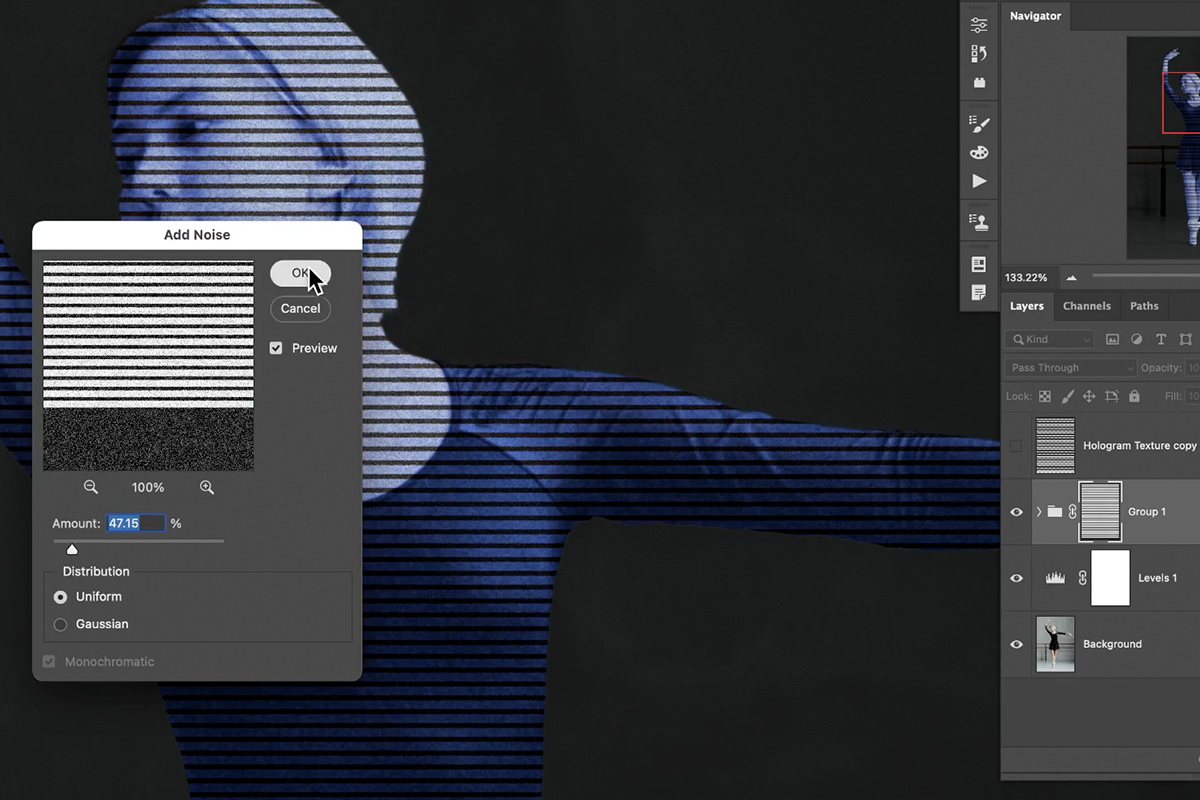
Adding Noise
Since these holograms from the future are usually fuzzy, let’s do a little more to create the illusion of random static and interference.
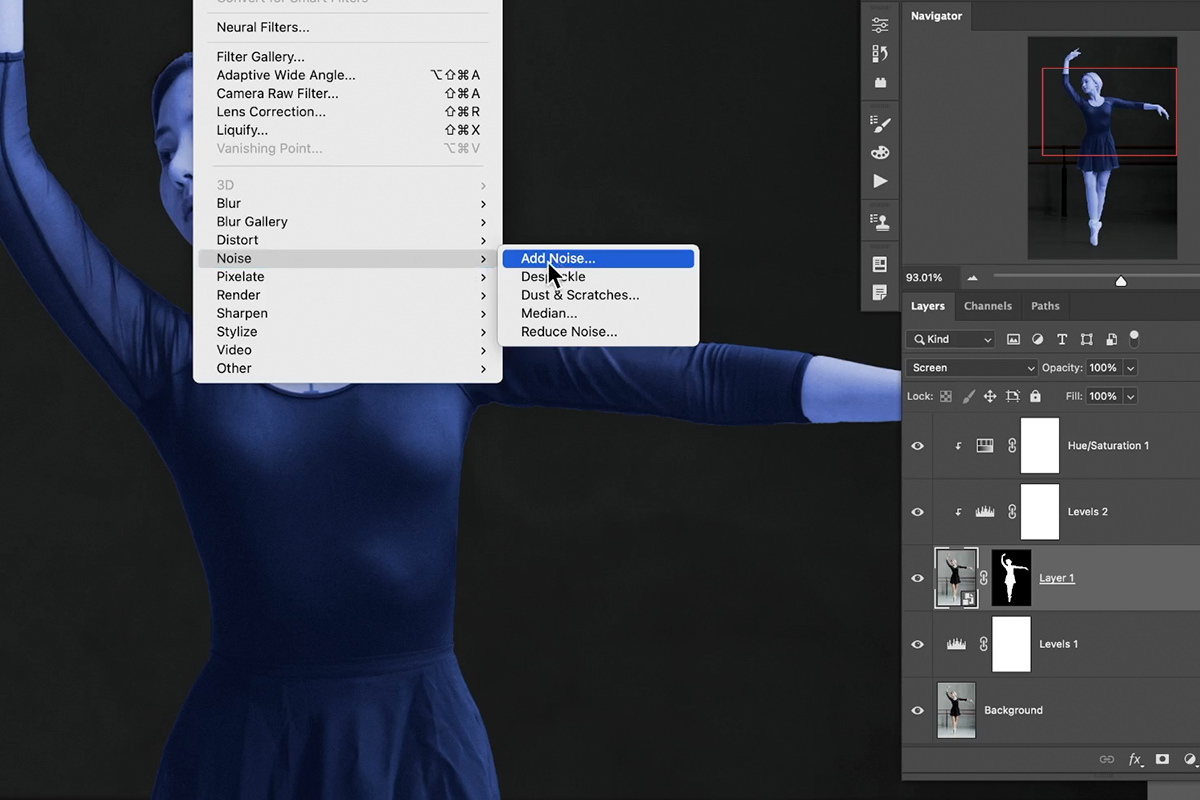
Select the subject layer, open the Filter menu, and choose Add Noise.
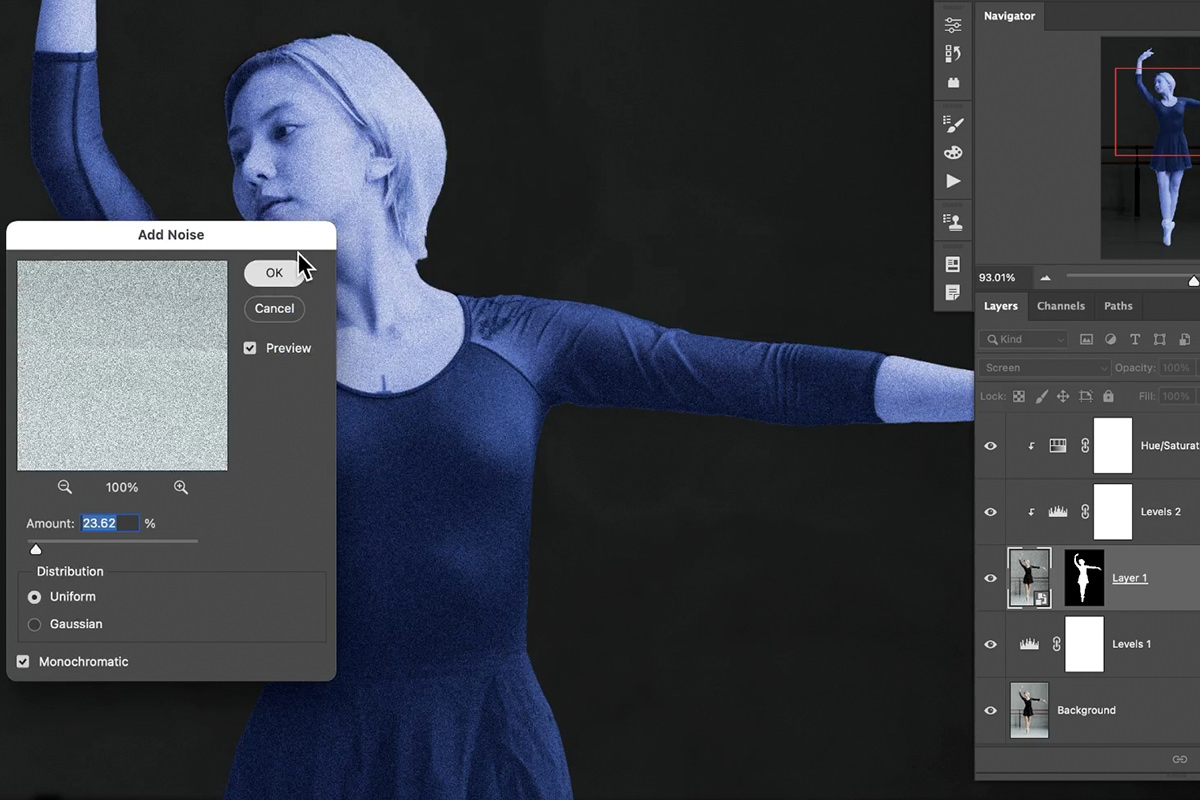
Add some noise to the layer, but try to keep it relatively subtle.
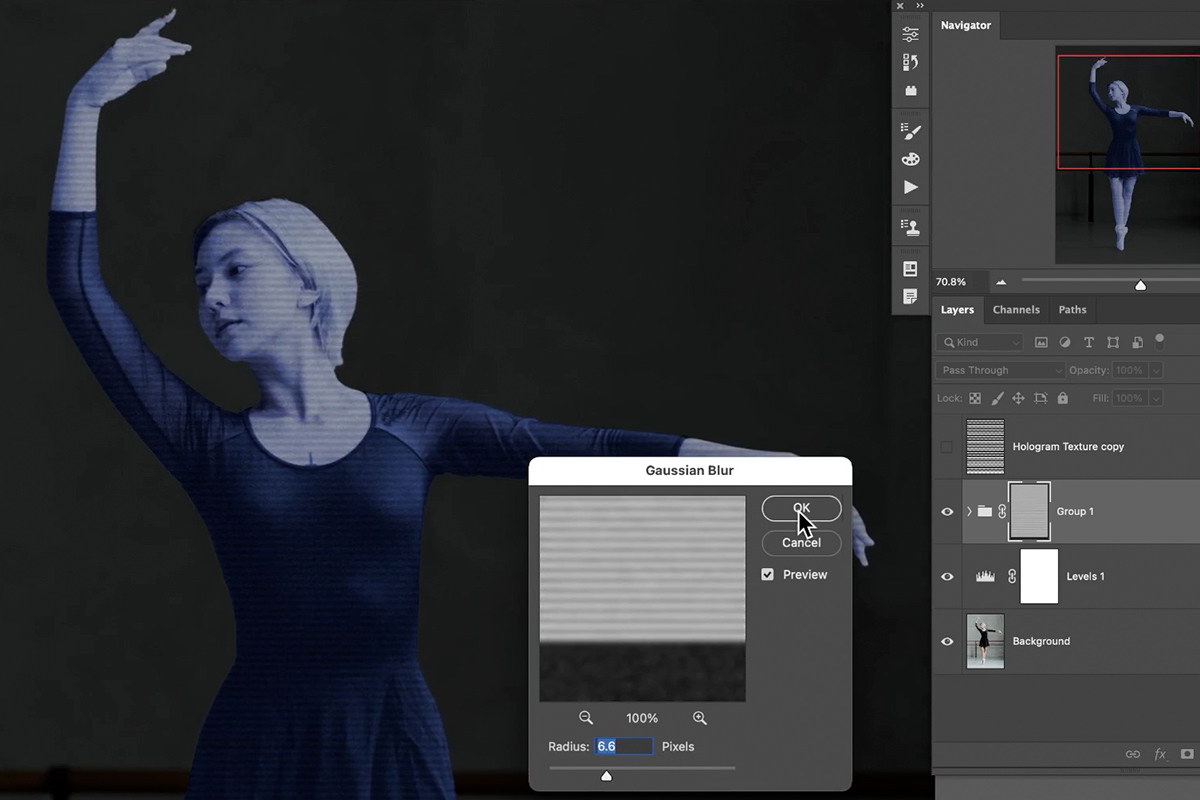
Next, let’s add a Gaussian Blur to give the hologram a softer look. Again, open the Filter menu, but this time choose Gaussian Blur under the Blur Gallery options.
Add a very subtle blur.
Remember that, since this layer is a Smart Object, these filters can be changed or removed at anytime.
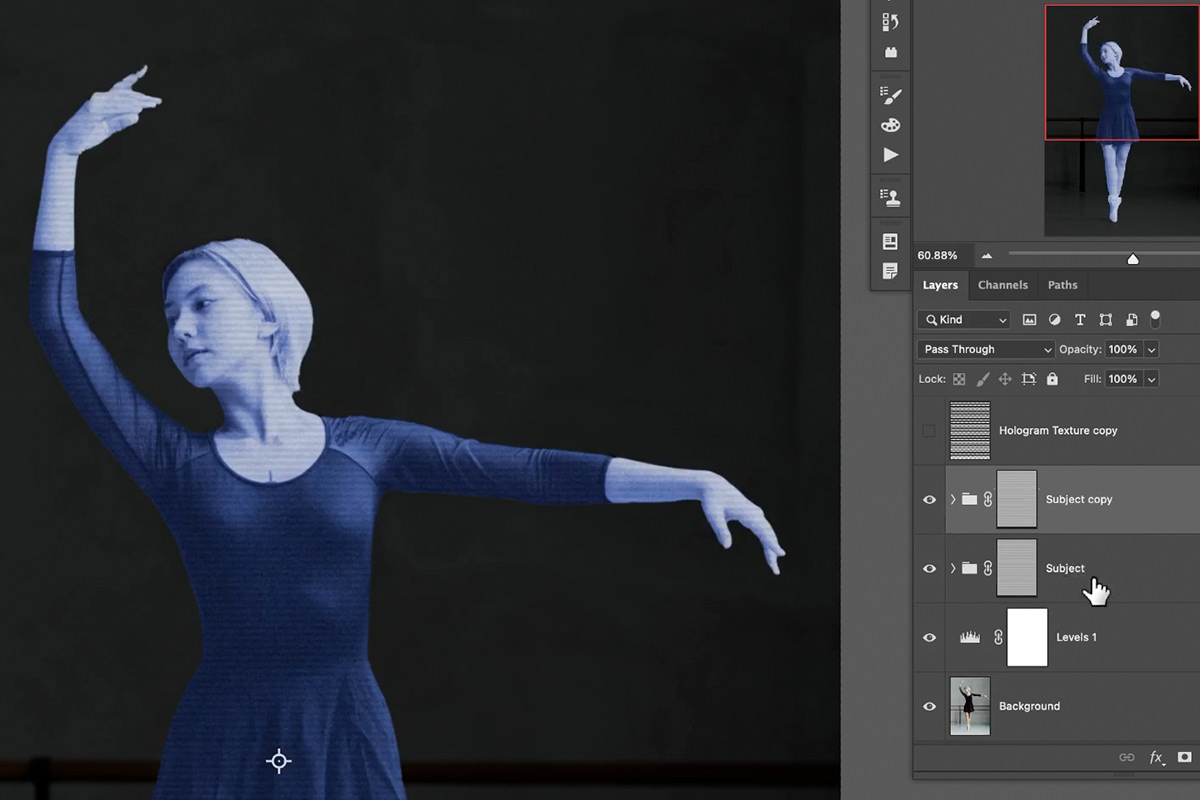
The effect is coming together nicely, but let’s clean up the cutout a little bit. Notice that the subject has a thin highlight, or ‘halo’, around the edge of the cutout.
To fix this, click on the Select menu and choose Select and Mask. Within the Select and Mask dialog, use the Shift Edge slider to move the edge of the cutout inward. This will ‘cut off’ that extra highlight.
Adding Texture
If you’re following along, we’ve included a hologram texture in the tutorial downloads. This is a simple texture designed to create the illusion of scan lines.
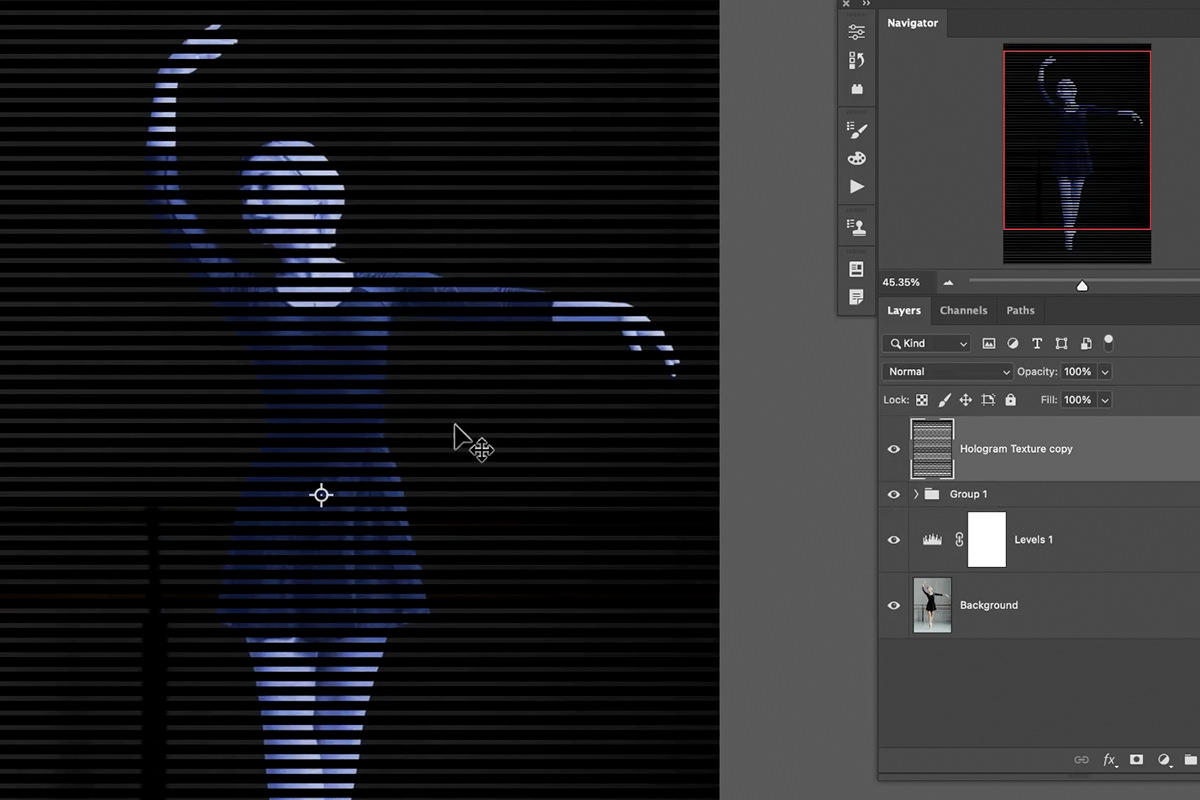
Load the texture into your Photoshop project and place it on top of the Layer Stack.
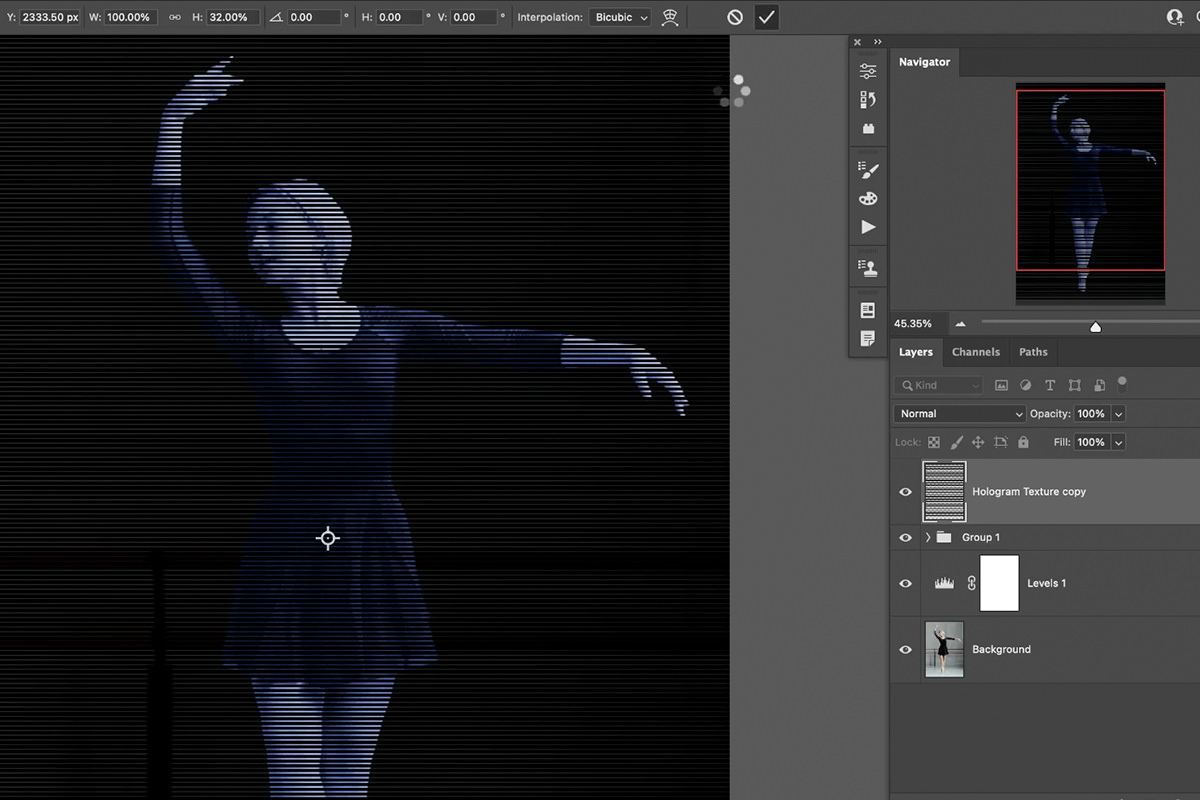
Next, scale the texture to make the black lines a little thinner.
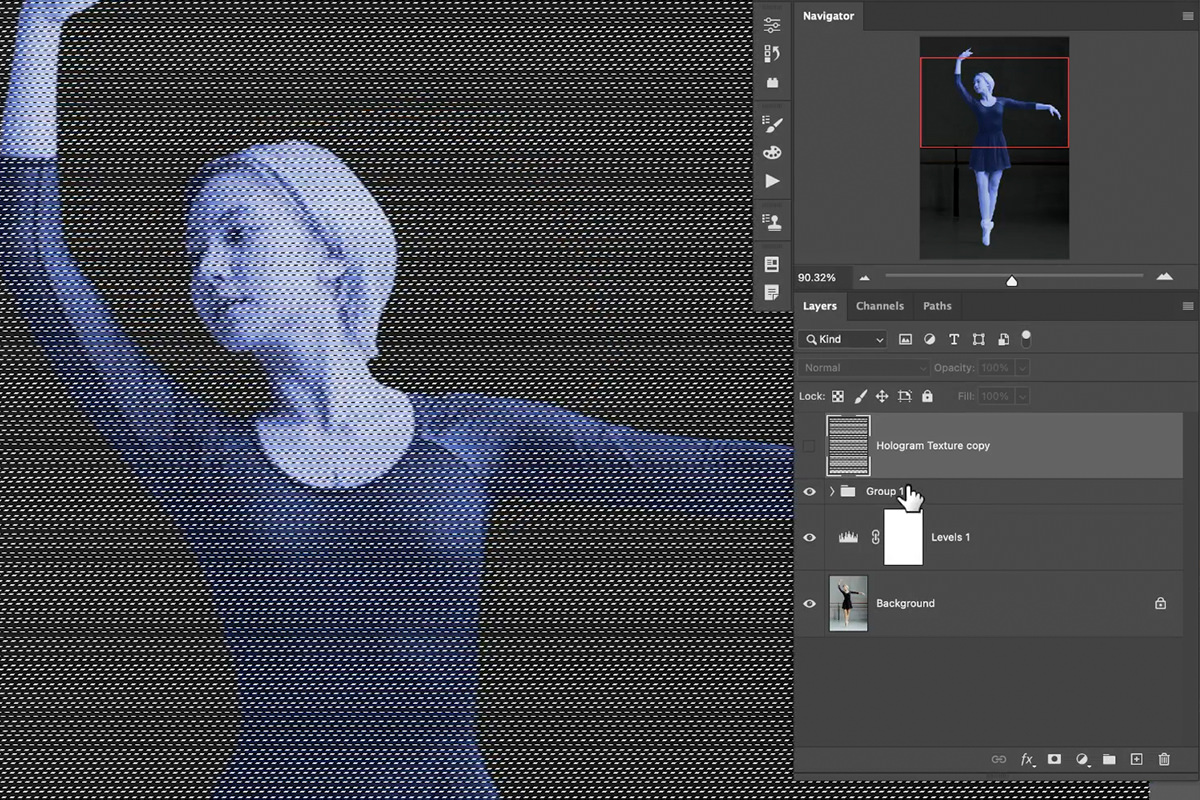
Once the lines are a good size, hold CTRL or CMD and click on the texture layer. This will create a selection of everything on the layer. Then, select the subject layer and all of the adjustments applied to it, and Group them together by hitting CTRL or CMD + G.
With the selections till active, select the group we just made and click on the Layer Mask icon at the bottom of the Layers Panel. This will load the selection of the lines as a Layer Mask.
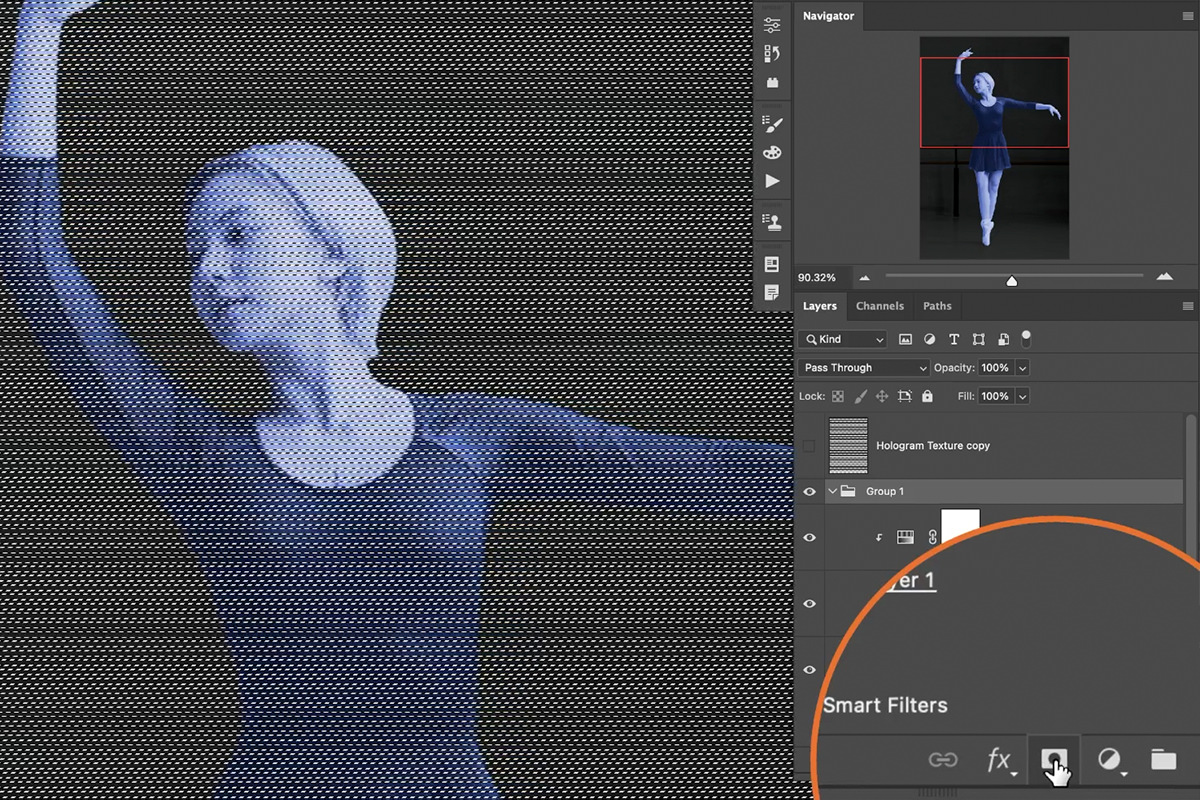
This will create the illusion of scan lines across the subject. Add a little bit of noise to the Layer Mask for a little extra effect.
And then apply a Gaussian Blur to the Layer Mask so that the lines are nice and soft. Looking good! Now let’s light our hologram up with some glow effects!
Adding Glow
The subject is starting to look like she’s being projected into an environment, but we need to make the effect brighter and more like a light source.
Duplicate the subject Group by selecting it and hitting CTRL or CMD + G.
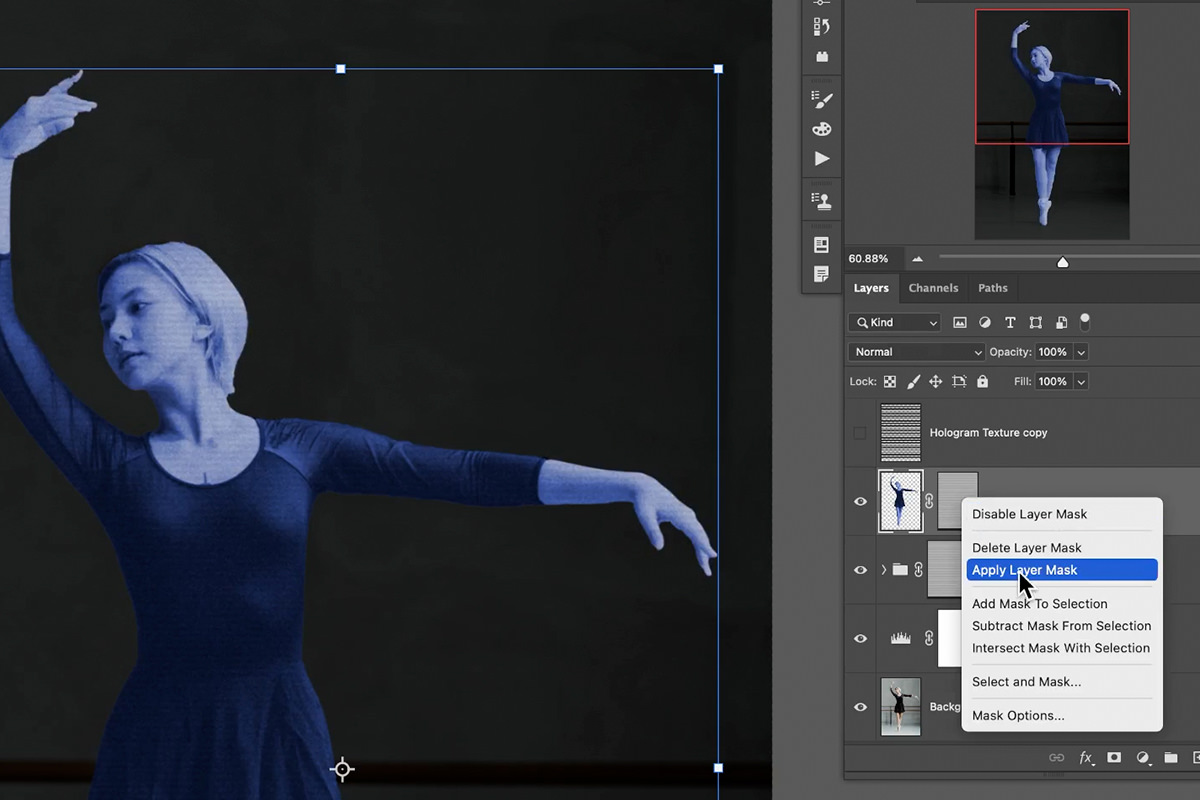
Right-click on the duplicate and select Apply Layer Mask. Then, set the Blending Mode of the layer to Screen.
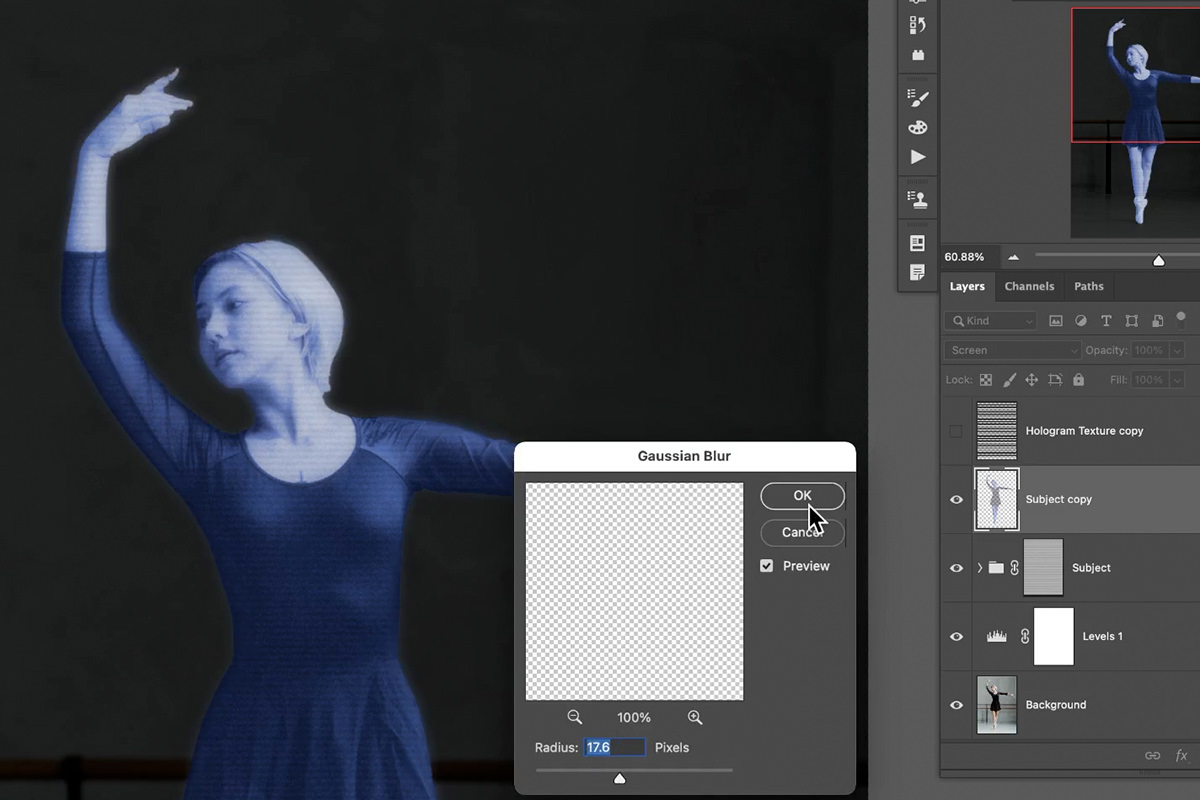
Add a bit of Gaussian Blur to this new copy.
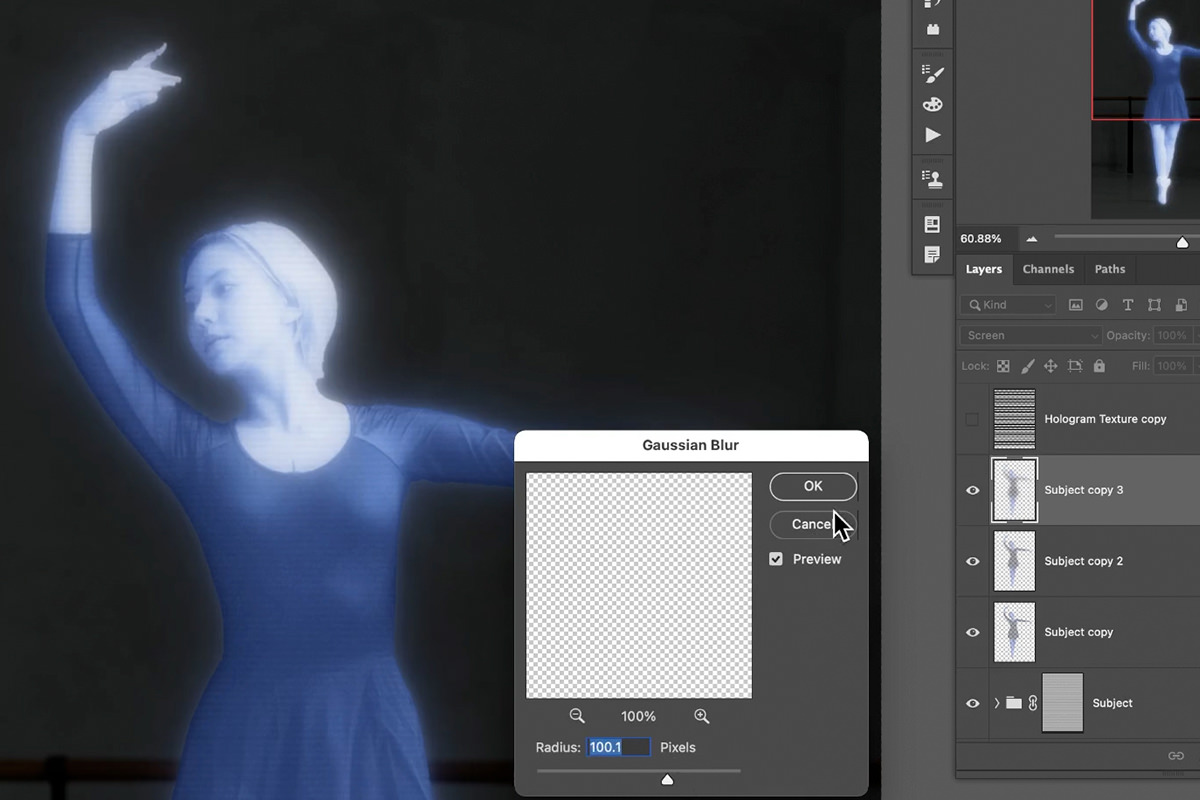
Repeat that process a few times, each with a slightly higher amount of blur applied. Notice that we’re starting to get the appearance of a glow around the subject.
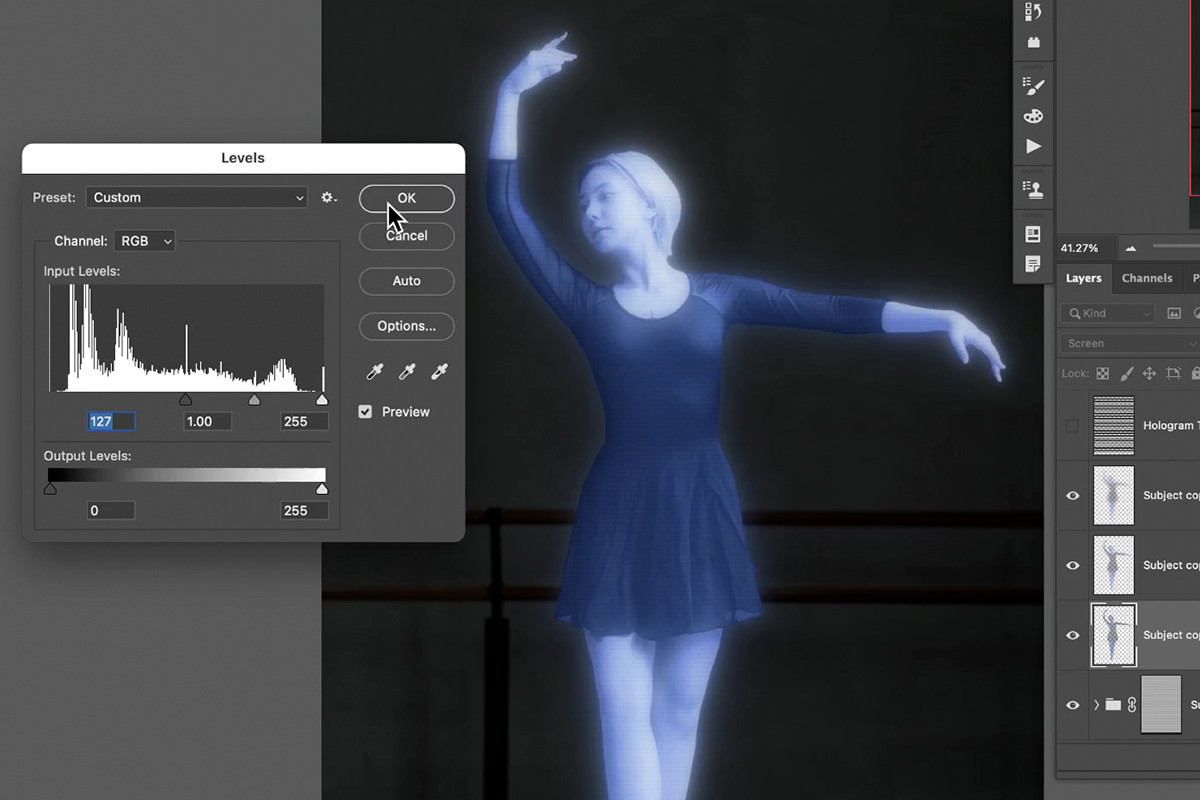
Next, let’s isolate the glow to just the bright areas.

Add a Levels Adjustment to each copy, moving the shadow slider to the right. This will remove the effect from the darks of the image while keeping it visible in the brightest highlights.
Make the same change to each copy, again with a different amount set for each Levels Adjustment.
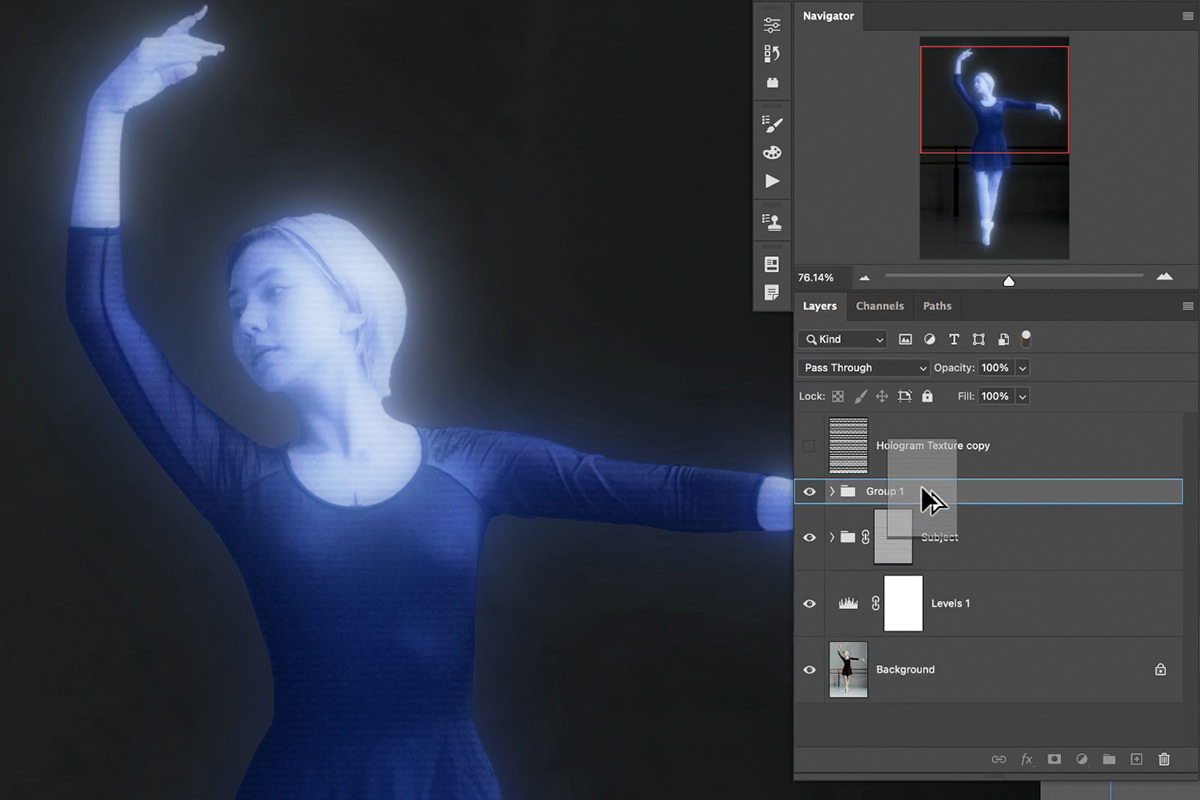
Group all of the copies together, and then hold ALT or OPTN and click and drag the Layer Mask from the main subject layer to the new Group. This will copy the scan line effect to the glow we just created.
Create a Levels Adjustment on the new Layer Mask, moving both the highlight and shadow sliders inward.
Adding Additional Glow & Flicker Effects
Since this is supposed to look like a projection, let’s try and give it the illusion of having some random flicker.
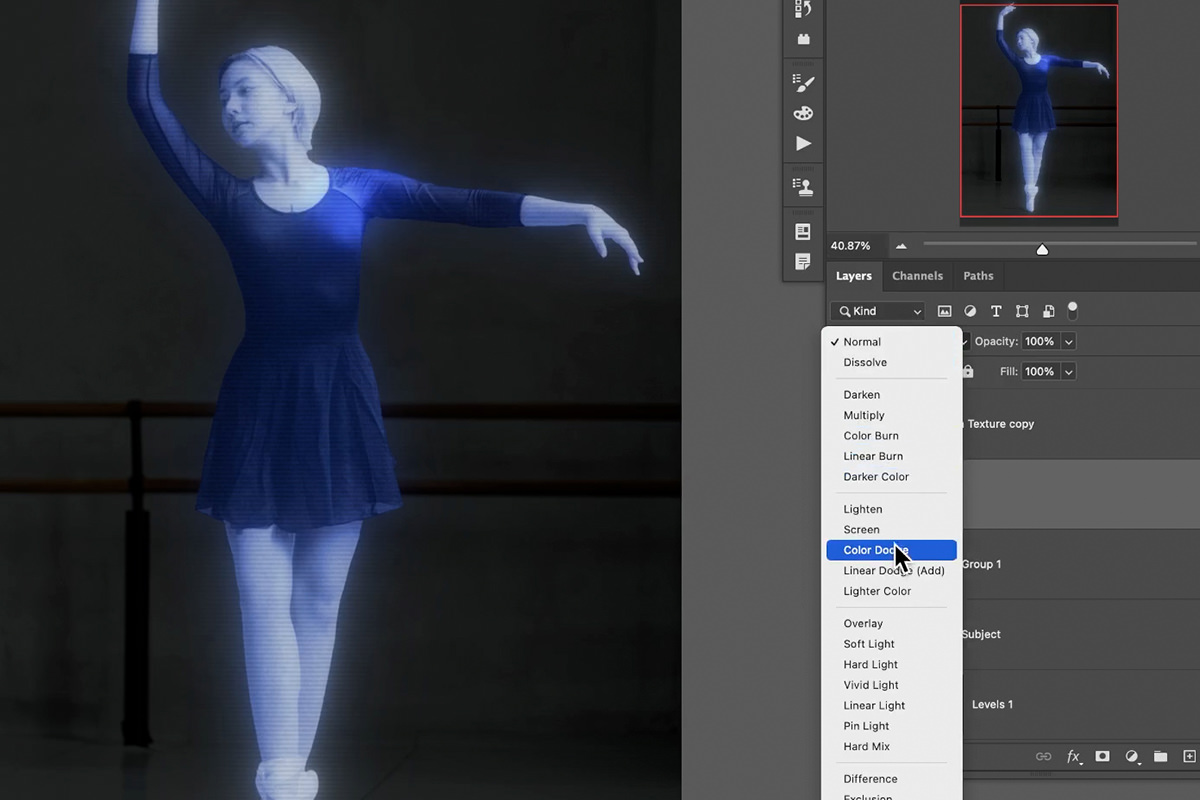
Create a new Layer above the subject and set the Blending Mode to Color Dodge.
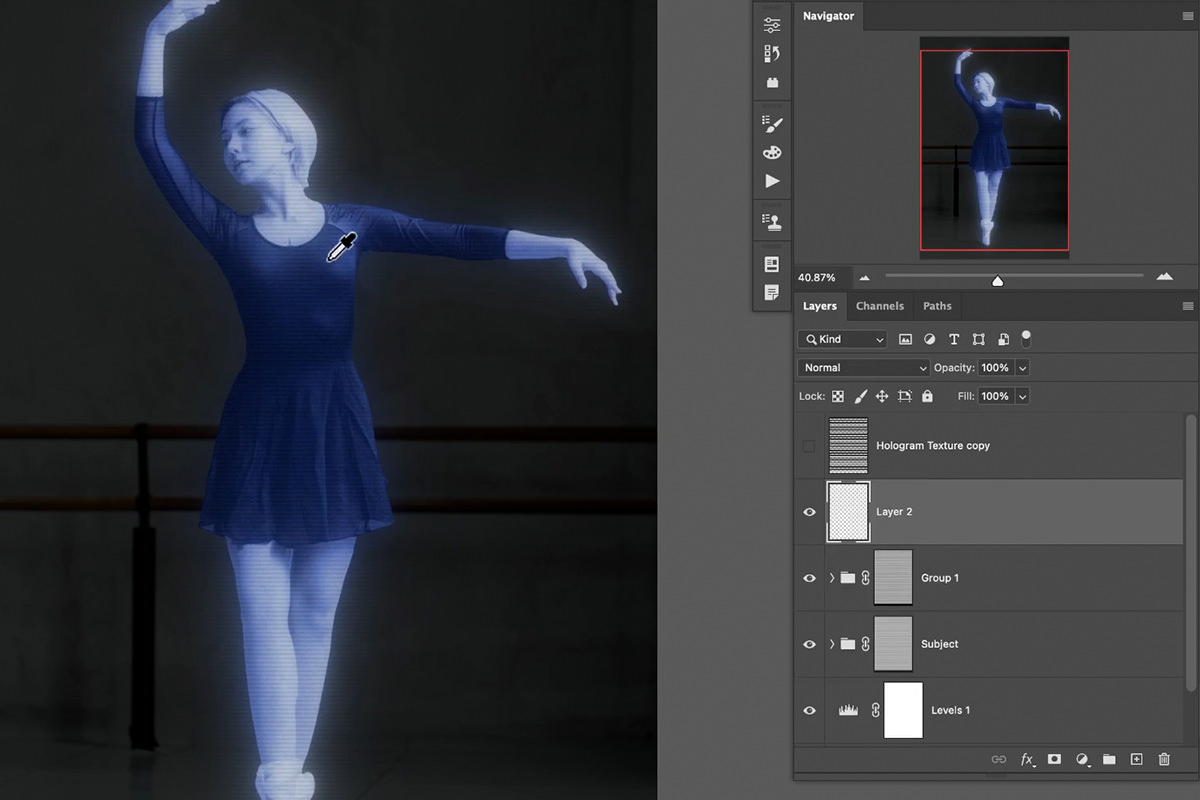
Select the Brush Tool and then hold ALT or OPTN and click on a bright blue color anywhere in the image to Sample it.
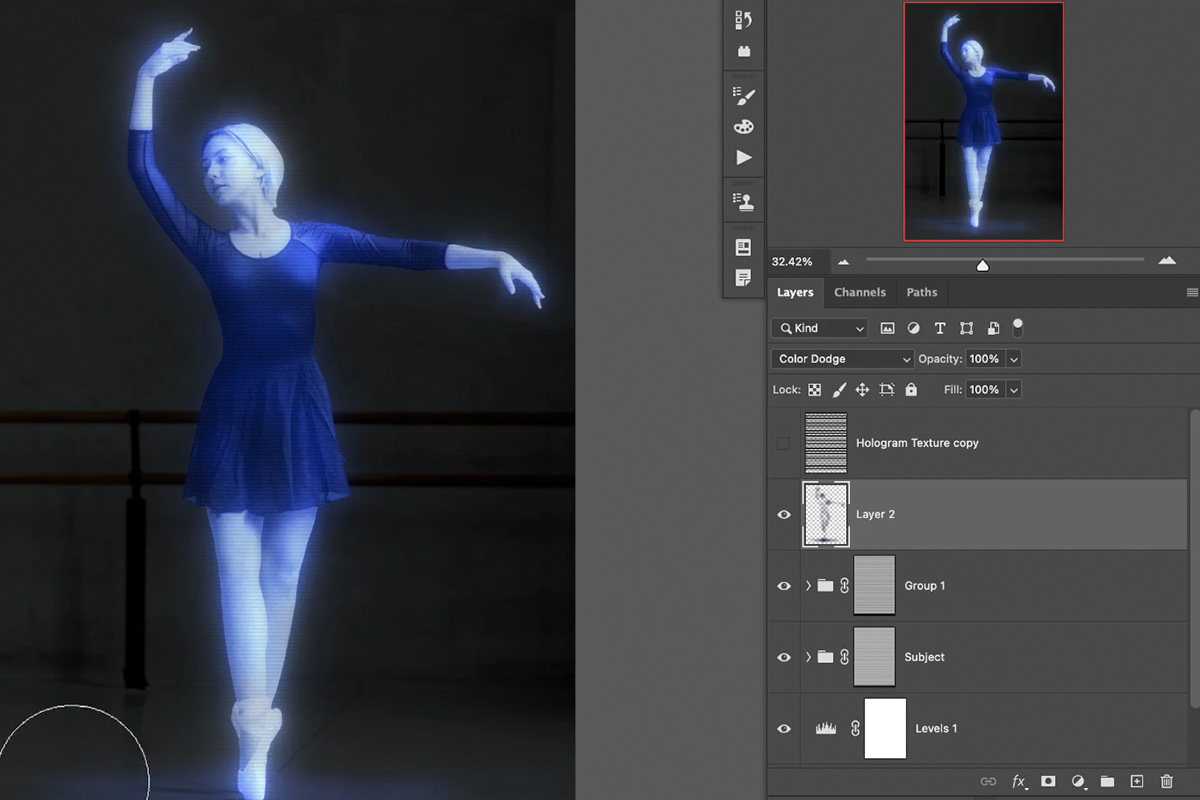
Now paint on the new layer using the Sampled color, focusing on brighter spots to make it look like they’re flickering.
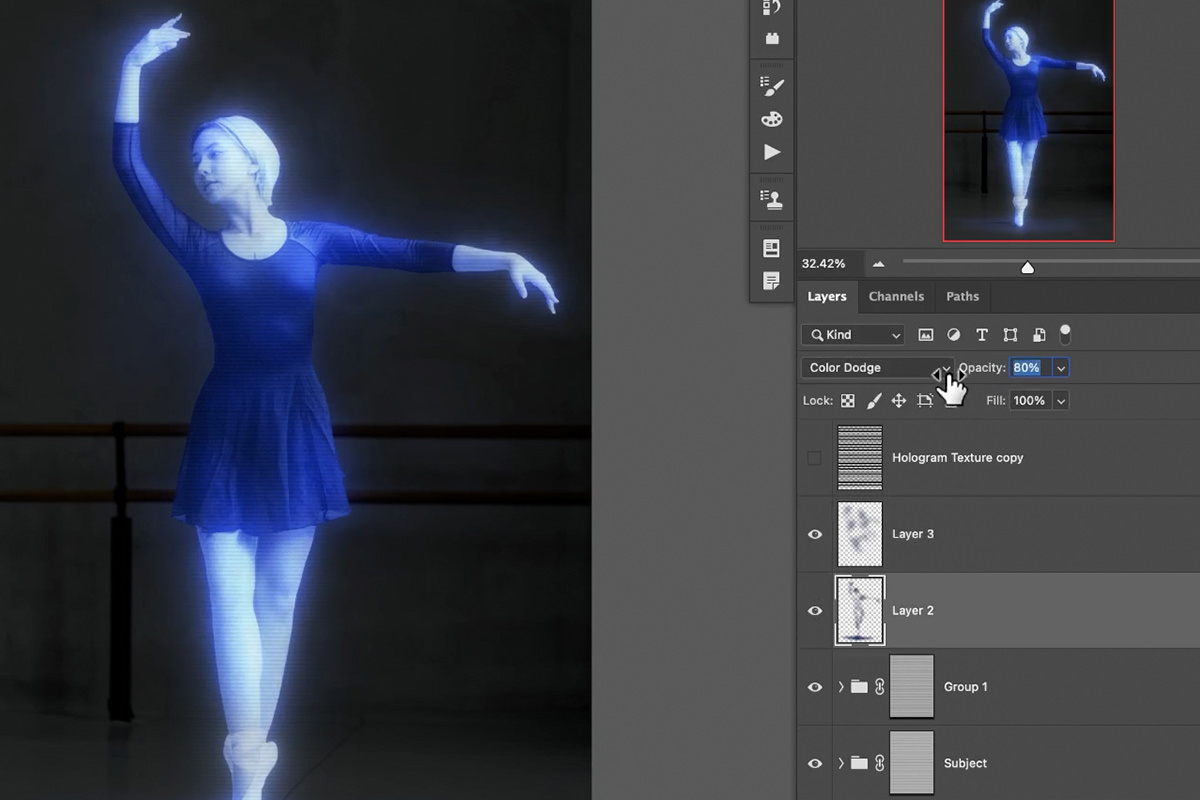
You can lower the Opacity to make the flicker effect more subtle.
Adding a Reflection
We’re almost done! Let’s just add one final flourish.

Duplicate the main subject group.
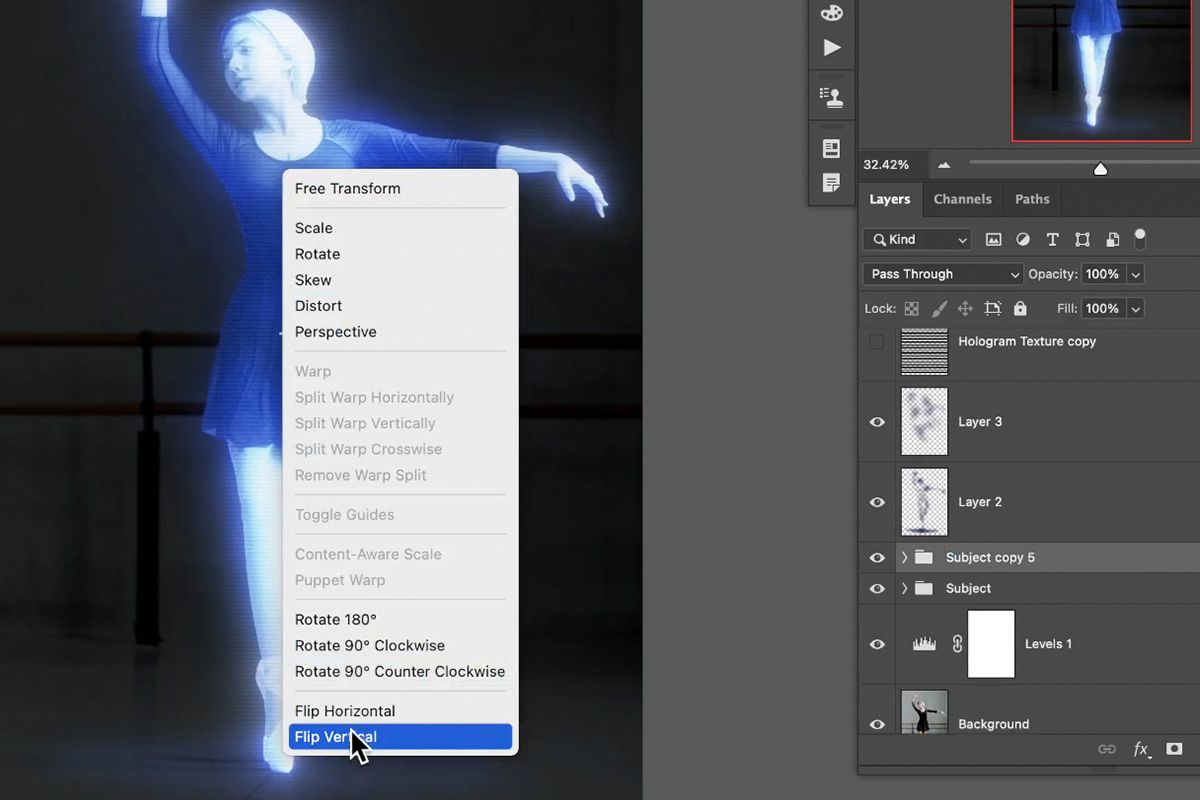
With the duplicated group active, right-click anywhere on the canvas and select Flip Vertical.
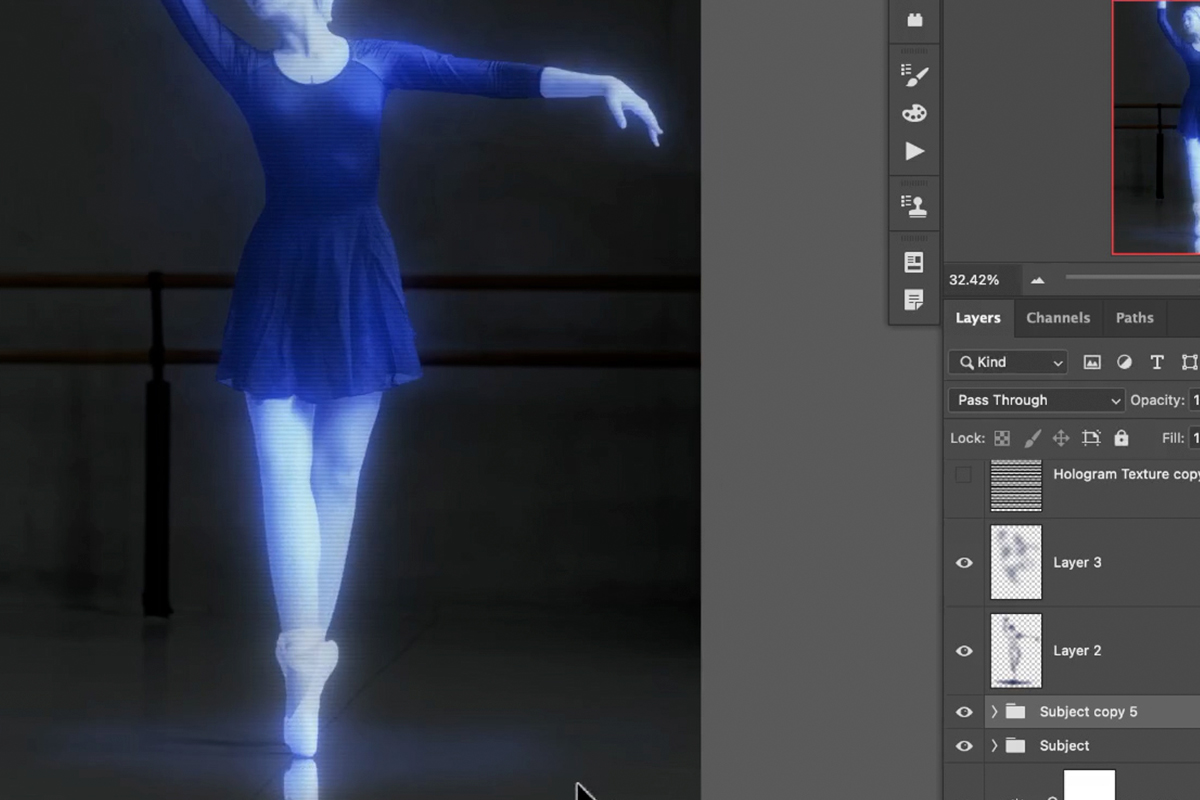
Move the now upside-down duplicate just below the main subject to create the illusion of a reflection on the floor.
Add a bit of blur and lower the Opacity to finish off the effect.