Download Assets
description
Learn how to create realistic light rays in Photoshop using Levels and Radial Blur!
Click here to download the complete PSD file (139MB).
Share
Photorealistic Light Effects in Photoshop
Getting Started
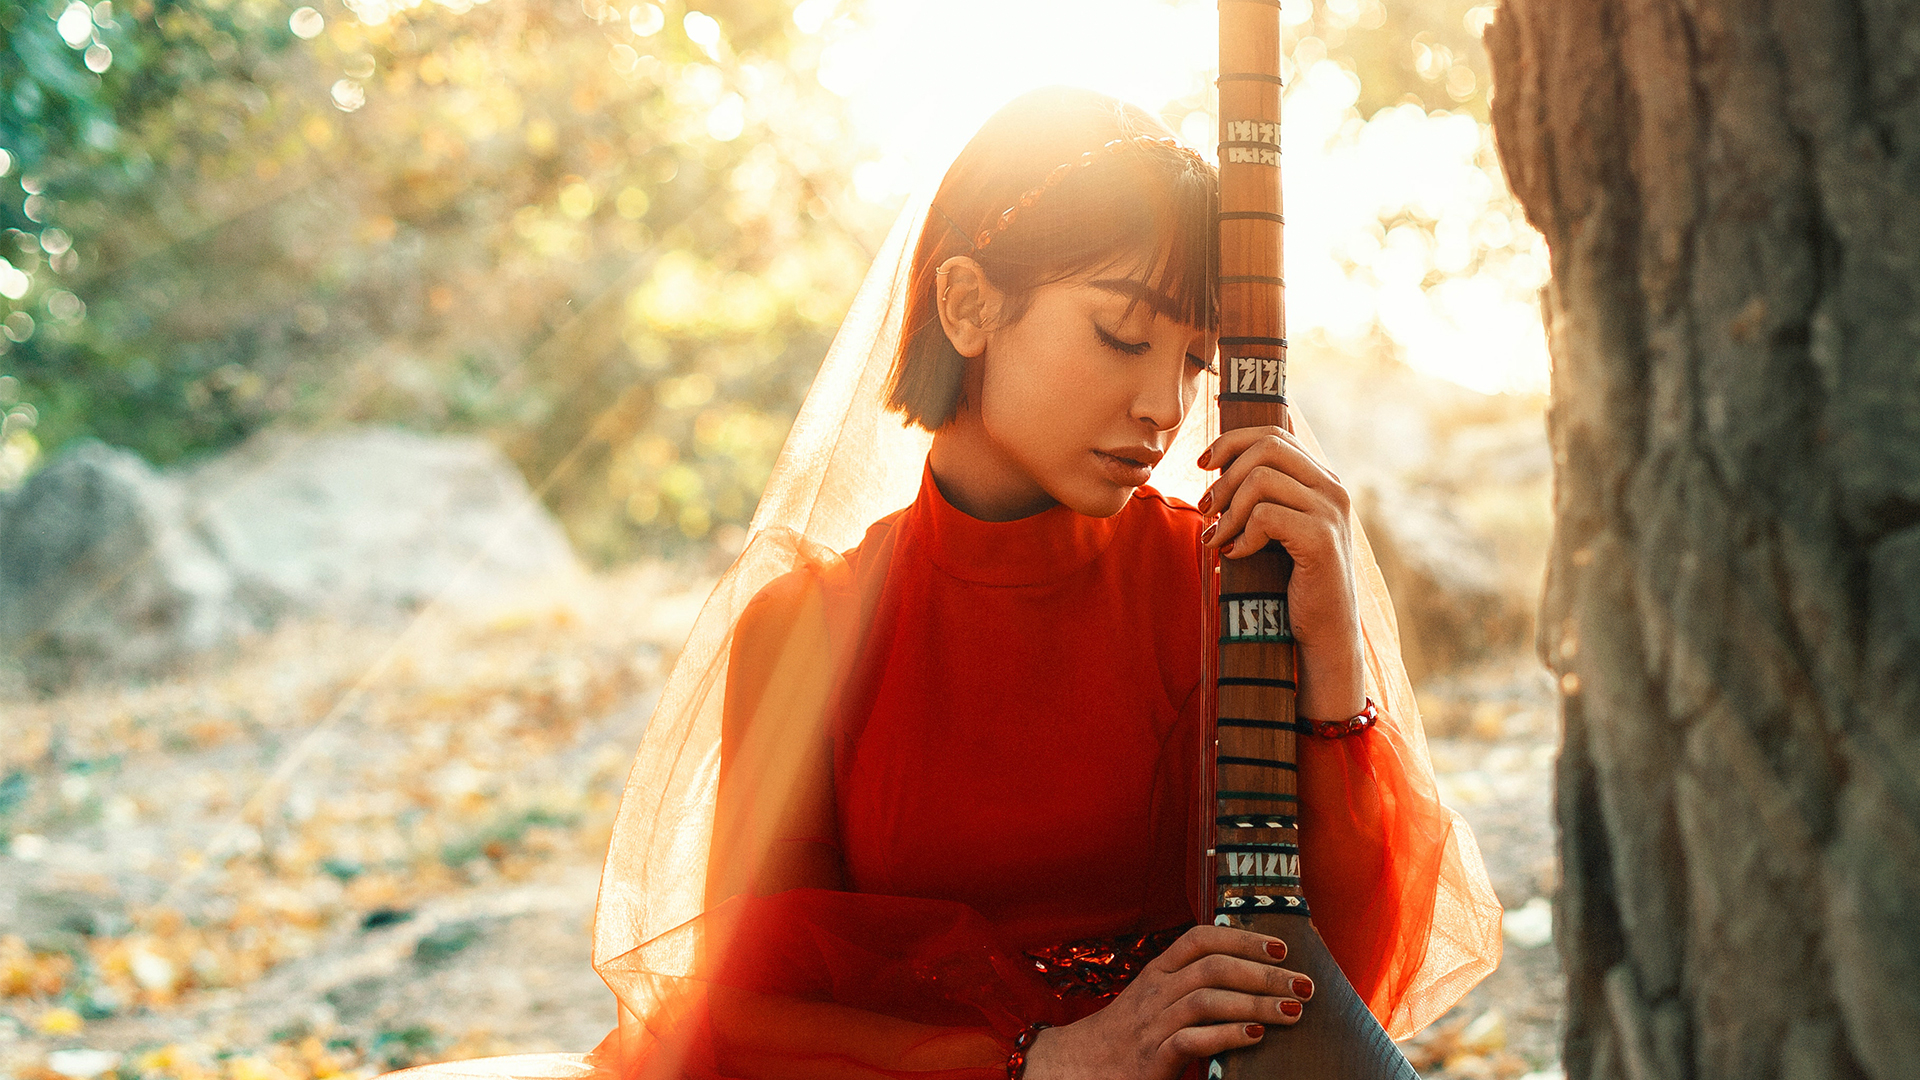
Light ray and sun ray effects can add visual interest and drama to a photo–but you’ll need the right kind of image for the effect to work.
For a realistic effect, use an image that is backlit by the sun (or any other large light source). Our example image features a subject in a forest, backlit by a setting sun. This is the perfect environment for creating light ray and sun ray effects. Once you’ve chosen an image, analyze the lighting to get a good idea of what direction(s) the light rays need to travel.
Once you’ve done that, you’re ready to create the effect!
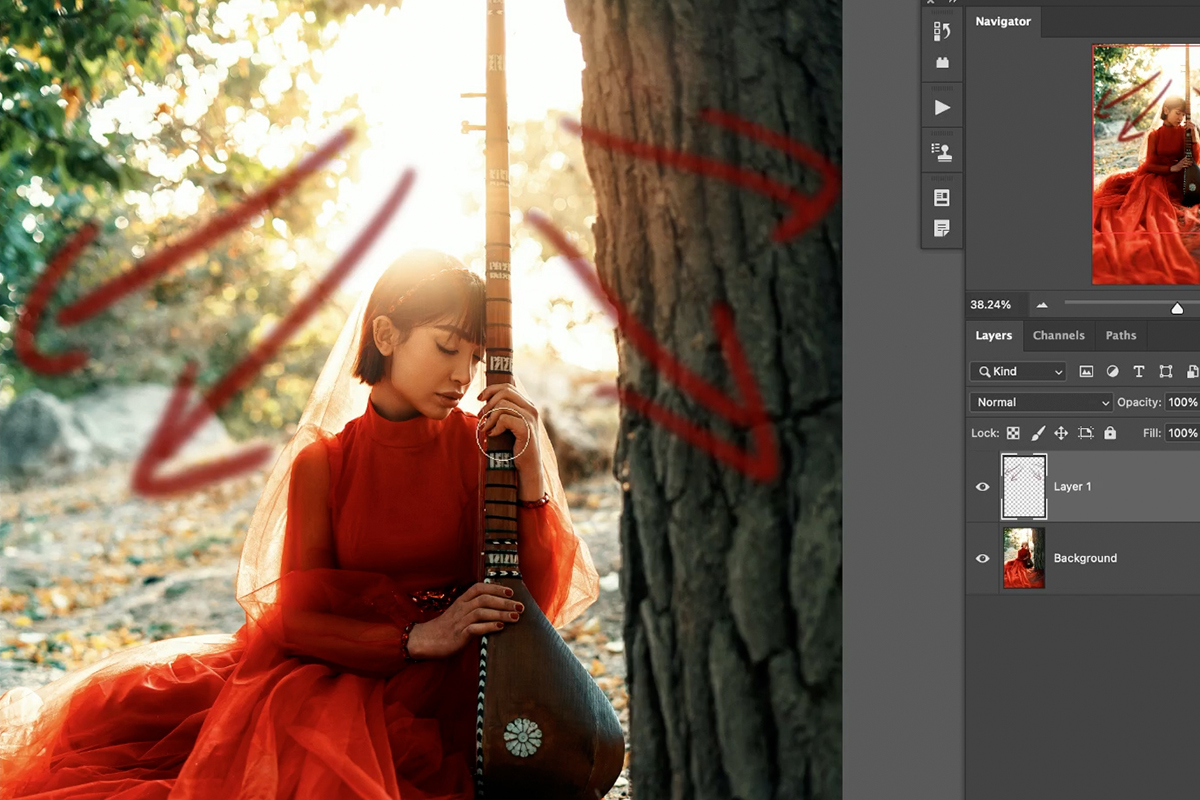
Paint Light with the Brush Tool
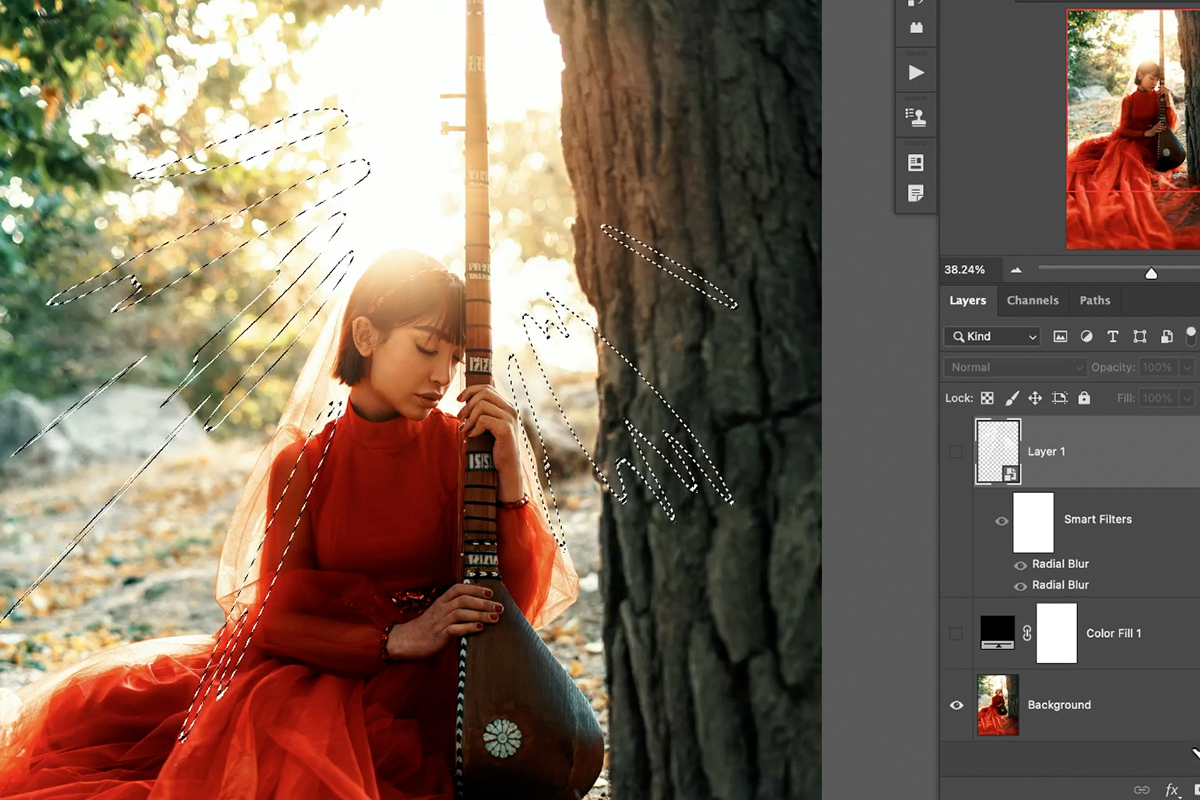
You don’t need any complicated tools to start creating a light ray effect. Begin by creating a new Layer.

Then use the Brush Tool to paint relatively thin white strips along the paths where you want light rays to appear. Focus on keeping the lines thin and relatively well-defined, and make sure that they’re traveling in the right direction.
Other than that, you don’t need to be precise. Will focus on making them look more realistic in the next steps.
Adding Radial Blur
Now that we have a foundation for the light effect, we can start making it look more natural. First, we’ll start by adding a blur so that they blend in more realistically with the environment.
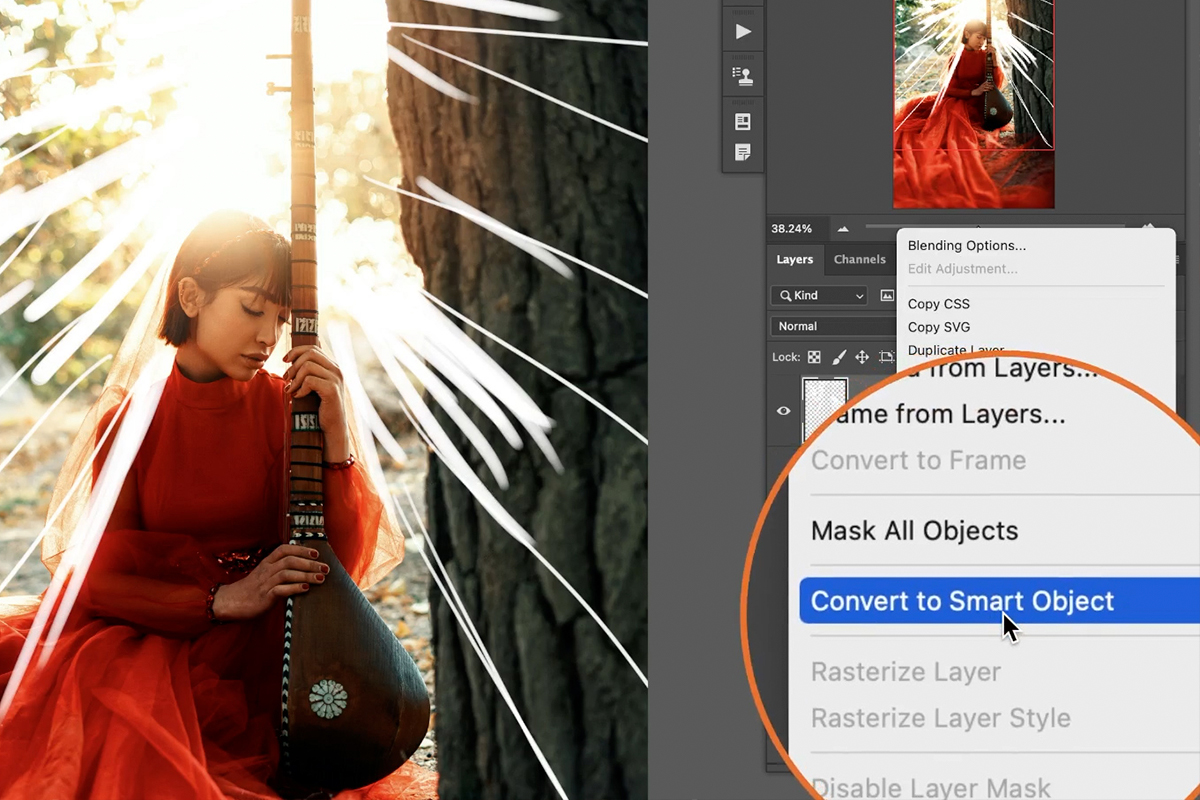
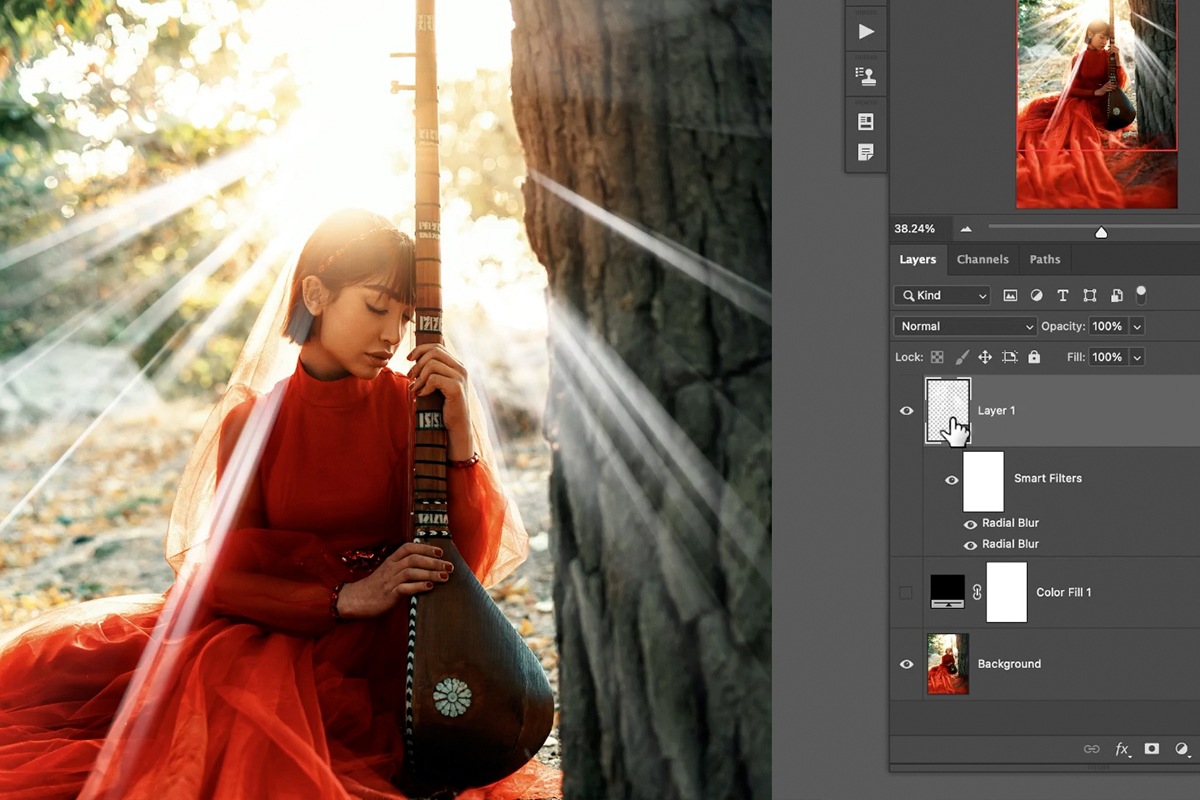
Before we get started, right-click on the Layer you create the rays on and select Convert to Smart Object. This will allow us to add Filters and effects to the Layer while being able to go back and adjust the settings at any time.
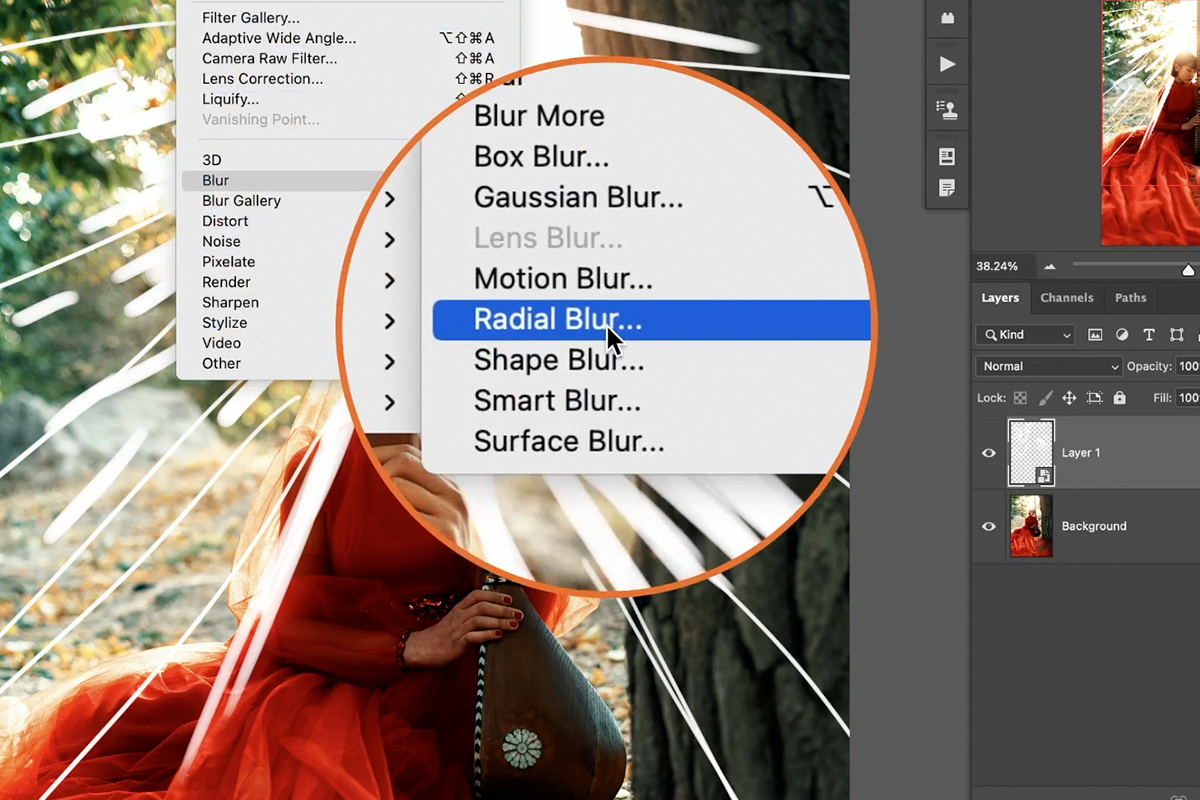
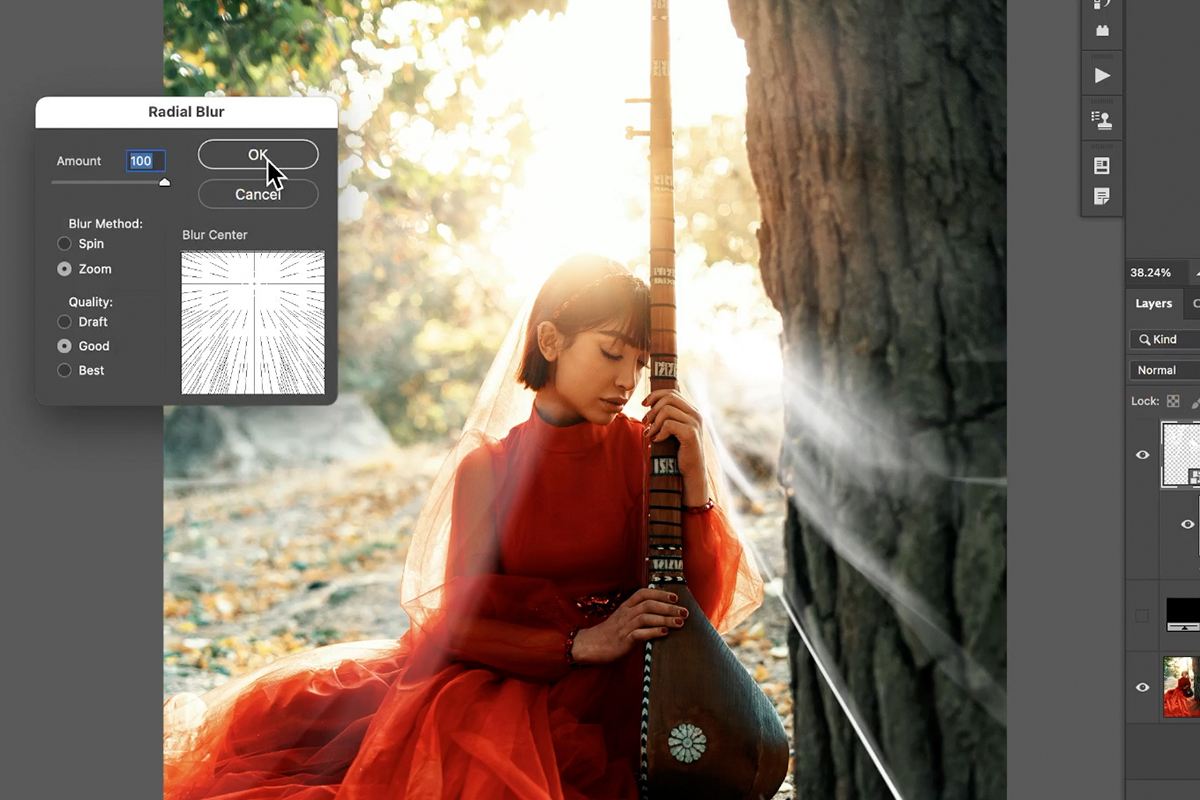
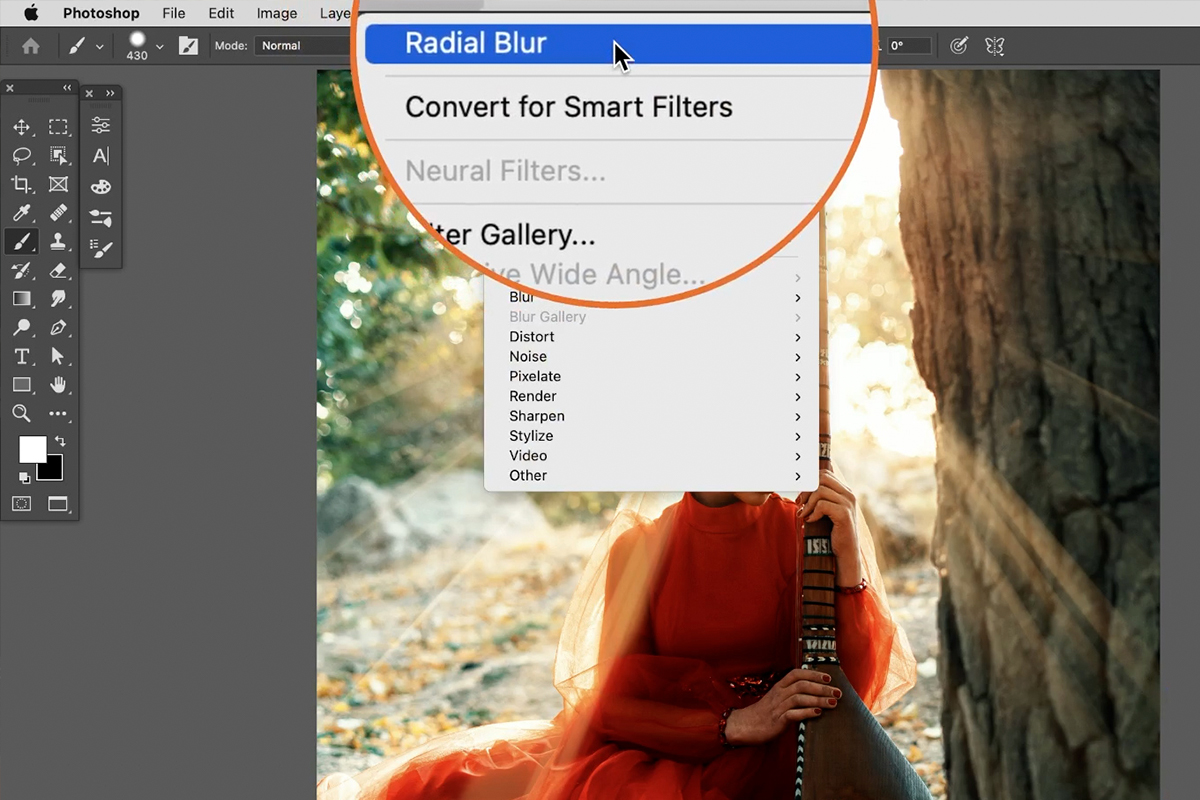
Next, open the Filter menu, select Blur, and Radial Blur.

The Radial Blur dialog will open. Set the Blur Method option to Zoom. Now you can set a single point where the blur effect will originate from. This should be positioned over the light source in the image.
Since we can’t see a real-time preview, you may need to go back and reposition this point if it doesn’t line up correctly.
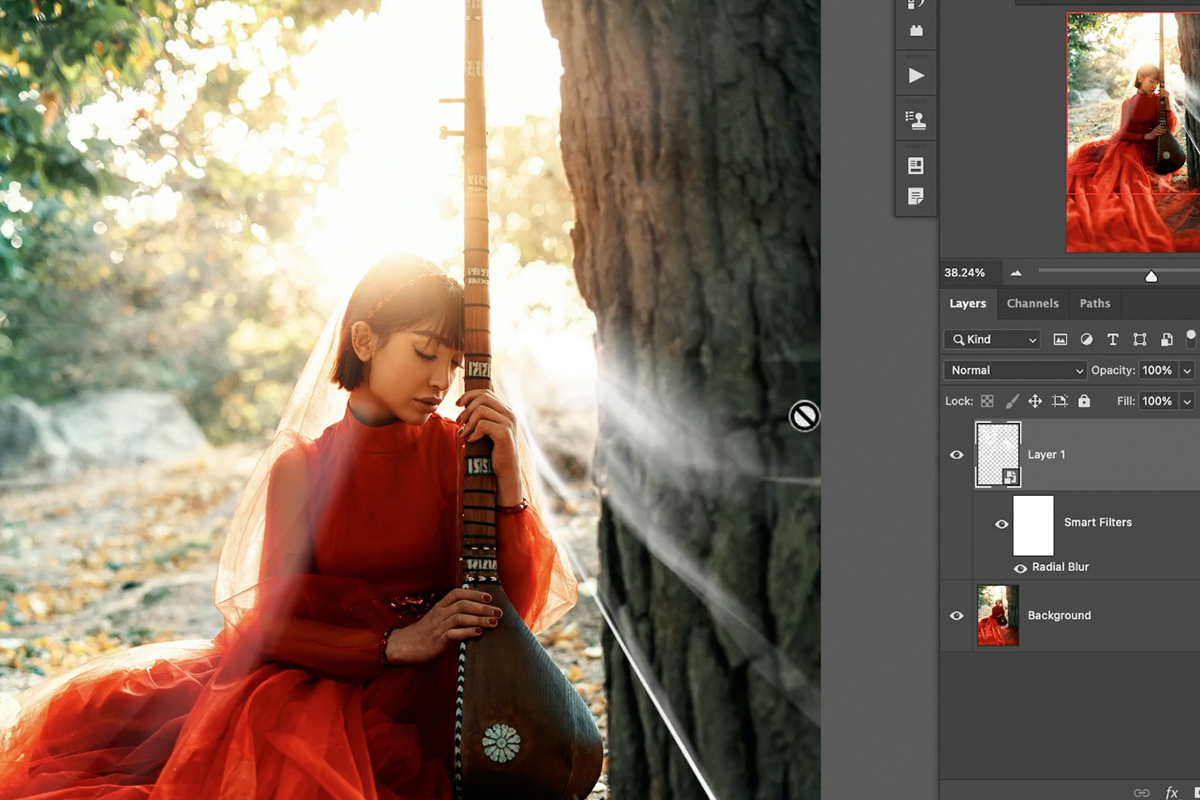
Apply a Radial Blur and then look at the effect it had. Check the definition of the light rays and check to see the blur effect is originating from the main light source.
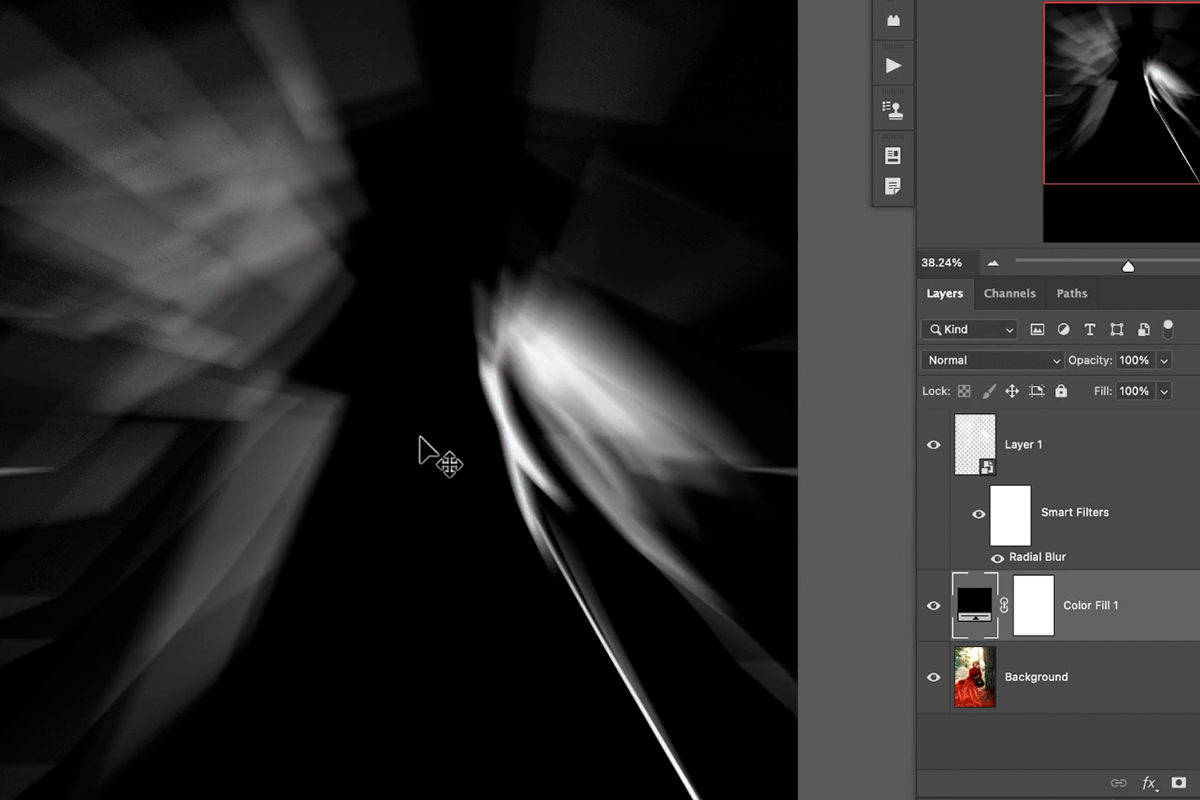
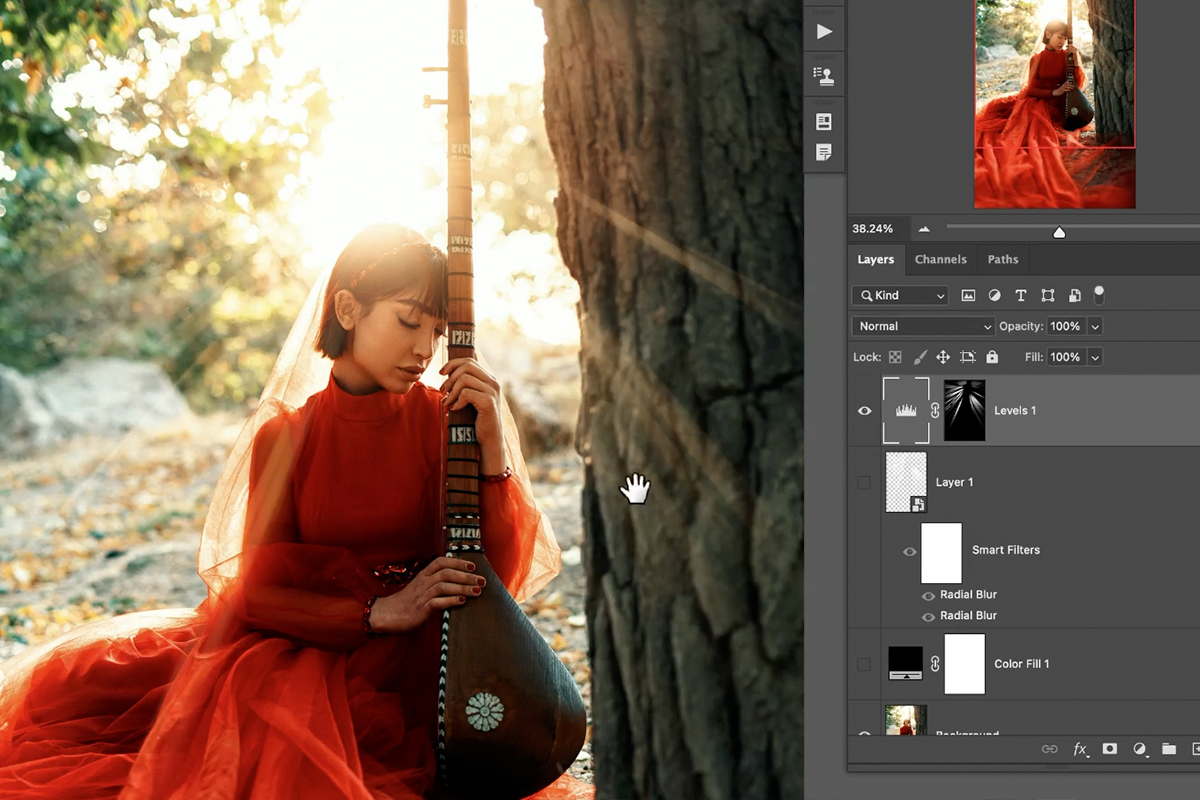
For an easier view of what the effect looks like, place a Solid Color Fill Layer set to black underneath the light ray Layer.
If you need to go back and make adjustments, simply double-click on the Radial Adjustment Layer Smart Filter underneath the Layer.
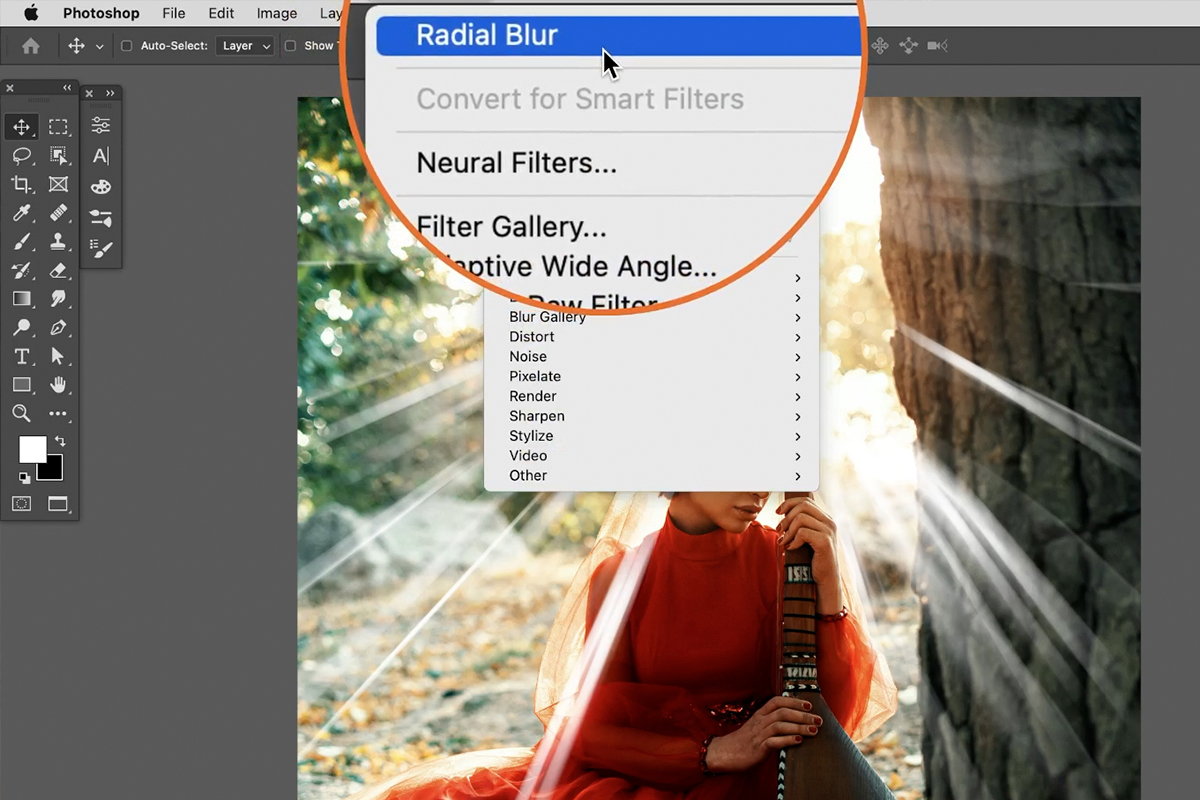
It might help to duplicate the effect multiple times to dial in the right amount of blur. To do so, open the Filter menu and click on the most recent Filter setting that was used at the very top of the list.
Adjusting Color
Now that the blur looks good, let’s focus on fixing the color of the light effect. Since it’s a low sun, we want a nice golden color.
The area we painted and blurred is going to be our light ray template that we can load into a Layer Mask of a Levels Adjustment Layer. The Levels Adjustment Layer will be what actually creates the final light effect.
In order to change the color of the light effect, we first need to select the light rays. To do this, hold ALT or OPTN and click on the light ray Layer.
This will create a selection around the contents of the Layer. Now we can load this selection into the Layer Mask of a Levels Adjustments Layer.
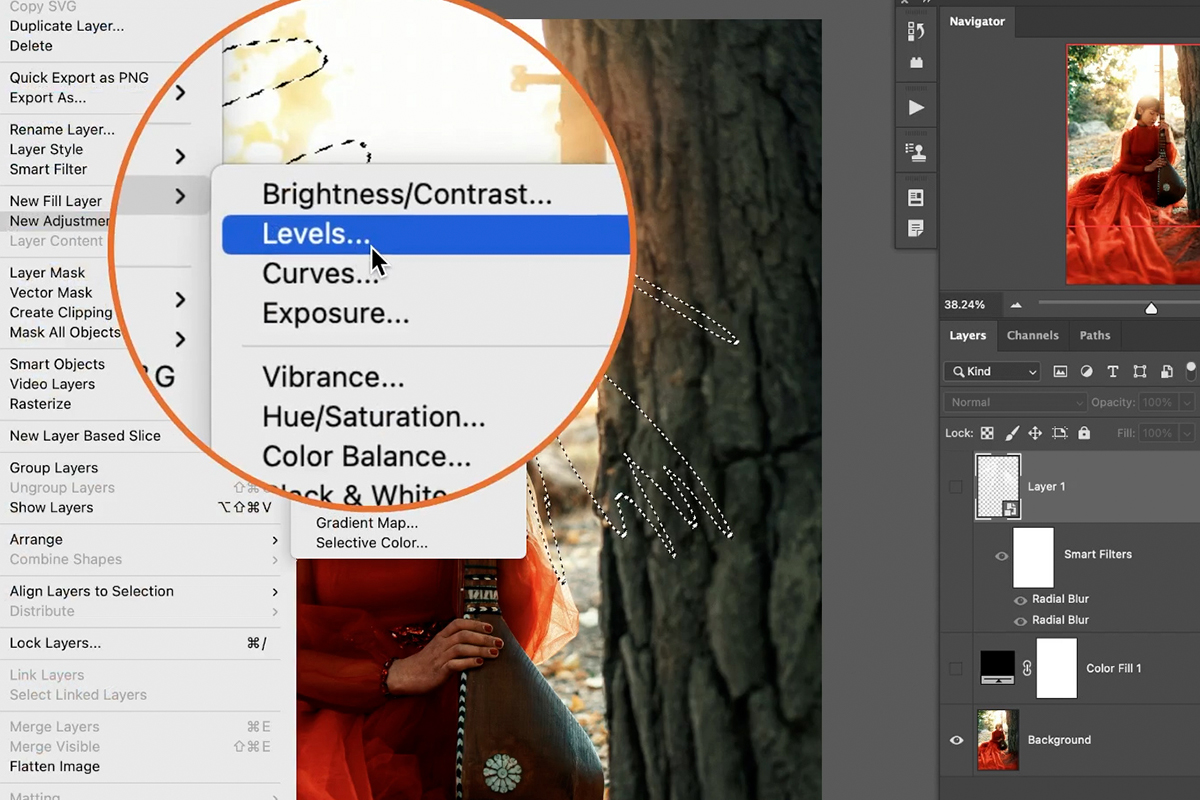
Create a Levels Adjustment Layer above the light ray Layer. Notice that since we had an active selection, it’s automatically loaded into a Layer Mask.
Hide the original light ray layer we created with the Brush Tool. We won’t need it any longer.
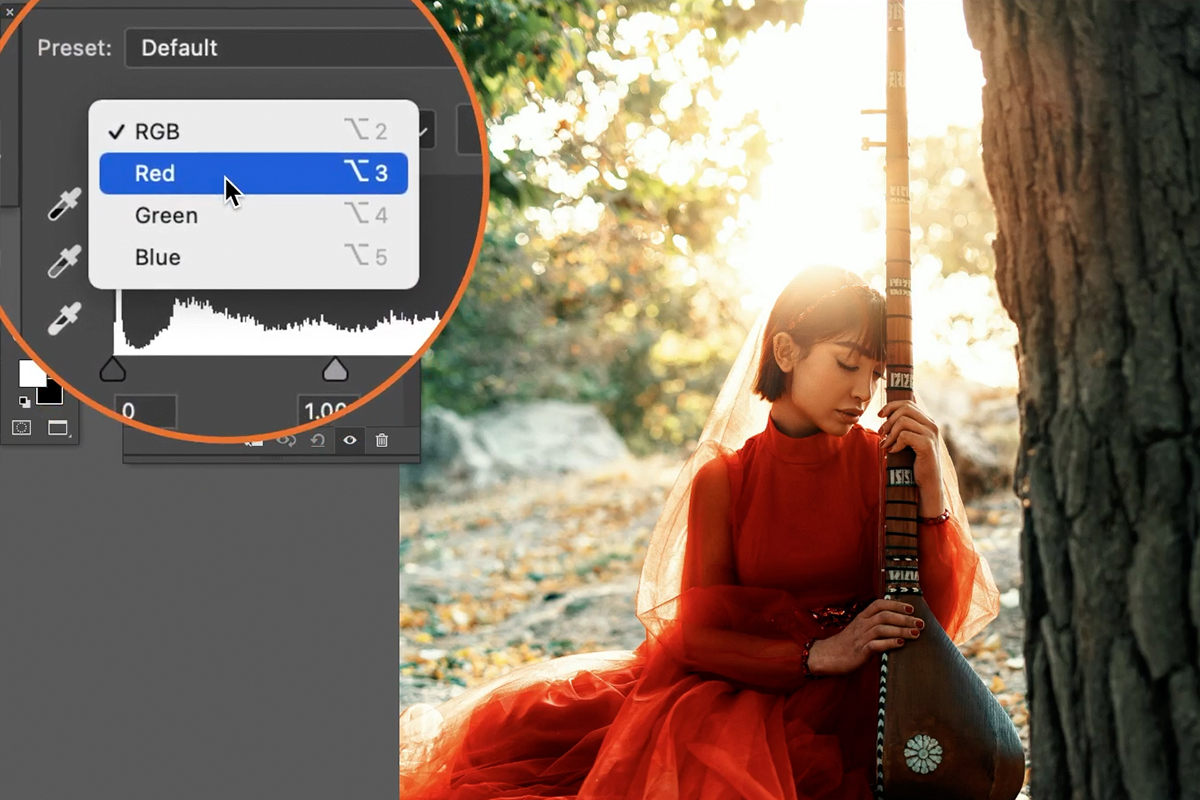
Levels allow you to adjust the highlight and shadow information in an image or Layer. Additionally, you can target specific color channels to adjust as well. This is what will allow us to shift the white lines to a warmer tone.
Start with the Red channel, moving the shadow slider to the right to adjust the color and appearance of the light rays.
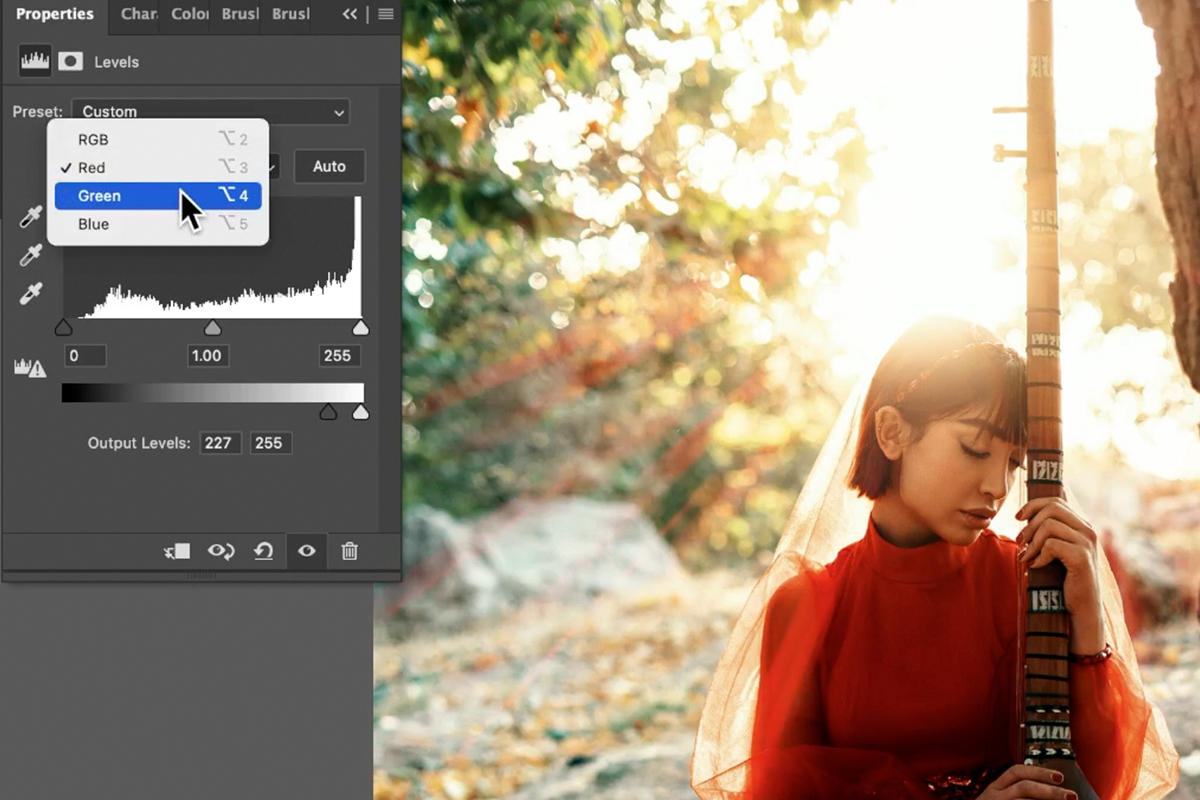
Then do the same but on the Green color channel. Feel free to switch between the two as much as you need to dial in the right look. The color should match the color of the lighting in the image as much as possible.
Finishing Touches
Now that the main effect is done, we can put the final touches on it so that it looks as realistic as possible.
The light ray effect might still be a little too well-defined. To fix this, duplicate the Levels Adjustment Layer.
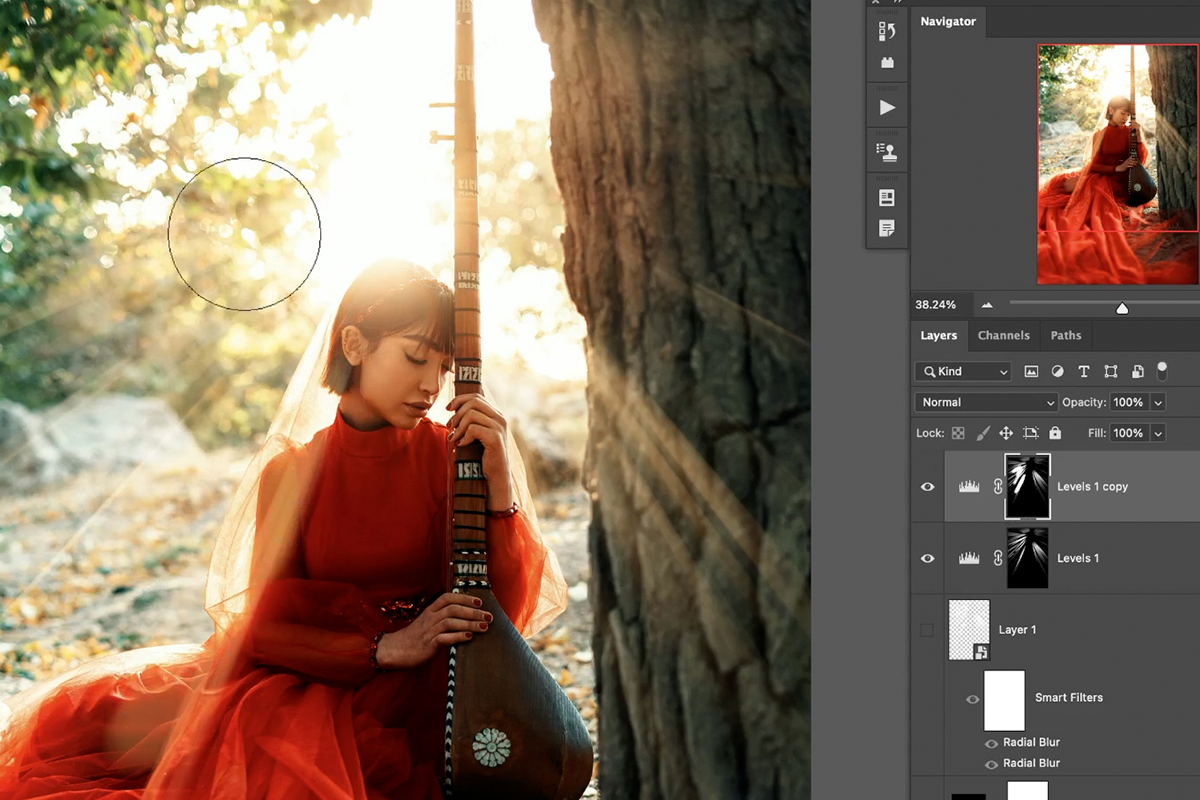
Using a soft, round Brush set to a low Flow, paint on the Layer Mask of the new Levels Adjustment to add more broad, soft areas of light and color.
You can add a Radial Blur to this Layer as well to make the effect even softer.
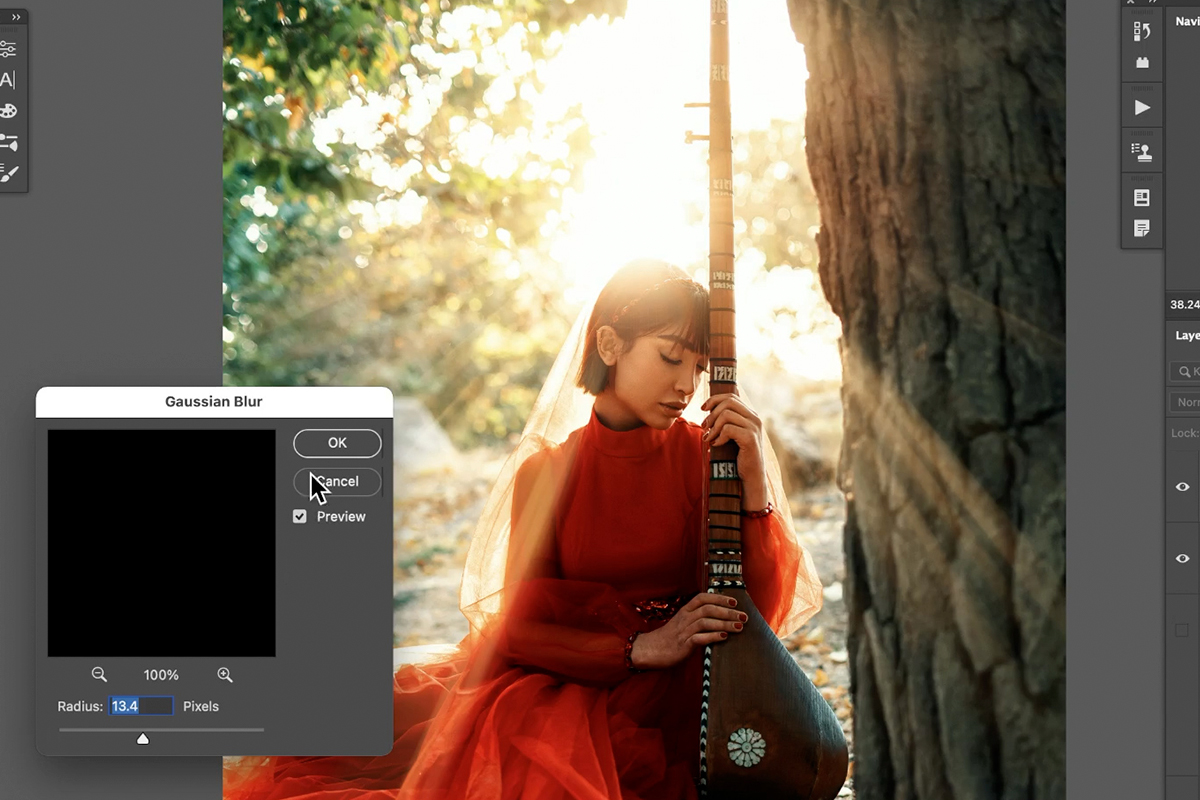
And a Gaussian Blur may help to blend the effect in more naturally with the rest of the image.
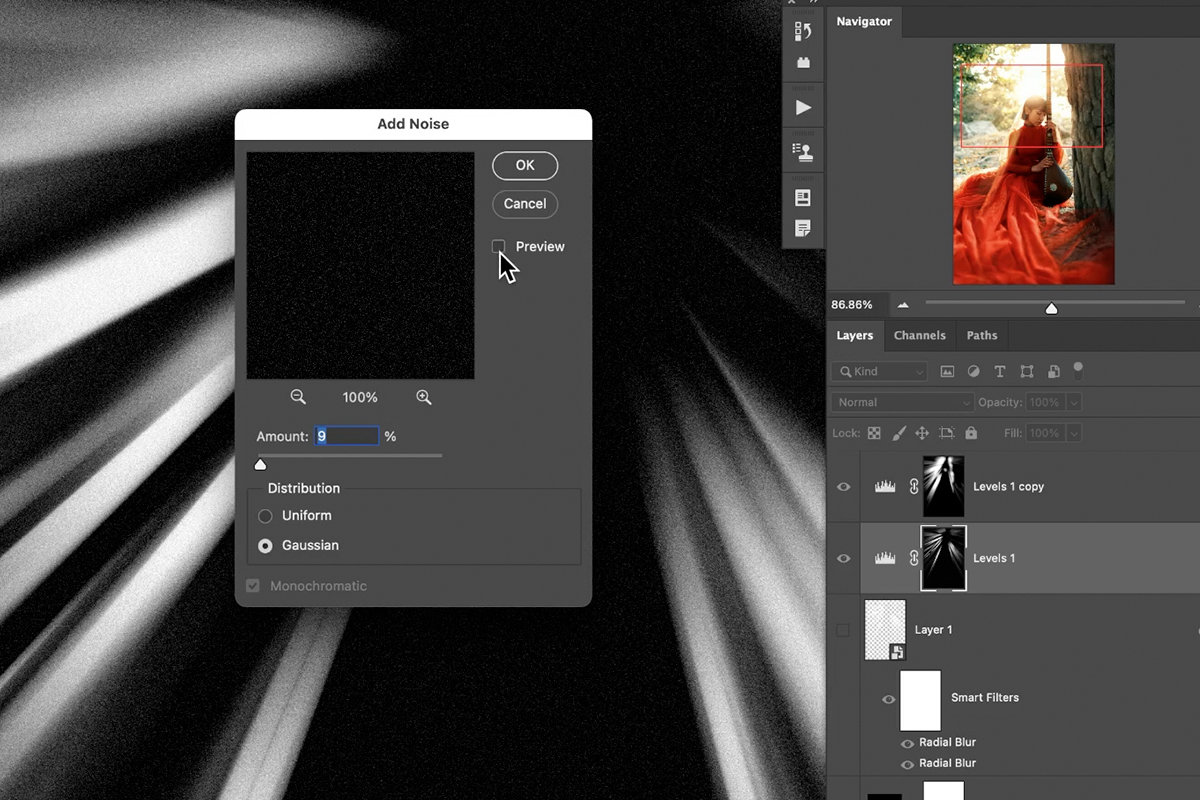
Lastly, we need to add a little bit of noise to the light rays. Since noise is present in all photographs, not having any noise present in our effect is a telltale sign that it’s fake.
Click on one of the Levels Adjustment Layers, open the Filter menu, select Noise, and Add Noise. Set the noise level to match the noise in the original photo as closely as possible.
Copy the noise effect over to the other Levels Adjustment.
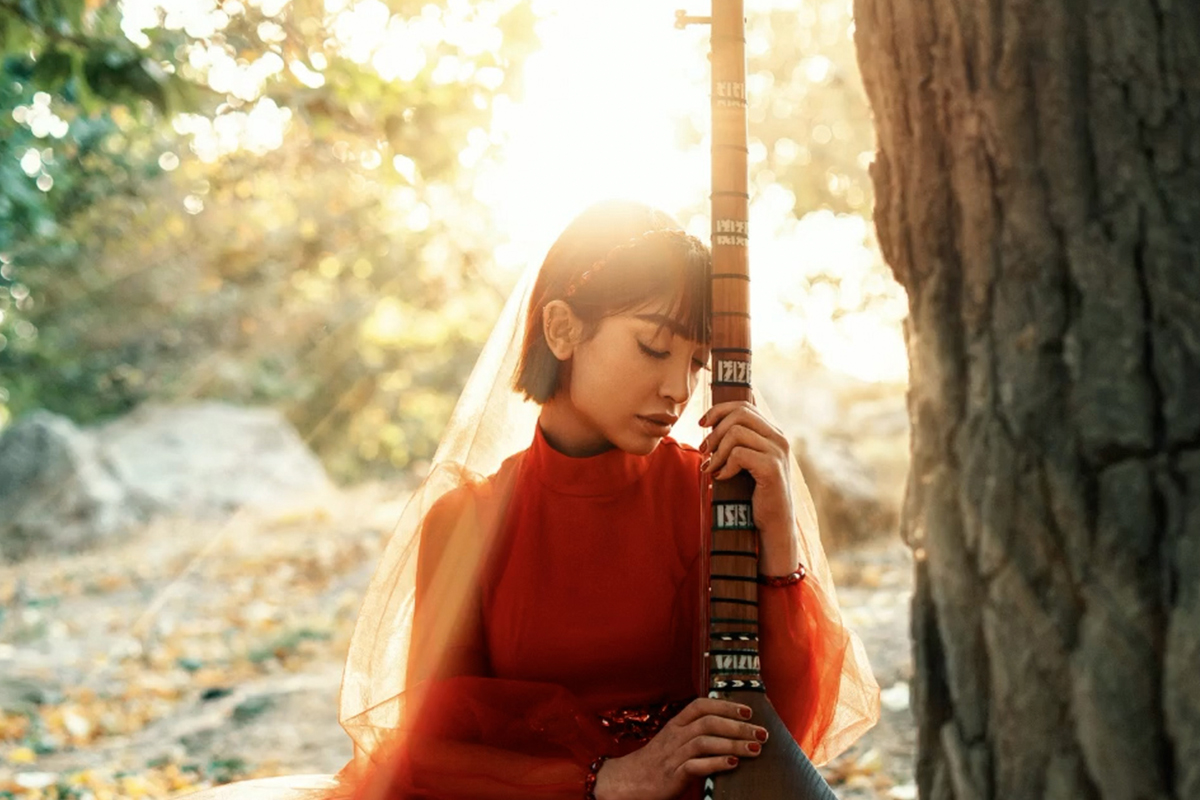
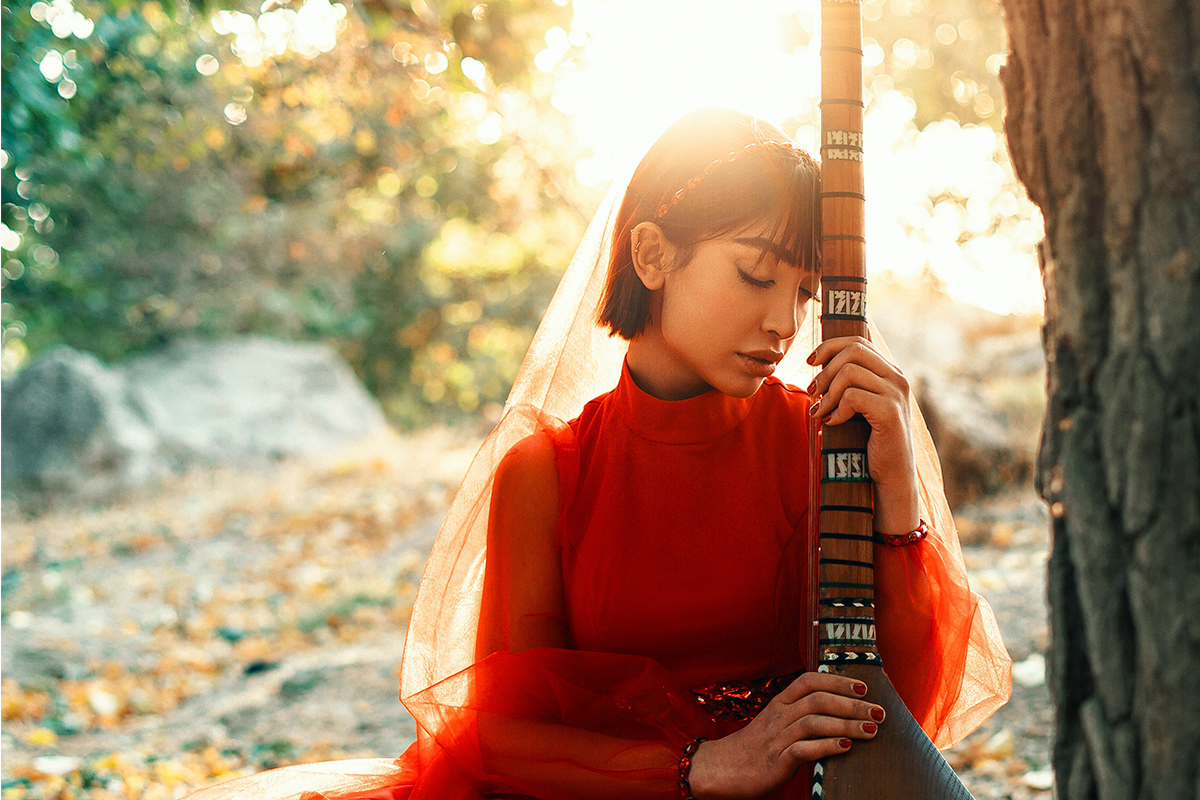
And you’re done! A realistic sun ray effect that blends in naturally with the lighting in the photograph.