

Download Assets
This tutorial includes 4 sample images, 1 sample PSD and 1 PDF guide. Downloads are free with a PHLEARN account.
- Download the sample images and PSDs from every free tutorial on PHLEARN
- New free tutorials published every week
- One free account — sign up once, then download anything
Free PDF Guide · 3 Pages
This Tutorial as a Step-by-Step PDF
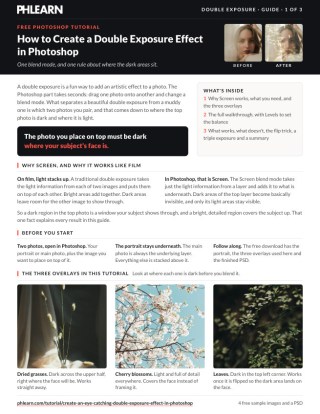
Walks through dragging an overlay onto the portrait with the Move Tool (V), scaling it with Ctrl/Command+T and the W or H label, setting it to Screen, balancing with the Levels midpoint slider, then the overlay that fails, Flip Horizontal to move a dark corner onto the face, and a triple exposure. Keep it next to your keyboard.
description
A double exposure effect in Photoshop is one blend mode and one rule: Screen mode stacks the two frames, and the overlay has to have somewhere dark to sit. In this new FREE tutorial, we’ll show you exactly how to create this effect.
Enjoying This Free Tutorial?
We publish a new free tutorial every week, each one with sample images and PSDs you can download and follow along with. Sign up and they land straight in your inbox, along with early word on sales, events and subscriber-only offers.
Artist Credit
- Mari Korz
- Ruts Vakulenko
- Eda Yurtkuran
- Vanessa Martins
Images sourced from Pexels.
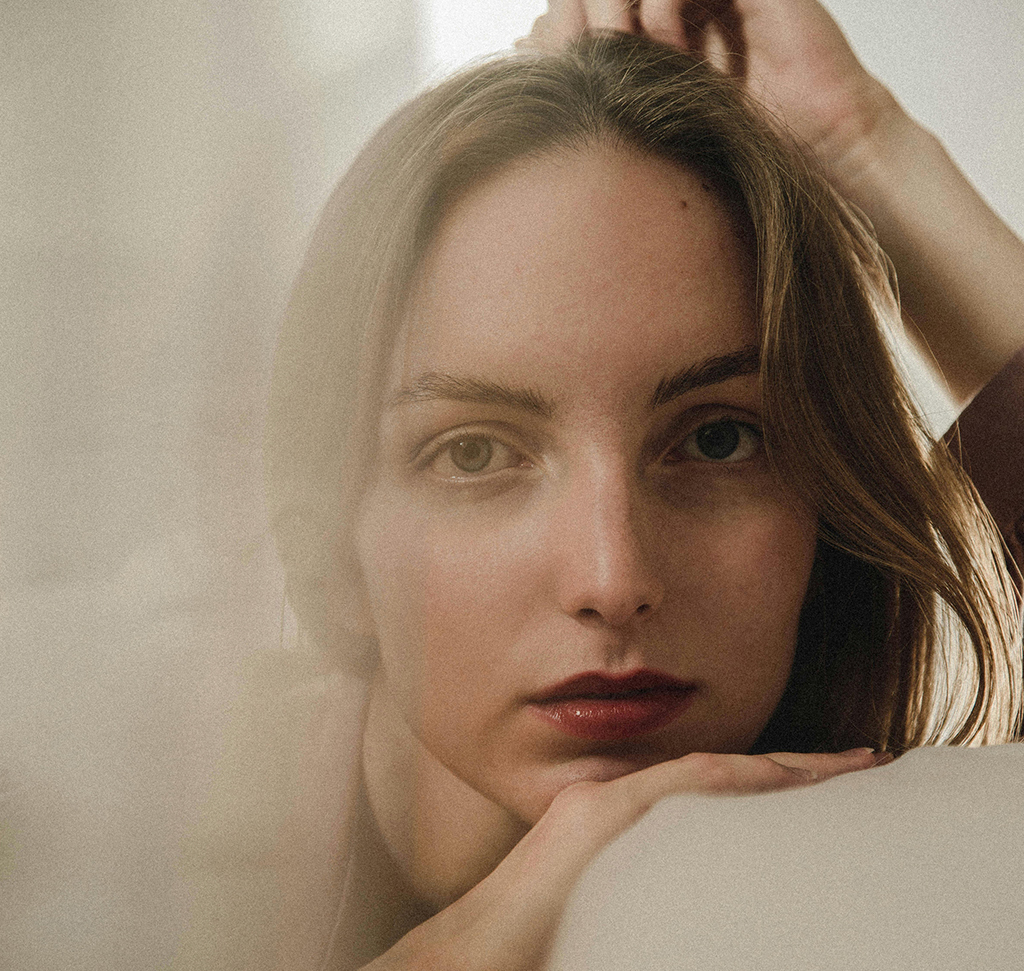
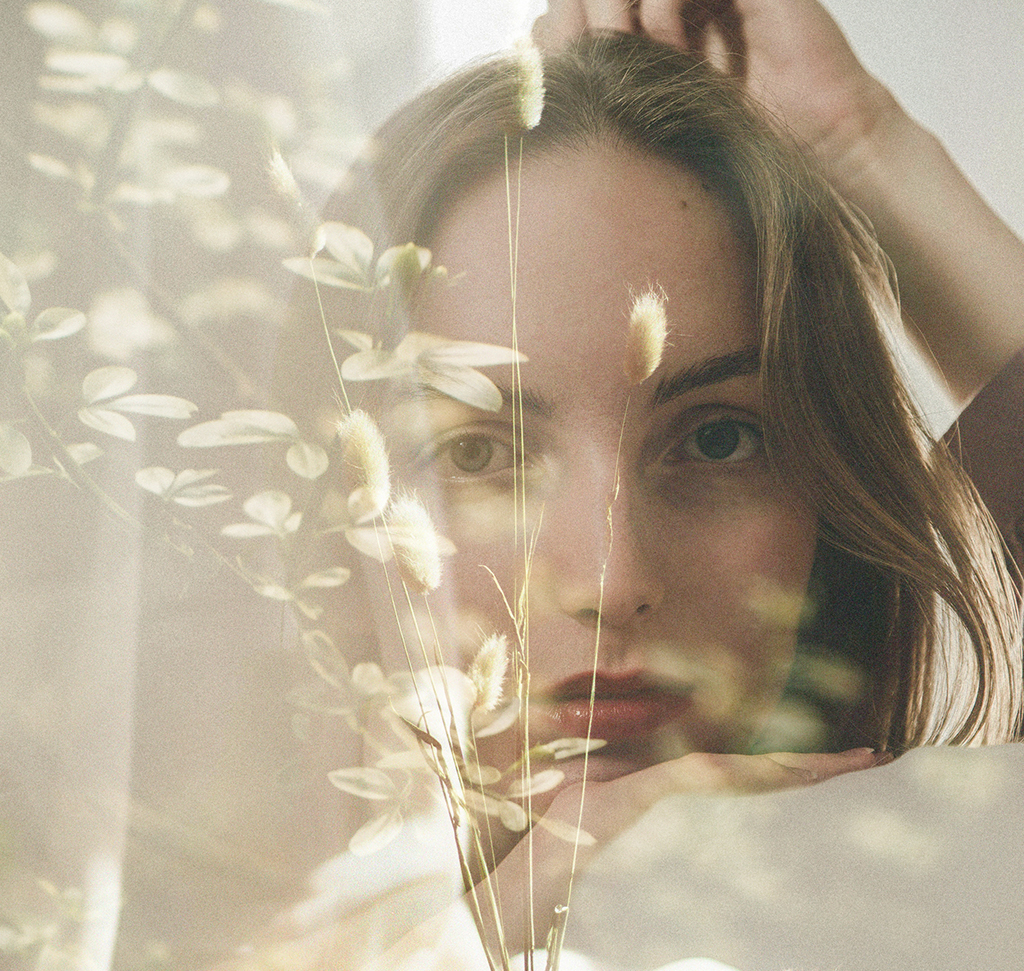
How to Create a Double Exposure Effect in Photoshop
A double exposure on film happens when two frames are captured onto the same piece of negative. The light from each exposure accumulates — bright areas add together, and dark areas leave room for the other image to show through.
Photoshop reproduces that behavior with a single blend mode. The technique itself takes about thirty seconds. What separates a striking double exposure from a muddy one is not the technique at all — it is which two photographs you choose, and that comes down to one rule about where the dark areas sit.
The Double Exposure Effect in Photoshop, in One Move
-
Open both images
Your portrait or main subject is the base. The texture image — foliage, a cityscape, cherry blossoms — goes on top.
-
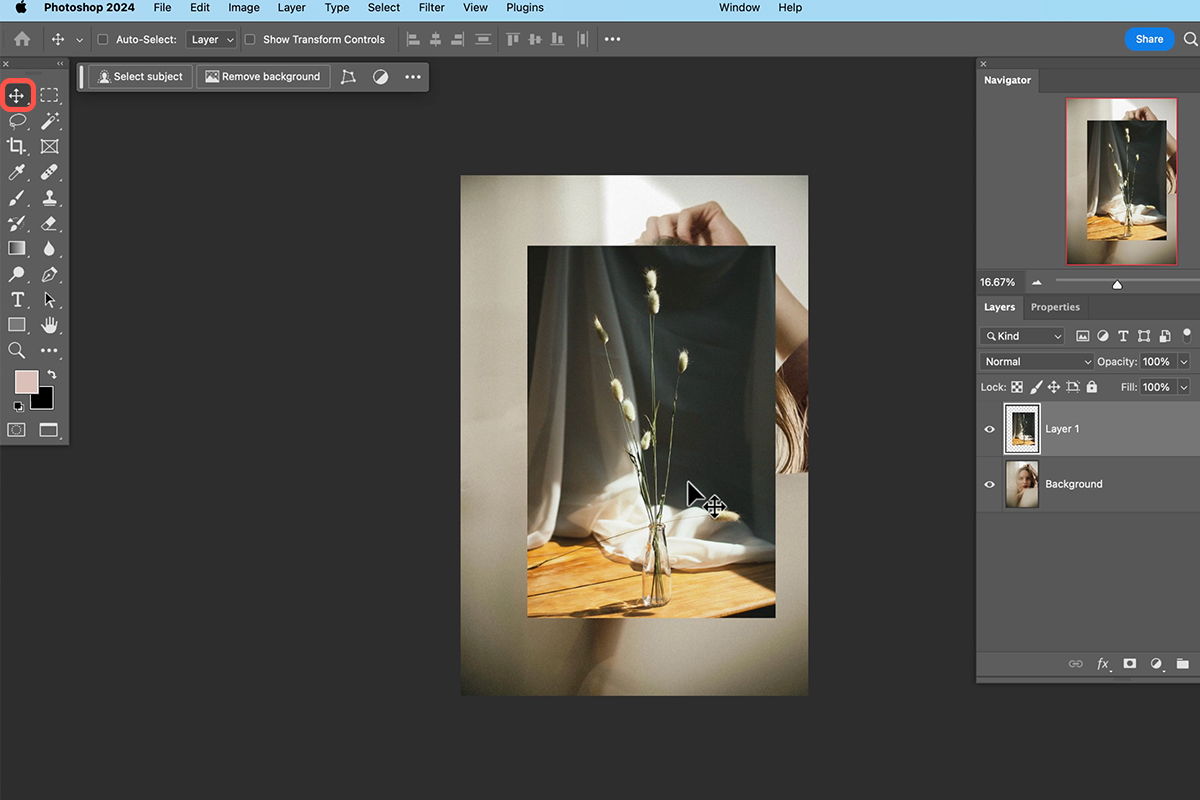
Drag the overlay across with the Move Tool
Press V, then click and drag from one document onto the other. It arrives as a new layer above your subject.
-
Scale it to cover the frame
Press Ctrl+T or Cmd+T for Free Transform. Rather than dragging a corner handle, scrub directly over the W or H field in the options bar — click and drag sideways on the label and the value scales smoothly. Cover the background layer completely.
-
Set the blend mode to Screen
With the top layer selected, change the blend mode from Normal to Screen in the Layers panel. That is the whole effect.
Why Screen and Not Something Else
Screen mode adds light. Anything pure black in the top layer becomes completely invisible; anything bright stays fully visible; everything in between blends proportionally.
That is precisely what happens on film. Two exposures on one negative accumulate light, and the parts of each frame that were dark simply do not contribute. Screen is not an approximation of a double exposure — it is the same arithmetic.
The Rule That Decides Everything
Here is the part worth remembering: the overlay image must be dark wherever your subject’s face is.
Because Screen makes dark pixels invisible, a dark region in the top image is effectively a hole your subject shows through. Bright regions in the top image cover the subject up.
So before you commit to a pairing, look at the overlay and ask where its shadows fall. If the deep shadows land over your subject’s face, the face reads clearly and the surrounding texture frames it. If the overlay is bright and detailed in that spot, the face vanishes into the pattern and the image reads as a mess.
A Pair That Works
An overlay with a genuinely dark region — heavy shadow between branches, an unlit patch of sky — positioned over the face gives you exactly the effect people want from a double exposure. The features stay legible, the texture wraps around them, and the two images read as one photograph.
A Pair That Does Not
A bright, high-detail overlay such as a sunlit cherry blossom branch fails in the same position. The face is buried. You can drag the midtone slider in Levels to darken the overlay and claw some of it back, but you are fighting the material — and the more you darken, the less of the overlay’s own character survives. Better to pick a different frame.
Control the Balance With Levels
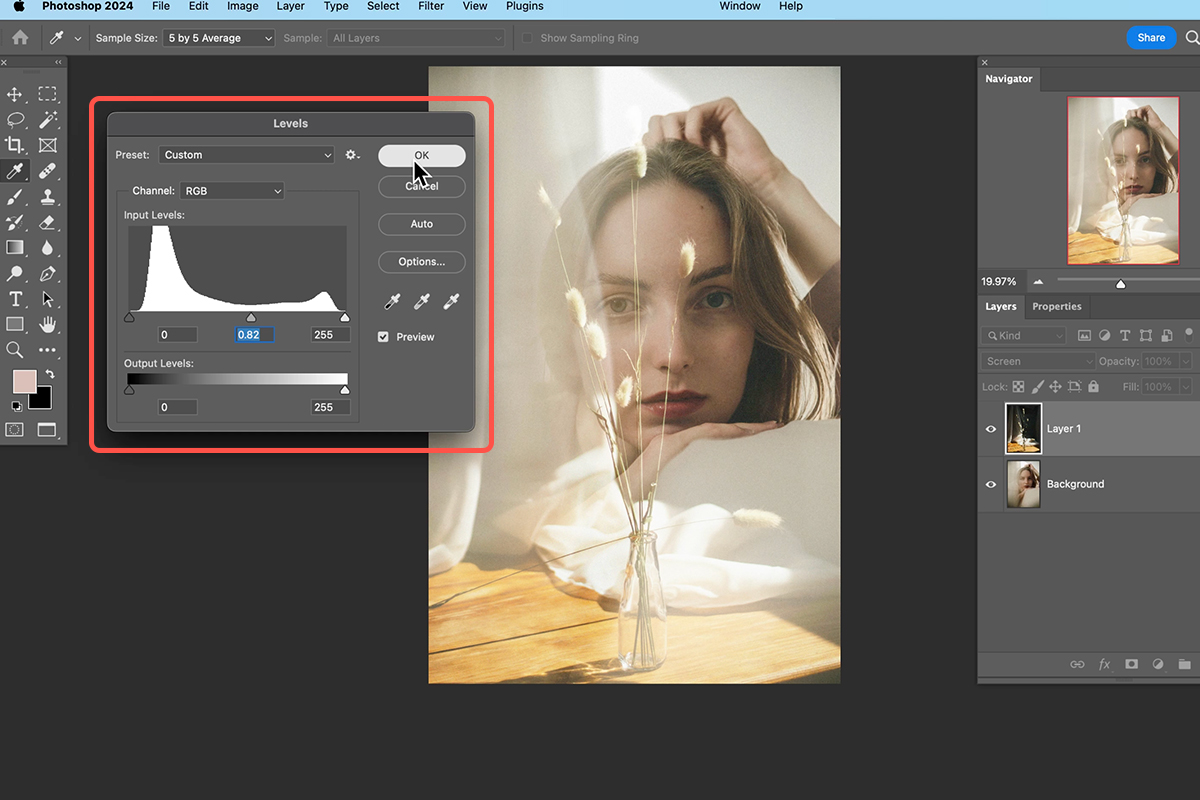
With the overlay layer active, press Ctrl+L or Cmd+L for Levels and drag the middle slider.
Right darkens the overlay, so more of your subject shows through. Left brightens it, so the overlay dominates. This one slider is the balance control for the entire composite, and small moves make a large difference. There is no correct setting — adjust until the face reads at the strength you want.
Reposition and Rescale Freely
The effect is live, so nothing is locked in. Press Ctrl/Cmd+T again at any point to move or resize the overlay. Moving the transform reference point before scaling lets you grow the image away from a fixed corner, which is useful when you want a particular part of the texture to stay put over the face.
Flip the Overlay to Move Its Shadows
This is the trick that rescues a promising overlay that has its dark area in the wrong place.
If a foliage image is dark in the top left but your subject’s face is on the right, flip it. Press Ctrl/Cmd+T and choose Flip Horizontal from the Contextual Task Bar. The dark region moves to the other side and now falls where you need it.
Vertical flips and rotations work the same way. You are not looking for an overlay whose composition is correct — you are looking for one that has a dark area somewhere, and then moving that area to where the face is.
Stack a Third Exposure
Nothing limits you to two images. Add another layer, set it to Screen as well, and you have a triple exposure. Each Screen layer contributes only its bright areas, so they accumulate rather than obscure one another.
The dark-where-the-face-is rule applies to every layer you add. With three images it gets harder to satisfy — each new layer is another chance to cover the face — so build up one at a time and check the face after each addition.
Choosing Images Before You Start
Since the whole result depends on the pairing, it is worth knowing what to look for.
For the base image, a portrait with clean separation from its background works best — the subject should already be distinct before anything is layered on. For the overlay, look for high contrast with a real dark region: silhouetted branches, a city skyline at dusk, trees against bright sky, mountains with deep shadow sides. Low-contrast overlays with no true blacks have no holes for the subject to show through and will always look flat.
The recognizable double exposure look — a person’s profile filled with a forest, a skyline, a mountain range — comes almost entirely from choosing images that satisfy this one condition. The Photoshop part takes seconds.
Quick Reference: Keys, Menus and Settings
- Bring in the overlayV for the Move Tool, drag the photo onto the portrait; F for full screen
- Cover the portraitCmd/Ctrl + T, click and drag over W or H in the options bar, Enter/Return
- Make it a double exposureTop layer blend mode: Normal > Screen
- Balance the twoCmd/Ctrl + L, drag the Levels midpoint slider right to show more of the subject
- Move the dark areaCmd/Ctrl + T, Flip Horizontal in the Contextual Task Bar
- Triple exposureTurn on another overlay layer set to Screen
No AI, no generative credits. The overlay must be dark where the face is.
Free Downloads
Follow Along on the Same Photos
Get the portrait, the grasses, cherry blossom and leaves overlays, the finished double exposure PSD and the 3-page PDF guide. Free with a PHLEARN account.
Double Exposure in Photoshop: Common Questions
Which blend mode makes a double exposure in Photoshop?
Screen. Select the top layer and change its blend mode in the Layers panel from Normal to Screen. That is literally all there is to the effect.
Why does Screen look like a film double exposure?
A film double exposure stacks the light from two images. Screen takes just the light information from the top layer and adds it to what is underneath, so dark areas of the top photo become basically invisible.
Which photo goes on top?
Your portrait or main photo is the underlying layer. The photo you want to blend in goes above it, dragged across with the Move Tool.
What makes a good overlay photo?
High contrast with a real dark area you can place over the face, like the dried grasses in the video, which are dark across the upper half. Toggle the layer between Normal and Screen to check where it is dark.
How do I scale the overlay to fill the frame?
Press Cmd/Ctrl + T for Transform, then click and drag over the W or H label in the options bar to scale it until it covers the Background layer. Press Enter or Return to commit.
How do I make the subject show through more?
With the overlay layer selected, press Cmd/Ctrl + L for Levels and drag the midpoint slider to the right. That darkens the top photo so more of the subject shows.
My overlay is dark in the wrong place. What can I do?
Flip it. Press Cmd/Ctrl + T and choose Flip Horizontal in the Contextual Task Bar so the dark area lands on the face, then move and scale it. The leaves photo in the video is dark in its top left corner and works once flipped.
Can I blend more than two photos?
Yes. Turn on another overlay layer set to Screen for a triple exposure. The same rule applies to each one, so check the face after every layer you add.
Are the sample files free?
Yes, with a free PHLEARN account. You get 4 sample images, 1 sample PSD and 1 PDF guide: the portrait, the three overlays and the finished double exposure, plus a 3-page walkthrough.
Master Photoshop, Lightroom and Photography
Join PHLEARN PRO for $12.99 a month or $99.99 a year. Cancel anytime, with a 100% money-back guarantee.





