Download Assets
description
Learn how to elevate your photography workflow with Lightroom presets. In this tutorial, you’ll discover the secrets to creating and applying stunning visual effects to your images. We’ll even show you how to export them so you can share them with friends or sell them online. And as a bonus, we’re including three FREE Lightroom Presets to get you started!
Go PRO:
Interested in learning more about Lightroom? Explore our exclusive Lightroom Learning Path. It’s designed to help you harness the power of Lightroom for efficient organization, stunning edits, and full access to RAW image files.
Image Source
Share
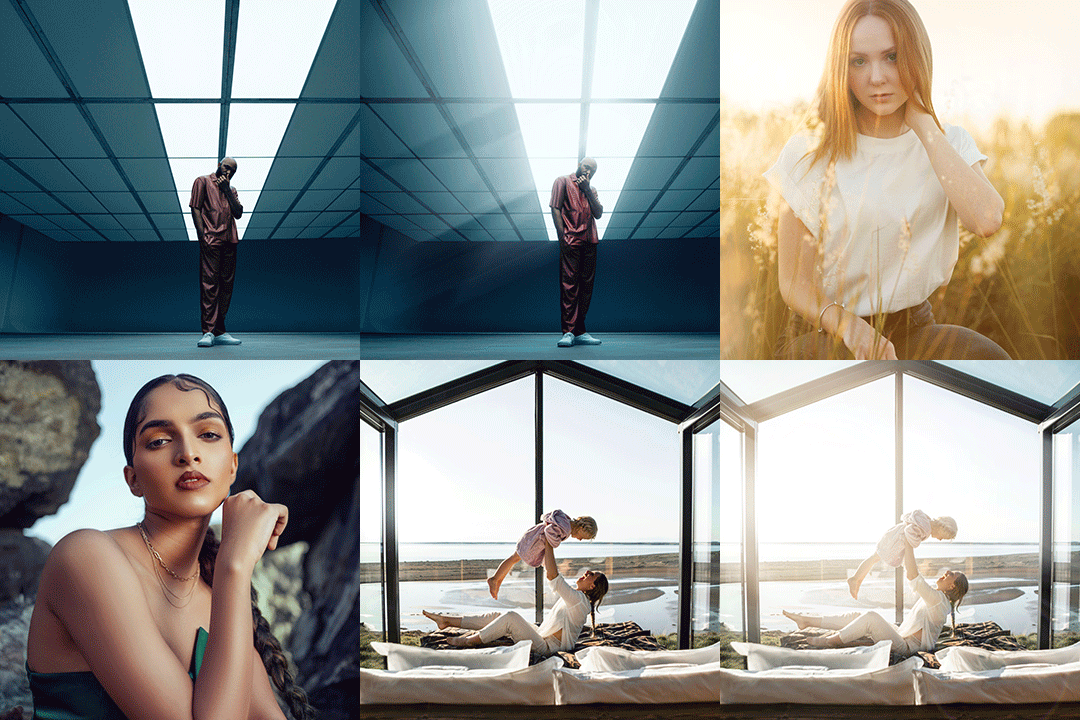
AFTER
BEFORE
Your Photos, Transformed.
Welcome to the world of Lightroom Presets! In this guide, we’ll walk you through the step-by-step process of creating, applying, and exporting custom presets to elevate your photo editing workflow.
Selecting & Adjusting
1. Double-click on the image you want to edit in Lightroom Classic.
2. Click on the “Develop” tab at the top right corner of the screen.
3. Make necessary adjustments. Consider fine-tuning the exposure, contrast, highlights, shadows, and white balance to achieve the desired look. You can also experiment with different color grading techniques to create unique effects.
Creating Presets
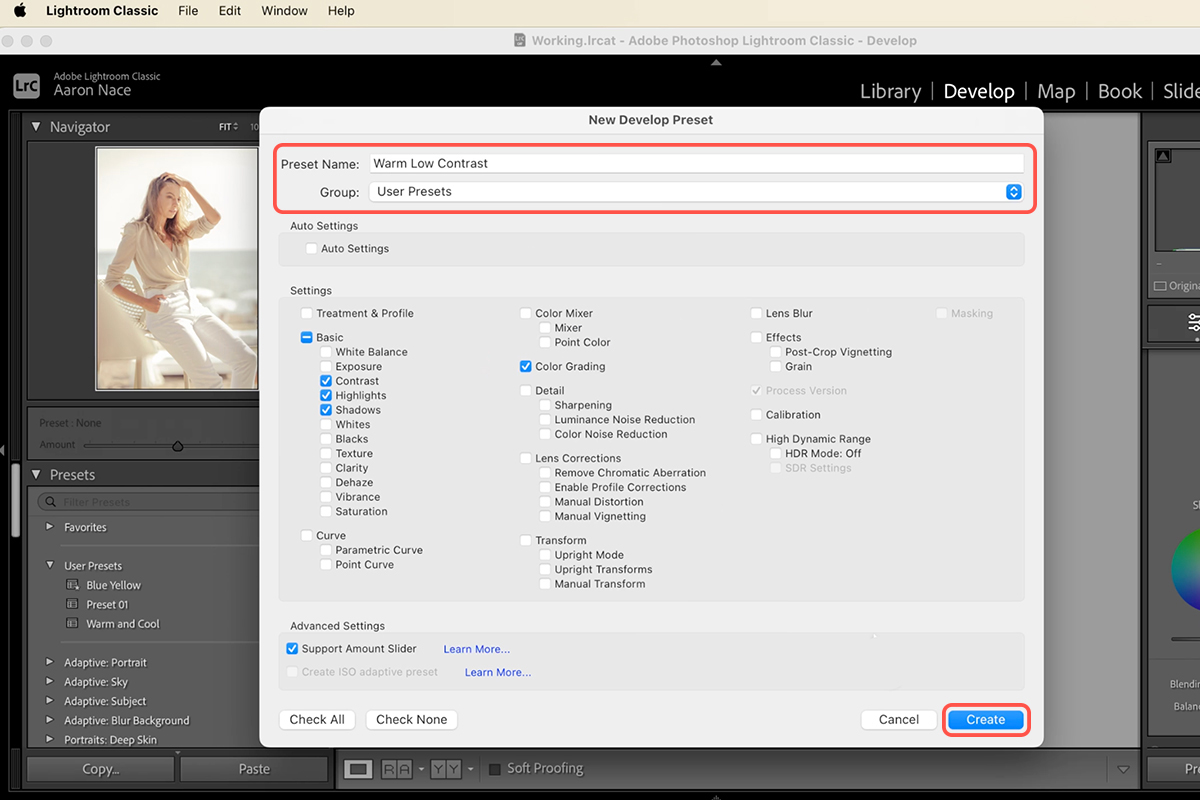
4. Navigate to the left-hand panel and click on “Presets.”
5. Click on the “+” icon to create a new preset.
6. Give your preset a descriptive name, such as “Warm and Soft.”
7. Check the boxes next to the adjustments you want to include in your preset.
8. Click “Create” to save your preset.
Applying Presets To Multiple Images
Applying a preset to multiple images simultaneously can significantly streamline your workflow. This is particularly useful when you want to apply a consistent style to a large number of photos, such as a batch of images from a specific photoshoot or a collection of similar subjects.
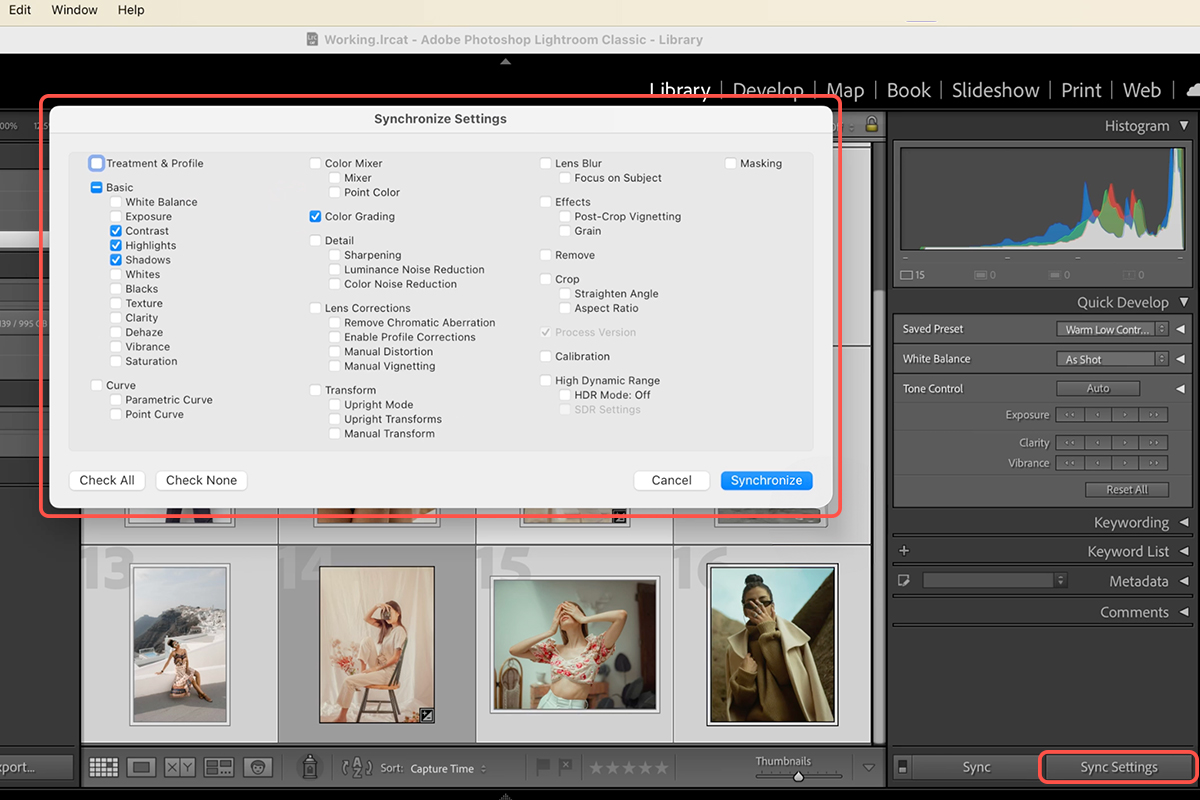
9. While in the Library Module, use the Shift key to select a range of images or the Command (Ctrl) key to select individual images.
10. Click on the “Sync Settings” tab on the lower right panel settings.
11. Check the boxes next to the adjustments you want to sync, such as contrast, highlights, shadows, and color grading.
12.Click “Synchronize” to apply the preset to all selected images.
Exporting Your Preset
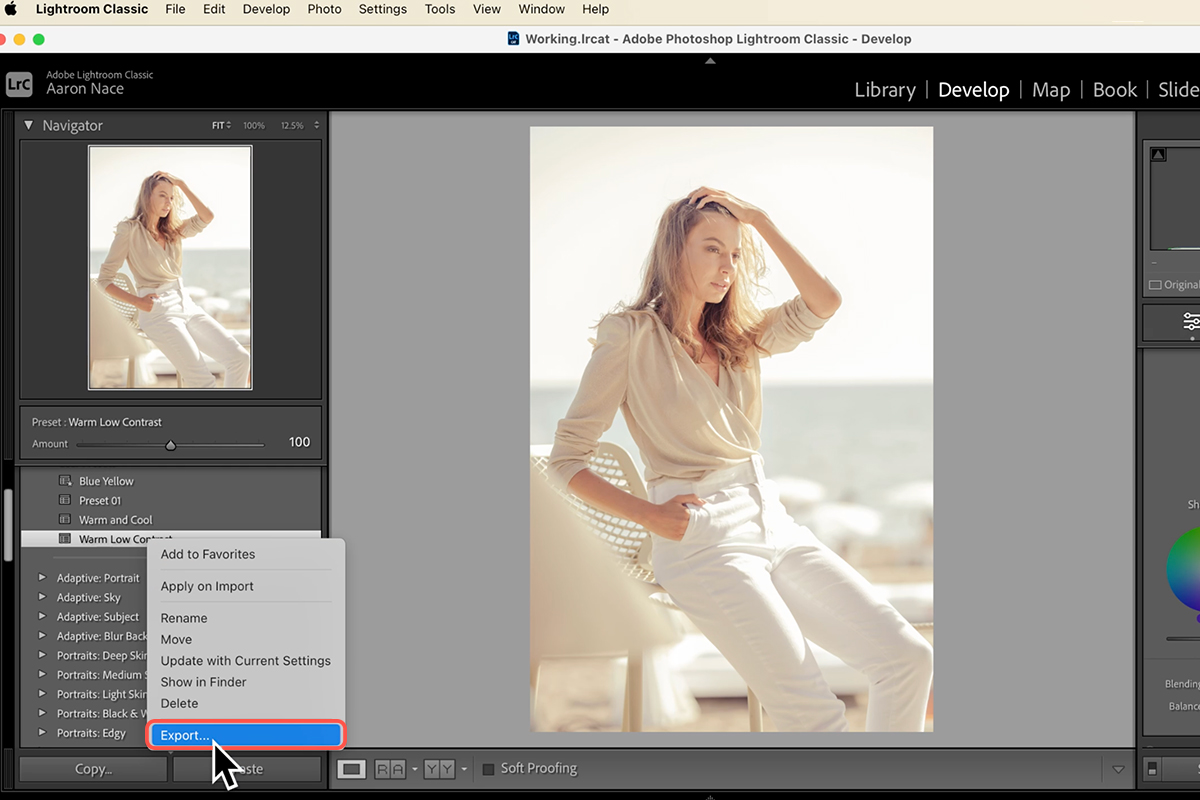
13. Right-click on your preset in the Presets panel.
14. Select the “Export” option.
15. Select a folder to save your exported preset.
16. Click “Export” to save your preset.
PHLEARN Lightroom Presets
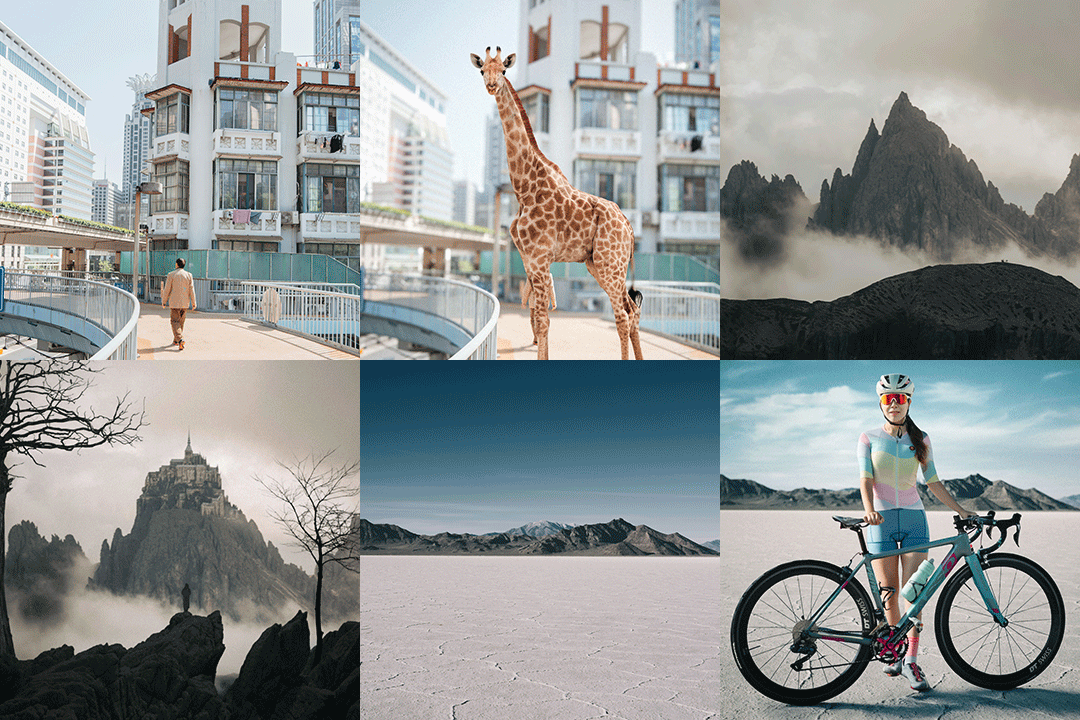
We have an extensive (and growing!) library of Lightroom Presets that cover a wide range of looks and styles. From old-school film looks, to oceanside vibes, to the perfect colors for life’s most important memories, there’s sure to be something that will spark your creative photo editing juices flowing.
Be sure to check out our free sample pack and try them out on your own photos today!


